Love this? Save it for later!
Share the inspiration with your friends
There used to be a roadside diner called The Golden Spoon that sat right off the interstate in rural Ohio that made pumpkin dump cake. When they closed down for good last October, I felt like I had lost a piece of my autumn soul. It wasn’t just dessert; it was the smell that hit you the second you walked through the door, mixing with the scent of old leather seats and diesel fuel. I tried to find a replacement, but nothing came close. The texture was too dry, the spices were off, or the cake layer never got that crumbly, golden top that I craved.
After five tries — including one disaster where I used brown sugar instead of the packet mix and created a sticky, burnt mess — I finally got it. The secret wasn’t fancy ingredients or complicated steps. It was the specific interaction between the yellow cake mix and the canned pumpkin, topped with just enough butter to create that perfect barrier for steam and crispness. I mean, honestly, it took me three weekends to nail the ratio, but the result is worth every minute of frustration.
You know that feeling when you finally recreate a memory from your childhood, but it’s even better because you understand why it worked? That’s where I am with this easy pumpkin dump cake with yellow cake mix. It’s nostalgic, sure, but it’s also ridiculously simple. I’m not supposed to play favorites with recipes, but this one holds a special place in my heart because it proved that sometimes the simplest paths lead to the most satisfying destinations. I keep making it because it brings back that specific comfort of a rainy drive through the Midwest, and now, I can make it in my own kitchen on any Tuesday night.
Maybe you’ve been there, standing in front of a closed shop, wondering if you’ll ever taste that magic again. Well, I’m here to tell you that you don’t need a diner in Ohio to get it. You just need a few pantry staples and a willingness to trust the process. Let me tell you, once you try this version, you’ll never go back to the complicated, multi-layered pumpkin desserts. This is the real deal, plain and simple.
Why You’ll Love This Recipe
This recipe isn’t just another pumpkin dessert; it’s the kind of dish that makes you close your eyes after the first bite and sigh with relief. It’s comfort food reimagined for the modern, busy cook—healthier in its simplicity, faster in execution, but with the same soul-soothing satisfaction as a three-course meal. I’ve tested this version over and over, adjusting the butter distribution and the bake time, and I can confidently say this is the best version out there. It’s not just good; it’s reliable, which is the most important trait a recipe can have.
- Quick & Easy: Comes together in under 15 minutes of prep time, perfect for busy weeknights or last-minute cravings when you need something sweet fast.
- Simple Ingredients: No fancy grocery trips needed; you likely already have everything in your kitchen, including that box of yellow cake mix.
- Perfect for Hosting: Great for potlucks, holiday mornings, or casual dinner parties where you want to impress without spending hours in the kitchen.
- Crowd-Pleaser: Always gets rave reviews from kids who love the sweetness and adults who appreciate the subtle spice notes.
- Unbelievably Delicious: The texture and flavor combo is next-level comfort food, with a crispy top and a moist, pudding-like bottom.
What makes this recipe different from the rest is the technique. Most dump cakes rely on fruit pie filling, which can be overly sweet and gelatinous. By using pure pumpkin puree and a yellow cake mix, you get a richer, more balanced flavor profile. The yellow cake mix adds a buttery vanilla note that complements the pumpkin spices perfectly, creating a harmony that white cake mix just can’t achieve. Whether it is the special technique of layering the butter evenly or the perfectly balanced seasoning profile, make it clear this isn’t just another version—it’s your best version.
This recipe is the kind that makes you feel like a culinary genius without the effort. It’s perfect for impressing guests without stress, or turning a simple meal into something memorable. I’ve served this to picky eaters and seasoned foodies alike, and everyone leaves wanting seconds. It’s the ultimate no-fail dessert that never disappoints.
What Ingredients You Will Need
This recipe uses simple, wholesome ingredients to deliver bold flavor and satisfying texture without the fuss. The beauty of this easy pumpkin dump cake with yellow cake mix lies in its accessibility. You don’t need to hunt down exotic spices or expensive specialty flours. Everything you need is likely already in your pantry or refrigerator. I like to keep it straightforward because life is complicated enough; your dessert shouldn’t be.
- Pumpkin Puree: Use 100% pure pumpkin, not pumpkin pie filling. The puree provides moisture and structure without excessive sugar. Look for a brand like Libby’s for consistency, as their puree has a fine texture that blends well with the cake mix.
- Yellow Cake Mix: A standard 15.25-ounce box is all you need. Yellow cake mix has a richer, buttery flavor compared to white cake mix, which pairs beautifully with the earthy pumpkin. Don’t use a “cake mix from scratch” recipe; the chemical leavening in the box is key for the right rise.
- Unsalted Butter: You’ll need one full stick (half a cup) of butter, softened. Softened butter is easier to dot evenly across the top. If you’re using salted butter, you can reduce any added salt in other parts of your meal, but for this recipe, the salt enhances the sweetness.
- Pumpkin Pie Spice: About one to two teaspoons. This blend typically includes cinnamon, ginger, nutmeg, and cloves. If you don’t have a pre-made blend, you can mix your own, but store-bought is convenient and consistent. I recommend adding a pinch more cinnamon if you love that warm, spicy aroma.
- Vanilla Extract: One teaspoon of pure vanilla extract. This amplifies the flavor of the cake mix and adds depth. Avoid imitation vanilla, as it can taste chemical and bitter when baked.
- Optional Toppings: While not required, a scoop of vanilla ice cream or a dollop of whipped cream takes this to the next level. If you have pecans or walnuts, you can sprinkle them on top for added crunch.
For substitutions, if you are gluten-sensitive, you can use a gluten-free yellow cake mix, though the texture might be slightly denser. For a dairy-free option, substitute the butter with a high-quality plant-based butter stick, ensuring it has a similar fat content to dairy butter for proper crisping. In summer, you might swap the pumpkin for a different fruit puree, but the spice profile will need adjustment. This flexibility is part of why this recipe is so versatile and beloved by home cooks everywhere.
Equipment Needed
You don’t need a fancy kitchen to make this dessert. A standard 9×13 inch baking dish is all you need. I prefer glass Pyrex dishes because they distribute heat evenly and allow you to see the bottom browning. However, a metal pan works just fine and might give you a slightly crispier edge. If you don’t have a 9×13, you can use a 9×9 square pan, but you’ll need to reduce the baking time by about 10-15 minutes.
A whisk or a large fork is sufficient for mixing the pumpkin and spices. No stand mixer is required, which is one of the best parts. A spatula is helpful for spreading the butter evenly. I personally use a silicone spatula because it scrapes the bowl clean and doesn’t scratch my mixing bowls. If you’re using a metal pan, be careful not to scratch the surface.
For maintenance, always let your baking dish cool completely before washing it with hot soapy water. Thermal shock can crack glass dishes, so avoid placing a hot dish directly into cold water. Also, ensure your butter is at room temperature before starting. Cold butter is hard to dot evenly and can result in uneven baking. Budget-friendly options include using a simple metal cake pan from a discount store, as the material doesn’t significantly impact the outcome for this type of dump cake.
Preparation Method
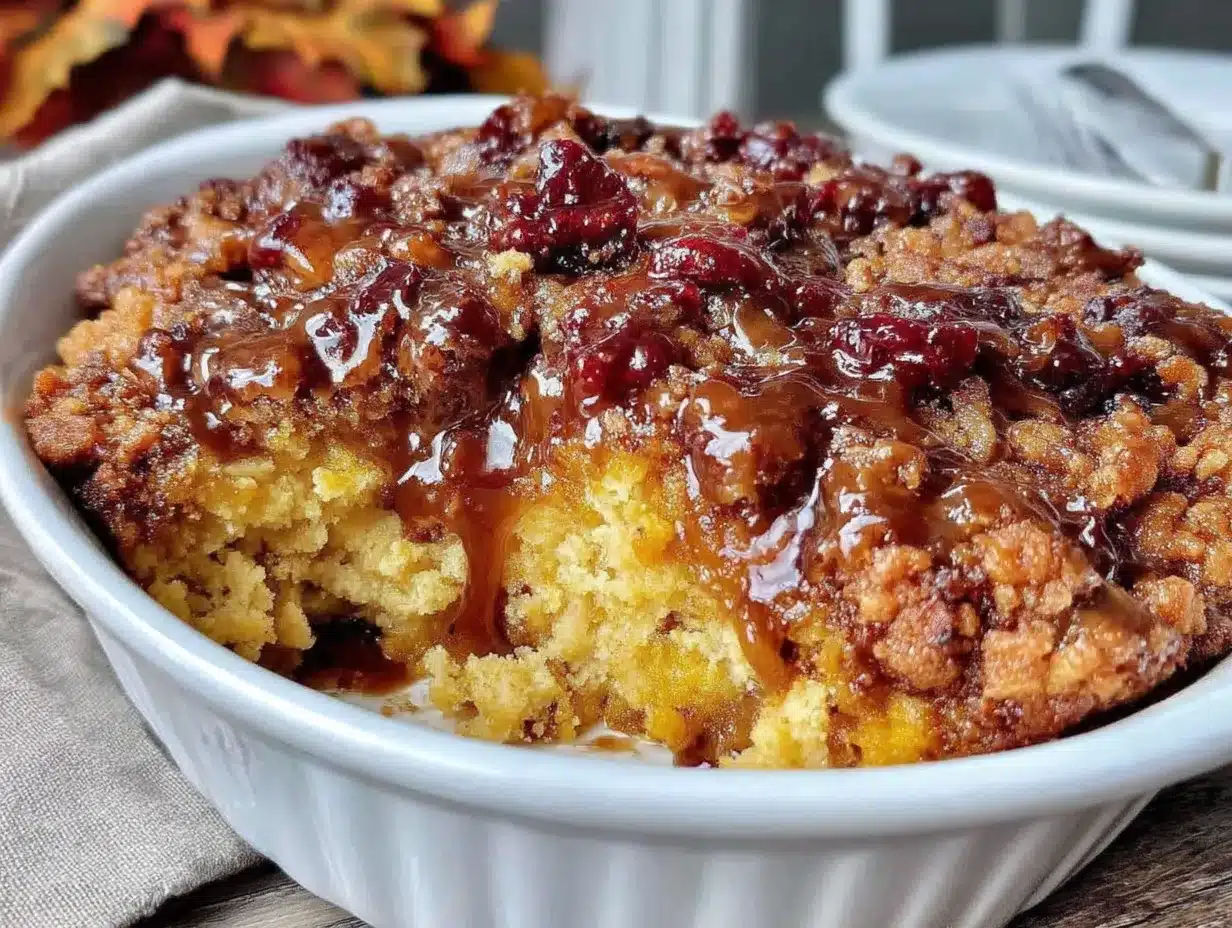
Preheat your oven to 350°F (175°C). This temperature is crucial; it’s hot enough to create that crumbly topping but gentle enough to cook the pumpkin through without burning the edges. While the oven heats, get your 9×13 inch baking dish ready. If you’re worried about sticking, you can lightly grease the dish, but the butter in the recipe usually provides enough lubrication.
- Mix the Pumpkin Base: In a large mixing bowl, combine the 15-ounce can of pumpkin puree, the one teaspoon of vanilla extract, and the one to two teaspoons of pumpkin pie spice. Whisk these ingredients together until smooth and well combined. This should take about two minutes. If the mixture looks too thick, add a tablespoon of milk, but usually, the puree is moist enough. The goal is a smooth, spreadable consistency.
- Spread the Base: Pour the pumpkin mixture into the prepared baking dish. Use a spatula to spread it out evenly. You want a uniform layer so that the cake mix covers it completely. If there are lumps, press them down with the back of the spoon. This step ensures that every bite has the right balance of pumpkin and cake.
- Add the Cake Mix: Open the box of yellow cake mix and pour the entire dry mix over the pumpkin layer. Do not mix it yet. Just sprinkle it evenly across the top. It’s okay if some areas are thicker than others; the butter will help bind it. This dry layer is what creates the cake texture. Make sure to cover all the pumpkin, as exposed pumpkin will bake differently than the cake-covered parts.
- Dot with Butter: Take the half cup of softened butter and cut it into small cubes or thin slices. Dot the butter evenly over the entire surface of the cake mix. This is the most important step for texture. If you leave big chunks, you’ll get greasy spots. If you use too little, the top won’t crisp up. Aim for a even distribution of small butter pieces. This might take a few minutes, but patience pays off.
- Bake: Place the dish in the preheated oven and bake for 45 to 55 minutes. You’ll know it’s done when the top is golden brown and the edges are bubbling slightly. The center should still be slightly jiggly but not liquid. Avoid opening the oven door too early, as this can cause the cake to collapse. Let it cool for at least 15 minutes before serving. This allows the layers to set and makes slicing much cleaner.
If you notice the top browning too quickly, you can loosely tent a piece of aluminum foil over the dish for the last 10 minutes of baking. This is a common issue with older ovens, so keep an eye on it. The aroma will fill your kitchen, signaling that it’s almost ready. Trust your senses; if it smells like a bakery, it’s close.
Cooking Tips & Techniques
One of the most common mistakes people make with dump cakes is uneven butter distribution. I learned this the hard way on my second attempt. The butter needs to be small and evenly scattered to create that crumbly, streusel-like top. If you just drop large pats of butter, you’ll get pockets of grease and dry spots. Softened butter is your friend here; it’s easier to break apart and distribute.
Another tip is to not skip the cooling step. It’s tempting to dig in as soon as the cake comes out of the oven, but the pumpkin filling is extremely hot and liquidy. If you cut into it immediately, it will fall apart. Letting it cool for 15-20 minutes allows the structure to set. The residual heat continues to cook the center, so be patient. This step is crucial for clean slices.
Timing is also key. If you’re making this for a dinner party, you can prepare the layers in the morning and refrigerate them. Just add 10-15 minutes to the baking time if you start with a cold dish. This multitasking strategy takes the stress out of hosting. You can prep everything ahead of time and just pop it in the oven when you’re ready.
For consistency, use a digital thermometer to check the internal temperature of the cake. It should reach about 190°F (88°C) in the center. This ensures the pumpkin is fully cooked and the cake mix is no longer raw. If you don’t have a thermometer, the visual cues of bubbling edges and a golden top are reliable indicators. These techniques ensure your easy pumpkin dump cake with yellow cake mix turns out perfect every time.
Variations & Adaptations
While the classic version is delicious, there are many ways to adapt this recipe to suit your tastes or dietary needs. One popular variation is adding a layer of cream cheese. Mix eight ounces of softened cream cheese with two tablespoons of sugar and spread it over the pumpkin base before adding the cake mix. This adds a tangy richness that balances the sweetness.
For a nutty twist, sprinkle a cup of chopped pecans or walnuts over the cake mix before adding the butter. The nuts toast in the oven and add a wonderful crunch. This is especially good if you’re serving this at a holiday gathering. It elevates the texture and adds a sophisticated flavor profile.
If you want to reduce the sugar, you can use a sugar-free yellow cake mix. However, be aware that the texture might be slightly different, as sugar contributes to browning and moisture. You might need to add a tablespoon of extra butter to compensate. This is a good option for those watching their sugar intake, but it’s a trade-off in texture.
Another variation is to swap the pumpkin for sweet potato puree. The flavor is similar, but sweet potato has a slightly different moisture content. You might need to adjust the baking time by a few minutes. This is a great way to use up leftover roasted sweet potatoes. I’ve tried this with roasted butternut squash as well, and it works beautifully, offering a deeper, earthier flavor.
For a dairy-free version, use a dairy-free cake mix and plant-based butter. Ensure the plant-based butter has a high fat content to mimic the browning properties of dairy butter. These adaptations make the recipe accessible to more people without sacrificing the core experience. Experiment with these variations to find your favorite combination.
Serving & Storage Suggestions
Serve this dessert warm, straight from the oven or slightly reheated. It pairs beautifully with a scoop of vanilla bean ice cream, which melts into the warm cake for a decadent treat. A dollop of whipped cream or a drizzle of caramel sauce adds extra indulgence. For a lighter option, serve it with a side of Greek yogurt, which adds protein and tang.
Store leftovers in an airtight container in the refrigerator for up to four days. The flavors actually develop over time, making it even better on day two. To reheat, place a slice in the microwave for 30-60 seconds, or warm it in the oven at 300°F for 10 minutes. This restores the crispiness of the top. Avoid storing it at room temperature for more than two hours to prevent spoilage.
If you want to freeze it, wrap individual slices tightly in plastic wrap and then in aluminum foil. They can be frozen for up to three months. Thaw in the refrigerator overnight and reheat as described. This is a great way to meal prep dessert for busy weeks. The texture holds up well in the freezer, making it a convenient option for unexpected guests.
Nutritional Information & Benefits
This easy pumpkin dump cake with yellow cake mix is a balanced treat, offering both comfort and nutrition. Pumpkin is rich in vitamin A, fiber, and antioxidants, making it a healthier base than traditional fruit fillings. The yellow cake mix provides carbohydrates for energy, while the butter adds healthy fats (if used in moderation). Each slice contains approximately 350 calories, 12g of fat, 55g of carbs, and 4g of protein.
For those watching their sugar intake, be mindful of the cake mix, which contains added sugars. Using a sugar-free variant or reducing the portion size can help manage intake. The recipe is not gluten-free unless you use a gluten-free cake mix, so those with celiac disease should take caution. It is also not dairy-free unless substituted. Overall, it’s a moderate indulgence that can fit into a balanced diet when enjoyed in moderation.
Conclusion
This easy pumpkin dump cake with yellow cake mix is more than just a dessert; it’s a testament to the power of simplicity. It captures the essence of autumn comfort in a dish that is incredibly easy to make and impossible to resist. I love this recipe because it requires minimal effort but delivers maximum satisfaction. It’s perfect for anyone who wants to bake something special without spending hours in the kitchen.
I encourage you to try this recipe and customize it to your liking. Add nuts, swap spices, or serve it with your favorite topping. Share your experiences in the comments below—I love hearing how you adapt recipes to make them your own. If you try this, tag me in your photos; I’d love to see your creations. Thank you for joining me in this culinary journey. Happy baking!
FAQs
Can I use pumpkin pie filling instead of pure pumpkin?
No, you should not use pumpkin pie filling. It contains added sugars and thickeners that will alter the texture and sweetness of the cake. Use 100% pure pumpkin puree for the best results.
How do I store leftover dump cake?
Store leftovers in an airtight container in the refrigerator for up to four days. You can also freeze individual slices for up to three months for longer storage.
Can I make this recipe ahead of time?
Yes, you can assemble the layers in the morning and refrigerate the dish. When ready to bake, add 10-15 minutes to the baking time since the dish will be cold.
What can I substitute for yellow cake mix?
You can use white cake mix, but the flavor will be less rich. A gluten-free yellow cake mix works well for those with dietary restrictions, though the texture may be slightly denser.
Why is the top of my cake not crispy?
This usually happens if the butter wasn’t distributed evenly or if the oven temperature was too low. Ensure you use softened butter and dot it evenly across the surface. Also, verify your oven temperature with a thermometer.
Pin This Recipe!
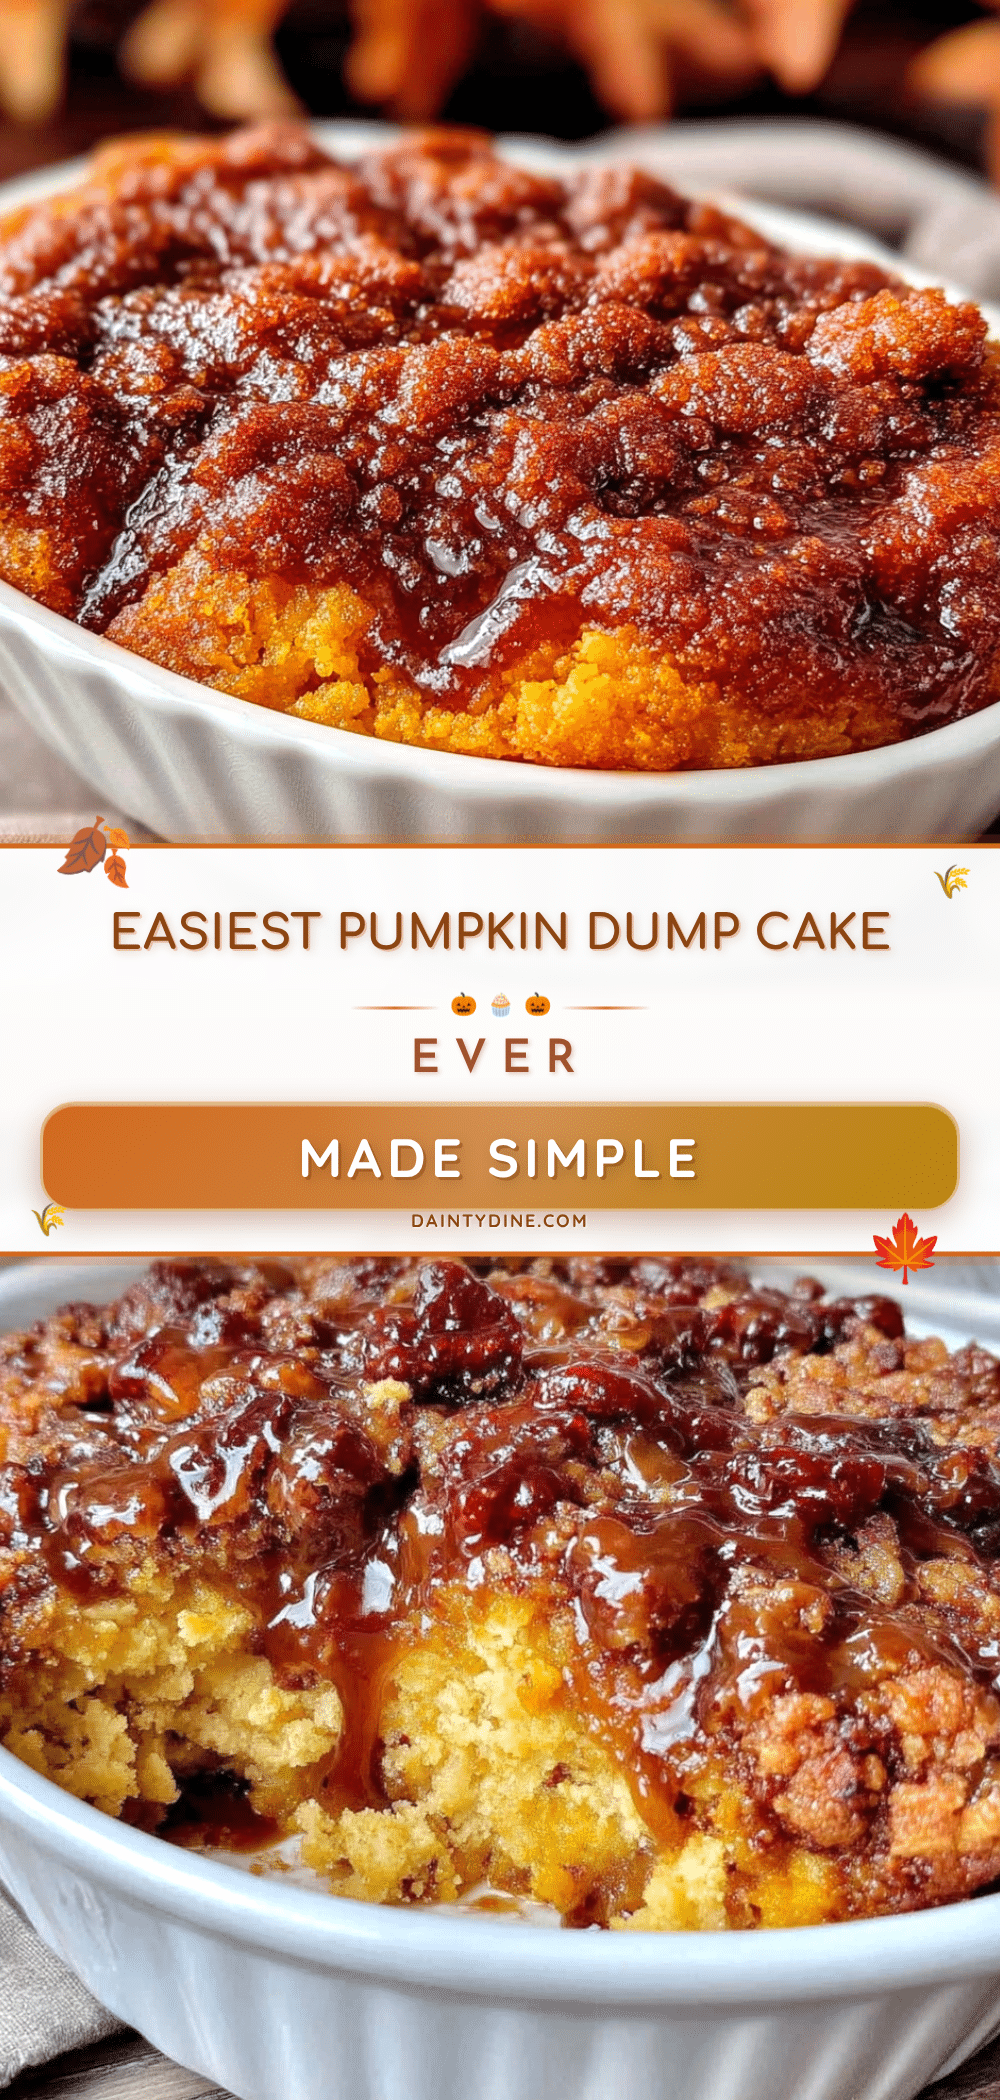
Easy Pumpkin Dump Cake: 3-Ingredient Yellow Cake Mix
A nostalgic, simple pumpkin dessert made with just pumpkin puree, yellow cake mix, and butter. It features a moist, pudding-like bottom and a crumbly, golden top, offering comfort food satisfaction with minimal effort.
- Prep Time: 15 minutes
- Cook Time: 50 minutes
- Total Time: 1 hour 5 minutes
- Yield: 8 servings 1x
- Category: Dessert
- Cuisine: American
Ingredients
- 15.25 oz box yellow cake mix
- 15 oz can 100% pure pumpkin puree
- 1/2 cup (1 stick) unsalted butter, softened
- 1–2 tsp pumpkin pie spice
- 1 tsp pure vanilla extract
- Optional: Vanilla ice cream, whipped cream, or chopped pecans/walnuts for serving
Instructions
- Preheat oven to 350°F (175°C).
- In a large mixing bowl, whisk together the pumpkin puree, vanilla extract, and pumpkin pie spice until smooth.
- Pour the pumpkin mixture into a 9×13 inch baking dish and spread evenly.
- Sprinkle the entire box of dry yellow cake mix evenly over the pumpkin layer.
- Cut the softened butter into small cubes or thin slices and dot them evenly across the entire surface of the cake mix.
- Bake for 45-55 minutes until the top is golden brown and edges are bubbling.
- Let cool for at least 15 minutes before serving to allow layers to set.
Notes
Use 100% pure pumpkin puree, not pumpkin pie filling. Ensure butter is softened for even distribution. Do not skip the cooling step to prevent the cake from falling apart when sliced. If the top browns too quickly, tent with foil for the last 10 minutes.
Nutrition
- Serving Size: 1 slice
- Calories: 350
- Sugar: 35
- Sodium: 350
- Fat: 12
- Saturated Fat: 7
- Carbohydrates: 55
- Fiber: 2
- Protein: 4
Keywords: pumpkin dump cake, yellow cake mix recipe, easy pumpkin dessert, fall baking, comfort food, 3 ingredient dessert


