Love this? Save it for later!
Share the inspiration with your friends
“The sizzle when the grill fired up was just background noise,” my neighbor said last Fourth of July, “but wait till you try these.” I wasn’t even supposed to stay long—I’d popped over to borrow some sugar for my lemonade—but the smell of fresh berries and something creamy stopped me dead at the door. Honestly, it was this easy no-bake red white and blue cheesecake cups that had me hooked before I sat down. What struck me wasn’t just the colors—though those patriotic layers looked like a celebration in a glass—but the host’s total chill about it. No stress, no fancy molds, just simple ingredients turned into something that felt like magic. I watched her casually spoon the mixture into cups, chatting about how she threw it together last minute for a neighborhood potluck. You know that feeling when you stumble on a recipe so effortlessly perfect that you find yourself making it in your own kitchen the next weekend? That’s exactly what happened here. Maybe you’ve been there—caught off guard by something unexpectedly delicious that feels like it belongs in a fancy bakery but was made with zero fuss. That’s the charm of this recipe: easy, colorful, and honestly, a little bit of summer happiness in every bite.”
Why You’ll Love This Recipe
Let me tell you, this easy no-bake red white and blue cheesecake cups recipe isn’t just a pretty face. It’s been tested in my kitchen more times than I can count, and every time, it delivers that perfect balance of creamy, sweet, and fresh. Here’s why it’s become a staple for me and many others:
- Quick & Easy: You can whip this up in under 20 minutes—no oven, no mess, just simple assembly.
- Simple Ingredients: No need for fancy or hard-to-find items. Most of these are pantry staples or things you can grab at any local market.
- Perfect for Patriotic Gatherings: Fourth of July, Memorial Day, or any summer barbecue, these cups bring that festive red, white, and blue spirit without the fuss.
- Crowd-Pleaser: Kids love the layers, adults appreciate the fresh berries and creamy texture—it hits all the right notes.
- Unbelievably Delicious: The combination of whipped cream and cream cheese gives it a light but tangy flavor that feels like classic cheesecake without the heaviness.
What sets this recipe apart? It’s the layering technique—each color is distinct but melts together in your mouth. Plus, blending the cream cheese with whipped topping creates this ultra-smooth texture that feels indulgent but is surprisingly light. Honestly, it’s the kind of dessert that makes you close your eyes with that first bite and smile. Whether you’re hosting a last-minute get-together or just want a fun summer treat, these no-bake cheesecake cups are a total win.
What Ingredients You Will Need
This recipe sticks to simple, wholesome ingredients to get that bold flavor and satisfying texture without any fuss. Most of these are pantry or fridge staples, with a few fresh touches to keep it bright and festive.
- For the crust layer:
- 1 ½ cups graham cracker crumbs (I like using honey-flavored for a touch of sweetness)
- 5 tablespoons unsalted butter, melted (helps bind the crumbs)
- 2 tablespoons granulated sugar (balances the buttery crumbs)
- For the cheesecake filling:
- 8 oz (225 g) cream cheese, softened (use full-fat for best creaminess)
- 1 cup (240 ml) heavy whipping cream, chilled (makes it light and airy)
- ½ cup (60 g) powdered sugar (for gentle sweetness)
- 1 teaspoon vanilla extract (adds depth to the flavor)
- For the red layer:
- 1 cup (150 g) fresh strawberries, chopped (or frozen thawed, if out of season)
- 1 tablespoon granulated sugar (to macerate the berries)
- 1 teaspoon lemon juice (brightens the berry flavor)
- For the blue layer:
- 1 cup (150 g) fresh blueberries (swap with blackberries if preferred)
- 1 tablespoon granulated sugar
- ½ teaspoon lemon zest (optional, for zing)
- Garnishes (optional but recommended):
- Fresh mint leaves (adds a fresh pop)
- Extra berries for topping
Tip: I usually pick up fresh berries at the local farmer’s market when in season—it makes a noticeable difference. If you want to switch things up, frozen berries work well too, just make sure to drain any excess liquid.
Equipment Needed
- Mixing bowls (one large for the cream cheese filling and smaller ones for macerating berries)
- Electric hand mixer or stand mixer (whipping cream and cream cheese gets much easier)
- Spoons or small spatulas for folding
- Measuring cups and spoons
- Serving cups or small mason jars (4 to 6 oz / 120 to 180 ml size works perfectly for layering)
- Food processor or rolling pin (for crushing graham crackers, unless you buy pre-crumbled)
If you don’t have a mixer, you can whip the cream by hand with a whisk, but it takes a bit more elbow grease. I’ve also used plastic cups when I ran out of jars—makes cleanup a breeze!
Preparation Method
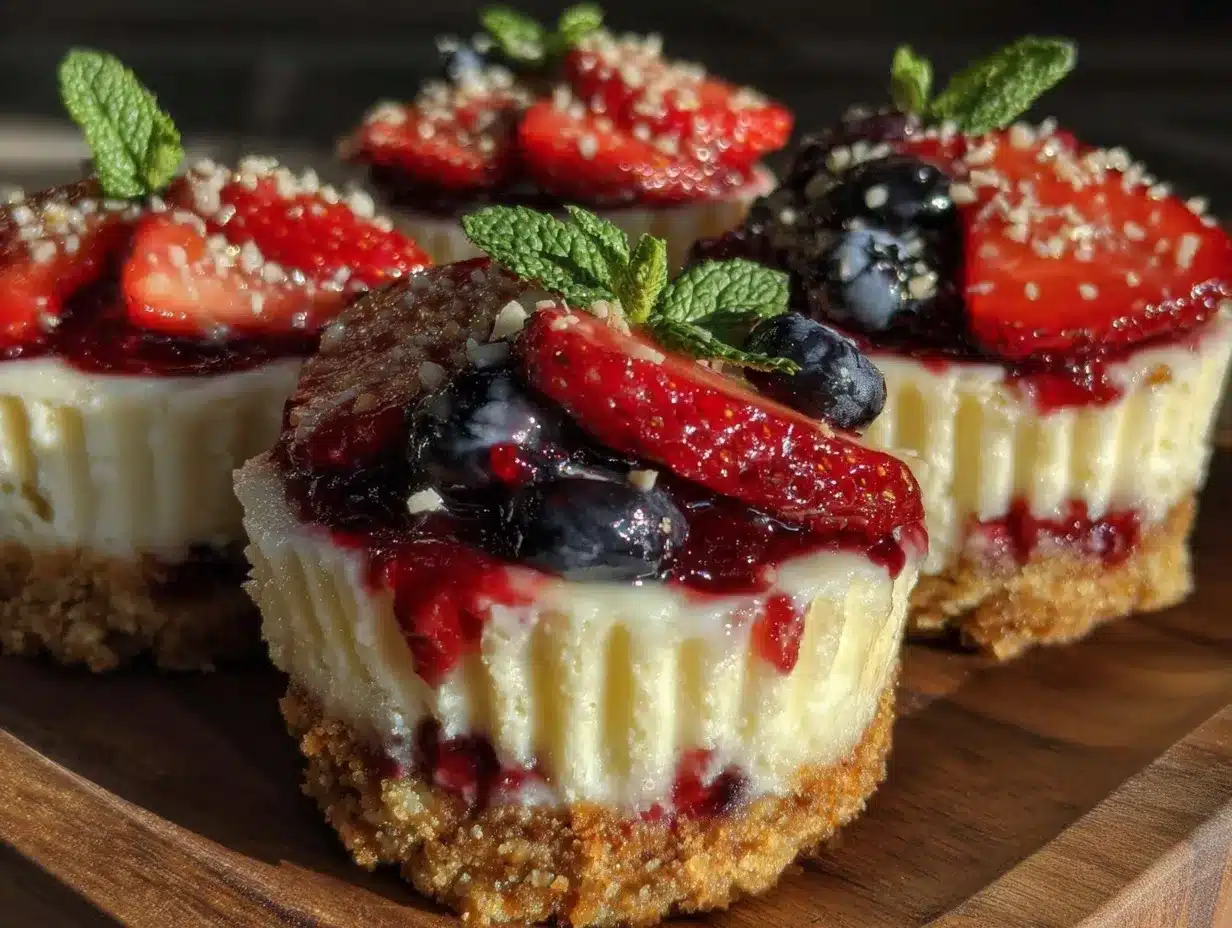
- Make the crust: In a medium bowl, combine 1 ½ cups graham cracker crumbs, 5 tablespoons melted unsalted butter, and 2 tablespoons sugar. Stir until the crumbs are evenly coated and feel like wet sand. Press about 2 tablespoons of this mixture firmly into the bottom of each serving cup to form a crust layer. Chill in the fridge while preparing the filling. (About 10 minutes)
- Prepare the berry layers: In separate small bowls, mix the chopped strawberries with 1 tablespoon sugar and 1 teaspoon lemon juice. Let them sit for 10 minutes to macerate and release their juices. Do the same with the blueberries, adding sugar and optional lemon zest. This step helps the berries get juicy and sweet, perfect for layering.
- Whip the cream cheese filling: Using an electric mixer, beat the softened cream cheese in a large bowl until smooth and creamy (about 2-3 minutes). Gradually add powdered sugar and vanilla extract, continuing to mix. In a separate chilled bowl, whip the heavy cream until soft peaks form. Gently fold the whipped cream into the cream cheese mixture, being careful not to deflate the airiness. The filling should be light, smooth, and spreadable.
- Assemble the cups: Spoon a layer of the cream cheese filling over the chilled crust in each cup. Then add a layer of the red strawberry mixture, followed by another layer of cream cheese filling. Next, layer the blueberry mixture and finish off with a final dollop of cream cheese filling. Smooth the tops gently with a spoon or spatula. (Assembly should take about 10-15 minutes.)
- Chill and garnish: Refrigerate the assembled cups for at least 2 hours to let the flavors meld and the filling set. Just before serving, garnish with fresh berries and mint leaves for that extra wow factor.
Pro tip: If you find the cream cheese is a little stubborn, warming it slightly (not melting) helps it blend better. Also, when folding the whipped cream in, use a light hand to keep it fluffy. Trust me, that fluffiness is what makes these cheesecake cups so dreamy.
Cooking Tips & Techniques
Making no-bake cheesecake cups sounds simple, but a few tricks can really take yours from good to unforgettable. First, room temperature cream cheese is key—cold cream cheese can clump and make mixing a pain. Don’t rush the maceration of berries; it softens them just enough so they’re juicy without being mushy.
When whipping cream, keep your bowl and beaters cold for best results—if the cream doesn’t thicken, it might be too warm. I once tried to skip chilling the bowl and ended up with liquid whipped cream that ruined the whole texture! Also, press the graham cracker crust firmly in the bottom to prevent it from falling apart when eating. You want that satisfying crunch contrasting the creamy layers.
Lastly, layering patiently pays off. Take your time so each layer is distinct—you want those red, white, and blue colors to pop beautifully when served. Multitasking here works well; while berries macerate, whip the cream cheese filling, then assemble.
Variations & Adaptations
This easy no-bake red white and blue cheesecake cups recipe is super flexible, so you can customize it however you like. Here are a few ideas I’ve tried or recommend:
- Dietary swap: Use dairy-free cream cheese and coconut whipped topping for a vegan twist that still tastes rich.
- Seasonal variation: Swap strawberries and blueberries with fresh peaches and blackberries for a late summer version.
- Flavor twist: Add a teaspoon of lemon zest directly into the cream cheese filling for a citrusy kick that brightens the whole cup.
- Gluten-free option: Replace graham cracker crumbs with gluten-free cookie crumbs or crushed nuts for the crust.
- Kids’ favorite: Mix in mini marshmallows or crushed pretzels into the crust layer for a fun texture surprise.
One time I swapped the crust for crushed vanilla wafers and added a swirl of blueberry jam in the cream cheese layer—totally decadent and a hit at a summer picnic. Honestly, this recipe invites creativity, so don’t be shy to try your own versions.
Serving & Storage Suggestions
Serve these cheesecake cups chilled straight from the fridge. The cold temperature helps the filling stay firm and the berries fresh. Presentation-wise, clear cups or small mason jars show off those beautiful patriotic layers, making them perfect for backyard barbecues or picnic trays.
They pair wonderfully with a light, sparkling lemonade or iced tea to keep things refreshing. If you want to add a little extra flair, a sprig of mint or a dusting of powdered sugar on top never fails.
Store leftover cups in the fridge, covered tightly with plastic wrap or lids, for up to 3 days. They don’t freeze well—the texture changes—but they do keep surprisingly well chilled. When reheating, just let them sit at room temperature for about 10 minutes before serving to soften slightly. The flavors actually deepen after a day, so making them a bit ahead can be a smart move.
Nutritional Information & Benefits
Each serving of these easy no-bake red white and blue cheesecake cups contains approximately:
| Nutrient | Amount per Serving |
|---|---|
| Calories | 280 kcal |
| Fat | 18 g |
| Carbohydrates | 22 g |
| Protein | 4 g |
| Fiber | 2 g |
Using fresh berries adds antioxidants and vitamins, especially vitamin C, which supports immunity. Cream cheese provides calcium and some protein, while the whipped cream keeps it light but indulgent. For those watching carbs, swapping the crust for almond flour or skipping the sugar can reduce the carb count. Be mindful that this recipe contains dairy and gluten (from graham crackers), so adjust accordingly for allergies.
Conclusion
This easy no-bake red white and blue cheesecake cups recipe is a total game-changer when you want a dessert that’s festive, delicious, and stress-free. I love how it comes together quickly with ingredients you probably already have, yet feels special enough for any holiday or casual get-together. Don’t be afraid to play with the berries or crust to make it your own—you might end up with your own signature summer treat.
Honestly, this recipe’s simplicity and charm keep me coming back every season. If you try it, I’d love to hear how you customize it or what memories you make around it. Share your tweaks or stories in the comments below—let’s keep the dessert conversation going!
Here’s to many sweet, colorful bites ahead!
FAQs
Can I make these cheesecake cups ahead of time?
Yes! They actually taste better after chilling for a few hours or overnight. Just keep them covered in the fridge to maintain freshness.
What can I use instead of graham cracker crumbs for the crust?
You can substitute crushed vanilla wafers, digestive biscuits, gluten-free cookies, or even crushed nuts for a different texture and flavor.
How do I prevent the cream cheese filling from being lumpy?
Make sure your cream cheese is softened to room temperature before mixing, and beat it well to smooth out any lumps before folding in the whipped cream.
Can I use frozen berries for the red and blue layers?
Absolutely! Just thaw them completely and drain any excess liquid before mixing with sugar to avoid soggy layers.
Is it possible to make this recipe dairy-free?
Yes, swap the cream cheese for a dairy-free cream cheese alternative and use coconut whipped cream or another dairy-free whipped topping.
Pin This Recipe!
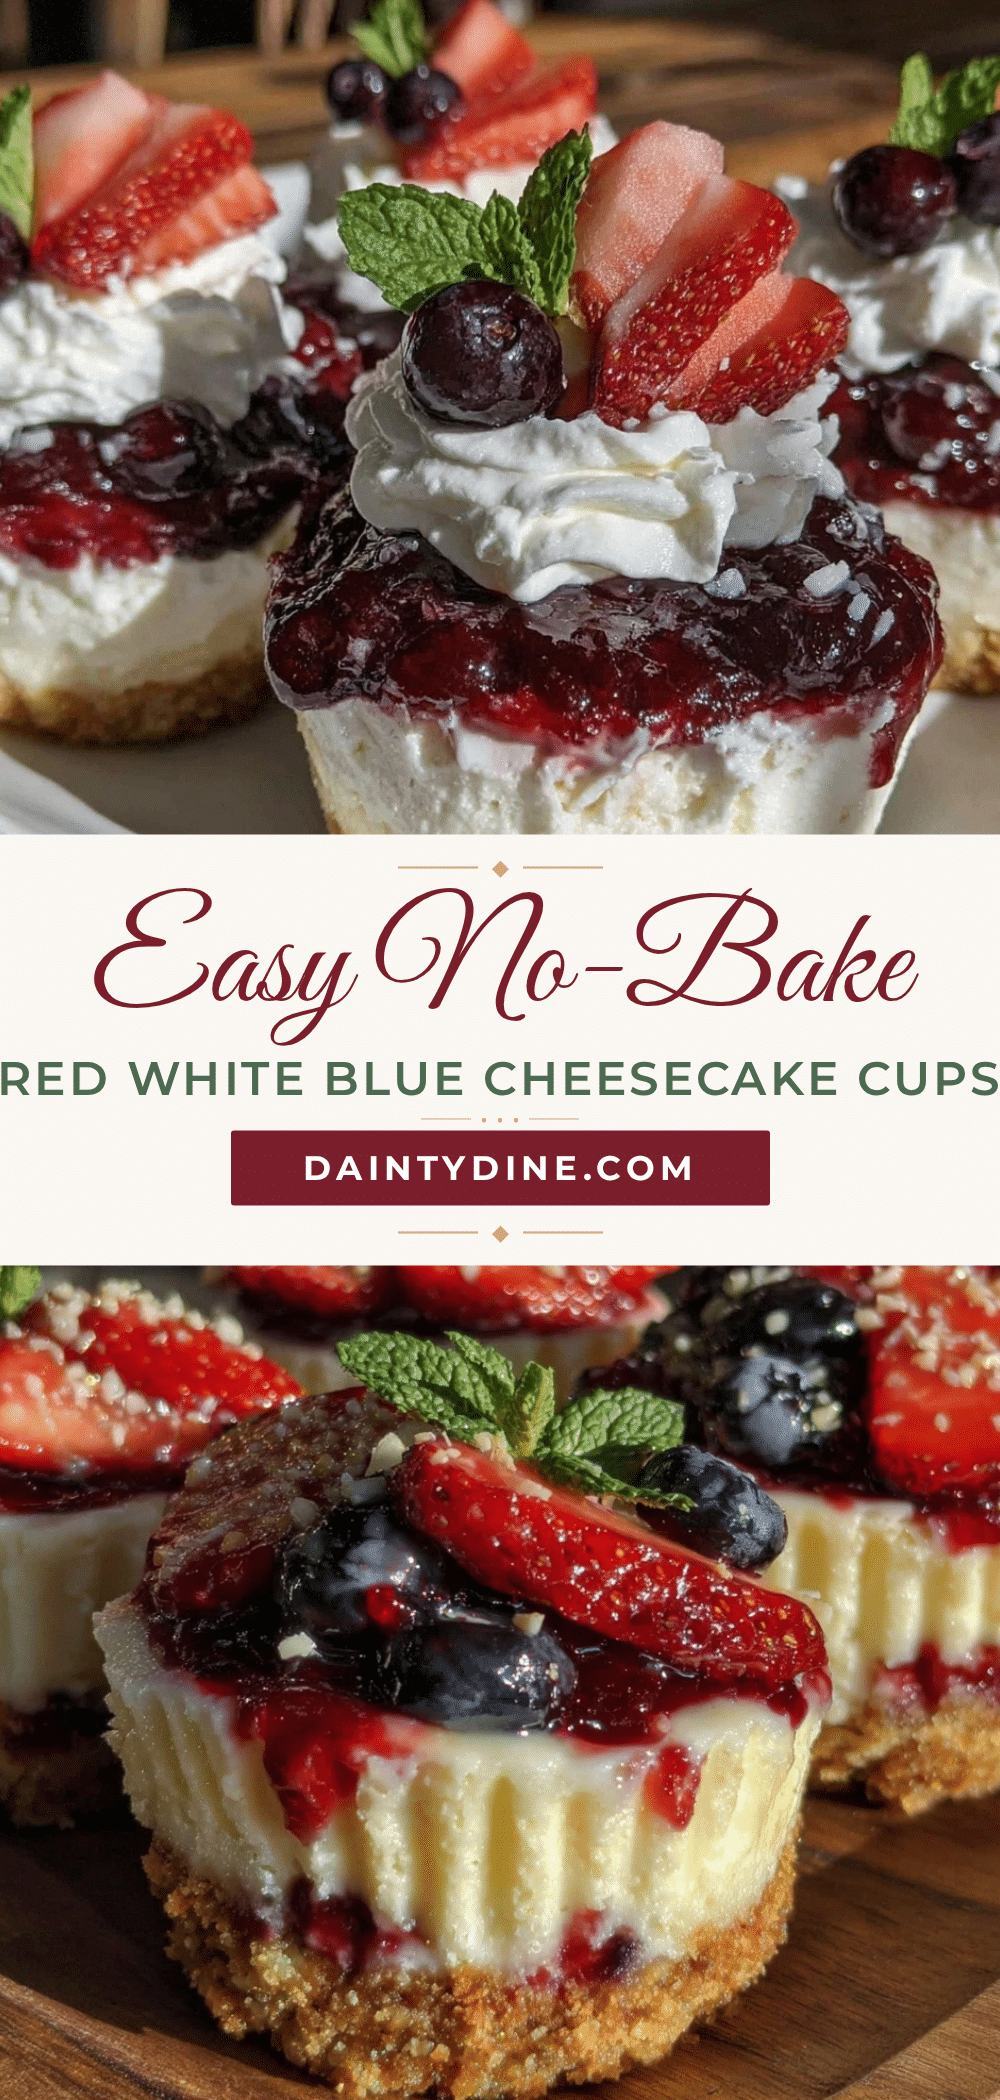
Easy No-Bake Red White and Blue Cheesecake Cups
A quick and festive no-bake cheesecake dessert featuring patriotic layers of fresh berries and creamy filling, perfect for summer gatherings.
- Prep Time: 15 minutes
- Cook Time: 0 minutes
- Total Time: 2 hours 15 minutes
- Yield: 6 servings 1x
- Category: Dessert
- Cuisine: American
Ingredients
- 1 ½ cups graham cracker crumbs (honey-flavored recommended)
- 5 tablespoons unsalted butter, melted
- 2 tablespoons granulated sugar
- 8 oz (225 g) cream cheese, softened (full-fat preferred)
- 1 cup (240 ml) heavy whipping cream, chilled
- ½ cup (60 g) powdered sugar
- 1 teaspoon vanilla extract
- 1 cup (150 g) fresh strawberries, chopped (or frozen thawed)
- 1 tablespoon granulated sugar (for strawberries)
- 1 teaspoon lemon juice
- 1 cup (150 g) fresh blueberries
- 1 tablespoon granulated sugar (for blueberries)
- ½ teaspoon lemon zest (optional)
- Fresh mint leaves (optional, for garnish)
- Extra berries for topping (optional)
Instructions
- Make the crust: In a medium bowl, combine graham cracker crumbs, melted butter, and sugar. Stir until evenly coated and press about 2 tablespoons into the bottom of each serving cup. Chill in the fridge for about 10 minutes.
- Prepare the berry layers: In separate small bowls, mix chopped strawberries with sugar and lemon juice; let sit for 10 minutes. Do the same with blueberries, adding sugar and optional lemon zest.
- Whip the cream cheese filling: Beat softened cream cheese until smooth. Gradually add powdered sugar and vanilla extract. In a separate chilled bowl, whip heavy cream until soft peaks form. Gently fold whipped cream into cream cheese mixture.
- Assemble the cups: Spoon a layer of cream cheese filling over the crust, then a layer of strawberry mixture, followed by cream cheese filling, then blueberry mixture, and finish with a final dollop of cream cheese filling. Smooth tops gently.
- Chill and garnish: Refrigerate assembled cups for at least 2 hours. Before serving, garnish with fresh berries and mint leaves.
Notes
Use room temperature cream cheese for smooth mixing. Chill bowl and beaters for whipping cream. Press crust firmly to prevent crumbling. Macerate berries for juicy layers. Fold whipped cream gently to keep filling airy. Can substitute dairy-free ingredients for vegan version. Store covered in fridge up to 3 days; do not freeze.
Nutrition
- Serving Size: 1 cheesecake cup (ap
- Calories: 280
- Fat: 18
- Carbohydrates: 22
- Fiber: 2
- Protein: 4
Keywords: no-bake cheesecake, patriotic dessert, red white and blue, summer dessert, easy cheesecake cups, berry dessert


