Love this? Save it for later!
Share the inspiration with your friends
There used to be a tiny bakery tucked behind a vintage bookstore in Beacon, New York called “The Flour Pot” that made the most incredible apple crisp. When they closed their doors three years ago—just a handwritten sign on the door one Tuesday, no warning, no goodbye—I honestly felt a little lost. That apple crisp was my go-to comfort on cold afternoons, my reward after long drives upstate, my little secret indulgence. I tried recreating it at least a dozen times before I got it right. The first few attempts were disasters—too watery, too sweet, not nearly enough of that buttery crumble on top. But after attempt number thirteen—and a very patient husband who ate every single failed batch—I finally cracked the code.
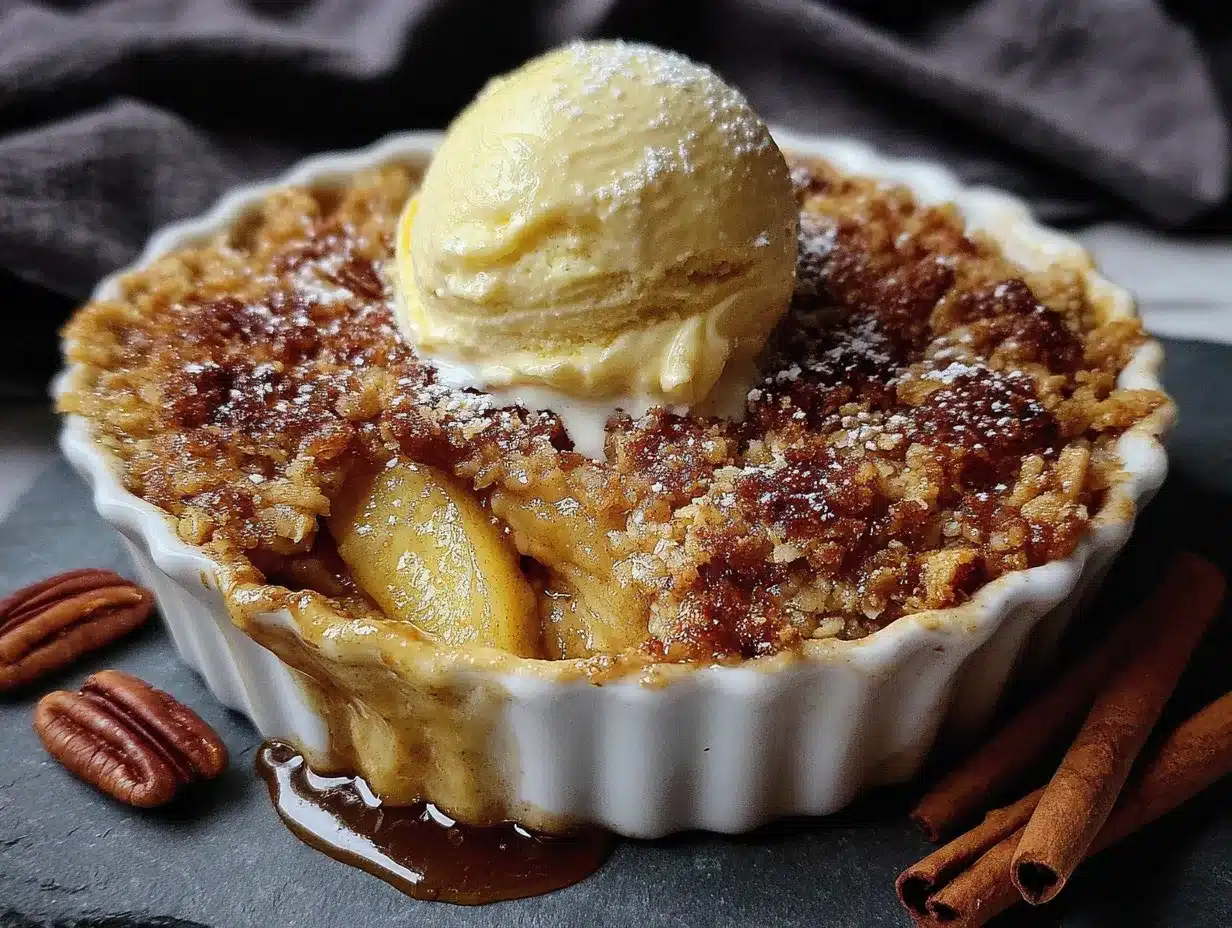
This cozy small-batch apple crisp for two is the result of that obsession. It’s not a replica of The Flour Pot’s version, honestly. It’s better. It’s mine. And now it can be yours too.
The thing about recreating a bakery memory is you have to stop trying to copy it and start understanding what made it special. For me, it was the contrast—the tender, jammy apples against that crunchy, buttery topping. The way the cinnamon and nutmeg hit you before the sweetness. And the fact that it was always served in a little ramekin, just for me, no sharing required. Maybe you’ve been there—chasing a food memory that feels just out of reach. This recipe is for you and whoever you want to share it with. Or not share it with. I won’t tell.
Why You’ll Love This Recipe
Let me tell you why this small-batch apple crisp has become my most-requested dessert, even over my famous chocolate cake. It’s the kind of recipe that makes you look like you spent hours in the kitchen when really, you barely broke a sweat.
- Quick & Easy: From start to table in under 45 minutes. No pie crust to roll, no mixer to haul out, no fancy techniques required.
- Simple Ingredients: You probably have everything in your kitchen right now. Apples, oats, butter, sugar, cinnamon—that’s it. No trips to specialty stores.
- Perfect for Cozy Nights: Cold weather, rainy afternoons, or just one of those days where you need something warm and sweet. This is your answer.
- No Waste: It makes exactly two servings. No leftover crisp sitting in the fridge for a week, no temptation to eat an entire 9×13 pan by yourself (though I wouldn’t judge).
- Unbelievably Delicious: The topping gets perfectly golden and crunchy while the apples turn soft and jammy underneath. It’s texture heaven.
What makes this recipe different from all the other apple crisps out there? Two things. First, I use a mix of brown butter and regular melted butter in the topping. That extra step—browning just a couple tablespoons of butter—adds a nutty, almost caramel depth that takes this from good to unforgettable. Second, I don’t peel my apples. The peel adds texture, color, and holds everything together so you don’t end up with apple mush. Trust me on this one.
This isn’t just another apple crisp recipe. It’s the one that makes you close your eyes after the first bite. It’s comfort food at its simplest and best.
What Ingredients You Will Need
This recipe uses simple, wholesome ingredients to deliver big flavor without any fuss. Most of these are pantry staples, which is exactly what you want when a dessert craving strikes on a quiet evening at home.
For the Apple Filling
- 2 medium apples (about 300g total) – I recommend Honeycrisp, Granny Smith, or a mix of both. Honeycrisp gives sweetness and holds its shape; Granny Smith adds tartness that balances the sugar. Look for apples that are firm with no soft spots.
- 2 tablespoons granulated sugar (25g) – Regular white sugar works perfectly here. It helps draw out the apple juices and creates that syrupy texture.
- 1 tablespoon brown sugar (12g), packed – Adds a hint of molasses flavor that pairs beautifully with the apples and cinnamon.
- 1 tablespoon all-purpose flour (8g) – This thickens the apple juices as they cook, preventing a watery filling.
- ½ teaspoon ground cinnamon – The essential warm spice. I prefer cinnamon from Vietnam or Ceylon for the best flavor.
- ⅛ teaspoon ground nutmeg – Freshly grated if you have it, but pre-ground works fine too.
- Pinch of salt – Sounds weird, but it makes everything taste more like itself.
- 1 teaspoon lemon juice (about ¼ lemon) – Keeps the apples from browning and adds brightness.
For the Crisp Topping
- ¼ cup old-fashioned rolled oats (20g) – Not quick oats! They get mushy. Old-fashioned oats give that perfect chewy-crunchy texture.
- ¼ cup all-purpose flour (30g) – Creates the structure for the crumble.
- 3 tablespoons brown sugar (36g), packed – More brown sugar in the topping for that deep, caramelized flavor.
- ¼ teaspoon ground cinnamon – A little more warmth on top.
- Pinch of salt – Balances the sweetness.
- 3 tablespoons unsalted butter (42g), cold and cut into small cubes – This is key. Cold butter creates those craggy, crispy bits. If you use salted butter, just skip the pinch of salt.
Substitution Notes
For a gluten-free version, swap the all-purpose flour with a good 1:1 gluten-free flour blend. Oats are naturally gluten-free, but make sure they’re certified if you’re sensitive. You can also use coconut oil (solid, not melted) instead of butter for a dairy-free option—the texture will be slightly different but still delicious. For the apples, any baking apple works: Braeburn, Fuji, or Pink Lady are all great choices.
Equipment Needed
You don’t need much for this recipe, which is part of its charm. Here’s what you’ll want to have on hand:
- Two 8-ounce ramekins or small baking dishes – This is the perfect size for individual servings. If you don’t have ramekins, you can use a small 6-inch cast iron skillet or an 8×8 baking dish (just adjust the baking time slightly).
- A sharp knife and cutting board – For coring and slicing the apples. A vegetable peeler is optional since we’re leaving the peels on.
- A small mixing bowl – For the topping. I use my favorite ceramic bowl that my sister gave me, but any bowl works.
- A medium mixing bowl – For the apple filling.
- A small skillet – Only if you’re browning the butter (which I highly recommend).
- A measuring spoon set – For accurate spices and such.
- A kitchen scale – Optional but helpful for precise measurements. I use a simple OXO scale that cost about $20.
That’s it! No stand mixer, no food processor, no fancy gadgets. Just your hands and a few basic tools.
Preparation Method
Alright, let’s make this happen. Preheat your oven to 375°F (190°C). While it’s heating up, get your apples ready.
Step 1: Prepare the apples
Wash your apples well since we’re keeping the peels on. Cut them in half through the stem, then cut each half into quarters. Remove the core and seeds from each quarter. Now slice each quarter crosswise into ¼-inch thick pieces. You want them all roughly the same size so they cook evenly. Don’t stress about perfection—rustic is good here. You should end up with about 2 cups of sliced apples.
Step 2: Make the filling
In your medium bowl, combine the sliced apples with the granulated sugar, brown sugar, flour, cinnamon, nutmeg, salt, and lemon juice. Toss everything together with your hands (or a spoon, but hands work better) until every apple slice is coated. Let this sit while you make the topping—this gives the apples time to release their juices, which will create that lovely syrupy filling.
Step 3: Brown the butter (optional but amazing)
If you want that extra nutty flavor, here’s what you do: In a small skillet over medium heat, melt 1 tablespoon of the butter. Let it cook, swirling occasionally, until it turns golden brown and smells like toasted nuts—about 3-4 minutes. Watch it carefully because it goes from brown to burnt fast. Pour it into a small bowl and let it cool slightly. Then cut the remaining 2 tablespoons of cold butter into small cubes and add them to the browned butter. Pop the bowl in the fridge for 5 minutes to firm up a bit. If you’re skipping this step, just use all 3 tablespoons of cold butter cut into cubes.
Step 4: Make the crisp topping
In your small bowl, combine the oats, flour, brown sugar, cinnamon, and salt. Stir with a fork to mix everything together. Add the butter cubes (browned or plain) and use your fingertips or a pastry cutter to work the butter into the dry ingredients. You’re looking for a crumbly mixture with some pea-sized butter pieces still visible. Don’t overwork it—you want those little pockets of butter that will melt and create crispy bits as it bakes. The mixture should hold together when you squeeze it in your fist but break apart easily.
Step 5: Assemble the crisps
Divide the apple filling evenly between your two ramekins. Don’t pack it down—just let it sit naturally. Now sprinkle the topping over each ramekin, pressing lightly so it sticks to the apples. Use all of it! Pile it high—it will settle as it bakes. Place the ramekins on a small baking sheet to catch any drips (trust me, do this).
Step 6: Bake
Bake for 25-30 minutes, or until the topping is golden brown and the filling is bubbling up around the edges. You’ll know it’s done when you see those happy little bubbles of apple juice peeking through the crumble. If the topping is browning too quickly but the apples aren’t bubbling yet, tent loosely with foil for the last 5-10 minutes.
Step 7: Rest and serve
Let the crisps cool on a wire rack for at least 10 minutes. This is crucial—the filling needs time to set, and you don’t want to burn your mouth. The waiting is the hardest part, I know. But trust me, it’s worth it.
Cooking Tips & Techniques
After making this recipe more times than I care to count, I’ve learned a few things the hard way. Let me save you some trouble.
Don’t skip the resting time. I know you’re hungry. I know it smells amazing. But if you dig in right away, the filling will be runny and you’ll wonder what went wrong. Give it those 10 minutes. The juices thicken as they cool slightly, and the texture becomes perfect.
Watch your oven like a hawk. Every oven runs differently. My friend’s oven runs hot and bakes these in 22 minutes. Mine takes the full 30. Start checking at 20 minutes and go from there. Look for golden brown topping and bubbling filling—that’s your cue.
Use a mix of apple varieties. This is my number one tip. One sweet apple and one tart apple gives you a complexity that a single variety can’t match. I once made it with two Honeycrisps and it was too sweet. Two Granny Smiths and it was too tart. The Goldilocks combo is one of each.
Don’t overmix the topping. I learned this lesson after making a batch that came out more like paste than crumble. You want to see little butter chunks throughout. Those chunks are what create the crispy, craggy bits that make crisp so satisfying.
Toast your oats first for extra crunch. If you have an extra 5 minutes, spread the oats on a baking sheet and toast them at 350°F for 5-7 minutes before adding them to the topping. This gives them a deeper, nuttier flavor and keeps them crunchier even after baking. It’s a small step that makes a big difference.
Make the topping ahead of time. You can prep the topping mixture and keep it in the fridge for up to 3 days. Then when you want a quick dessert, just slice your apples, toss them with the sugar and spices, and bake. It’s perfect for those spontaneous cozy cravings.
Variations & Adaptations
One of the best things about this recipe is how flexible it is. Here are some ways I’ve adapted it over the years:
Berry-Apple Crisp: Add a handful of fresh or frozen berries to the apple mixture. Raspberries or blackberries work beautifully. Just toss them in with the apples and reduce the sugar by 1 tablespoon since berries are less sweet. I made this version last summer when my neighbor brought over a basket of wild blackberries—it was incredible.
Pear Crisp: Swap the apples for ripe but firm pears. Bosc or Anjou pears work great. The texture will be a bit softer, so add an extra tablespoon of flour to the filling to help it thicken. Pears also pair wonderfully with a pinch of ground ginger in the topping.
Gluten-Free Version: Use a 1:1 gluten-free flour blend in place of the all-purpose flour. Make sure your oats are certified gluten-free. The texture will be slightly different—a bit more delicate—but still delicious. I’ve tested this with King Arthur’s Measure for Measure blend and it works perfectly.
Vegan Option: Substitute the butter with solid coconut oil or a high-quality vegan butter like Miyoko’s. The topping won’t get quite as crispy, but it will still be tasty. Use maple syrup instead of honey if you’re avoiding all animal products.
Spiced Apple Crisp: Add ¼ teaspoon of cardamom and a pinch of cloves to the apple filling for a more warming, holiday-inspired flavor. This is my go-to version in December when I want something that tastes like Christmas in a bowl.
Serving & Storage Suggestions
This crisp is best served warm, straight from the oven. But how you serve it can take it from good to unforgettable.
Serving Temperature and Presentation: Let the ramekins cool for 10 minutes, then serve them on small plates with a napkin or a spoon. I like to place each ramekin on a small saucer—it feels more special that way. A dusting of powdered sugar on top adds a pretty finish, but it’s totally optional.
What to Serve With It: A scoop of vanilla ice cream is the classic pairing, and for good reason—the cold creaminess against the warm, spiced apples is heaven. But don’t stop there. A dollop of whipped cream, a drizzle of heavy cream, or a spoonful of Greek yogurt all work beautifully. For a special treat, try it with a scoop of salted caramel ice cream. I once served this with a side of warm homemade caramel sauce and my husband nearly cried.
Storage Instructions: If you have leftovers (unlikely, but possible), cover each ramekin with plastic wrap or foil and store in the refrigerator for up to 3 days. The topping will soften over time, but it’s still delicious.
Reheating Methods: The best way to reheat is in the oven at 350°F for 10-15 minutes. This helps re-crisp the topping. You can also use an air fryer at 350°F for 5-7 minutes. The microwave works in a pinch (about 45 seconds), but the topping will be soft, not crispy. If you’re reheating in the microwave, try topping it with a fresh sprinkle of granola or crushed cookies to add back some crunch.
How Flavors Develop: Honestly, this crisp is even better the next day. The flavors meld together overnight, and the apples become even more jammy and tender. If you can resist eating it all at once, you’re in for a treat.
Nutritional Information & Benefits
Let’s be real—this is dessert, not a health food. But it’s made with whole ingredients, and that counts for something. Here’s the approximate nutritional breakdown per serving (one ramekin, without ice cream):
| Nutrient | Amount per Serving |
|---|---|
| Calories | 320 |
| Total Fat | 12g |
| Saturated Fat | 7g |
| Carbohydrates | 55g |
| Fiber | 5g |
| Sugar | 35g |
| Protein | 3g |
The apples provide fiber and vitamin C, plus antioxidants from the peels. Oats are a good source of soluble fiber, which helps with heart health. Cinnamon has anti-inflammatory properties and may help regulate blood sugar. So while this isn’t a health food, it’s certainly not empty calories either. It’s comfort food made with real ingredients, and that’s something to feel good about.
If you’re watching your sugar intake, you can reduce the sugar by 1-2 tablespoons without sacrificing much flavor. The apples provide natural sweetness, so it will still taste good.
FAQs
Can I make this in advance?
Yes! You can assemble the crisps completely (without baking), cover them, and refrigerate for up to 24 hours. When you’re ready to bake, add about 5 minutes to the baking time since you’re starting from cold.
What if I don’t have ramekins?
No problem! Use a small baking dish, a 6-inch cast iron skillet, or even a large mug. Just adjust the baking time—a wider dish will bake faster, a deeper one will take longer. Keep an eye on it and look for the same visual cues: golden topping and bubbling filling.
Can I use quick oats instead of old-fashioned?
I really don’t recommend it. Quick oats are cut finer and will turn mushy in the oven. Old-fashioned rolled oats hold their texture and give you that perfect chewy-crunchy topping. If that’s all you have, it will work, but the texture won’t be the same.
Why did my topping turn out soggy?
A few possible reasons: your butter was too warm when you mixed it in, you overmixed the topping, or the filling was too watery. Make sure your butter is cold, mix just until combined, and let the apple mixture sit for 5 minutes before assembling so the flour can absorb some of the juices.
Can I double this recipe?
Absolutely! Just double all the ingredients and bake in a 9×9 inch pan or a 10-inch cast iron skillet. The baking time will increase to about 35-40 minutes. Keep an eye on it and test for doneness by looking for bubbling filling and a golden topping.
Conclusion
This cozy small-batch apple crisp for two is more than just a dessert—it’s a little moment of warmth in a bowl. It’s the kind of recipe that makes you slow down, breathe deep, and appreciate the simple things. The smell of cinnamon and baked apples filling your kitchen. The sound of that first spoonful breaking through the crispy topping. The feeling of sharing something homemade with someone you love—or keeping it all for yourself, no judgment here.
I’ve made this recipe on rainy Sundays, after tough days at work, and on quiet nights when I just needed something sweet. Every time, it delivers. It’s forgiving, it’s flexible, and it’s genuinely delicious. I hope you make it your own—add your favorite spices, swap in different fruits, serve it with whatever makes you happy. That’s the beauty of a simple recipe like this.
If you try this recipe, I’d love to hear about it. Leave a comment below and let me know how it turned out, what variations you tried, or just tell me about your favorite food memory. And if you’re looking for more cozy desserts, don’t miss my chocolate lava cake for two or these soft peanut butter cookies—they’re perfect for small-batch baking too.
Now go preheat your oven. You deserve this.
Pin This Recipe!

Cozy Small-Batch Apple Crisp for Two (Easy Dessert)

A cozy small-batch apple crisp for two with a buttery, crunchy oat topping and tender, jammy apples. Perfect for a quick and easy dessert that feels special without the fuss.
- Prep Time: 15 minutes
- Cook Time: 30 minutes
- Total Time: 45 minutes
- Yield: 2 servings 1x
- Category: Dessert
- Cuisine: American
Ingredients
- 2 medium apples (about 300g total), such as Honeycrisp, Granny Smith, or a mix
- 2 tablespoons granulated sugar (25g)
- 1 tablespoon brown sugar (12g), packed
- 1 tablespoon all-purpose flour (8g)
- ½ teaspoon ground cinnamon
- ⅛ teaspoon ground nutmeg
- Pinch of salt
- 1 teaspoon lemon juice (about ¼ lemon)
- ¼ cup old-fashioned rolled oats (20g)
- ¼ cup all-purpose flour (30g)
- 3 tablespoons brown sugar (36g), packed
- ¼ teaspoon ground cinnamon
- Pinch of salt
- 3 tablespoons unsalted butter (42g), cold and cut into small cubes
Instructions
- Preheat your oven to 375°F (190°C).
- Wash the apples and cut them in half through the stem, then each half into quarters. Remove the core and seeds, then slice each quarter crosswise into ¼-inch thick pieces. You should have about 2 cups of sliced apples.
- In a medium bowl, combine the sliced apples with granulated sugar, brown sugar, flour, cinnamon, nutmeg, salt, and lemon juice. Toss until every apple slice is coated. Let sit while you make the topping.
- For the topping, if browning the butter: In a small skillet over medium heat, melt 1 tablespoon of the butter. Cook, swirling occasionally, until golden brown and smells like toasted nuts (about 3-4 minutes). Pour into a small bowl and let cool slightly. Cut the remaining 2 tablespoons of cold butter into small cubes and add to the browned butter. Refrigerate for 5 minutes to firm up. If skipping this step, use all 3 tablespoons of cold butter cut into cubes.
- In a small bowl, combine oats, flour, brown sugar, cinnamon, and salt. Stir with a fork. Add the butter cubes and use your fingertips or a pastry cutter to work the butter into the dry ingredients until crumbly with some pea-sized butter pieces visible.
- Divide the apple filling evenly between two 8-ounce ramekins. Sprinkle the topping over each, pressing lightly. Place ramekins on a small baking sheet.
- Bake for 25-30 minutes, until the topping is golden brown and the filling is bubbling around the edges. If topping browns too quickly, tent loosely with foil for the last 5-10 minutes.
- Let cool on a wire rack for at least 10 minutes before serving.
Notes
Don’t skip the resting time after baking—it allows the filling to set. Use a mix of apple varieties for best flavor. For extra crunch, toast the oats before adding to the topping. The topping can be made ahead and refrigerated for up to 3 days.
Nutrition
- Serving Size: 1 ramekin
- Calories: 320
- Sugar: 35
- Sodium: 150
- Fat: 12
- Saturated Fat: 7
- Carbohydrates: 55
- Fiber: 5
- Protein: 3
Keywords: apple crisp, small batch, dessert for two, easy apple crisp, cozy dessert, fall dessert, apple recipe


