Love this? Save it for later!
Share the inspiration with your friends
My brother-in-law, Dave, had a very specific rule about football food. For three entire seasons, he swore that layered dips were “restaurant gimmicks” that had no business on a coffee table during a game. He was a purist — chips and salsa, maybe some queso, and that was it. Then came the Sunday afternoon I made this 7-layer taco dip just for myself. I mean, honestly, I was tired of plain chips and wanted something with a little more personality. I set the dish down next to his armchair, grabbed a cold beer, and walked away to answer my phone. When I came back ten minutes later, Dave was hunched over the baking dish, a tortilla chip in each hand, looking like a man caught mid-crime. He had the audacity to say, “I was just testing it for you.” Sure, Dave. Sure. That was the moment I knew this recipe was something special.
There is something about a cold, creamy, crunchy, and slightly spicy dip that just works when the game is on. Maybe you’ve been there — staring down a spread of snacks, feeling like something is missing. This dip fills that gap, and then some. It is the kind of dish that disappears before halftime, and the one people ask you to bring to every watch party. The best part? It takes about fifteen minutes of actual work. The layers stack up beautifully, and the flavor combination is just unbeatable. This isn’t just another dip; it is the dip that turned a skeptic into a believer, and it has been a game-day staple ever since.
Why You’ll Love This Recipe
Let me tell you, after years of testing dips for every imaginable occasion — from Super Bowl blowouts to quiet Sunday dinners — this version stands alone. I have made this for crowds of twenty and for just my husband and me on a rainy Tuesday. It always delivers.
- Quick & Easy: Comes together in under 20 minutes. No oven required, no complicated steps. You can even prep the layers the night before.
- Simple Ingredients: Everything you need is at your local grocery store. No hunting for exotic spices or specialty items. Refried beans, sour cream, cheese — you know the drill.
- Perfect for Game Day: This dip is built for football Sunday. It holds up at room temperature, travels well, and pairs perfectly with a cold beer or soda.
- Crowd-Pleaser: I have watched people who “don’t like beans” go back for thirds. The layers work together so well that even picky eaters get won over.
- Unbelievably Delicious: The contrast between the cool sour cream layer, the warm-ish refried beans, and the crunchy fresh toppings is next-level comfort food.
What makes this recipe different from the rest? It is the balance. I have tried versions that are too wet, too dry, or just plain boring. This one uses a simple trick — seasoning the sour cream layer with taco seasoning — that ties everything together. It doesn’t just sit there; it actually tastes like something. It is comfort food reimagined — faster, fresher, but with the same soul-soothing satisfaction you want when your team is on the field.
What Ingredients You Will Need
This recipe uses simple, wholesome ingredients to deliver bold flavor and satisfying texture without the fuss. Most of these are pantry staples or easy to find in any grocery store.
- Refried Beans (16 oz can) — The base layer. I prefer Old El Paso or Rosarita brand for a smooth, creamy texture. Look for “traditional” or “original” flavor. (Adds a hearty, savory foundation)
- Sour Cream (1 cup) — The cool, tangy layer that balances the spices. Use full-fat for best texture; low-fat can be a bit watery. (Provides creaminess)
- Taco Seasoning (1 packet or 2 tablespoons homemade) — This is my secret weapon. Mixing it into the sour cream layer gives every bite a consistent flavor. I like McCormick or a DIY blend of chili powder, cumin, garlic powder, and onion powder.
- Guacamole (1 cup) — Store-bought or homemade. If using store-bought, look for one that lists avocado as the first ingredient and has a vibrant green color. (Adds healthy fats and freshness)
- Salsa (1 cup) — Use your favorite. A medium-heat chunky salsa works best. Drain off some liquid if it looks watery to avoid a soggy dip. (Brings acidity and heat)
- Shredded Cheddar Cheese (1 ½ cups) — Sharp cheddar is my go-to. Shred it yourself from a block for better melting and less anti-caking agent. (Provides salty, melty richness)
- Shredded Lettuce (1 cup) — Iceberg or romaine, finely chopped. Adds a necessary crunch. (Gives texture and freshness)
- Diced Tomatoes (1 cup) — Roma tomatoes work best. Remove the seeds and juice to keep the dip from getting watery. (Adds brightness and acidity)
- Sliced Black Olives (½ cup) — Canned, drained. They add a briny, salty pop that cuts through the richness. (Provides a savory, briny note)
- Fresh Jalapeño (1-2, sliced) — Optional but recommended for heat. Remove seeds for less spice. (Adds a fresh, spicy kick)
- Green Onions (¼ cup, sliced) — For a mild oniony finish. (Adds color and a subtle sharpness)
Ingredient Selection Tip: For the best texture, let your refried beans come to room temperature before spreading. They are much easier to work with than cold beans straight from the can. If you are making your own guacamole, add a squeeze of lime juice to keep it from browning.
Equipment Needed
You don’t need any fancy gadgets for this one. A few basic tools will get the job done perfectly.
- 9×13-inch Baking Dish or Large Pie Plate — A clear glass dish lets you see the beautiful layers. A ceramic dish works great too.
- Rubber Spatula — For spreading the refried beans and sour cream layers evenly. I have a favorite red one that has seen many game days.
- Small Mixing Bowl — To combine the sour cream and taco seasoning.
- Cutting Board and Sharp Knife — For dicing tomatoes, slicing jalapeños, and chopping green onions.
- Cheese Grater — If you are shredding your own cheese (highly recommended), a box grater is perfect.
- Measuring Cups and Spoons — For accuracy, though after a few times you will just eyeball it.
Budget-Friendly Tip: Don’t have a 9×13 dish? A large, deep pie plate or even a cast-iron skillet works beautifully. The shape doesn’t matter as much as having enough surface area for all those layers.
Preparation Method
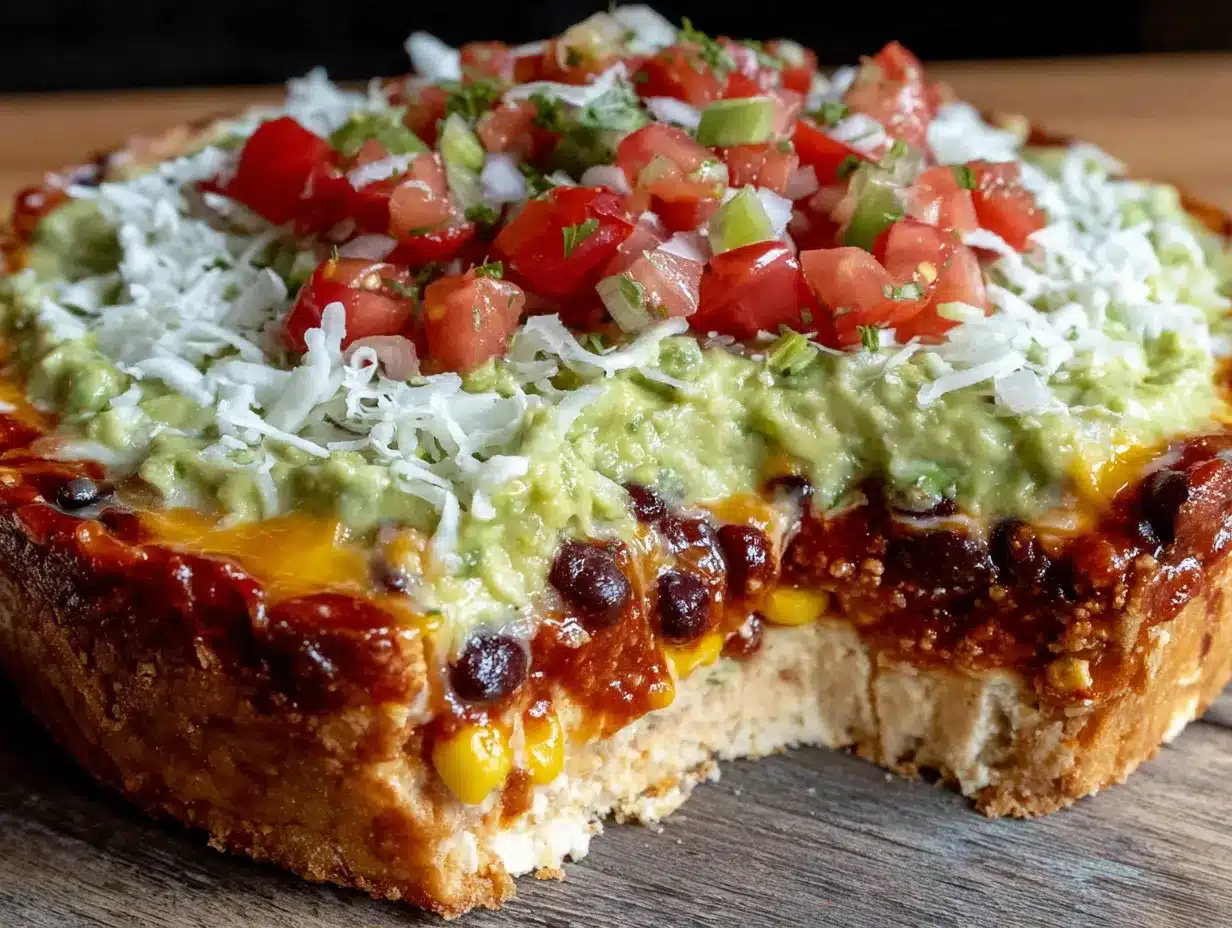
Follow these steps, and you will have a dip that looks like it came from a restaurant. I have made this dozens of times, and this method never fails.
- Prep Your Ingredients (5 minutes)
Gather everything. Dice your tomatoes and remove the seeds. Slice the jalapeños and green onions. Shred your cheese if you are doing it fresh. Open the can of refried beans and stir them in a bowl to loosen them up. This makes spreading much easier. - Make the Seasoned Sour Cream Layer (2 minutes)
In a small bowl, combine 1 cup of sour cream with 1 packet (or 2 tablespoons) of taco seasoning. Stir until completely smooth. Taste it — it should be tangy, savory, and just a little spicy. Set it aside. This is the layer that will tie the whole dip together. - Spread the First Layer: Refried Beans (3 minutes)
Using your rubber spatula, spread the refried beans evenly across the bottom of your 9×13 dish. Aim for a smooth, even layer about ¼-inch thick. If the beans are too stiff, add a tablespoon of water or salsa and mix it in. Pro tip: Wet your spatula slightly to prevent sticking. - Add the Second Layer: Seasoned Sour Cream (2 minutes)
Gently spread the seasoned sour cream over the refried beans. Be careful not to mix the layers — use a light touch. Spread all the way to the edges so every bite has some of everything. - Add the Third Layer: Guacamole (2 minutes)
Spoon the guacamole over the sour cream layer. Spread it gently. If your guacamole is thick, drop small spoonfuls first and then spread them together. This prevents pulling up the sour cream layer underneath. - Add the Fourth Layer: Salsa (2 minutes)
Pour the salsa over the guacamole. Spread it evenly. If your salsa is very watery, drain off the excess liquid first. Nobody wants a soggy dip. - Add the Fifth Layer: Shredded Cheddar Cheese (2 minutes)
Sprinkle the shredded cheddar cheese evenly over the salsa. Cover every inch. This is the layer that makes it look irresistible. - Add the Sixth Layer: Shredded Lettuce (2 minutes)
Scatter the shredded lettuce over the cheese. Don’t press it down — you want it to stay light and fluffy for that perfect crunch. - Add the Seventh Layer: Toppings (3 minutes)
Sprinkle the diced tomatoes, sliced black olives, and sliced jalapeños over the lettuce. Finish with a scattering of green onions. Step back and admire your work. It should look like a colorful, layered masterpiece. - Chill Before Serving (Optional but Recommended — 30 minutes)
Cover the dish with plastic wrap and refrigerate for at least 30 minutes. This allows the flavors to meld together. The dip is still delicious served immediately, but the wait is worth it.
Sensory Cue: When you pull the dip out of the fridge, you should see distinct, vibrant layers. The cheese should look fresh, the lettuce crisp, and the guacamole a beautiful pale green. The smell is a mix of cool dairy, earthy beans, and bright salsa.
Cooking Tips & Techniques
I have made this dip for years, and I have definitely learned a few things the hard way. Here are my best tips to make your dip perfect every time.
- Don’t Skip the Seasoned Sour Cream: This is the single most important tip. Plain sour cream is boring. Mixing it with taco seasoning transforms the entire dip. It adds flavor to every bite, not just the top layers.
- Layer Order Matters: The wet ingredients go on the bottom (beans, sour cream, guacamole, salsa). The dry, crunchy ingredients go on top (cheese, lettuce, tomatoes). This keeps the dip from turning into a soggy mess.
- Room Temperature Beans Are Your Friend: Cold refried beans are stiff and hard to spread. Let them sit on the counter for 15 minutes before you start. Or, microwave them for 20 seconds and stir. This one step saves so much frustration.
- Drain Your Salsa: I learned this after one particularly watery dip that turned into soup by the second quarter. Use a slotted spoon or drain the salsa in a fine-mesh strainer for a minute. Your dip will thank you.
- Shred Your Own Cheese: Pre-shredded cheese has anti-caking agents that prevent it from melting and sticking together. Freshly shredded cheddar has a better texture and richer flavor. It takes two extra minutes and makes a noticeable difference.
- Make It Ahead: You can assemble the dip up to the cheese layer (step 7) a day in advance. Cover and refrigerate. Add the lettuce, tomatoes, olives, and jalapeños just before serving. This keeps the toppings crisp and fresh.
Variations & Adaptations
This dip is incredibly flexible. I have tried many variations over the years, and some have become new favorites.
- Spicy Kick Version: Add a layer of pickled jalapeños between the salsa and cheese. Use hot salsa and add a pinch of cayenne to the sour cream. My husband loves this version — it has a serious heat that builds with each bite.
- Vegetarian & Gluten-Free: This recipe is naturally vegetarian and gluten-free as written. Just double-check your taco seasoning packet — some brands contain wheat flour as a filler. I use Simply Organic or make my own blend to be safe.
- Healthier Twist: Use Greek yogurt instead of sour cream for extra protein and less fat. Swap the refried beans for black beans (mashed slightly) for more fiber. Use reduced-fat cheese. It still tastes great, just a little lighter on the waistline.
- Protein-Packed Version: Add a layer of seasoned ground beef or shredded chicken between the refried beans and sour cream. Brown ½ pound of ground beef with taco seasoning, let it cool, and spread it on. This turns the dip into a full meal.
- Breakfast Taco Dip: Yes, I have done this. Swap the salsa for pico de gallo, add a layer of scrambled eggs under the cheese, and serve with warm tortilla chips. It is surprisingly good for a lazy Sunday morning.
Serving & Storage Suggestions
This dip is best served cold or at room temperature. The contrast between the cool, creamy layers and the crunchy chips is part of the magic.
- Serving Temperature: Serve straight from the refrigerator. If you are bringing it to a party, keep it chilled until the last minute. It can sit out for about 2 hours safely.
- What to Serve With It: Tortilla chips are the classic choice. Go for sturdy, restaurant-style chips — thin chips will break under the weight of the layers. You can also serve it with cucumber slices, bell pepper strips, or jicama sticks for a low-carb option.
- Pairing Suggestions: This dip pairs beautifully with a cold Mexican lager like Corona or Modelo. For a non-alcoholic option, try a lime sparkling water or a horchata. It also works great alongside other game-day favorites like buffalo wings or chili.
- Storage Instructions: Leftover dip keeps in the refrigerator for up to 2 days. Cover it tightly with plastic wrap. The lettuce and tomatoes will wilt a bit, but the flavors will actually deepen overnight.
- Reheating: I don’t recommend reheating the entire dip because the lettuce and sour cream don’t handle heat well. If you have leftovers, scoop out individual portions and microwave them for 20-30 seconds — just the bean and cheese parts. Top with fresh lettuce.
- Flavor Development: Honestly, this dip tastes even better the next day. The layers settle together, and the flavors meld into something even more cohesive. Just add fresh toppings before serving again.
Nutritional Information & Benefits
Per serving (based on 12 servings):
- Calories: 285
- Fat: 18g
- Carbohydrates: 22g
- Protein: 10g
- Fiber: 6g
- Sugar: 4g
- Sodium: 620mg
Health Benefits: This dip actually has some surprising nutritional perks. The refried beans are packed with fiber and plant-based protein, which helps keep you full. Avocados in the guacamole provide heart-healthy monounsaturated fats and potassium. Tomatoes are rich in lycopene, an antioxidant that supports heart health. The cheese adds calcium for strong bones. It is not exactly health food, but it is a lot more nutritious than most game-day snacks.
Dietary Considerations: This recipe is naturally gluten-free (check your taco seasoning) and vegetarian. To make it dairy-free, use dairy-free sour cream and cheese alternatives. To make it vegan, use vegan sour cream, vegan cheese, and ensure your refried beans are made without lard. For a lower-sodium version, use low-sodium beans and salsa, and skip the added salt.
Conclusion
This 7-layer taco dip has become my go-to for every football Sunday, and I am not exaggerating when I say it has converted more than a few dip skeptics. It is simple, beautiful, and absolutely packed with flavor. The layers stack up into something that looks impressive but takes almost no effort. That is the kind of recipe you keep in your back pocket.
I encourage you to make this your own. Add more heat if you like it spicy. Swap in your favorite salsa. Pile on extra jalapeños. The beauty of this dip is that it welcomes customization. Just keep the basic structure — creamy base, fresh toppings, and a good chip-to-dip ratio — and you cannot go wrong.
I would love to hear how yours turns out. Did you add a secret ingredient? Did your own “Dave” get caught sneaking a bite? Drop a comment below and share your game-day dip story. And if you loved this recipe, pass it along to a friend who needs a new touchdown-worthy snack. Until next time, happy dipping and go team!
Frequently Asked Questions
Can I make this 7-layer taco dip ahead of time?
Yes, absolutely. You can assemble the dip up to the cheese layer (step 7) a day in advance. Cover it tightly with plastic wrap and refrigerate. Add the fresh toppings — lettuce, tomatoes, olives, and jalapeños — just before serving to keep them crisp and vibrant.
How do I keep the guacamole from turning brown?
If you are making the dip ahead, spread the guacamole layer and then press a layer of plastic wrap directly onto the surface before adding the next layer. This prevents air from reaching the avocado. You can also add extra lime juice to the guacamole, which helps slow browning.
What are the best chips to serve with this dip?
Sturdy, restaurant-style tortilla chips are your best bet. Thin chips will break under the weight of the layers. I like Tostitos Scoops or On the Border Café Style chips. They are thick enough to hold up to a generous scoop of dip.
Can I use homemade taco seasoning instead of a packet?
Definitely. Homemade taco seasoning is easy to make and lets you control the salt and spice levels. Mix together 1 tablespoon chili powder, 1 teaspoon cumin, 1 teaspoon garlic powder, 1 teaspoon onion powder, ½ teaspoon paprika, ½ teaspoon oregano, and a pinch of cayenne. Use 2 tablespoons of this blend for the sour cream layer.
How long can this dip sit out at a party?
For food safety, this dip should not sit out at room temperature for more than 2 hours. If you are serving it during a long game, consider placing the dish on a bed of ice or serving smaller portions and refreshing them from the refrigerator as needed. The cold, creamy layers are part of what makes it so good, so keeping it chilled is best.
Pin This Recipe!
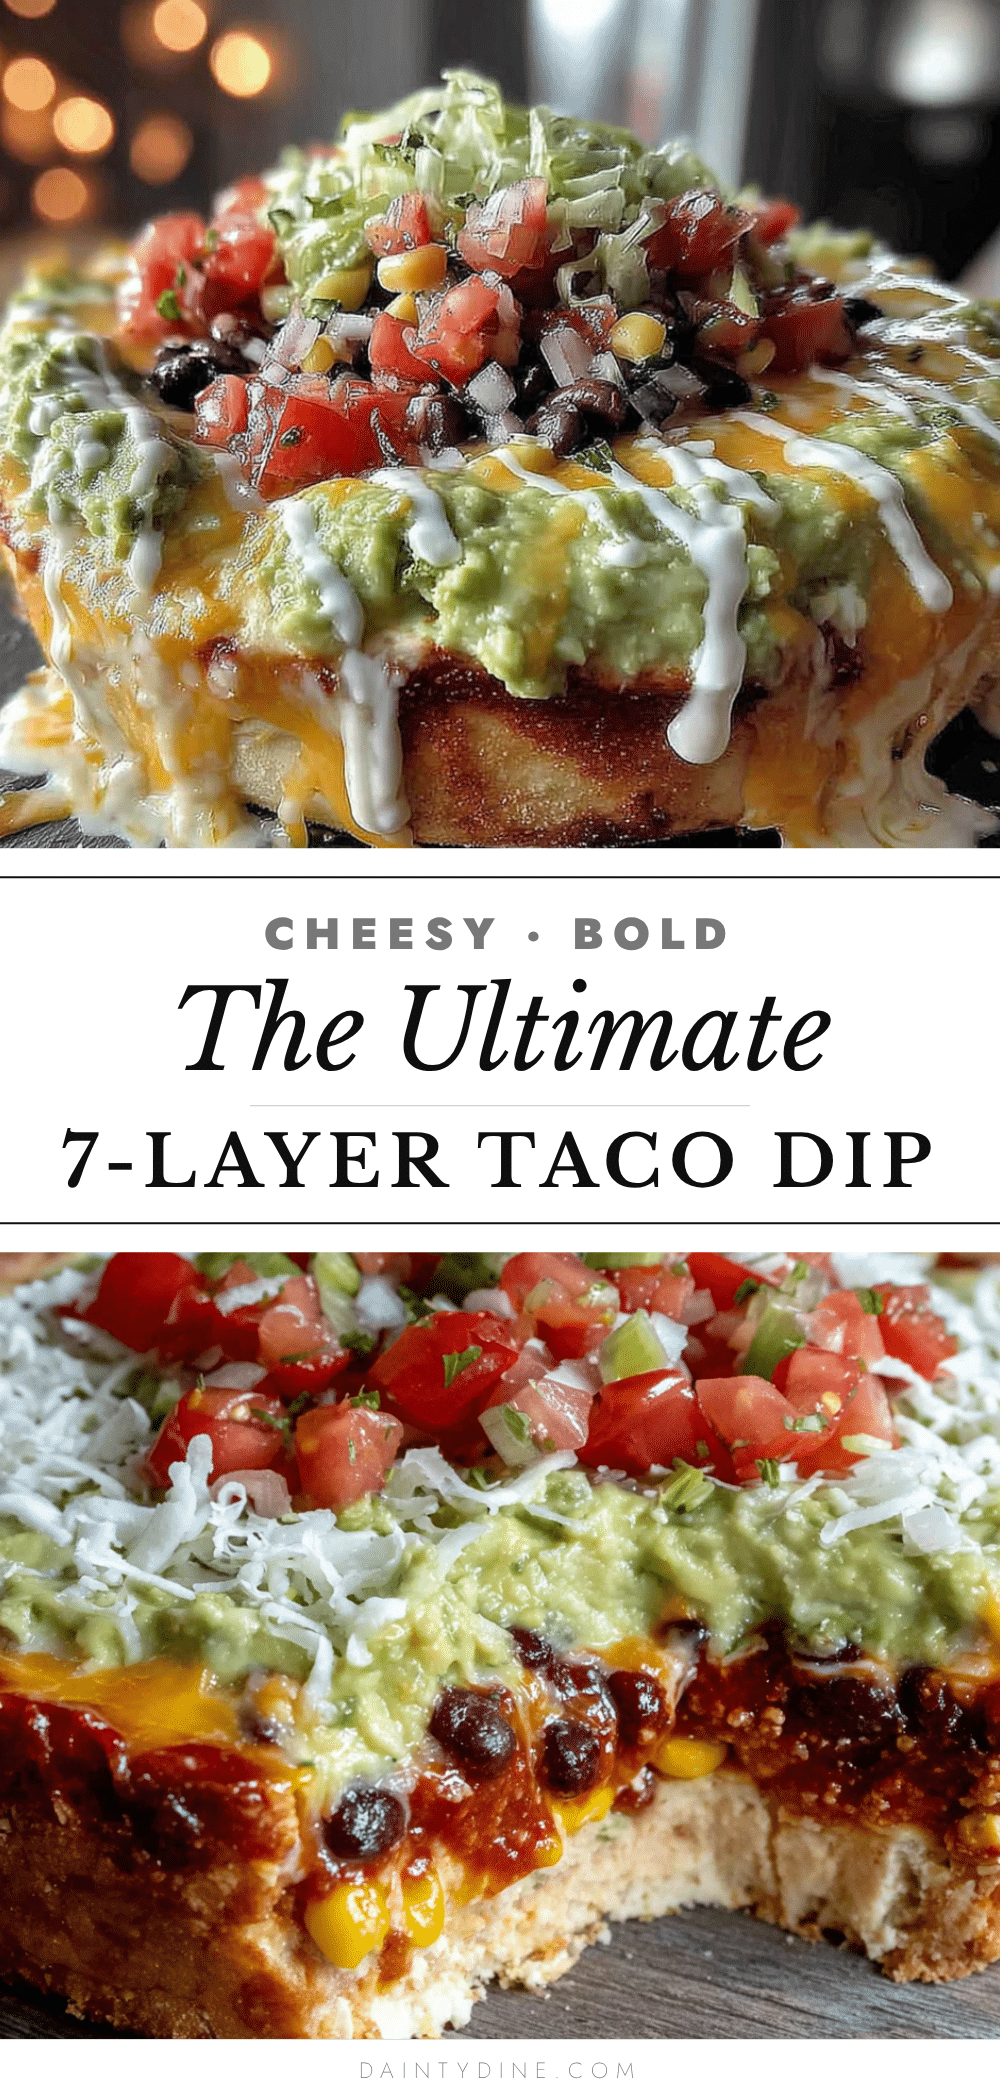
Best 7-Layer Taco Dip for Football Sunday

This 7-layer taco dip is a game-day staple that comes together in under 20 minutes. Layers of refried beans, seasoned sour cream, guacamole, salsa, cheese, lettuce, and fresh toppings create a crowd-pleasing snack that even skeptics love.
- Prep Time: 15 minutes
- Cook Time: 0 minutes
- Total Time: 15 minutes (plus optional 30 minutes chilling)
- Yield: 12 servings 1x
- Category: Appetizer
- Cuisine: Mexican-American
Ingredients
- 16 oz can refried beans
- 1 cup sour cream
- 1 packet (or 2 tablespoons) taco seasoning
- 1 cup guacamole
- 1 cup salsa
- 1 ½ cups shredded cheddar cheese
- 1 cup shredded lettuce
- 1 cup diced tomatoes (seeds removed)
- ½ cup sliced black olives
- 1–2 fresh jalapeños, sliced (optional)
- ¼ cup sliced green onions
Instructions
- Prep your ingredients: dice tomatoes (remove seeds), slice jalapeños and green onions, shred cheese, and stir refried beans in a bowl to loosen.
- In a small bowl, combine sour cream and taco seasoning until smooth.
- Spread refried beans evenly in a 9×13-inch dish to form the first layer.
- Gently spread seasoned sour cream over the beans as the second layer.
- Spoon guacamole over the sour cream and spread gently as the third layer.
- Pour salsa over the guacamole and spread evenly as the fourth layer.
- Sprinkle shredded cheddar cheese evenly over the salsa as the fifth layer.
- Scatter shredded lettuce over the cheese as the sixth layer.
- Top with diced tomatoes, sliced black olives, jalapeños, and green onions as the seventh layer.
- Cover and refrigerate for at least 30 minutes before serving (optional but recommended).
Notes
For best texture, let refried beans come to room temperature before spreading. Drain salsa if watery to avoid soggy dip. Shred cheese from a block for better melting. Can be assembled up to the cheese layer a day in advance; add fresh toppings just before serving.
Nutrition
- Serving Size: 1 serving (based on
- Calories: 285
- Sugar: 4
- Sodium: 620
- Fat: 18
- Saturated Fat: 8
- Carbohydrates: 22
- Fiber: 6
- Protein: 10
Keywords: 7-layer dip, taco dip, game day dip, football snack, layered dip, easy appetizer, party dip