Love this? Save it for later!
Share the inspiration with your friends
I wasn’t supposed to be in Abuela Elena’s kitchen that October afternoon. I’d stopped by to borrow a ladder—mine had mysteriously vanished during a weekend trip—and the smell of orange blossoms and warm butter hit me before I even made it past her screen door. She wasn’t trying to impress anyone. Honestly, I don’t think she even remembered I was coming. She just stood there, her hands dusted in flour, shaping these little rounds of dough with the kind of quiet focus most people reserve for crossword puzzles.
“Grab that tray,” she said, nodding toward the counter without looking up. “You’re early, but you might as well make yourself useful.”
That’s how I ended up spending the next three hours learning to make Pan de Muerto—a bread I’d only ever seen in bakery windows, never once considered making myself. She didn’t call it a recipe. She called it “what we do this time of year.” There was no printed card, no measuring cups for the flour—just handfuls and pinches and the occasional “that’s enough, don’t be greedy” when I added too much sugar. The dough felt like silk between my fingers, soft and yielding, and the orange blossom glaze she brushed on at the end caught the late afternoon light like stained glass.
I’ve made this bread every October since then. Maybe you’ve been there—that moment when someone shares something so casually that you almost miss how special it is. That’s this recipe. It’s not fussy or complicated. It’s just bread that tastes like memory, shaped like a prayer, and sweet enough to make you close your eyes on the first bite.
Why You’ll Love This Recipe
Let me tell you why this Traditional Pan de Muerto with Orange Blossom Glaze has become my most-requested fall recipe. After testing this dough about seven times (Abuela Elena’s “pinch of this” approach doesn’t translate perfectly to measuring spoons), I’ve landed on a version that’s forgiving for beginners but still tastes like it came from a panadería.
- Surprisingly Simple Dough: Despite how impressive it looks, this is a straightforward yeasted dough. No complicated lamination, no fancy shaping tricks. Just patience and a little love.
- Pantry-Friendly Ingredients: You probably have most of this already—flour, butter, sugar, eggs. The orange blossom water is the one special ingredient, and a bottle lasts forever.
- Perfect for Día de Muertos: This bread is meant for the altar, but honestly, it’s perfect for any fall gathering. It’s a conversation starter and a comfort food all in one.
- That Orange Blossom Glaze: This is where the magic happens. The floral sweetness pairs with the soft, buttery bread in a way that feels both familiar and exotic. I’ve had people who swore they didn’t like floral flavors ask for seconds.
- Make-Ahead Friendly: The dough freezes beautifully, and the glaze keeps for days. You can prep this over two days if you want to spread out the work.
What makes this version different from other recipes? It’s the balance. I tested this until the orange blossom flavor was present but not overpowering—like a memory of citrus, not a punch in the face. The dough is enriched enough to be tender but sturdy enough to hold its shape. And the glaze? It’s thin enough to soak in but thick enough to leave that signature sheen.
This isn’t just another bread recipe. It’s the kind that makes you understand why certain foods become traditions. One bite, and you’ll get it.
What Ingredients You Will Need
This recipe uses simple, wholesome ingredients to create a bread that’s rich, aromatic, and deeply satisfying. Most of these are pantry staples, with the orange blossom water being the one special addition worth seeking out.
For the Dough
- All-purpose flour, 4 cups (500g) — I prefer King Arthur for consistent results, but any brand works. Spoon and level your flour for the most accurate measurement.
- Active dry yeast, 2 ¼ teaspoons (one packet) — Make sure it’s fresh. Old yeast is the number one reason bread fails.
- Granulated sugar, ½ cup (100g) — This isn’t an overly sweet bread, but the sugar feeds the yeast and adds tenderness.
- Unsalted butter, ½ cup (113g), softened — Room temperature matters here. Cold butter won’t incorporate properly.
- Large eggs, 3, at room temperature — Plus one more for the egg wash. Cold eggs can shock the yeast and slow rising.
- Whole milk, ½ cup (120ml), warmed to about 110°F — Warm milk wakes up the yeast. Too hot will kill it, so test it on your wrist like a baby bottle.
- Orange zest, from 2 medium oranges — Use a microplane if you have one. This is where the bright, citrusy backbone comes from.
- Orange blossom water, 2 tablespoons — Find this in the international aisle, at Middle Eastern grocers, or online. A little goes a long way.
- Salt, 1 teaspoon — Don’t skip this. Salt controls yeast activity and strengthens the dough structure.
- Vanilla extract, 1 teaspoon — Pure vanilla, not imitation. It rounds out the floral notes beautifully.
For the Orange Blossom Glaze
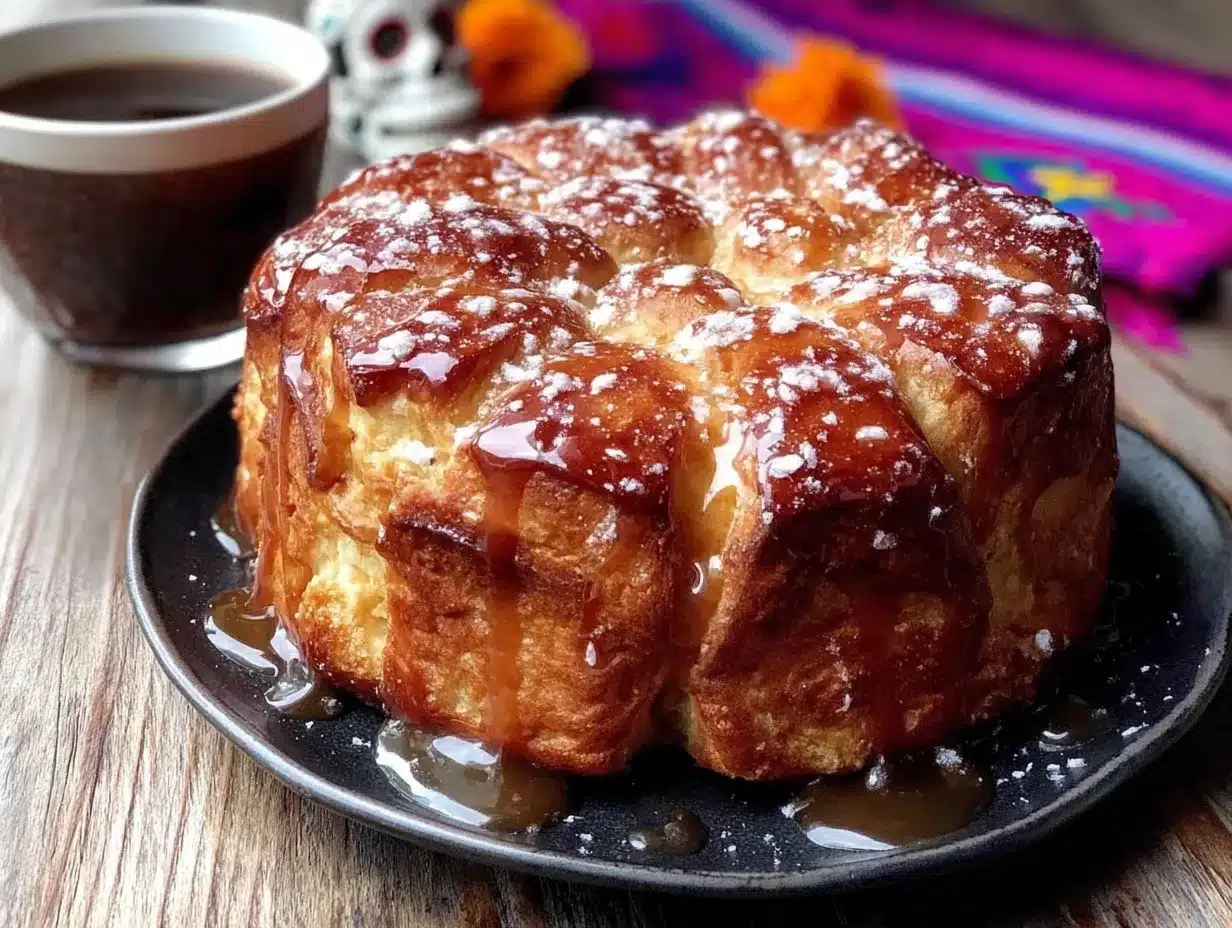
- Powdered sugar, 1 ½ cups (180g), sifted — Sifting prevents lumps. Trust me on this one.
- Orange blossom water, 2 tablespoons — Adjust based on how floral you want it. I like it strong.
- Fresh orange juice, 2-3 tablespoons — Fresh squeezed makes a difference. The bottled stuff has a flat taste.
- Orange zest, 1 teaspoon, finely grated — For color and a little texture.
For Decoration (Traditional)
- Granulated sugar, ¼ cup, for sprinkling — Optional but traditional. It adds sparkle and a tiny crunch.
- Sesame seeds, 1 tablespoon, for garnish — Also optional. Some regions use them, some don’t. I like the subtle nuttiness.
Ingredient selection tip: When buying orange blossom water, look for brands from Lebanon or Morocco. They tend to have the most authentic floral aroma without tasting like perfume. I’ve tried a few, and Cortas is my go-to for consistent quality.
Equipment Needed
You don’t need a professional bakery setup for this. Here’s what I use and what you can substitute if you’re improvising:
- Stand mixer with dough hook — This makes kneading effortless, but you can absolutely do it by hand. It’ll take about 10-12 minutes of arm work.
- Large mixing bowl — Glass or ceramic works best. Avoid metal if you’re proofing in the same bowl—metal can conduct temperature changes unevenly.
- Baking sheets — Two half-sheet pans, lined with parchment paper. I’ve used the same beat-up pans for years. They don’t need to be fancy.
- Plastic wrap or a clean kitchen towel — For covering the dough while it rises. A damp towel works in a pinch.
- Pastry brush — For the egg wash and glaze. A silicone brush is easier to clean, but a natural bristle brush applies more evenly.
- Cooling rack — Essential for even cooling. If you don’t have one, you can carefully balance the bread on the edges of the pan, but it’s not ideal.
- Microplane or fine grater — For zesting oranges without getting bitter pith.
- Liquid measuring cup and dry measuring cups — Use the right ones. Liquid measuring cups for milk and water, dry cups for flour and sugar. It sounds fussy, but it matters.
Budget-friendly tip: If you don’t have a stand mixer, a sturdy wooden spoon and some elbow grease work perfectly. I made this bread by hand for two years before I got my mixer. The bread turned out just as good.
Preparation Method
This recipe takes about 3 hours total, with most of that being inactive rising time. Here’s the step-by-step, exactly as I do it.
Step 1: Activate the Yeast
In a small bowl, combine the warm milk (110°F), 1 tablespoon of the sugar, and the active dry yeast. Stir gently and let it sit for 5-10 minutes until it becomes foamy and smells like warm bread. If it doesn’t foam, your yeast is dead. Start over with fresh yeast—don’t risk it.
Step 2: Mix the Dough
In the bowl of your stand mixer (or a large mixing bowl), whisk together the flour, remaining sugar, orange zest, and salt. Make a well in the center. Add the foamy yeast mixture, softened butter, eggs, orange blossom water, and vanilla extract. Mix on low speed with the dough hook until a shaggy dough forms, about 2 minutes. The dough will look messy and sticky at this point. That’s normal.
Step 3: Knead the Dough
Increase the mixer speed to medium-low and knead for 8-10 minutes. The dough should pull away from the sides of the bowl and feel smooth and elastic. If you’re kneading by hand, turn the dough onto a floured surface and knead for 10-12 minutes, adding flour only as needed to prevent sticking. You’ll know it’s ready when you can stretch a small piece thin enough to see light through without it tearing—that’s the windowpane test.
Step 4: First Rise
Shape the dough into a smooth ball and place it in a lightly greased bowl. Cover with plastic wrap or a clean kitchen towel. Let it rise in a warm, draft-free spot for 1 ½ to 2 hours, until doubled in size. I usually put mine in the oven with just the light on. It’s the perfect temperature.
Step 5: Shape the Bread
Punch down the dough gently to release the air. Turn it onto a lightly floured surface. Divide it into two pieces: one larger piece (about two-thirds of the dough) for the base, and one smaller piece for the decorations.
For the base: Shape the larger piece into a round loaf and place it on a parchment-lined baking sheet.
For the decorations: Divide the smaller piece into several parts. Roll small ropes of dough to form the “bones”—traditionally, these are four strips placed crosswise on top of the loaf to represent the four directions. Roll a small ball of dough for the top center, which represents a skull or tear. Press the decorations gently into the surface of the loaf so they stick during baking.
Step 6: Second Rise
Cover the shaped loaf loosely with plastic wrap and let it rise for 45 minutes to 1 hour, until puffy but not doubled. It should feel pillowy when you gently press it.
Step 7: Preheat and Egg Wash
About 20 minutes before baking, preheat your oven to 350°F (175°C). Beat the remaining egg with 1 tablespoon of water to make an egg wash. Gently brush the risen loaf with the egg wash, being careful not to deflate the dough.
Step 8: Bake
Bake for 25-30 minutes, rotating the pan halfway through. The bread should be deep golden brown on top and sound hollow when tapped on the bottom. If the decorations are browning too quickly, tent the loaf loosely with foil for the last 10 minutes.
Step 9: Make the Glaze
While the bread bakes, whisk together the sifted powdered sugar, orange blossom water, orange juice, and orange zest in a small bowl. The glaze should be thick but pourable—like heavy cream. Adjust with more juice or sugar as needed.
Step 10: Glaze and Serve
Let the bread cool on the baking sheet for 10 minutes, then transfer to a cooling rack. While it’s still warm (but not hot), brush the glaze generously over the top. Let it soak in for a few minutes, then sprinkle with granulated sugar and sesame seeds if using. The glaze will set into a shiny, crackly coating as it cools.
Cooking Tips & Techniques
I’ve made this bread about fifteen times now, and I’ve learned some things the hard way. Here’s what I wish someone had told me the first time:
Temperature is everything. The first time I made this, my kitchen was cold, and the dough took nearly four hours to rise. I almost gave up. Now I warm my mixing bowl with hot water before I start, and I proof the dough in my oven with just the light on. Consistent warmth makes for happy yeast.
Don’t overthink the shaping. My first few loaves looked more like lumpy blobs than traditional Pan de Muerto. Here’s the secret: it doesn’t have to be perfect. The bread is about intention, not precision. As long as you have the cross-shaped bones on top and a little round knob in the center, you’re good. Abuela Elena told me once that the imperfections are what make it yours.
Watch the glaze timing. I learned this the messy way: if you glaze the bread when it’s too hot, the glaze runs right off and pools on the pan. Too cold, and it sits on top like a crust instead of soaking in. Aim for warm—about 10 minutes out of the oven. The bread should still feel warm to the touch but not hot.
Use a kitchen scale. I resisted this for years, but weighing your flour is the single easiest way to get consistent results. Flour volume varies wildly depending on how you scoop it. A scale takes the guesswork out.
Multitasking strategy: While the dough is doing its first rise, zest your oranges and make the glaze base (just mix the dry ingredients and store them in a bag). While the bread bakes, clean up your kitchen. This way, when the bread comes out, you’re ready to glaze and enjoy without scrambling.
Variations & Adaptations
This recipe is surprisingly flexible. Here are some ways I’ve adapted it over the years:
Citrus Swap: If you can’t find orange blossom water, or you just want to try something different, substitute lemon blossom water or rose water. Use a little less—rose water is stronger. I made a lemon version last spring for a friend who doesn’t like floral flavors, and it was a hit.
Dairy-Free Version: Swap the butter for vegan butter (I like Miyoko’s) and use oat milk instead of whole milk. The texture will be slightly less tender, but it still works beautifully. I tested this for a friend with a dairy allergy, and she said it was the best bread she’d had in years.
Whole Wheat Twist: Replace 1 cup of the all-purpose flour with whole wheat flour. The bread will be denser and nuttier, with a more rustic flavor. Add an extra tablespoon of milk to compensate for the extra absorption.
Spiced Version: Add 1 teaspoon of cinnamon and ½ teaspoon of nutmeg to the dry ingredients. This gives the bread a warmer, cozier flavor that’s perfect for winter. I made this for a Christmas gathering once, and people fought over the last slice.
Gluten-Free Adaptation: Use a high-quality gluten-free flour blend that includes xanthan gum. Cup4Cup works well. The dough will be stickier and harder to shape, so wet your hands frequently. The texture won’t be quite as fluffy, but the flavor is still there.
Serving & Storage Suggestions
Pan de Muerto is best served the day it’s made, but it keeps surprisingly well if stored properly.
Serving Temperature: Serve at room temperature or slightly warm. If it’s been sitting for a while, pop it in a 300°F oven for 5 minutes to revive the crust. It pairs beautifully with a cup of Mexican hot chocolate or café de olla—the spiced coffee with cinnamon and piloncillo.
Presentation: Arrange the whole loaf on a wooden board or a colorful plate. Don’t slice it until you’re ready to serve—the whole loaf is part of the tradition. If you’re making it for a Día de Muertos altar, place it alongside marigolds, photos, and sugar skulls.
Storage: Wrap the cooled bread tightly in plastic wrap and store at room temperature for up to 3 days. Do not refrigerate—it will dry out the bread. If you need to keep it longer, freeze it.
Freezing Instructions: Wrap the unglazed, cooled loaf in plastic wrap, then foil, and freeze for up to 3 months. To serve, thaw at room temperature, warm gently in the oven, then glaze fresh. The glaze doesn’t freeze well, so always add it after thawing.
Flavor Development: Here’s something interesting—the orange blossom flavor actually deepens overnight. If you can resist eating it all on day one, day two is even better. The glaze soaks in and the floral notes become more pronounced.
Nutritional Information & Benefits
Let’s be honest—this isn’t health food. It’s celebration bread. But here’s what you’re working with per slice (based on 12 servings):
| Nutrient | Amount Per Slice |
|---|---|
| Calories | 285 |
| Total Fat | 10g |
| Saturated Fat | 6g |
| Carbohydrates | 44g |
| Sugar | 18g |
| Protein | 6g |
| Fiber | 1g |
| Sodium | 210mg |
Health Benefits: The orange zest provides vitamin C and antioxidants. The eggs add high-quality protein. And honestly? The biggest benefit is the one you can’t measure—the ritual of making something with your hands, the smell filling your kitchen, the joy of sharing it with people you love. That counts for something.
Dietary Considerations: This recipe contains gluten, dairy, and eggs. For allergen-friendly versions, see the variations section above.
Conclusion
This Traditional Pan de Muerto with Orange Blossom Glaze has become my October ritual—the thing I make when the air turns crisp and the marigolds start appearing at the farmer’s market. It’s not the easiest bread I’ve ever made, and it’s not the fanciest. But it’s the one that makes me feel connected to something bigger than myself—to Abuela Elena’s flour-dusted kitchen, to generations of bakers who shaped this same dough, to the people I love who are still here and the ones who aren’t.
I hope you make this bread. I hope you get flour on your counter and under your nails. I hope the orange blossom smell follows you around your house for the rest of the day. And I hope, when you take that first bite, you close your eyes for just a second.
If you try this recipe, I’d love to hear about it. Drop a comment below—tell me if you added your own twist, or if it reminded you of someone, or if you just really loved the glaze. And if you share it on social media, tag me so I can see your beautiful loaves. Happy baking, friend.
Frequently Asked Questions
Can I make this bread ahead of time?
Absolutely. You can make the dough through the first rise, punch it down, wrap it tightly, and refrigerate it for up to 24 hours. When you’re ready to bake, let it come to room temperature (about 1 hour), then shape and proceed with the second rise. The cold fermentation actually develops more flavor.
What can I substitute for orange blossom water?
If you can’t find orange blossom water, you can use the same amount of fresh orange juice plus an extra teaspoon of orange zest. The flavor won’t be as floral, but it will still be delicious. Alternatively, try vanilla extract or almond extract for a completely different but lovely flavor profile.
Why didn’t my dough rise?
This is usually a yeast problem. Either your yeast was too old, your milk was too hot (over 120°F kills yeast), or your kitchen was too cold. Make sure your milk is around 110°F—warm but not hot. If your kitchen is chilly, proof the dough in your oven with just the light on.
Can I freeze the baked bread?
Yes, but freeze it without the glaze. Wrap the cooled, unglazed loaf in plastic wrap, then foil, and freeze for up to 3 months. When you’re ready to serve, thaw at room temperature, warm in a 300°F oven for 5-10 minutes, then glaze fresh.
How do I know when the bread is fully baked?
The bread should be deep golden brown on top and sound hollow when you tap the bottom. If you have an instant-read thermometer, the internal temperature should be around 190°F. The decorations might look done before the base, so don’t rely on color alone—use the tap test or thermometer to be sure.
Pin This Recipe!
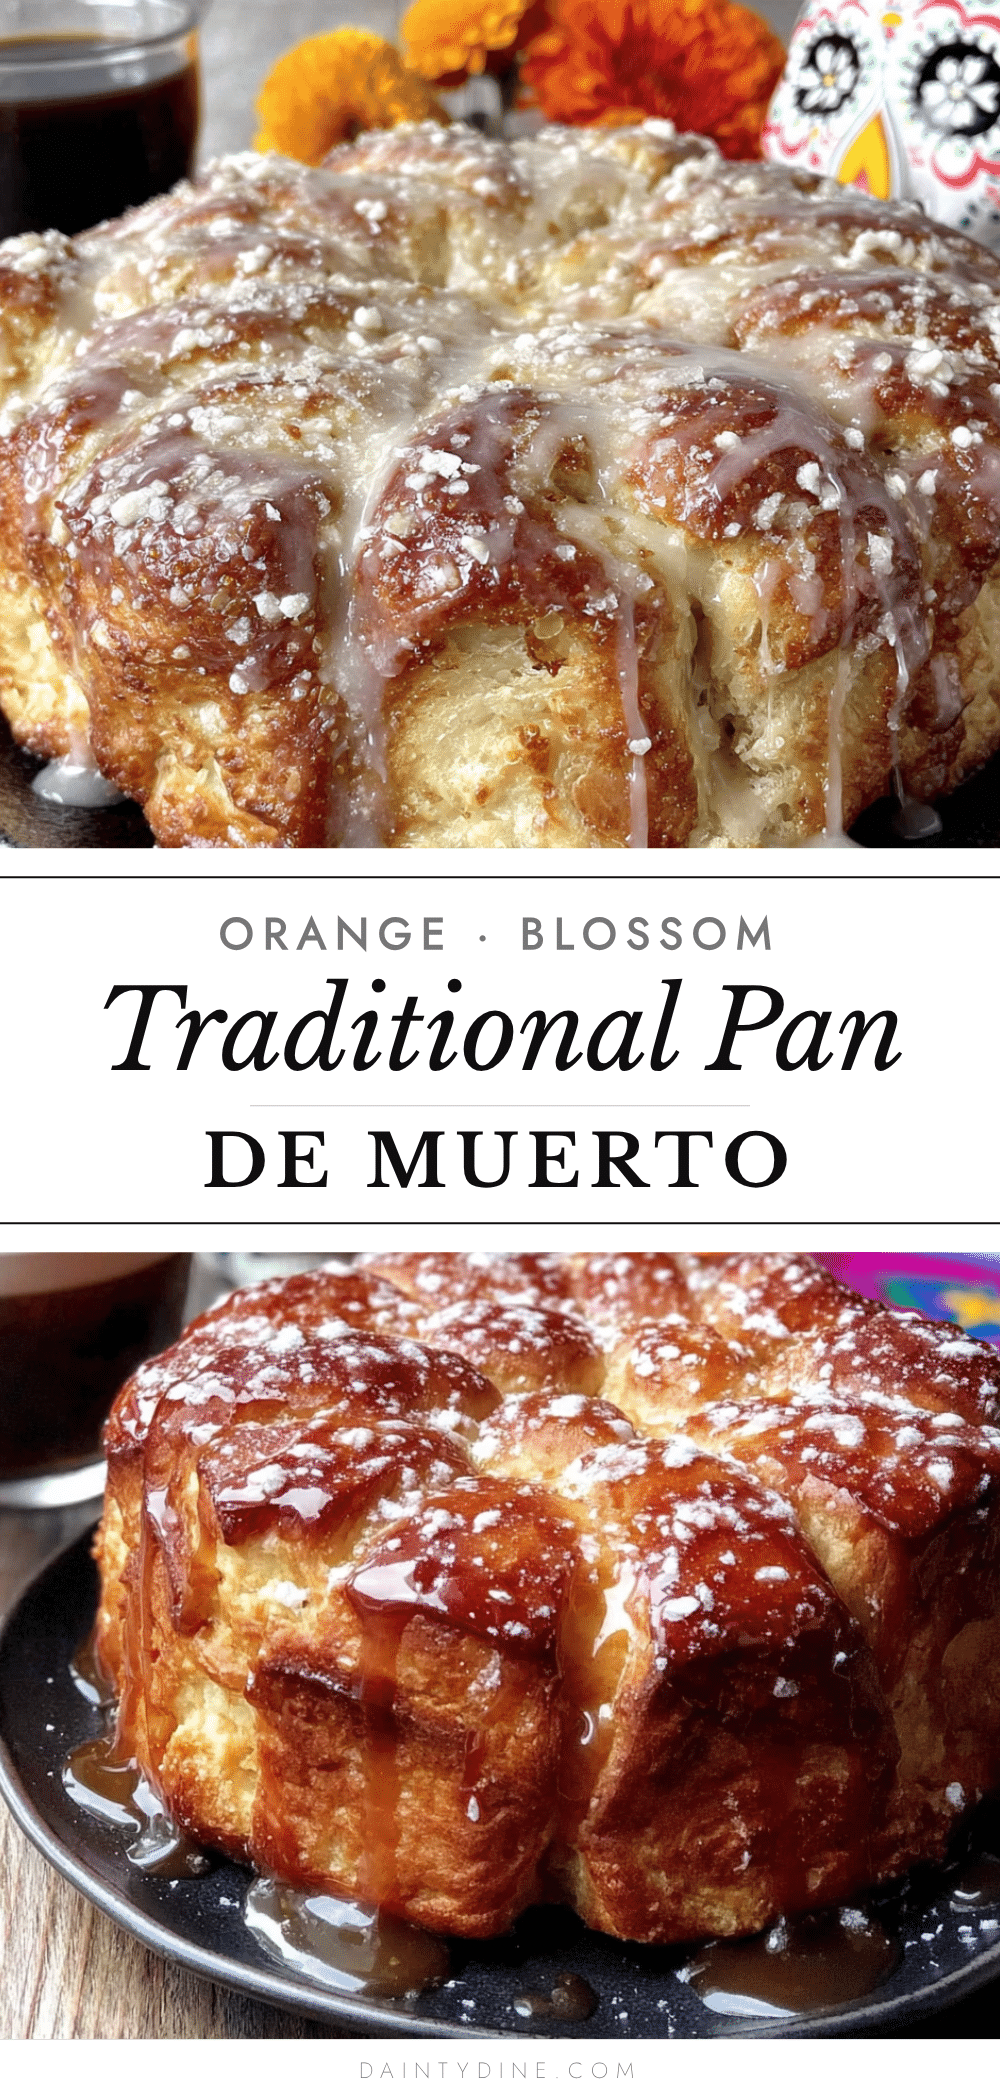
Traditional Pan de Muerto with Orange Blossom Glaze

A soft, buttery yeasted bread infused with orange blossom and citrus, topped with a floral glaze. This easy homemade version of the classic Día de Muertos bread is forgiving for beginners but tastes like it came from a panadería.
- Prep Time: 20 minutes
- Cook Time: 30 minutes
- Total Time: 3 hours (including rising time)
- Yield: 12 servings 1x
- Category: Bread
- Cuisine: Mexican
Ingredients
- 4 cups (500g) all-purpose flour
- 2 ¼ teaspoons (one packet) active dry yeast
- ½ cup (100g) granulated sugar
- ½ cup (113g) unsalted butter, softened
- 3 large eggs, at room temperature
- ½ cup (120ml) whole milk, warmed to about 110°F
- Zest of 2 medium oranges
- 2 tablespoons orange blossom water
- 1 teaspoon salt
- 1 teaspoon vanilla extract
- 1 large egg (for egg wash)
- 1 tablespoon water (for egg wash)
- 1 ½ cups (180g) powdered sugar, sifted
- 2 tablespoons orange blossom water (for glaze)
- 2–3 tablespoons fresh orange juice
- 1 teaspoon finely grated orange zest
- ¼ cup granulated sugar (for sprinkling, optional)
- 1 tablespoon sesame seeds (for garnish, optional)
Instructions
- Activate the yeast: In a small bowl, combine the warm milk (110°F), 1 tablespoon of the sugar, and the active dry yeast. Stir gently and let it sit for 5-10 minutes until foamy.
- Mix the dough: In the bowl of a stand mixer (or large mixing bowl), whisk together the flour, remaining sugar, orange zest, and salt. Make a well in the center. Add the foamy yeast mixture, softened butter, eggs, orange blossom water, and vanilla extract. Mix on low speed with the dough hook until a shaggy dough forms, about 2 minutes.
- Knead the dough: Increase mixer speed to medium-low and knead for 8-10 minutes until smooth and elastic. If kneading by hand, turn onto a floured surface and knead for 10-12 minutes. The dough should pass the windowpane test.
- First rise: Shape the dough into a smooth ball and place in a lightly greased bowl. Cover with plastic wrap or a clean kitchen towel. Let rise in a warm, draft-free spot for 1 ½ to 2 hours, until doubled in size.
- Shape the bread: Punch down the dough gently. Turn onto a lightly floured surface. Divide into two pieces: one larger piece (about two-thirds) for the base, and one smaller piece for decorations. Shape the larger piece into a round loaf and place on a parchment-lined baking sheet. Divide the smaller piece into parts: roll small ropes to form four ‘bones’ (strips placed crosswise on top) and a small ball for the top center. Press decorations gently into the surface.
- Second rise: Cover the shaped loaf loosely with plastic wrap and let rise for 45 minutes to 1 hour, until puffy but not doubled.
- Preheat and egg wash: About 20 minutes before baking, preheat oven to 350°F (175°C). Beat the remaining egg with 1 tablespoon of water. Gently brush the risen loaf with the egg wash.
- Bake: Bake for 25-30 minutes, rotating the pan halfway through. The bread should be deep golden brown and sound hollow when tapped on the bottom. Tent with foil if decorations brown too quickly.
- Make the glaze: While the bread bakes, whisk together the sifted powdered sugar, orange blossom water, orange juice, and orange zest in a small bowl until thick but pourable.
- Glaze and serve: Let the bread cool on the baking sheet for 10 minutes, then transfer to a cooling rack. While still warm, brush the glaze generously over the top. Let soak in for a few minutes, then sprinkle with granulated sugar and sesame seeds if using.
Notes
Temperature is key: warm milk (110°F) for yeast activation, and a warm draft-free spot for rising. The dough can be made ahead through the first rise and refrigerated for up to 24 hours. Freeze unglazed baked bread for up to 3 months; glaze fresh after thawing. The orange blossom flavor deepens overnight.
Nutrition
- Serving Size: 1 slice
- Calories: 285
- Sugar: 18
- Sodium: 210
- Fat: 10
- Saturated Fat: 6
- Carbohydrates: 44
- Fiber: 1
- Protein: 6
Keywords: Pan de Muerto, Day of the Dead bread, orange blossom bread, Mexican sweet bread, traditional bread, Día de Muertos recipe, homemade bread


