Love this? Save it for later!
Share the inspiration with your friends
The neighborhood potluck was in four hours and I’d completely forgotten. Everyone else would be bringing those elaborate, multi-day preparations—the kind with obscure ingredients and complicated techniques that require a culinary degree. I had a half-empty jar of peanut butter, some questionable-looking butter from the back of the fridge, and a sugar stash that was definitely running low. Honestly, I thought about just grabbing a store-bought dessert and pretending I’d slaved over it. But pride, you know? It gets you every time.
So I stood in my kitchen, staring at these bare-bones ingredients, and remembered this ridiculously simple recipe my college roommate used to make. She was the kind of person who could whip up a feast from a pantry that looked empty to anyone else. I figured, what’s the worst that could happen? If they were a disaster, I’d just hide them under a napkin. No one would know. I mean, I’d know, but desperate times call for desperate measures, right?
I started mixing, honestly not expecting much. The dough came together in about five minutes, and it smelled… good. Really good. Like the kind of smell that makes your neighbors suddenly find a reason to knock on your door. I popped them in the oven, set the timer, and nervously cleaned up the kitchen. When that timer went off, the apartment smelled like a bakery had exploded. I pulled them out—golden, crinkly on top, perfect. I snuck one while they were still warm (you have to, it’s the law), and let me tell you, that first bite was a revelation. It was chewy, salty-sweet, and just the right amount of crumbly.
I walked into that potluck feeling like I was bringing a secret weapon. And you know what happened? Those five-ingredient peanut butter cookies were gone in twenty minutes. Someone actually asked me for the recipe, and when I told them it was just five things, they didn’t believe me. That’s the thing about the best recipes—they don’t need a long ingredient list or a complex story. They just need to be made with a little bit of panic and a whole lot of heart. Maybe you’ve been there, staring into your pantry, convinced you have nothing to work with. Trust me on this one. You do.
Why You’ll Love This Recipe
Let’s be real for a second. There are a million peanut butter cookie recipes out there. Some are fussy, some require chilling the dough for hours, and some just don’t deliver on the promise of that perfect texture. This one is different. I’ve tested it at least a dozen times—for cookie swaps, last-minute dinner parties, and even a bake sale where I was competing against a woman who brought professionally decorated sugar cookies. Mine won. Not because they were fancy, but because they were just that good.
- Quick & Easy: From start to finish, you’re looking at about 20 minutes. No chilling, no standing mixer required, no fancy techniques. Just mix, scoop, and bake.
- Simple Ingredients: You probably have everything in your pantry right now. Peanut butter, sugar, an egg, butter, and vanilla extract. That’s it. No trips to the specialty grocery store.
- Perfect for Hosting: These cookies are a lifesaver when you’ve got people coming over. They’re impressive enough to serve at a dinner party but simple enough to make while you’re juggling a dozen other things.
- Crowd-Pleaser: I have never, and I mean never, seen these cookies last longer than an hour at any gathering. Kids love them, adults sneak them, and even the gluten-free folks can usually join in (just check your oat flour substitution).
- Unbelievably Delicious: The texture is the star here. They’re chewy in the center with those classic crinkly tops and just the right amount of salty-sweet balance. It’s the kind of cookie that makes you close your eyes after the first bite.
What makes this recipe different from the rest? It’s the ratio. I’ve played around with the proportions until I found the sweet spot that gives you that perfect, slightly underbaked center without the cookies spreading into a flat mess. It’s not just another version—it’s my best version. And honestly? It’s the version that will make you look like a hero at your next gathering.
What Ingredients You Will Need
This recipe uses simple, wholesome ingredients to deliver bold flavor and satisfying texture without the fuss. You likely have most of these in your kitchen right now, which is exactly the point. Let’s break down each one so you know exactly what to grab.
- 1 cup creamy peanut butter (I recommend Skippy or Jif for best texture—natural peanut butter that separates can make the cookies greasy. Look for a brand that’s stable at room temperature. If you only have natural, stir it really well and add an extra tablespoon of sugar.)
- 1 cup granulated sugar (Regular white sugar works perfectly here. It gives the cookies that classic crinkly top and the right amount of sweetness. You could try coconut sugar for a deeper flavor, but the texture will be slightly different.)
- 1 large egg (Room temperature, if you remember to take it out ahead of time. If not, no stress—just run it under warm water for a minute. The egg binds everything together and gives the cookies their structure.)
- 1/2 cup unsalted butter, softened (Salted butter works too, just skip the pinch of salt I mention later. Let it sit out for about 30 minutes before you start. If you’re in a rush, microwave it in 10-second bursts until it’s soft but not melted. Melted butter will change the texture.)
- 1 teaspoon vanilla extract (Pure vanilla extract is best, but imitation works in a pinch. It adds that warm, cozy flavor that makes these cookies taste like they came from a bakery.)
That’s it. Seriously. Five ingredients. I know it sounds almost too simple, but that’s the beauty of this recipe. Each ingredient pulls its weight, and there’s nowhere to hide. The peanut butter does most of the heavy lifting—it provides flavor, fat, and structure. The sugar adds sweetness and helps create that crinkly top. The egg gives structure and richness. The butter adds tenderness and flavor. And the vanilla? It’s the secret weapon that makes everything taste more, well, cookie-like.
A quick note on peanut butter: I’ve tried this with crunchy peanut butter, and it works, but the texture is a little different. The pieces of peanut can make the cookies harder to scoop and they don’t spread as evenly. If you love crunch, go for it, but creamy gives you that perfect, uniform cookie every time.
Equipment Needed
You don’t need a fancy kitchen to make these cookies. In fact, I’ve made them in a tiny apartment with a broken oven and a mixing bowl that had a crack in it. They still turned out great. Here’s what you’ll need:
- Mixing bowl (Any size works, but medium is perfect. I use a glass bowl because I can see if everything is mixed evenly.)
- Electric mixer or wooden spoon (An electric hand mixer makes this faster, but a wooden spoon works just fine. The dough is soft enough to mix by hand. I actually prefer mixing by hand—it feels more intentional, you know?)
- Baking sheet (A standard 13×18 inch sheet works. Line it with parchment paper for easy cleanup. If you don’t have parchment, a silicone baking mat is even better.)
- Cookie scoop or tablespoon (A 1.5-tablespoon cookie scoop gives you perfectly uniform cookies. If you don’t have one, just use a regular tablespoon and shape the dough into balls with your hands.)
- Cooling rack (Not strictly necessary, but it helps the cookies cool evenly. If you don’t have one, just let them cool on the baking sheet for a few extra minutes.)
- Fork (For making that classic crisscross pattern on top. It’s not just decorative—it helps the cookies flatten evenly while baking.)
If you’re on a budget, don’t worry. A spoon, a bowl, and a baking sheet are all you really need. I’ve made these cookies in a friend’s kitchen with nothing but a fork and a coffee mug to mix the dough. They weren’t pretty, but they still tasted amazing.
Preparation Method
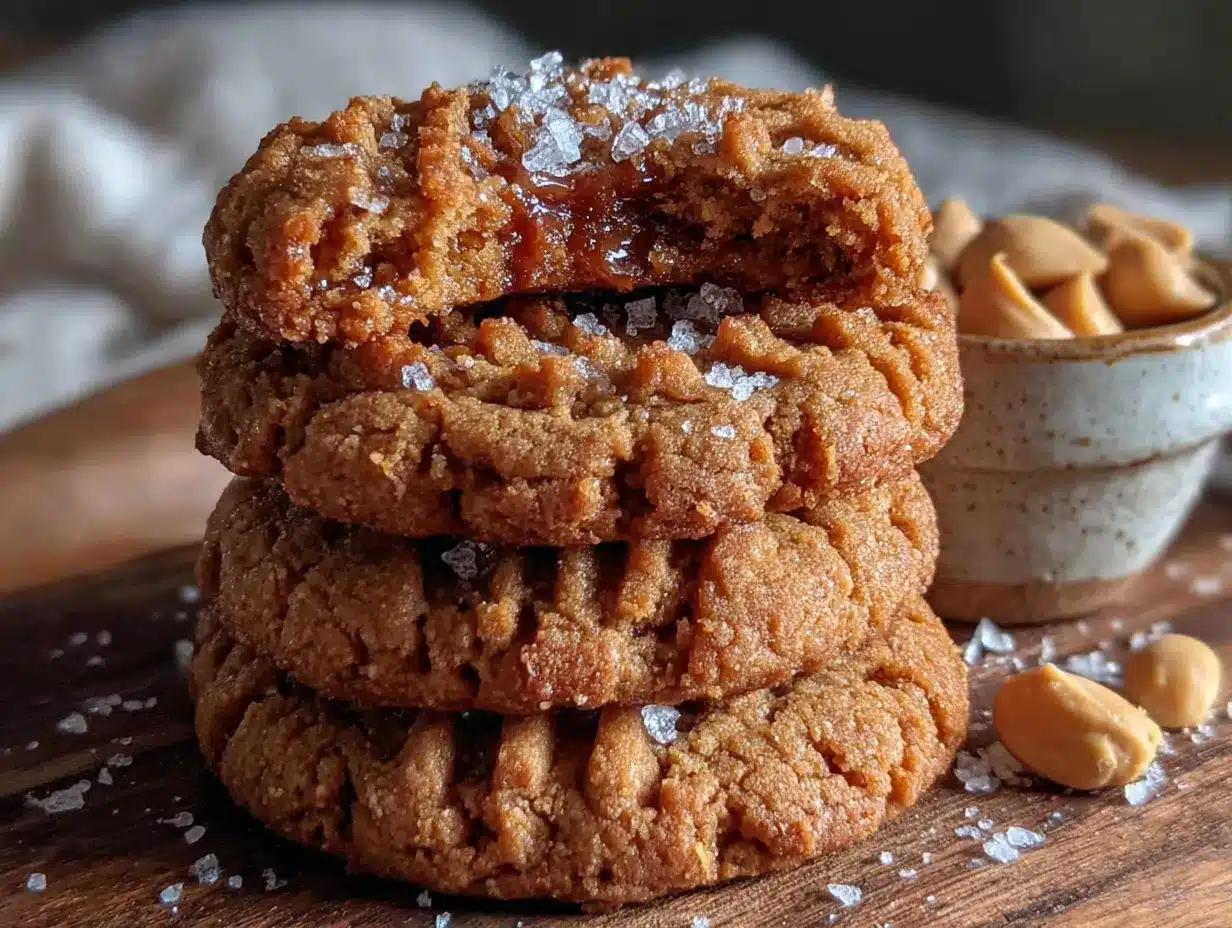
Alright, let’s get to the fun part. Follow these steps, and you’ll have perfect peanut butter cookies in no time. I’ve included all my little tricks and notes so you don’t make the same mistakes I did the first time.
- Preheat your oven to 350°F (175°C). This is important—don’t skip it. A properly preheated oven ensures even baking. While the oven heats up, line your baking sheet with parchment paper or a silicone mat. This prevents sticking and makes cleanup a breeze.
- Cream the butter and sugar together. In your mixing bowl, combine the softened butter and granulated sugar. Beat them together with an electric mixer on medium speed, or use a wooden spoon and some elbow grease. You’re looking for a light, fluffy mixture—about 2-3 minutes with a mixer, or 4-5 minutes by hand. It should look pale and slightly grainy. Don’t rush this step; it’s what gives the cookies their tender texture.
- Add the egg and vanilla. Crack the egg into the bowl and add the vanilla extract. Mix until everything is combined. The mixture might look a little separated at this point—that’s normal. Don’t panic. It will come together when you add the peanut butter.
- Mix in the peanut butter. Add the cup of peanut butter to the bowl. Mix until you have a smooth, cohesive dough. It will be soft and a little sticky, but it should hold together when you press it. If it feels too wet, add a tablespoon of flour or oat flour. If it feels too dry, add a tablespoon of milk or water.
- Shape the cookies. Using a cookie scoop or a tablespoon, scoop out portions of dough (about 1.5 tablespoons each). Roll them into balls between your palms. Place them on the prepared baking sheet, spacing them about 2 inches apart. They will spread a little, so give them room to breathe.
- Make the crisscross pattern. Dip a fork in granulated sugar (this prevents sticking) and gently press it into each dough ball, first in one direction, then in the other, to create that classic crisscross pattern. Don’t press too hard—you want to flatten the cookie slightly, not smash it into a pancake. If the dough sticks to the fork, dip it in sugar again.
- Bake for 10-12 minutes. Place the baking sheet in the preheated oven and bake until the edges are set and lightly golden. The centers might look a little underdone and puffy—that’s exactly what you want. They will continue to cook on the hot baking sheet after you take them out. For chewier cookies, bake for 10 minutes. For crispier cookies, bake for 12 minutes. I prefer 10 minutes for that perfect chewy center.
- Cool on the baking sheet. Let the cookies rest on the baking sheet for 5 minutes. This is crucial—if you try to move them right away, they will fall apart. After 5 minutes, transfer them to a cooling rack to cool completely. Or, you know, eat one warm. I won’t judge.
A few sensory cues to watch for: When you’re mixing the dough, it should smell rich and nutty. When the cookies are baking, your kitchen will fill with a warm, toasty aroma. When they’re done, the edges should be a light golden brown, and the tops should have those beautiful crinkles. If you tap the top of a cookie gently, it should feel set but still soft underneath.
Cooking Tips & Techniques
I’ve made these cookies more times than I can count, and I’ve learned a few things along the way. Some of these tips came from happy accidents, and others came from full-on disasters. Let me save you the trouble.
Don’t overmix the dough. Once you add the peanut butter, mix just until everything comes together. Overmixing develops the gluten in the flour (if you’re using any) and can make the cookies tough. You want them tender and crumbly, not dense and chewy. I learned this the hard way when I made a batch that could have doubled as hockey pucks.
Chill the dough if you have time. This isn’t strictly necessary, but if you can pop the dough balls in the fridge for 15-20 minutes before baking, they will hold their shape better and spread less. This is especially helpful if your kitchen is warm or if you’re using natural peanut butter. I’ve skipped this step plenty of times, and the cookies still turn out great, but chilling gives you a slightly thicker, more uniform cookie.
Watch the baking time closely. Ovens vary, and the difference between a perfect cookie and an overbaked one is about 60 seconds. Start checking at the 9-minute mark. The cookies should look puffy and slightly underdone in the center. They will set as they cool. If you wait until they look fully baked in the oven, they’ll be too crisp when they cool down. Trust me on this—I’ve ruined many a batch by walking away for “just one more minute.”
Use a cookie scoop for uniform sizes. This isn’t just about aesthetics. Uniform cookies bake evenly, so you don’t end up with some burnt and some underdone. If you don’t have a cookie scoop, use a measuring spoon or just eyeball it. I’ve done both, and honestly, the uneven ones have their own charm.
Let them cool completely before storing. I know it’s tempting to stack them while they’re still warm, but they will stick together and get soggy. Let them cool completely on a wire rack, then store them in an airtight container. They’ll stay fresh for up to a week—if they last that long.
Variations & Adaptations
One of the best things about this recipe is how versatile it is. You can change it up based on what you have on hand, dietary needs, or just your mood. Here are some of my favorite variations.
Gluten-Free Peanut Butter Cookies: This recipe is naturally gluten-free if you use certified gluten-free oat flour or just skip the flour altogether. The peanut butter and egg provide enough structure that you don’t really need flour. I’ve made these for friends with celiac disease, and they couldn’t tell the difference. Just make sure your peanut butter and vanilla extract are certified gluten-free.
Vegan Peanut Butter Cookies: Replace the butter with coconut oil (solid, not melted) and use a flax egg (1 tablespoon ground flaxseed mixed with 3 tablespoons water, let sit for 5 minutes). The texture will be slightly different—a bit more crumbly—but they’re still delicious. I tried this version when a vegan friend came over, and honestly, I almost preferred them.
Chocolate Peanut Butter Cookies: Add 1/4 cup of cocoa powder to the dough for a chocolate-peanut butter twist. You might need to add an extra tablespoon of milk or water to keep the dough from getting too dry. These are dangerous—I can’t stop eating them.
Peanut Butter Blossoms: After baking, press a chocolate kiss into the center of each cookie while they’re still warm. Let them cool completely so the chocolate sets. This is the classic holiday version, and it’s always a hit at cookie swaps. Just make sure you have enough chocolate kisses on hand—I’ve been known to eat half the bag before the cookies are even done.
Spiced Peanut Butter Cookies: Add 1/2 teaspoon of cinnamon and a pinch of nutmeg to the dough. The warm spices complement the peanut butter beautifully. I tried this on a whim one fall afternoon, and it’s become my go-to for Thanksgiving gatherings.
Serving & Storage Suggestions
These cookies are best served at room temperature, but honestly, they’re delicious at any temperature. I’ve eaten them straight out of the freezer, and I’m not ashamed. Here’s how to serve and store them for the best experience.
Serving Temperature: Room temperature is ideal. The texture is perfectly chewy, and the flavors are fully developed. If you’re serving them at a party, arrange them on a nice platter. They look beautiful on their own, but you can also dust them with a little powdered sugar for a more elegant presentation.
Complementary Dishes: These cookies pair beautifully with a glass of cold milk, a hot cup of coffee, or a scoop of vanilla ice cream. For a dessert board, arrange them alongside fresh berries, dark chocolate squares, and a drizzle of caramel sauce. They’re also fantastic crumbled over a bowl of vanilla yogurt or ice cream.
Storage Instructions: Store the cookies in an airtight container at room temperature for up to 7 days. Place a piece of bread in the container to keep them soft—the cookies will absorb the moisture from the bread. If you live in a humid climate, skip the bread trick and just keep the container sealed tightly.
Freezer Instructions: These cookies freeze beautifully. Place them in a single layer on a baking sheet and freeze until solid, then transfer them to a freezer-safe bag or container. They’ll keep for up to 3 months. To thaw, let them sit at room temperature for about 15 minutes. You can also freeze the dough balls and bake them straight from the freezer—just add 2-3 minutes to the baking time.
Reheating Tips: If you want that just-baked warmth, pop a cookie in the microwave for 10-15 seconds. Or, for a crispier exterior, reheat them in a 300°F oven for 5 minutes. The flavors actually develop over time, so day-old cookies can be even better than fresh ones. The peanut butter flavor deepens, and the texture becomes perfectly chewy.
Nutritional Information & Benefits
Let’s be honest—these are cookies. They’re a treat, not a health food. But that doesn’t mean they can’t have some redeeming qualities. Here’s a rough breakdown per cookie (based on 24 cookies per batch):
- Calories: Approximately 150-170
- Fat: 10-12g (mostly from peanut butter and butter, which are healthy fats in moderation)
- Carbohydrates: 14-16g
- Protein: 4-5g (thanks to the peanut butter and egg)
- Sugar: 10-12g
Health Benefits of Key Ingredients: Peanut butter is a good source of protein, healthy fats, and vitamin E. It’s also rich in magnesium and potassium. The egg adds high-quality protein and B vitamins. While these aren’t exactly a superfood, they’re certainly better than most store-bought cookies that are full of preservatives and artificial ingredients.
Dietary Considerations: This recipe is naturally gluten-free (just skip the optional flour). For a lower-sugar version, you can reduce the sugar to 3/4 cup, but the texture will be slightly less tender. For a lower-fat version, you can replace half the butter with unsweetened applesauce, but the cookies will be more cake-like. I’ve tried both variations, and while they’re not as rich as the original, they’re still pretty darn good.
Potential Allergens: This recipe contains peanuts, dairy (butter), and eggs. For a nut-free version, substitute sunflower seed butter for the peanut butter. Just note that sunflower seed butter can turn green when baked (it’s a chemical reaction, not a safety issue), so don’t be alarmed. For a dairy-free version, use vegan butter or coconut oil.
My Personal Wellness Perspective: I believe in balance. These cookies are a treat, and there’s nothing wrong with enjoying a treat in moderation. I make them for special occasions, for guests, and for those days when I just need a little pick-me-up. Life is too short to skip the cookies, you know?
Conclusion
So there you have it—the best 5-ingredient peanut butter cookies you’ll ever make. They’re simple, they’re delicious, and they’re guaranteed to make you look like a kitchen hero even when you’re running on fumes. Whether you’re hosting a dinner party, bringing something to a potluck, or just need a quick dessert fix, these cookies deliver every single time.
I love this recipe because it reminds me that you don’t need fancy ingredients or complicated techniques to create something special. Sometimes the simplest things are the best. And honestly? These cookies are proof that a little bit of peanut butter, sugar, and butter can go a long way.
Now it’s your turn. Make these cookies, share them with the people you love, and don’t forget to save one for yourself. Trust me, you deserve it. If you try this recipe, I’d love to hear how it turned out. Leave a comment below, share your photos on social media, and tag me so I can see your beautiful creations. Happy baking, my friend!
Frequently Asked Questions
Can I use natural peanut butter in this recipe?
You can, but the texture will be slightly different. Natural peanut butter tends to separate and can make the cookies greasier. If you use it, make sure to stir it really well and consider adding an extra tablespoon of sugar to help with structure. I recommend using a stable brand like Skippy or Jif for the best results.
Why did my cookies turn out flat?
Flat cookies usually mean the butter was too soft or melted, or the dough was too warm. Make sure your butter is softened but not melted, and if your kitchen is warm, chill the dough balls for 15-20 minutes before baking. Also, make sure your baking soda or powder is fresh—old leavening agents can cause flat cookies.
Can I make these cookies without an electric mixer?
Absolutely! A wooden spoon and a little elbow grease work just fine. The dough is soft enough to mix by hand. It might take a little longer, but it’s totally doable. I actually prefer mixing by hand—it gives me more control over the texture.
How do I get the perfect crisscross pattern?
Dip a fork in granulated sugar before pressing it into the dough. This prevents sticking and gives you clean, defined lines. Press gently—you want to flatten the cookie slightly, not smash it into a pancake. If the dough sticks, dip the fork in sugar again.
Can I double this recipe?
Yes! This recipe doubles beautifully. Just make sure you have enough baking sheets or bake in batches. If you’re doubling, you might need to mix the dough in a larger bowl. The baking time stays the same, but you might need to rotate the baking sheets halfway through for even baking.
Pin This Recipe!

The Best 5-Ingredient Peanut Butter Cookies (Easy Recipe)

These 5-ingredient peanut butter cookies are quick, easy, and incredibly delicious. Perfect for last-minute gatherings, they deliver a chewy center with crinkly tops and a salty-sweet balance that will make you a kitchen hero.
- Prep Time: 10 minutes
- Cook Time: 10-12 minutes
- Total Time: 20-22 minutes
- Yield: 24 cookies 1x
- Category: Dessert
- Cuisine: American
Ingredients
- 1 cup creamy peanut butter (recommended: Skippy or Jif)
- 1 cup granulated sugar
- 1 large egg (room temperature)
- 1/2 cup unsalted butter, softened
- 1 teaspoon vanilla extract
Instructions
- Preheat your oven to 350°F (175°C). Line a baking sheet with parchment paper or a silicone mat.
- In a mixing bowl, cream the softened butter and granulated sugar together with an electric mixer on medium speed (or a wooden spoon) until light and fluffy, about 2-3 minutes with a mixer or 4-5 minutes by hand.
- Add the egg and vanilla extract, mixing until combined. The mixture may look slightly separated; that’s normal.
- Mix in the peanut butter until you have a smooth, cohesive dough. It should be soft and slightly sticky but hold together when pressed.
- Using a cookie scoop or tablespoon, scoop portions of dough (about 1.5 tablespoons each) and roll into balls. Place them on the prepared baking sheet, spacing about 2 inches apart.
- Dip a fork in granulated sugar and gently press it into each dough ball, first in one direction then the other, to create a crisscross pattern. Flatten slightly without smashing.
- Bake for 10-12 minutes, until the edges are set and lightly golden. The centers should look slightly underdone and puffy. For chewier cookies, bake 10 minutes; for crispier, bake 12 minutes.
- Let the cookies cool on the baking sheet for 5 minutes, then transfer to a cooling rack to cool completely.
Notes
For best results, use a stable peanut butter like Skippy or Jif. If using natural peanut butter, stir well and add an extra tablespoon of sugar. Chilling the dough balls for 15-20 minutes before baking helps prevent spreading. Watch baking time closely; cookies should look slightly underdone in the center when removed from the oven. Store in an airtight container at room temperature for up to 7 days, or freeze for up to 3 months.
Nutrition
- Serving Size: 1 cookie
- Calories: 150170
- Sugar: 1012
- Sodium: 100120
- Fat: 1012
- Saturated Fat: 45
- Carbohydrates: 1416
- Fiber: 1
- Protein: 45
Keywords: peanut butter cookies, 5-ingredient cookies, easy cookies, quick dessert, gluten-free cookies, potluck dessert


