Love this? Save it for later!
Share the inspiration with your friends
My cousin Dave had sworn off Halloween baking for years. “It’s all just sugar cookies with extra food coloring,” he’d say, crossing his arms like I’d personally offended him by suggesting we make something spooky together. For a solid decade, he refused to participate in any holiday treat-making that involved fake spider webs or plastic skeletons. Then last October, I showed up at his place with a batch of these Spooky Witch Finger Pretzel Rods, and I caught him—I mean literally caught him—sneaking one from the kitchen counter when he thought no one was looking.
The pretzel rod was halfway to his mouth when he froze, his eyes going wide like a kid caught with his hand in the cookie jar. “These are actually good,” he mumbled, taking a defiant bite anyway. And honestly? That moment made my whole Halloween. Because here’s the thing about these witch finger pretzel rods—they look ridiculous and creepy in the best way, but they taste genuinely amazing. The salty crunch of the pretzel against the sweet almond bark, the little almond fingernail that gives you that satisfying snap… it’s the kind of treat that makes you forget you’re eating something that looks like a severed digit.
Maybe you’ve been there too, you know? You want something festive and fun for Halloween, but you don’t want to spend three days in the kitchen or end up with a mountain of complicated decorations. These witch finger pretzel rods are my answer to that problem. They come together in about twenty minutes, they look properly spooky, and they taste like something you’d actually want to eat more than one of. I’ve been making them for four Halloweens now, and they never fail to get the exact reaction Dave gave me—suspicion, then surprise, then reaching for another.
Why You’ll Love This Recipe
Let me tell you why these witch finger pretzel rods have become my most-requested Halloween treat. I’ve tested this recipe more times than I care to admit, tweaking the chocolate-to-pretzel ratio and experimenting with different fingernail shapes until I got it just right. Here’s what makes them special:
- Quick & Easy: Comes together in under 25 minutes, perfect for last-minute Halloween parties or when you realize tomorrow is the school Halloween celebration and you promised to bring treats.
- Simple Ingredients: No fancy grocery trips needed. You likely already have pretzel rods, almond bark or white chocolate, and some form of almond slivers in your pantry.
- Perfect for Halloween: These are the star of any Halloween spread. Kids love the creepy factor, and adults appreciate that they’re not overwhelmingly sweet.
- Crowd-Pleaser: I’ve brought these to parties, school events, and family gatherings. They always disappear first, and someone always asks for the recipe.
- Unbelievably Delicious: The salty-sweet combination is absolutely addictive. The crunchy pretzel, creamy coating, and nutty almond fingernail create a texture experience that’s next-level satisfying.
What makes these different from other Halloween treats? It’s the attention to detail. I spent an entire afternoon figuring out how to make the almond slivers look like real fingernails—the angle matters, the placement matters, even the slight curve of the almond makes a difference. And the green food coloring? I found that gel food coloring gives you that perfect witchy green without making the coating taste weird.
This isn’t just another Halloween dessert. It’s the kind that makes people do a double-take, then laugh, then reach for another one. It’s comfort food with a spooky twist—familiar enough to be satisfying, weird enough to be memorable.
What Ingredients You Will Need
This recipe uses simple, pantry-friendly ingredients to create something that looks complicated but isn’t. Most of these are things you probably already have on hand, especially if you’re the type of person who keeps baking supplies around during October.
For the Witch Finger Coating
- 16 ounces white almond bark or white chocolate melting wafers (I prefer Ghirardelli melting wafers for the smoothest finish, but any brand works)
- Green gel food coloring (regular liquid food coloring can make the coating seize up, so stick with gel—I use Wilton brand)
- 1 tablespoon coconut oil or vegetable shortening (optional, helps thin the coating for easier dipping)
For the Pretzel Base
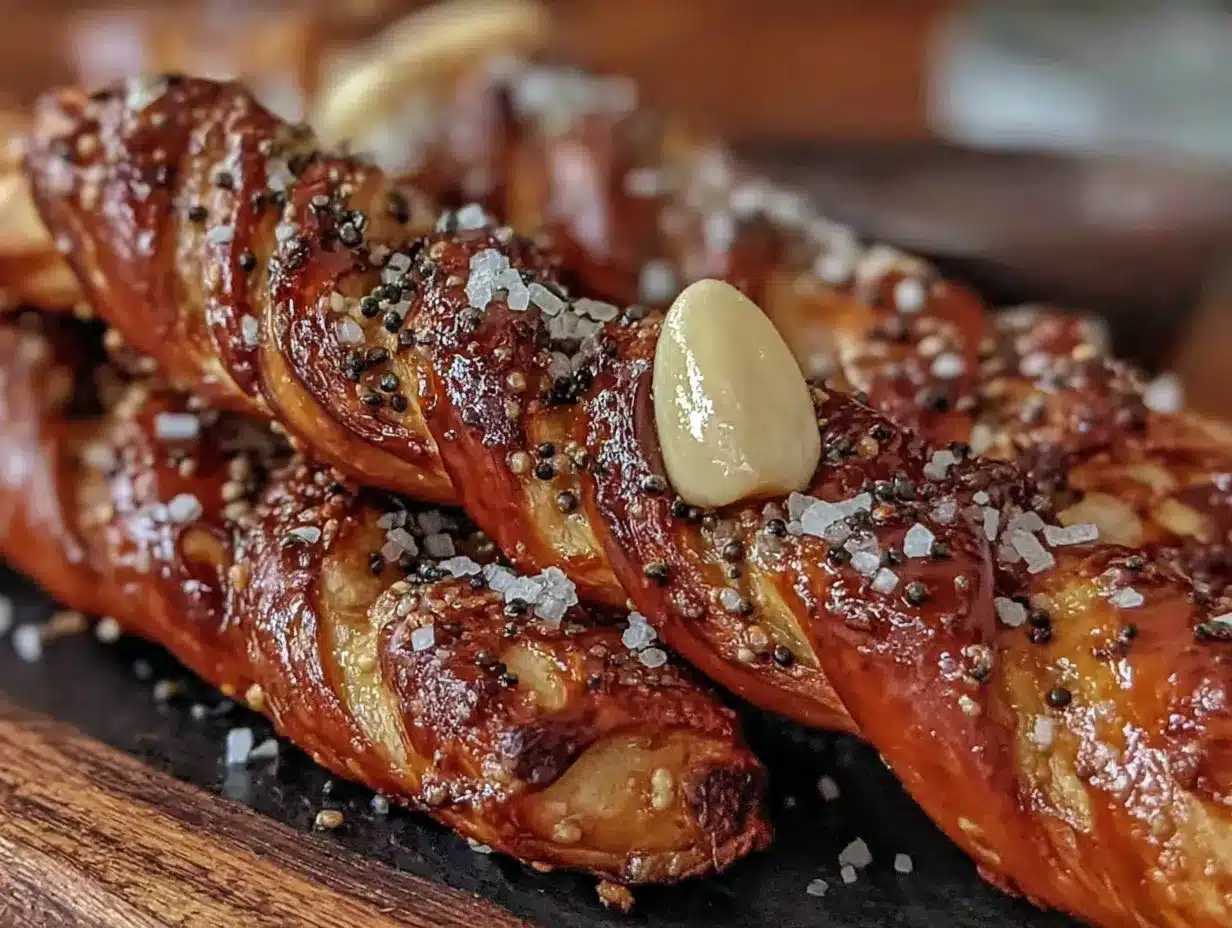
- 24 pretzel rods (look for thick, sturdy ones—store brand works fine, but avoid the thin, fragile pretzel rods that snap easily)
For the Fingernails
- 24 whole almond slivers or sliced almonds (you want the ones that are shaped like little fingernails—look for the wider, flatter pieces in the bag)
For Decoration
- Red gel food coloring or red frosting (for adding “blood” drips at the base of the fingernail—totally optional but highly recommended for maximum creep factor)
One thing I learned the hard way: don’t skip the gel food coloring. The first time I made these, I used regular liquid food coloring, and my white chocolate seized up into a grainy, clumpy mess. I had to start over completely. Gel coloring gives you that vibrant green without messing with the chocolate’s chemistry.
Also, a note on the almond slivers—dig through the bag to find the pieces that look most like actual fingernails. You want ones that are relatively flat and have a slight curve. The more natural they look, the more convincing your witch fingers will be. I usually buy an extra bag just so I can pick out the best-looking pieces.
Equipment Needed
You don’t need much fancy equipment for these witch finger pretzel rods, which is part of why I love making them. Here’s what you’ll need:
- Microwave-safe bowl (glass or ceramic works best—plastic can hold onto food coloring stains)
- Parchment paper or wax paper (for letting the coated pretzels set)
- Baking sheet (to hold the parchment paper flat while the pretzels dry)
- Small spoon or fork (for drizzling and dipping)
- Measuring spoons (for the coconut oil and food coloring)
- Toothpicks (helpful for adjusting almond placement)
If you don’t have almond bark or melting wafers, you can use white chocolate chips, but you’ll definitely need the coconut oil to thin them out. White chocolate chips have stabilizers that make them thicker when melted. I’ve also used candy melts in a pinch, and they work fine, though the flavor isn’t quite as good.
One tip: if you’re making a big batch, consider using a small slow cooker or fondue pot to keep the coating melted. It saves you from having to reheat it every few minutes, and it keeps the consistency perfect for dipping.
Preparation Method
Making these witch finger pretzel rods is surprisingly straightforward. The key is working efficiently while the coating is still warm and smooth. Here’s how I do it:
- Prep your workspace: Line a baking sheet with parchment paper or wax paper. Lay out your pretzel rods so they’re ready to grab. Arrange your almond slivers in a small bowl or on a plate so you can grab them quickly. Trust me, you don’t want to be hunting for the perfect almond while your coating is cooling.
- Melt the coating: Break the almond bark or white chocolate into pieces and place them in a microwave-safe bowl. Microwave in 30-second intervals, stirring thoroughly after each interval. This usually takes about 2-3 minutes total. Add the coconut oil if you’re using it—I find it makes the coating smoother and easier to work with. Stir until completely smooth and glossy.
- Add the green color: Add a small amount of green gel food coloring—start with just a dab on the end of a toothpick. Stir it in completely, then add more if needed. You’re going for a witchy green, like the skin of a cartoon witch. I usually add about 1/4 teaspoon total, but it depends on your brand of food coloring. Remember, the color will lighten slightly as it sets.
- Dip the pretzels: Hold a pretzel rod by one end and dip it into the green coating, rotating it to cover about two-thirds of the pretzel. Let any excess drip back into the bowl. You want a nice, even coating, but you don’t need it to be perfectly smooth—in fact, a slightly uneven surface looks more like actual witch fingers.
- Place on parchment: Set the coated pretzel on the parchment paper. Leave about an inch of space between each one so they don’t touch while setting. Work quickly—you want the coating to still be wet when you add the fingernail.
- Add the fingernail: Immediately after placing the pretzel on the parchment, press an almond sliver into the tip of the coated end. The almond should be positioned at a slight angle, with the wider end closest to the pretzel tip and the pointed end extending outward. Press gently but firmly—you want it to stick well. Use a toothpick to adjust the position if needed.
- Create the knuckle wrinkles: While the coating is still soft, use the back of a spoon or a toothpick to create small wrinkles and indentations along the coated portion of the pretzel. These will look like knuckles and joints on a real finger. Don’t overthink it—just a few gentle press marks will do.
- Let them set: Allow the pretzels to set completely at room temperature. This usually takes about 30-45 minutes, depending on your kitchen temperature. Don’t put them in the refrigerator unless you’re in a huge hurry—condensation can form and make the coating look dull.
- Add the blood drips: Once the green coating is completely set, use a toothpick to add small dots or drips of red gel food coloring or red frosting at the base of the almond fingernail. This is optional, but it really sells the creepy effect. I like to add a tiny drip that looks like it’s running down the “finger.”
- Final set: Let the red coloring dry for about 15 minutes before serving or storing. The blood effect looks best when it’s slightly glossy.
The first time I made these, I tried to rush the setting process and ended up with fingerprints all over my witch fingers. Not the creepy kind—just my own greasy thumbprints from handling them too soon. Patience is your friend here.
Cooking Tips & Techniques
After making these witch finger pretzel rods for four Halloweens straight, I’ve collected a few tricks that make the process smoother and the results more convincing. Here’s what I’ve learned:
Temperature matters. If your kitchen is warm and humid, the coating will take longer to set and might stay tacky. On the flip side, if it’s too cold, the coating will harden before you can add the almond fingernails. Aim for a comfortable room temperature—around 68-72°F is perfect. I once made these on a particularly humid October day, and the coating never fully set. It stayed sticky and the almonds kept sliding off. Lesson learned.
Don’t overheat the coating. White chocolate and almond bark are sensitive to high heat. If you microwave them too long or at too high a power, they’ll burn and become grainy. Always use 30-second intervals and stir thoroughly between each one. If the coating starts to look thick or lumpy, you’ve overheated it. You can sometimes salvage it by stirring in a teaspoon of coconut oil, but honestly, it’s better to just start over.
Work in small batches. Don’t try to dip all 24 pretzels at once. The coating will start to cool and thicken, making it harder to get an even layer. I dip about 6 pretzels at a time, adding the almonds and knuckle wrinkles immediately, then move on to the next batch. If the coating starts to thicken, just pop it back in the microwave for 10-15 seconds.
The almond placement is everything. The angle of the almond determines whether your witch finger looks creepy or just weird. You want the almond to extend slightly beyond the tip of the pretzel, like a real fingernail. If it’s placed too flat against the pretzel, it looks like a weird patch. If it’s sticking out too far, it looks like a claw. I aim for about a 30-degree angle, with the almond overlapping the pretzel tip by about 1/4 inch.
One mistake I made early on: I tried to make the knuckle wrinkles too perfect. Real fingers aren’t perfectly symmetrical, so your witch fingers shouldn’t be either. A few random-looking indentations look much more natural—or, you know, unnaturally natural for a witch finger.
Variations & Adaptations
One of the best things about this recipe is how easy it is to customize. Here are some variations I’ve tried and loved:
Purple Witch Fingers: Instead of green, use purple gel food coloring for a different witchy vibe. I made these for a friend’s Harry Potter-themed Halloween party, and they were a huge hit. The purple looks especially creepy with the red blood drips.
Dark Chocolate Witch Fingers: Use dark chocolate melting wafers instead of white. Skip the food coloring entirely—the dark chocolate already looks dark and mysterious. Use sliced almonds for the fingernails, and the contrast between dark chocolate and light almond is actually quite striking. These are less sweet and have a more sophisticated flavor.
Gluten-Free Version: Most pretzel rods contain wheat, but you can find gluten-free pretzel rods at specialty stores or online. The rest of the ingredients are naturally gluten-free, so this is an easy swap. I’ve tested this with Snyder’s gluten-free pretzel rods, and they work perfectly.
Extra Spooky Version: After the coating sets, drizzle a little more melted white chocolate over the top and immediately sprinkle with black sanding sugar or edible glitter. The sparkly effect against the green is surprisingly creepy, like witch fingers that have been dusted with magical powder.
Mummy Pretzel Rods: Skip the green food coloring and instead drizzle the white coating back and forth over the pretzel to create a mummy-wrap effect. Add two small candy eyes near the top. This is a great alternative if you’re making treats for kids who might be scared by the finger concept.
My personal favorite variation? I made a batch with orange coating and black sanding sugar for a friend’s fall harvest party. They looked like creepy carrot fingers, which sounds weird but was actually hilarious and delicious. Sometimes the best recipes come from happy accidents.
Serving & Storage Suggestions
These witch finger pretzel rods are best served at room temperature. The coating should be firm but not hard, and the pretzel should still have that satisfying crunch. I like to arrange them on a platter with the “fingernails” pointing outward, like a hand reaching up from the plate. It’s a simple presentation trick that always gets a laugh.
For serving at parties, I recommend placing them upright in a small cup or jar filled with black beans or coffee grounds—it looks like they’re growing out of the dirt. Just make sure the beans or grounds are completely dry so they don’t make the pretzels soggy.
Storage: Store these in an airtight container at room temperature for up to 2 weeks. Don’t refrigerate them—the coating can develop condensation and become sticky. If you live in a warm climate, you can store them in a cool, dark pantry or even in the refrigerator, but let them come to room temperature before serving.
Freezer instructions: These freeze beautifully! Place them in a single layer on a baking sheet and freeze until solid, about 2 hours. Then transfer to a freezer-safe container or zip-top bag, separating layers with parchment paper. They’ll keep for up to 3 months. Thaw at room temperature for about 30 minutes before serving.
One thing I’ve noticed: the flavors actually develop a bit overnight. The pretzel absorbs a tiny bit of moisture from the coating, making the texture even more pleasant. I actually prefer making these a day ahead of when I plan to serve them. They taste better, and it’s one less thing to do on party day.
Nutritional Information & Benefits
Let’s be real—these are a treat, not a health food. But here’s the approximate nutritional breakdown for one witch finger pretzel rod:
- Calories: Approximately 180-200 per rod
- Carbohydrates: 22g
- Fat: 10g
- Protein: 3g
- Sugar: 14g
That said, there are a few redeeming qualities. Almonds are a good source of vitamin E and healthy fats. Pretzels provide quick energy from carbohydrates. And honestly, the portion control is built in—each one is a single serving, so it’s easier to stop at one or two than it is with a pan of brownies.
If you’re watching your sugar intake, you can use sugar-free white chocolate or dark chocolate with a higher cocoa percentage. The dark chocolate version is naturally lower in sugar and has the added benefit of antioxidants. Just keep in mind that sugar-free white chocolate can be harder to work with—it doesn’t melt as smoothly and can seize up more easily.
For anyone with dietary restrictions, note that these contain dairy (white chocolate), gluten (pretzels), and tree nuts (almonds). I always mention this when I bring them to parties, just to be safe. The last thing you want is someone taking a bite and having an allergic reaction.
Conclusion
These Spooky Witch Finger Pretzel Rods are everything I want in a Halloween treat—they’re fun to make, they look properly creepy, and they actually taste amazing. The salty-sweet combination is addictive, the presentation is guaranteed to get a reaction, and the whole process takes less than half an hour. Honestly, what more could you ask for?
I love that this recipe lets me be creative without being complicated. You can make them as simple or as elaborate as you want. Add extra details, experiment with different colors, or keep them basic—they’ll be a hit either way. My cousin Dave, by the way, now makes these every year for his own Halloween party. He even adds his own twist with a green glitter drizzle. Some converts become the biggest fans.
I’d love to hear how yours turn out! Did you try a different color? Add extra decorations? Have you found the perfect almond-to-pretzel ratio? Drop a comment below and share your spooky creations. And if you’re looking for more Halloween fun, check out my spider web dip or these mummy hot dogs for a complete Halloween spread. Happy haunting, and happy snacking!
Frequently Asked Questions
Can I make these witch finger pretzel rods ahead of time?
Absolutely! These are perfect for making ahead. Store them in an airtight container at room temperature for up to 2 weeks. I actually think they taste even better the next day. Just don’t refrigerate them, or the coating might get sticky from condensation.
Why did my white chocolate seize up when I added the food coloring?
This happens when you use liquid food coloring instead of gel. Liquid food coloring contains water, which causes white chocolate to seize and become grainy. Always use gel food coloring for candy making—it’s thicker, more concentrated, and won’t mess with your chocolate’s texture.
Can I use something other than almonds for the fingernails?
Yes! You can use white chocolate chips shaped into fingernail shapes, or even small pieces of white candy melts. Some people use sliced macadamia nuts or even small slivers of white chocolate. Just make sure whatever you use is firm enough to hold its shape and light in color so it contrasts with the green coating.
How do I get the green color to be even and vibrant?
The key is using gel food coloring and adding it gradually. Start with a tiny amount on the tip of a toothpick, stir it in completely, then add more until you reach your desired shade. Remember that the color will lighten slightly as the coating sets, so make it a shade darker than you want the final result to be.
My almond slivers keep falling off after the coating sets. What am I doing wrong?
This usually means the coating had started to set before you added the almond. Make sure you press the almond into the coating while it’s still wet and warm. If the coating has started to form a skin, the almond won’t stick properly. Work in small batches and add the almonds immediately after dipping each pretzel.
Pin This Recipe!

Spooky Witch Finger Pretzel Rods: Easy Halloween Treat

These Spooky Witch Finger Pretzel Rods are a fun and easy Halloween treat that combines salty pretzels with a sweet green coating and almond fingernails. They look properly creepy but taste genuinely amazing, making them a crowd-pleaser for parties and school events.
- Prep Time: 15 minutes
- Cook Time: 5 minutes
- Total Time: 25 minutes
- Yield: 24 servings 1x
- Category: Dessert
- Cuisine: American
Ingredients
- 16 ounces white almond bark or white chocolate melting wafers
- Green gel food coloring
- 1 tablespoon coconut oil or vegetable shortening (optional)
- 24 pretzel rods
- 24 whole almond slivers or sliced almonds
- Red gel food coloring or red frosting (optional, for decoration)
Instructions
- Prep your workspace: Line a baking sheet with parchment paper or wax paper. Lay out your pretzel rods and arrange your almond slivers in a small bowl or on a plate.
- Melt the coating: Break the almond bark or white chocolate into pieces and place them in a microwave-safe bowl. Microwave in 30-second intervals, stirring thoroughly after each interval, until completely smooth and glossy (about 2-3 minutes total). Add the coconut oil if using.
- Add the green color: Add a small amount of green gel food coloring—start with a dab on the end of a toothpick. Stir it in completely, then add more if needed until you reach a witchy green shade (about 1/4 teaspoon total).
- Dip the pretzels: Hold a pretzel rod by one end and dip it into the green coating, rotating to cover about two-thirds of the pretzel. Let any excess drip back into the bowl.
- Place on parchment: Set the coated pretzel on the parchment paper, leaving about an inch of space between each one.
- Add the fingernail: Immediately press an almond sliver into the tip of the coated end at a slight angle, with the wider end closest to the pretzel tip and the pointed end extending outward. Use a toothpick to adjust if needed.
- Create the knuckle wrinkles: While the coating is still soft, use the back of a spoon or a toothpick to create small wrinkles and indentations along the coated portion to look like knuckles.
- Let them set: Allow the pretzels to set completely at room temperature, about 30-45 minutes.
- Add the blood drips: Once set, use a toothpick to add small dots or drips of red gel food coloring or red frosting at the base of the almond fingernail (optional).
- Final set: Let the red coloring dry for about 15 minutes before serving or storing.
Notes
Use gel food coloring instead of liquid to prevent the white chocolate from seizing. Work in small batches to keep the coating from cooling too quickly. For best results, make these a day ahead as flavors develop overnight. Store in an airtight container at room temperature for up to 2 weeks. Do not refrigerate as condensation can make the coating sticky.
Nutrition
- Serving Size: 1 pretzel rod
- Calories: 190
- Sugar: 14
- Sodium: 180
- Fat: 10
- Saturated Fat: 6
- Carbohydrates: 22
- Fiber: 1
- Protein: 3
Keywords: Halloween treats, witch finger pretzels, easy Halloween dessert, spooky snacks, pretzel rods, white chocolate, almond fingernails, festive treats


