Love this? Save it for later!
Share the inspiration with your friends
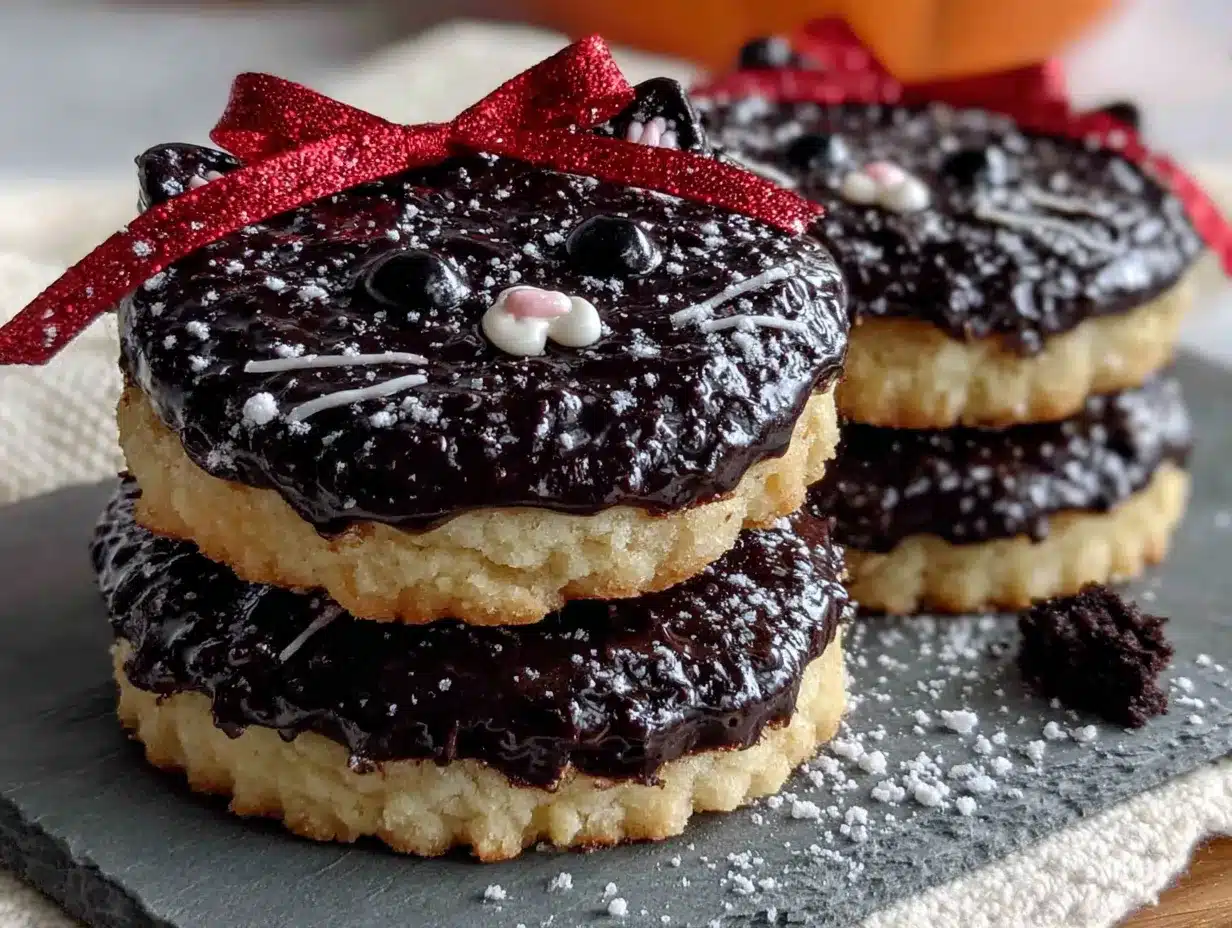
There used to be a tiny bakery tucked between a laundromat and a vintage shop on the edge of town called The Whisk & Wand that made the most incredible Halloween sugar cookies. When they closed their doors three Octobers ago—the owner retired to Florida, of all places—I honestly felt a little lost. Every year, I’d stop by for their black cat cookies with those bright yellow eyes, and suddenly, poof, gone. After eight tries—eight batches of cookies that spread too much, cracked in the oven, or looked more like lumpy potatoes than sleek felines—I finally got it. This recipe is the spitting image of those bakery cookies, and let me tell you, the satisfaction of that first perfect batch was pure magic.
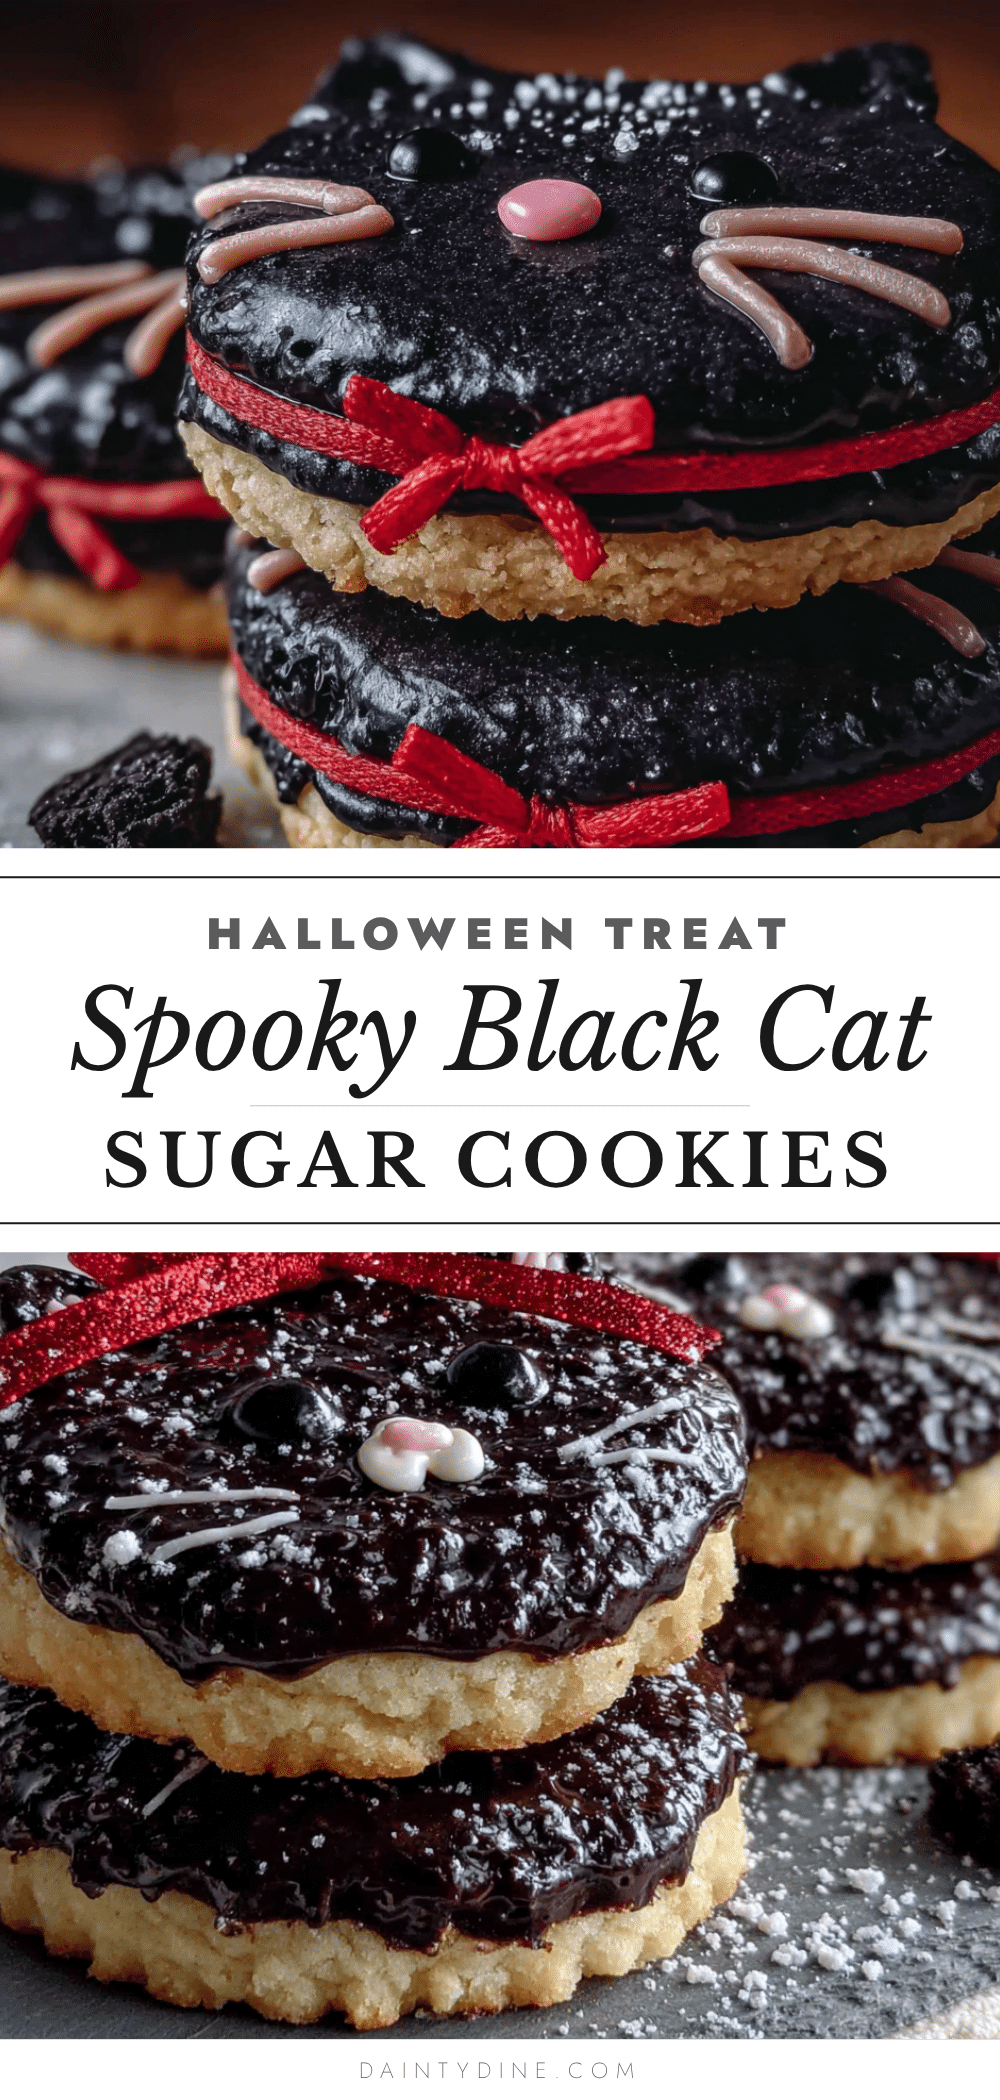
These spooky black cat sugar cookies aren’t just another Halloween treat. They’re the kind of cookie that makes people stop mid-conversation and say, “Wait, you made those?” The deep black color comes from a clever combination of cocoa powder and black food coloring, so they taste like a rich, buttery vanilla sugar cookie with a hint of chocolate. No weird artificial flavors here, I promise. The texture is that perfect balance—crisp edges with a soft, tender center that holds its shape beautifully.
Maybe you’ve been there, searching for that one specific cookie that defined your Halloween memories. Or maybe you’re just looking for a showstopper to bring to a party that doesn’t require a pastry degree. Either way, these cookies deliver. They’re surprisingly straightforward to make, and the decorating process is forgiving enough that even beginners end up with something adorable. I mean, it’s a black cat—slightly crooked whiskers just add character, right?
Why You’ll Love This Recipe
- Perfect for Halloween Parties: These cookies are guaranteed to be the talk of any gathering. They look impressive on a dessert table, and guests always do a double-take when they realize you made them from scratch.
- Simple Ingredients: You probably already have most of these in your pantry. No hunting down specialty stores or expensive imported extracts—just good old-fashioned baking staples.
- Crowd-Pleaser: Kids absolutely adore them, and adults can’t resist either. The subtle cocoa flavor makes them more sophisticated than plain sugar cookies, but they’re still familiar and comforting.
- Make-Ahead Friendly: The dough freezes beautifully, and the baked cookies stay fresh for days. You can prep everything well before your guests arrive, which is a lifesaver when you’re hosting.
- Forgiving Recipe: The black color hides a multitude of sins. Slightly overbaked? Can’t tell. Uneven shaping? The cats just look quirky. It’s the most stress-free decorating experience I’ve ever had.
What sets this recipe apart from the dozens I tested is the technique of chilling the shaped cookies before baking. That extra step—which I used to skip because I was impatient—is the secret to getting those clean, sharp edges that make the cats actually look like cats. Plus, using a mix of butter and shortening gives you the perfect cookie texture that holds its shape without spreading into a puddle.
This isn’t just another sugar cookie recipe. It’s the one I spent three years perfecting, and honestly, it’s the only Halloween cookie I make anymore. When you see those little black cats lined up on a cooling rack, their yellow eyes staring back at you, you’ll understand why I got a little obsessed.
What Ingredients You Will Need
This recipe uses simple, wholesome ingredients to deliver bold flavor and satisfying texture without the fuss. Most of these are pantry staples, so you can whip up a batch whenever the Halloween spirit strikes.
For the Cookie Dough
- 1 cup (226g) unsalted butter, softened – I use Land O’Lakes for consistent results. Make sure it’s truly soft, not melted, or your cookies will spread.
- 1/2 cup (100g) granulated sugar – Regular white sugar gives the cookies that classic crisp edge.
- 1/2 cup (60g) powdered sugar – This adds tenderness and helps the cookies hold their shape.
- 1 large egg, room temperature – Cold eggs can seize the butter mixture. Leave yours out for 30 minutes.
- 1 teaspoon vanilla extract – Pure vanilla makes a difference here. Avoid imitation if you can.
- 2 1/2 cups (315g) all-purpose flour – Spoon and level your flour—packing it down leads to dry cookies.
- 1/4 cup (20g) Dutch-process cocoa powder – This gives the cookies their dark base color and a subtle chocolate flavor. I prefer Droste or Rodelle.
- 1/2 teaspoon salt – Don’t skip this; it balances the sweetness.
- 1/2 teaspoon baking powder – Just enough for a slight lift without puffing up the details.
- Black gel food coloring – I use Americolor Super Black. Liquid coloring won’t give you the same deep shade without making the dough sticky.
For the Royal Icing
- 2 cups (240g) powdered sugar – Sift it first to avoid lumps.
- 2 tablespoons meringue powder – This gives the icing that smooth, hard finish. Wilton brand works great.
- 3-4 tablespoons water – Add slowly; you want a consistency that flows but holds a peak.
- Yellow gel food coloring – For those iconic cat eyes.
- Black decorating icing (optional) – For drawing whiskers and details if you don’t want to pipe with royal icing.
Ingredient Selection Tips: Look for Dutch-process cocoa powder rather than natural cocoa—it’s darker and less acidic, which means your cookies will be truly black instead of muddy brown. If you only have natural cocoa, add an extra 1/4 teaspoon of black food coloring. For the butter, I’ve found that European-style butters like Kerrygold make the cookies slightly richer, but any unsalted butter works perfectly fine.
Substitution Guidance: Need a dairy-free version? Swap the butter for a high-quality vegan butter stick (not margarine) and use a flax egg (1 tablespoon ground flaxseed mixed with 3 tablespoons water). The texture will be slightly less tender but still delicious. For a gluten-free option, use a 1:1 gluten-free baking flour blend—I’ve had good luck with King Arthur Measure for Measure.
Equipment Needed
- Electric stand mixer or hand mixer – Creaming the butter and sugar properly is crucial. I’ve made these with both, and my KitchenAid stand mixer makes it easier, but a hand mixer works just fine.
- Cat-shaped cookie cutter – About 3-4 inches in size. I found mine on Amazon for under $10, and it’s been worth every penny.
- Baking sheets – Heavy-duty, light-colored sheets prevent over-browning. Dark pans can make the bottoms too dark.
- Parchment paper or silicone baking mats – Silpat mats are my go-to for even baking and easy cleanup.
- Cooling racks – Wire racks let air circulate so the cookies cool evenly without soggy bottoms.
- Piping bags with small round tips – Wilton tip #2 or #3 for the eyes and details.
- Rolling pin with thickness guides – This is a game-changer for even cookies. I use a wooden pin with removable rings.
- Plastic wrap – For chilling the dough.
- Small offset spatula – Helps transfer cut cookies without distorting their shape.
If you don’t have a cat-shaped cutter, you can use a simple round cutter and add piped cat features—honestly, they end up looking just as cute. For the royal icing, a squeeze bottle works in a pinch if you don’t have piping bags. I’ve definitely used a ziplock bag with the corner snipped off in a moment of desperation, and it worked surprisingly well.
Preparation Method
Step 1: Make the Dough
In a large bowl, cream together the softened butter, granulated sugar, and powdered sugar until light and fluffy—about 3 minutes on medium speed. Scrape down the sides of the bowl halfway through. Add the egg and vanilla extract, then beat until fully incorporated. The mixture should look smooth and slightly glossy.
In a separate bowl, whisk together the flour, cocoa powder, salt, and baking powder. Gradually add the dry ingredients to the wet mixture, mixing on low speed until just combined. Don’t overmix here, or your cookies will be tough. The dough will look dark brown at this point, not black—that’s normal.
Step 2: Add the Black Color
Add about 1 teaspoon of black gel food coloring and mix on low speed. The dough will start to darken. Keep adding coloring, 1/2 teaspoon at a time, until you reach a deep, inky black. I usually use about 2 teaspoons total. The dough should be uniform in color with no streaks. If the dough feels slightly sticky, wrap it in plastic and refrigerate for 20 minutes before rolling.
Step 3: Chill and Roll
Divide the dough into two disks, wrap each in plastic wrap, and refrigerate for at least 1 hour. This step is non-negotiable—chilled dough rolls out cleanly and holds its shape during baking. When you’re ready, lightly flour your work surface and rolling pin. Roll the dough to about 1/4-inch thickness. Use those thickness guides if you have them; they make a world of difference.
Step 4: Cut the Cookies
Dip your cat cutter in flour between cuts to prevent sticking. Press straight down and lift straight up—no twisting, which can distort the shape. Use an offset spatula to transfer the cut cookies to parchment-lined baking sheets, spacing them about 2 inches apart. Gather the scraps, re-roll, and repeat. Pop the baking sheets into the refrigerator for another 15-20 minutes. I know it’s tempting to skip this, but cold cookies bake up with those perfect sharp edges.
Step 5: Bake
Preheat your oven to 350°F (175°C). Bake the chilled cookies for 8-10 minutes. You want the edges to look set and the tops to be just slightly puffed. They won’t look done—that’s the black color playing tricks on you. Trust the timing. Let them cool on the baking sheet for 5 minutes, then transfer to wire racks to cool completely. The cookies will firm up as they cool.
Step 6: Make the Royal Icing
In a medium bowl, whisk together the powdered sugar and meringue powder. Add 3 tablespoons of water and beat on medium speed for 4-5 minutes until the icing is glossy and holds stiff peaks. Add more water, a teaspoon at a time, until the icing reaches a “15-second consistency”—when you drizzle a ribbon of icing back into the bowl, it takes about 15 seconds to disappear. Divide the icing into two bowls. Tint one bowl with yellow gel food coloring for the eyes. Leave the other white if you want white accents, or color it orange for a fun twist.
Step 7: Decorate the Cats
Fit a piping bag with a small round tip and fill with the black royal icing. Outline each cat cookie, then flood the inside with a slightly thinned version of the same icing. Use a toothpick to guide the icing into all the nooks and crannies. Let the base layer dry for at least 1 hour. Once set, pipe two yellow dots for the eyes. Let those dry for 30 minutes, then add tiny black pupils in the center. Finally, pipe whiskers and a small pink or white nose. For the whiskers, I like to use black decorating icing in a fine tip—it gives you more control than royal icing.
Cooking Tips & Techniques
Let me save you from my biggest mistake: the first time I made these, I skipped the second chill before baking. The cats came out looking like blobs with ears. Honestly, it was tragic. That extra 15 minutes in the fridge makes all the difference between a cookie that looks like a cat and one that looks like a sad potato.
Another thing I learned the hard way—black food coloring stains everything. Wear an apron, and maybe use a dedicated bowl and spatula for the coloring step. I permanently stained a white silicone spatula on my first attempt, and now it’s my “Halloween only” tool. Also, wash your hands immediately after handling the colored dough, or you’ll walk around looking like you’ve been fingerprinted.
For the royal icing, humidity is your enemy. If you’re decorating on a rainy day, the icing might take longer to set. I’ve found that adding an extra tablespoon of meringue powder helps it firm up faster in damp conditions. And here’s a pro tip: if your icing is too thick, add water a drop at a time. Too thin? Add more powdered sugar, a tablespoon at a time. You want it to flow like honey—slow but steady.
Timing strategy for hosting: Make the dough up to 3 days ahead and keep it wrapped in the fridge. Bake the cookies the day before your party. Decorate them the morning of. This way, you’re not rushing around when guests arrive, and you get to actually enjoy your own party. Plus, the cookies taste even better the next day—the flavors meld together somehow.
Variations & Adaptations
Dietary Variations
Gluten-Free: Swap the all-purpose flour with a 1:1 gluten-free baking blend. I’ve tested this with King Arthur Measure for Measure, and the texture is remarkably close to the original. Add an extra tablespoon of butter to compensate for the drier flour blend.
Vegan: Use vegan butter sticks and a flax egg. The cookies will be slightly less tender, but the black color actually helps hide any imperfections. Use aquafaba instead of meringue powder for the royal icing.
Flavor Twists
Chocolate Mint Cats: Add 1/2 teaspoon peppermint extract along with the vanilla. These are especially fun for a Halloween party with a minty surprise.
Spiced Pumpkin Cats: Replace 1/4 cup of the butter with pumpkin puree and add 1 teaspoon pumpkin pie spice. The cookies will be softer and more cake-like, but still delicious.
Design Variations
Instead of royal icing, you can dip the cooled cookies in melted black candy melts for a glossy, candy-shell finish. It’s faster and more forgiving than royal icing. For a simpler look, just dust the baked cookies with powdered sugar to look like ghosts—though then they wouldn’t be black cats, would they?
I once made a batch where I piped little witch hats on half the cats and broomsticks on the others. It was a hit at my neighbor’s Halloween block party. The same cookie cutter can become a bat if you flip it upside down and add wings—just a thought for next year.
Serving & Storage Suggestions
These cookies are best served at room temperature. Arrange them on a platter with some orange and purple napkins for a festive touch. I like to place them on a cake stand so they’re at eye level—guests can’t resist grabbing one as they walk by. For a dramatic effect, arrange them in a circle around a small pumpkin or a candle.
Storage: Baked and undecorated cookies can be stored in an airtight container at room temperature for up to 1 week. Decorated cookies should be stored in a single layer, not stacked, to prevent the icing from smudging. If you must stack them, place a sheet of parchment paper between layers.
Freezing: The unbaked dough freezes beautifully for up to 3 months. Wrap it tightly in plastic wrap and then foil. When you’re ready to bake, thaw it overnight in the refrigerator, then roll and cut as usual. Baked, undecorated cookies also freeze well for up to 2 months. Thaw at room temperature before decorating.
Reheating: These are best enjoyed fresh, but if you want that just-baked warmth, pop them in a 300°F (150°C) oven for 3-4 minutes. Let them cool slightly before serving. The flavors actually deepen after a day or two—the cocoa becomes more pronounced, and the cookies get a little chewier.
Nutritional Information & Benefits
| Nutrient | Per Cookie (approx.) |
|---|---|
| Calories | 145 |
| Total Fat | 7g |
| Saturated Fat | 4g |
| Carbohydrates | 20g |
| Sugar | 12g |
| Protein | 2g |
These cookies are a treat, not a health food, but the cocoa powder does provide a small amount of antioxidants. Using real butter gives you a source of vitamin A, and the eggs add protein. For a slightly lighter version, you can reduce the sugar by 1/4 cup—the cookies will be less sweet but still flavorful. If you’re watching your sugar intake, consider making smaller cookies with the same cutter by rolling the dough thinner, about 1/8 inch.
Potential allergens include dairy, eggs, and wheat. The royal icing contains egg whites from the meringue powder, so it’s not safe for those with raw egg concerns. Use a pasteurized egg white powder if that’s a worry, or skip the royal icing entirely and use candy melts instead.
Conclusion
These spooky black cat sugar cookies are more than just a Halloween treat—they’re a little piece of bakery magic you can create in your own kitchen. After that first bakery closed, I never thought I’d find those cookies again. But now, every time I pull a batch out of the oven, I feel like I’ve brought a little bit of that memory back to life. The way the yellow eyes gleam against the black cookie, the subtle chocolate flavor that surprises people, the way kids’ faces light up when they see them—that’s why I keep making these year after year.
I’d love to see your versions! Tag me in your photos, leave a comment below with your decorating ideas, or tell me about the Halloween treat that defined your childhood. Maybe you’ll inspire my next recipe obsession. Until then, happy baking—and don’t forget to save one for yourself before they disappear.
Frequently Asked Questions
Can I make the dough ahead of time?
Absolutely! The dough can be refrigerated for up to 3 days or frozen for up to 3 months. Just wrap it tightly in plastic wrap. If freezing, thaw overnight in the fridge before rolling.
Why did my cookies spread into blobs?
This usually happens when the dough isn’t chilled enough. Make sure you chill the shaped cookies for at least 15 minutes before baking. Also, check that your butter was softened, not melted—melted butter causes spreading.
Can I use regular cocoa powder instead of Dutch-process?
Yes, but the color won’t be as dark, and you’ll need more black food coloring. Dutch-process cocoa is alkalized, which makes it darker and less acidic. If using natural cocoa, add an extra 1/2 teaspoon of black gel coloring.
How do I get the royal icing perfectly smooth?
The key is getting the right consistency. Your icing should flow like honey—slow but steady. When you drizzle a ribbon back into the bowl, it should take about 15 seconds to disappear. Use a toothpick to guide the icing into all the corners of the cookie.
Can I skip the royal icing and use something else?
Definitely! You can dip the cookies in melted black candy melts for a glossy finish, or simply dust them with powdered sugar. For a quick option, use store-bought black decorating icing in a tube to draw the cat features directly on the plain cookies.
Pin This Recipe!
Spooky Black Cat Sugar Cookies: Easy Halloween Treat
These spooky black cat sugar cookies are a perfect Halloween treat with a rich, buttery vanilla flavor and a hint of chocolate. They feature crisp edges, a soft center, and are decorated with bright yellow eyes, making them a showstopper for any party.
- Prep Time: 30 minutes
- Cook Time: 10 minutes
- Total Time: 1 hour 40 minutes (includes chilling and decorating time)
- Yield: 24 servings 1x
- Category: Dessert
- Cuisine: American
Ingredients
- 1 cup (226g) unsalted butter, softened
- 1/2 cup (100g) granulated sugar
- 1/2 cup (60g) powdered sugar
- 1 large egg, room temperature
- 1 teaspoon vanilla extract
- 2 1/2 cups (315g) all-purpose flour
- 1/4 cup (20g) Dutch-process cocoa powder
- 1/2 teaspoon salt
- 1/2 teaspoon baking powder
- Black gel food coloring (about 2 teaspoons)
- 2 cups (240g) powdered sugar (for royal icing)
- 2 tablespoons meringue powder
- 3–4 tablespoons water (for royal icing)
- Yellow gel food coloring (for eyes)
- Black decorating icing (optional, for whiskers)
Instructions
- Make the Dough: In a large bowl, cream together softened butter, granulated sugar, and powdered sugar until light and fluffy (about 3 minutes on medium speed). Add egg and vanilla extract, beat until smooth.
- In a separate bowl, whisk together flour, cocoa powder, salt, and baking powder. Gradually add dry ingredients to wet mixture, mixing on low until just combined. Do not overmix.
- Add black gel food coloring (about 1 teaspoon initially, then more as needed) and mix until dough is deep black. If sticky, wrap in plastic and refrigerate 20 minutes.
- Divide dough into two disks, wrap in plastic, and refrigerate for at least 1 hour.
- Preheat oven to 350°F (175°C). Lightly flour work surface and rolling pin. Roll dough to 1/4-inch thickness.
- Cut cookies with a cat-shaped cookie cutter, dipping cutter in flour between cuts. Transfer to parchment-lined baking sheets, spacing 2 inches apart. Refrigerate cut cookies for 15-20 minutes.
- Bake chilled cookies for 8-10 minutes. Edges should look set and tops slightly puffed. Cool on baking sheet for 5 minutes, then transfer to wire racks to cool completely.
- Make Royal Icing: Whisk together powdered sugar and meringue powder. Add 3 tablespoons water and beat on medium speed for 4-5 minutes until glossy and stiff peaks form. Adjust consistency with more water (15-second consistency). Divide icing; tint one portion yellow for eyes.
- Decorate: Pipe black royal icing to outline and flood each cookie. Let base dry for 1 hour. Pipe yellow dots for eyes, let dry 30 minutes, then add tiny black pupils. Pipe whiskers and nose using black decorating icing or royal icing.
Notes
Chilling the shaped cookies before baking is crucial for sharp edges. Black food coloring stains; use dedicated tools. For royal icing, humidity affects drying time; add extra meringue powder if needed. Dough can be made up to 3 days ahead. Baked undecorated cookies keep for 1 week in an airtight container.
Nutrition
- Serving Size: 1 cookie
- Calories: 145
- Sugar: 12
- Sodium: 75
- Fat: 7
- Saturated Fat: 4
- Carbohydrates: 20
- Protein: 2
Keywords: Halloween cookies, black cat cookies, sugar cookies, royal icing, Halloween treats, easy cookie recipe


