Love this? Save it for later!
Share the inspiration with your friends
I was standing in the frozen food aisle last Tuesday, staring at a box of something that claimed to be a “chocolate covered strawberry cheesecake,” when a memory hit me so hard I almost laughed out loud. It was the smell of my aunt’s kitchen—that mix of cocoa powder and cream cheese and something sweet she always had going on. I was maybe nine years old, perched on a wobbly stool at her counter, watching her crush graham crackers with a rolling pin because she said it “built character.” She’d let me lick the spoon, and I remember thinking, this is what being a grown-up must feel like—getting to eat something this good before dinner. That aunt passed away a few years ago, and I haven’t thought about those afternoons in forever. But standing there in the cold aisle, I knew I had to try to make that feeling again. Not the exact recipe—I don’t even know if she had one written down—but something close. Something that tasted like that moment. These Quick No-Bake Chocolate Covered Strawberry Cheesecake Cups are my attempt at catching that memory. And honestly? They might be even better than I remembered. Maybe you’ve had one of those moments where a recipe just hits right. That’s what these are.
Why You’ll Love This Recipe
Let me tell you why these cheesecake cups have become my go-to for everything from last-minute desserts to “I need something sweet right now” emergencies. I’ve tested this recipe about six times—yes, six—to get the texture just right, and I can promise you it works.
- Quick & Easy: These come together in about 15 minutes of active time. No oven, no water bath, no fuss. Perfect for those weeknights when you want dessert but don’t want to work for it.
- Simple Ingredients: Cream cheese, heavy cream, powdered sugar, vanilla, graham crackers, butter, strawberries, and chocolate chips. That’s it. You probably have most of this in your kitchen right now.
- Perfect for Weeknights: These are great for a regular Tuesday dessert, a last-minute potluck contribution, or even a Valentine’s Day treat when you’re short on time.
- Crowd-Pleaser: I brought these to a neighborhood gathering last month, and three people asked for the recipe before I even finished my coffee. Kids love them. Adults love them. It’s basically magic.
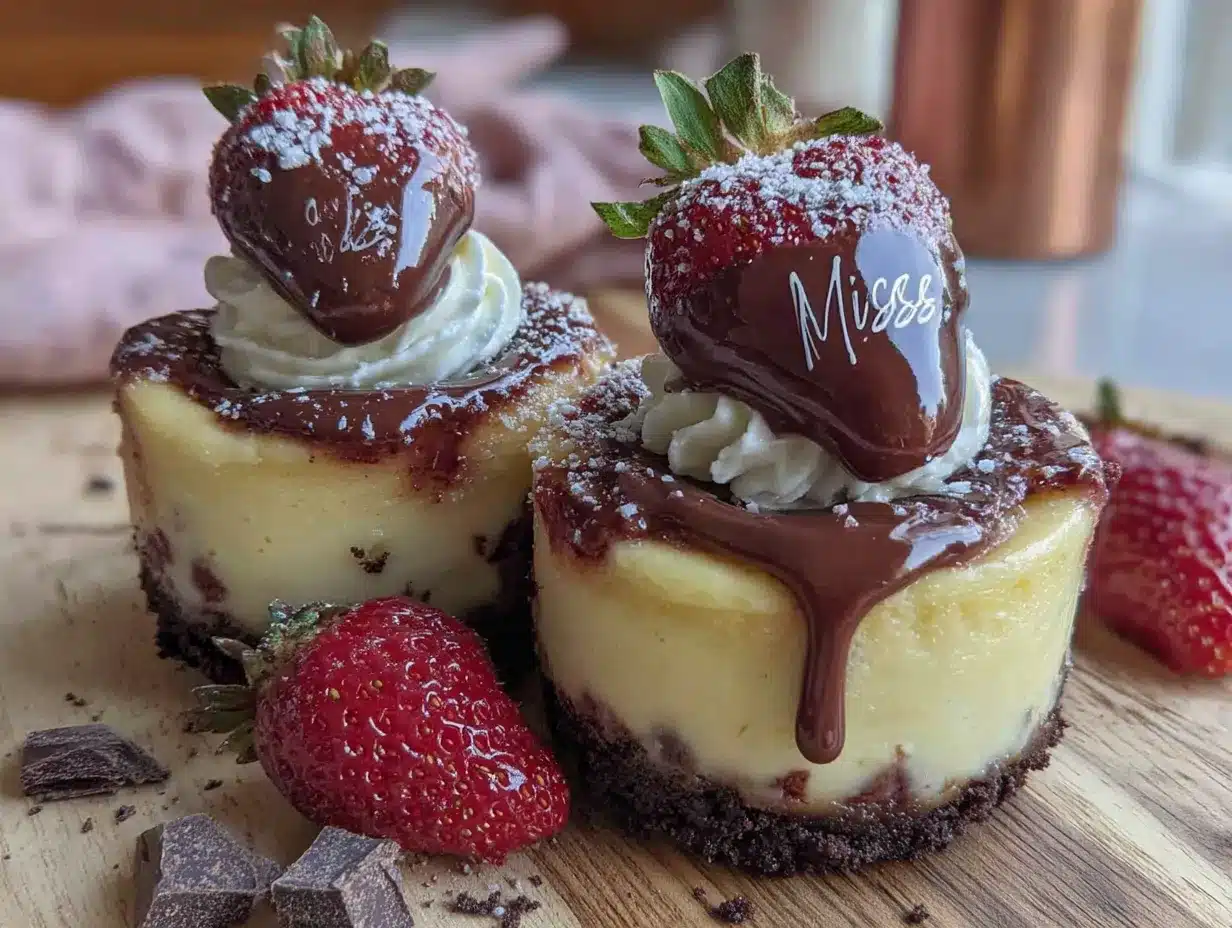
- Unbelievably Delicious: The combination of the creamy cheesecake filling, the sweet strawberry layer, and the crunchy chocolate shell is next-level comfort food. I’m not exaggerating when I say I close my eyes on the first bite every single time.
What makes these different from other no-bake cheesecake recipes? It’s the texture. I use a slightly higher ratio of cream cheese to cream, which gives you that dense, almost mousse-like consistency that holds up beautifully in the cups. And the chocolate shell? It’s not just melted chocolate—it’s tempered just enough to give you that satisfying snap when you bite through. This isn’t just another no-bake dessert. It’s the one you’ll keep coming back to.
What Ingredients You Will Need
This recipe uses simple, everyday ingredients to create something that feels special. Here’s what you’ll need, broken down by component so it’s easy to follow.
For the Crust
- 1 cup graham cracker crumbs (about 8 full sheets, crushed finely—I use a food processor, but a zip-top bag and rolling pin work too)
- 4 tablespoons unsalted butter, melted (use salted butter if that’s all you have, just skip the pinch of salt)
- 1 tablespoon granulated sugar (optional, but I like a tiny bit of sweetness in the crust)
- Pinch of salt (balances the sweetness)
For the Cheesecake Filling
- 8 ounces cream cheese, softened to room temperature (this is non-negotiable—cold cream cheese gives you lumps)
- 1/2 cup powdered sugar (sifted if you’re feeling fancy, but I’ve skipped this step plenty of times)
- 1 teaspoon vanilla extract (pure vanilla extract makes a difference here—trust me)
- 1/2 cup heavy cream, cold (whipped to stiff peaks before folding in)
For the Strawberry Layer
- 1 cup fresh strawberries, finely chopped (frozen strawberries work if thawed and drained well, but fresh is better for texture)
- 2 tablespoons strawberry jam or preserves (this adds sweetness and helps thicken the layer)
- 1 teaspoon lemon juice (brightens the flavor and keeps the strawberries from browning)
For the Chocolate Coating
- 1 cup semi-sweet chocolate chips (I prefer Ghirardelli or Guittard for the smoothest melt)
- 1 tablespoon coconut oil or vegetable oil (this helps the chocolate set with a nice shine and makes it easier to bite through)
Ingredient Tips: For the cream cheese, I always use full-fat Philadelphia—it gives the creamiest texture. If you’re dairy-free, dairy-free cream cheese and coconut cream can work, but the texture will be slightly different. For the chocolate, don’t use chocolate chips with stabilizers if you can avoid it; chopped chocolate bars melt more smoothly. And for the strawberries, look for ones that are deep red and fragrant—that’s how you know they’ll be sweet.
Equipment Needed
You don’t need a lot of fancy equipment for this recipe, which is part of why I love it. Here’s what you’ll need:
- 6 small cups or ramekins (4-ounce size works perfectly—I use these little glass jars I found at a thrift store)
- Mixing bowls (one medium, one small)
- Electric hand mixer or stand mixer (you can whisk by hand, but your arm will thank you for the mixer)
- Food processor or zip-top bag and rolling pin (for crushing the graham crackers)
- Small saucepan or microwave-safe bowl (for melting the chocolate)
- Rubber spatula (for folding the whipped cream into the cream cheese)
- Measuring cups and spoons
If you don’t have ramekins, small mason jars or even sturdy disposable cups work fine. I’ve used both, and the mason jars actually make them look prettier for gifting. Just make sure whatever you use is freezer-safe, since these need to chill.
Preparation Method
- Make the crust (5 minutes): In a small bowl, combine the graham cracker crumbs, melted butter, sugar, and salt. Stir until the mixture looks like wet sand. Divide the mixture evenly among your 6 cups—about 2 tablespoons each. Press it down firmly with the back of a spoon or the bottom of a small glass. You want it compact so it holds together when you eat it. Pop the cups in the fridge while you make the filling.
- Make the cheesecake filling (10 minutes): In a medium bowl, beat the softened cream cheese with an electric mixer until smooth and creamy—about 1 minute. Add the powdered sugar and vanilla, and beat until combined, scraping down the sides as needed. In a separate bowl, whip the cold heavy cream until stiff peaks form—this takes about 2-3 minutes with a hand mixer. You’ll know it’s ready when you lift the beaters and the cream holds its shape without drooping. Gently fold the whipped cream into the cream cheese mixture using a rubber spatula. Don’t stir vigorously—you want to keep the air in the whipped cream so the filling stays light. Fold until just combined, with no white streaks remaining.
- Prepare the strawberry layer (5 minutes): In a small bowl, combine the chopped strawberries, strawberry jam, and lemon juice. Stir gently until the jam is evenly distributed. The mixture should be slightly chunky—that’s what gives it texture. If your strawberries are very juicy, let the mixture sit for a minute, then drain off any excess liquid. Too much liquid will make the cheesecake filling watery.
- Assemble the cups (5 minutes): Take the cups out of the fridge. Spoon about 2 tablespoons of the cheesecake filling over the crust in each cup, spreading it evenly. Add a layer of the strawberry mixture on top—about 1 tablespoon per cup. Then add another layer of cheesecake filling on top of the strawberries, using the remaining filling. Smooth the tops with the back of a spoon. Place the cups back in the fridge and let them set for at least 2 hours, or overnight for the best texture.
- Make the chocolate coating (5 minutes): About 30 minutes before serving, melt the chocolate chips and coconut oil together in a small saucepan over low heat, stirring constantly. Or microwave in 30-second bursts, stirring between each, until smooth. Let the chocolate cool for 2-3 minutes—it should be warm but not hot. Spoon the melted chocolate over the top of each cheesecake cup, spreading it gently to the edges. The chocolate should form a thin, even layer. Return the cups to the fridge for at least 20 minutes to let the chocolate set.
- Serve: Once the chocolate is firm, the cups are ready to eat. You can serve them straight from the fridge or let them sit at room temperature for 5 minutes to soften slightly. The chocolate should crack when you bite into it, giving way to the creamy cheesecake and sweet strawberry layer underneath.
Prep Note: If you’re making these ahead of time, add the chocolate coating just before serving. The chocolate can get soft if the cups sit in the fridge for more than a day with the coating on. I learned this the hard way when I made them for a party a day early and the chocolate looked a little messy. Still tasted amazing, though.
Cooking Tips & Techniques
I’ve made these cups more times than I can count, and I’ve learned a few things along the way. Here are my best tips:
- Room temperature cream cheese is key. I know it’s tempting to use it straight from the fridge when you’re in a hurry, but cold cream cheese will give you lumps that no amount of mixing can fix. Let it sit on the counter for 30 minutes before you start. If you forget, you can microwave it in 10-second bursts—just be careful not to melt it.
- Don’t overmix the filling. Once you fold in the whipped cream, stop as soon as it’s combined. Overmixing will deflate the air and give you a dense, heavy filling instead of that light, mousse-like texture.
- Press the crust firmly. I can’t stress this enough. If the crust is too loose, it’ll crumble when you try to eat the cups. Use the bottom of a small glass or a measuring cup to press it down evenly.
- Let the cups set overnight if you can. Two hours is the minimum, but overnight gives the flavors time to meld and the texture to firm up perfectly. I’ve made these the night before a party and they were even better the next day.
- Use a good quality chocolate. The chocolate coating is the first thing you taste, so don’t skimp here. I’ve tried cheap chocolate chips and the coating was waxy and didn’t set properly. Splurge on a good brand—it makes a difference.
Common Mistake: The first time I made these, I didn’t drain the strawberries well enough, and the filling turned pink and watery. Learn from my mistake—if your strawberries are very juicy, let them sit in a strainer for a few minutes before adding them to the cups.
Variations & Adaptations
One of the best things about this recipe is how easy it is to customize. Here are some variations I’ve tried and loved:
- Chocolate Lover’s Version: Add 2 tablespoons of melted dark chocolate to the cheesecake filling before folding in the whipped cream. It gives the filling a subtle chocolate flavor that pairs beautifully with the strawberry layer.
- Berry Swap: Replace the strawberries with raspberries, blueberries, or a mix of both. Use raspberry jam instead of strawberry jam for a different flavor profile. I made a mixed berry version for Fourth of July and it was a hit.
- Vegan Option: Use dairy-free cream cheese (I like Kite Hill), coconut cream instead of heavy cream, and vegan butter for the crust. The texture will be slightly different—a bit softer—but still delicious. Just make sure to let the cups set for at least 4 hours.
- Gluten-Free Version: Use gluten-free graham crackers or crushed gluten-free cookies for the crust. I’ve used gluten-free vanilla wafers before and they worked great.
- No-Bake Cheesecake Bites: Instead of cups, press the crust mixture into the bottom of a lined 8×8 pan, add the filling and strawberry layer, and chill. Cut into squares and drizzle with melted chocolate for a portable version.
Serving & Storage Suggestions
These cheesecake cups are best served cold, straight from the fridge. The chocolate should be firm and snappy, and the filling should be creamy but not too soft. If you let them sit at room temperature for too long, the chocolate will start to soften, so I recommend serving them within 10 minutes of taking them out of the fridge.
Storage: Keep the cups covered in the refrigerator for up to 3 days. If you’ve already added the chocolate coating, place them in an airtight container to prevent the chocolate from absorbing any fridge odors. Without the chocolate coating, the cups can be stored for up to 5 days.
Freezing: These freeze beautifully! Freeze the cups without the chocolate coating for up to 2 months. Wrap each cup tightly in plastic wrap, then place them in a freezer-safe bag. When you’re ready to serve, thaw them in the fridge overnight, then add the chocolate coating.
Reheating: There’s no reheating needed for these, but if you want a slightly softer chocolate coating, let the cups sit at room temperature for 5 minutes before serving. The chocolate will still be firm but will have a creamier bite.
Flavor Development: I’ve noticed that these cups taste even better the next day. The flavors meld together, and the crust softens slightly, making each bite more cohesive. So don’t be afraid to make them a day ahead.
Nutritional Information & Benefits
Here’s an approximate nutritional breakdown for one cheesecake cup (based on 6 servings):
- Calories: 380
- Fat: 26g
- Saturated Fat: 15g
- Carbohydrates: 32g
- Sugar: 22g
- Protein: 6g
- Fiber: 2g
- Sodium: 220mg
Health Benefits: Strawberries are packed with vitamin C and antioxidants, which support immune health and reduce inflammation. The cream cheese and heavy cream provide calcium for bone health, and the dark chocolate in the coating contains flavonoids that are good for heart health. Plus, the portion-controlled cups make it easier to enjoy a sweet treat without overdoing it.
Dietary Considerations: This recipe contains dairy and gluten. For a dairy-free version, use the substitutions mentioned in the variations section. For a gluten-free version, use gluten-free graham crackers. The recipe is naturally nut-free, but check your chocolate chips to make sure they weren’t processed in a facility that handles nuts.
Conclusion
These Quick No-Bake Chocolate Covered Strawberry Cheesecake Cups are everything I want in a dessert—easy, impressive, and absolutely delicious. They remind me of those afternoons in my aunt’s kitchen, but they’ve also become their own thing in my life. I make them for weeknight cravings, for parties, for those days when I just need something sweet and comforting. And every time I bite through that chocolate shell and hit the creamy filling, I smile.
I hope you’ll try these and make them your own. Maybe you’ll add a different berry, or swap the crust for Oreo crumbs, or double the chocolate. Whatever you do, I’d love to hear about it. Drop a comment below and let me know how yours turned out—did you make any changes? Did you serve them for a special occasion? I read every comment, and honestly, hearing about your kitchen adventures makes my day.
Go ahead, give yourself permission to enjoy something sweet tonight. You’ve earned it.
Frequently Asked Questions
Can I use frozen strawberries instead of fresh?
Yes, but make sure to thaw them completely and drain off any excess liquid before using. Frozen strawberries tend to be more watery than fresh, so you might need to add an extra teaspoon of cornstarch to the strawberry mixture to help it thicken.
How long do these need to set in the fridge?
At least 2 hours, but overnight is best. The longer they set, the firmer the filling becomes and the more the flavors meld together. If you’re in a rush, you can pop them in the freezer for 30 minutes, but don’t forget about them—they can freeze solid if left too long.
Can I make these without a hand mixer?
Absolutely! You can whip the cream by hand using a whisk—it’ll take about 5-7 minutes of vigorous whisking, but it’s a great arm workout. For the cream cheese, make sure it’s very soft so you can beat it smooth with a spatula or wooden spoon.
What if I don’t have ramekins or small cups?
No problem! You can use a small baking dish or loaf pan instead. Press the crust into the bottom, add the filling and strawberry layer, chill, then cut into squares. Drizzle with melted chocolate and serve. It’s less portable but just as delicious.
Can I double this recipe?
Yes, this recipe doubles beautifully. Just make sure you have enough cups and enough space in your fridge. The only thing to keep in mind is that the filling might take slightly longer to set if you’re making a larger batch, so give it an extra hour in the fridge just to be safe.
Pin This Recipe!
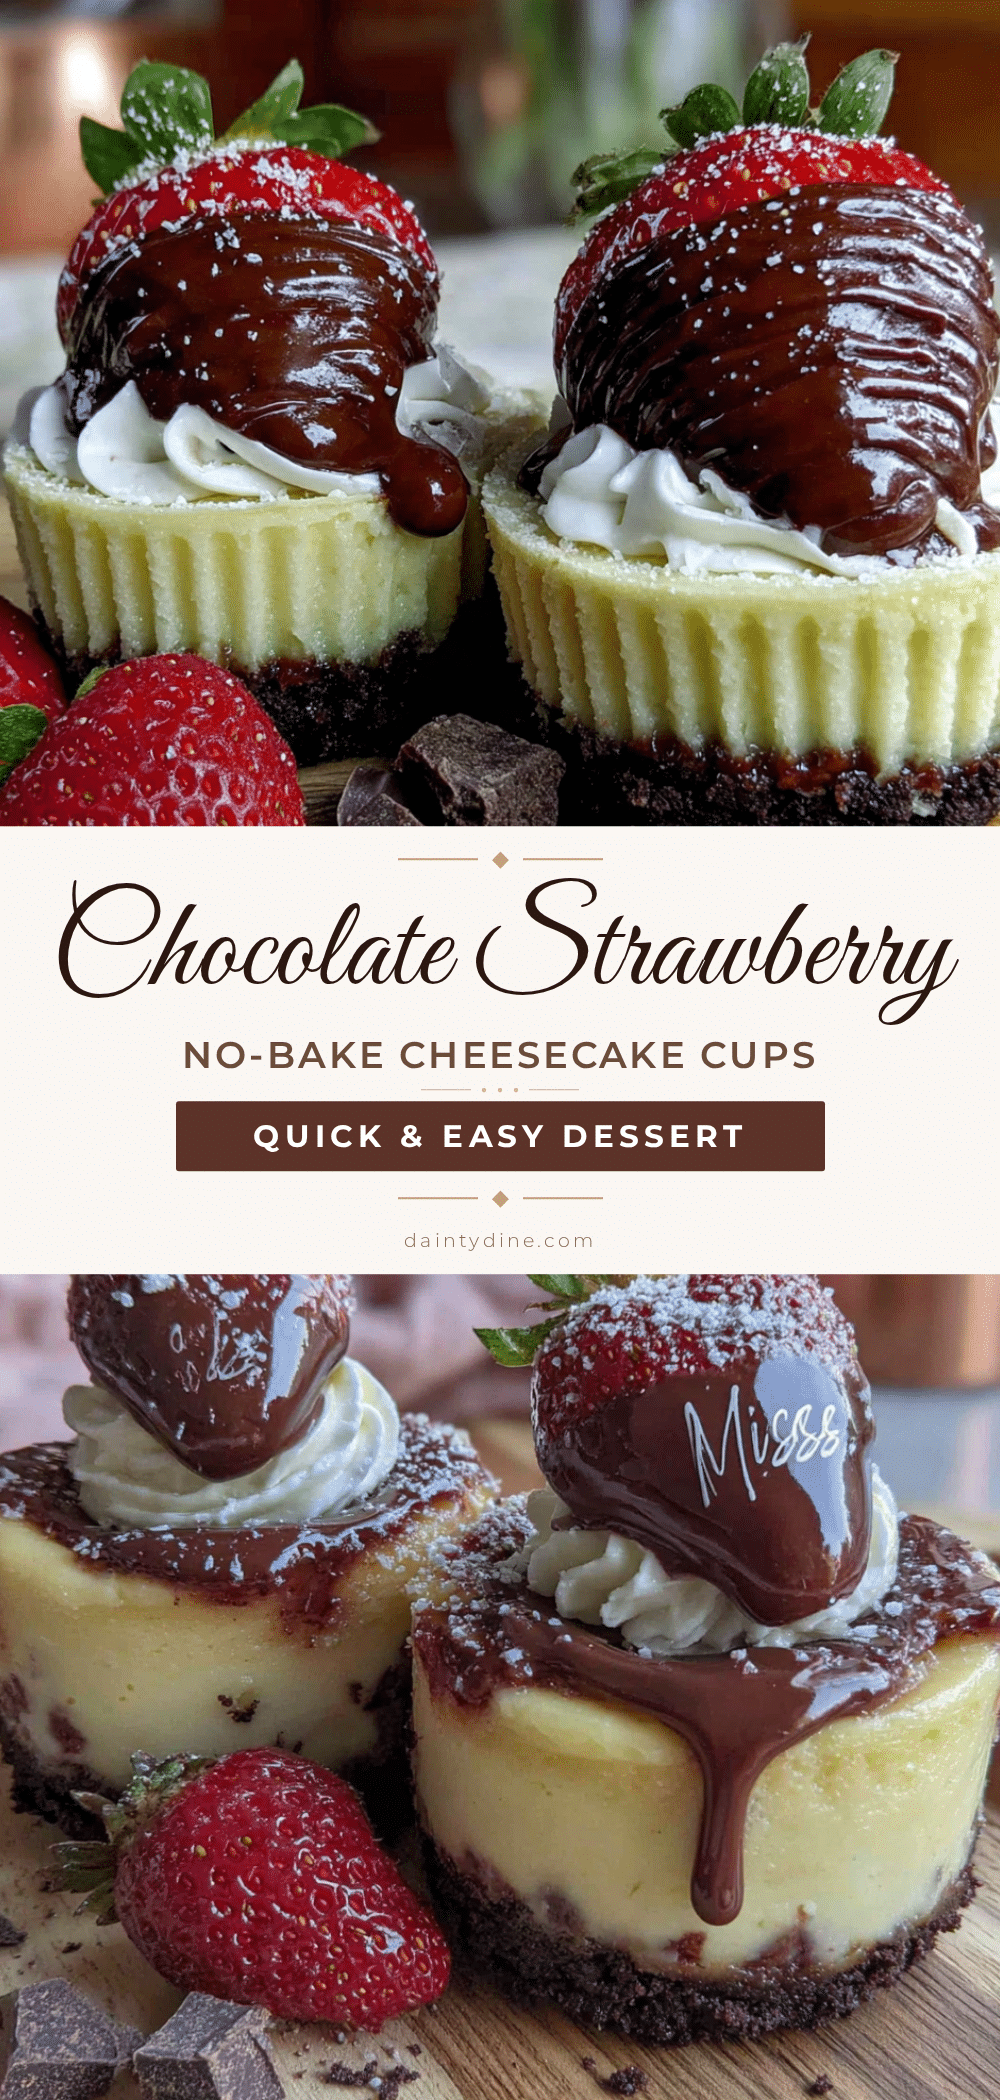
Quick No-Bake Chocolate Strawberry Cheesecake Cups
These no-bake cheesecake cups feature a creamy cheesecake filling, a sweet strawberry layer, and a crunchy chocolate shell. They come together in about 15 minutes of active time and are perfect for weeknight desserts or last-minute gatherings.
- Prep Time: 15 minutes
- Cook Time: 0 minutes
- Total Time: 2 hours 35 minutes (includes chilling)
- Yield: 6 servings 1x
- Category: Dessert
- Cuisine: American
Ingredients
- 1 cup graham cracker crumbs (about 8 full sheets)
- 4 tablespoons unsalted butter, melted
- 1 tablespoon granulated sugar (optional)
- Pinch of salt
- 8 ounces cream cheese, softened to room temperature
- 1/2 cup powdered sugar
- 1 teaspoon vanilla extract
- 1/2 cup heavy cream, cold
- 1 cup fresh strawberries, finely chopped
- 2 tablespoons strawberry jam or preserves
- 1 teaspoon lemon juice
- 1 cup semi-sweet chocolate chips
- 1 tablespoon coconut oil or vegetable oil
Instructions
- Make the crust: In a small bowl, combine graham cracker crumbs, melted butter, sugar, and salt. Stir until the mixture looks like wet sand. Divide evenly among 6 cups (about 2 tablespoons each). Press down firmly with the back of a spoon or bottom of a small glass. Refrigerate while making the filling.
- Make the cheesecake filling: In a medium bowl, beat softened cream cheese with an electric mixer until smooth (about 1 minute). Add powdered sugar and vanilla, beat until combined. In a separate bowl, whip cold heavy cream until stiff peaks form (2-3 minutes). Gently fold whipped cream into cream cheese mixture until just combined.
- Prepare the strawberry layer: In a small bowl, combine chopped strawberries, strawberry jam, and lemon juice. Stir gently. If strawberries are very juicy, let sit for a minute and drain excess liquid.
- Assemble the cups: Remove cups from fridge. Spoon about 2 tablespoons cheesecake filling over crust in each cup. Add about 1 tablespoon strawberry mixture on top. Add another layer of cheesecake filling, smoothing tops. Refrigerate at least 2 hours or overnight.
- Make the chocolate coating: About 30 minutes before serving, melt chocolate chips and coconut oil together in a small saucepan over low heat, stirring constantly, or microwave in 30-second bursts. Let cool 2-3 minutes. Spoon over each cheesecake cup, spreading gently to edges. Return to fridge for at least 20 minutes to set.
- Serve: Once chocolate is firm, serve straight from the fridge or let sit at room temperature for 5 minutes to soften slightly.
Notes
For best texture, let cream cheese come to room temperature. Press crust firmly. Drain strawberries if very juicy. For make-ahead, add chocolate coating just before serving. Can be stored in refrigerator for up to 3 days with coating or 5 days without. Freezes well without coating for up to 2 months.
Nutrition
- Serving Size: 1 cheesecake cup
- Calories: 380
- Sugar: 22
- Sodium: 220
- Fat: 26
- Saturated Fat: 15
- Carbohydrates: 32
- Fiber: 2
- Protein: 6
Keywords: no-bake cheesecake, chocolate strawberry, cheesecake cups, easy dessert, no-bake dessert, strawberry cheesecake, chocolate covered strawberry


