Love this? Save it for later!
Share the inspiration with your friends
My neighbor Carol wasn’t trying to impress anyone. I’d stopped by to borrow a ladder—ours had mysteriously vanished during a garage cleanout—and this warm, spicy-sweet smell hit me before I even got past her screen door. It was late October, not quite Halloween, and I figured she was baking something elaborate for a party. But when I poked my head into her kitchen, there she was, pulling these little ramekins out of the oven with one hand while scrolling through her phone with the other. No big deal. Just a Tuesday.
She shrugged when I asked what it was. “Oh, just some pumpkin custard thing. No crust, because I didn’t feel like dealing with dough.” She said it like it was nothing—like she hadn’t just created the most perfectly simple, soul-warming dessert I’d ever smelled. I stood there holding my borrowed ladder, honestly a little jealous of how casually she made something so good. She handed me a warm cup, still steaming, and told me to try it. “It’s just five ingredients,” she said. “You probably have them all right now.”
That first bite stopped me mid-sentence. It was creamy but not heavy, sweet but not cloying, with that unmistakable pumpkin pie spice warmth that just feels like fall in a cup. And the best part? No crust to fuss with, no rolling pins, no chilling dough. She’d literally thrown it together between loads of laundry. I mean, maybe you’ve been there—standing in someone else’s kitchen, realizing they’ve just solved a problem you didn’t even know you had. That was me, holding a ladder and a warm custard cup, already planning to make it myself that weekend. And honestly? I’ve been making it ever since.
Why You’ll Love This Recipe
Let me tell you why these Quick Crustless Pumpkin Pie Custard Cups have become my go-to fall dessert. First off, they come together in about 35 minutes total—that’s 5 minutes of prep and 30 minutes of baking. For a weeknight when you’re tired and the kids are asking for something sweet, that’s a game-changer.
Here’s what makes these custard cups stand out:
- Quick & Easy: From pantry to table in under 40 minutes. No complicated steps, no special techniques. Just mix, pour, and bake.
- Simple Ingredients: You need exactly five things—pumpkin puree, eggs, sweetened condensed milk, pumpkin pie spice, and vanilla extract. That’s it. No fancy grocery store trips required.
- Perfect for Weeknights: This is the kind of dessert you can make after dinner while you’re cleaning up. It bakes while you do dishes, and by the time you’re done, dessert is ready.
- Crowd-Pleaser: I’ve served these to picky eaters, pumpkin skeptics, and die-hard pie fans. Everyone loves them. The texture is silky and satisfying without being too rich.
- Unbelievably Delicious: Here’s the thing—without a crust, the pumpkin flavor really shines. It’s pure, unadulterated pumpkin pie filling, baked into individual portions that feel special without any fuss.
This isn’t just another pumpkin dessert. It’s the one you’ll make when you want something that tastes like you spent hours in the kitchen but actually took minutes. It’s comfort food simplified—faster, easier, but with all the soul-soothing satisfaction of traditional pumpkin pie. And honestly, I think it’s even better without the crust. Less distraction, more pumpkin.
What Ingredients You Will Need
This recipe uses simple, wholesome ingredients to deliver that classic pumpkin pie flavor without any complicated additions. Everything you need is probably already in your pantry or fridge, especially if you do any fall baking.
- Pumpkin Puree (15 oz can): Not pumpkin pie filling—make sure you grab plain pumpkin puree. I prefer Libby’s for consistent texture and flavor, but store brands work fine too. Look for 100% pure pumpkin with no added spices or sweeteners.
- Sweetened Condensed Milk (14 oz can): This is what gives the custard its creamy sweetness without needing extra sugar. Eagle Brand is my go-to, but any brand works. For a dairy-free option, you can use coconut sweetened condensed milk—just know the texture will be slightly different.
- Large Eggs (2): Eggs provide structure and help the custard set properly. Make sure they’re at room temperature for the smoothest texture. If you forgot to take them out ahead of time, place them in a bowl of warm water for 5 minutes.
- Pumpkin Pie Spice (2 teaspoons): You can use store-bought or make your own. I actually prefer making my own blend—1 teaspoon cinnamon, 1/2 teaspoon ginger, 1/4 teaspoon nutmeg, 1/4 teaspoon cloves. It’s fresher and you can adjust it to your taste.
- Vanilla Extract (1 teaspoon): Pure vanilla extract adds depth and rounds out the spices. Avoid imitation vanilla if you can—the flavor really does make a difference here since there are so few ingredients.
That’s genuinely it. Five ingredients, no crust, no complicated steps. The beauty of this recipe is that every ingredient earns its place. The pumpkin puree provides that earthy sweetness and vibrant color. The sweetened condensed milk replaces both sugar and cream, simplifying everything. Eggs bind it all together and create that silky custard texture. And the spices? Well, they’re what makes it taste like fall in a cup.
One thing I’ve learned through trial and error—don’t skip the vanilla. I tried it once without, thinking the pumpkin spice would carry the flavor. It didn’t. The vanilla acts as a flavor bridge, tying everything together and making the spices taste warmer and more rounded. Trust me on this one.
Equipment Needed
The equipment list for these custard cups is refreshingly short. No special gadgets required—just basic kitchen tools you probably already own.
- Oven-safe ramekins or custard cups (6, about 6 oz each): These are the star of the show. You can find them at any kitchen store or online for pretty cheap. I got my set at Target for under $10. If you don’t have ramekins, you can use a standard muffin tin—just grease it well and reduce the baking time by about 5 minutes.
- Mixing bowl (medium): Any medium bowl works. I use a glass one because it’s easy to see when everything’s fully combined.
- Whisk: A good whisk helps you get that smooth, lump-free custard. A fork works in a pinch, but you’ll have to work harder to break up any egg clumps.
- Measuring cups and spoons: For the pumpkin pie spice and vanilla. The pumpkin and condensed milk come pre-measured in cans, which is part of the beauty of this recipe.
- Baking sheet (optional but recommended): Placing your ramekins on a baking sheet makes them easier to get in and out of the oven, and catches any potential spills. I learned this the hard way after a drippy ramekin left a burnt mess on my oven floor.
- Liquid measuring cup (for pouring): A spouted measuring cup makes pouring the custard into ramekins much cleaner than trying to spoon it in. Less mess, less stress.
That’s the whole list. Nothing fancy, nothing expensive. If you’re just starting out in the kitchen, this is a great recipe to build confidence. And if you’re a seasoned cook, you’ll appreciate how little cleanup is involved.
Preparation Method
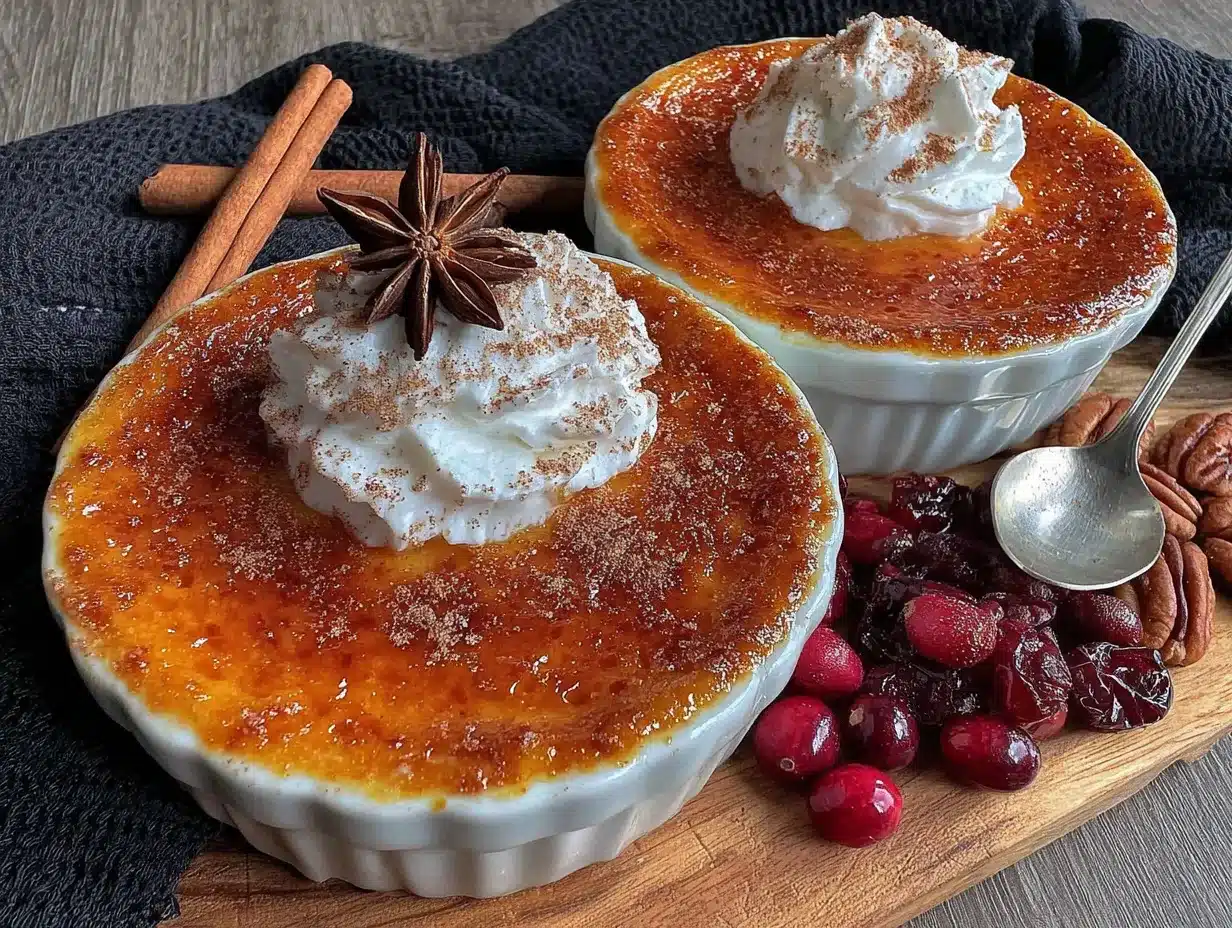
Making these custard cups is almost embarrassingly easy. But there are a few tricks I’ve picked up along the way that make the difference between good custard and great custard.
- Preheat your oven to 350°F (175°C). While it’s heating, arrange your ramekins on a baking sheet. This makes them easier to handle and catches any drips. I like to give the ramekins a quick spray with non-stick cooking spray, even though the custard usually doesn’t stick much. Better safe than sorry.
- In your medium mixing bowl, crack both eggs. Whisk them gently until the yolks and whites are fully combined—about 30 seconds. You’re not trying to incorporate air here, just make sure there are no streaks of egg white. I used to whisk vigorously and ended up with a slightly foamy custard. Gentle and steady is the way to go.
- Add the entire can of sweetened condensed milk. Pour it in slowly while whisking, so it incorporates smoothly. The mixture will look pale and slightly thick. This is where the magic starts happening.
- Add the pumpkin puree. All 15 ounces go in at once. Whisk until the mixture is completely smooth and uniform in color. You shouldn’t see any streaks of orange or white. This takes about a minute of steady whisking. If you see lumps, keep whisking—they’ll break up.
- Add the pumpkin pie spice and vanilla extract. Sprinkle the spice evenly over the surface so it doesn’t clump in one spot. Add the vanilla, then whisk everything together one more time. Give the bowl a good scrape with a spatula to make sure nothing’s hiding at the bottom.
- Pour the custard into your ramekins. I use a liquid measuring cup with a spout for this—it’s so much cleaner than trying to ladle it in. Fill each ramekin about 3/4 full. The custard won’t rise much, so you don’t need to worry about overflow, but leaving a little room makes them easier to handle.
- Bake for 25-30 minutes. The custard is done when the edges are set but the center still jiggles slightly when you gently shake the ramekin. Think of it like jello—it should wobble but not be liquid. Overbaking is the most common mistake here. The custard continues to set as it cools, so it’s better to pull them out a minute early than a minute late.
- Let them cool on a wire rack for at least 15 minutes. This is crucial. The custard needs time to finish setting up. If you try to eat them straight out of the oven, they’ll be too loose. Patience, my friend. They’re worth the wait.
- Serve warm or refrigerate. These are delicious at room temperature, warm, or cold. If you’re serving them warm, a dollop of whipped cream on top is perfection. If you’re refrigerating them, cover each ramekin with plastic wrap once they’re completely cool.
One thing I want to emphasize—don’t skip the cooling step. I know it’s tempting to dig in right away. I’ve been there. But the texture really does improve as they cool. The custard firms up, the flavors meld together, and what you get is a much more satisfying dessert. Trust the process.
Cooking Tips & Techniques
After making these custard cups more times than I can count, I’ve collected a few tips that make the process even smoother. Some of these I learned the hard way—like the time I forgot the eggs entirely and ended up with pumpkin soup in ramekins.
Room temperature ingredients matter. Cold eggs and cold pumpkin puree can cause the sweetened condensed milk to seize up slightly, leaving you with a lumpy custard. Take everything out of the fridge about 20 minutes before you start. If you’re in a rush, you can warm the pumpkin puree in the microwave for about 15 seconds—just don’t let it get hot.
Whisk gently. I know I’ve said this before, but it’s worth repeating. Vigorous whisking incorporates air bubbles that create a foamy texture on top of your custard. You want it smooth and dense, not airy. Gentle, steady strokes are your friend here.
Use a water bath for extra silky texture. If you have the time and patience, placing your ramekins in a baking dish and filling it with hot water halfway up the sides of the ramekins creates a more even, gentle heat. This gives you an even silkier custard. I don’t always do this on a weeknight, but when I’m trying to impress someone, it’s worth the extra step.
Check for doneness early. Every oven runs a little differently. Start checking your custards at the 22-minute mark. Gently shake a ramekin—if the center wobbles like firm jello, they’re done. If it’s still liquidy, give them another 3 minutes and check again.
Don’t overbake. This is the number one mistake I see people make. Overbaked custard turns grainy and watery, with a texture that’s more scrambled eggs than silky dessert. The carryover heat continues cooking the custard after you pull it out of the oven, so err on the side of underdone.
Make ahead for easy entertaining. These custard cups actually taste better the next day. The spices meld together overnight, creating a deeper, more complex flavor. Make them a day ahead, refrigerate, and serve cold or at room temperature. Perfect for Thanksgiving when oven space is at a premium.
Variations & Adaptations
One of the things I love about this recipe is how easily it adapts to different tastes and dietary needs. Here are some variations I’ve tried and loved:
Dairy-Free Version: Swap the sweetened condensed milk for a dairy-free version made from coconut milk. The texture will be slightly less creamy, but the coconut flavor actually complements the pumpkin beautifully. I’ve used the Nature’s Charm brand with good results.
Spice It Up: If you like things on the spicier side, add a pinch of cayenne pepper or an extra 1/4 teaspoon of ginger. The heat cuts through the sweetness and adds a nice warmth on the finish. My husband loves this version—I call it “pumpkin pie with a kick.”
Maple Pumpkin Custard: Replace 2 tablespoons of the sweetened condensed milk with pure maple syrup. It adds a deeper, more complex sweetness that pairs beautifully with the pumpkin. Just know that the custard will be slightly softer since maple syrup doesn’t set up as firmly as condensed milk.
Chocolate Pumpkin Custard: Add 2 tablespoons of unsweetened cocoa powder to the custard mixture before baking. The chocolate and pumpkin combination is surprisingly good—like a healthier version of a chocolate pumpkin brownie, but creamier. My kids absolutely love this version.
Mini Custard Cups: Use a mini muffin tin instead of ramekins for bite-sized treats. Reduce the baking time to about 12-15 minutes. These are perfect for parties or holiday gatherings where people want just a taste.
Paleo-Friendly: Use full-fat coconut milk mixed with a few tablespoons of honey or maple syrup instead of sweetened condensed milk. The texture won’t be quite as creamy, but it’s still delicious and fits a paleo lifestyle.
The beauty of this recipe is that it’s forgiving. I’ve made it with different milks, different sweeteners, and different spice combinations, and it’s always turned out well. Don’t be afraid to experiment—that’s how you find your perfect version.
Serving & Storage Suggestions
These custard cups are versatile when it comes to serving. Here’s how I like to enjoy them:
Serving Temperature: They’re delicious warm, at room temperature, or cold. Warm is my favorite on a chilly fall evening, especially with a cup of coffee. Cold is perfect for a quick dessert straight from the fridge on a busy weeknight.
Toppings: A dollop of whipped cream is the classic choice—it adds a light, airy contrast to the dense custard. For something different, try a sprinkle of cinnamon sugar, a drizzle of caramel sauce, or a few toasted pecans. I’ve even topped them with crumbled ginger snaps for a crunchy texture.
Pairings: These custard cups pair beautifully with a cup of hot apple cider, a spiced chai latte, or a simple black coffee. For a dessert spread, serve them alongside classic apple crisp or a slice of simple pumpkin bread. The combination of textures and flavors is wonderful.
Storage: Cover each ramekin tightly with plastic wrap or transfer the custard to an airtight container. They’ll keep in the refrigerator for up to 5 days. The flavor actually improves after a day or two as the spices meld together.
Freezing: These custard cups freeze surprisingly well. Let them cool completely, then wrap each ramekin tightly in plastic wrap and then aluminum foil. They’ll keep for up to 3 months. To thaw, transfer them to the refrigerator overnight. The texture might be slightly softer after freezing, but the flavor is still excellent.
Reheating: If you prefer them warm, pop a refrigerated custard cup in the microwave for about 20-30 seconds. You can also reheat them in a 300°F oven for about 10 minutes. Just don’t overheat them, or the custard can become grainy.
One thing I love about making these ahead for Thanksgiving—they free up oven space on the big day. You can make them a day or two in advance, and they’re ready to serve whenever you need them. No last-minute baking stress.
Nutritional Information & Benefits
While these custard cups are definitely a treat, they do offer some nutritional benefits worth noting. Here’s a rough breakdown per serving (one custard cup):
| Nutrient | Amount per Serving |
|---|---|
| Calories | 220 |
| Total Fat | 6g |
| Saturated Fat | 3.5g |
| Cholesterol | 75mg |
| Sodium | 120mg |
| Total Carbohydrates | 36g |
| Dietary Fiber | 3g |
| Sugars | 28g |
| Protein | 6g |
| Vitamin A | 190% DV |
| Vitamin C | 4% DV |
| Calcium | 15% DV |
| Iron | 6% DV |
The star ingredient here is pumpkin, which is packed with vitamin A—a single serving provides nearly 200% of your daily needs. Vitamin A is crucial for eye health, immune function, and skin health. Pumpkin is also a good source of fiber, which helps with digestion and keeps you feeling full longer.
The eggs add high-quality protein and important nutrients like choline, which supports brain health. The sweetened condensed milk provides calcium for strong bones, though it does add sugar. If you’re watching your sugar intake, you can reduce the amount slightly or try the maple variation for a different sweetness profile.
These custard cups are naturally gluten-free and can be made dairy-free with a simple substitution. They’re also lower in calories than traditional pumpkin pie, which typically has around 300-350 calories per slice with the crust. So you can enjoy a satisfying dessert without derailing your healthy eating goals.
As with any dessert, moderation is key. But honestly? These custard cups are one of the more nutritious ways to satisfy a sweet craving. The pumpkin provides real nutritional value, and the portion size is naturally controlled since they’re baked in individual servings.
Conclusion
These Quick Crustless Pumpkin Pie Custard Cups have become a staple in my kitchen for good reason. They’re fast, they’re simple, and they deliver all the cozy fall flavor of traditional pumpkin pie without any of the fuss. No rolling pins, no chilled dough, no pie weights—just five ingredients and about 35 minutes to dessert.
What I love most about this recipe is how it proves that simple doesn’t mean boring. Sometimes the best dishes come from the most humble beginnings—like a neighbor making custard cups on a random Tuesday, not trying to impress anyone, just making something good. That’s the energy I try to bring to my kitchen every time I make these.
I encourage you to make these your own. Play with the spices, try different toppings, experiment with variations. That’s the fun of cooking—finding what works for you and your family. And when you do find your perfect version, I’d love to hear about it. Leave a comment below and let me know how yours turned out. Did you add a pinch of cayenne? Top them with toasted pecans? Serve them with a scoop of vanilla ice cream? Share your creations—I read every comment and I love seeing what you come up with.
Here’s to simple desserts that feel special, quick recipes that taste like you spent hours, and the joy of sharing something delicious with the people you love. Happy baking, friends.
Frequently Asked Questions
Can I use pumpkin pie filling instead of pumpkin puree?
I wouldn’t recommend it. Pumpkin pie filling already has sugar and spices added, so using it would throw off the sweetness and spice balance of this recipe. Stick with 100% pure pumpkin puree for the best results. If you only have pumpkin pie filling on hand, reduce the sweetened condensed milk by about 1/4 cup and skip the pumpkin pie spice entirely.
Can I make these custard cups without eggs?
You can, but the texture will be different. Eggs provide the structure that gives custard its silky, set texture. For an egg-free version, try using a flax egg (1 tablespoon ground flaxseed mixed with 3 tablespoons water per egg) or a commercial egg replacer. The custard will be softer and more pudding-like, but still delicious. You might need to bake it a few minutes longer to help it set.
How do I know when the custard cups are done baking?
The best test is the jiggle test. Gently shake the ramekin—the edges should be set and firm, but the center should wobble slightly, like firm jello. If the center is still liquidy, give them another 3-5 minutes. If the whole thing is firm and doesn’t move at all, you’ve overbaked them. Remember, they continue to set as they cool, so it’s better to pull them out a minute early.
Can I use a different type of milk instead of sweetened condensed milk?
Sweetened condensed milk is pretty unique because it’s both a sweetener and a thickener. If you substitute regular milk or cream, you’ll need to add sugar and adjust the liquid ratio. A good alternative is to use 1 cup of heavy cream mixed with 1/2 cup of sugar, but the texture won’t be quite as creamy. For a dairy-free option, coconut sweetened condensed milk works beautifully.
How long do these custard cups last in the refrigerator?
Covered tightly with plastic wrap, these custard cups will keep in the refrigerator for up to 5 days. The flavor actually improves after a day or two as the spices meld together. You can serve them cold straight from the fridge or warm them up for about 20 seconds in the microwave. Just don’t leave them at room temperature for more than 2 hours.
Pin This Recipe!
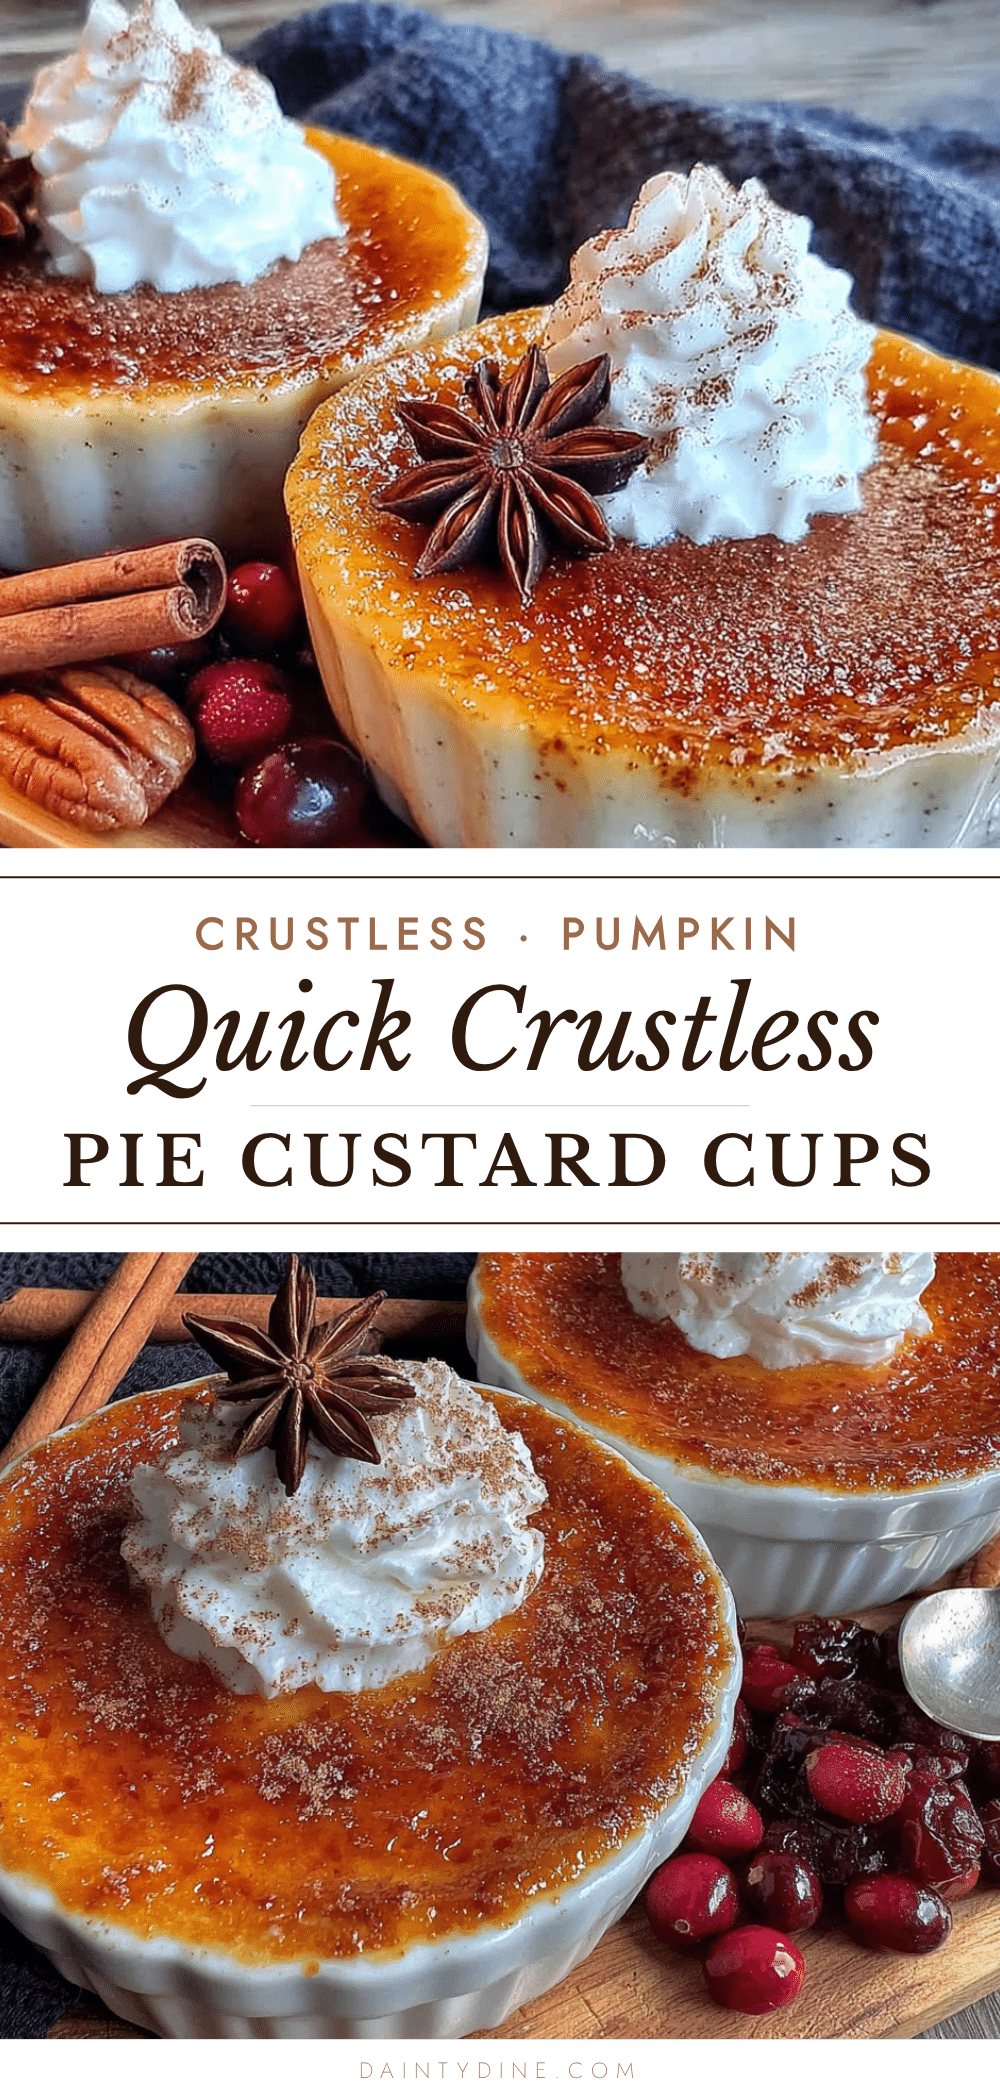
Quick Crustless Pumpkin Pie Custard Cups: Easy 5-Ingredient Dessert
These quick and easy crustless pumpkin pie custard cups are made with just five simple ingredients and come together in about 35 minutes. They deliver all the cozy fall flavor of traditional pumpkin pie without any fuss—no crust, no rolling pins, just pure pumpkin custard in individual servings.
- Prep Time: 5 minutes
- Cook Time: 30 minutes
- Total Time: 35 minutes
- Yield: 6 servings 1x
- Category: Dessert
- Cuisine: American
Ingredients
- 1 (15 oz) can pumpkin puree (not pumpkin pie filling)
- 1 (14 oz) can sweetened condensed milk
- 2 large eggs, at room temperature
- 2 teaspoons pumpkin pie spice (or homemade blend: 1 tsp cinnamon, 1/2 tsp ginger, 1/4 tsp nutmeg, 1/4 tsp cloves)
- 1 teaspoon pure vanilla extract
Instructions
- Preheat oven to 350°F (175°C). Arrange 6 (6 oz) oven-safe ramekins on a baking sheet. Lightly spray ramekins with non-stick cooking spray.
- In a medium mixing bowl, gently whisk the eggs until yolks and whites are fully combined, about 30 seconds. Avoid vigorous whisking to prevent air bubbles.
- Slowly pour in the sweetened condensed milk while whisking until smooth and pale.
- Add the entire can of pumpkin puree and whisk until completely smooth and uniform in color, about 1 minute.
- Sprinkle pumpkin pie spice evenly over the mixture, add vanilla extract, and whisk until fully incorporated. Scrape bottom of bowl with a spatula.
- Pour custard into ramekins, filling each about 3/4 full. Use a liquid measuring cup with a spout for clean pouring.
- Bake for 25-30 minutes, until edges are set and centers jiggle slightly when shaken (like firm jello). Start checking at 22 minutes.
- Cool on a wire rack for at least 15 minutes. Custard will continue to set as it cools.
- Serve warm, at room temperature, or refrigerate. If refrigerating, cover each ramekin with plastic wrap once completely cool.
Notes
For extra silky texture, use a water bath: place ramekins in a baking dish and fill with hot water halfway up the sides. Room temperature ingredients help prevent lumps. Don’t overbake—custard continues to set as it cools. These taste even better the next day as flavors meld. For dairy-free, use coconut sweetened condensed milk. For egg-free, use flax eggs (texture will be softer).
Nutrition
- Serving Size: 1 custard cup
- Calories: 220
- Sugar: 28
- Sodium: 120
- Fat: 6
- Saturated Fat: 3.5
- Carbohydrates: 36
- Fiber: 3
- Protein: 6
Keywords: crustless pumpkin pie, pumpkin custard, easy pumpkin dessert, 5-ingredient dessert, fall dessert, gluten-free pumpkin dessert


