Love this? Save it for later!
Share the inspiration with your friends
Introduction
The woman at the farmers market stall—the one with the sun-weathered hands and a basket of tomatoes that looked like they’d been painted by an artist—watched me hesitate over a bag of rice. I was holding two different brands, squinting at the prices, trying to remember which one my kids actually ate without complaint. She didn’t say anything at first. Then she reached under her table and pulled out a little handwritten card, edges curled from being tucked into her apron pocket. “This is what I make on Tuesday nights,” she said, handing it over. “It’s nothing fancy. But everyone stays at the table.”
I looked at the card. Quick Cheesy Ground Beef and Rice Skillet. Her handwriting was messy—the “g” in ground trailed off into a little loop—and there was a grease stain on the corner that told me she actually used this recipe. Not just collected it. I thanked her, bought my tomatoes, and tucked the card into my bag. Honestly, I almost forgot about it. It sat on my counter for three days under a pile of school permission slips and a half-eaten bag of pretzels. But then came one of those nights—you know the ones—where the fridge looked sad, the kids were hungry, and I had about twenty minutes before someone started asking for snacks.
I pulled out her card, scanned the ingredients, and realized I had everything. Every single thing. That never happens, let me tell you. I browned the beef, tossed in the rice, stirred in the cheese, and stood there stirring while the smell filled my kitchen. It wasn’t complicated. It wasn’t fancy. But when I put that skillet on the table, my oldest said, “This is good, Mom,” without being prompted. And the youngest asked for seconds. That’s why this recipe stayed with me—not because it’s perfect, but because it works. It works on tired nights, on busy nights, on nights when you just need everyone to sit down and eat something that feels like dinner.
Why You’ll Love This Recipe
Let me tell you why this Quick Cheesy Ground Beef and Rice Skillet has earned a permanent spot in my weekly rotation. I’ve tested it on picky eaters, on nights when I had zero energy, and on a Tuesday when I accidentally doubled the garlic. It held up every time.
- Ready in Under 30 Minutes: From the moment you turn on the stove to the moment you’re scooping it onto plates, you’re looking at about 25 minutes. That’s faster than delivery, and it costs a fraction of the price.
- Simple, Budget-Friendly Ingredients: Ground beef, rice, cheese, a few pantry staples. No trips to a specialty store. No spending ten dollars on one ingredient. This is honest food that respects your grocery budget.
- Perfect for Busy Weeknights: When you’ve got homework to supervise, laundry to fold, and a million other things pulling at you, this skillet doesn’t ask for much. One pot, minimal stirring, maximum payoff.
- Crowd-Pleaser for All Ages: I’ve served this to my kids, to my in-laws, and to a neighbor who stopped by unannounced. Everyone ate it. The cheese does the heavy lifting here—it’s hard to argue with melted cheddar.
- Unbelievably Satisfying: The texture is what gets me. The rice soaks up all that beefy, cheesy goodness, and every bite has that cozy, stick-to-your-ribs feeling. It’s comfort food that doesn’t leave you feeling heavy.
What makes this version different from the others? It’s the balance. I’ve tried skillets that were too greasy, too dry, or just plain boring. This one hits that sweet spot where the rice is tender, the beef is seasoned just right, and the cheese melts into every crevice. It’s not just another recipe—it’s the one you’ll actually make on a Tuesday.
What Ingredients You Will Need
This recipe uses simple, honest ingredients that most of you probably already have in your kitchen. I’ve tested it with different brands and substitutions, so I’ll share what works best.
- Ground Beef: 1 pound (450g) of 80/20 ground beef works perfectly. The fat adds flavor, but you can use leaner beef (90/10) if you prefer. Just add a tablespoon of oil to keep it moist. I usually grab whatever is on sale at my local grocery store.
- White Rice: 1 cup (200g) of long-grain white rice, uncooked. Basmati or jasmine also work well. I don’t recommend instant rice here—it gets mushy. Brown rice will work, but you’ll need to add about 15 minutes of cooking time and extra liquid.
- Cheddar Cheese: 1½ cups (170g) shredded sharp cheddar. The sharper the better—it gives you more flavor with less cheese. Pre-shredded works in a pinch, but freshly shredded melts so much smoother. I’ve used Colby Jack and Monterey Jack too, and they’re both great.
- Beef Broth: 2 cups (480ml) low-sodium beef broth. This is where the rice gets its flavor. If you only have chicken broth, that’s fine—just add a little Worcestershire sauce to deepen the flavor.
- Onion: 1 medium yellow onion, diced. About 1 cup. Red onion works too, but yellow gives that classic savory base. If you’re short on time, a tablespoon of dried minced onion can step in.
- Garlic: 3 cloves, minced. Fresh is always best, but jarred minced garlic works in a hurry. I’ve used garlic powder in a pinch (1 teaspoon), and it’s acceptable.
- Tomato Paste: 2 tablespoons. This adds a subtle richness and a tiny bit of acidity that cuts through the cheese. Don’t skip it—it’s a small ingredient that makes a big difference.
- Paprika: 1 teaspoon. Smoked paprika adds a lovely depth, but regular works just fine. I accidentally used hot paprika once, and it was actually delicious—just a little spicy.
- Salt and Black Pepper: 1 teaspoon salt, ½ teaspoon black pepper, or to taste. I always start with less and adjust at the end.
- Optional Garnishes: Chopped fresh parsley, sliced green onions, or a pinch of red pepper flakes for heat.
Ingredient Selection Tip: For the best texture, look for ground beef that’s not too lean. The fat helps carry the flavor and keeps the rice from drying out. And for the cheese—trust me on this—buy a block and shred it yourself. It takes two minutes and makes a noticeable difference in how smoothly it melts.
Equipment Needed
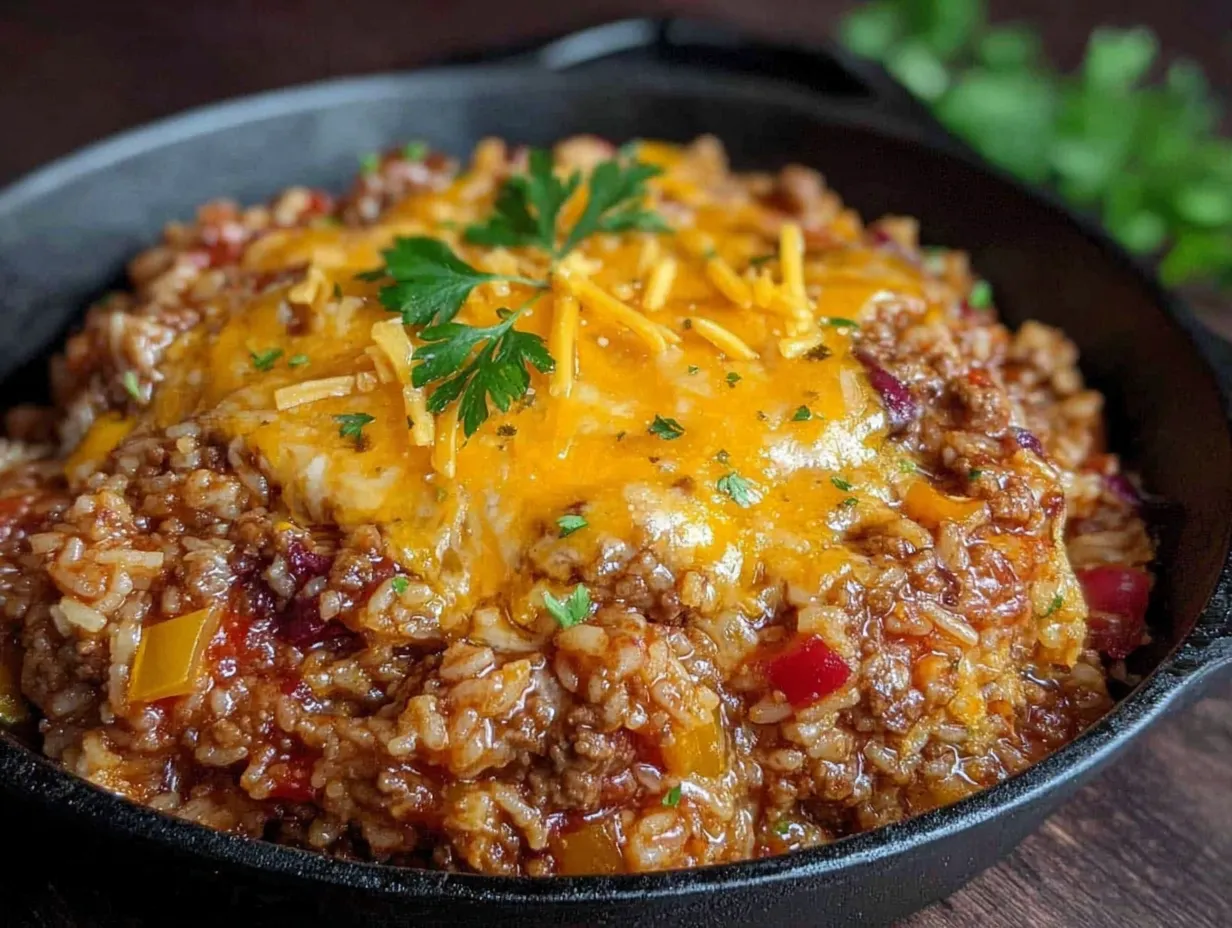
You don’t need a fancy kitchen to make this recipe. Here’s what you’ll need:
- Large Skillet or Dutch Oven: A 12-inch skillet with a lid is ideal. I use my cast iron skillet, but a stainless steel or non-stick pan works perfectly. If you don’t have a lid, a sheet of aluminum foil works as a temporary cover.
- Wooden Spoon or Spatula: For breaking up the ground beef and stirring. A silicone spatula also works, especially for scraping up any browned bits from the bottom.
- Cutting Board and Knife: For dicing the onion and mincing the garlic. Nothing fancy needed.
- Measuring Cups and Spoons: For accuracy, especially with the rice and broth. Eyeballing rice can lead to a mushy or crunchy skillet.
- Box Grater: If you’re shredding your own cheese (which I highly recommend). A microplane also works for smaller amounts.
Budget-Friendly Tip: You don’t need a high-end skillet for this. I made this recipe for years in a $15 non-stick pan from the discount store. It worked just fine. The only thing that matters is that your pan has a lid and can hold everything without overflowing.
Preparation Method
- Brown the Ground Beef: Place your skillet over medium-high heat. Add the ground beef and break it apart with your wooden spoon. Cook for 5-7 minutes, stirring occasionally, until the beef is browned and no longer pink. Don’t drain all the fat—leave about a tablespoon in the pan for flavor. If you’re using very lean beef, add a tablespoon of olive oil to prevent sticking.
- Sauté the Aromatics: Reduce the heat to medium. Add the diced onion to the skillet and cook for 3-4 minutes, stirring often, until it softens and becomes translucent. Add the minced garlic and cook for 30 seconds more—just until it smells amazing. Be careful not to burn the garlic; it turns bitter quickly.
- Add the Tomato Paste and Seasonings: Stir in the tomato paste, paprika, salt, and black pepper. Cook for 1 minute, stirring constantly. This step deepens the flavor and removes the raw taste from the tomato paste. You’ll notice the color darkens slightly.
- Add the Rice and Broth: Pour in the uncooked rice and stir to coat it with the beef mixture. Then add the beef broth. Stir everything together, scraping up any browned bits from the bottom of the pan—that’s pure flavor. Bring the mixture to a gentle boil.
- Simmer Until Rice is Tender: Reduce the heat to low, cover the skillet with a tight-fitting lid, and let it simmer for 18-20 minutes. Do not lift the lid during this time—the steam is what cooks the rice. After 18 minutes, check the rice. It should be tender and have absorbed most of the liquid. If it’s still a little firm, cover and cook for 2-3 more minutes.
- Add the Cheese: Remove the skillet from the heat. Sprinkle the shredded cheddar cheese evenly over the top. Cover the skillet again and let it sit for 2-3 minutes—the residual heat will melt the cheese perfectly. If you want a golden, bubbly top, place the skillet under the broiler for 1-2 minutes. Watch it carefully so it doesn’t burn.
- Rest and Serve: Let the skillet sit uncovered for 2 minutes before serving. This allows the steam to escape and the flavors to settle. Garnish with chopped parsley or green onions if you like. Scoop directly from the skillet onto plates.
Sensory Cue: When the rice is done, you should see small steam holes on the surface, and the cheese should be melted and stretchy when you lift it with a spoon. The aroma will be rich, savory, and slightly toasty from the browned beef.
Cooking Tips & Techniques
I’ve made this skillet more times than I can count, and I’ve learned a few things the hard way. Let me save you some trouble.
Don’t Rush the Browning: Let the ground beef sit in the pan for a minute before you start breaking it apart. You want a good sear on at least some of the meat—that browning adds a depth of flavor that you can’t get from just cooking it through. I used to stir constantly, and my beef was always gray. Let it brown. Trust me.
The Lid is Non-Negotiable: I once tried to cook the rice without a proper lid, thinking I could just add more broth. It was a disaster. The rice cooked unevenly, some grains were crunchy, and the bottom burned. Use a tight-fitting lid. If yours is loose, wrap the edge with aluminum foil before covering.
Check Your Rice at 18 Minutes: Different brands of rice absorb liquid at different rates. After 18 minutes, peek quickly and see where you’re at. If there’s still visible liquid, cook for 2-3 more minutes. If it looks dry but the rice is still firm, add ¼ cup of water or broth and cook for 5 more minutes.
Shred Your Own Cheese: I know it’s tempting to buy the pre-shredded bags. I’ve done it. But those bags have anti-caking agents that prevent the cheese from melting smoothly. Freshly shredded cheese melts into a creamy, cohesive layer. It’s a small step that makes a big difference.
Multitasking Strategy: While the beef is browning, dice your onion and mince your garlic. While the rice is simmering, shred your cheese. This recipe moves fast, and having everything ready makes it stress-free.
Variations & Adaptations
This recipe is a great base for experimenting. Here are some variations I’ve tried and loved:
- Mexican-Style Skillet: Add 1 teaspoon of cumin, ½ teaspoon of chili powder, and a 4-ounce can of diced green chiles with the tomato paste. Top with pepper jack cheese and a squeeze of lime juice. Serve with tortilla chips on the side.
- Vegetable-Packed Version: Add 1 cup of frozen peas and carrots during the last 5 minutes of simmering. Or stir in a handful of fresh spinach right before adding the cheese—it wilts down and adds color without changing the flavor much.
- Low-Carb Adaptation: Swap the rice for 2 cups of cauliflower rice. Reduce the broth to ½ cup and cook for only 8-10 minutes, since cauliflower rice cooks much faster. The texture is different, but it’s still satisfying.
- Spicy Kick: Add ½ teaspoon of red pepper flakes with the paprika, or stir in a diced jalapeño with the onion. For extra heat, use pepper jack cheese instead of cheddar.
- Herb-Infused: Stir in 1 teaspoon of dried thyme or oregano with the seasonings. Fresh herbs like parsley or basil make a great garnish at the end.
Personal Variation: My family loves when I add a can of drained black beans and a handful of frozen corn along with the broth. It stretches the meal further and adds a little sweetness. My youngest calls it “confetti dinner.”
Serving & Storage Suggestions
Serving: Serve this skillet hot, straight from the pan. It’s a complete meal on its own, but it pairs beautifully with a simple side salad dressed with vinaigrette—the acidity cuts through the richness. Steamed green beans or a handful of cherry tomatoes on the side also work well. For a heartier meal, serve with warm flour tortillas or crusty bread to soak up any extra cheesy goodness.
Storage: Let any leftovers cool completely before storing. Transfer to an airtight container and refrigerate for up to 4 days. The flavors actually meld together overnight, so leftovers taste even better the next day. I’ve been known to make a double batch just for this reason.
Freezing: This skillet freezes beautifully. Portion it into freezer-safe containers and freeze for up to 3 months. Thaw overnight in the refrigerator before reheating.
Reheating: The best way to reheat is in a skillet over medium-low heat with a splash of beef broth or water to loosen it up. Stir occasionally until warmed through. You can also microwave individual portions in 30-second bursts, stirring between each. If the rice seems dry, add a little water or broth.
Flavor Development: I’ve noticed that this dish tastes even better the next day. The rice absorbs more of the beefy flavor, and the cheese melds into the whole dish rather than staying on top. It’s one of those rare recipes where leftovers are genuinely something to look forward to.
Nutritional Information & Benefits
Here’s an approximate nutritional breakdown per serving (based on 6 servings):
| Nutrient | Amount per Serving |
|---|---|
| Calories | 420 |
| Protein | 28g |
| Fat | 18g |
| Saturated Fat | 9g |
| Carbohydrates | 35g |
| Fiber | 1g |
| Sugar | 3g |
| Sodium | 680mg |
Health Benefits: This recipe offers a good balance of protein from the beef, carbohydrates from the rice for sustained energy, and calcium from the cheese for bone health. The onions and garlic provide antioxidants and anti-inflammatory compounds. To boost the fiber content, consider adding vegetables or using brown rice.
Dietary Considerations: This recipe is naturally nut-free and egg-free. For a gluten-free version, ensure your beef broth is certified gluten-free. For a lower-sodium option, use low-sodium broth and reduce the added salt. To make it lighter, use lean ground beef and reduced-fat cheese.
Allergen Note: Contains dairy from the cheese. If you’re lactose intolerant, use a lactose-free cheddar or a dairy-free cheese alternative.
Conclusion
This Quick Cheesy Ground Beef and Rice Skillet is the kind of recipe that becomes a family staple—not because it’s fancy, but because it’s reliable. It shows up on busy nights, on tired nights, on nights when you need something that just works. The ingredients are simple, the method is straightforward, and the result is a warm, satisfying meal that brings everyone to the table.
I hope you make this your own. Add your favorite spices, throw in whatever vegetables you have, or double the cheese—I won’t judge. That’s the beauty of a skillet dinner. It’s forgiving. It’s flexible. And it’s always, always good.
If you try this recipe, I’d love to hear about it. Leave a comment below and let me know how it turned out for your family. Did you add a twist? Did your kids ask for seconds? Share your story—I read every single comment, and nothing makes me happier than knowing this little recipe found a place in your kitchen.
Happy cooking, friends. You’ve got this.
Frequently Asked Questions
Can I use ground turkey or chicken instead of beef?
Absolutely. Ground turkey or chicken works well, though they’re leaner. Add a tablespoon of olive oil when browning to keep it moist, and consider adding a little extra seasoning since poultry is milder than beef.
Why is my rice still crunchy after 20 minutes?
This usually happens if the heat was too low or the lid wasn’t sealed properly. Make sure your liquid is at a gentle simmer before covering. If the rice is still crunchy, add ¼ cup of broth, cover, and cook for 5 more minutes on low heat.
Can I make this recipe in advance for meal prep?
Yes! This recipe is great for meal prep. Cook it completely, let it cool, and portion it into containers. It reheats beautifully. I often make a double batch on Sunday for easy lunches throughout the week.
How can I make this recipe dairy-free?
Use a dairy-free shredded cheese alternative. Look for one that melts well—some brands are better than others. You can also skip the cheese entirely and add a tablespoon of nutritional yeast for a cheesy flavor without the dairy.
Can I add more vegetables to this dish?
Definitely. Diced bell peppers, zucchini, or mushrooms can be added with the onion. Frozen peas, corn, or spinach work well when stirred in during the last few minutes of cooking. Just keep the total vegetable volume to about 1 cup so you don’t throw off the liquid ratio.
Pin This Recipe!
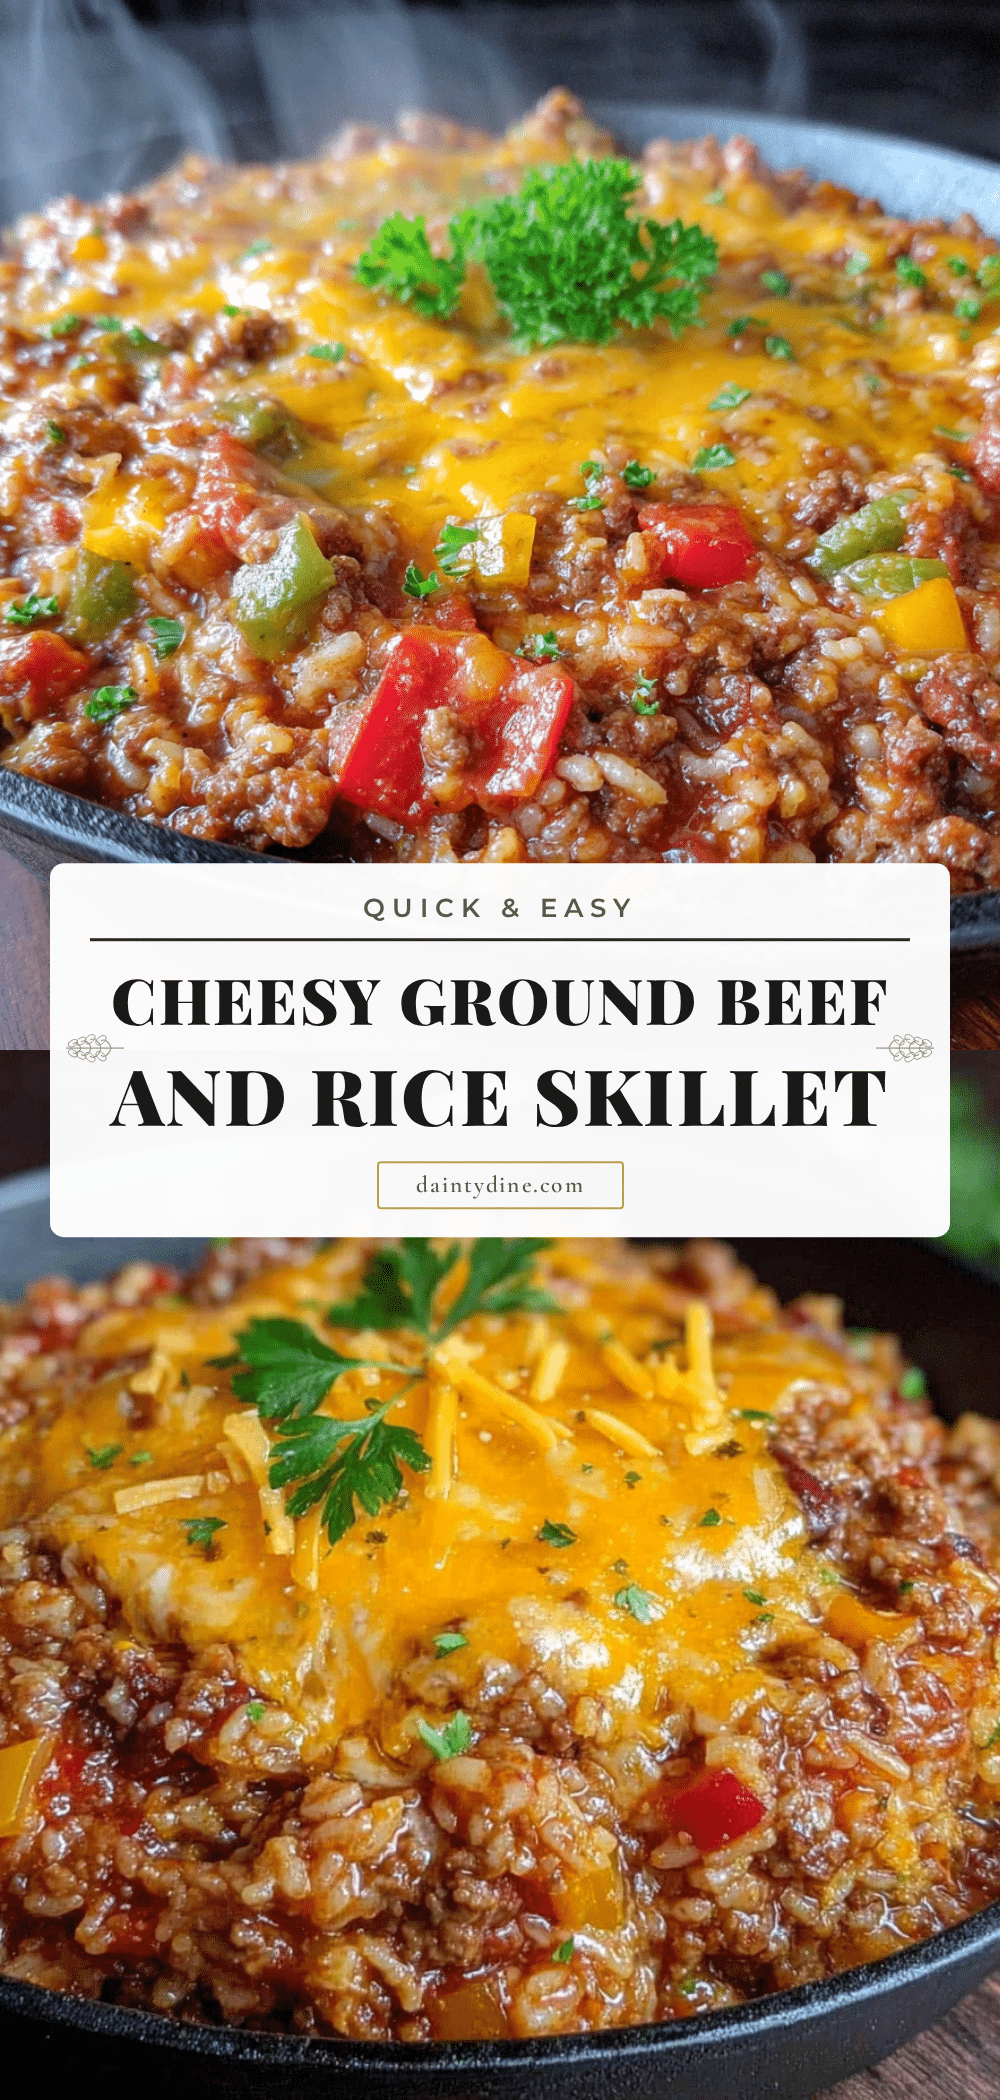
Quick Cheesy Ground Beef and Rice Skillet – Easy Family Dinner

A quick, budget-friendly one-pot meal featuring seasoned ground beef, tender rice, and melted cheddar cheese. Ready in under 30 minutes, it’s a comforting weeknight dinner that pleases the whole family.
- Prep Time: 10 minutes
- Cook Time: 20 minutes
- Total Time: 30 minutes
- Yield: 6 servings 1x
- Category: Main Course
- Cuisine: American
Ingredients
- 1 pound (450g) ground beef (80/20 recommended)
- 1 cup (200g) long-grain white rice, uncooked
- 1½ cups (170g) shredded sharp cheddar cheese
- 2 cups (480ml) low-sodium beef broth
- 1 medium yellow onion, diced (about 1 cup)
- 3 cloves garlic, minced
- 2 tablespoons tomato paste
- 1 teaspoon paprika (smoked or regular)
- 1 teaspoon salt
- ½ teaspoon black pepper
- Optional: chopped fresh parsley, sliced green onions, or red pepper flakes for garnish
Instructions
- Brown the ground beef: Place a large skillet over medium-high heat. Add the ground beef and break it apart with a wooden spoon. Cook for 5-7 minutes, stirring occasionally, until browned and no longer pink. Leave about 1 tablespoon of fat in the pan.
- Sauté the aromatics: Reduce heat to medium. Add the diced onion and cook for 3-4 minutes until softened. Add the minced garlic and cook for 30 seconds until fragrant.
- Add tomato paste and seasonings: Stir in the tomato paste, paprika, salt, and black pepper. Cook for 1 minute, stirring constantly.
- Add rice and broth: Pour in the uncooked rice and stir to coat. Add the beef broth, scraping up any browned bits from the bottom. Bring to a gentle boil.
- Simmer until rice is tender: Reduce heat to low, cover with a tight-fitting lid, and simmer for 18-20 minutes. Do not lift the lid during this time. Check the rice; it should be tender and have absorbed most of the liquid. If still firm, cook 2-3 more minutes.
- Add cheese: Remove from heat. Sprinkle shredded cheddar evenly over the top. Cover and let sit for 2-3 minutes until melted. For a golden top, broil for 1-2 minutes.
- Rest and serve: Let sit uncovered for 2 minutes. Garnish with parsley or green onions if desired. Serve directly from the skillet.
Notes
For best results, use freshly shredded cheese (pre-shredded contains anti-caking agents that affect melting). Do not lift the lid while rice is simmering. If rice is still crunchy after 20 minutes, add ¼ cup broth and cook 5 more minutes. Leftovers keep in the fridge for up to 4 days and freeze for up to 3 months.
Nutrition
- Serving Size: 1 serving (about 1.5
- Calories: 420
- Sugar: 3
- Sodium: 680
- Fat: 18
- Saturated Fat: 9
- Carbohydrates: 35
- Fiber: 1
- Protein: 28
Keywords: cheesy ground beef and rice skillet, easy weeknight dinner, one-pot meal, ground beef recipe, quick family dinner


