Love this? Save it for later!
Share the inspiration with your friends
“You know that moment when a dessert isn’t just food but a whole celebration on a plate?” That’s exactly what happened one sweltering July afternoon at my friend Mark’s block party. I was lugging a tray of something pretty ordinary when his neighbor—this quiet guy named Jim who rarely spoke more than a nod—rolled out the most stunning July 4th flag cake I’d ever seen. It wasn’t just the bright red, white, and blue colors or the flawless, even layers that caught my eye; it was how effortlessly it stole the spotlight like it belonged to the party’s headliner. I mean, honestly, the way those layers held up, so perfectly straight and vibrant, made me rethink how I’d ever approached patriotic desserts before.
That day, I was scribbling notes on a crumpled napkin while Jim calmly explained his secret technique between bites of hot dogs and laughter. I remember one of my kids accidentally knocking over the frosting bowl—and rather than a disaster, it turned into a quick lesson in frosting rescue tactics. Maybe you’ve been there, juggling kids, sun, and party prep all at once. What stuck with me was how this cake wasn’t just a showpiece; it was a joy to make and even better to eat.
Since then, I’ve tinkered with that recipe until it felt like mine—perfectly balanced, easy enough to whip up after work, and still showing off those bold, festive colors that make any Fourth of July gathering feel extra special. Let me tell you, this Perfect July 4th Flag Cake with Even Layers and Vibrant Colors isn’t just a dessert; it’s a slice of celebration you can hold in your hands.
Why You’ll Love This Recipe
After countless tries and a few frosting mishaps (trust me, I’ve been there), I’ve landed on a July 4th flag cake recipe that’s genuinely a crowd-pleaser. What makes it stand out isn’t just the show-stopping look but the ease and flavor that come together without the stress.
- Quick & Easy: You can get this cake from batter to table in under two hours—ideal for last-minute party plans or when you realize dessert is missing at the last minute.
- Simple Ingredients: No need for specialty stores; most ingredients are pantry staples or easy to find at any grocery.
- Perfect for Patriotic Celebrations: It’s ideal for July 4th, Memorial Day, or any summer gathering where you want to impress with minimal fuss.
- Crowd-Pleaser: Kids and adults alike rave about the moist texture and balanced sweetness. Bonus: the vibrant colors make it irresistible.
- Unbelievably Delicious: The layers stay moist and soft, with just enough tang in the frosting to keep things from being too sweet—trust me, that balance is key.
This isn’t just another layered cake. The trick is in the batter’s consistency and a few frosting techniques I picked up from professional bakers, which help keep those layers sharp and colors popping. Honestly, when you slice into it and see those clean lines and bold stars, it’s like fireworks on a plate—no special skills needed. Plus, it’s the kind of dessert that gets you compliments but also lets you sneak off for a quiet second slice before the crowd arrives.
What Ingredients You Will Need
This July 4th flag cake uses straightforward ingredients that combine to create those distinct, even layers with vibrant colors. Most are pantry staples, with a few additions to achieve the perfect texture and frosting consistency.
- For the Cake Batter:
- All-purpose flour – 2 ½ cups (315g), sifted for lightness
- Baking powder – 2 ½ teaspoons, to keep layers fluffy
- Salt – ½ teaspoon, to balance sweetness
- Unsalted butter – 1 cup (227g), softened (I prefer Kerrygold for creaminess)
- Granulated sugar – 2 cups (400g), for that classic sweetness
- Large eggs – 4, room temperature (important for even mixing)
- Pure vanilla extract – 2 teaspoons, adds warmth to the flavor
- Whole milk – 1 cup (240ml), room temperature (can swap for almond milk for dairy-free)
- Gel food coloring – red and blue (I recommend AmeriColor for vibrant, natural hues)
- For the Frosting:
- Unsalted butter – 1 cup (227g), softened
- Powdered sugar – 4 cups (480g), sifted to avoid lumps
- Heavy cream – 2 to 3 tablespoons (30-45ml), to adjust consistency
- Pure vanilla extract – 1 teaspoon
- Pinch of salt, to cut the sweetness
- Decoration:
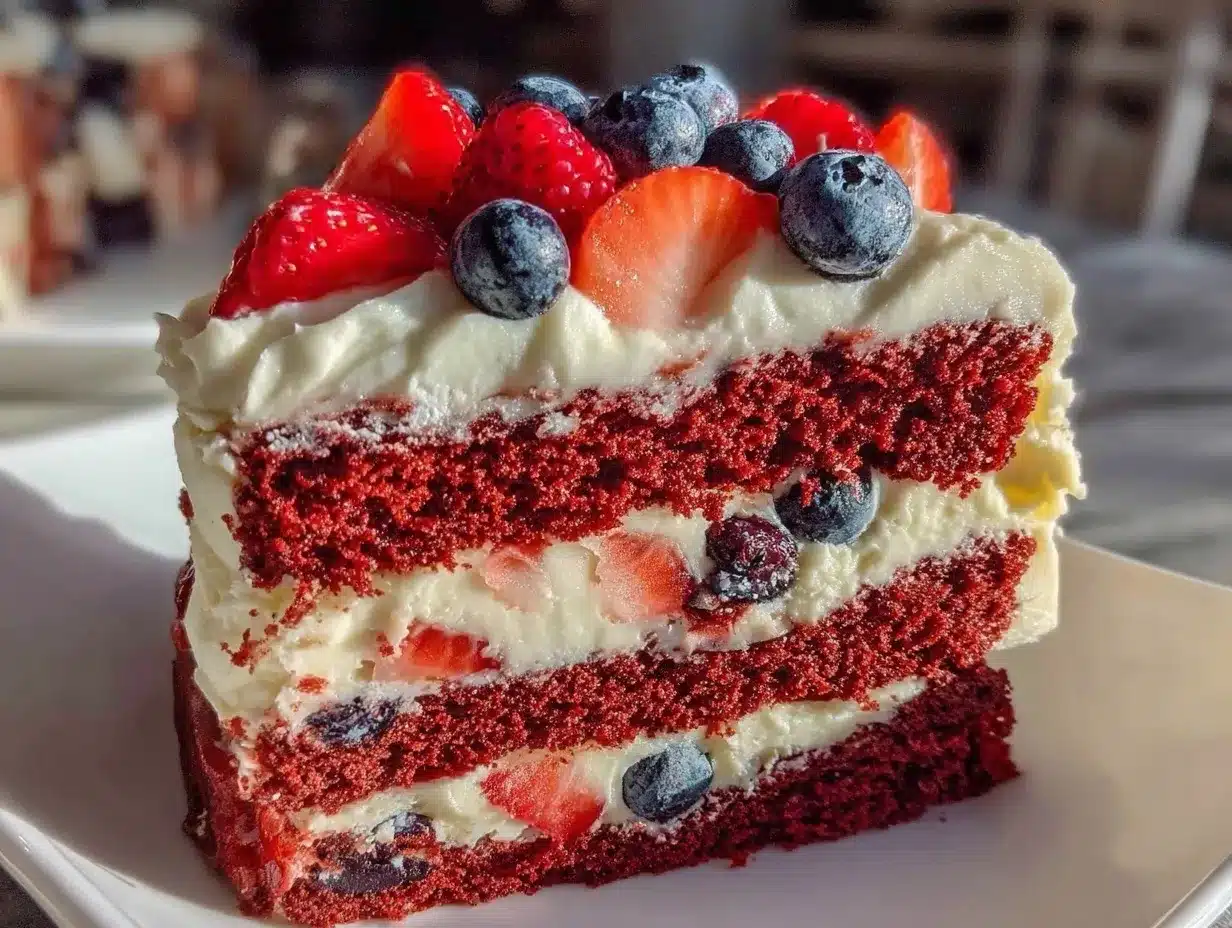
- Fresh strawberries – sliced, for the red stripes
- Blueberries – fresh, for the blue field
- White chocolate stars or edible star decorations (optional)
Pro tip: When coloring the batter, add gel food coloring little by little until you hit that perfect shade. I’ve learned that too much liquid color can mess with the batter’s texture, so gel is your best friend here. Also, for the freshest berries, I usually pick them up the morning of the party at my local farmer’s market—there’s just something about that brightness that makes the cake pop even more.
Equipment Needed
- Three 8-inch (20 cm) round cake pans – essential for the even layers. If you don’t have three, you can bake in batches, but it takes longer.
- Electric stand mixer or hand mixer – makes creaming butter and sugar effortless.
- Mixing bowls – at least two, for separating batter and frosting.
- Offset spatula – perfect for smooth frosting application and clean edges.
- Cooling racks – allows cakes to cool evenly without sogginess.
- Measuring cups and spoons – accuracy is key for baking success.
- Toothpicks or cake tester – to check bake doneness.
If you don’t own a stand mixer, a hand mixer works just fine—I’ve made this cake many times with both. For budget-friendly cake pans, non-stick aluminum sets from brands like Wilton do the trick and clean up easily. Just remember to line your pans with parchment paper to avoid sticking and to help with clean removal of your layers.
Preparation Method
- Preheat your oven to 350°F (175°C) and grease the three 8-inch cake pans. Line the bottoms with parchment paper circles for easy cake release. This step is crucial to get those clean layers without cracking.
- In a medium bowl, whisk together 2 ½ cups (315g) sifted all-purpose flour, 2 ½ teaspoons baking powder, and ½ teaspoon salt. Set aside. This dry mix is what gives the cake its structure and rise.
- In your mixer, cream 1 cup (227g) softened unsalted butter and 2 cups (400g) granulated sugar on medium speed until light and fluffy—usually about 4-5 minutes. Don’t rush this part; it’s the secret to a tender crumb.
- Add the eggs, one at a time, beating well after each addition. Then stir in 2 teaspoons pure vanilla extract. Your batter should be smooth and glossy here.
- Alternate adding the dry ingredients and 1 cup (240ml) whole milk to the butter mixture, starting and ending with the dry. Mix each addition just until combined to avoid overworking the batter.
- Divide the batter evenly into three bowls. Add red gel food coloring to one, blue to another, and leave the last plain for the white layer. Remember to add color slowly—you can always add more, but can’t take it out!
- Pour each colored batter into the prepared pans—about 1 1/3 cups (320 ml) per pan. Tap the pans gently on the counter to remove air bubbles.
- Bake for 25-30 minutes or until a toothpick inserted into the center comes out clean. Rotate pans halfway through for even baking if your oven runs hot on one side.
- Cool cakes in pans for 10 minutes, then invert onto cooling racks. Remove parchment paper and let cool completely. Cooling fully prevents frosting meltdown.
- While cakes cool, prepare the frosting: Beat 1 cup (227g) softened unsalted butter on medium speed until smooth. Gradually add 4 cups (480g) powdered sugar, mixing on low speed. Add 2-3 tablespoons (30-45ml) heavy cream, 1 teaspoon vanilla extract, and a pinch of salt, beating on high until fluffy. Adjust consistency with more cream or powdered sugar as needed.
- Once cakes are cool, assemble: Place the red layer on your cake stand or plate, spread a thin layer of frosting. Repeat with the white and blue layers. Use the offset spatula to smooth the top and sides.
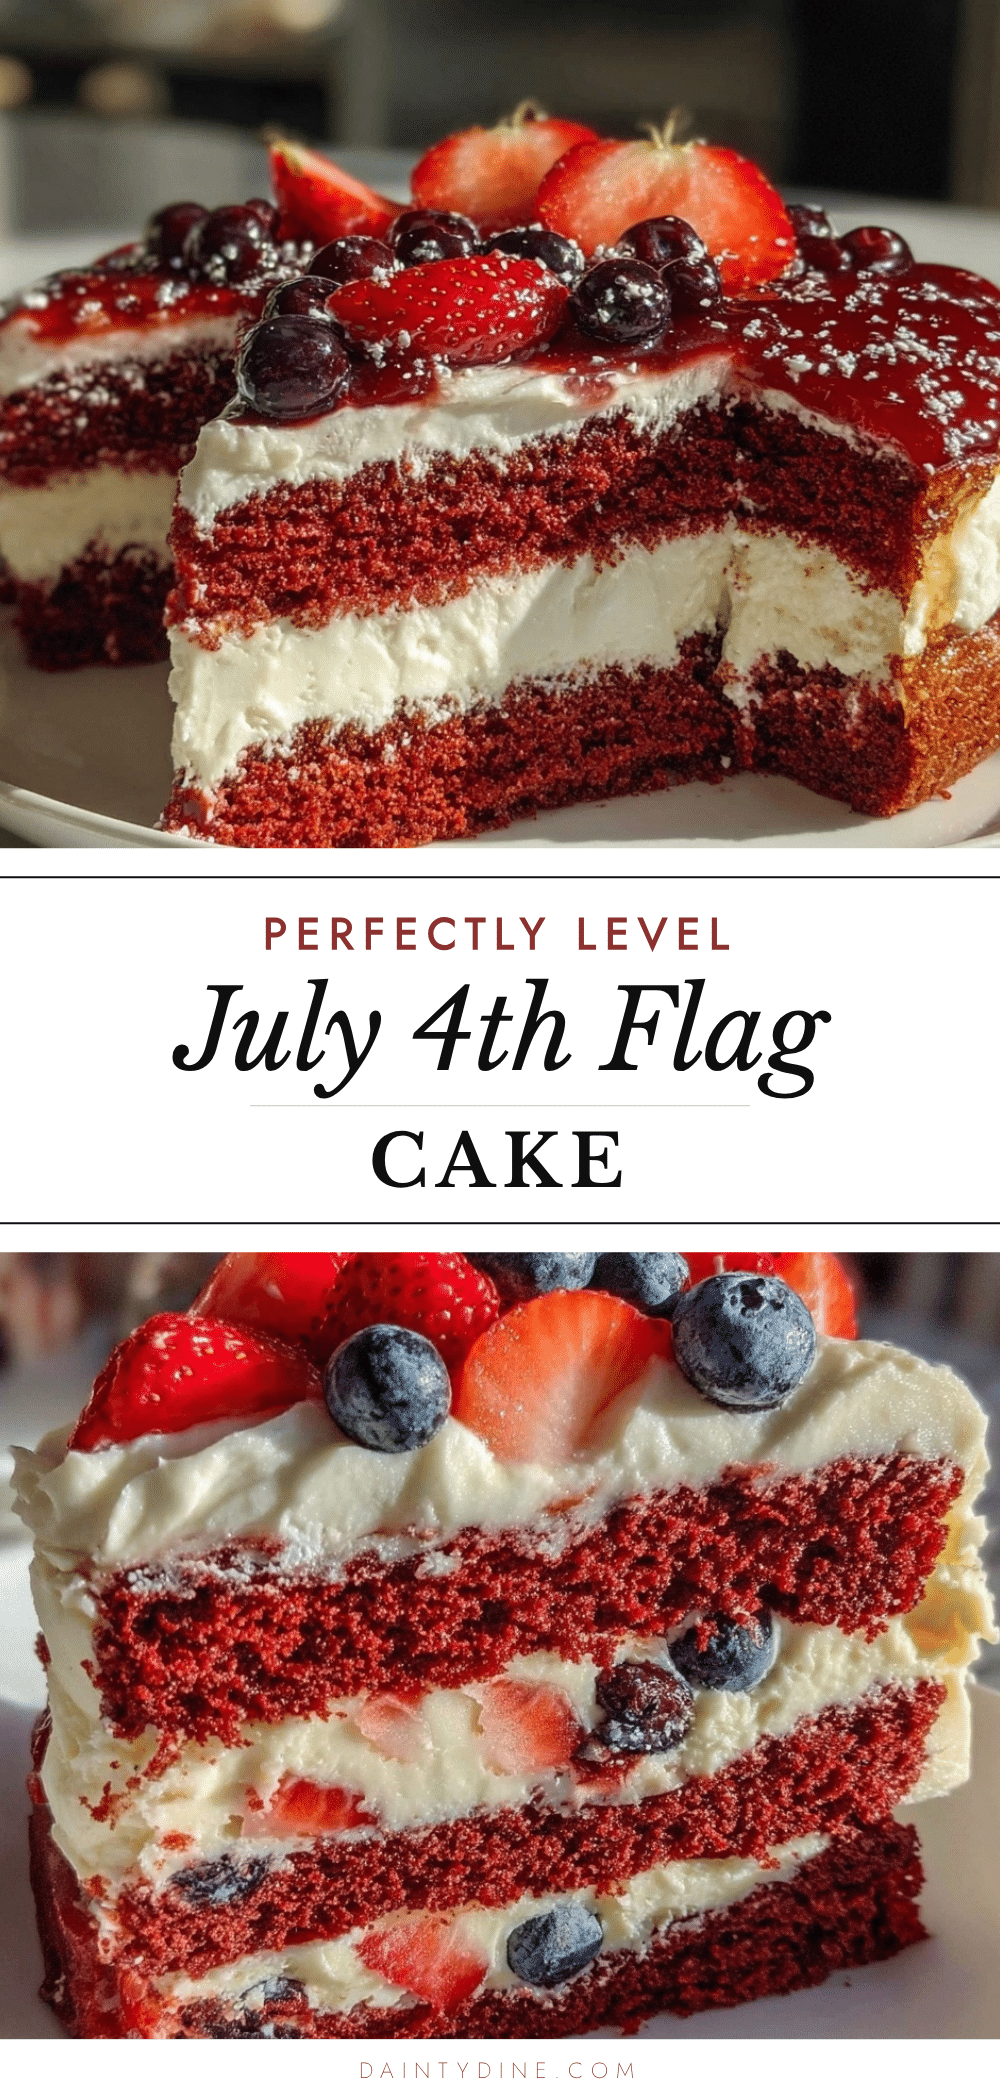
- Decorate the top: Arrange fresh strawberries in stripes for the red, leave some frosting white, and cluster blueberries in the corner for the blue field. Add white chocolate or edible stars if desired.
Tip: If any layers have domed during baking, use a serrated knife to level them before stacking. This keeps your cake from leaning or collapsing. I once tried skipping this step and ended up with a lopsided flag—lesson learned!
Cooking Tips & Techniques
Getting those even layers and vibrant colors demands a bit of finesse, but a few tips from my experience will save you stress:
- Room temperature ingredients: Butter, eggs, and milk should all be about the same temperature to blend smoothly without curdling.
- Don’t overmix the batter: Mix until just combined after adding flour to prevent a dense cake.
- Use gel food coloring: It provides bright colors without thinning your batter, unlike liquid dyes.
- Level your cakes: A flat surface means neat layers and no wobble. I use a small serrated knife or a cake leveler.
- Chill the frosting: If it gets too soft while frosting, pop it in the fridge for 10 minutes to firm up—this makes spreading much easier.
- Frost in thin layers: Start with a crumb coat (thin frosting layer) to seal crumbs, chill for 15 minutes, then add the final thicker layer.
- Multitask smartly: Bake layers in parallel if you have multiple pans, or prep your frosting while the cakes bake to save time.
One time, I tried rushing the frosting and ended up with a crumbly mess—lesson? Patience with frosting always pays off. Also, using an offset spatula makes smoothing the frosting so much easier and gives a professional look without effort.
Variations & Adaptations
This flag cake recipe is flexible, so feel free to make it your own:
- Gluten-Free: Swap all-purpose flour for a 1:1 gluten-free baking blend like Bob’s Red Mill. The texture stays surprisingly close!
- Dairy-Free/Vegan: Use coconut or almond milk instead of dairy milk, vegan butter substitutes, and aquafaba (chickpea water) in place of eggs.
- Flavor Twists: Add lemon zest to the batter for a citrusy zing, or swap vanilla extract for almond or coconut extract for a unique flavor profile.
- Seasonal Fruit: During summer, fresh raspberries can replace strawberries for red stripes, or blackberries for a deeper blue tone.
- Alternative Frostings: Cream cheese frosting adds tang and richness, or try a whipped coconut cream frosting for a lighter finish.
Personally, I once made a version with a hint of espresso powder in the batter—unexpected but surprisingly delicious with the berry toppings. The key is balancing flavors without losing that classic flag cake vibe.
Serving & Storage Suggestions
This Perfect July 4th flag cake shines best served at room temperature, allowing the frosting to soften slightly and the flavors to meld. Slice it with a sharp serrated knife for clean cuts that show those distinct, even layers.
Pair the cake with fresh lemonade, iced tea, or even a berry-infused sparkling water for a refreshing combo that complements the sweetness. If you’re serving a crowd, this cake’s vibrant look makes it a centerpiece all on its own.
Leftovers? Wrap the cake tightly with plastic wrap or store in an airtight container in the refrigerator for up to 4 days. For longer storage, freeze individual slices wrapped in foil and plastic wrap; thaw overnight in the fridge before serving.
Reheating isn’t necessary, but if you want a soft slice, let it warm slightly at room temperature for about 20-30 minutes. You’ll notice the flavors deepen and the frosting’s texture becomes more luscious after a day or two—if it lasts that long!
Nutritional Information & Benefits
Per serving (based on 12 slices), this cake provides approximately 350 calories, 15g fat, 45g carbohydrates, and 3g protein. It’s a treat, but one made with real ingredients and no artificial fillers.
The fresh berries add antioxidants, vitamins, and a burst of natural sweetness that pairs beautifully with the rich cake. Using real butter and whole milk gives a satisfying mouthfeel and essential nutrients like calcium and vitamin A.
For those watching carbs or gluten, the variations mentioned earlier can make this dessert more inclusive without losing the festive spirit. And honestly, a slice of this cake feels like a reward for all your hard work in the kitchen—and that’s a wellness win in itself!
Conclusion
This Perfect July 4th Flag Cake with Even Layers and Vibrant Colors is more than just a dessert; it’s a celebration you can bake at home with confidence—and maybe a little fun mess along the way. Whether you’re a seasoned baker or just looking for an impressive but manageable patriotic treat, this recipe hits the mark every time.
Feel free to tweak the colors, flavors, or decorations to match your style. I love how adaptable it is; it’s become my go-to for not only Independence Day but summer birthdays and picnics too. Honestly, every time I see those clean, colorful layers, I smile—because it means I pulled off something special without stress.
If you make this cake, I’d love to hear how it turned out or what variations you tried. Leave a comment below or share your photos! Now, grab your mixing bowls and let that kitchen party begin!
FAQs
How do I keep the cake layers from cracking?
Make sure your oven temperature is accurate—too hot and the cake tops may crack. Also, avoid overmixing the batter and use parchment paper to help layers release easily.
Can I make this cake ahead of time?
Yes! You can bake the layers a day in advance and store them wrapped tightly in plastic wrap. Assemble and frost the day you plan to serve for best freshness.
What’s the best way to get vibrant red and blue colors?
Use gel or paste food coloring rather than liquid. Add color gradually and mix well until you reach the desired brightness.
Can I use frozen berries for decoration?
Fresh berries are best for texture and appearance, but if you must use frozen, thaw and pat them dry to avoid extra moisture on the cake.
How should I slice the cake for the best presentation?
Use a sharp serrated knife and wipe the blade clean between cuts. Slice slowly to keep the layers intact and show off those vibrant colors beautifully.
Pin This Recipe!
Perfect July 4th Flag Cake Recipe Easy Vibrant Patriotic Dessert Tutorial
A vibrant and easy-to-make July 4th flag cake featuring even layers and patriotic colors, perfect for summer celebrations and crowd-pleasing dessert tables.
- Prep Time: 30 minutes
- Cook Time: 30 minutes
- Total Time: 1 hour
- Yield: 12 servings
- Category: Dessert
- Cuisine: American
Ingredients
- All-purpose flour – 2 ½ cups (315g), sifted
- Baking powder – 2 ½ teaspoons
- Salt – ½ teaspoon
- Unsalted butter – 1 cup (227g), softened (plus 1 cup for frosting)
- Granulated sugar – 2 cups (400g)
- Large eggs – 4, room temperature
- Pure vanilla extract – 2 teaspoons (plus 1 teaspoon for frosting)
- Whole milk – 1 cup (240ml), room temperature (can substitute almond milk)
- Gel food coloring – red and blue
- Powdered sugar – 4 cups (480g), sifted
- Heavy cream – 2 to 3 tablespoons (30-45ml)
- Pinch of salt (for frosting)
- Fresh strawberries – sliced (for decoration)
- Blueberries – fresh (for decoration)
- White chocolate stars or edible star decorations (optional)
Instructions
- Preheat oven to 350°F (175°C) and grease three 8-inch cake pans. Line bottoms with parchment paper.
- Whisk together flour, baking powder, and salt in a medium bowl; set aside.
- Cream 1 cup softened unsalted butter and granulated sugar in a mixer on medium speed until light and fluffy, about 4-5 minutes.
- Add eggs one at a time, beating well after each addition, then stir in 2 teaspoons vanilla extract.
- Alternate adding dry ingredients and milk to the butter mixture, starting and ending with dry ingredients. Mix just until combined.
- Divide batter evenly into three bowls. Add red gel food coloring to one, blue to another, and leave one plain for the white layer.
- Pour each colored batter into prepared pans (about 1 1/3 cups per pan). Tap pans gently to remove air bubbles.
- Bake for 25-30 minutes or until a toothpick inserted in the center comes out clean. Rotate pans halfway through baking if needed.
- Cool cakes in pans for 10 minutes, then invert onto cooling racks. Remove parchment and cool completely.
- Prepare frosting by beating 1 cup softened butter until smooth. Gradually add powdered sugar, then heavy cream, vanilla extract, and salt. Beat until fluffy and adjust consistency as needed.
- Level cakes if domed. Assemble cake by placing red layer on plate, spreading thin frosting layer. Repeat with white and blue layers. Smooth top and sides with offset spatula.
- Decorate top with sliced strawberries in stripes, leave some frosting white, cluster blueberries in corner, and add white chocolate or edible stars if desired.
Notes
Use gel food coloring to avoid thinning batter. Add color gradually. Chill frosting if too soft for easier spreading. Level domed cakes with serrated knife for even layers. Bake layers in parallel if possible to save time. Store leftovers wrapped tightly in refrigerator up to 4 days or freeze slices.
Nutrition
- Serving Size: 1 slice (1/12 of cak
- Calories: 350
- Sugar: 30
- Sodium: 200
- Fat: 15
- Saturated Fat: 9
- Carbohydrates: 45
- Fiber: 1
- Protein: 3
Keywords: July 4th cake, flag cake, patriotic dessert, layered cake, easy cake recipe, vibrant cake, summer dessert