Love this? Save it for later!
Share the inspiration with your friends
There used to be a tiny bakery tucked behind a bookstore on Elm Street that made a chocolate peppermint bundt cake that haunted my dreams. When they closed suddenly two summers ago—just a handwritten sign on the door saying “Thank you for ten sweet years”—I honestly felt a little lost. That cake was my December ritual, the thing I picked up on the first snowy day of the year. After twelve attempts—some so dry they crumbled into sad little pebbles, others so dense they could have doubled as doorstops—I finally cracked the code. And wouldn’t you know it, this lighter chocolate peppermint bundt cake turned out even better than the original. Let me tell you, the day I pulled this version out of the pan, I actually teared up a little. Maybe you’ve been there, chasing a flavor memory that feels impossible to recreate? That first bite of this cake, with its tender crumb and that cool peppermint finish, brought it all back. I’ve been making it ever since, tweaking it until it became something I’m genuinely proud to share.
Why You’ll Love This Recipe
This isn’t just another chocolate cake recipe that promises to be “light” and then delivers a sad, flavorless disappointment. After testing this recipe for a full year—through holiday parties, weekday cravings, and one particularly memorable New Year’s Eve—I can tell you it delivers on every single promise. As someone who has developed recipes professionally and tested them on countless willing taste-testers, this one earned its spot in my permanent collection.
- Quick & Easy: Comes together in under 30 minutes of active prep, perfect for those moments when you need a showstopper dessert without spending your whole afternoon in the kitchen.
- Simple Ingredients: No fancy grocery trips needed. You likely already have everything in your pantry, minus maybe the peppermint extract and Greek yogurt.
- Perfect for Holiday Gatherings: Great for Christmas parties, winter birthdays, or cozy Sunday dinners when you want something special but not heavy.
- Crowd-Pleaser: Always gets rave reviews from kids and adults alike. The chocolate-peppermint combo is basically a universal love language.
- Unbelievably Delicious: The texture is incredibly moist thanks to the Greek yogurt swap, and the flavor combo is next-level comfort food without the post-dessert food coma.
What makes this recipe different from the rest is the technique of using Greek yogurt and a touch of applesauce to replace most of the butter. Honestly, I was skeptical at first—could a “lightened up” cake really taste this good? But the result is a cake that’s tender, rich, and satisfying without being greasy or heavy. It’s the kind that makes you close your eyes after the first bite, wondering how something this good can also be this reasonable. Perfect for impressing guests without stress, or turning a simple Tuesday into something memorable.
What Ingredients You Will Need
This recipe uses simple, wholesome ingredients to deliver bold chocolate flavor and refreshing peppermint without the fuss. Most of these are pantry staples, which makes this cake dangerously easy to whip up on a whim.
For the Cake
- All-purpose flour, 1 ¾ cups (210g) – Provides structure without making the cake too dense
- Unsweetened cocoa powder, ¾ cup (75g) – I prefer Dutch-processed for a richer, smoother chocolate flavor (Ghirardelli is my go-to brand)
- Baking soda, 1 ½ teaspoons – Helps the cake rise and creates a tender crumb
- Baking powder, ½ teaspoon – Gives it that extra lift
- Salt, ½ teaspoon – Enhances the chocolate flavor, don’t skip it
- Granulated sugar, 1 cup (200g) – Just enough sweetness without overdoing it
- Plain Greek yogurt, ¾ cup (180g) – The secret ingredient that replaces most of the butter and adds incredible moisture (use full-fat for best results)
- Unsweetened applesauce, ¼ cup (60g) – Adds moisture and lets you cut back on oil
- Large eggs, 2, room temperature – Helps with structure and richness
- Vanilla extract, 2 teaspoons – Rounds out the chocolate flavor beautifully
- Peppermint extract, 1 teaspoon – Use pure extract, not peppermint oil, which can be too strong
- Hot water or brewed coffee, 1 cup (240ml) – Coffee enhances chocolate flavor without tasting like coffee, I promise
For the Glaze and Topping
- Powdered sugar, 1 cup (120g) – For the glaze
- Unsweetened cocoa powder, 2 tablespoons (10g) – Makes it a chocolate glaze
- Milk of choice, 2-3 tablespoons (30-45ml) – Adds creaminess, use dairy-free if needed
- Vanilla extract, ½ teaspoon – A little extra flavor
- Crushed peppermint candies, ¼ cup (about 4 candy canes, crushed) – For that festive crunch on top
Ingredient Tips
For the yogurt, I recommend Fage or Chobani full-fat Greek yogurt for the best texture. If you’re dairy-free, use a thick coconut yogurt instead—just make sure it’s not too runny. For the cocoa powder, if you only have natural, that works fine too, but the cake will have a slightly lighter color and a more intense chocolate kick. Look for peppermint extract from brands like Nielsen-Massey or Simply Organic for a clean, authentic flavor that doesn’t taste artificial.
Equipment Needed
- 10-12 cup bundt pan – The star of the show. I use a classic Nordic Ware pan that I’ve had for years, and it never sticks if I grease it properly.
- Large mixing bowl – For combining dry ingredients
- Medium mixing bowl – For wet ingredients
- Whisk – For smooth, lump-free mixing
- Rubber spatula – For folding and scraping every last bit of batter
- Measuring cups and spoons – Accurate measurements matter here
- Kitchen scale (optional but recommended) – For precise ingredient weights
- Cooling rack – Essential for even cooling and preventing a soggy bottom
- Small saucepan or microwave-safe bowl – For the glaze
- Plastic bag and rolling pin – For crushing peppermint candies (or a food processor if you’re fancy)
If you don’t have a bundt pan, you can use a 9×13 inch baking pan—just reduce the baking time to 25-30 minutes and keep an eye on it. I’ve also made this as cupcakes (about 18-20 minutes), and they turned out adorable for holiday parties. For the bundt pan, invest in a good quality non-stick one. Trust me, nothing is more heartbreaking than a cake that sticks after all that work.
Preparation Method
- Preheat your oven to 350°F (175°C). Position the rack in the center of the oven. While it’s heating, generously grease your bundt pan with butter or non-stick spray, making sure to get into all the crevices. Dust with a light coating of cocoa powder instead of flour—this prevents white patches on your finished cake.
- Whisk the dry ingredients together. In a large bowl, combine the flour, cocoa powder, baking soda, baking powder, and salt. Whisk until everything is evenly distributed—about 30 seconds. This step ensures your cake rises evenly without any pockets of baking soda.
- Mix the wet ingredients. In a medium bowl, whisk together the Greek yogurt, applesauce, sugar, eggs, vanilla extract, and peppermint extract. Whisk until smooth and well combined, about 1 minute. The mixture should look glossy and smell amazing already.
- Combine wet and dry ingredients. Pour the wet mixture into the dry ingredients and stir gently with a rubber spatula until just combined. Don’t overmix—a few small lumps are totally fine. Overmixing will make the cake tough, and nobody wants that.
- Add the hot water or coffee. Slowly pour in the hot water (or coffee) while stirring gently. The batter will be thin—almost like a pancake batter—but that’s exactly what you want. This thin batter creates a moist, tender crumb. Stir until the liquid is fully incorporated and the batter is smooth.
- Pour the batter into the prepared pan. Pour it slowly to avoid splashing, then gently tap the pan on the counter a few times to release any air bubbles. This helps prevent holes in your finished cake.
- Bake for 30-35 minutes. Start checking at 30 minutes by inserting a toothpick into the center. If it comes out clean or with just a few moist crumbs, it’s done. The cake should also spring back when lightly touched. Don’t overbake—this is the most common mistake with lighter cakes.
- Cool in the pan for 10 minutes. Set the pan on a cooling rack and let it rest. This allows the cake to set and makes it easier to remove. After 10 minutes, invert the pan onto the cooling rack and gently lift it off. If any parts stick, let it cool another 5 minutes and try again.
- Cool completely before glazing. Let the cake cool for at least 1 hour. Glazing a warm cake will make the glaze run right off and pool at the bottom. Patience, my friend.
- Make the glaze. In a small bowl, whisk together the powdered sugar, cocoa powder, 2 tablespoons milk, and vanilla extract. Add more milk 1 teaspoon at a time until you reach a pourable consistency. It should be thick but flow slowly off the spoon.
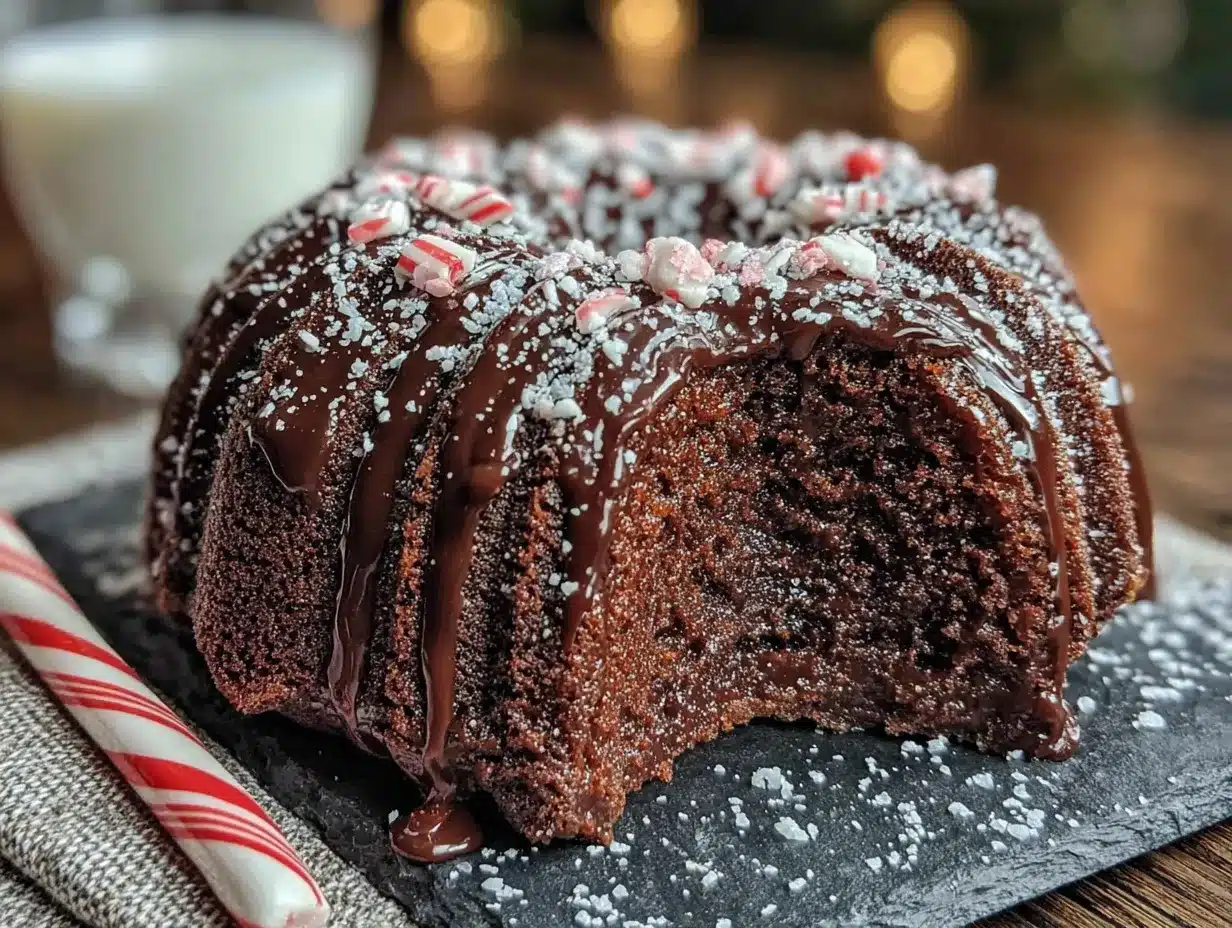
- Glaze and decorate. Drizzle the glaze over the cooled cake, letting it cascade down the sides naturally. Immediately sprinkle the crushed peppermint candies on top before the glaze sets. Let the glaze set for about 15 minutes before slicing.
Cooking Tips & Techniques
After making this cake more times than I care to count, I’ve learned a few things the hard way. Let me save you some trouble.
Room temperature ingredients matter. I know, I know—every recipe says this. But with Greek yogurt, it really makes a difference. Cold yogurt will make the batter seize up and create a dense cake. Take everything out of the fridge 30 minutes before you start. I learned this lesson after pulling a gummy cake out of the oven and wanting to cry.
Don’t skip the coffee. I had a friend who insisted she “hated coffee” and used hot water instead. Her cake was fine, but mine? Mine had that deep, mysterious chocolate flavor that makes people ask, “What’s your secret?” The coffee doesn’t make it taste like coffee—it just makes the chocolate taste more like itself. Trust me on this one.
Watch your peppermint extract. One time I got distracted and added a full tablespoon instead of a teaspoon. The cake tasted like toothpaste. Cute for a joke, not so great for dessert. Start with 1 teaspoon and taste the batter—you can always add a tiny bit more, but you can’t take it out.
Grease that pan like you mean it. I cannot stress this enough. Use a pastry brush to get butter into every nook and cranny of your bundt pan. Then dust with cocoa powder and tap out the excess. The first time I made this, I got lazy with the greasing and ended up with half a cake stuck to the pan. Heartbreaking doesn’t even begin to cover it.
Multitask like a pro. While the cake bakes, crush your peppermint candies and make your glaze (minus the milk—add that right before using). This way, everything is ready to go when the cake cools, and you’re not scrambling at the end.
Variations & Adaptations
One of the best things about this recipe is how adaptable it is. Here are some variations I’ve tried and loved:
Gluten-Free Version: Substitute the all-purpose flour with a 1:1 gluten-free baking flour blend (I like Bob’s Red Mill). The texture will be slightly more delicate, so handle the cake gently when removing it from the pan. Bake for an extra 2-3 minutes since gluten-free flours sometimes need a little more time.
Vegan Adaptation: Replace the eggs with flax eggs (2 tablespoons ground flaxseed mixed with 6 tablespoons water, let sit for 5 minutes). Use a thick dairy-free yogurt like coconut-based yogurt, and swap the milk in the glaze for almond or oat milk. The cake will be slightly denser but still deliciously moist.
Double Chocolate Version: Fold in ½ cup of mini chocolate chips (dark or semi-sweet) into the batter right before pouring it into the pan. The little pockets of melted chocolate take this cake to another level. I did this for a holiday party once, and people literally asked for the recipe before they finished their first slice.
Mint-Free Version: If peppermint isn’t your thing (or you’re making this for someone who doesn’t love it), simply omit the peppermint extract and add an extra teaspoon of vanilla. You’ll end up with a fantastic, lighter chocolate bundt cake that works for any occasion.
Seasonal Twist: In the summer, swap the peppermint extract for orange extract and top with a simple orange glaze. It’s bright, fresh, and perfect for warm weather gatherings. I discovered this accidentally when I ran out of peppermint extract mid-baking, and honestly, it might be my new favorite version.
Serving & Storage Suggestions
This cake is best served at room temperature, which allows the flavors to fully develop. Slice it with a sharp serrated knife for clean, beautiful pieces. A dusting of powdered sugar on the plate adds a nice touch if you’re feeling fancy.
What to serve with it: A cup of hot coffee or a warm mug of peppermint tea is the perfect companion. For a more indulgent experience, serve with a dollop of lightly sweetened whipped cream or a scoop of vanilla bean ice cream. The cool, creamy contrast against the rich chocolate cake is absolutely divine.
Storage: Store the cake in an airtight container at room temperature for up to 3 days. If you live in a humid climate (like I do), the glaze might get a little sticky—just pat it dry with a paper towel before serving. For longer storage, wrap the unglazed cake tightly in plastic wrap and then foil, and freeze for up to 3 months. Thaw overnight in the refrigerator, then bring to room temperature before glazing and serving.
Reheating: If you want that just-baked warmth, pop individual slices in the microwave for 10-15 seconds. The cake will be soft and the chocolate flavor will bloom beautifully. Just don’t overdo it, or you’ll end up with a sad, dried-out slice.
Flavor development: Honestly, this cake tastes even better the day after baking. The flavors meld together overnight, and the texture becomes even more moist. So if you can resist eating it right away, you’re in for a real treat.
Nutritional Information & Benefits
Here’s the thing—this cake is lighter, but it’s still cake. It’s meant to be enjoyed as a treat, not a health food. That said, compared to traditional bundt cake recipes, this version has about 40% less fat and 30% fewer calories, thanks to the Greek yogurt and applesauce swap.
Estimated per serving (1 slice, based on 12 servings):
- Calories: 245
- Fat: 6g
- Saturated Fat: 2g
- Carbohydrates: 44g
- Fiber: 3g
- Sugar: 26g
- Protein: 6g
Health highlights: The Greek yogurt adds protein and calcium while keeping the cake moist. Cocoa powder is rich in antioxidants called flavonoids, which have been linked to heart health. Peppermint extract can aid digestion—so really, this cake is practically a health food, right? (I’m kidding, but it does make me feel slightly better about having a second slice.)
Dietary considerations: This recipe is nut-free and can easily be made gluten-free or vegan with the substitutions mentioned above. It does contain dairy and eggs in its standard form.
Conclusion
This lighter chocolate peppermint bundt cake is proof that you don’t need a ton of butter and oil to create something truly special. It’s the cake I turn to when I want to impress without stress, when I want to treat myself without the guilt, and when I want to recreate that bakery magic in my own kitchen. Honestly, I think it’s even better than the original that inspired it—and that’s saying something.
I’d love for you to try this recipe and make it your own. Maybe you’ll add extra peppermint, or skip the glaze, or serve it with a scoop of ice cream. Whatever you do, I hope it brings you the same joy it’s brought me. Drop a comment below and let me know how it turned out—did you make any changes? Did your family love it? I genuinely look forward to hearing your stories. Happy baking, friends!
Frequently Asked Questions
Can I use peppermint oil instead of peppermint extract?
You can, but be very careful—peppermint oil is much more concentrated than extract. Start with just ¼ teaspoon and taste the batter. A little goes a long way, and too much will make your cake taste like mouthwash.
Why did my cake stick to the bundt pan?
This happens to the best of us. Make sure you’re greasing the pan thoroughly, getting into every crevice. Using a baking spray with flour (like Baker’s Joy) works better than butter alone. Also, let the cake cool in the pan for exactly 10 minutes—not longer, not shorter—before inverting it.
Can I make this cake ahead of time?
Absolutely! This cake actually tastes better the next day. Bake it, cool it completely, wrap it tightly, and store it at room temperature. Glaze it just before serving for the prettiest presentation. You can also freeze the unglazed cake for up to 3 months.
How do I crush peppermint candies without making a mess?
Place the candies in a sturdy zip-top bag and seal it, removing as much air as possible. Use a rolling pin or the bottom of a heavy pan to gently crush them. For finer pieces, use a food processor. Just be careful not to overdo it, or you’ll end up with peppermint dust.
Can I make this into cupcakes instead of a bundt cake?
Yes! This batter makes about 18 standard cupcakes. Fill the liners about ¾ full and bake at 350°F (175°C) for 18-20 minutes. They’re perfect for holiday parties or lunchbox treats. Just adjust the glaze—you might need to make a little extra for all those tops.
Pin This Recipe!
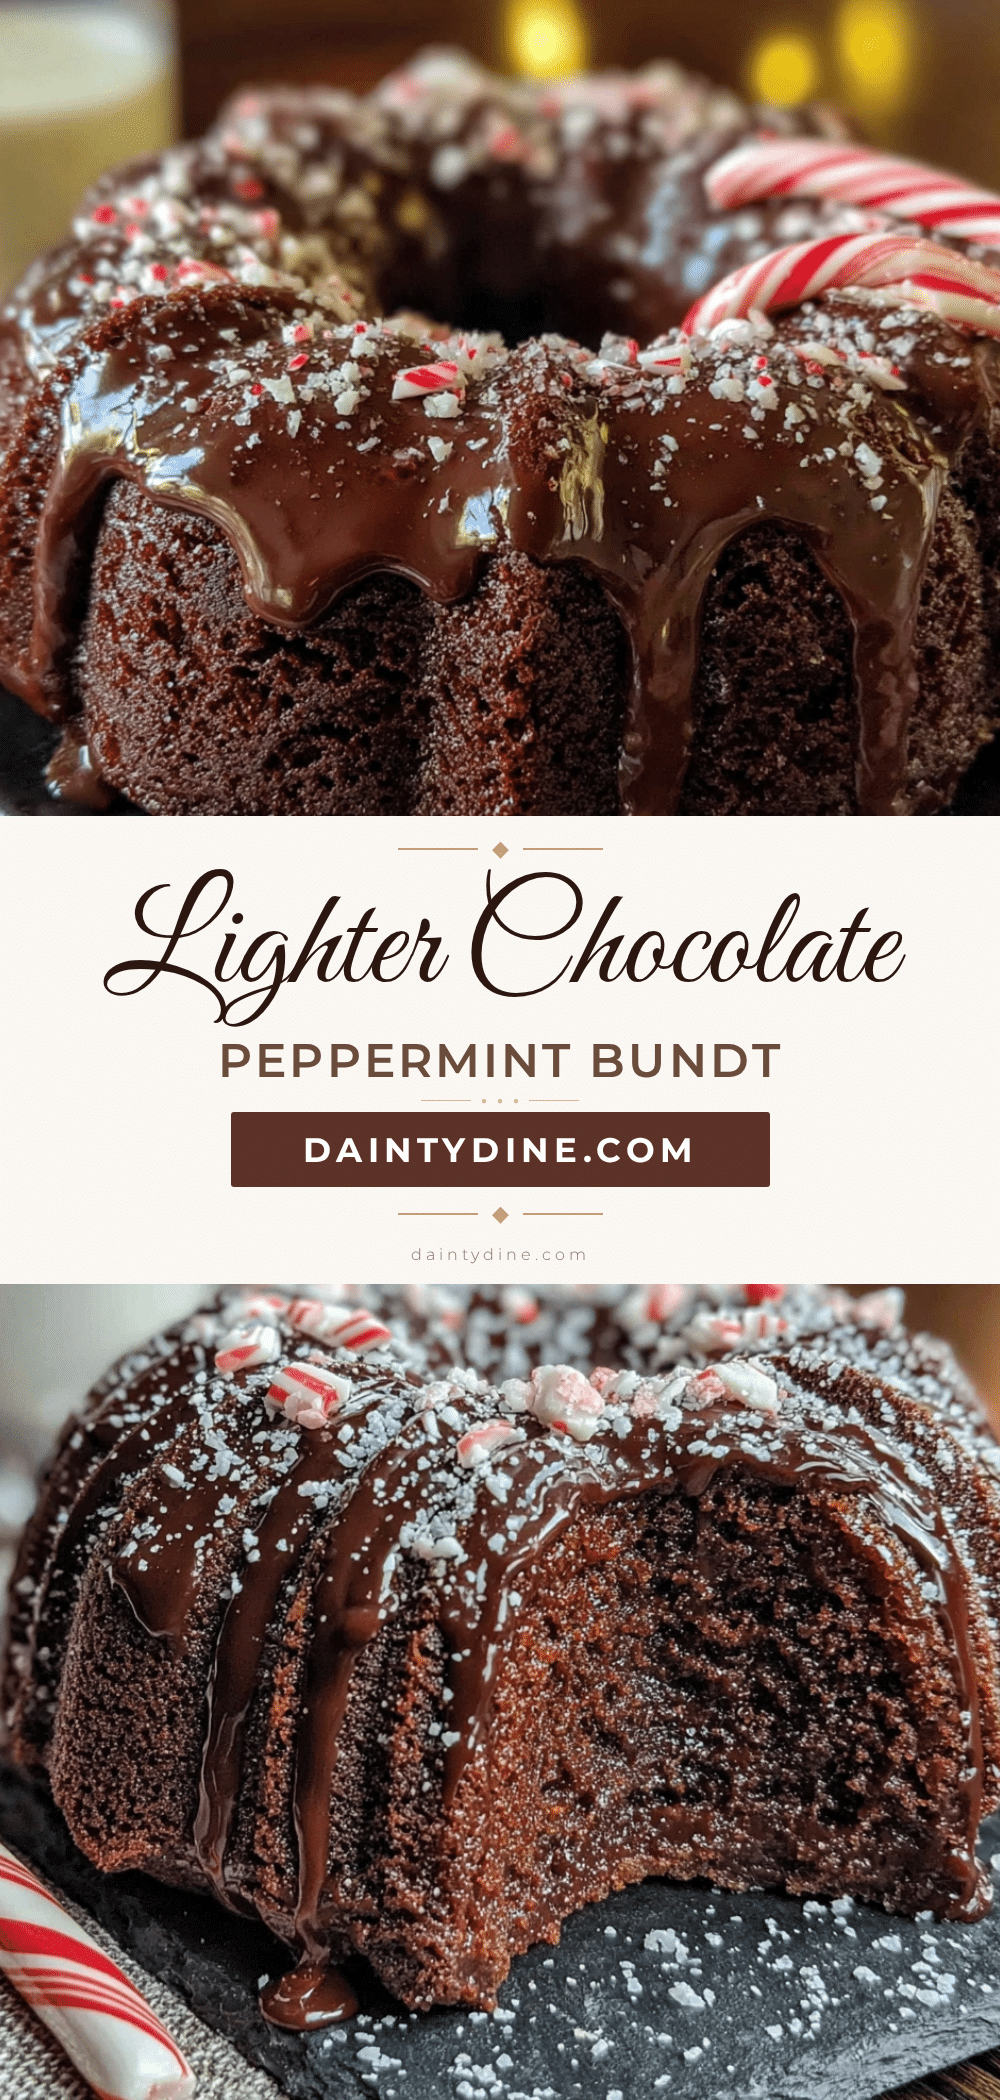
Lighter Chocolate Peppermint Bundt Cake
A lighter version of a classic chocolate peppermint bundt cake, made with Greek yogurt and applesauce for a moist, tender crumb. This easy 30-minute recipe is perfect for holiday gatherings and delivers rich chocolate flavor with a refreshing peppermint finish.
- Prep Time: 15 minutes
- Cook Time: 30 minutes
- Total Time: 45 minutes
- Yield: 12 servings 1x
- Category: Dessert
- Cuisine: American
Ingredients
- 1 ¾ cups (210g) all-purpose flour
- ¾ cup (75g) unsweetened cocoa powder (Dutch-processed preferred)
- 1 ½ teaspoons baking soda
- ½ teaspoon baking powder
- ½ teaspoon salt
- 1 cup (200g) granulated sugar
- ¾ cup (180g) plain Greek yogurt (full-fat recommended)
- ¼ cup (60g) unsweetened applesauce
- 2 large eggs, room temperature
- 2 teaspoons vanilla extract
- 1 teaspoon peppermint extract (pure extract, not oil)
- 1 cup (240ml) hot water or brewed coffee
- 1 cup (120g) powdered sugar
- 2 tablespoons (10g) unsweetened cocoa powder
- 2–3 tablespoons (30-45ml) milk of choice
- ½ teaspoon vanilla extract
- ¼ cup crushed peppermint candies (about 4 candy canes)
Instructions
- Preheat oven to 350°F (175°C). Generously grease a 10-12 cup bundt pan with butter or non-stick spray, then dust with cocoa powder.
- In a large bowl, whisk together flour, cocoa powder, baking soda, baking powder, and salt until evenly distributed (about 30 seconds).
- In a medium bowl, whisk together Greek yogurt, applesauce, sugar, eggs, vanilla extract, and peppermint extract until smooth and glossy (about 1 minute).
- Pour wet mixture into dry ingredients and stir gently with a rubber spatula until just combined. Do not overmix; a few lumps are fine.
- Slowly pour in hot water or coffee while stirring gently until fully incorporated. Batter will be thin.
- Pour batter into prepared pan, then gently tap pan on counter to release air bubbles.
- Bake for 30-35 minutes, until a toothpick inserted in center comes out clean or with a few moist crumbs. Cake should spring back when lightly touched.
- Cool in pan on a cooling rack for 10 minutes. Invert pan onto rack and lift off. If cake sticks, let cool another 5 minutes and try again.
- Cool completely before glazing (at least 1 hour).
- For glaze: In a small bowl, whisk together powdered sugar, cocoa powder, 2 tablespoons milk, and vanilla extract. Add more milk 1 teaspoon at a time until pourable but thick.
- Drizzle glaze over cooled cake, then immediately sprinkle crushed peppermint candies on top. Let glaze set for about 15 minutes before slicing.
Notes
Room temperature ingredients are important for best texture. Don’t skip the coffee—it enhances chocolate flavor without tasting like coffee. Be careful with peppermint extract; start with 1 teaspoon. Grease the bundt pan thoroughly to prevent sticking. Cake tastes even better the day after baking.
Nutrition
- Serving Size: 1 slice
- Calories: 245
- Sugar: 26
- Fat: 6
- Saturated Fat: 2
- Carbohydrates: 44
- Fiber: 3
- Protein: 6
Keywords: chocolate peppermint bundt cake, lighter bundt cake, easy bundt cake, holiday dessert, chocolate cake, peppermint cake, Greek yogurt cake


