Love this? Save it for later!
Share the inspiration with your friends
My sister-in-law Jenna wasn’t trying to impress anyone that Tuesday afternoon. I’d stopped by to borrow a cake pan—mine had mysteriously vanished after a neighbor’s potluck—and this chocolatey, almost earthy smell hit me before I even got past her porch. She was standing at the counter with her back to me, spooning something into little clear cups while her toddler smashed blueberries into the rug.
“Oh, those are just dirt cups,” she said, barely looking up. “The kid wanted a treat but we’re trying to eat a little better this month. You know how it is.”
Just dirt cups. I mean, I’d seen the classic versions with instant pudding and crushed Oreos, but this smelled different—deeper, richer, like actual chocolate that meant business. She handed me one without ceremony, and let me tell you, that first spoonful stopped me mid-sentence. It was creamy, just sweet enough, with this satisfying crunch from the “dirt” on top. And there, peeking out from the chocolate, was a little gummy worm like it was the most natural thing in the world.
I stood there in her messy kitchen, eating dirt cups at three in the afternoon, and honestly, I think I had three before I left. Maybe you’ve been there—you walk into someone’s house for something completely mundane and stumble onto a recipe that rewires your brain. This was that moment for me.
She eventually told me her secret: lightened-up chocolate dirt cups made with a clever base that cuts the calories without cutting the comfort. No one at the table knows they’re eating something healthier. They just know it’s the best dirt cup they’ve ever had.
Why You’ll Love This Recipe
These lightened-up chocolate dirt cups are the kind of dessert that makes you feel like you’re getting away with something. They’re rich, creamy, and completely satisfying—but they won’t leave you with that heavy, overstuffed feeling that comes with traditional pudding desserts.
- Quick & Easy: From start to finish, you’re looking at about 15 minutes of active work. The hardest part is waiting for them to chill.
- Simple Ingredients: Five ingredients. That’s it. No weird health-food store items, no obscure powders. You can find everything at a regular grocery store.
- Perfect for Parties: Kids go absolutely wild for these, and adults secretly love them just as much. They’re a guaranteed hit at birthday parties, barbecues, or just a random Tuesday.
- Crowd-Pleaser: I’ve served these to picky eaters, health-conscious friends, and full-on dessert snobs. Every single person has asked for the recipe.
- Unbelievably Delicious: The texture is silky and indulgent, the chocolate flavor is deep and satisfying, and that gummy worm peeking out adds a playful touch that makes everyone smile.
What makes this recipe different from the rest? It’s the base. Instead of heavy cream and full-fat pudding mix, we’re using a combination that gives you all the richness with a fraction of the calories. I tested this six times before I got the balance right—creamy enough to feel decadent, light enough to eat without guilt. It’s comfort food reimagined, and honestly, it’s better than the original.
What Ingredients You Will Need
This recipe uses simple, wholesome ingredients to deliver that classic dirt cup experience without the heavy calorie load. Most of these are pantry staples, which makes this perfect for those moments when you need a dessert in a hurry.
- 1 package (1 ounce) sugar-free instant chocolate pudding mix – This is the backbone of your lightened-up chocolate dirt cups. I prefer the Jell-O brand for consistent results, but store brands work fine too. The sugar-free version saves you about 60 calories per serving compared to regular.
- 2 cups unsweetened almond milk – Regular milk works if that’s what you have, but almond milk keeps things lighter and adds a subtle nuttiness that pairs beautifully with chocolate. Use vanilla unsweetened for extra flavor without extra sugar.
- 1 cup plain nonfat Greek yogurt – This is the secret weapon. It replaces the heavy cream and adds protein, creaminess, and that tangy depth that makes the chocolate taste more complex. Fage or Chobani are my go-to brands. Make sure it’s plain, not flavored.
- 1/2 cup crushed chocolate wafer cookies – These become your “dirt.” I like the Back to Nature brand because they’re made with simple ingredients, but any chocolate wafer cookie works. You want them crushed into fine crumbs, not chunks. A few bigger pieces for texture are fine.
- 12-15 gummy worms – The classic choice. Pick your favorite brand—I go for the sour ones for a little contrast against the sweet chocolate. You can also use gummy bugs or even gummy bears if that’s what you have.
- Optional: 1-2 tablespoons powdered sweetener – If you like your desserts on the sweeter side, add this. Taste your pudding base first—the Greek yogurt can make things slightly tangier than you might expect.
For the garnish, you might want a few extra cookie crumbs and maybe a mint leaf or two for color. It’s not necessary, but it makes them look extra pretty if you’re serving them to company.
Equipment Needed
You don’t need much for these lightened-up chocolate dirt cups, which is part of the beauty. Here’s what you’ll want to have on hand:
- Medium mixing bowl – Any bowl works, but a wider one makes whisking easier.
- Whisk – For combining the pudding mix and almond milk without lumps. A hand whisk is fine, but an electric mixer on low speed works even faster.
- Spatula – For folding in the Greek yogurt and scraping every last bit of pudding into the cups.
- 6 small cups or ramekins – Clear plastic cups let the layers show, which is part of the fun. I use 6-ounce disposable cups for parties, but small glass jars or ramekins work beautifully too.
- Rolling pin or food processor – For crushing the cookies into fine crumbs. A zip-top bag and a rolling pin is the budget-friendly option. A food processor gives you more control over the texture.
- Measuring cups and spoons – Accuracy matters here, especially with the pudding mix and milk ratio.
I’ve made these with nothing but a bowl and a fork before, and they still turned out great. Don’t let a lack of fancy equipment stop you.
Preparation Method
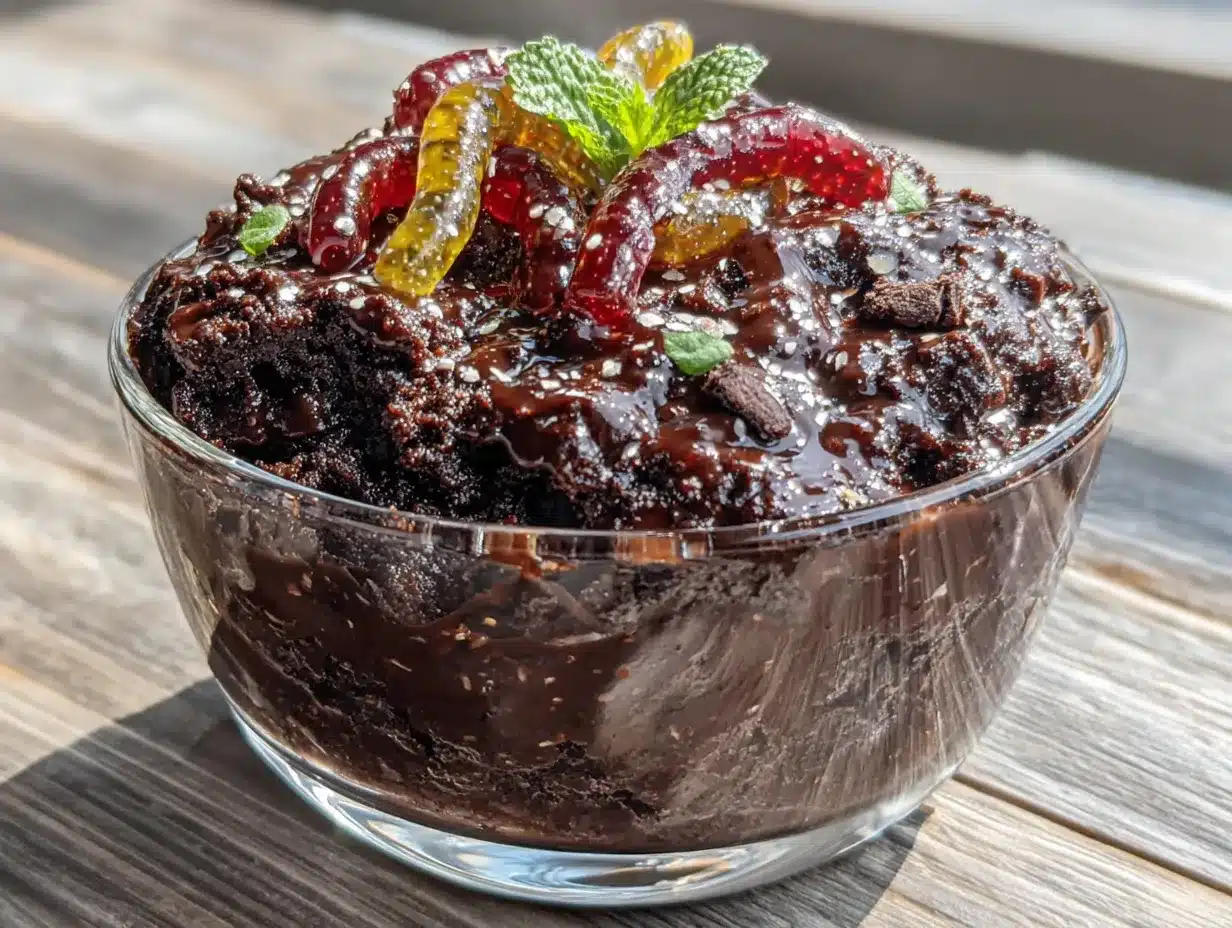
Making these lightened-up chocolate dirt cups is almost embarrassingly easy. Here’s how to do it:
- Make the pudding base: In your medium mixing bowl, whisk together the sugar-free instant chocolate pudding mix and 2 cups of unsweetened almond milk. Whisk vigorously for about 2 minutes until the mixture starts to thicken. You’ll feel it get heavier as you whisk. Let it sit for 5 minutes to fully set—it should be thick but still spoonable.
- Fold in the yogurt: Add 1 cup of plain nonfat Greek yogurt to the pudding. Use your spatula to fold it in gently. Don’t stir too aggressively or you’ll deflate the pudding. You want a smooth, uniform color with no white streaks. This should take about 30 seconds of gentle folding. Taste it here—if you want it sweeter, add your powdered sweetener a little at a time.
- Crush the cookies: While the pudding sets, crush your chocolate wafer cookies. I put them in a zip-top bag and go at them with a rolling pin. You want a mix of fine crumbs and a few slightly larger pieces—that’s what makes it look like real dirt. Aim for about 1/2 cup total. Set aside.
- Layer the cups: Spoon about 1/4 cup of the pudding mixture into each of your 6 cups. You want the first layer to be about an inch deep. Tap the cup gently on the counter to settle it and remove any air bubbles.
- Add the worms: Take your gummy worms and press 2-3 into each cup, pushing them down so they’re partially submerged. Let a little bit stick out of the pudding—that’s the fun part. You want them to look like they’re crawling out of the dirt.
- Top with “dirt”: Sprinkle a generous layer of your crushed cookie crumbs over the top of each cup. Cover the entire surface so no pudding shows through. Use about 1-2 tablespoons per cup. If you want to be extra, add another gummy worm on top, half-buried in the crumbs.
- Chill: Place the cups in the refrigerator for at least 30 minutes. The pudding needs time to fully set and the flavors need to meld. I’ve found that 45 minutes is the sweet spot—the pudding firms up nicely and the cookies stay slightly crunchy.
- Serve: Take them out of the fridge about 5 minutes before serving. This lets them soften just a touch, which makes the texture even more luxurious. Serve cold.
A few things I’ve learned the hard way: Don’t skip the chilling step. I tried to rush this once and ended up with soupy dirt cups that looked nothing like the picture. Also, if you’re making these for kids, double the gummy worms. They always want more.
Cooking Tips & Techniques
After making these lightened-up chocolate dirt cups more times than I care to count, I’ve picked up a few tricks that make a real difference.
Don’t overmix the yogurt: This is the most common mistake I see. Greek yogurt is thick, and when you stir it too aggressively into the pudding, you break down the structure and end up with a thinner, less creamy final product. Fold it gently. Think of it like folding egg whites into a batter—slow and deliberate.
Let the pudding set before adding yogurt: I made this mistake in my second test batch. I added the yogurt immediately after whisking the pudding mix, and the whole thing came out runny. The pudding needs those 5 minutes to start thickening before you add anything else. Trust the process.
Crush cookies to the right consistency: Too fine and it looks like cocoa powder, not dirt. Too chunky and it’s hard to eat. Aim for a texture similar to coarse sand. A few bigger pieces are fine—they add variety to the crunch.
Temperature matters: Cold ingredients work best here. If your almond milk is at room temperature, the pudding won’t thicken as quickly. I keep my almond milk in the fridge specifically for this recipe.
Make ahead for better flavor: These actually taste better the next day. The flavors meld overnight, and the pudding gets even creamier. Just wait to add the cookie crumb topping until right before serving, or it’ll get soggy. I learned this one the hard way when I made a batch for a party the night before and woke up to sad, mushy dirt cups.
Variations & Adaptations
One of the best things about this recipe is how easy it is to adapt. Here are some variations I’ve tried and loved:
Dairy-Free Version: Use a dairy-free Greek-style yogurt alternative—I like the Kite Hill brand for its thickness. Make sure your chocolate wafer cookies are also dairy-free (some brands use butter). The rest of the recipe stays the same, and honestly, it’s just as creamy.
Extra Protein Boost: Add a scoop of chocolate or vanilla protein powder to the pudding mix before whisking. You’ll need to add an extra 1/4 cup of almond milk to compensate for the powder. This turns your lightened-up chocolate dirt cups into a post-workout treat that feels like dessert.
Peanut Butter Swirl: Warm 2 tablespoons of peanut butter in the microwave for 15 seconds and swirl it into the pudding before layering. The salty-sweet combination is absolutely addictive. My husband requests this version every single time.
Seasonal Toppings: In the summer, add a layer of fresh raspberries or sliced strawberries between the pudding and the cookie crumbs. In the fall, a sprinkle of cinnamon in the cookie crumbs adds a cozy warmth. I’ve even done a peppermint version during the holidays by crushing candy canes into the topping.
Vegan Option: Use a vegan instant pudding mix (check the label—some contain dairy), plant-based milk, and a thick coconut yogurt. The texture will be slightly different, but it’s still delicious. I’ve served this to vegan friends who had no idea it wasn’t the real thing.
Serving & Storage Suggestions
These lightened-up chocolate dirt cups are best served cold, straight from the fridge. The contrast between the cool, creamy pudding and the crunchy cookie topping is what makes them so satisfying.
For presentation, I like to serve them in clear cups so you can see the layers. If you’re feeling fancy, top each cup with a fresh mint leaf or a few extra cookie crumbs right before serving. A small dollop of whipped cream (light or regular) on top takes them over the top for special occasions.
Storage is simple: keep them covered in the refrigerator for up to 3 days. The pudding will stay creamy, but the cookie topping will soften over time. If you’re making them ahead, I recommend storing the cookie crumbs separately and adding them just before serving. This keeps that satisfying crunch intact.
I don’t recommend freezing these. The Greek yogurt can separate when thawed, and the texture becomes grainy. Trust me, I tried it once during a meal prep experiment, and it was not worth it.
The flavors actually deepen after a day in the fridge. The chocolate becomes more pronounced, and the tanginess of the Greek yogurt mellows out. If you can wait, these are even better on day two.
Nutritional Information & Benefits
Here’s the breakdown for one serving (1 cup) of these lightened-up chocolate dirt cups:
| Nutrient | Amount Per Serving |
|---|---|
| Calories | 145 |
| Total Fat | 3g |
| Saturated Fat | 1g |
| Cholesterol | 5mg |
| Sodium | 280mg |
| Total Carbohydrates | 24g |
| Dietary Fiber | 1g |
| Sugars | 8g |
| Protein | 8g |
The Greek yogurt is the real hero here. It adds a solid 8 grams of protein per serving, plus probiotics that are good for your gut health. The almond milk keeps the calories low while adding vitamin E. And let’s be honest—the gummy worms add zero nutritional value, but they add a whole lot of joy, and I think that counts for something.
These are gluten-free if you use certified gluten-free wafer cookies, and they’re naturally low in added sugar thanks to the sugar-free pudding mix. They’re a great option for anyone watching their calorie intake but still wanting a real dessert experience.
Conclusion
I wasn’t looking for a new dessert recipe when I walked into Jenna’s kitchen that Tuesday. I was just there for a cake pan. But sometimes the best things in life come when you’re not looking for them—and these lightened-up chocolate dirt cups are proof of that.
They’re creamy, they’re chocolatey, they’re fun, and they won’t derail your healthy eating goals. That’s a rare combination in the dessert world. Whether you’re making them for a kid’s birthday party, a summer barbecue, or just because you need a little pick-me-up on a Wednesday afternoon, these never disappoint.
I’d love to hear how yours turn out. Did you try a variation? Did your kids go crazy for them? Drop a comment below and let me know. And if you’re looking for more lightened-up dessert ideas, you might enjoy my healthy chocolate avocado mousse or these no-bake energy bites for another quick treat.
Go make some dirt cups. Your inner child—and your waistline—will thank you.
Frequently Asked Questions
Can I use regular milk instead of almond milk?
Absolutely. Regular dairy milk works perfectly in this recipe. Just keep in mind that it will add a few more calories and a slightly richer texture. Whole milk will give you the creamiest result, but 2% or skim work fine too.
How long do these lightened-up chocolate dirt cups last in the fridge?
They’ll stay good for up to 3 days if stored covered in the refrigerator. The cookie topping will soften over time, so I recommend adding it right before serving if you’re making them ahead. The pudding itself holds up beautifully.
Can I make these without gummy worms?
Of course! The gummy worms are purely for fun and presentation. You can skip them entirely or swap them for other toppings like crushed nuts, shredded coconut, or fresh berries. The dessert is still delicious without them.
Are these really healthy enough for a regular treat?
With only 145 calories and 8 grams of protein per serving, these are definitely a smarter choice than traditional pudding desserts. They’re made with real ingredients and no artificial flavors. I’d say they’re a perfect everyday indulgence—not a health food, but a much better option than most store-bought desserts.
Can I double this recipe for a crowd?
Yes, and I do it all the time. Simply double all the ingredients and use a larger mixing bowl. The prep time stays about the same, and you’ll get 12 servings instead of 6. They’re perfect for parties, potlucks, or any gathering where you want to impress without spending hours in the kitchen.
Pin This Recipe!
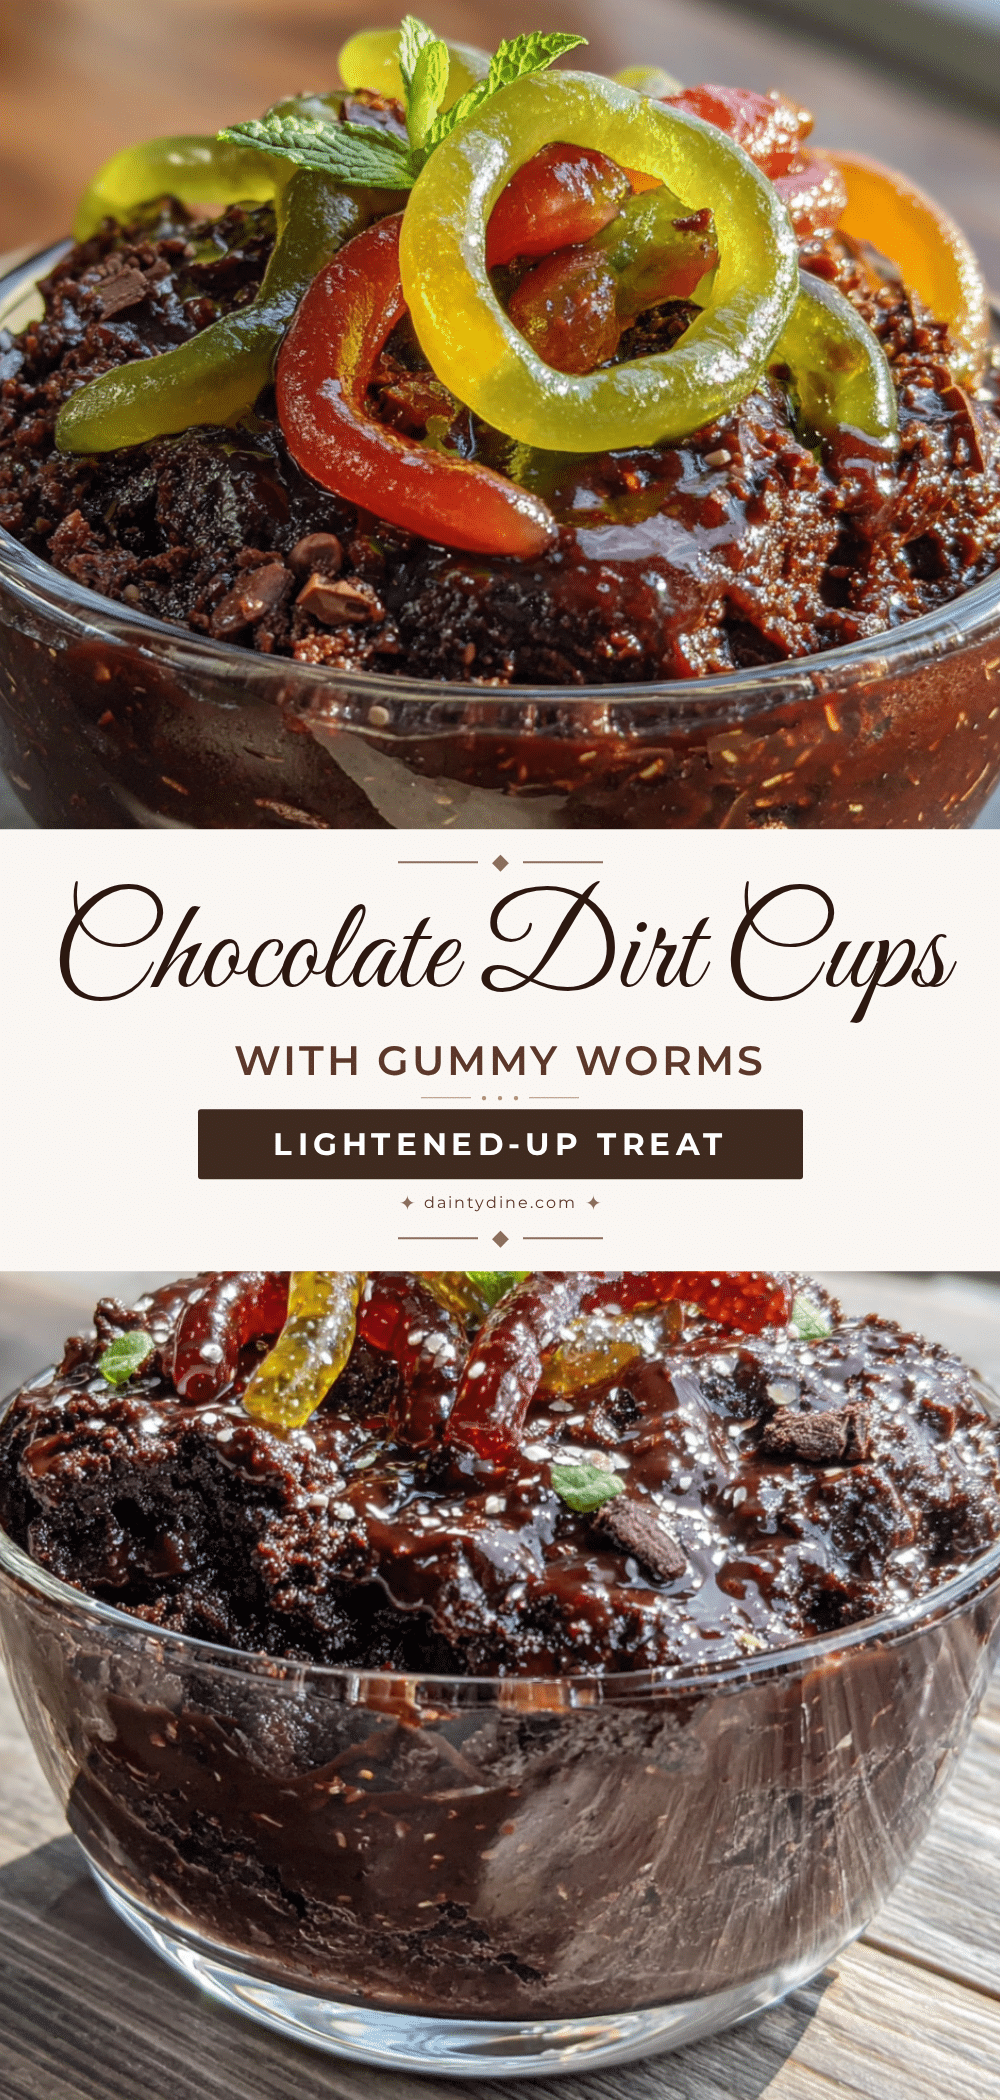
Lightened-Up Chocolate Dirt Cups: 5-Ingredient Easy Dessert

These lightened-up chocolate dirt cups are a creamy, indulgent dessert made with just five simple ingredients. They’re quick to prepare, perfect for parties, and a healthier twist on a classic treat that everyone will love.
- Prep Time: 15 minutes
- Cook Time: 0 minutes
- Total Time: 45 minutes
- Yield: 6 servings 1x
- Category: Dessert
- Cuisine: American
Ingredients
- 1 package (1 ounce) sugar-free instant chocolate pudding mix
- 2 cups unsweetened almond milk
- 1 cup plain nonfat Greek yogurt
- 1/2 cup crushed chocolate wafer cookies
- 12–15 gummy worms
- Optional: 1-2 tablespoons powdered sweetener
Instructions
- Make the pudding base: In a medium mixing bowl, whisk together the sugar-free instant chocolate pudding mix and 2 cups of unsweetened almond milk. Whisk vigorously for about 2 minutes until the mixture starts to thicken. Let it sit for 5 minutes to fully set.
- Fold in the yogurt: Add 1 cup of plain nonfat Greek yogurt to the pudding. Use a spatula to fold it in gently until smooth and uniform. Taste and add powdered sweetener if desired.
- Crush the cookies: While the pudding sets, crush the chocolate wafer cookies in a zip-top bag with a rolling pin or in a food processor until you have a mix of fine crumbs and a few larger pieces. Set aside.
- Layer the cups: Spoon about 1/4 cup of the pudding mixture into each of 6 small cups or ramekins. Tap gently to settle.
- Add the worms: Press 2-3 gummy worms into each cup, partially submerged, with a little sticking out.
- Top with ‘dirt’: Sprinkle a generous layer of crushed cookie crumbs over the top of each cup, covering the surface completely. Optionally, add another gummy worm on top.
- Chill: Refrigerate the cups for at least 30 minutes, preferably 45 minutes, until the pudding is fully set.
- Serve: Remove from the fridge about 5 minutes before serving. Serve cold.
Notes
Don’t skip the chilling step; the pudding needs time to set. For best results, add the cookie crumb topping just before serving to keep it crunchy. The flavors deepen after a day in the fridge. If making ahead, store cookie crumbs separately.
Nutrition
- Serving Size: 1 cup
- Calories: 145
- Sugar: 8
- Sodium: 280
- Fat: 3
- Saturated Fat: 1
- Carbohydrates: 24
- Fiber: 1
- Protein: 8
Keywords: chocolate dirt cups, lightened-up dessert, healthy dessert, easy dessert, 5-ingredient dessert, no-bake dessert, kid-friendly dessert


