Love this? Save it for later!
Share the inspiration with your friends
I was at the hardware store last Saturday—not exactly where you expect to find dessert inspiration. I was standing in the paint aisle, trying to match a shade of “warm cream” that my wife insisted was different from “vanilla whisper,” when the store manager, a guy named Dave who I’d only ever seen discussing PVC pipe fittings, started talking about cake. “You know what my wife makes when it’s too hot to think?” he said, not even bothering with a hello first. “That no-bake strawberry thing. She layers it up in a pan, and it’s gone before I get a second slice.” I wasn’t taking cooking advice from a man holding a paint roller, but honestly, I was intrigued. He scribbled the gist of it on the back of a receipt, and I stood there in the fluorescent light, holding a sticky note that would change my summer dessert game forever.
That night, I tried to recreate what Dave described. The first attempt was a bit of a mess—too much cream, not enough structure, and a sad, soggy graham cracker situation. But I’m not the kind of person who gives up after one kitchen disaster. I tweaked it. I swapped in lighter ingredients, played with the ratios, and found a way to make it set beautifully without turning on the oven. The result? A Light No-Bake Strawberry Shortcake Icebox Cake that tastes like summer in a dish, but won’t leave you feeling like you need a nap afterward. I mean, isn’t that the dream? A dessert that feels indulgent but doesn’t weigh you down.
Maybe you’ve been there—standing in your kitchen on a sweltering July afternoon, wanting something sweet but refusing to turn on the oven. Or maybe you’re just looking for a dessert that looks impressive without requiring a pastry degree. This Light No-Bake Strawberry Shortcake Icebox Cake is for you. It’s the kind of recipe that makes you wonder why you ever bothered with complicated baking in the first place. And honestly, it’s the only good thing that came out of that trip to the hardware store—we never did find the right shade of cream.
Why You’ll Love This Recipe
Let me tell you why this Light No-Bake Strawberry Shortcake Icebox Cake has become my most-requested dessert. I’ve tested this recipe at least seven times to get it just right, and I’m not ashamed to admit that my family has been the happy beneficiary of all those trials. This isn’t just another no-bake dessert—it’s the one that makes people ask for the recipe before they’ve even finished their first slice.
- Ready in 10 Minutes: I’m not exaggerating when I say you can have this assembled in the time it takes to watch a single episode of your favorite show. Ten minutes of active prep, and the refrigerator does the rest of the work. It’s honestly magic for busy weeknights or unexpected guests.
- Simple, Wholesome Ingredients: You probably already have most of what you need in your kitchen right now. No trips to specialty stores, no hunting down obscure ingredients. This is real food made from real ingredients—Greek yogurt, fresh strawberries, and simple pantry staples.
- Perfect for Hot Summer Days: When the temperature hits 90 degrees, the last thing you want is to hover over a hot oven. This Light No-Bake Strawberry Shortcake Icebox Cake keeps your kitchen cool while delivering all the satisfaction of a traditional shortcake dessert.
- Crowd-Pleaser Guaranteed: I’ve brought this to potlucks, family gatherings, and backyard barbecues, and it never fails to get rave reviews. Kids love the creamy texture, adults appreciate the lighter twist, and everyone goes back for seconds.
- Unbelievably Light Yet Satisfying: Here’s the thing—most icebox cakes are heavy, dense, and leave you feeling like you ate a brick. This version uses a clever combination of Greek yogurt and light whipped topping to create a texture that’s creamy and rich without being overwhelming. You get that indulgent feeling without the food coma.
What makes this recipe different from all the other no-bake desserts out there? It’s the way the layers work together. The vanilla wafers soften just enough to create a cake-like texture, while the strawberry filling stays bright and fresh. The cream layer is perfectly balanced—not too sweet, not too tangy. It’s comfort food reimagined for people who want to feel good about what they’re eating. And honestly, it’s the kind of dessert that makes you close your eyes after the first bite. That’s the reaction I get every single time.
What Ingredients You Will Need
This Light No-Bake Strawberry Shortcake Icebox Cake uses simple, wholesome ingredients that come together to create something truly special. I’ve tested this with different brands and variations, so let me walk you through what works best and why.
For the Strawberry Layer
- 4 cups fresh strawberries, hulled and sliced (about 2 pounds) — Fresh strawberries are absolutely key here. I’ve tried frozen, and they release too much water, making the cake soggy. Look for berries that are deep red and fragrant. In the peak of summer, I get mine from the farmer’s market, and the flavor difference is incredible.
- 3 tablespoons granulated sugar (or honey) — This draws out the natural juices from the strawberries and creates a light syrup. If you’re watching your sugar intake, honey works beautifully here—just use 2 tablespoons since it’s sweeter.
- 1 tablespoon fresh lemon juice — This brightens the strawberries and balances the sweetness. Don’t skip it! I once did, and the filling tasted flat.
- 1 teaspoon vanilla extract — I recommend pure vanilla extract, not imitation. It makes a noticeable difference in the overall flavor profile.
For the Cream Layer
- 1 cup heavy whipping cream (or full-fat coconut cream for dairy-free) — This needs to be cold for proper whipping. I pop my bowl and beaters in the freezer for 10 minutes before starting.
- 1/2 cup powdered sugar — Powdered sugar dissolves more easily than granulated, giving you a smooth, silky cream layer.
- 1 cup plain Greek yogurt (I prefer 2% or full-fat) — This is my secret ingredient for keeping the cake light. The yogurt adds tanginess and protein while reducing the overall heaviness. I’ve tried nonfat, and it works but isn’t as creamy. Fage or Chobani are my go-to brands.
- 1 teaspoon vanilla extract — Yes, again. Vanilla is doing double duty here, and it’s worth it.
For the Layers
- 1 box (about 11 ounces) vanilla wafers (or graham crackers, shortbread cookies, or gluten-free vanilla cookies) — Vanilla wafers are traditional, but I’ve made this with graham crackers when I ran out, and it was delicious. For a gluten-free version, look for gluten-free vanilla wafers or use gluten-free graham crackers. Nilla Wafers are my standard choice.
- Additional strawberries and mint leaves for garnish (optional, but makes it look gorgeous)
Ingredient Selection Tips
When choosing strawberries, look for ones that are uniformly red with no white shoulders—that’s a sign they were picked too early. The smell test is important too; if they don’t smell like strawberries, they won’t taste like them. For the Greek yogurt, I recommend avoiding flavored or sweetened varieties since they’ll throw off the balance. Plain is the way to go.
If you’re making this dairy-free, full-fat coconut cream whips up beautifully and adds a subtle tropical note that actually pairs wonderfully with the strawberries. Just chill the can overnight and scoop out the solid part, leaving the liquid behind.
Equipment Needed
The beauty of this Light No-Bake Strawberry Shortcake Icebox Cake is that you don’t need a fancy kitchen to make it. Here’s what you’ll need:
- 8×8-inch baking dish (or 9×9-inch) — Glass or ceramic works best. I use a glass dish because I like being able to see the layers. If you only have a 9×13-inch pan, you can double the recipe or make a thinner cake.
- Electric hand mixer or stand mixer — You can whip the cream by hand with a whisk, but I won’t lie—it takes a solid 10 minutes of arm work. A hand mixer makes it effortless. I’ve been using the same KitchenAid hand mixer for eight years, and it’s never let me down.
- Large mixing bowl — Make sure it’s big enough to whip cream without splattering. I learned this the hard way.
- Medium bowl — For macerating the strawberries.
- Sharp knife and cutting board — For hulling and slicing the strawberries. A paring knife works best for hulling.
- Rubber spatula — For folding the cream mixture and spreading layers evenly. A flexible silicone spatula is worth its weight in gold here.
- Measuring cups and spoons — Precision matters, even in no-bake desserts.
- Plastic wrap or parchment paper — For covering the dish while it chills.
If you don’t have an electric mixer, you can shake the cream in a jar with a tight-fitting lid—it takes about 5 minutes of vigorous shaking, and it’s a great arm workout. I’ve done this while camping, and it works surprisingly well.
Preparation Method
Let me walk you through making this Light No-Bake Strawberry Shortcake Icebox Cake step by step. I’ve included all the little details that make the difference between a good dessert and a showstopper.
Step 1: Prepare the Strawberries (5 minutes)
Start by washing and hulling your strawberries. To hull them, simply insert a paring knife at an angle around the green stem and pop it out. Then slice them about 1/4-inch thick. Place the sliced strawberries in a medium bowl and sprinkle with the granulated sugar, lemon juice, and 1 teaspoon of vanilla extract. Gently toss everything together with a spatula until the strawberries are evenly coated. Let them sit for 10-15 minutes while you prepare the cream layer. This process, called macerating, draws out the natural juices and creates a beautiful syrupy mixture. The strawberries will soften slightly and become incredibly flavorful. Give them a gentle stir halfway through.
Step 2: Whip the Cream (5 minutes)
In a large mixing bowl (chilled if possible), pour in the cold heavy whipping cream. Using an electric hand mixer on medium speed, whip the cream until soft peaks form—this means when you lift the beaters, the cream forms gentle peaks that flop over slightly. This usually takes about 2-3 minutes. Then add the powdered sugar and remaining 1 teaspoon of vanilla extract. Continue whipping on medium-high speed until stiff peaks form—the cream should hold its shape when you lift the beaters. Be careful not to over-whip, or you’ll end up with butter. I’ve done that before, and it’s a sad moment. The cream should be smooth and billowy, not grainy.
Step 3: Fold in the Greek Yogurt (2 minutes)
Using a rubber spatula, gently fold the Greek yogurt into the whipped cream. The key word here is “fold”—you want to cut through the center of the mixture, scrape along the bottom, and bring the spatula up and over. Rotate the bowl a quarter turn and repeat. Do this until no white streaks remain and the mixture is uniform. It should be thick, creamy, and slightly tangy. Don’t overmix, or you’ll deflate all that air you just whipped into the cream. This is where the lightness of your cake comes from, so be gentle.
Step 4: Assemble the Layers (8 minutes)
Now comes the fun part. Spread about 1/4 cup of the cream mixture evenly across the bottom of your 8×8-inch baking dish. This thin layer prevents the cookies from sliding around. Then arrange a single layer of vanilla wafers over the cream. I like to place them close together, but they don’t need to overlap. You can break some wafers in half to fill in the gaps. Spoon about one-third of the macerated strawberries (including their juices) evenly over the wafers. Then spread one-third of the remaining cream mixture over the strawberries. Use an offset spatula or the back of a spoon to spread it gently—you don’t want to disturb the strawberry layer underneath.
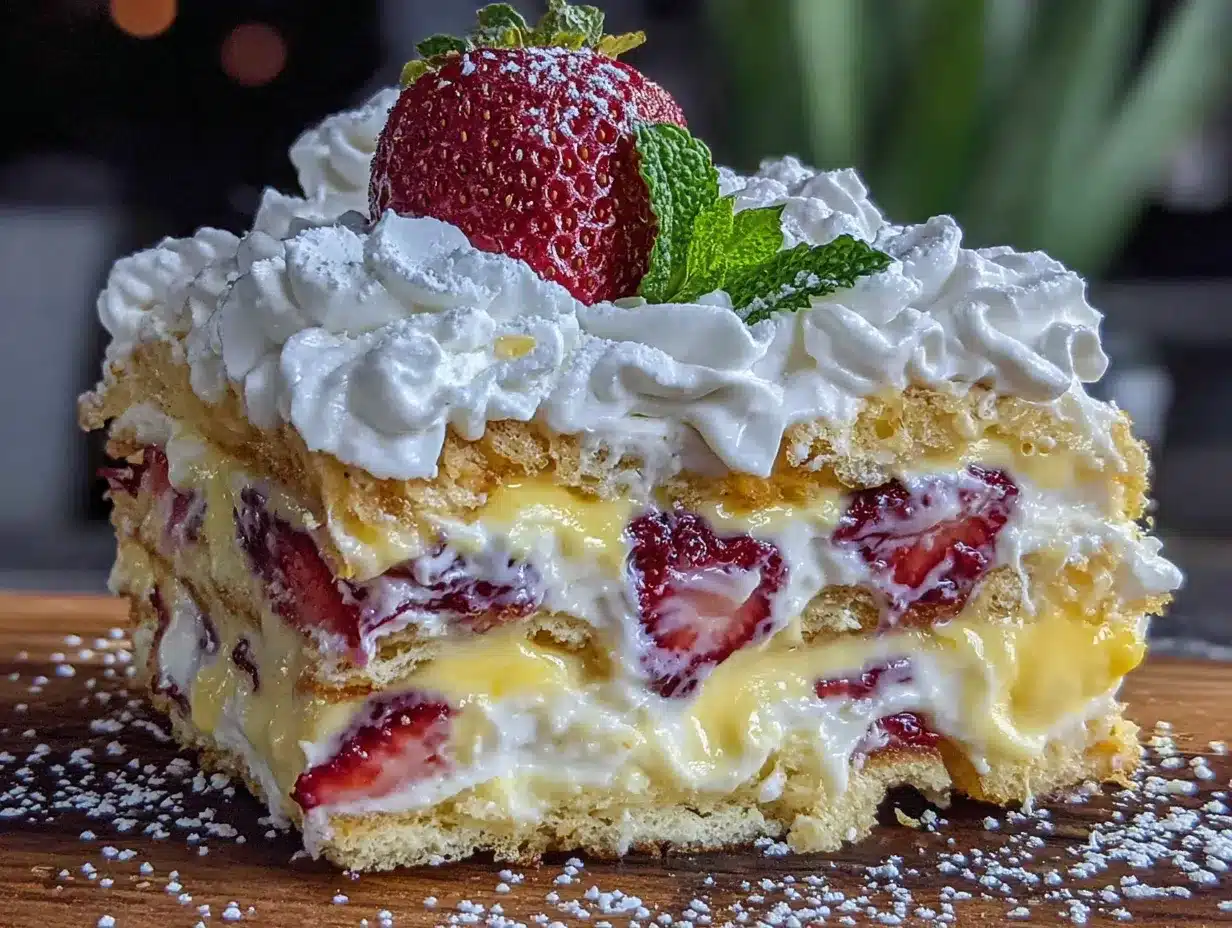
Repeat the layers: wafers, strawberries, cream. You should get three complete layers of each. End with a final layer of cream mixture on top. Use your spatula to create decorative swirls or simply spread it smooth. Cover the dish tightly with plastic wrap, making sure the plastic touches the surface of the cream to prevent a skin from forming.
Step 5: Chill and Set (6-8 hours, or overnight)
Place the assembled Light No-Bake Strawberry Shortcake Icebox Cake in the refrigerator. This is the hardest part—the waiting. The cake needs at least 6 hours to set properly, but overnight is truly best. During this time, the vanilla wafers absorb moisture from the cream and strawberries, transforming from crunchy cookies into a soft, cake-like texture. The flavors meld together, and the whole thing firms up enough to slice cleanly. Don’t rush this step. I once tried to serve it after only 4 hours, and it was a delicious mess that wouldn’t hold its shape. Patience pays off here.
Step 6: Garnish and Serve (5 minutes)
Just before serving, remove the plastic wrap. Top with fresh sliced strawberries and a few mint leaves for color. Slice into squares and serve cold. For the cleanest slices, use a sharp knife dipped in hot water and wiped dry between cuts. The cake should be firm but creamy, with distinct layers visible when you cut into it.
Cooking Tips & Techniques
After making this Light No-Bake Strawberry Shortcake Icebox Cake more times than I can count, I’ve picked up a few tricks that make the process smoother and the results more consistent. Let me share what I’ve learned—including the mistakes I’ve made so you don’t have to.
Don’t Skip Macerating the Strawberries: I know it’s tempting to just layer fresh strawberries directly into the cake, but macerating them first is non-negotiable. The sugar draws out the natural juices, which then soak into the wafers and create that signature icebox cake texture. Without this step, your cake will be drier and less flavorful. Trust me on this one—I learned the hard way when I was rushing one afternoon.
Room Temperature Ingredients Matter: For the cream layer, you want the heavy cream to be very cold—straight from the refrigerator. But the Greek yogurt should be at room temperature so it folds in smoothly without creating lumps. Take the yogurt out of the fridge about 20 minutes before you start. This small detail makes a big difference in the final texture.
Layer Evenly for Best Results: Take your time when spreading each layer. I use the back of a spoon to gently press the wafers into the cream before adding the strawberries. This ensures even absorption and prevents dry spots. And when you spread the cream, go from the center outward in a circular motion—it distributes more evenly than back-and-forth strokes.
The Overnight Chill is Worth It: I know I’ve said this already, but it bears repeating. The magic of an icebox cake happens in the refrigerator. The wafers need time to soften completely, and the flavors need time to meld. If you’re planning to serve this for a dinner party, make it the night before. Your future self will thank you when all you have to do is garnish and serve.
Use a Sharp Knife for Clean Slices: When you’re ready to serve, use a long, sharp knife. Dip it in hot water, wipe it dry, and make one clean cut. Wipe the knife between each slice. This gives you those beautiful, Instagram-worthy pieces with distinct layers. I’ve ruined many a pretty cake with a dull knife—don’t be like me.
Variations & Adaptations
One of the things I love most about this Light No-Bake Strawberry Shortcake Icebox Cake is how versatile it is. Here are some variations I’ve tried and loved:
Berry Medley Version
Replace half the strawberries with fresh blueberries, raspberries, or sliced peaches. The combination of berries adds complexity and visual appeal. I made this for a Fourth of July barbecue, and the red, white, and blue layers were a hit. Just make sure to macerate the mixed berries together so they all release their juices evenly.
Chocolate Strawberry Twist
Add a layer of chocolate by spreading a thin layer of melted dark chocolate between the wafers and the strawberries. Or use chocolate wafer cookies instead of vanilla wafers. The chocolate-strawberry combination is classic for a reason. I tried this on a whim when I had leftover chocolate cookies, and it was dangerously good.
Dairy-Free and Vegan Version
Use full-fat coconut cream (chilled overnight) in place of heavy cream, and dairy-free Greek-style yogurt. For the wafers, look for vegan vanilla cookies. The coconut adds a subtle tropical note that pairs beautifully with the strawberries. I’ve served this to dairy-free guests who couldn’t tell the difference.
Lemon Strawberry Version
Add the zest of one lemon to the cream mixture and increase the lemon juice in the strawberry layer to 2 tablespoons. The bright citrus cuts through the richness and makes the strawberries pop. This is my personal favorite variation for spring.
Individual Servings
Instead of a single large dish, assemble the layers in individual mason jars or small glasses. This makes for gorgeous presentation at parties and eliminates the need for slicing. Layer it exactly the same way, but use about 3-4 wafers per jar, depending on size. These individual portions set faster—about 4 hours in the refrigerator.
Serving & Storage Suggestions
This Light No-Bake Strawberry Shortcake Icebox Cake is best served cold, straight from the refrigerator. The texture is at its peak when the cake has been chilled for at least 6 hours but no more than 48 hours. Beyond that, the wafers can become too soft and the cake loses its structure.
Serving Temperature: Serve directly from the refrigerator. I don’t recommend letting it sit at room temperature for more than 15 minutes before serving, especially on warm days. The cream layer can soften and become runny if it gets too warm.
Presentation Ideas: For a beautiful presentation, garnish each slice with a fresh strawberry fan and a sprig of mint. You can also dust the top lightly with powdered sugar just before serving. If you’re feeling fancy, drizzle a little strawberry syrup over each plate before placing the slice on top.
Complementary Dishes: This cake pairs wonderfully with a cup of hot coffee or iced tea. For a complete summer dessert spread, serve it alongside fresh fruit skewers or a light lemon sorbet. It’s also lovely after a grilled meal—the lightness of the cake balances the heartiness of barbecue.
Storage Instructions: Cover the dish tightly with plastic wrap or transfer leftovers to an airtight container. The cake will keep in the refrigerator for up to 3 days. After 24 hours, the texture continues to soften, so it becomes more pudding-like. Some people prefer it this way, but I like it best on day two.
Freezing Instructions: You can freeze this cake for up to 1 month. Wrap the entire dish in plastic wrap, then a layer of aluminum foil. Thaw overnight in the refrigerator before serving. The texture will be slightly different—a bit icier—but it’s still delicious. I’ve done this when making it ahead for holidays.
Flavor Development: The flavors actually improve after 24 hours in the refrigerator. The strawberries continue to release their juices, the cream absorbs the vanilla, and everything melds together beautifully. This is one of those rare desserts that tastes even better the next day.
Nutritional Information & Benefits
I believe in enjoying dessert without guilt, and this Light No-Bake Strawberry Shortcake Icebox Cake fits perfectly into that philosophy. Here’s the estimated nutritional breakdown per serving (based on 9 servings):
| Nutrient | Amount Per Serving |
|---|---|
| Calories | 285 |
| Total Fat | 16g |
| Saturated Fat | 9g |
| Cholesterol | 48mg |
| Sodium | 115mg |
| Total Carbohydrates | 32g |
| Dietary Fiber | 2g |
| Sugars | 18g |
| Protein | 5g |
| Vitamin C | 45% DV |
| Calcium | 8% DV |
Health Benefits: Strawberries are packed with vitamin C and antioxidants, which support immune health and fight inflammation. Greek yogurt adds protein and probiotics for gut health. By using yogurt in place of some of the heavy cream, I’ve reduced the overall fat content while keeping the creamy texture you crave.
Dietary Considerations: This recipe can be made gluten-free by using gluten-free vanilla wafers. For a lower-sugar version, reduce the sugar in the strawberry layer to 2 tablespoons and use a sugar substitute in the cream layer. The Greek yogurt already adds natural tanginess that balances sweetness. This dessert is suitable for vegetarians and can be adapted for dairy-free diets as noted above.
Allergen Information: This recipe contains dairy and gluten (if using standard wafers). It is nut-free and egg-free. Always check labels on packaged ingredients to confirm allergen status.
Conclusion
This Light No-Bake Strawberry Shortcake Icebox Cake has become my go-to summer dessert for good reason. It’s the perfect balance of indulgence and lightness—creamy, fruity, and satisfying without being heavy. Every time I make it, I think back to that hardware store conversation with Dave, and I smile. Sometimes the best recipes come from the most unexpected places.
I hope you give this recipe a try and make it your own. Maybe you’ll add extra strawberries, or try the lemon variation, or discover a new twist I haven’t thought of yet. That’s the beauty of cooking—it’s always evolving. And honestly, that’s what keeps it fun.
When you make this Light No-Bake Strawberry Shortcake Icebox Cake, I’d love to hear about it. Drop a comment below and tell me how it turned out, what variations you tried, or just share your own kitchen story. And if you’re looking for another no-bake favorite, I’ve got a creamy lemon cheesecake bars recipe that’s equally easy and delicious. Happy cooking, friends—may your summer be full of sweet moments and cold desserts!
Frequently Asked Questions
Can I use frozen strawberries instead of fresh?
I don’t recommend it for this recipe. Frozen strawberries release too much water when they thaw, which makes the cake watery and prevents it from setting properly. Fresh strawberries are the way to go for the best texture and flavor. If fresh strawberries aren’t available, you can use other fresh berries like raspberries or blueberries instead.
How long does this cake need to set in the refrigerator?
At least 6 hours, but overnight is ideal. The wafers need time to soften and absorb the moisture from the cream and strawberries. If you try to serve it too early, the layers won’t hold together, and you’ll end up with a delicious but messy bowl of components. Plan ahead and make it the day before you want to serve it.
Can I make this dessert ahead of time for a party?
Absolutely! In fact, this is the perfect make-ahead dessert. You can assemble it up to 48 hours in advance and keep it covered in the refrigerator. Just add the fresh strawberry garnish right before serving for the prettiest presentation. The flavors actually improve over the first 24 hours as they meld together.
What’s the best way to get clean slices?
Use a long, sharp knife and dip it in hot water before each cut. Wipe the blade dry with a clean towel, then make one smooth cut. Repeat for each slice. This prevents the cream from sticking to the knife and keeps the layers intact. For the first slice, cutting along the edge of the dish helps release the cake cleanly.
Can I use a different type of cookie or cracker?
Yes, you can experiment with different cookies! Graham crackers, shortbread cookies, or even thin ginger snaps work well. Just keep in mind that different cookies absorb moisture at different rates, so you may need to adjust the chilling time. Thicker cookies like graham crackers might need a few extra hours to soften completely.
Pin This Recipe!
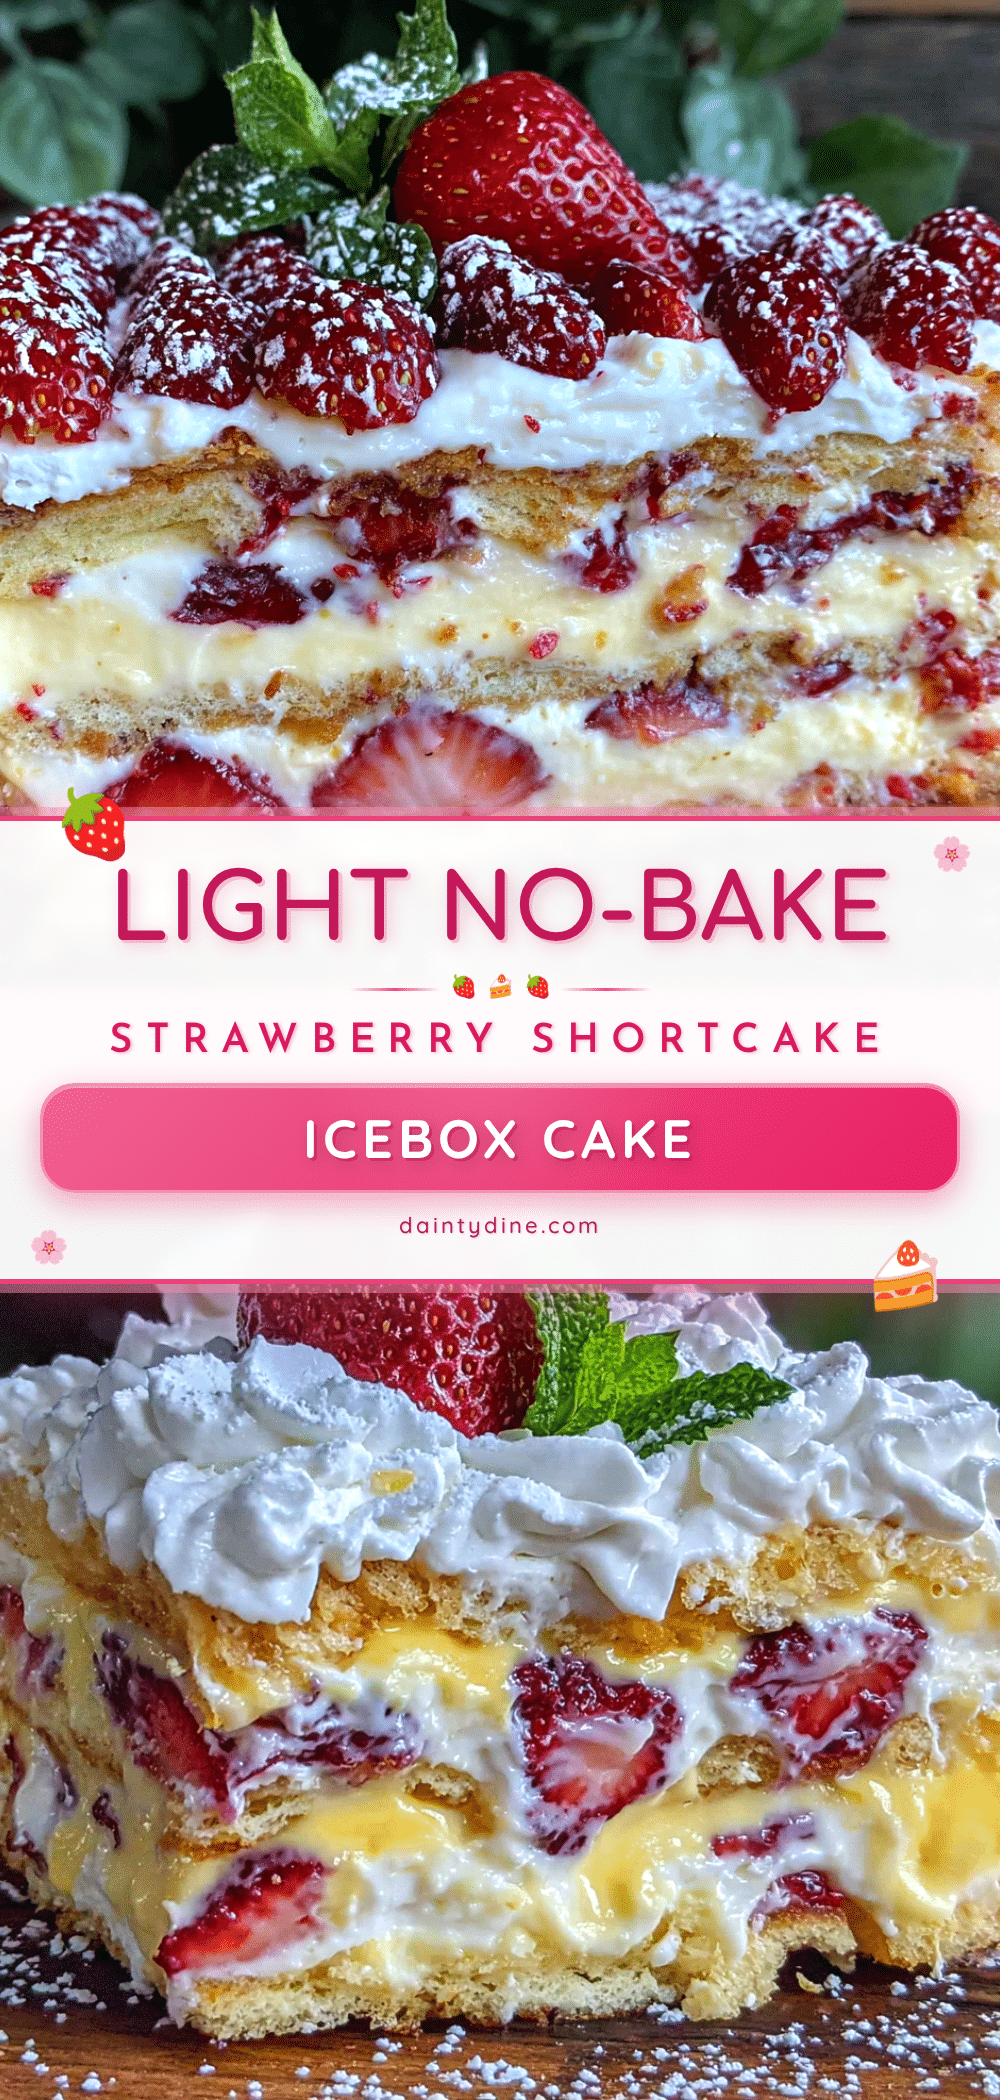
Light No-Bake Strawberry Shortcake Icebox Cake: Best 10-Minute Dessert
A light and creamy no-bake dessert featuring layers of vanilla wafers, macerated strawberries, and a Greek yogurt whipped cream filling. Ready in just 10 minutes of prep, it’s the perfect summer treat without turning on the oven.
- Prep Time: 10 minutes
- Cook Time: 0 minutes
- Total Time: 6 hours 10 minutes (includes chilling)
- Yield: 9 servings 1x
- Category: Dessert
- Cuisine: American
Ingredients
- 4 cups fresh strawberries, hulled and sliced (about 2 pounds)
- 3 tablespoons granulated sugar (or honey)
- 1 tablespoon fresh lemon juice
- 1 teaspoon vanilla extract
- 1 cup heavy whipping cream (or full-fat coconut cream for dairy-free)
- 1/2 cup powdered sugar
- 1 cup plain Greek yogurt (2% or full-fat preferred)
- 1 teaspoon vanilla extract
- 1 box (about 11 ounces) vanilla wafers (or graham crackers, shortbread cookies, or gluten-free vanilla cookies)
- Additional strawberries and mint leaves for garnish (optional)
Instructions
- Prepare the strawberries: Wash, hull, and slice strawberries about 1/4-inch thick. Place in a medium bowl and sprinkle with granulated sugar, lemon juice, and 1 teaspoon vanilla extract. Gently toss to coat. Let sit for 10-15 minutes to macerate.
- Whip the cream: In a large chilled mixing bowl, pour cold heavy whipping cream. Using an electric hand mixer on medium speed, whip until soft peaks form (about 2-3 minutes). Add powdered sugar and remaining 1 teaspoon vanilla extract. Continue whipping on medium-high speed until stiff peaks form. Be careful not to over-whip.
- Fold in the Greek yogurt: Using a rubber spatula, gently fold the Greek yogurt into the whipped cream until no white streaks remain and the mixture is uniform. Do not overmix.
- Assemble the layers: Spread about 1/4 cup of the cream mixture evenly across the bottom of an 8×8-inch baking dish. Arrange a single layer of vanilla wafers over the cream. Spoon about one-third of the macerated strawberries (including juices) evenly over the wafers. Spread one-third of the remaining cream mixture over the strawberries. Repeat layers: wafers, strawberries, cream, ending with a final layer of cream mixture on top. Use a spatula to spread smooth or create decorative swirls.
- Chill and set: Cover the dish tightly with plastic wrap, ensuring the plastic touches the surface of the cream. Refrigerate for at least 6 hours, preferably overnight, until the wafers have softened and the cake is firm.
- Garnish and serve: Just before serving, remove plastic wrap. Top with fresh sliced strawberries and mint leaves. Slice into squares and serve cold. For clean slices, use a sharp knife dipped in hot water and wiped dry between cuts.
Notes
For best results, use fresh strawberries and do not skip macerating. The cake needs at least 6 hours to set; overnight is ideal. For dairy-free, use full-fat coconut cream and dairy-free Greek-style yogurt. For gluten-free, use gluten-free vanilla wafers. The cake can be stored in the refrigerator for up to 3 days or frozen for up to 1 month.
Nutrition
- Serving Size: 1 slice (1/9 of cake
- Calories: 285
- Sugar: 18
- Sodium: 115
- Fat: 16
- Saturated Fat: 9
- Carbohydrates: 32
- Fiber: 2
- Protein: 5
Keywords: no-bake, strawberry shortcake, icebox cake, summer dessert, easy dessert, 10-minute dessert, light dessert


