Love this? Save it for later!
Share the inspiration with your friends
This was supposed to be a pumpkin cheesecake. I mean, I had it all planned out in my head—a creamy, layered masterpiece with a gingersnap crust that would take up my entire Sunday afternoon. But then my neighbor Karen knocked on the door needing help with her sink, and by the time I got back to the kitchen, the cream cheese had been sitting out way too long and honestly, I just didn’t have the energy to start over. So I grabbed a box of yellow cake mix instead. A can of pumpkin puree. Some eggs. And I thought, well, let’s just see what happens.
The result was nothing like the cheesecake I’d planned. It was better. Light, almost fluffy, with that perfect crumbly top that forms when cake mix meets melted butter. I stood there in my messy kitchen, fork in hand, eating straight from the pan at 9 PM on a Tuesday. Maybe you’ve been there—when a recipe fails so hard it circles back to being a total win.
This pumpkin dump cake has become my fall secret weapon. It takes five ingredients, about five minutes of actual work, and tastes like you spent hours layering flavors and textures. The best part? It feels indulgent but somehow isn’t heavy—that’s the trick with this version. I’ve tweaked it over three autumns now, swapping out ingredients, testing different pans, and even accidentally using pumpkin pie filling once (don’t do that). What I’m sharing today is the version that finally made me stop experimenting. It’s the one I keep coming back to, and I think you will too.
Why You’ll Love This Recipe
Let me tell you why this pumpkin dump cake has earned a permanent spot in my fall rotation. I’ve tested this recipe at least a dozen times—for book club, for Thanksgiving potlucks, for those random Tuesday nights when you just need something sweet without the drama.
- Only 5 Ingredients : Seriously. Pumpkin puree, yellow cake mix, eggs, butter, and your favorite pumpkin pie spice blend. That’s it. No heavy cream, no cream cheese, no complicated steps.
- Ready in Under an Hour : From pantry to plate in about 50 minutes. Most of that is hands-off baking time, which means you can actually enjoy your company or catch up on that show you’ve been neglecting.
- Surprisingly Light : Traditional dump cakes can be dense and almost gluey. This version uses a trick—whisking the pumpkin and eggs until airy—that gives it a texture closer to a tender pumpkin cake than a heavy dump cake.
- Perfect for Fall Gatherings : Whether it’s a casual Friendsgiving, a Halloween party, or just a cozy Sunday dessert, this dish fits right in. It travels well, too, which is huge if you’re the one bringing dessert.
- Crowd-Pleaser Guaranteed : I’ve served this to kids, picky eaters, and even my aunt who “doesn’t do pumpkin.” Every single time, the pan comes back empty.
What makes this different from every other pumpkin dump cake recipe out there? It’s the balance. Most versions either drown you in sugar or leave you with a sad, soggy bottom. This one nails that perfect middle ground—sweet enough to feel like a treat but light enough that you don’t feel like you need a nap afterward. The crumble topping gets all golden and buttery while the pumpkin layer stays soft and almost mousse-like. It’s comfort food that doesn’t weigh you down.
What Ingredients You Will Need
This recipe relies on simple, wholesome ingredients that come together to create something genuinely special. No fancy grocery store runs required—you probably already have most of these in your pantry.
- 1 can (15 oz) pumpkin puree — Not pumpkin pie filling! Make sure you grab 100% pure pumpkin puree. I prefer Libby’s for its consistent texture, but store brands work fine too. The pumpkin gives this cake its moisture and that gorgeous orange hue without adding heaviness.
- 1 box (15.25 oz) yellow cake mix — This is your shortcut to that perfect crumbly topping. I’ve tested this with both generic and brand-name mixes, and honestly, they all work. Duncan Hines and Betty Crocker are my go-tos. The dry mix gets sprinkled on top and transforms into this magical buttery crust as it bakes.
- 2 large eggs — Room temperature eggs work best here. They incorporate more easily into the pumpkin and help create that light, airy texture. If you forgot to take them out of the fridge, just place them in a bowl of warm water for 5 minutes.
- 1/2 cup unsalted butter, melted — This is what makes the cake mix turn into that golden, crispy topping. I use salted butter in a pinch and just skip adding any extra salt. Make sure it’s fully melted but not boiling hot—you don’t want to cook the eggs when you mix things together.
- 2 teaspoons pumpkin pie spice — You can use store-bought or make your own blend. I actually prefer making my own: 1 teaspoon cinnamon, 1/2 teaspoon ginger, 1/4 teaspoon nutmeg, and 1/4 teaspoon cloves. It tastes fresher and you can adjust it to your liking.
A quick note on substitutions: If you’re gluten-free, use a gluten-free yellow cake mix—I’ve had good luck with King Arthur’s brand. For a dairy-free version, swap the butter with melted coconut oil or a plant-based butter alternative. Just know that coconut oil will add a subtle coconut flavor, which actually pairs beautifully with pumpkin.
Equipment Needed
One of the reasons I love this recipe is that it doesn’t require any special equipment. No stand mixer, no food processor—just basic kitchen tools you already own.
- 9×13-inch baking dish — Glass or ceramic works best. Metal pans can work too, but you might need to reduce the baking time by 5 minutes since metal conducts heat faster.
- Large mixing bowl — Any bowl will do. I use my grandmother’s old Pyrex mixing bowl because it reminds me of her, but a stainless steel one works just as well.
- Whisk — A whisk is key here for getting that airy pumpkin mixture. A fork works in a pinch, but you’ll get better results with a whisk.
- Spatula — For scraping every last bit of pumpkin mixture into the pan. Nobody wants to waste that goodness.
- Measuring cups and spoons — For the butter and spice. If you’re using a stick of butter, just melt it in the microwave—no measuring needed.
If you don’t have a 9×13 dish, you can use two 8×8 square pans instead. Just reduce the baking time to about 30-35 minutes and check for doneness earlier. I’ve also made this in a cast iron skillet for a rustic presentation—it works beautifully, just watch the edges so they don’t burn.
Preparation Method
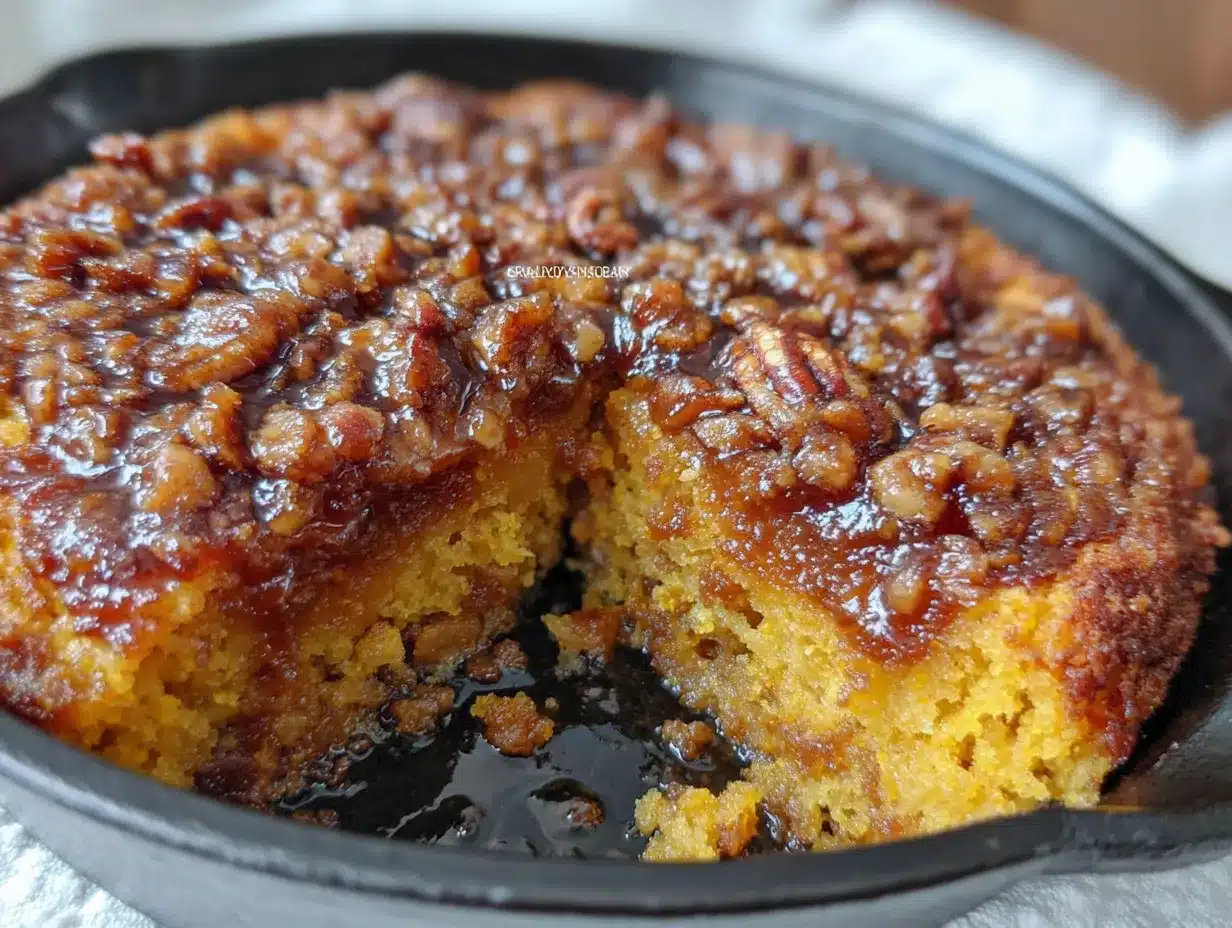
Alright, let’s get to the good part. This pumpkin dump cake comes together in just a few simple steps. I’ll walk you through each one with the little details that make all the difference.
- Preheat your oven to 350°F (175°C). This is important—don’t skip the preheat. A cold oven will mess with the texture. While it’s heating up, lightly grease your 9×13 baking dish with butter or non-stick spray. I use a paper towel to spread it evenly across the bottom and up the sides.
- In your large mixing bowl, combine the pumpkin puree, eggs, and pumpkin pie spice. Whisk everything together until it’s smooth and well combined. Here’s the trick: keep whisking for about 2 minutes until the mixture looks slightly lighter in color and a bit frothy on top. This incorporates air and gives you that lighter texture I keep talking about. You’ll notice it goes from looking thick and dense to almost creamy and pourable.
- Pour the pumpkin mixture into your prepared baking dish. Use your spatula to spread it evenly across the bottom. Don’t worry if it looks thin—it will puff up as it bakes. I like to tilt the pan a bit to make sure it reaches all the corners evenly.
- Sprinkle the entire box of yellow cake mix evenly over the pumpkin layer. This is where you want to be patient. Don’t just dump it all in one spot—sprinkle it in an even layer, covering every bit of that pumpkin mixture. I use my fingers to break up any clumps as I go. It should look like a blanket of dry cake mix covering the whole pan.
- Drizzle the melted butter evenly over the cake mix layer. This is the most satisfying step. Try to get the butter over as much of the surface as possible. Some spots will get more butter than others, and that’s totally fine—it creates those beautiful pockets of crispy topping. Don’t stir it! Just let the butter sit on top and do its magic in the oven.
- Bake for 40-45 minutes, or until the top is golden brown and the edges are bubbling. You’ll know it’s done when the cake mix has transformed into a crunchy, buttery crust and the pumpkin layer underneath is set but still slightly jiggly in the center. A toothpick inserted into the center should come out mostly clean, with maybe a few moist crumbs attached.
- Let it cool for at least 15 minutes before serving. I know this is the hardest part—the smell filling your kitchen is absolutely intoxicating. But letting it cool allows the layers to set properly. If you cut into it too soon, it will be soupy. Trust me on this one; I learned the hard way.
One thing I want to mention: every oven runs a little differently. If your top is getting too dark before the center is set, tent it loosely with foil for the last 10 minutes of baking. My oven runs hot, so I usually check at the 35-minute mark just to be safe.
Cooking Tips & Techniques
After making this pumpkin dump cake more times than I care to count, I’ve picked up a few tricks that make a real difference. Let me share what I’ve learned—including some mistakes I’ve made so you don’t have to repeat them.
Don’t overmix the pumpkin layer. I know I said to whisk for 2 minutes to incorporate air, but there’s a fine line. Overmixing can make the pumpkin layer tough instead of tender. Stop when the mixture looks smooth and slightly frothy—about 2 minutes of steady whisking is perfect.
The butter drizzle makes or breaks this recipe. The first time I made this, I poured all the melted butter in one spot and watched it pool in the center. The edges of the cake mix stayed dry and powdery. Now I drizzle slowly, moving back and forth across the pan, making sure every inch gets at least a little butter. If you see dry spots, use a spoon to nudge some butter their way.
Let it rest after baking. I cannot stress this enough. The pumpkin layer needs time to set up. If you cut into it while it’s still hot, you’ll end up with a puddle of pumpkin soup under your crunchy topping. Twenty minutes of cooling makes all the difference between a beautiful slice and a messy spoonful.
Use a serrated knife to cut clean slices. A regular knife will crush that beautiful crispy topping. A serrated knife saws through gently, keeping the crunchy bits intact. Run it under hot water and wipe it clean between cuts for the prettiest presentation.
One mistake I still make: Forgetting to check the expiration date on my pumpkin pie spice. Old spices lose their punch, and your cake will taste flat. If your spice blend has been sitting in the cabinet for more than a year, it’s time for a fresh bottle. Trust your nose—if it doesn’t smell strong and aromatic, it won’t do your cake any favors.
Variations & Adaptations
This pumpkin dump cake is incredibly forgiving, which means you can play around with it based on what you have or what you’re craving. Here are some of my favorite variations.
Spiced Pecan Crunch: Before drizzling the butter, sprinkle 1/2 cup of chopped pecans over the cake mix. The nuts toast up during baking and add this wonderful crunch that contrasts with the soft pumpkin layer. I did this for a Thanksgiving potluck and people went nuts—pun intended.
Chocolate Pumpkin Version: Use a chocolate cake mix instead of yellow. The chocolate and pumpkin combination is surprisingly good—like a healthier take on a brownie. My kids love this version, and I love that they’re eating pumpkin without realizing it.
Dairy-Free Adaptation: Swap the butter for melted coconut oil or a plant-based butter like Miyoko’s. The texture stays almost identical, and the coconut oil adds a subtle tropical note that works well with the pumpkin spice. I’ve tested this for a friend with dairy allergies, and she couldn’t tell the difference.
Extra Spicy Version: If you like things on the warmer side, add 1/4 teaspoon of cayenne pepper to the pumpkin mixture. It sounds weird, I know, but the heat plays beautifully with the sweet topping. I discovered this by accident when I grabbed the wrong jar from my spice rack, and now it’s my secret go-to.
Low-Sugar Option: Use a sugar-free yellow cake mix and reduce the butter to 1/3 cup. The texture will be slightly less tender, but the flavor is still fantastic. This version works well if you’re watching your sugar intake but still want that fall dessert experience.
Serving & Storage Suggestions
This pumpkin dump cake is versatile when it comes to serving. Here’s how I like to enjoy it and how to keep it fresh for later.
Serving Temperature: This cake is delicious at room temperature, but I actually prefer it slightly warm—about 20 minutes after it comes out of the oven. The topping is at its crispiest, and the pumpkin layer is soft and luscious. If you’re serving it later, just pop individual slices in the microwave for 15 seconds to bring back that warmth.
Topping Ideas: A dollop of whipped cream is the classic choice, and it’s perfect for cutting through the sweetness. For something richer, try a scoop of vanilla ice cream melting over the top. I’ve also drizzled caramel sauce over it for special occasions—it’s over the top in the best way. If you’re keeping it light, a dusting of powdered sugar and some fresh pomegranate seeds add color and a little tartness.
Storage Instructions: Cover the baking dish tightly with plastic wrap or aluminum foil and store it in the refrigerator for up to 5 days. The topping will soften over time, but the flavor actually gets better as the spices meld together. I think day two is when this cake really shines.
Freezing: This pumpkin dump cake freezes beautifully. Let it cool completely, then wrap the entire dish in plastic wrap, followed by a layer of foil. Freeze for up to 3 months. To thaw, let it sit in the refrigerator overnight, then warm individual slices in the microwave or a 300°F oven for 10 minutes.
Reheating: The best way to bring back that crispy topping is in the oven. Place slices on a baking sheet and warm at 350°F for 8-10 minutes. The microwave works in a pinch, but the topping will be softer. I’ve found that an air fryer at 300°F for 3 minutes does a fantastic job of reviving the crunch.
Nutritional Information & Benefits
I’m not a nutritionist, but I do pay attention to what goes into my food. Here’s a rough breakdown of what you’re getting in each serving of this pumpkin dump cake.
Per serving (1/12 of the recipe): Approximately 280 calories, 12g fat, 38g carbohydrates, 4g protein, 2g fiber, and 22g sugar. These numbers will vary based on the specific brands you use and any substitutions you make.
The good stuff: Pumpkin is packed with vitamin A—one serving gives you over 100% of your daily needs. It’s also rich in fiber and antioxidants. The eggs add protein, and if you use a quality butter, you’re getting some vitamin A and healthy fats too. This isn’t health food by any stretch, but it’s a dessert that brings some nutritional value to the table.
Dietary considerations: This recipe is vegetarian. For gluten-free, use a certified gluten-free cake mix. For dairy-free, use coconut oil or plant-based butter. It’s not vegan-friendly as written, but you could experiment with flax eggs and a vegan cake mix—I haven’t tested that version yet, so let me know if you do.
Allergen note: Contains wheat, dairy, and eggs. If you’re serving a crowd, it’s worth asking about allergies before you bring this to a potluck.
I like knowing that when I serve this dessert, I’m giving people something that tastes indulgent but isn’t completely empty calories. It’s that balance I mentioned earlier—feeling good about what you’re eating without sacrificing the joy of a real treat.
Conclusion
This pumpkin dump cake has become my fall signature dish for good reason. It’s the recipe that proves you don’t need fancy techniques or a dozen ingredients to create something truly memorable. Five ingredients, one bowl, and about an hour of your time—that’s all it takes to bring a little autumn magic to your table.
I love that this recipe is forgiving enough for beginners but satisfying enough for experienced bakers who just want something easy. It’s the kind of dessert that makes you look like a hero without actually doing much work. And honestly, isn’t that the best kind of recipe?
I’d love to hear how yours turns out. Did you try one of the variations? Did you come up with your own twist? Drop a comment below and let me know—I read every single one and I’m always looking for new ideas to test in my kitchen. And if you share a photo on Pinterest or Instagram, tag me so I can see your beautiful creation.
Here’s to happy accidents, simple ingredients, and desserts that make you close your eyes after the first bite. Happy baking, friends!
Frequently Asked Questions
Can I use pumpkin pie filling instead of pumpkin puree?
I wouldn’t recommend it. Pumpkin pie filling already has sugar and spices added, which will throw off the sweetness and texture of this recipe. Stick with 100% pure pumpkin puree for the best results. If you only have pie filling, reduce the sugar elsewhere and skip the extra pumpkin pie spice.
Why is my pumpkin dump cake soggy in the middle?
This usually happens for one of two reasons: either the cake wasn’t baked long enough, or it was cut into while still too hot. Make sure you’re baking until the edges are bubbling and the top is golden brown. And please, let it cool for at least 15-20 minutes before slicing. Patience pays off here.
Can I make this pumpkin dump cake ahead of time?
Absolutely. You can prepare it the day before and store it covered in the refrigerator. The topping will soften slightly, but the flavors will meld together beautifully. Just reheat individual slices in the oven or microwave before serving. I actually think day-old pumpkin dump cake has a deeper, more developed flavor.
What’s the best way to get clean slices?
Use a serrated knife and run it under hot water before each cut. Wipe the blade clean between slices. This prevents the topping from crumbling and gives you those picture-perfect squares. If you’re serving guests, this little trick makes a big difference in presentation.
Can I add mix-ins like chocolate chips or nuts?
Yes, and I encourage it! Sprinkle up to 1/2 cup of chocolate chips, chopped pecans, or even dried cranberries over the cake mix layer before drizzling the butter. The mix-ins will toast and add texture to the topping. Just don’t go overboard—too many add-ins can prevent the cake mix from forming that signature crunchy crust.
Pin This Recipe!
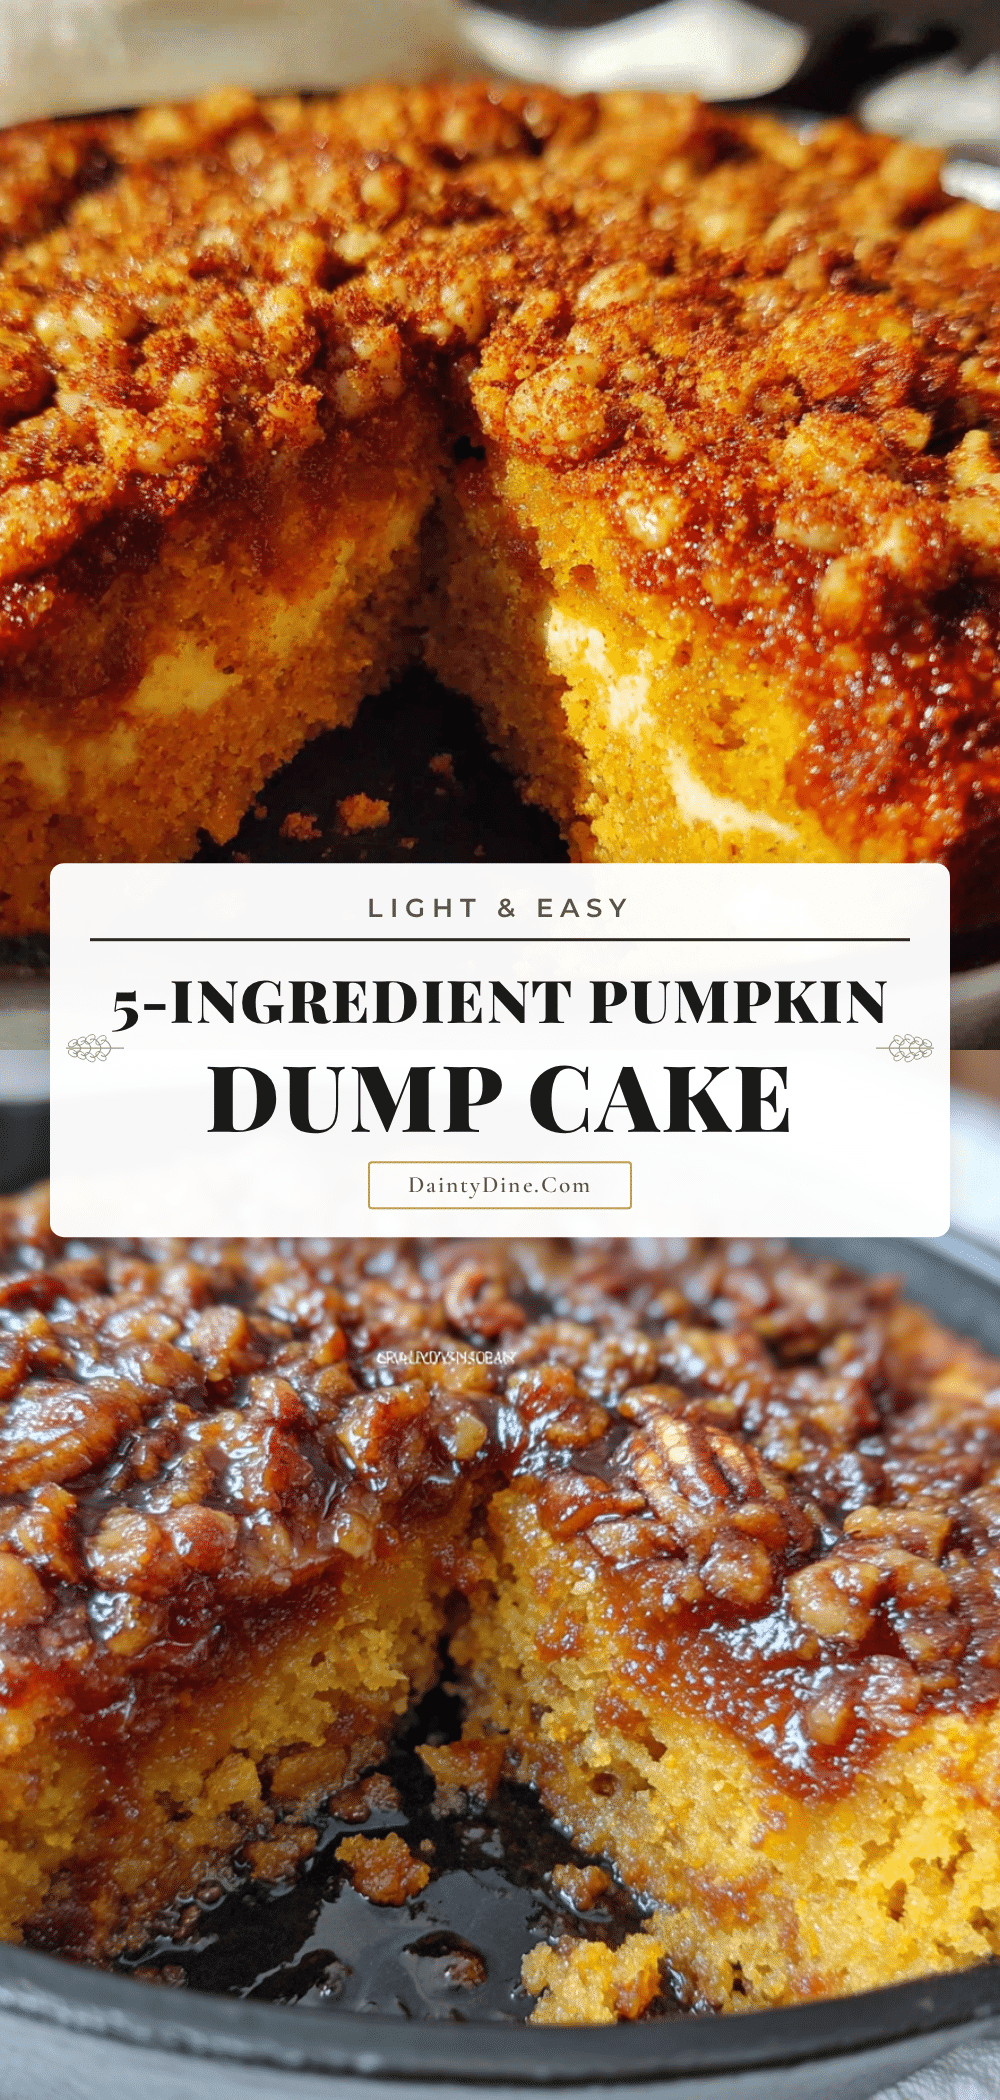
Light & Easy 5-Ingredient Pumpkin Dump Cake
A light, fluffy pumpkin dump cake made with just five ingredients and about five minutes of work. Perfect for fall gatherings, this dessert features a tender pumpkin layer topped with a golden, buttery crumble.
- Prep Time: 5 minutes
- Cook Time: 40-45 minutes
- Total Time: 50 minutes
- Yield: 12 servings 1x
- Category: Dessert
- Cuisine: American
Ingredients
- 1 can (15 oz) pumpkin puree (not pumpkin pie filling)
- 1 box (15.25 oz) yellow cake mix
- 2 large eggs, room temperature
- 1/2 cup unsalted butter, melted
- 2 teaspoons pumpkin pie spice
Instructions
- Preheat your oven to 350°F (175°C). Lightly grease a 9×13-inch baking dish with butter or non-stick spray.
- In a large mixing bowl, combine the pumpkin puree, eggs, and pumpkin pie spice. Whisk together until smooth and well combined, about 2 minutes, until the mixture looks slightly lighter in color and a bit frothy on top.
- Pour the pumpkin mixture into the prepared baking dish and spread it evenly across the bottom using a spatula.
- Sprinkle the entire box of yellow cake mix evenly over the pumpkin layer, covering every bit of the mixture. Use your fingers to break up any clumps.
- Drizzle the melted butter evenly over the cake mix layer. Do not stir.
- Bake for 40-45 minutes, or until the top is golden brown and the edges are bubbling. A toothpick inserted into the center should come out mostly clean with a few moist crumbs.
- Let it cool for at least 15 minutes before serving to allow the layers to set properly.
Notes
For gluten-free, use a gluten-free yellow cake mix. For dairy-free, swap butter with melted coconut oil or plant-based butter. Let the cake cool for at least 15-20 minutes before slicing to avoid a soupy texture. Use a serrated knife for clean slices. Store covered in the refrigerator for up to 5 days or freeze for up to 3 months.
Nutrition
- Serving Size: 1 slice (1/12 of rec
- Calories: 280
- Sugar: 22
- Sodium: 320
- Fat: 12
- Saturated Fat: 7
- Carbohydrates: 38
- Fiber: 2
- Protein: 4
Keywords: pumpkin dump cake, easy fall dessert, 5-ingredient dessert, pumpkin cake, dump cake recipe


