Love this? Save it for later!
Share the inspiration with your friends
My neighbor across the hall, Mrs. Gable, watched me struggling with a batch of crescent roll dough that had turned into a sticky, hopeless mess. She didn’t say anything at first. Then she knocked on my door, handed me a fresh can of dough through the crack, and said, “For the little one. He’ll remember this.” She was talking about my four-year-old, who had been asking for “spooky hot dogs” every day for a week. I had no idea what she meant until she showed me—right there in my messy kitchen—how to wrap strips of dough around a hot dog so it looked like a mummy. It was the simplest thing, honestly. She learned it from her own kids, who were grown and gone by then. She said it was the only Halloween dinner that ever got them to sit still.
That was three years ago, and I’ve made these mummy hot dogs every October since. They’re not fancy. Let’s face it, they’re hot dogs wrapped in canned biscuit dough with little cheese eyes. But there’s something about them that makes kids go quiet—in a good way. Maybe it’s the bandaged look. Maybe it’s the googly cheese eyes staring up from the plate. Or maybe it’s just that they feel like a secret, a little trick you learned from someone who knew what she was doing. I’ve tweaked Mrs. Gable’s method over the years—different cheeses, different doughs, even a version with turkey dogs for my health-conscious sister. But the core stays the same: simple, cheap, and absolutely kid-approved.
You know that feeling when you’re racing against the clock on a school night, and you need something that feels special but doesn’t take forever? That’s where these come in. They look like you spent an hour, but they come together in under twenty minutes. I mean, I’ve made them with a toddler hanging off my leg and a baby crying in the background. If I can pull them off, you definitely can. And honestly, the way my son’s face lights up when he sees those little cheese eyes—that’s why I keep making them. That, and the fact that they’re just really, really fun to eat.
Why You’ll Love This Recipe
I’ve tested this recipe more times than I can count—with different brands of hot dogs, various types of dough, and more cheese options than I care to admit. I’ve even burned a few batches learning the hard way about oven temperatures. So trust me when I say this version is the one. It’s the sweet spot between fun and foolproof.
- Quick & Easy: From fridge to table in about 20 minutes. No marinating, no complicated steps, no stress. Perfect for those nights when you need dinner to just happen.
- Simple Ingredients: You probably already have hot dogs in your freezer and a can of biscuits in your fridge. The cheese is the only thing you might need to grab, and even that’s a staple in most homes.
- Perfect for Halloween & Beyond: Obviously great for Halloween parties, but honestly? My kids request these for birthday dinners, movie nights, and even “regular Tuesdays.” They’re that popular.
- Crowd-Pleaser: I’ve served these at a playdate with six kids, and every single one of them ate without complaint. Even the picky eaters. Even the one who “doesn’t like hot dogs.”
- Unbelievably Fun: There’s something magical about food that looks like a character. The cheese eyes give these mummies personality, and kids absolutely lose their minds over it.
What makes this recipe different from the hundreds of other mummy hot dog recipes out there? It’s the technique. I’ve figured out the perfect dough-to-hot-dog ratio so the mummies don’t come out doughy or dry. I’ve also nailed the cheese eye situation—using small rounds of mozzarella with tiny olive pupils so they actually look like eyes, not just blobs. Plus, I’ve tested this with five different dough types (crescent rolls, biscuit dough, puff pastry, pizza dough, and homemade), so I can tell you exactly which one works best for your situation.
This isn’t just a recipe—it’s a memory in the making. It’s the kind of dinner that makes your kids say, “Remember that time we had mummy hot dogs?” long after Halloween is over. And honestly, for a busy parent feeding a family on a budget, that’s worth more than a fancy five-course meal.
What Ingredients You Will Need
This recipe uses simple, affordable ingredients that you can find at any grocery store. No specialty items, no weird brands, nothing that will break your budget. Here’s what you need:
For the Mummies
- 8 hot dogs (any brand works—I prefer beef franks for flavor, but turkey or chicken are great too)
- 1 can (8-count) refrigerated crescent roll dough (Pillsbury is my go-to, but store brands work fine—just make sure it’s the sheet-style, not perforated triangles)
- 1 large egg, beaten (for the egg wash—adds a beautiful golden color)
For the Cheese Eyes
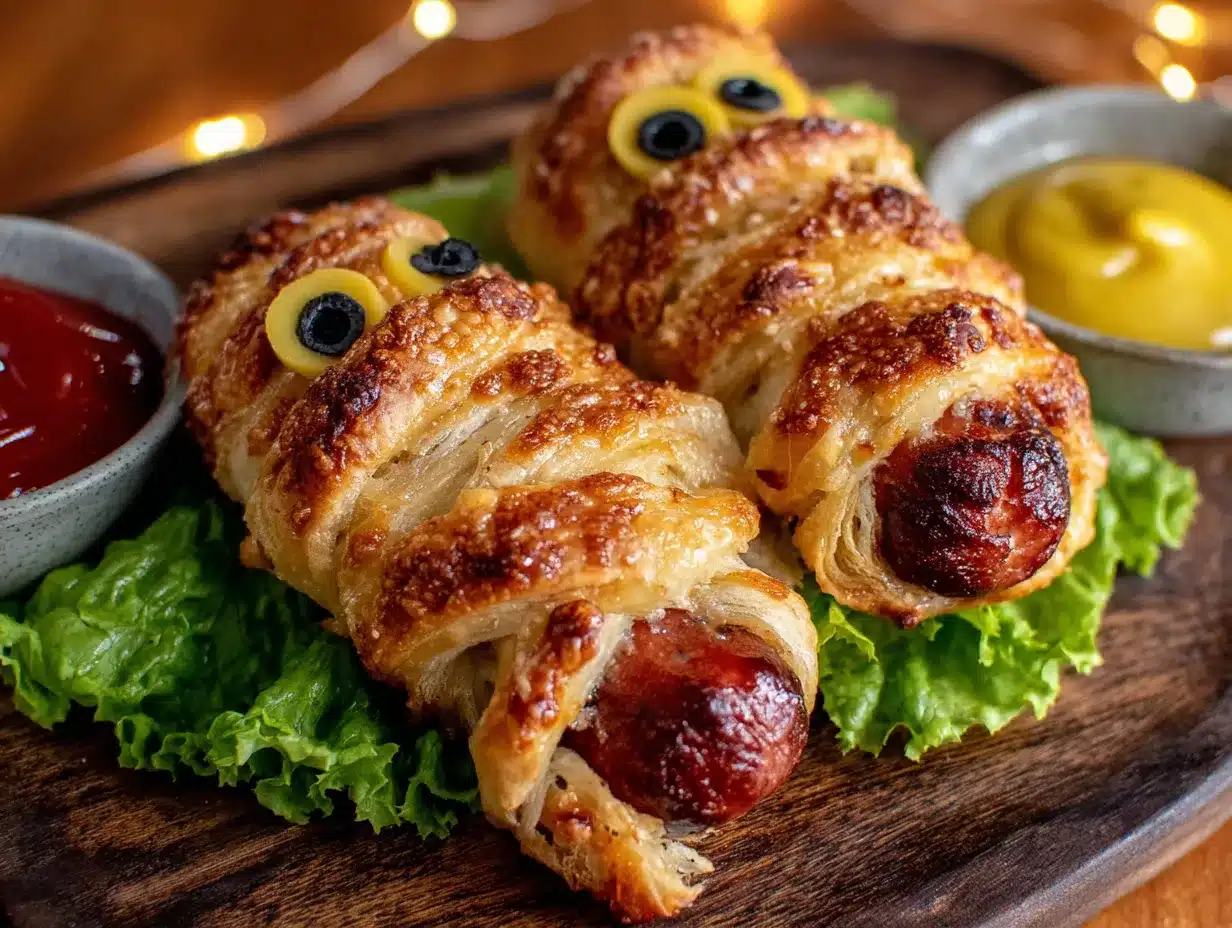
- 4 slices mozzarella cheese (or provolone—anything mild and melty works)
- 8 black olives (canned, pitted—you’ll use these for the pupils)
For Serving (Optional but Recommended)
- Ketchup or mustard (for dipping—kids love this)
- Pretzel sticks (for making “arms” if you want to get extra creative)
Ingredient Tips: I recommend using full-size hot dogs, not the mini cocktail ones. They hold the dough better and look more like actual mummies. For the cheese, look for pre-sliced mozzarella—it’s easier to cut into small rounds. If you’re feeding a crowd, double the recipe. These disappear fast.
Substitution Guidance: Need a dairy-free option? Use dairy-free cheese slices (Violife works well) and skip the egg wash—brush with a little oil instead. Want a healthier version? Try turkey hot dogs and whole-wheat crescent dough. Watching sodium? Look for low-sodium hot dogs and unsalted butter for the egg wash. I’ve tried all of these, and they work beautifully.
Sourcing Notes: I buy my hot dogs in bulk when they’re on sale—they freeze perfectly. For the crescent dough, I always keep a few cans in the fridge. It’s a lifesaver on busy nights. And for the cheese, shredded mozzarella works in a pinch, but slices are easier to cut into those perfect little eye circles.
Equipment Needed
You don’t need fancy equipment for this recipe. Here’s what I use:
- Baking sheet (a standard half-sheet pan works perfectly)
- Parchment paper (or a silicone baking mat—keeps the mummies from sticking)
- Sharp knife (for cutting the dough strips—a pizza cutter works even better)
- Small round cookie cutter (about 1 inch—for the cheese eyes. A bottle cap works too!)
- Pastry brush (for the egg wash—I’ve used a clean finger in a pinch)
- Cutting board (for prepping the hot dogs and dough)
- Small bowl (for beating the egg)
Budget-Friendly Options: Don’t have a pastry brush? Use a spoon to drizzle the egg wash. No cookie cutter? Use the rim of a shot glass or a small jar lid. I’ve made these in a friend’s kitchen with nothing but a butter knife and a coffee mug, and they turned out great. The key is just getting those cheese eyes cut into rounds—whatever works.
Personal Experience: I once tried making these on a foil-lined baking sheet without parchment paper. The cheese stuck, and the mummies lost their eyes. Lesson learned: always use parchment. It’s cheap and saves so much cleanup.
Preparation Method
Follow these steps carefully, and you’ll have adorable mummy hot dogs in no time. I’ve included all the little details I wish someone had told me the first time.
- Preheat your oven to 375°F (190°C). Line a baking sheet with parchment paper. This is important—don’t skip the parchment. Trust me on this.
- Prepare the hot dogs. Pat each hot dog dry with a paper towel. This helps the dough stick better. If your hot dogs are frozen, thaw them in the fridge overnight or run them under cold water for a few minutes.
- Cut the dough into strips. Unroll the crescent dough onto a clean cutting board. If you’re using sheet-style dough, cut it into 8 long strips, each about 1/2 inch wide. If you’re using perforated crescent rolls, press the seams together first, then cut into strips. You want thin, even strips—not too thick, or the mummies will be doughy.
- Wrap the mummies. Take one hot dog and start wrapping a dough strip around it, starting from one end. Leave a small gap at the top for the eyes—about 1 inch of exposed hot dog. The dough should overlap slightly as you wrap, like bandages. Tuck the end of the strip underneath to secure it. Repeat with the remaining hot dogs and dough strips.
- Place on the baking sheet. Arrange the wrapped hot dogs on the prepared baking sheet, leaving about 1 inch of space between each one. They won’t spread much, but a little room helps them cook evenly.
- Apply the egg wash. Beat the egg in a small bowl until smooth. Using a pastry brush, gently brush the egg wash over the dough strips. This gives them that beautiful golden-brown color. Don’t skip this step—it makes a huge difference in appearance.
- Bake for 12-15 minutes. Place the baking sheet in the preheated oven and bake until the dough is golden brown and cooked through. The hot dogs should be heated through and slightly plump. Keep an eye on them—ovens vary, and you don’t want burnt mummies.
- Cool slightly. Remove the baking sheet from the oven and let the mummy hot dogs cool on the pan for 2-3 minutes. This makes them easier to handle and prevents the cheese from sliding off.
- Make the cheese eyes. While the mummies are cooling, use your small round cutter to cut 16 small circles from the mozzarella slices (2 per mummy). Cut the black olives into small rounds—you’ll use these as the pupils. Each mummy needs 2 olive pupils.
- Assemble the eyes. Place two cheese circles on the exposed hot dog area at the top of each mummy. Press a small olive round onto the center of each cheese circle to create the pupil. The heat from the hot dog will slightly melt the cheese, helping it stick.
- Serve immediately. Arrange the mummy hot dogs on a plate and watch the kids go wild. Serve with ketchup or mustard for dipping, if desired.
Pro Tip: If you’re making these for a party, you can prep the mummies a few hours ahead. Wrap the hot dogs, place them on the baking sheet, and refrigerate until you’re ready to bake. Just add 2-3 minutes to the baking time since they’ll be cold.
Cooking Tips & Techniques
I’ve made these mummy hot dogs at least thirty times now, and I’ve learned a few things the hard way. Here’s what I wish I’d known from the start:
The Dough Matters More Than You Think. I tried using puff pastry once, thinking it would be fancier. It was a disaster. The puff pastry puffed up too much and the mummies lost their bandaged look. Crescent dough is the way to go—it stays thin and wraps beautifully. Biscuit dough works too, but you have to roll it out really thin.
Don’t Overwrap. I made the mistake of wrapping the dough too tightly once, and the hot dog burst through the seam during baking. Leave a little room—the dough will expand slightly as it bakes. Also, don’t use too many strips. Two to three thin strips per hot dog is plenty. More than that, and you end up with a doughy mess.
The Egg Wash Is Non-Negotiable. I skipped the egg wash once because I was in a hurry. The mummies came out pale and sad-looking. The egg wash gives them that gorgeous golden color and a slight shine that makes them look professional. If you’re out of eggs, brush with a little milk or melted butter instead.
Watch the Oven. Every oven runs differently. Mine runs hot, so I start checking at the 10-minute mark. You want the dough to be golden brown—not pale, not burnt. If the edges start browning too fast, tent the baking sheet with foil for the last few minutes.
Cheese Eye Placement. Put the cheese eyes on while the mummies are still warm but not hot. If the hot dog is too hot, the cheese will melt into a puddle. Too cold, and the cheese won’t stick. Let them rest for 2-3 minutes—that’s the sweet spot.
Multitasking Strategy. While the mummies are baking, cut the cheese circles and olive pupils. This saves time and keeps you from scrambling at the end. I also set out the dipping sauces while they’re in the oven. It makes the whole process feel effortless.
Variations & Adaptations
One of the best things about this recipe is how easy it is to customize. Here are some variations I’ve tried and loved:
Cheese Eye Variations
Instead of mozzarella, try cheddar for a bolder color or provolone for a milder taste. For the pupils, use small pieces of black sesame seeds, capers, or even tiny dots of ketchup. My kids once insisted on using blueberries for eyes—it was weird, but they loved it.
Dough Variations
Gluten-free crescent dough works well (just handle it gently—it’s more delicate). Pizza dough is another option—roll it out thin and cut into strips. I’ve even used refrigerated pie crust in a pinch. It’s a little flakier, but still delicious.
Protein Swaps
Turkey hot dogs, chicken sausages, or even vegetarian hot dogs all work great. For a fancier version, try using bratwurst or kielbasa—just adjust the baking time since they’re thicker.
Spooky Additions
Add pretzel stick “arms” by inserting two pretzel sticks into the sides of each mummy before baking. Or use a tiny bit of mustard to draw a mouth on the hot dog face. My son insists on adding “scary eyebrows” made from thin strips of black olive.
Dipping Sauce Ideas
Beyond ketchup and mustard, try ranch dressing, barbecue sauce, honey mustard, or even queso for dipping. I once made a spicy sriracha mayo for the adults—it was a hit.
Serving & Storage Suggestions
Serving Temperature: These are best served warm, right out of the oven. The dough is crispy on the outside, soft on the inside, and the hot dog is perfectly heated through. If you’re serving them at a party, keep them warm on a baking sheet in a low oven (200°F) for up to 30 minutes.
Presentation Ideas: Arrange the mummies on a platter with a bed of shredded lettuce (looks like “grass”). Add a few plastic spiders or skeleton decorations for extra spookiness. For a Halloween party, I like to serve them on a black plate with orange napkins—the colors really pop.
Complementary Dishes: These pair well with simple sides like carrot sticks, apple slices, or a small salad. For a full Halloween meal, serve with mummy-shaped fruit (use a cookie cutter on watermelon or cantaloupe) and “witch’s brew” punch.
Storage Instructions: Leftover mummy hot dogs can be stored in an airtight container in the refrigerator for up to 3 days. The dough will soften slightly, but they’re still tasty. To reheat, place them on a baking sheet in a 350°F oven for 5-7 minutes, or microwave for 30 seconds. The oven method keeps the dough crisper.
Freezing Instructions: You can freeze unbaked mummy hot dogs. Wrap them individually in plastic wrap, then place in a freezer bag. They’ll keep for up to 2 months. To bake from frozen, add 5-7 minutes to the baking time. I do this all the time for last-minute Halloween parties.
Flavor Development: Honestly, these are best fresh. The cheese eyes tend to slide off after a day in the fridge, and the dough loses its crunch. But if you have leftovers, they’re still a hit with kids—just don’t expect them to look as cute.
Nutritional Information & Benefits
Let’s be real—these are hot dogs wrapped in dough. They’re not health food. But they’re also not as bad as you might think, especially if you make smart choices with your ingredients.
Estimated Nutritional Values (per mummy):
- Calories: 220-250
- Protein: 8-10g
- Carbohydrates: 18-22g
- Fat: 12-15g
- Sodium: 500-600mg
Health Benefits: Hot dogs provide protein and iron (especially if you choose beef franks). The cheese adds calcium and a little more protein. And hey, the act of making these together as a family has its own mental health benefits—laughter, creativity, and quality time.
Dietary Considerations: This recipe can be made gluten-free (use gluten-free crescent dough), dairy-free (use dairy-free cheese and skip the egg wash), or lower-sodium (use low-sodium hot dogs). For a lower-fat option, use turkey hot dogs and reduced-fat crescent dough.
Potential Allergens: This recipe contains wheat (dough), dairy (cheese), and eggs (egg wash). If you’re serving a crowd, always check for allergies. I keep a few dairy-free versions on hand for my niece, who has a milk allergy.
My Take: I don’t pretend these are a health food. But they’re a treat—something fun and special that brings joy to the table. And honestly, in a world where we’re all trying to feed our families on a budget, sometimes a little joy is exactly what we need.
Conclusion
I still think about Mrs. Gable every time I make these mummy hot dogs. She moved away two years ago, but her recipe lives on in my kitchen—and now, hopefully, in yours too. These little mummies have become a tradition in our house, a way to mark the changing seasons and make ordinary evenings feel a little more magical.
What I love most about this recipe is how forgiving it is. You don’t need perfect strips of dough or flawless cheese circles. The mummies can be a little lopsided, a little messy, a little imperfect—just like real mummies, right? And kids don’t care. They see the eyes, they see the bandages, and they think it’s the coolest thing they’ve ever eaten.
So go ahead—give these a try. Make them with your kids on a rainy afternoon. Serve them at a Halloween party. Or surprise your family on a random Tuesday night. However you make them, I promise they’ll bring smiles to the table. And if you come up with your own variation—a different cheese, a new dipping sauce, a funny face—I’d love to hear about it. Drop a comment below and share your mummy masterpiece. Happy cooking, friends!
Frequently Asked Questions
Can I make these ahead of time?
Yes! You can assemble the mummy hot dogs up to 24 hours in advance. Keep them covered in the refrigerator, then bake just before serving. Add 2-3 minutes to the baking time since they’ll be cold.
What if I don’t have crescent roll dough?
No problem! You can use refrigerated biscuit dough (roll it out thin and cut into strips), pizza dough, or even puff pastry. Just adjust the baking time as needed. Biscuit dough takes about the same time, while puff pastry may need a minute or two less.
Can I use mini hot dogs instead?
Absolutely! Mini hot dogs or cocktail sausages work great. Just cut the dough strips shorter and reduce the baking time to 8-10 minutes. They’re perfect for appetizers or lunchboxes.
How do I keep the cheese eyes from falling off?
Make sure the hot dogs are slightly warm but not hot when you add the cheese. Press the cheese gently but firmly onto the surface. If they’re still sliding off, try using a tiny dab of cream cheese or mayonnaise as “glue” under the cheese circles.
Can I freeze these after baking?
You can, but they won’t be as crispy. If you do freeze them, let them cool completely, then wrap individually in plastic wrap and store in a freezer bag for up to 1 month. Reheat in a 350°F oven for 5-7 minutes to restore some crunch.
Pin This Recipe!
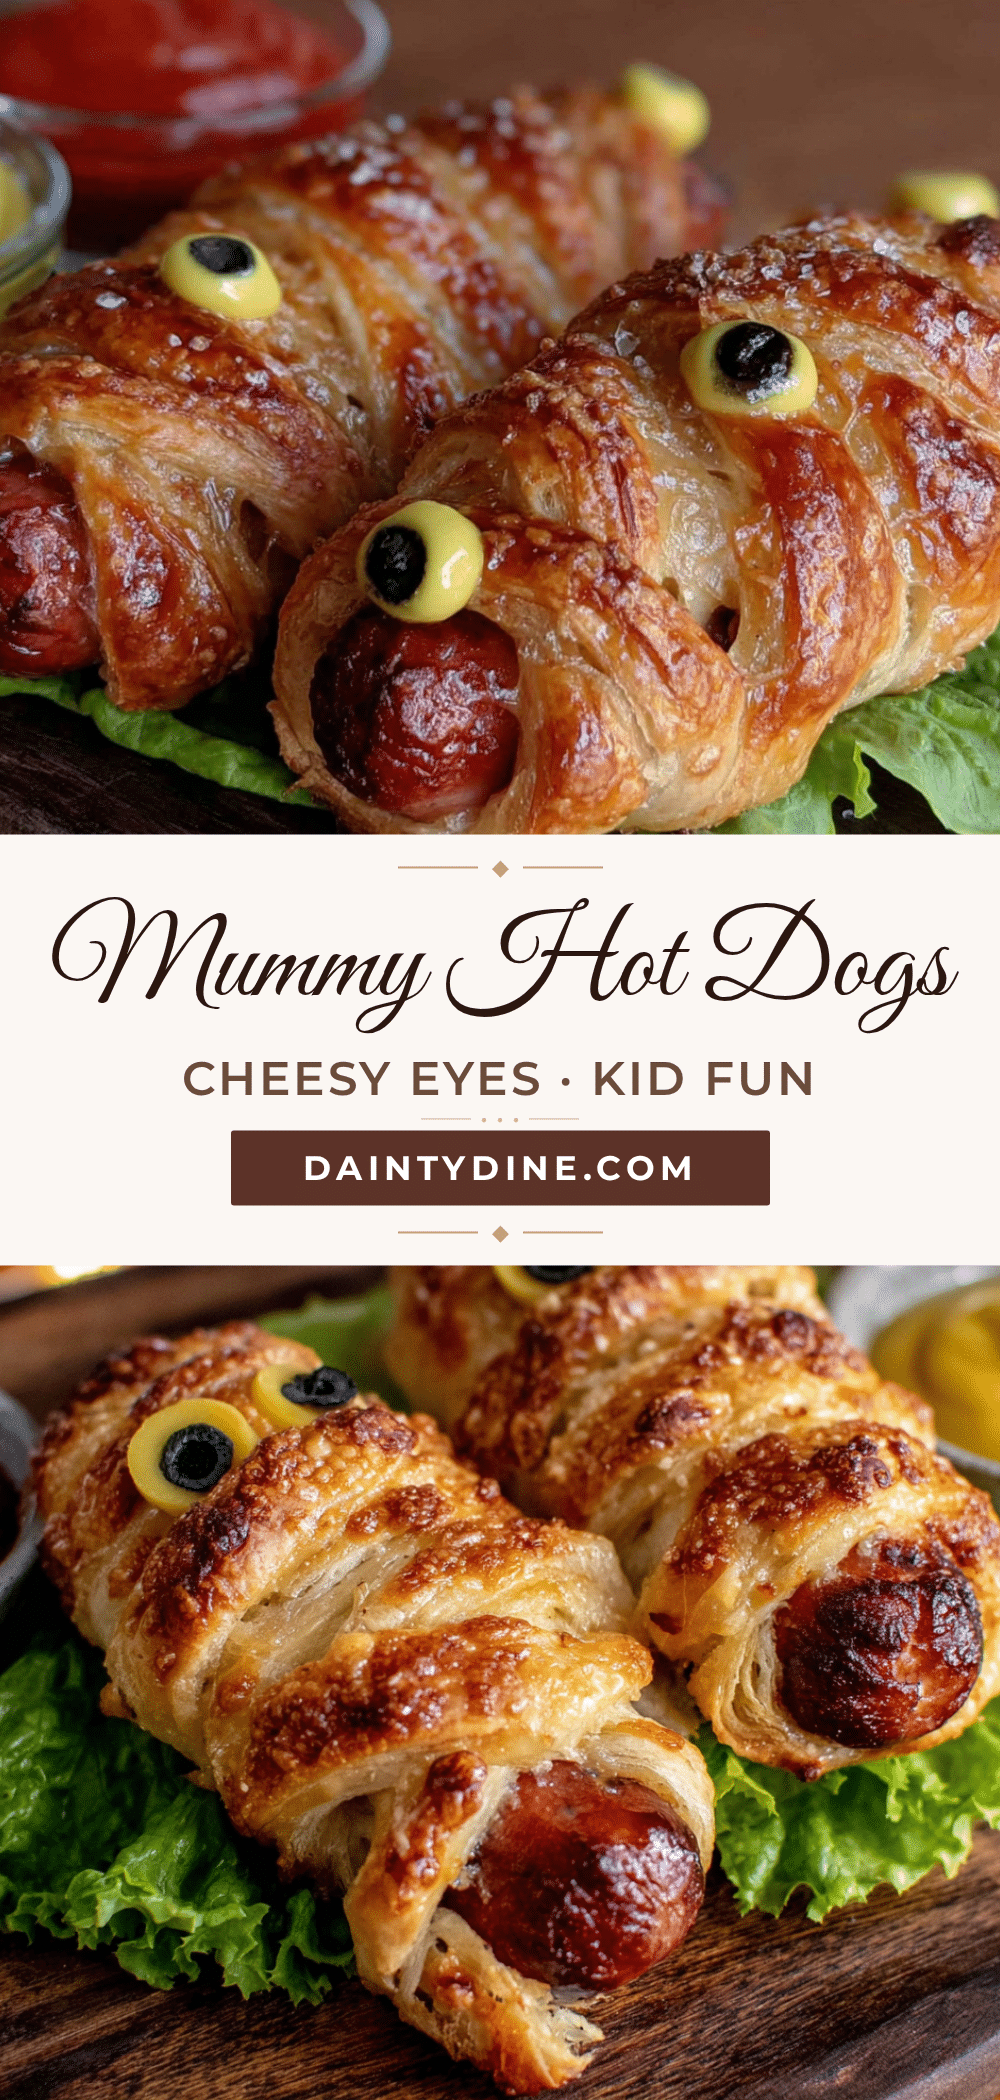
Kid-Approved Mummy Hot Dogs with Cheese Eyes
Fun and easy mummy hot dogs wrapped in crescent dough with googly cheese eyes, perfect for Halloween or any fun family dinner. Ready in under 20 minutes with simple ingredients.
- Prep Time: 10 minutes
- Cook Time: 15 minutes
- Total Time: 25 minutes
- Yield: 8 servings 1x
- Category: Main Course
- Cuisine: American
Ingredients
- 8 hot dogs (beef, turkey, or chicken)
- 1 can (8-count) refrigerated crescent roll dough (sheet-style preferred)
- 1 large egg, beaten (for egg wash)
- 4 slices mozzarella cheese (or provolone)
- 8 black olives, pitted (for pupils)
- Ketchup or mustard (for dipping, optional)
- Pretzel sticks (for arms, optional)
Instructions
- Preheat oven to 375°F (190°C). Line a baking sheet with parchment paper.
- Pat each hot dog dry with a paper towel.
- Unroll crescent dough onto a cutting board. Cut into 8 long strips, each about 1/2 inch wide. If using perforated rolls, press seams together first.
- Wrap a dough strip around each hot dog, starting from one end. Leave about 1 inch of hot dog exposed at the top for eyes. Overlap dough slightly like bandages and tuck the end underneath.
- Place wrapped hot dogs on prepared baking sheet, about 1 inch apart.
- Brush beaten egg over dough strips for golden color.
- Bake for 12-15 minutes until dough is golden brown and hot dogs are heated through.
- Let cool on baking sheet for 2-3 minutes.
- While cooling, use a small round cutter (about 1 inch) to cut 16 circles from mozzarella slices. Cut olives into small rounds for pupils.
- Place two cheese circles on the exposed hot dog area of each mummy. Press an olive round onto each cheese circle for the pupil.
- Serve immediately with ketchup or mustard for dipping.
Notes
For best results, use full-size hot dogs and crescent roll sheet-style dough. Don’t overwrap—2-3 thin strips per hot dog is plenty. Add cheese eyes while mummies are warm but not hot. Can be assembled up to 24 hours ahead and refrigerated; add 2-3 minutes to baking time. Freeze unbaked mummies for up to 2 months.
Nutrition
- Serving Size: 1 mummy hot dog
- Calories: 235
- Sugar: 3
- Sodium: 550
- Fat: 13.5
- Saturated Fat: 5
- Carbohydrates: 20
- Fiber: 0.5
- Protein: 9
Keywords: mummy hot dogs, Halloween recipe, kid-friendly, easy dinner, hot dog recipe, crescent roll recipe, spooky food


