Love this? Save it for later!
Share the inspiration with your friends
I was standing in the frozen foods aisle last Tuesday, half-listening to my toddler argue with me about why we absolutely needed the kind of yogurt with cartoon characters on it, when a woman walked past me pushing a cart with a wobbling wheel. The squeak—that specific, rhythmic squeak—hit me like a time machine. Suddenly I was seven, standing in my Aunt Rita’s linoleum-floored kitchen in the middle of July, watching her pull a giant glass bowl out of the refrigerator. The bowl was cold enough to fog up in the humid air, and inside it was this billowy, snowy white cloud dotted with bright red cherries. I hadn’t thought about that bowl in twenty years. I mean, honestly, I had completely forgotten about it until that squeaky cart wheel brought it all back. My aunt called it Cherries in the Snow, and to my seven-year-old self, it was the most magical thing I had ever seen. You know that feeling when you taste something and your brain just stops? That was me, standing on a step stool, sneaking spoonfuls when she turned around to answer the phone. I dropped the spoon once and made a mess on her clean floor, but she just laughed and handed me another one. That dessert salad stayed with me because it wasn’t fancy or complicated—it was just pure, simple joy in a bowl. And honestly? That’s exactly what I needed to bring back into my own kitchen.
Why You’ll Love This Recipe
Let me tell you why this Kid-Approved Cherries in the Snow Dessert Salad has become a non-negotiable staple in my house. I’ve tested this recipe about six times now, tweaking the ratios and trying different brands, and I can say with confidence—this is the version that works every single time.
- Quick & Easy: This comes together in literally 5 minutes. Not five minutes of active prep plus chilling time—five minutes total. You dump, stir, and serve. That’s it.
- Simple Ingredients: You probably have most of these in your kitchen right now. No fancy grocery runs, no obscure extracts, no hunting down specialty items. I mean it.
- Perfect for Family Meals: This is the kind of dessert that makes everyone happy. The kids think it’s a treat, and you know it’s made with real ingredients you can feel good about.
- Crowd-Pleaser: I brought this to a potluck last month, and three people asked for the recipe before I even sat down. It disappears fast.
- Unbelievably Delicious: The texture is what gets you—it’s light and fluffy like a cloud, but the cherries add this pop of sweetness and color that makes it feel special. It’s comfort food, plain and simple.
What makes this recipe different from all the other versions out there? It’s the balance. I spent a whole afternoon testing different combinations of sour cream and cream cheese ratios because I wanted that perfect tangy-sweet balance that doesn’t feel heavy. Most versions are either too sweet or too rich. This one? It hits that sweet spot where you keep going back for just one more spoonful. Plus, it’s family-approved by my own picky eaters—and trust me, that’s not easy to earn.
What Ingredients You Will Need
This recipe uses simple, everyday ingredients to deliver that creamy, dreamy texture and bright cherry flavor without any fuss. Most of these are pantry staples or things you probably already have in your fridge.
- 1 package (8 oz) cream cheese, softened to room temperature (I prefer Philadelphia brand for the smoothest texture—trust me on this one)
- 1 cup powdered sugar (also called confectioners’ sugar—sift it if it’s lumpy)
- 1 teaspoon vanilla extract (pure vanilla extract makes a difference, but imitation works fine too)
- 1 container (8 oz) frozen whipped topping, thawed (like Cool Whip—or use homemade whipped cream if you’re feeling fancy)
- 1 can (21 oz) cherry pie filling (I like Lucky Leaf or Comstock—look for one with real cherries, not just syrup)
- Optional: 1 cup mini marshmallows (my kids love these, but I leave them out when I’m serving adults only)
- Optional: 1/2 cup chopped pecans or walnuts (adds a nice crunch if you’re into that)
A few notes on ingredients: Make sure your cream cheese is truly softened. I know we’re all in a hurry, but cold cream cheese will leave you with lumpy results. Let it sit on the counter for about 30 minutes, or microwave it in 10-second bursts if you’re impatient like me. For the whipped topping, let it thaw in the fridge overnight or on the counter for about an hour. Don’t microwave it—trust me, I learned that the hard way. If you want to make this a bit lighter, you can use reduced-fat cream cheese and light whipped topping. The texture changes slightly, but it’s still delicious. For a dairy-free version, use vegan cream cheese and coconut-based whipped topping. I’ve tested both, and while they’re not exactly the same, they’re still pretty great.
Equipment Needed
You don’t need much for this recipe, which is part of why I love it. Here’s what you’ll need:
- Large mixing bowl (glass or stainless steel works best—I use a big glass bowl so I can see the pretty layers)
- Electric hand mixer or stand mixer (you can do this by hand with a whisk, but your arm will thank you for using a mixer)
- Rubber spatula (for folding in the whipped topping and scraping every last bit of goodness)
- Measuring cups and spoons
- Large serving bowl or 9×13-inch dish (for chilling and serving)
If you don’t have an electric mixer, no worries—you can absolutely do this with a whisk and some elbow grease. Just make sure the cream cheese is really soft first. I’ve made this in my mother-in-law’s tiny kitchen with nothing but a fork and a bowl, and it turned out just fine. For the serving dish, any pretty bowl works. I like using a clear glass bowl because the red and white layers look so festive. But honestly, a plastic mixing bowl works too—I’ve done it.
Preparation Method
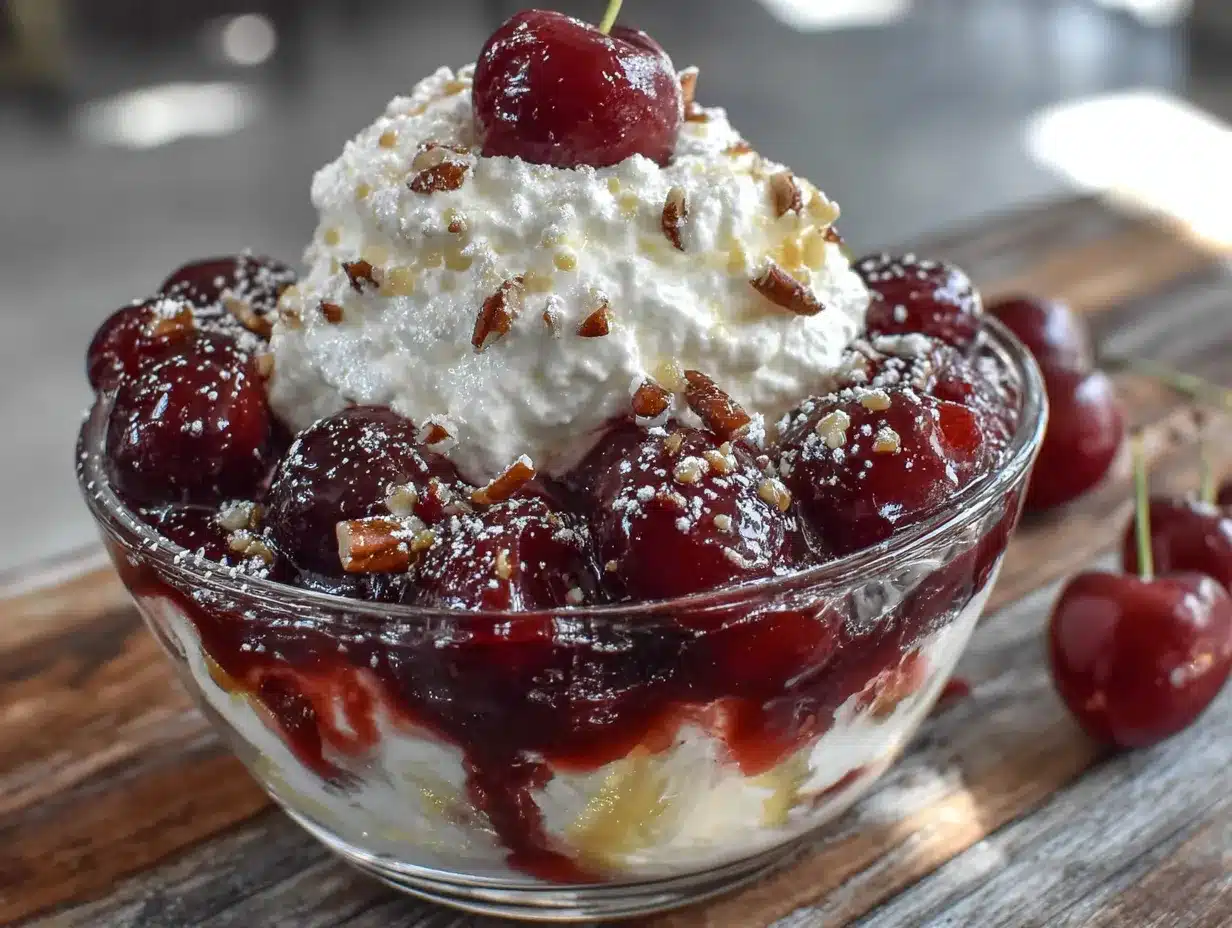
This is where the magic happens. Follow these steps, and you’ll have a dessert that looks like you spent way more time on it than you actually did.
- Soften the cream cheese. Take your cream cheese out of the fridge about 30 minutes before you start. If you forgot (I do this all the time), unwrap it and microwave it in 10-second intervals until it’s soft but not melted. You want it to give when you press it with your finger.
- Beat the cream cheese. Place the softened cream cheese in your large mixing bowl. Beat it with an electric mixer on medium speed until it’s smooth and creamy—about 1 minute. Scrape down the sides of the bowl with your spatula. This step is important because lumps here will stay lumps forever.
- Add the powdered sugar. Gradually add the powdered sugar, about 1/4 cup at a time, beating on low speed after each addition. This prevents a sugar cloud from exploding all over your kitchen. I speak from experience. Once all the sugar is in, beat for another 30 seconds until everything is combined and smooth.
- Mix in the vanilla. Add the vanilla extract and beat until just combined. Give it a taste—it should be sweet and creamy with a hint of vanilla.
- Fold in the whipped topping. Add the thawed whipped topping to the cream cheese mixture. Use your rubber spatula to gently fold it in. Don’t stir vigorously—you want to keep that light, airy texture. Fold until you don’t see any white streaks. This takes about 1 minute of gentle folding.
- Add the cherry pie filling. Gently fold in the cherry pie filling. You don’t want to break up the cherries too much, so use a light hand. If you’re adding marshmallows or nuts, fold them in now too. The mixture should look like a snowy landscape dotted with bright red jewels.
- Transfer to serving dish. Spoon the mixture into your serving bowl or dish. Spread it evenly with your spatula. If you want to get fancy, you can swirl a few extra cherries on top for presentation.
- Chill (optional but recommended). Cover and refrigerate for at least 1 hour before serving. This helps the flavors meld together and makes the texture even creamier. But honestly? I’ve served it immediately and nobody complained.
Your mixture should be thick, creamy, and billowy—like a cloud that tastes like cherries and vanilla. If it looks too runny, your cream cheese might not have been soft enough, or your whipped topping might have been over-thawed. Don’t worry, it will still taste amazing. Just chill it longer and it will firm up.
Cooking Tips & Techniques
I’ve made this recipe more times than I can count, and I’ve learned a few things the hard way. Let me save you some trouble.
The number one mistake people make is using cold cream cheese. I know I’ve said this already, but it’s that important. Cold cream cheese doesn’t blend smoothly, and you’ll end up with little white lumps throughout your dessert. It’s not the end of the world—it still tastes fine—but it’s not as pretty. Let it sit out. Set a timer if you have to.
Another common issue is over-mixing the whipped topping. When you fold it in, be gentle. If you stir it too aggressively, you’ll deflate all that air, and your dessert will be dense instead of light and fluffy. Think of it like you’re folding a soufflé—slow, gentle, and patient.
Here’s a tip I learned from a failed batch: If your cherry pie filling is really thick and syrupy, you can drain off a little of the syrup before adding it. This keeps your dessert from getting too wet. I usually spoon out about 2 tablespoons of the syrup and save it for drizzling over ice cream later. Waste not, want not.
For the best texture, let it chill overnight. The flavors really develop and meld together. It’s even better the next day, which makes it perfect for making ahead. I often make this the night before a family gathering, and it’s always a hit.
One more thing: If you’re using a glass bowl, let it come to room temperature for about 10 minutes before serving. It makes scooping easier and the texture is more pleasant. Cold desserts can sometimes be a bit too firm straight from the fridge.
Variations & Adaptations
This recipe is super flexible, which is one of the reasons I keep coming back to it. Here are some variations I’ve tried and loved:
- Berry Bliss Version: Swap the cherry pie filling for blueberry or strawberry pie filling. My sister makes it with strawberry, and it’s a completely different but equally delicious dessert. The tangy cream cheese base works with any fruit.
- Chocolate Cherry Dream: Add 1/2 cup mini chocolate chips along with the cherries. The combination of chocolate and cherry is classic for a reason. I made this for Valentine’s Day last year, and it was gone in 10 minutes.
- Lighter Version: Use reduced-fat cream cheese, light whipped topping, and sugar-free powdered sugar substitute. It’s not quite as indulgent, but it’s still really good. I make this version when I’m trying to be a little more mindful.
- Crunchy Top Version: Sprinkle crushed graham crackers or vanilla wafer crumbs on top before serving. It adds a nice texture contrast. My kids love this version because it feels like eating a cheesecake without all the work.
- Pineapple Snow: Use crushed pineapple (drained well) instead of cherries. Add 1/2 cup shredded coconut for a tropical twist. This is my go-to summer version when cherries aren’t in season.
For dietary adaptations, you can make this gluten-free easily—just double-check your pie filling label. Most brands are gluten-free, but it’s always good to verify. For a nut-free version, simply leave out the pecans or walnuts. For a lower-sugar option, use sugar-free pudding mix or a sugar substitute in place of the powdered sugar. I’ve tested it with Swerve, and it works pretty well, though the texture is slightly different.
Serving & Storage Suggestions
This dessert is best served chilled, straight from the refrigerator. I like to scoop it into individual bowls or cups for a more polished presentation, but honestly, setting out the big bowl with a spoon works just fine for family dinners. It’s also great for potlucks and picnics because it travels well.
For serving: Scoop into dessert bowls and garnish with a fresh cherry on top if you’re feeling fancy. It pairs beautifully with a cup of coffee or a glass of cold milk. For a more indulgent treat, serve it alongside a slice of pound cake or angel food cake. The lightness of the cake complements the creamy dessert perfectly.
Storage instructions: Store any leftovers in an airtight container in the refrigerator for up to 3 days. The texture will soften slightly over time, but it still tastes great. I actually think it’s even better on day two because the flavors have had time to meld. Do not freeze this dessert—the texture becomes watery and grainy when thawed. Trust me, I tried it once, and it was not pretty.
Reheating? This is a cold dessert, so no reheating needed. Just take it out of the fridge about 10 minutes before serving to take the chill off. If you’ve stored it for a day or two, give it a gentle stir before serving to redistribute any liquid that might have separated.
Nutritional Information & Benefits
Here’s the nutritional breakdown for one serving (based on 10 servings):
| Nutrient | Amount per Serving |
|---|---|
| Calories | 285 |
| Total Fat | 15g |
| Saturated Fat | 9g |
| Cholesterol | 25mg |
| Sodium | 115mg |
| Total Carbohydrates | 36g |
| Dietary Fiber | 1g |
| Sugars | 28g |
| Protein | 3g |
While this is definitely a treat, there are a few redeeming qualities. Cherries are a good source of antioxidants and vitamin C. Cream cheese provides calcium and protein. And honestly? Sometimes we need a dessert that just makes us happy. From my perspective, this dessert is about balance—enjoying something delicious without guilt. It’s perfect for special occasions, family dinners, or just because it’s Tuesday.
Dietary considerations: This recipe contains dairy and gluten (check your pie filling). For a gluten-free version, ensure all ingredients are certified gluten-free. For a dairy-free version, use vegan cream cheese and coconut whipped topping. It’s not suitable for vegans in its original form due to the cream cheese and whipped topping, but the adaptations work well.
Conclusion
This Kid-Approved Cherries in the Snow Dessert Salad is the kind of recipe that becomes a family tradition without you even planning it. It’s quick enough for a last-minute dessert, special enough for holidays, and simple enough that your kids can help make it. The creamy, fluffy texture combined with those bright, sweet cherries is just pure comfort in a bowl. I love this recipe because it reminds me of my Aunt Rita and those hot summer afternoons in her kitchen, but it also works perfectly for my own family’s busy weeknights. It’s one of those rare recipes that bridges generations without any fuss.
I’d love to hear how this turns out for you! Did your kids love it? Did you try one of the variations? Drop a comment below and let me know. And if you have your own twist on this classic, please share it—I’m always looking for new ideas to try. Don’t forget to pin this recipe for later and share it with someone who needs a quick, crowd-pleasing dessert in their life. Happy cooking, friends!
Frequently Asked Questions
Can I make this dessert ahead of time?
Absolutely! In fact, I recommend it. This dessert actually gets better after chilling overnight because the flavors have time to meld together. Just make it, cover it, and refrigerate for up to 24 hours before serving. Give it a gentle stir before serving if any liquid has separated.
Can I use fresh cherries instead of cherry pie filling?
You can, but it changes the recipe significantly. Fresh cherries don’t have the same syrup or sweetness level as pie filling. If you want to use fresh cherries, pit and chop them, then toss them with about 1/4 cup of sugar and let them sit for 30 minutes to create a syrup. Drain off some of the liquid before adding them to the mixture. It’s a bit more work, but it’s delicious in its own way.
Why is my dessert runny?
There are a few reasons this might happen. The most common culprit is cream cheese that wasn’t fully softened before mixing. Another possibility is that your whipped topping was over-thawed or you folded it in too aggressively. If your dessert turns out runny, don’t panic—just chill it for at least 4 hours, and it will firm up nicely. If it’s still runny after that, you can fold in an extra 1/2 cup of whipped topping to thicken it.
Can I use homemade whipped cream instead of Cool Whip?
Yes, you can! Whip 1 1/2 cups of heavy cream with 2 tablespoons of powdered sugar until stiff peaks form, then fold it in just like you would with the store-bought version. Homemade whipped cream is lighter and less stable, so the dessert might be a bit softer and won’t hold up as long in the fridge. It’s best eaten within 24 hours if you go this route.
How long does this dessert last in the refrigerator?
This dessert will keep in an airtight container in the refrigerator for up to 3 days. After that, the texture starts to break down and it can become watery. I don’t recommend freezing it because the texture changes significantly—it becomes grainy and separates when thawed. The good news is, it’s so delicious that leftovers are rarely a problem!
Pin This Recipe!
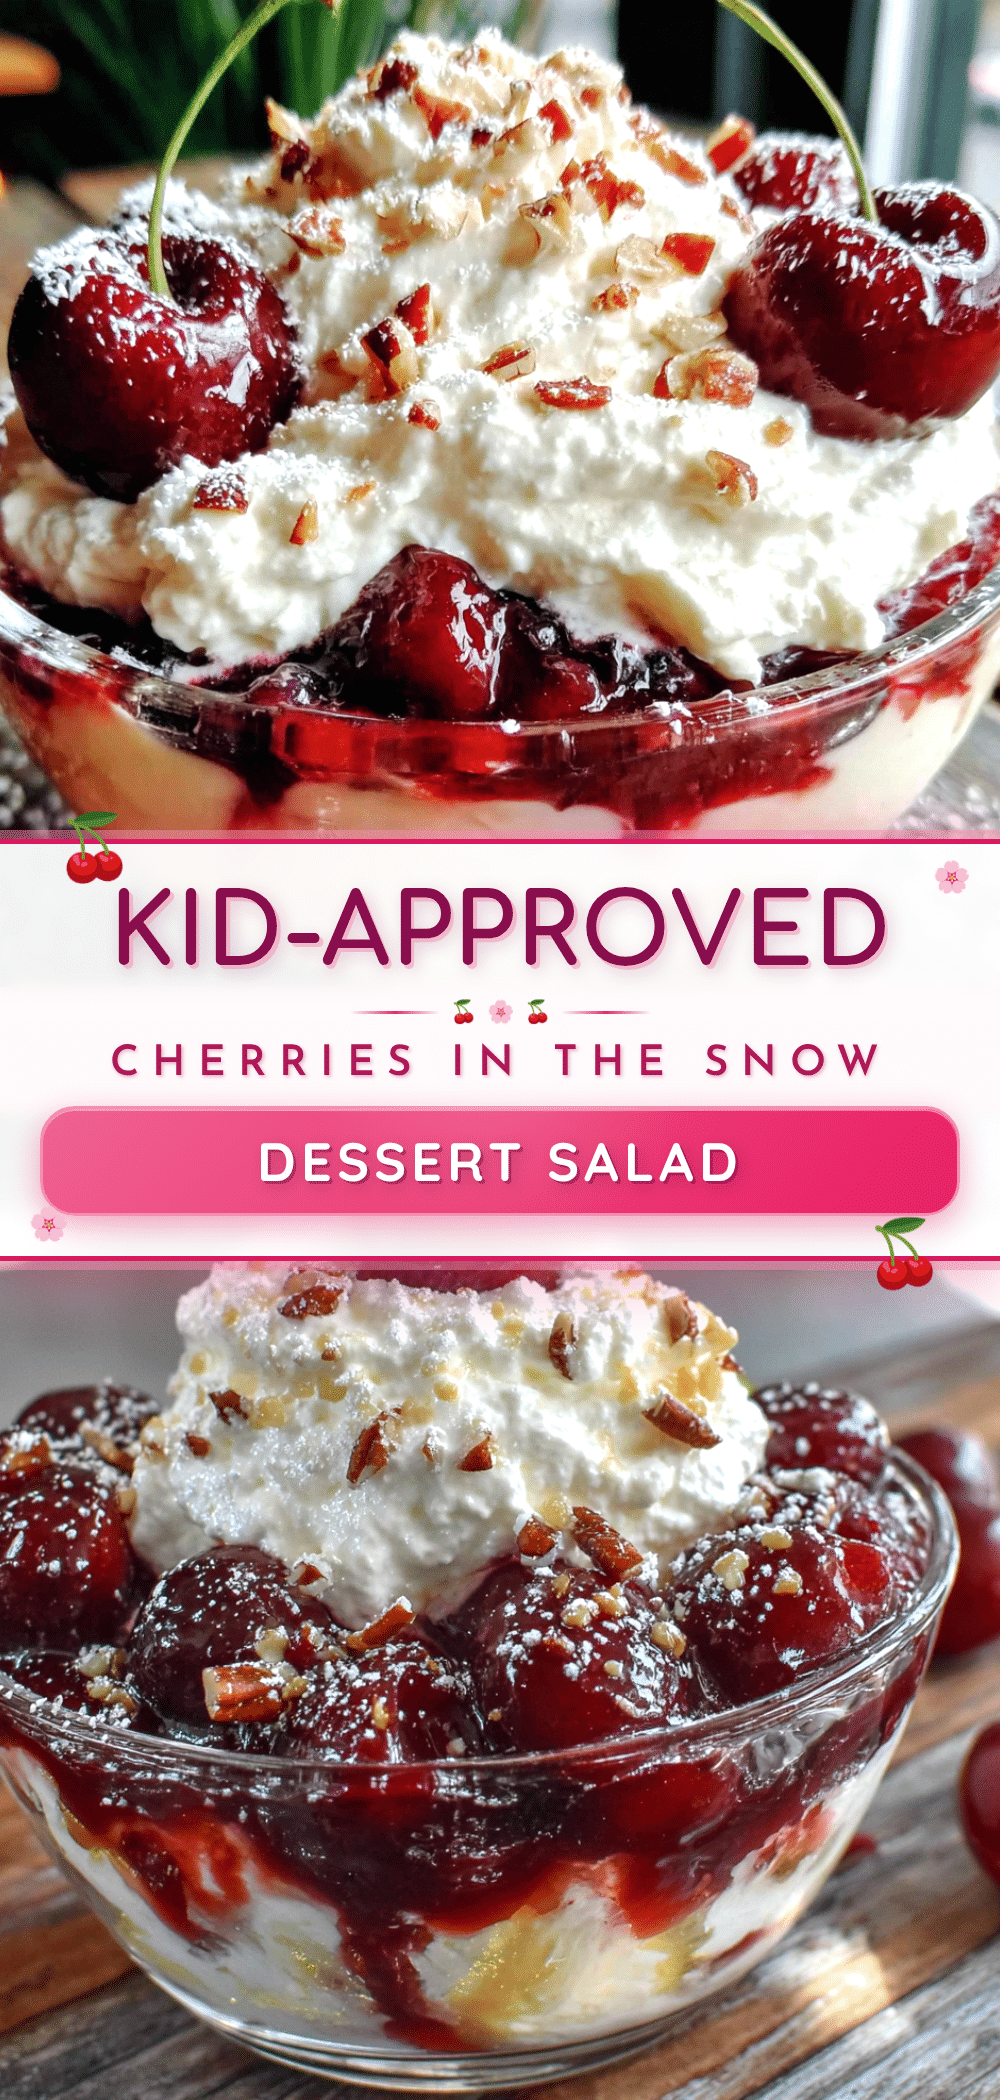
Kid-Approved Cherries in the Snow Dessert Salad: Easy 5-Minute Recipe

This quick and easy dessert salad combines creamy, fluffy cream cheese and whipped topping with sweet cherry pie filling for a nostalgic, crowd-pleasing treat that comes together in just 5 minutes.
- Prep Time: 5 minutes
- Cook Time: 0 minutes
- Total Time: 5 minutes
- Yield: 10 servings 1x
- Category: Dessert
- Cuisine: American
Ingredients
- 1 package (8 oz) cream cheese, softened to room temperature
- 1 cup powdered sugar
- 1 teaspoon vanilla extract
- 1 container (8 oz) frozen whipped topping, thawed
- 1 can (21 oz) cherry pie filling
- Optional: 1 cup mini marshmallows
- Optional: 1/2 cup chopped pecans or walnuts
Instructions
- Soften the cream cheese by letting it sit at room temperature for 30 minutes or microwaving in 10-second intervals until soft.
- Beat the softened cream cheese with an electric mixer on medium speed until smooth and creamy, about 1 minute. Scrape down the sides of the bowl.
- Gradually add the powdered sugar, about 1/4 cup at a time, beating on low speed after each addition. Once all sugar is added, beat for another 30 seconds until combined and smooth.
- Mix in the vanilla extract until just combined.
- Gently fold in the thawed whipped topping with a rubber spatula until no white streaks remain, about 1 minute.
- Gently fold in the cherry pie filling, being careful not to break up the cherries too much. If using, fold in marshmallows or nuts.
- Spoon the mixture into a serving bowl or 9×13-inch dish and spread evenly.
- Cover and refrigerate for at least 1 hour before serving (optional but recommended). Serve chilled.
Notes
Make sure cream cheese is fully softened to avoid lumps. Fold whipped topping gently to keep the texture light and airy. For best results, chill overnight to allow flavors to meld. If cherry pie filling is very thick, drain off about 2 tablespoons of syrup to prevent a runny dessert. Do not freeze.
Nutrition
- Serving Size: 1 serving
- Calories: 285
- Sugar: 28
- Sodium: 115
- Fat: 15
- Saturated Fat: 9
- Carbohydrates: 36
- Fiber: 1
- Protein: 3
Keywords: cherries in the snow, dessert salad, cherry dessert, no-bake dessert, easy dessert, kid-friendly, potluck dessert, 5-minute recipe