Love this? Save it for later!
Share the inspiration with your friends
The woman at the community garden stand watched me eyeing her basket of fresh cranberries for a good three minutes before she finally spoke. “You’re thinking about baking, aren’t you?” she said, not really asking. I laughed and admitted I was obsessed with those Starbucks cranberry bliss bars but couldn’t justify spending five dollars on one little triangle anymore. She nodded slowly, then reached into her bag and pulled out a crumpled index card. “My daughter worked there for a summer,” she said, handing it over. “She figured out the secret. Just don’t tell them I gave this to you.”
Honestly, I forgot her name the moment she walked away. But I remember exactly how the card felt in my hands—slightly damp from the morning dew, the ink smudged in one corner where she’d wiped her thumb across it. I stuffed it in my pocket and didn’t look at it until I got home, half expecting it to be a joke or a grocery list. Instead, it was the real deal. A handwritten recipe for homemade cranberry bliss bars that she’d scribbled down after her daughter’s late-night baking experiments. No fancy food styling. No step-by-step photos. Just ingredients and the note: “Don’t overbake the crust.”
I tweaked it, of course—I mean, I couldn’t help myself. I added a little more white chocolate to the topping because, let’s face it, that’s the best part. I swapped the cream cheese for a slightly tangier version to cut through the sweetness. And I figured out the trick to getting that signature blondie-like base just right without it turning into a brick. The first batch came out of the oven on a Tuesday night, and I stood there eating a warm, gooey bar straight off the parchment paper, thinking about that woman and her daughter and how some recipes just find you at the right moment. Maybe you’ve had that experience too—when a dish shows up exactly when you need it.
These homemade cranberry bliss bars are better than Starbucks. I’m not saying that to be dramatic. I’m saying it because I’ve done the side-by-side taste test, and there’s no contest. The copycat version has a softer, more buttery crust. The white chocolate drizzle actually tastes like real white chocolate, not waxy imitation. And the tart cranberries? They pop in a way that the store-bought version just doesn’t deliver. This is the kind of bar you make when you want to impress someone without breaking a sweat. Or when you need a little sweetness on a cold afternoon. Or honestly, just because you deserve it.
Why You’ll Love This Recipe
I’ve tested this recipe at least seven times to get it exactly right. The first attempt was edible but dry. The second had too much white chocolate (though honestly, is that really a problem?). By the fifth batch, I had it dialed in, and by the seventh, I was ready to share it with you. Here’s why these homemade cranberry bliss bars deserve a spot in your baking rotation:
- Quick & Easy : Comes together in about 35 minutes, with only 15 minutes of active prep. Perfect for those last-minute holiday cravings or when you need a dessert for a party tomorrow.
- Simple Ingredients : No fancy grocery trips needed. Butter, sugar, eggs, flour, cream cheese, white chocolate chips, and dried cranberries—that’s it. You probably have most of this in your kitchen right now.
- Perfect for the Holidays : These bars scream Christmas, but honestly, I make them year-round. They’re great for Thanksgiving, cookie exchanges, or just a random Tuesday when you need a pick-me-up.
- Crowd-Pleaser : Every single time I bring these somewhere, someone asks for the recipe. Kids love them, adults love them, and people who claim they don’t like cranberries suddenly change their minds.
- Unbelievably Delicious : The combination of buttery blondie crust, tangy cream cheese layer, tart cranberries, and sweet white chocolate is pure comfort food magic. It’s the kind of bar that makes you close your eyes after the first bite.
What makes this recipe different from the other copycat versions floating around the internet? It’s the texture. Most recipes produce a dry, crumbly bar that falls apart the second you pick it up. Not this one. The crust stays soft and tender, almost like a sugar cookie. The cream cheese layer is thick enough to taste but not so thick that it overpowers everything else. And the white chocolate drizzle? It sets up perfectly without turning into a hard, brittle mess. I spent weeks perfecting the ratios so you don’t have to. This isn’t just another version of cranberry bliss bars—it’s the best version.
This recipe is comfort food reimagined. It’s faster than the drive to Starbucks, cheaper by a long shot, and somehow even more satisfying. There’s something about pulling a pan of homemade cranberry bliss bars out of your own oven that feels like a small victory. The smell alone is worth it—butter and sugar and vanilla filling up your kitchen, making everything feel warm and right. Perfect for impressing guests without stress, or turning a simple evening into something a little more special.
What Ingredients You Will Need
This recipe uses simple, wholesome ingredients to deliver bold flavor and satisfying texture without the fuss. Most of these are pantry staples, and the ones that aren’t are easy to find at any grocery store. Let me walk you through each one so you know exactly what to look for.
For the Crust
- Unsalted butter, softened (1/2 cup, or 1 stick) — I use Land O’Lakes for consistent results. Make sure it’s truly softened, not melted. Room temperature butter creams better with the sugar and gives you that tender, melt-in-your-mouth texture.
- Granulated sugar (3/4 cup) — Regular white sugar works perfectly here. No need for anything fancy.
- Large egg (1, room temperature) — Cold eggs can seize up the batter. Let yours sit on the counter for 20 minutes before starting.
- Vanilla extract (1 teaspoon) — Pure vanilla extract makes a difference. The imitation stuff works in a pinch, but the flavor won’t be as deep.
- All-purpose flour (1 1/2 cups) — Spoon and level your flour. Scooping directly from the bag packs it down and gives you too much, which leads to a dry crust.
- Baking powder (1/2 teaspoon) — Make sure yours isn’t expired. Old baking powder won’t give you the lift you need.
- Salt (1/4 teaspoon) — Just enough to balance the sweetness. I use fine sea salt.
For the Cream Cheese Layer
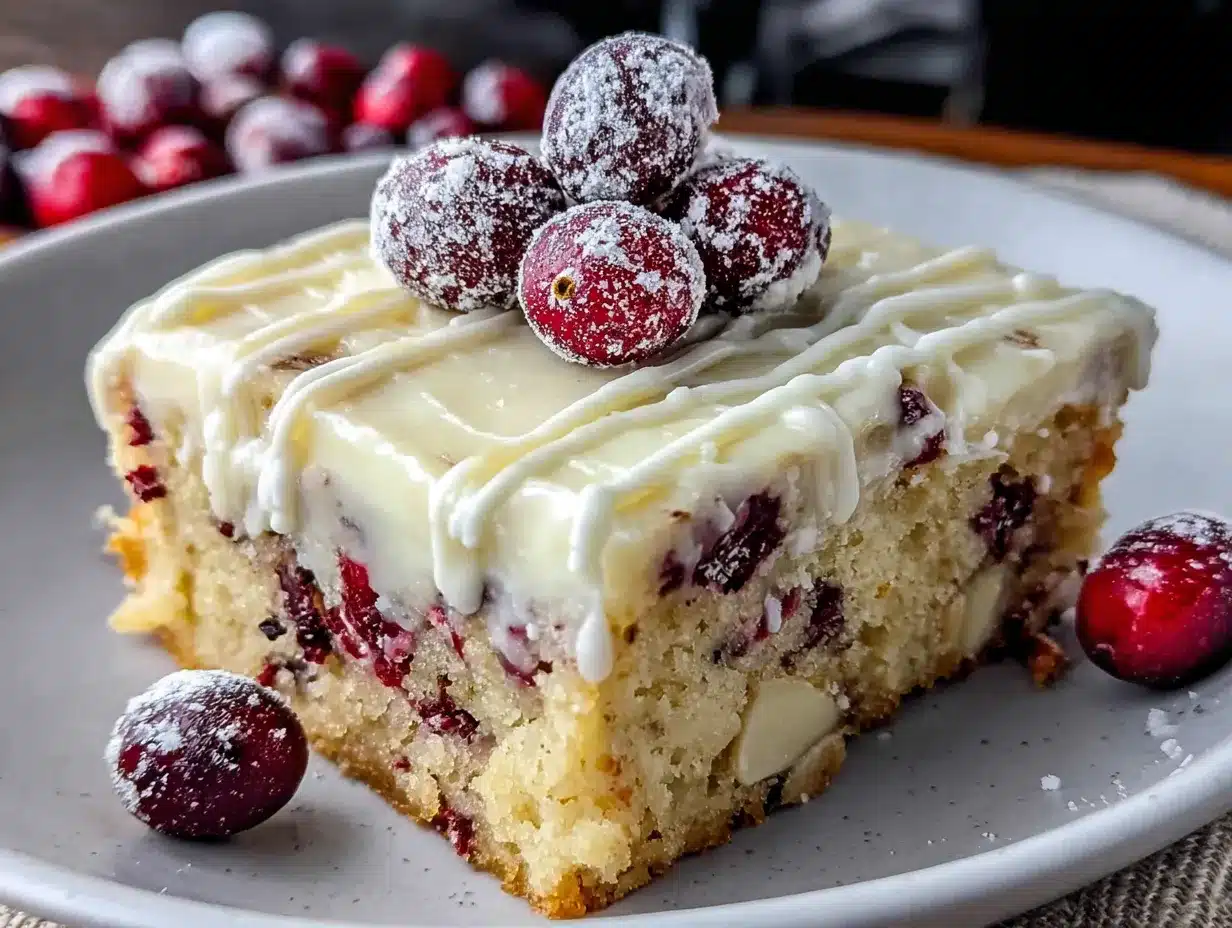
- Cream cheese (4 ounces, softened) — Full-fat cream cheese gives the best texture. I’ve tried low-fat versions, and they turn out runny. Philadelphia is my go-to brand.
- Granulated sugar (2 tablespoons) — Just a little to sweeten the cream cheese without making it cloying.
- Vanilla extract (1/2 teaspoon) — Adds warmth and depth.
- All-purpose flour (1 tablespoon) — This helps stabilize the cream cheese layer so it doesn’t crack or separate while baking.
For the Topping & Drizzle
- Dried cranberries (1/2 cup) — I prefer Ocean Spray Craisins for consistent sweetness and texture. Chop them roughly if they’re large, so every bite gets a little piece.
- White chocolate chips (1/2 cup for the bars, plus 1/3 cup for the drizzle) — Ghirardelli white chocolate chips melt beautifully and taste like real white chocolate. Avoid white baking chips or morsels labeled “white morsels”—they’re often artificially flavored and don’t melt as smoothly.
Ingredient Selection Tips
For the best homemade cranberry bliss bars, pay attention to your butter and cream cheese temperature. Seriously—this is the thing most people get wrong. If your butter is too cold, it won’t cream properly with the sugar, and your crust will be dense. If your cream cheese is too cold, you’ll end up with lumpy streaks instead of a smooth layer. Let both sit out for at least 30 minutes before you start. Room temperature ingredients are non-negotiable here.
If you’re in a hurry, you can soften cream cheese in the microwave on low power for about 10-15 seconds, but watch it carefully. Nobody wants scrambled eggs in their cream cheese layer.
Substitution Guidance
Need to adapt this recipe? Here are a few swaps that work well:
- Gluten-free option : Substitute the all-purpose flour with a 1:1 gluten-free baking flour blend. I’ve used Bob’s Red Mill with good results. Add an extra tablespoon of flour to the crust to compensate for the lack of gluten structure.
- Dairy-free option : Use vegan butter sticks (like Earth Balance) and dairy-free cream cheese. The texture will be slightly softer, but the flavor is still fantastic.
- Fresh cranberries : You can use fresh cranberries instead of dried, but chop them finely and toss them in a tablespoon of flour before adding them to the batter. This prevents them from sinking to the bottom.
- Dark chocolate : Not a white chocolate fan? Use dark chocolate chips for the drizzle instead. It gives the bars a more sophisticated, less sweet flavor profile.
Equipment Needed
You don’t need a fully stocked professional kitchen to make these homemade cranberry bliss bars. Here’s what you’ll need:
- 8×8-inch baking pan — Glass or metal both work, but I prefer a metal pan for even browning. If you’re using glass, reduce the oven temperature by 25°F to prevent overbaking.
- Parchment paper — This is your best friend. Line the pan with parchment paper, leaving an overhang on two sides. It makes lifting the bars out so much easier. I learned this the hard way after wrestling a stuck batch out of the pan with a spatula.
- Electric hand mixer or stand mixer — You can mix the crust by hand, but an electric mixer makes creaming the butter and sugar much easier. A whisk and some elbow grease will work if that’s all you have.
- Mixing bowls — One medium bowl for the dry ingredients, one large bowl for the wet ingredients. Nothing fancy needed.
- Rubber spatula — For scraping down the sides of the bowl and spreading the batter evenly in the pan.
- Small microwave-safe bowl — For melting the white chocolate drizzle. I use a glass measuring cup for easy pouring.
- Wire cooling rack — Essential for cooling the bars evenly. If you don’t have one, you can use the stovetop grates in a pinch.
Budget-friendly tip: You don’t need a fancy mixer for this recipe. I made my first batch with a wooden spoon and a whisk, and they turned out great. The key is making sure your butter is truly softened so it creams easily. Also, skip the expensive white chocolate melting wafers—regular good-quality white chocolate chips work perfectly and cost half as much.
Preparation Method
Let me walk you through this step by step. I’ve included all the little details that make the difference between good homemade cranberry bliss bars and truly great ones. Trust me on the timing and temperatures—I’ve tested this enough to know what works.
Step 1: Preheat and Prep the Pan
Preheat your oven to 350°F (175°C). Line an 8×8-inch baking pan with parchment paper, leaving a 2-inch overhang on two opposite sides. This creates handles that let you lift the entire batch out after baking. Lightly spray the parchment with non-stick cooking spray for extra insurance. Set the pan aside.
Step 2: Make the Crust Dough
In a large mixing bowl, beat 1/2 cup softened unsalted butter and 3/4 cup granulated sugar together until light and fluffy, about 2-3 minutes with an electric mixer on medium speed. You want the mixture to look pale and almost doubled in volume. Scrape down the sides of the bowl with a rubber spatula halfway through.
Add 1 large room-temperature egg and 1 teaspoon vanilla extract. Beat until combined, about 30 seconds. The mixture might look slightly curdled at this point—that’s normal. Don’t panic.
In a separate medium bowl, whisk together 1 1/2 cups all-purpose flour, 1/2 teaspoon baking powder, and 1/4 teaspoon salt. Gradually add the dry ingredients to the wet ingredients, mixing on low speed just until combined. The dough will be thick and slightly sticky—similar to sugar cookie dough. Fold in 1/2 cup dried cranberries and 1/2 cup white chocolate chips with a rubber spatula.
Step 3: Press the Crust into the Pan
Transfer the dough to your prepared pan. Using lightly floured hands or the back of a spoon, press the dough into an even layer. Take your time with this step—uneven thickness means uneven baking. The dough should reach all the way to the corners. If it’s sticking to your fingers, dust them with a little flour.
Bake the crust for 12 minutes. It should look set around the edges but still slightly soft in the center. Don’t overbake it at this stage—the crust will continue baking after you add the cream cheese layer. Remove the pan from the oven and let it cool on a wire rack for 5 minutes.
Step 4: Prepare the Cream Cheese Layer
While the crust cools slightly, make the cream cheese layer. In a small bowl, beat 4 ounces softened cream cheese, 2 tablespoons granulated sugar, 1/2 teaspoon vanilla extract, and 1 tablespoon all-purpose flour together until smooth and creamy. This should take about 1 minute with an electric mixer. The flour might seem like a weird addition, but trust me—it prevents the cream cheese from cracking while baking.
Step 5: Assemble and Bake
Drop spoonfuls of the cream cheese mixture over the slightly cooled crust. Use a small offset spatula or the back of a spoon to gently spread it into an even layer. Be careful not to press too hard—you don’t want to disturb the crust underneath. The cream cheese layer should be thin but completely cover the surface.
Return the pan to the oven and bake for another 12-15 minutes. The edges should be lightly golden, and the center should look set but still slightly jiggly when you gently shake the pan. A toothpick inserted into the center should come out with a few moist crumbs attached—not wet batter.
Step 6: Cool Completely
Place the pan on a wire rack and let the bars cool completely in the pan. This is crucial. If you try to cut them while they’re still warm, they’ll fall apart into a delicious but messy pile. I speak from experience. Let them cool for at least 1 hour at room temperature, then transfer the pan to the refrigerator for another 30 minutes to firm up the cream cheese layer.
Step 7: Make the White Chocolate Drizzle
Once the bars are completely cool, make the drizzle. Place 1/3 cup white chocolate chips in a small microwave-safe bowl. Microwave in 20-second intervals, stirring between each, until smooth and fully melted. This usually takes about 60-80 seconds total. Be careful not to overheat the white chocolate—it seizes up quickly and turns into a grainy mess.
Using a fork or a small piping bag (or a zip-top bag with the corner snipped off), drizzle the melted white chocolate over the cooled bars in a zigzag pattern. Don’t overthink this—imperfect drizzles look more homemade and charming anyway.
Step 8: Cut and Serve
Let the white chocolate drizzle set for about 15-20 minutes at room temperature. Then lift the entire batch out of the pan using the parchment paper overhangs. Place on a cutting board and slice into 9 squares (3 rows by 3 rows) or 16 smaller squares if you prefer bite-sized portions. For the classic Starbucks triangle look, cut each square diagonally in half.
Cooking Tips & Techniques
After making these homemade cranberry bliss bars more times than I care to count, I’ve picked up a few tricks that make the process smoother and the results more consistent. Here are the ones that matter most:
The Room Temperature Rule
I cannot stress this enough: your butter, egg, and cream cheese all need to be at room temperature. Cold ingredients don’t emulsify properly, which means your crust will be dense instead of tender, and your cream cheese layer will be lumpy instead of silky. Take everything out of the fridge 30-45 minutes before you start. If you forget, place the egg in a bowl of warm water for 5 minutes, and microwave the cream cheese on low power for 10 seconds.
Don’t Overbake the Crust
The biggest mistake I made with my first few batches was overbaking the crust during the initial bake. Remember, it’s going back in the oven for another 12-15 minutes after you add the cream cheese layer. If you bake it until it’s fully golden brown the first time, it’ll end up dry and hard by the time the bars are done. Pull it out when the edges are set and the center still looks slightly underdone.
The Parchment Paper Hack
Cut two strips of parchment paper—one horizontal, one vertical—and place them in the pan so they overlap. This gives you four handles instead of two, making it even easier to lift the bars out. I learned this from a baking blog years ago, and it’s been a game-changer for bar recipes.
White Chocolate Melting Tips
White chocolate is finicky. It burns easily and seizes up if it comes into contact with even a drop of water. Use a completely dry bowl and utensils. If your white chocolate looks grainy or clumpy, you overheated it. Try stirring in a teaspoon of coconut oil or vegetable shortening to smooth it out. If that doesn’t work, start over with fresh chips—it’s not worth trying to salvage burnt chocolate.
Cutting Clean Slices
For clean, bakery-style cuts, use a sharp chef’s knife and wipe it clean between each slice. I keep a damp paper towel nearby and run the blade across it after every cut. This prevents the cream cheese layer from smearing across the surface. If your bars are still too soft to cut cleanly, pop them in the freezer for 15 minutes first.
Variations & Adaptations
One of the best things about this recipe is how easily it adapts to different tastes and dietary needs. Here are some variations I’ve tried and loved:
Lemon Cranberry Bliss Bars
Add 1 tablespoon of fresh lemon zest to the crust dough and 1 teaspoon of lemon juice to the cream cheese layer. The citrus brightens up the tart cranberries and cuts through the richness of the white chocolate. This version is especially good in spring or summer when you want something a little lighter.
Dark Chocolate & Cranberry
Swap the white chocolate chips in the crust and drizzle for dark chocolate chips (60-70% cacao). The bitterness of the dark chocolate balances the sweetness of the cranberries beautifully. I made this version for a friend who “doesn’t do white chocolate,” and she ate three bars before admitting she was wrong about the original.
Gluten-Free Version
Use a 1:1 gluten-free baking flour blend in place of the all-purpose flour. Add an extra tablespoon of flour to the crust to help with structure. The texture will be slightly more crumbly than the original, but the flavor is still spot-on. I’ve served these to gluten-free guests who had no idea they were eating a modified version.
Vegan Version
Use vegan butter sticks and dairy-free cream cheese. Replace the egg with a flax egg (1 tablespoon ground flaxseed mixed with 3 tablespoons water, let sit for 5 minutes). The crust will be a little denser, but the bars are still delicious. Use vegan white chocolate chips for the drizzle—Enjoy Life makes a good one.
Spiced Cranberry Bliss Bars
Add 1/2 teaspoon of cinnamon and 1/4 teaspoon of nutmeg to the crust dough. The warm spices complement the tart cranberries and make these bars taste even more like the holidays. I make this version for Christmas cookie exchanges, and they always disappear first.
Serving & Storage Suggestions
These homemade cranberry bliss bars are versatile enough to serve at a fancy brunch or a casual weeknight treat. Here’s how to get the most out of them:
Serving Temperature
I prefer these bars at room temperature or slightly chilled. Straight from the fridge, the cream cheese layer is firmer and the white chocolate drizzle snaps when you bite into it. At room temperature, the bars are softer and more tender. Both are delicious—it just depends on your preference. If you’re serving them at a party, pull them out of the fridge about 20 minutes before you plan to serve.
Presentation Ideas
Arrange the bars on a white platter or a wooden cutting board for a rustic look. Dust them with a little powdered sugar just before serving for an extra touch of elegance. If you’re feeling fancy, add a few fresh cranberries and sprigs of rosemary around the edges of the platter for a holiday vibe.
Perfect Pairings
These bars pair beautifully with a hot cup of coffee or a cold glass of milk. For a dessert spread, serve them alongside other bar cookies like lemon bars or brownies. They also work well on a brunch table next to fresh fruit and yogurt parfaits.
Storage Instructions
Store leftover bars in an airtight container in the refrigerator for up to 5 days. Layer them between sheets of parchment paper to prevent sticking. The flavors actually meld together and improve after a day in the fridge, so don’t be surprised if they taste even better on day two.
Freezing Instructions
These bars freeze beautifully. Place the fully cooled, undrizzled bars in a single layer on a baking sheet and freeze for 1 hour. Transfer the frozen bars to a freezer-safe container or zip-top bag, separating layers with parchment paper. They’ll keep for up to 3 months. When you’re ready to serve, thaw them in the refrigerator overnight, then add the white chocolate drizzle fresh. Never freeze bars with the drizzle already on—it gets weepy and sad when it thaws.
Reheating Tips
If you prefer your bars warm, microwave a single bar for about 10-15 seconds. The white chocolate will soften, and the cream cheese layer will become almost gooey. It’s a completely different experience from the cold version, but equally wonderful.
Nutritional Information & Benefits
Let’s be real—these homemade cranberry bliss bars are a treat, not a health food. But that doesn’t mean they can’t fit into a balanced lifestyle. Here’s the estimated nutritional breakdown for one bar (based on 9 servings):
| Nutrient | Amount Per Serving |
|---|---|
| Calories | 320 |
| Total Fat | 16g |
| Saturated Fat | 10g |
| Cholesterol | 55mg |
| Sodium | 150mg |
| Total Carbohydrates | 42g |
| Dietary Fiber | 1g |
| Sugars | 28g |
| Protein | 4g |
On the plus side, cranberries are packed with antioxidants and vitamin C. They’re known for supporting urinary tract health and reducing inflammation. The white chocolate provides a small amount of calcium, and the cream cheese adds a bit of protein. But honestly, I’m not eating these bars for the health benefits. I’m eating them because they make me happy, and there’s something to be said for that.
If you’re watching your sugar intake, you can reduce the sugar in the crust to 1/2 cup and skip the white chocolate drizzle. The bars will still be sweet enough from the dried cranberries and the cream cheese layer. They won’t be as indulgent, but they’ll still hit the spot.
This recipe contains dairy, eggs, and gluten. If you have allergies, check out the variations section for suitable substitutions.
Conclusion
I’ve made these homemade cranberry bliss bars for holiday parties, quiet Sunday afternoons, and everything in between. Every single time, they deliver that same feeling of warmth and satisfaction. They’re not complicated. They’re not fussy. They’re just really, really good.
What I love most about this recipe is how it brings people together. I think about that woman at the garden stand every time I pull a batch out of the oven. She shared a recipe with a stranger, and now I’m sharing it with you. That’s the beautiful thing about cooking—it connects us in ways we don’t always expect.
I’d love to hear how your batch turns out. Did you stick with the original, or did you try one of the variations? Did you serve them warm or cold? Drop a comment below and let me know. And if you share a photo on Pinterest or Instagram, tag me—I want to see your beautiful homemade cranberry bliss bars. Happy baking, friend. You’ve got this.
Frequently Asked Questions
Can I use fresh cranberries instead of dried?
Yes, you can use fresh cranberries, but you’ll need to chop them finely and toss them in a tablespoon of flour before adding them to the batter. This prevents them from sinking to the bottom of the crust. Fresh cranberries are more tart than dried, so the bars will have a sharper flavor. If you prefer a sweeter bar, stick with dried cranberries.
How do I know when the bars are done baking?
The bars are done when the edges are lightly golden and the center looks set but still slightly jiggly when you gently shake the pan. A toothpick inserted into the center should come out with a few moist crumbs attached—not wet batter. If the toothpick comes out clean, you’ve overbaked them. Remember, the bars will continue to set as they cool.
Can I double this recipe for a 9×13 pan?
Absolutely. Double all the ingredients and bake in a 9×13-inch pan. The baking time will be similar—start checking at 25 minutes total. You might need to add 3-5 minutes, so keep an eye on it. The bars will be slightly thinner, so cut them into 12-16 pieces instead of 9.
Why did my white chocolate seize up?
White chocolate seizes when it comes into contact with even a tiny amount of water or when it’s overheated. Make sure your bowl and utensils are completely dry. Microwave in short 20-second bursts, stirring between each, and stop as soon as the chocolate is mostly melted—the residual heat will finish the job. If it still seizes, try stirring in a teaspoon of coconut oil or vegetable shortening to bring it back.
Can I make these bars ahead of time?
Yes, these bars are perfect for making ahead. Bake them up to 2 days in advance and store them in the refrigerator without the white chocolate drizzle. Add the drizzle the day you plan to serve them for the freshest look. You can also freeze the undrizzled bars for up to 3 months—just thaw overnight in the fridge before adding the drizzle and serving.
Pin This Recipe!
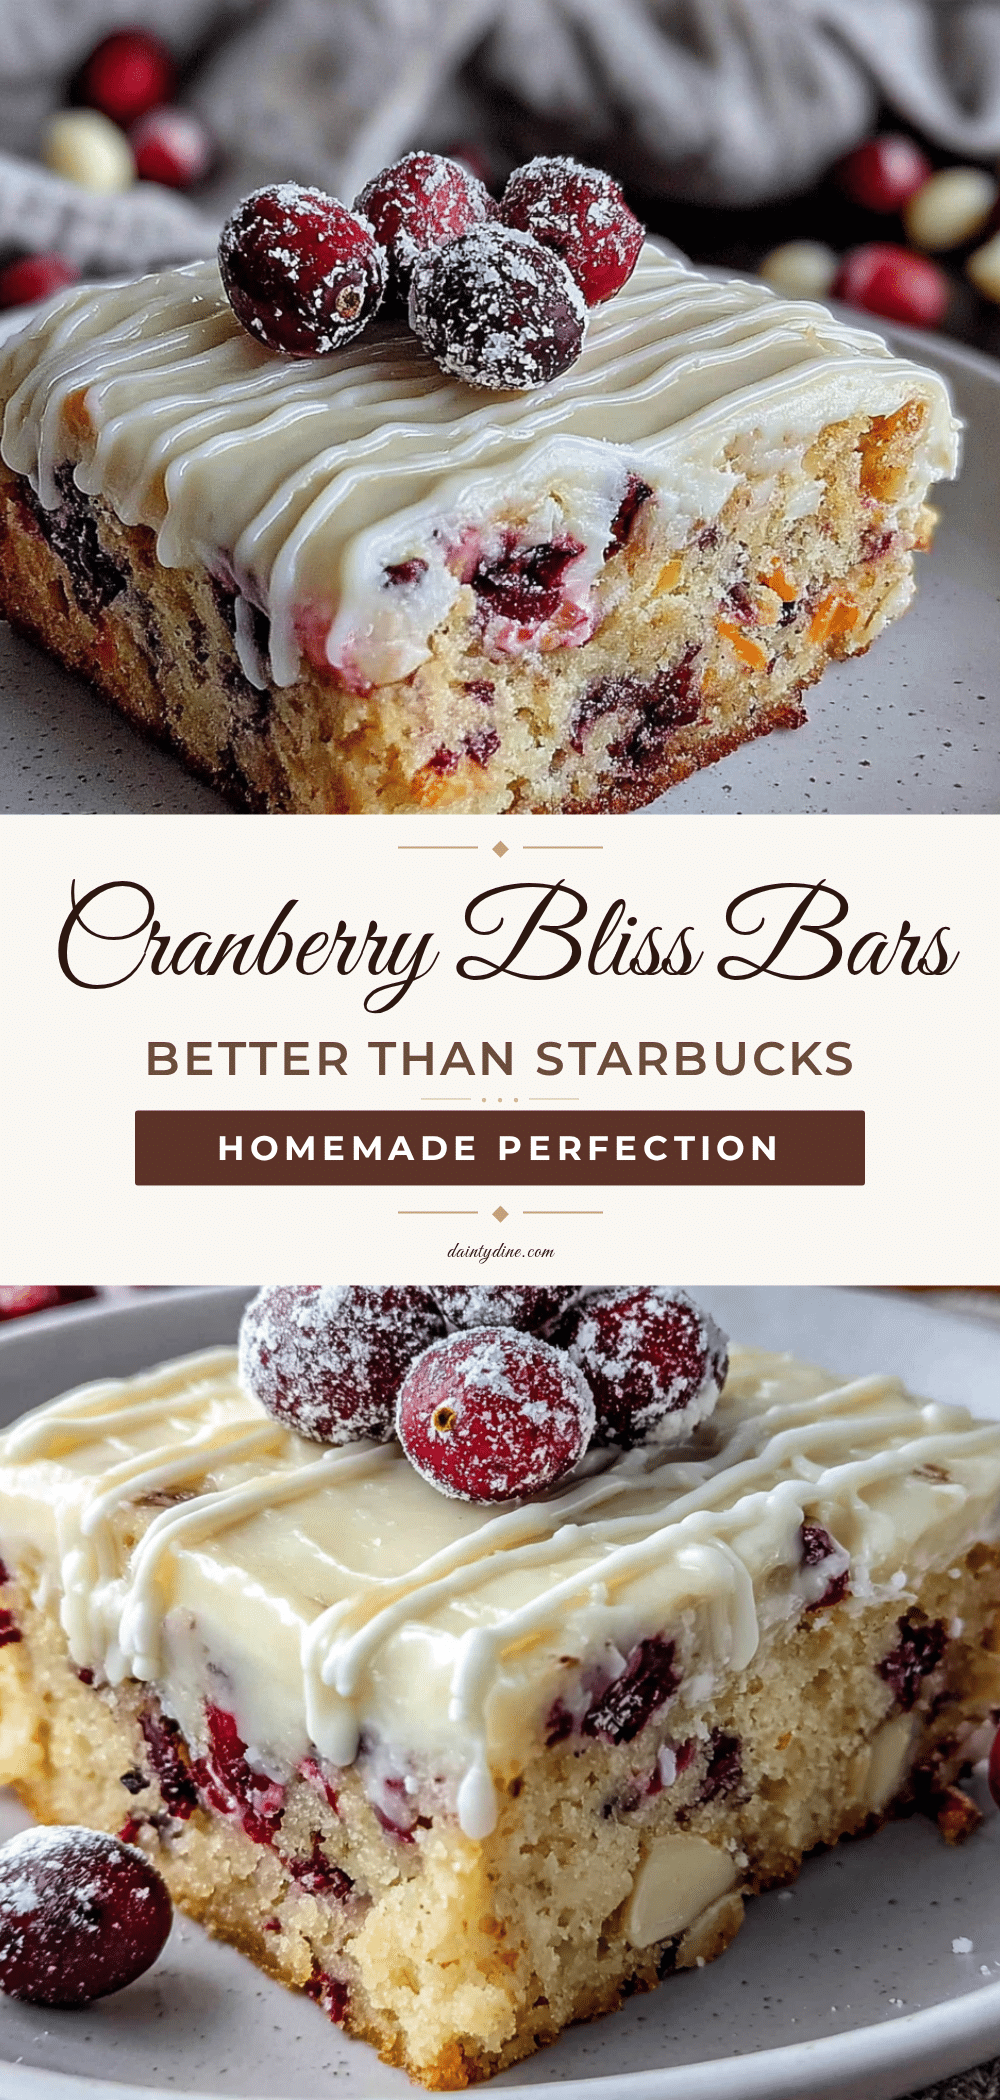
Homemade Cranberry Bliss Bars – Better Than Starbucks
These homemade cranberry bliss bars are better than Starbucks, featuring a soft, buttery blondie crust, a tangy cream cheese layer, tart dried cranberries, and a sweet white chocolate drizzle. They come together in about 35 minutes with simple ingredients.
- Prep Time: 15 minutes
- Cook Time: 27 minutes
- Total Time: 42 minutes
- Yield: 9 servings 1x
- Category: Dessert
- Cuisine: American
Ingredients
- 1/2 cup unsalted butter, softened
- 3/4 cup granulated sugar
- 1 large egg, room temperature
- 1 teaspoon vanilla extract
- 1 1/2 cups all-purpose flour
- 1/2 teaspoon baking powder
- 1/4 teaspoon salt
- 1/2 cup dried cranberries
- 1/2 cup white chocolate chips (for the bars)
- 4 ounces cream cheese, softened
- 2 tablespoons granulated sugar
- 1/2 teaspoon vanilla extract
- 1 tablespoon all-purpose flour
- 1/3 cup white chocolate chips (for the drizzle)
Instructions
- Preheat oven to 350°F (175°C). Line an 8×8-inch baking pan with parchment paper, leaving a 2-inch overhang on two opposite sides. Lightly spray with non-stick cooking spray.
- In a large bowl, beat 1/2 cup softened butter and 3/4 cup sugar until light and fluffy, about 2-3 minutes. Add 1 egg and 1 teaspoon vanilla; beat until combined.
- In a separate bowl, whisk together 1 1/2 cups flour, 1/2 teaspoon baking powder, and 1/4 teaspoon salt. Gradually add to wet ingredients, mixing on low just until combined. Fold in 1/2 cup dried cranberries and 1/2 cup white chocolate chips.
- Press dough evenly into prepared pan. Bake for 12 minutes, until edges are set but center is still soft. Cool on a wire rack for 5 minutes.
- In a small bowl, beat 4 ounces cream cheese, 2 tablespoons sugar, 1/2 teaspoon vanilla, and 1 tablespoon flour until smooth. Drop spoonfuls over crust and gently spread into an even layer.
- Bake for 12-15 minutes more, until edges are lightly golden and center is set but slightly jiggly. Cool completely in pan on a wire rack (at least 1 hour), then refrigerate for 30 minutes.
- Melt 1/3 cup white chocolate chips in a microwave-safe bowl in 20-second intervals, stirring until smooth. Drizzle over cooled bars.
- Let drizzle set for 15-20 minutes. Lift bars out using parchment, cut into 9 squares (or 16 smaller squares), and serve.
Notes
Ensure butter, egg, and cream cheese are at room temperature for best texture. Do not overbake the crust during the first bake. For clean cuts, wipe the knife between slices. Bars can be stored in the refrigerator for up to 5 days or frozen (without drizzle) for up to 3 months.
Nutrition
- Serving Size: 1 bar
- Calories: 320
- Sugar: 28
- Sodium: 150
- Fat: 16
- Saturated Fat: 10
- Carbohydrates: 42
- Fiber: 1
- Protein: 4
Keywords: cranberry bliss bars, Starbucks copycat, holiday dessert, white chocolate cranberry bars, easy bar cookies