Love this? Save it for later!
Share the inspiration with your friends
My neighbor Jen wasn’t trying to impress anyone. I’d stopped by to borrow a pumpkin pie plate—the one with the gold rim she’d inherited from her grandmother—and this cocoa-sweet, crumbly smell hit me before I even got her screen door open. She was standing at her counter, fingers dusted in black crumbs, casually dropping what looked like tiny cat heads onto a sheet pan. “Oh, these?” she said when I asked. “Just something stupid for the kids’ class party.” She shrugged like she’d thrown them together from trash, but I couldn’t stop staring. They had these little candy ears and those yellow M&M eyes staring back at me like they knew a secret. I stood there holding the pie plate for a solid minute, not even pretending to leave. She finally laughed and handed me one. Honestly, let me tell you—I almost dropped the plate. That first bite was this ridiculous combo of creamy, crunchy, and sweet that made me forget why I’d even come over. I mean, I’d made Oreo truffles before, but these? These were something else. Maybe you’ve been there—you taste something at a friend’s house and you know you’re going to be making it for the next five Halloweens straight. That was this recipe for me. Jen never even wrote it down. She just said, “Crush some Oreos, mix with cream cheese, dip in black candy melts.” And then she went back to peeling carrots for dinner like she hadn’t just changed my entire October.
Why You’ll Love This Recipe
These Spooky Black Cat Oreo Truffles are the kind of Halloween treat that makes people stop and stare—then grab three before you can even offer. I’ve made these for three Halloweens straight now, and they never last more than an hour on any dessert table. Here is why they work so well:
- No-Bake & Quick: You don’t even turn on the oven. Seriously. These come together in about 30 minutes of active work, plus some chill time. Perfect for that night-before-the-party panic.
- Simple Ingredients: Oreos, cream cheese, black candy melts, and a few candies for the face. That’s it. You probably have half of this in your pantry right now.
- Perfect for Halloween: These little black cats are basically the mascot of spooky season. They work for classroom parties, office potlucks, or just making your kitchen feel festive.
- Total Crowd-Pleaser: I’ve watched kids and adults alike go quiet for a second after that first bite. It’s that familiar Oreo truffle texture everyone loves, just dressed up in a costume.
- Unbelievably Cute: Let’s be real—the look is half the fun. Those little candy ears and M&M eyes make people smile before they even taste them.
What makes my version different from the dozens of other black cat truffle recipes out there? I’ve tested every candy melt brand to find the one that doesn’t seize up on you, and I figured out the trick for getting those ears to stay put without sliding off. This isn’t just another Halloween recipe—it’s the one I’ve tweaked and perfected until it felt right. It’s the kind of treat that makes you feel like you pulled off something fancy, when really you just crushed cookies and dipped things. That’s my favorite kind of recipe.
What Ingredients You Will Need
This recipe uses simple, mostly pantry-friendly ingredients to create something that looks way more complicated than it actually is. Here is everything you need and a few notes on what to look for:
For the Truffle Base
- 1 (14.3 oz) package Oreos (regular, not Double Stuf—the standard filling-to-cookie ratio matters here for texture)
- 8 oz cream cheese, softened to room temperature (full-fat works best; low-fat can make the mixture too sticky)
For the Coating and Decorations
- 12 oz black candy melts (I recommend Wilton or Ghirardelli—they melt smoother and don’t get that weird grayish tint some cheap brands have)
- 1/2 cup yellow candy melts or yellow M&Ms (for the eyes—M&Ms are easier, but candy melts give you more control over placement)
- 24 small candy eyes (optional, but these add a fun googly-eyed look if you want it)
- 1/4 cup mini chocolate chips (for the noses—the pointy end of a mini chip looks just like a little cat nose)
- Black licorice strings or black decorating icing (for whiskers—icing is way easier, trust me)
Ingredient Tips and Substitutions
For the Oreos, stick with the original ones. I tried this with the thin Oreos once and the texture was off—too crumbly, not enough creaminess. If you need a gluten-free version, use gluten-free chocolate sandwich cookies. They work the same, just check the texture before rolling. For the cream cheese, let it sit out for about 30 minutes before you start. Cold cream cheese makes lumpy truffles, and nobody wants a lumpy cat head. If you are dairy-free, use a plant-based cream cheese block (not the spreadable kind in a tub—too soft). I’ve used Kite Hill with good results.
The black candy melts are the trickiest ingredient. I’ve had batches seize up on me because I overheated them. Go slow—microwave in 20-second bursts, stirring each time. If your melts are too thick, add a teaspoon of coconut oil or vegetable shortening to thin them out. Do not add water, ever. Candy melts and water do not mix and you will end up with a ruined, clumpy mess. I learned that one the hard way during a pre-Halloween meltdown last year.
Equipment Needed
You don’t need anything fancy here, which is part of the beauty of this recipe. Here is what you will need:
- Food processor (for crushing Oreos into fine crumbs—you can also use a rolling pin and a zip-top bag, but the processor is faster and gives you more consistent texture)
- Large mixing bowl (for combining crumbs and cream cheese)
- Small cookie scoop or tablespoon (for portioning the truffle mixture evenly—I use a 1-tablespoon scoop and it works perfectly)
- Baking sheet lined with parchment paper (for chilling the truffles before dipping)
- Microwave-safe bowl (for melting the candy melts)
- Fork or dipping tool (for coating the truffles—I actually prefer a toothpick or a dedicated dipping fork for better control)
- Small piping bag or zip-top bag (for adding the whiskers and eyes with icing)
- Toothpicks (for placing the candy details while the coating is still wet)
If you don’t have a food processor, no worries. I’ve made these using the “smash with a rolling pin” method plenty of times. Just put the Oreos in a gallon zip-top bag, squeeze out the air, and go to town. It’s oddly satisfying and your kids will fight over who gets to do it. For the candy melts, a double boiler works if you prefer stovetop melting, but the microwave is faster and easier to clean up. Just watch it closely—candy melts go from perfect to burnt in about 10 seconds.
Preparation Method
Making these Spooky Black Cat Oreo Truffles is straightforward, but there are a few tricks that make the difference between a cute cat and a lopsided mess. Here is exactly how I do it:
- Crush the Oreos. Place the entire package of Oreos (filling and all) into your food processor. Pulse until you have fine, uniform crumbs. You want it to look like dark sand—no large chunks. This should take about 30 seconds. If you are using the bag method, give it some elbow grease for about 5 minutes.
- Mix with cream cheese. In a large mixing bowl, combine the Oreo crumbs with the softened cream cheese. Use a spatula or your hands (I use my hands—it’s faster and you can feel when it’s mixed evenly) until everything is fully incorporated. The mixture should hold together when you squeeze it, like a stiff cookie dough. If it feels too dry, add another tablespoon of cream cheese. If it is too sticky, add a few more crushed Oreos.
- Portion and shape. Scoop out tablespoon-sized portions of the mixture and roll them into smooth balls. Place them on the parchment-lined baking sheet. You should get about 24 truffles from this batch. Pop the sheet into the freezer for 15-20 minutes. This is crucial—cold truffles are way easier to dip without them falling apart.
- Melt the black candy melts. While the truffles chill, place the black candy melts in a microwave-safe bowl. Microwave in 20-second intervals, stirring well after each, until completely smooth. Do not rush this step. If your melts are too thick, stir in 1 teaspoon of coconut oil. The consistency should be runny enough to coat the back of a spoon but not watery.
- Dip the truffles. Remove the truffles from the freezer. Working one at a time, drop a truffle into the melted candy coating. Use a fork or dipping tool to turn it and coat it completely. Lift it out and let the excess drip off, then gently scrape the bottom against the edge of the bowl. Place it back on the parchment. The coating will set quickly because the truffles are cold, so work fast.
- Add the ears. While the coating is still wet, press two mini chocolate chips into the top of each truffle at slight angles to form cat ears. The pointed end should stick out. If the coating starts to set before you add the ears, the chocolate chips won’t stick—so do this immediately after placing each truffle.
- Add the eyes. Use yellow M&Ms or dots of yellow candy melt for the eyes. Place them just below the center of the truffle, spaced evenly. I use a toothpick to dab a tiny bit of melted candy on the back of each M&M to help it stick if the coating has started to set.
- Add the nose and whiskers. For the nose, place a mini chocolate chip pointy-side-down in the center, just below the eyes. For whiskers, use black decorating icing to pipe three tiny lines on each side of the nose. You can also use thin strips of black licorice, but icing is easier and looks cleaner.
- Let them set completely. Allow the truffles to sit at room temperature until the coating is fully hardened, about 15-20 minutes. If you are in a hurry, pop them back in the fridge for 10 minutes.
A quick note on timing: The dipping and decorating part is where most people get stressed. I recommend doing it in batches of 6-8 truffles at a time. Take that many out of the freezer, dip and decorate them, then move to the next batch. This keeps the truffles cold and the coating workable.
Cooking Tips & Techniques
After making these Spooky Black Cat Oreo Truffles at least a dozen times, I have a few hard-won lessons to share. First, the biggest mistake people make is rushing the cream cheese to room temperature. I know, you are in a hurry. We all are. But cold cream cheese leaves little white lumps in your truffle mixture that look weird and feel worse. Let it sit out for 30 minutes. Set a timer if you have to.
Another thing I learned the hard way: do not skip the freezer step. I tried to dip room-temperature truffles once because I was in a rush, and three of them fell apart in the melted candy coating. It was a disaster. The cold truffles create a quick shell around the coating and keep everything intact. Fifteen minutes in the freezer makes all the difference.
For the candy melts, temperature control is everything. If your melts get too hot, they’ll turn into a thick, clumpy mess. I ruined an entire bag of black melts last October because I walked away for two minutes. Now I set my microwave to 50% power and do 15-second bursts. It takes longer, but it never fails. If your melts do get too thick, stir in a teaspoon of coconut oil—do not add water. Water makes candy melts seize up instantly and irreversibly.
One more tip for consistency: use a cookie scoop for the truffle balls. Eyeballing it means some cats will be bigger than others, and then the ears look weird and the eyes are off-center. A 1-tablespoon scoop gives you uniform truffles that all look like siblings instead of a weird family reunion.
Variations & Adaptations
This recipe is super flexible once you get the basic technique down. Here are a few ways I’ve changed it up over the years:
- Pumpkin Spice Version: Add 1 teaspoon of pumpkin pie spice to the Oreo and cream cheese mixture. It gives the truffles a subtle fall flavor that pairs surprisingly well with the chocolate. I did this on a whim last October and my sister-in-law demanded the recipe.
- White Chocolate Ghosts: Instead of black candy melts, use white candy melts. Shape the truffles into slightly flattened ovals instead of round balls. Add two candy eyes and pipe a little ghost mouth with black icing. They look adorable next to the black cats on a platter.
- Gluten-Free Option: Use gluten-free chocolate sandwich cookies. I’ve tested this with the Glutino brand and the texture is nearly identical. Just make sure your candy melts are also gluten-free (most are, but check the label).
- Vegan Version: Use vegan cream cheese (Kite Hill or Tofutti work well) and vegan chocolate sandwich cookies. For the coating, use vegan dark chocolate chips with a little coconut oil instead of candy melts. The texture is slightly different but still delicious.
- Peppermint Black Cats: For a winter holiday twist, crush a few peppermint candies and mix them into the Oreo crumbs before adding the cream cheese. Use white candy melts with a drizzle of dark chocolate on top. They look like little snow cats.
My personal favorite variation is the pumpkin spice one. I made it for a Halloween potluck and people kept asking if I’d bought them from a bakery. It’s that subtle extra flavor that makes people pause and go, “Wait, what’s in this?”
Serving & Storage Suggestions
These Spooky Black Cat Oreo Truffles are best served chilled or at room temperature. I actually prefer them straight from the fridge—the texture is firmer and the coating has this satisfying snap when you bite into them. If you are serving them at a party, arrange them on a black or orange platter for maximum Halloween effect. I like to add a few fake spider webs around the edges for extra spooky vibes.
For storage, keep the truffles in an airtight container in the refrigerator. They will stay good for up to 2 weeks, though honestly, they never last that long in my house. Layer them between sheets of parchment paper so the decorations don’t smudge. If you are stacking them, make sure the coating is fully set before you put the lid on.
You can also freeze these truffles for up to 3 months. Place them in a single layer on a baking sheet and freeze until solid, then transfer to a freezer-safe container. To thaw, move them to the refrigerator overnight. Do not thaw them at room temperature—the coating can get sweaty and lose its shine.
A few notes on how the flavors develop: these truffles actually taste better after a day or two in the fridge. The Oreo crumbs absorb a bit of moisture from the cream cheese and the texture becomes almost fudge-like. So if you can make them a day ahead, do it. Your future self will thank you.
Nutritional Information & Benefits
Let’s be real—these are a treat, not a health food. But here is the estimated nutritional breakdown per truffle (based on 24 servings):
- Calories: approximately 180
- Fat: 10g
- Carbohydrates: 22g
- Protein: 2g
- Sugar: 16g
That said, there are a few redeeming qualities. Oreos contain a small amount of iron and calcium from the enriched flour, and cream cheese provides some calcium and protein. The dark chocolate in the coating (if you use dark chocolate melts) has antioxidants. I mean, it’s a stretch, but it makes me feel slightly better about eating three of them in one sitting.
For dietary considerations: these are not gluten-free unless you use gluten-free cookies. They contain dairy from the cream cheese and candy melts. They are egg-free, which is good news if you have egg allergies. If you need a nut-free option, check your candy melt label—some brands are processed in facilities that handle nuts.
My personal take: I make these once a year for Halloween and I don’t stress about the nutrition. It’s a holiday treat. Enjoy it, share it, and get back to your normal routine the next day. Life is too short to count calories on Halloween.
Conclusion
These Spooky Black Cat Oreo Truffles are the kind of recipe that makes you look like a Halloween hero without actually working that hard. They are cute, delicious, and come together with ingredients you probably already have in your pantry. I’ve been making them for three years now and they never get old—partly because they taste amazing, and partly because watching people’s faces light up when they see those little cat faces is genuinely fun.
I encourage you to make these your own. Use different candy colors for the eyes, add a little orange drizzle for a pumpkin vibe, or experiment with different cookie bases. The basic technique is forgiving and the decorating is where the personality comes in. That’s the best part of any recipe—making it yours.
If you make these, I would love to hear about it. Drop a comment below and tell me how your black cats turned out. Did you add whiskers? Did you make ghosts too? Did your kids try to eat the candy melts straight from the bowl? (Mine did.) Share your photos, your stories, and your variations. Happy Halloween, and happy snacking!
Frequently Asked Questions
Can I use Double Stuf Oreos instead of regular ones?
I would not recommend it. The extra filling makes the truffle mixture too soft and sticky. You end up with truffles that are harder to shape and don’t hold their form as well during dipping. Stick with regular Oreos for the best texture.
How do I prevent the candy melts from getting lumpy?
Low and slow is the key. Microwave in 20-second bursts at 50% power, stirring thoroughly between each. If your melts still get thick, stir in a teaspoon of coconut oil or vegetable shortening. Never add water—it will ruin the melts instantly.
Can I make these ahead of time for a party?
Absolutely. In fact, I prefer making them a day ahead. The flavors meld together overnight and the texture becomes even creamier. Store them in an airtight container in the fridge and they will be perfect for your party.
How do I get the ears to stay on without falling off?
The trick is to add the ears immediately after dipping, while the coating is still wet. If the coating starts to set, dip the bottom of the chocolate chip in a tiny bit of melted candy before pressing it onto the truffle. This acts like glue.
Can I freeze these truffles?
Yes, they freeze well for up to 3 months. Freeze them in a single layer on a baking sheet first, then transfer to a freezer-safe container. Thaw in the refrigerator overnight before serving. Do not thaw at room temperature or the coating may get sweaty.
Pin This Recipe!

Easy Spooky Black Cat Oreo Truffles for Halloween

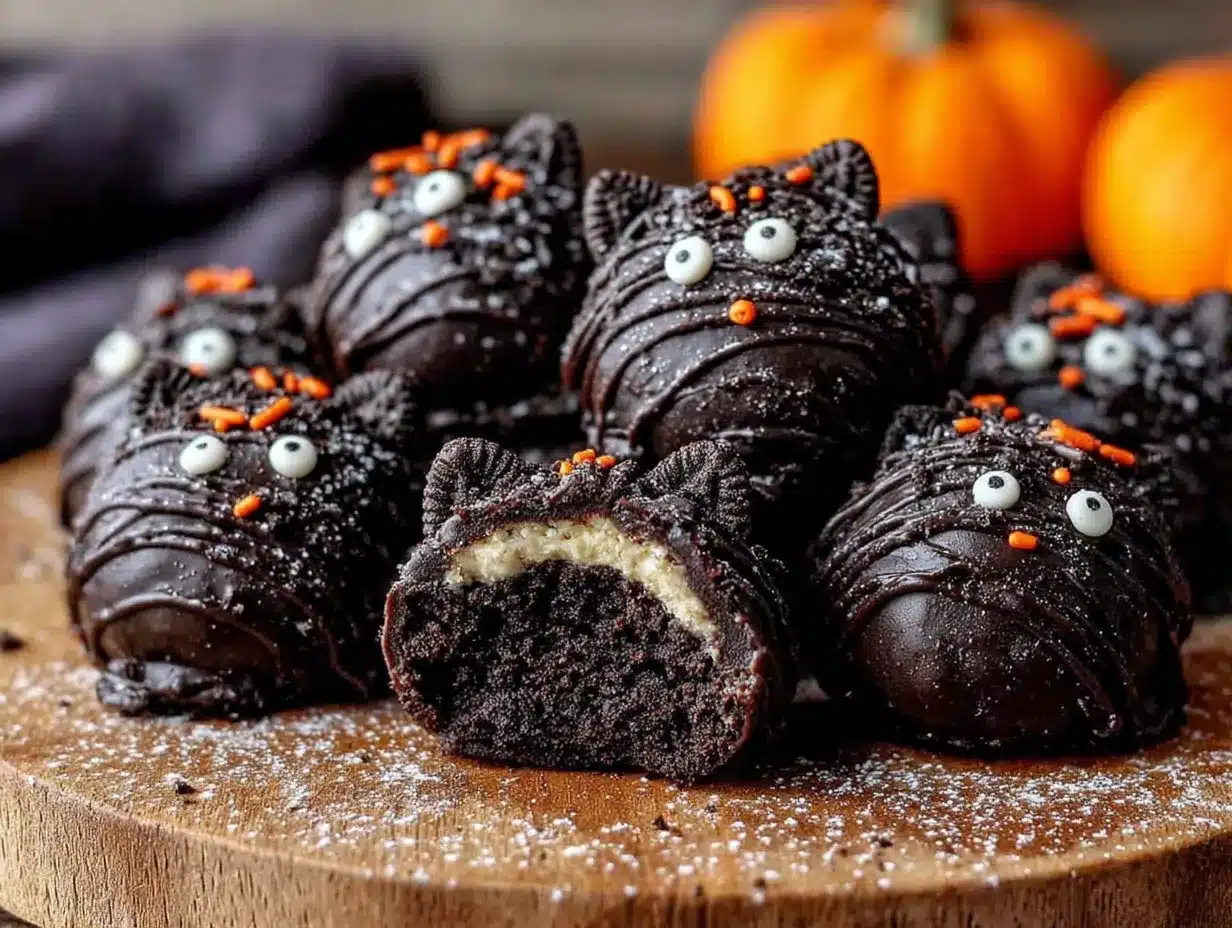
These no-bake Oreo truffles are shaped like adorable black cats with candy ears and M&M eyes. They’re a fun, crowd-pleasing Halloween treat that comes together quickly with simple ingredients.
- Prep Time: 30 minutes
- Cook Time: 0 minutes
- Total Time: 1 hour 5 minutes (including chilling and setting)
- Yield: 24 servings 1x
- Category: Dessert
- Cuisine: American
Ingredients
- 1 (14.3 oz) package Oreos (regular, not Double Stuf)
- 8 oz cream cheese, softened to room temperature
- 12 oz black candy melts (Wilton or Ghirardelli recommended)
- 1/2 cup yellow candy melts or yellow M&Ms (for eyes)
- 24 small candy eyes (optional)
- 1/4 cup mini chocolate chips (for noses)
- Black licorice strings or black decorating icing (for whiskers)
Instructions
- Crush the entire package of Oreos (filling and all) in a food processor until you have fine, uniform crumbs (about 30 seconds). Alternatively, use a rolling pin and zip-top bag.
- In a large mixing bowl, combine the Oreo crumbs with the softened cream cheese. Mix with a spatula or your hands until fully incorporated. The mixture should hold together like stiff cookie dough.
- Scoop out tablespoon-sized portions and roll into smooth balls. Place on a parchment-lined baking sheet. Freeze for 15-20 minutes.
- While truffles chill, melt black candy melts in a microwave-safe bowl in 20-second intervals, stirring well after each, until smooth. If too thick, stir in 1 teaspoon coconut oil.
- Remove truffles from freezer. Working one at a time, drop a truffle into the melted candy coating. Use a fork or dipping tool to coat completely, lift out, let excess drip off, and place back on parchment.
- Immediately press two mini chocolate chips into the top of each truffle at slight angles to form cat ears (pointed end out).
- Add yellow M&Ms or dots of yellow candy melt for eyes just below center, spaced evenly. Use a toothpick to dab a bit of melted candy on the back of each M&M to help it stick if needed.
- For the nose, place a mini chocolate chip pointy-side-down in the center just below the eyes. Pipe three tiny lines on each side of the nose for whiskers using black decorating icing.
- Let truffles set at room temperature until coating is fully hardened, about 15-20 minutes, or refrigerate for 10 minutes.
Notes
For best results, let cream cheese sit out for 30 minutes before starting. Do not skip the freezer step—cold truffles are easier to dip. Microwave candy melts at 50% power in 20-second bursts to prevent seizing. Never add water to candy melts. Add ears immediately after dipping while coating is still wet. Truffles taste even better after a day in the fridge.
Nutrition
- Serving Size: 1 truffle
- Calories: 180
- Sugar: 16
- Sodium: 120
- Fat: 10
- Saturated Fat: 5
- Carbohydrates: 22
- Fiber: 1
- Protein: 2
Keywords: Halloween, Oreo truffles, black cat, no-bake, easy, spooky, chocolate, cream cheese, candy melts, party treat


