Love this? Save it for later!
Share the inspiration with your friends
My neighbor, Carol, wasn’t trying to impress anyone. I’d stopped by to borrow a cup of sugar—how cliché, right?—and the smell of ginger and warm pumpkin hit me before I even got to her screen door. It was a random Tuesday in October, not a holiday, not a party. Just a regular afternoon.
She was pulling a pan out of the oven, nonchalant, like she was just reheating leftovers. “Oh, these?” she said when I asked, waving a spatula. “Just some bars. My husband likes them.” Just some bars. Honestly, I almost laughed. The kitchen smelled like a bakery and a cozy sweater had a baby. I stood there, holding my empty measuring cup, completely derailed from my sugar mission.
I watched her cut them into squares. The crust was dark and sandy, the filling was the exact color of a perfect autumn leaf, and there was this gorgeous, creamy swirl on top. She handed me one on a napkin, still warm. I took a bite, and let me tell you, the whole world got quiet for a second. The gingersnap crust crunched, the pumpkin filling was like a cloud, and that cheesecake layer was so tangy and smooth. I think I mumbled something like, “This is insane,” while she just shrugged and went back to wiping the counter.
That’s the thing about the best recipes, you know? They come from people who don’t realize they’re doing anything special. Carol wasn’t a chef. She wasn’t trying to win a bake-off. She just knew how to make a dessert that tastes like a hug. I practically begged her for the method, and she scribbled it on a sticky note stuck to my fridge. It had four ingredients. Four! Maybe you’ve been there—standing in someone’s kitchen, eating something that feels like a secret, wondering why you don’t make this every single day.
This recipe stayed with me because it’s so simple it almost feels like cheating. But the flavor? It’s the kind that makes you close your eyes. And now, every time I pull that pan out of the oven, I feel a little bit like Carol—like I’m in on a really good secret that’s too easy to keep to myself.
Why You’ll Love This Recipe
Let’s be real for a second. Weeknights are a blur. You’re tired, the kids are hungry, and the last thing you want is a project that takes over your kitchen. These Easy Pumpkin Cheesecake Bars are the opposite of a project. They are the dessert equivalent of a five-minute shower—refreshing, effective, and over before you know it.
- Quick & Easy: These bars come together in about 15 minutes of hands-on time. We are talking no mixer required for the filling, no water bath, and no fuss. Just stir, pour, and bake.
- Simple Ingredients: You probably have most of these in your pantry right now. No need to hunt down fancy extracts or obscure spices. It’s all basic, grocery-store stuff.
- Perfect for Weeknights: This is a dessert you can make after dinner, while you’re cleaning up, and have it ready for the next day. Or, you know, eat it warm because you deserve it.
- Crowd-Pleaser: I have brought these to potlucks, office parties, and family dinners. They disappear. Every single time. Kids love the creamy texture, and adults love the grown-up gingersnap kick.
- Unbelievably Delicious: The magic here is the contrast. The crunchy, spicy crust against the silky, cool filling. It’s comfort food that feels a little bit fancy, but without the stress.
What makes this different from every other pumpkin bar recipe out there? It’s the crust. Using store-bought gingersnaps instead of graham crackers is a game-changer. It adds a deep, molasses-y warmth that plain grahams just can’t touch. Plus, the four-ingredient filling is foolproof. No curdling, no cracking. It’s the version you will make again and again, not because it’s complicated, but because it’s so perfectly simple.
What Ingredients You Will Need
This recipe uses a short list of humble ingredients to create something truly special. Each one plays a key role, so let’s talk about what to look for.
- Gingersnap Cookies: You’ll need about 2 cups of crushed gingersnaps. I prefer the Nabisco brand or the store-brand version—they have that perfect snap and a strong ginger flavor. Don’t use the soft, bakery-style ones; they won’t give you a crunchy crust. (Pro tip: crush them in a zip-top bag with a rolling pin for easy cleanup.)
- Unsalted Butter: 5 tablespoons, melted. Using unsalted butter lets you control the salt level. If you only have salted butter on hand, just skip adding any extra salt to the crust.
- Cream Cheese: 16 ounces (two 8-ounce blocks), softened to room temperature. This is non-negotiable. Cold cream cheese will leave you with lumpy filling. Let it sit on the counter for at least 30 minutes. I recommend Philadelphia for the smoothest, creamiest texture.
- Pumpkin Purée: 1 cup (not pumpkin pie filling!). Make sure you grab a can of 100% pure pumpkin. The pie filling has sugar and spices already added, which will mess with the balance of the recipe. Libby’s is a great, reliable choice.
- Sweetened Condensed Milk: 1 can (14 ounces). This is the secret weapon. It sweetens the filling and gives it that dense, fudgy texture. No need to add extra sugar!
- Pumpkin Pie Spice: 1 teaspoon. You can buy a jar, or make your own with a mix of cinnamon, nutmeg, ginger, and cloves. It adds that warm, cozy fall flavor.
- Vanilla Extract: 1 teaspoon. Pure vanilla is best, but imitation will work in a pinch. It rounds out the flavors beautifully.
- Eggs: 2 large eggs, at room temperature. They help bind the filling and give it structure. If you forget to take them out of the fridge, place them in a bowl of warm water for 5 minutes.
Equipment Needed
You don’t need a fancy kitchen to pull this off. Here is the basic gear you will need, along with a few smart alternatives.
- 8×8-inch Baking Pan: This is the perfect size for these bars. If you use a 9×9-inch pan, the bars will be thinner and bake faster. A 9×13-inch pan will make them too thin.
- Parchment Paper: Line your pan with parchment paper, leaving some overhang on two sides. This creates “handles” so you can lift the whole block of bars out easily for clean slicing.
- Mixing Bowls: You’ll need a medium bowl for the crust and a large bowl for the filling. Any bowls you have will work.
- Rolling Pin or Food Processor: To crush the gingersnaps. A food processor makes it quick, but a rolling pin and a zip-top bag are just as effective and require less cleanup.
- Hand Mixer or Whisk: A hand mixer makes the filling smooth and quick. However, a strong whisk and some elbow grease will also get the job done—just make sure your cream cheese is very soft.
- Spatula: For scraping down the bowl and smoothing the filling into the pan.
Preparation Method
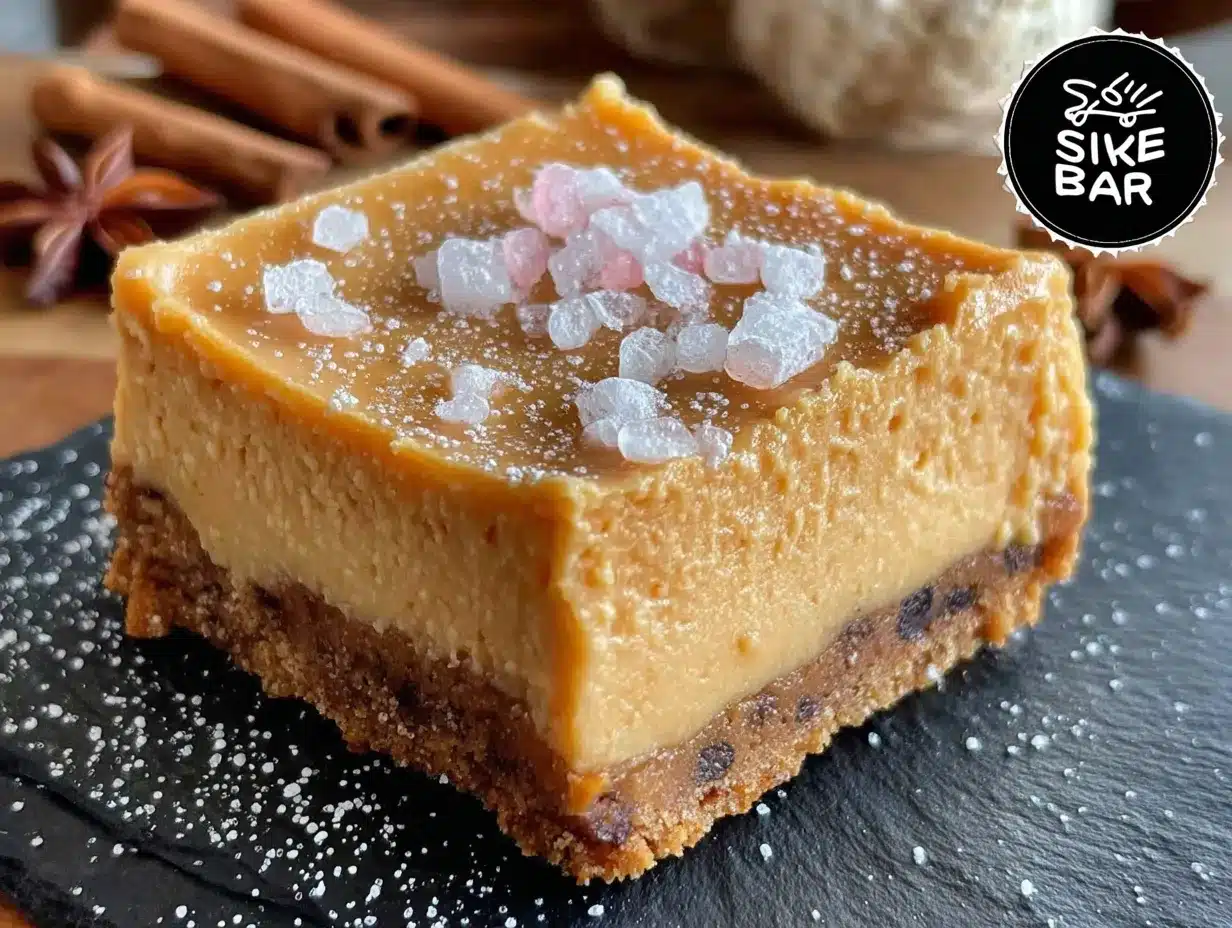
Let’s get baking! Follow these steps, and you will have the most incredible pumpkin cheesecake bars in your oven in no time.
- Preheat and Prep: Preheat your oven to 350°F (175°C). Line your 8×8-inch baking pan with a sheet of parchment paper, leaving a couple of inches hanging over two opposite sides. This is your lifeline for lifting the bars out later.
- Make the Gingersnap Crust: Place 2 cups of gingersnap cookies in a zip-top bag. Seal it, and crush them with a rolling pin until you have fine crumbs. (Alternatively, pulse them in a food processor.) Pour the crumbs into a medium bowl. Add 5 tablespoons of melted unsalted butter and stir with a fork until every crumb is moistened. It should look like wet sand.
- Press the Crust: Dump the crumb mixture into your prepared pan. Use the bottom of a measuring cup or a flat glass to press it down firmly and evenly. Don’t skimp on this step—a tightly packed crust holds together better. Bake the crust for 8 minutes. It will smell amazing and just start to set. Set it aside to cool slightly while you make the filling.
- Make the Filling: In a large bowl, beat the 16 ounces of softened cream cheese with a hand mixer on medium speed until it’s smooth and creamy—about 1 minute. Scrape down the sides of the bowl. Add the 1 can of sweetened condensed milk and beat again until combined. It should be silky.
- Add the Pumpkin and Spices: Add the 1 cup of pumpkin purée, 1 teaspoon of pumpkin pie spice, and 1 teaspoon of vanilla extract. Beat on low speed until everything is mixed in. Don’t overmix! Finally, add the 2 eggs one at a time, beating on low just until the yolk disappears after each addition. Overmixing at this stage can incorporate too much air and cause cracks.
- Assemble the Bars: Pour the filling over the pre-baked crust. Use your spatula to spread it evenly into the corners. Give the pan a gentle tap on the counter to release any air bubbles.
- Bake to Perfection: Place the pan in the preheated oven and bake for 35–40 minutes. The edges will look set, but the center will still have a slight jiggle when you gently shake the pan. That jiggle is your friend—it means the cheesecake will be creamy, not dry. If the top starts to brown too quickly, tent it loosely with foil for the last 10 minutes.
- Cool Completely: This is the hardest part. Let the bars cool on a wire rack for 1 hour. Then, transfer the pan to the refrigerator and chill for at least 4 hours, but overnight is best. Chilling allows the bars to fully set and makes them much easier to slice cleanly.
- Slice and Serve: Once fully chilled, use the parchment paper handles to lift the entire block of bars out of the pan. Place it on a cutting board. Use a sharp knife to cut into 16 squares. For the cleanest cuts, wipe the knife clean between each slice.
Cooking Tips & Techniques
I have made these bars more times than I can count, and I have definitely learned a few things the hard way. Here are my best tips to make your batch perfect every time.
Don’t skip the room temperature ingredients. I know, it’s annoying to wait. But cold cream cheese and cold eggs will give you a lumpy, curdled-looking filling. Trust me on this one. Set everything out 30 minutes before you start. It makes a world of difference.
The jiggle test is your best friend. The biggest mistake I ever made was overbaking these. I wanted them to be “done” and left them in for an extra 10 minutes. The result? A dry, cracked top. The center should wobble like Jell-O when you pull it out. It will firm up beautifully as it chills.
Crush the cookies consistently. If you have big chunks of cookie in your crust, it will be crumbly and hard to press. Aim for fine, sand-like crumbs. A food processor is the easiest way to get a uniform texture, but a rolling pin works great if you are patient.
Line your pan properly. I once forgot the parchment paper and had to dig the bars out with a spatula. It was a tragic, messy affair. The parchment overhang is not optional—it’s your ticket to perfect, unbroken squares.
Variations & Adaptations
One of the best things about this recipe is how flexible it is. Here are a few ways to make it your own.
- Gluten-Free Option: Swap the gingersnap cookies for your favorite gluten-free gingersnaps. Many brands make them, and they work perfectly. Everything else in the recipe is naturally gluten-free.
- Spice It Up: If you love a strong spice flavor, add an extra ½ teaspoon of cinnamon and a pinch of ground cloves to the filling. For a little heat, try adding ¼ teaspoon of cayenne pepper—it sounds weird, but it pairs beautifully with the pumpkin.
- Chocolate Drizzle: After the bars have chilled and been sliced, melt ½ cup of semi-sweet chocolate chips with 1 teaspoon of coconut oil. Drizzle it over the top for a fancy, bakery-style finish. It adds a lovely richness.
- No-Bake Version: For a no-bake alternative, use a pre-made graham cracker crust. Prepare the filling as directed but do not bake it. Pour it into the crust and chill for at least 6 hours. The texture will be softer, more like a mousse, but it’s still delicious.
- Pecan Topping: Before baking, sprinkle ½ cup of chopped pecans over the top of the filling. They will toast as the bars bake, adding a wonderful crunch and nutty flavor.
Serving & Storage Suggestions
These bars are incredibly versatile when it comes to serving. Here is how to make the most of them.
Serving Temperature: They are best served cold, straight from the fridge. The texture is firm and creamy, like a classic cheesecake. If you let them sit out for more than 20 minutes, they will soften, so keep them chilled until you are ready to serve.
Presentation: For a pretty presentation, top each bar with a small dollop of whipped cream and a light dusting of cinnamon or nutmeg. A few fresh cranberries or a single candied pecan on top also look gorgeous.
What to Serve With: These bars are wonderful on their own, but they pair beautifully with a cup of hot coffee or a mug of spiced apple cider. For a dessert board, serve them alongside fresh apple slices and a bowl of caramel sauce for dipping.
Storage: Store any leftover bars in an airtight container in the refrigerator. They will stay fresh for up to 5 days. In fact, the flavors actually get better after a day or two as they meld together.
Freezing: These bars freeze like a dream. Once they are fully chilled and sliced, place them on a baking sheet in a single layer and freeze for 1 hour. Then, transfer the frozen bars to a freezer-safe bag or container. They will keep for up to 3 months. Thaw them in the fridge overnight before serving.
Nutritional Information & Benefits
While these are definitely a treat, there are a few bright spots in the nutritional profile. Here is an estimated breakdown per bar (based on 16 servings).
| Nutrient | Amount per Bar |
|---|---|
| Calories | 285 |
| Fat | 18g |
| Carbohydrates | 28g |
| Protein | 5g |
| Sugar | 22g |
Health Highlights: Pumpkin is packed with Vitamin A and fiber, which is great for your immune system and digestion. The cream cheese provides a good amount of calcium and protein. The gingersnaps offer a touch of ginger, which is known for its anti-inflammatory properties. Is it health food? No. But it’s a dessert you can feel a little bit better about serving your family.
Dietary Considerations: This recipe is vegetarian. For a gluten-free version, use gluten-free gingersnaps. To make it lower in sugar, you can try using a sugar-free sweetened condensed milk, but the texture may be slightly different.
Conclusion
So there you have it. Easy Pumpkin Cheesecake Bars that taste like you spent hours in the kitchen, when really, you just threw a few things together. That’s my favorite kind of recipe—the one that makes you look like a hero without the stress.
I love these bars because they capture everything good about fall in one single, perfect bite. They are creamy, crunchy, spicy, and sweet. They are the dessert you bring to a friend’s house when you want to be impressive but still have time to do your laundry. Honestly, they are the dessert you make just because it’s Tuesday and you deserve a little something special.
Now, I want to hear from you. Have you tried these? Did you add your own twist? Drop a comment below and tell me how they turned out. And if you loved them as much as I do, please share this recipe with a friend who needs a little pumpkin magic in their life. Happy baking!
Frequently Asked Questions
Can I use pumpkin pie filling instead of pumpkin purée?
No, I wouldn’t recommend it. Pumpkin pie filling already has sugar and spices added, which will make your bars overly sweet and throw off the spice balance. Stick with 100% pure pumpkin purée for the best results.
My crust is too crumbly. What went wrong?
This usually happens if you didn’t add enough butter or didn’t press the crumbs firmly enough into the pan. Make sure you are using the full 5 tablespoons of melted butter and really pack the crust down with a flat-bottomed glass or measuring cup.
Can I make these bars dairy-free?
Yes, you can! Use a dairy-free cream cheese alternative (like Kite Hill or Tofutti) and a dairy-free butter substitute. The texture will be slightly softer, but the flavor will still be great. Just make sure your dairy-free cream cheese is softened to room temperature.
How do I know when the bars are done baking?
The edges will look set and slightly puffed, but the center will still jiggle when you gently shake the pan. That jiggle is what you want! If the center is completely firm, the bars are overbaked and may crack as they cool.
Can I use a different type of cookie for the crust?
Absolutely! While gingersnaps are my favorite for their spicy flavor, you can use graham crackers, vanilla wafers, or even chocolate cookies. If you use a sweeter cookie, you might want to reduce the butter slightly so the crust isn’t greasy.
Pin This Recipe!
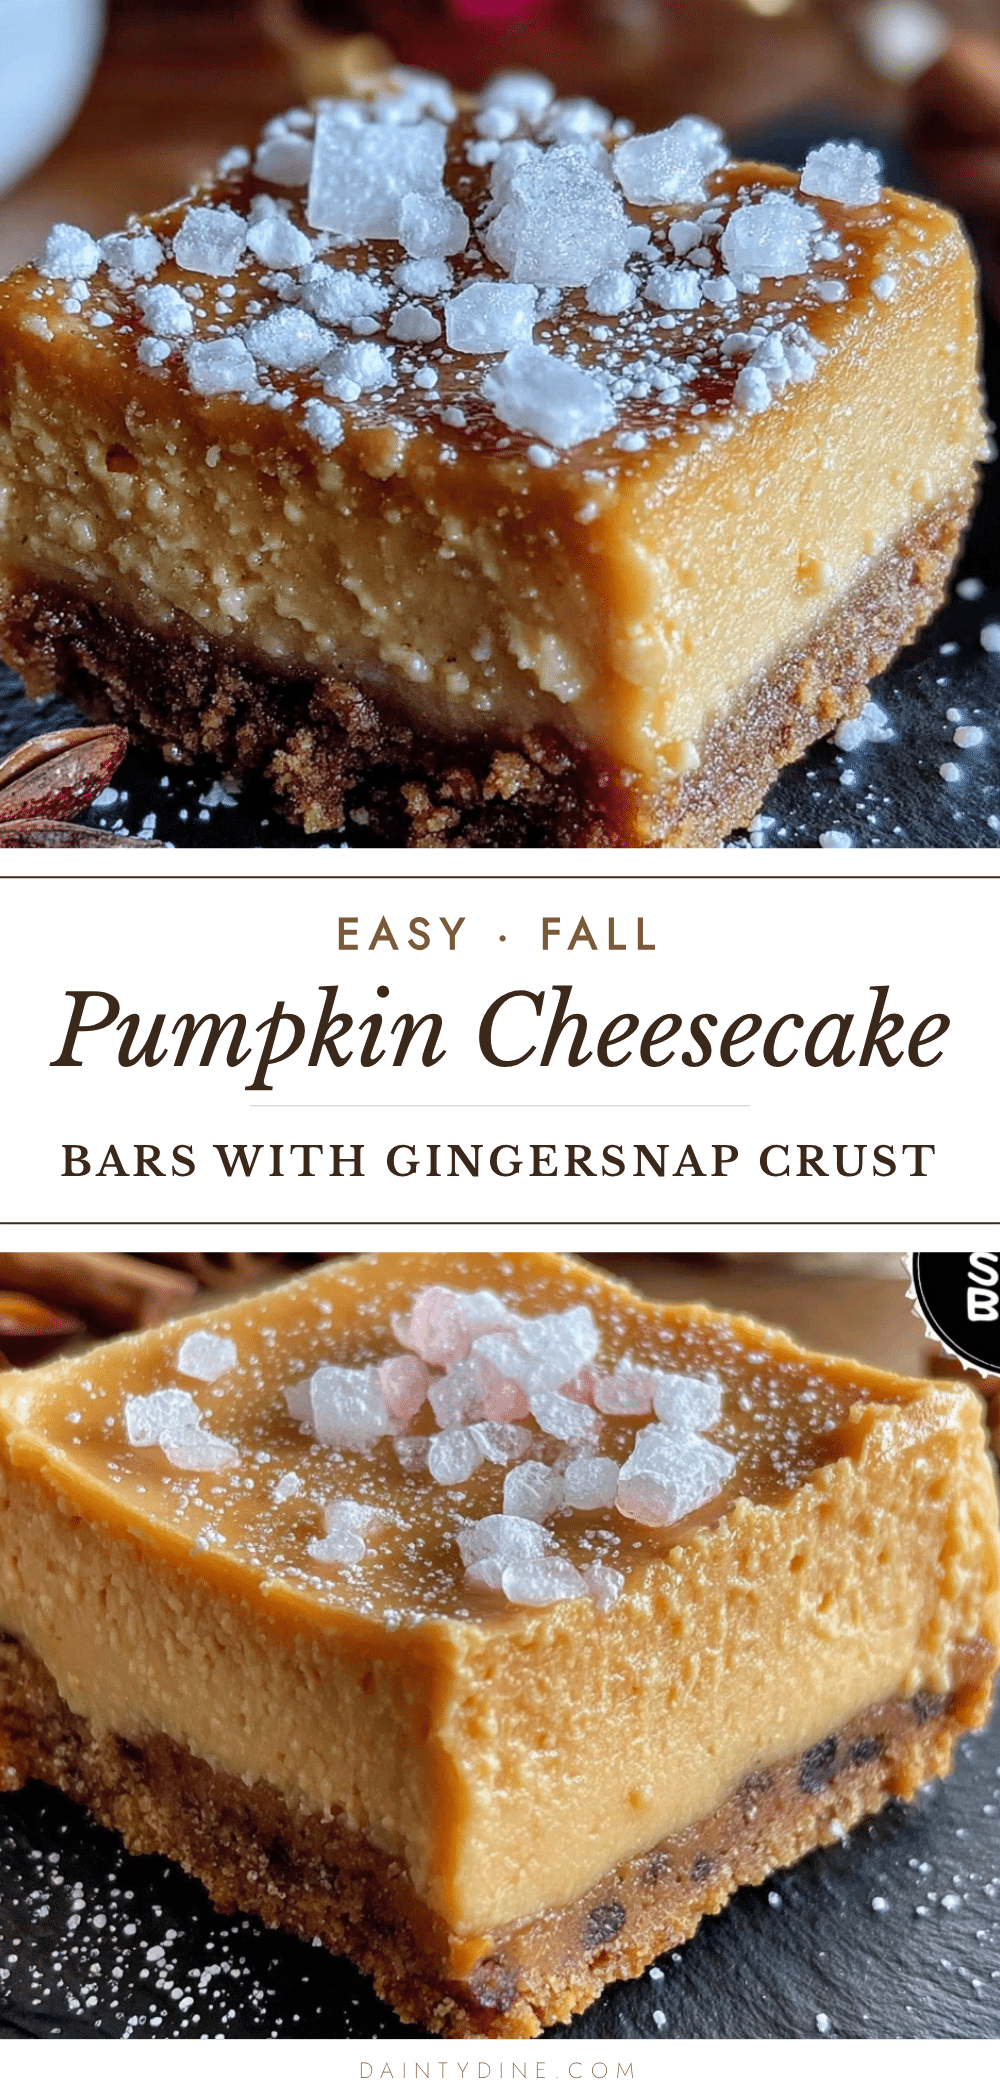
Easy Pumpkin Cheesecake Bars: Best 4-Ingredient Dessert
These Easy Pumpkin Cheesecake Bars are the ultimate fall dessert with a crunchy gingersnap crust and a creamy, tangy pumpkin filling. Made with just four main ingredients, they’re quick, simple, and perfect for weeknights or holiday gatherings.
- Prep Time: 15 minutes
- Cook Time: 35-40 minutes
- Total Time: 4 hours 50 minutes (includes chilling)
- Yield: 16 bars 1x
- Category: Dessert
- Cuisine: American
Ingredients
- 2 cups crushed gingersnap cookies (about 8 oz)
- 5 tablespoons unsalted butter, melted
- 16 ounces cream cheese, softened to room temperature
- 1 cup pumpkin purée (not pumpkin pie filling)
- 1 can (14 ounces) sweetened condensed milk
- 1 teaspoon pumpkin pie spice
- 1 teaspoon vanilla extract
- 2 large eggs, at room temperature
Instructions
- Preheat your oven to 350°F (175°C). Line an 8×8-inch baking pan with parchment paper, leaving overhang on two sides.
- Make the crust: Place 2 cups of gingersnap cookies in a zip-top bag and crush with a rolling pin into fine crumbs. Pour into a medium bowl, add 5 tablespoons melted unsalted butter, and stir until moistened like wet sand.
- Press the crust mixture firmly and evenly into the prepared pan using the bottom of a measuring cup. Bake for 8 minutes, then set aside to cool slightly.
- Make the filling: In a large bowl, beat 16 ounces softened cream cheese with a hand mixer on medium speed until smooth, about 1 minute. Scrape down the sides.
- Add 1 can sweetened condensed milk and beat until combined and silky.
- Add 1 cup pumpkin purée, 1 teaspoon pumpkin pie spice, and 1 teaspoon vanilla extract. Beat on low until mixed. Add 2 eggs one at a time, beating on low just until each yolk disappears. Do not overmix.
- Pour the filling over the pre-baked crust and spread evenly. Tap the pan gently on the counter to release air bubbles.
- Bake for 35–40 minutes. The edges will be set, but the center should still jiggle slightly. If the top browns too quickly, tent with foil for the last 10 minutes.
- Cool on a wire rack for 1 hour, then refrigerate for at least 4 hours or overnight until fully set.
- Use the parchment handles to lift the bars out of the pan. Cut into 16 squares with a sharp knife, wiping the blade clean between cuts.
Notes
For best results, use room temperature cream cheese and eggs to avoid a lumpy filling. The center should jiggle when done—do not overbake. Chill overnight for cleanest slices. For a gluten-free version, use gluten-free gingersnaps.
Nutrition
- Serving Size: 1 bar
- Calories: 285
- Sugar: 22
- Sodium: 220
- Fat: 18
- Saturated Fat: 10
- Carbohydrates: 28
- Fiber: 1
- Protein: 5
Keywords: pumpkin cheesecake bars, easy pumpkin dessert, 4-ingredient dessert, fall dessert, gingersnap crust, pumpkin bars, cheesecake bars