Love this? Save it for later!
Share the inspiration with your friends
I was standing in line at the local hardware store—the one that smells like sawdust and lawn fertilizer—when the woman behind me started talking about orange slices. Not oranges, mind you. Orange slices. She was maybe seventy, holding a single paint sample the color of a sunset, and she just launched into it like we were old friends. “You know,” she said, “the best thing I ever made for Christmas didn’t come from a bakery. It came from my oven.” She told me about the year her power went out for three days, and how she’d used up the fruit in her fridge before it spoiled. She sliced everything thin, laid it on racks, and let the residual heat from her wood stove do the work. The result? A kitchen that smelled like a holiday candle, and a garland that outlasted the real tree. I mean, honestly—who expects life-changing advice from the paint aisle?
I went home that afternoon, grabbed a bag of navel oranges I’d bought for juicing, and gave it a shot. My first batch came out uneven, some edges burnt, others still tacky. But the second batch? That was the one. I’ve been making these easy oven-dried orange slices every winter since, and let me tell you—they’re not just for garlands. They’re for cocktails, too. One slice floating in a glass of bourbon or sparkling water, and suddenly you’re the host who thought of everything.
Maybe you’ve been there, staring at a bag of oranges that’s about to turn, wondering what to do besides juice or eat them. This is your answer. It’s simple, it’s beautiful, and it makes your whole house smell like you’ve been baking all day—even when you haven’t. That’s the kind of magic I can get behind.
Why You’ll Love This Recipe
These easy oven-dried orange slices are the kind of project that feels fancy but requires almost zero effort. I’ve tested this method at least a dozen times across different ovens, different orange varieties, and different slice thicknesses. What I’m sharing here is the version that works every single time—no burnt edges, no wasted fruit.
- Quick & Easy : Active prep time is about 10 minutes. The oven does the rest. You can slice, arrange, and walk away.
- Simple Ingredients : You need exactly one ingredient—oranges. That’s it. No sugar, no syrup, no special additives. Just fruit and heat.
- Perfect for Gifting & Decorating : These slices make stunning DIY garlands, wreath accents, or cocktail garnishes. They also pack beautifully in gift bags for neighbors and teachers.
- Crowd-Pleaser : Every time I bring a jar of these to a gathering, someone asks for the recipe. They look impressive, but they’re secretly the easiest thing you’ll make all season.
- Unbelievably Versatile : Use them in drinks, on cheese boards, in potpourri, or strung up as decor. They last for months when stored properly.
What makes this different from other drying methods? It’s the low-and-slow approach with a slight temperature bump at the end. Most recipes either dry at too high a heat (which burns the natural sugars) or too low (which takes forever). My tested method hits the sweet spot—literally. The oranges retain their vibrant color, their citrusy scent, and just enough flexibility to thread onto twine without cracking. This isn’t just another version of dried oranges. It’s the one that actually works for both garlands and cocktails without compromise.
What Ingredients You Will Need
This recipe uses a single, humble ingredient to deliver beautiful, aromatic results. No fancy pantry items required. The quality of your oranges, however, does matter—so let’s talk about what to look for.
- Oranges, 3–4 medium-sized : Navel oranges are my go-to. They’re widely available, seedless, and have a balanced sweetness that dries beautifully. If you want a more tart, floral flavor, try blood oranges when they’re in season. Cara Cara oranges work well too—they’re slightly sweeter and have a lovely pink hue. Avoid oranges that are overly thick-skinned or pithy, as they take longer to dry and can turn bitter. Look for fruit that feels heavy for its size (that means it’s juicy) and has smooth, unblemished skin.
Optional add-ins for variety :
- Limes or lemons : Mix in a few citrus varieties for a multicolored garland. Limes dry a bit faster than oranges, so keep an eye on them.
- Grapefruit : Larger and more tart, grapefruit slices make a bold statement. They take slightly longer to dry due to their thicker pith.
- Whole spices (for decoration only) : Cinnamon sticks, star anise, or cloves can be threaded into garlands alongside dried slices for extra visual and aromatic appeal.
Ingredient selection tip : I personally recommend organic oranges whenever possible. Since you’re drying the peel (and often using it as decoration or garnish), you want to avoid any wax coatings or pesticide residues. If organic isn’t available, scrub the oranges thoroughly under warm water with a vegetable brush before slicing. It makes a real difference—I learned this the hard way after my first batch left a weird residue on the baking sheet.
Substitution guidance : You can use any citrus fruit with this method. Thinner-skinned fruits like clementines or mandarins dry faster and are great for smaller garlands. Just reduce the drying time by about 30 minutes and check frequently. Avoid using fruit that’s overripe or mushy—it won’t hold its shape during drying.
Equipment Needed
You don’t need a dehydrator or any fancy kitchen gadget for this recipe. Here’s what you’ll actually use:
- Sharp chef’s knife or mandoline slicer : A sharp knife gives you control over slice thickness. A mandoline slicer makes the job faster and ensures uniform slices—but watch your fingers! I’ve nicked myself more times than I’d like to admit. If using a mandoline, use the guard.
- Cutting board : Any stable board works. I prefer a large wooden one because it doesn’t slide around.
- Baking sheets : One or two rimmed baking sheets, depending on how many oranges you’re drying. Half-sheet pans are perfect.
- Wire cooling racks : These fit inside the baking sheets and allow air to circulate under the slices. They’re essential for even drying. If you don’t have them, you can flip the slices halfway through, but the racks make a noticeable difference.
- Paper towels : For blotting the slices before they go in the oven. This step removes excess moisture and speeds up drying.
- Oven : Any standard home oven works. Convection ovens dry faster—reduce the time by about 15–20 minutes and check early.
- Kitchen twine or string : For garlands. Hemp or jute twine gives a rustic look. Avoid synthetic string, which can melt near heat sources.
- Airtight glass jar or container : For storing dried slices you’re not using right away.
Budget-friendly tip : If you don’t have wire cooling racks, you can use the oven-safe grill grates that came with your oven, or simply flip the slices every 45 minutes. It’s a bit more hands-on, but it works. I’ve done it both ways, and honestly, the racks are worth the small investment if you plan to make these regularly.
Preparation Method
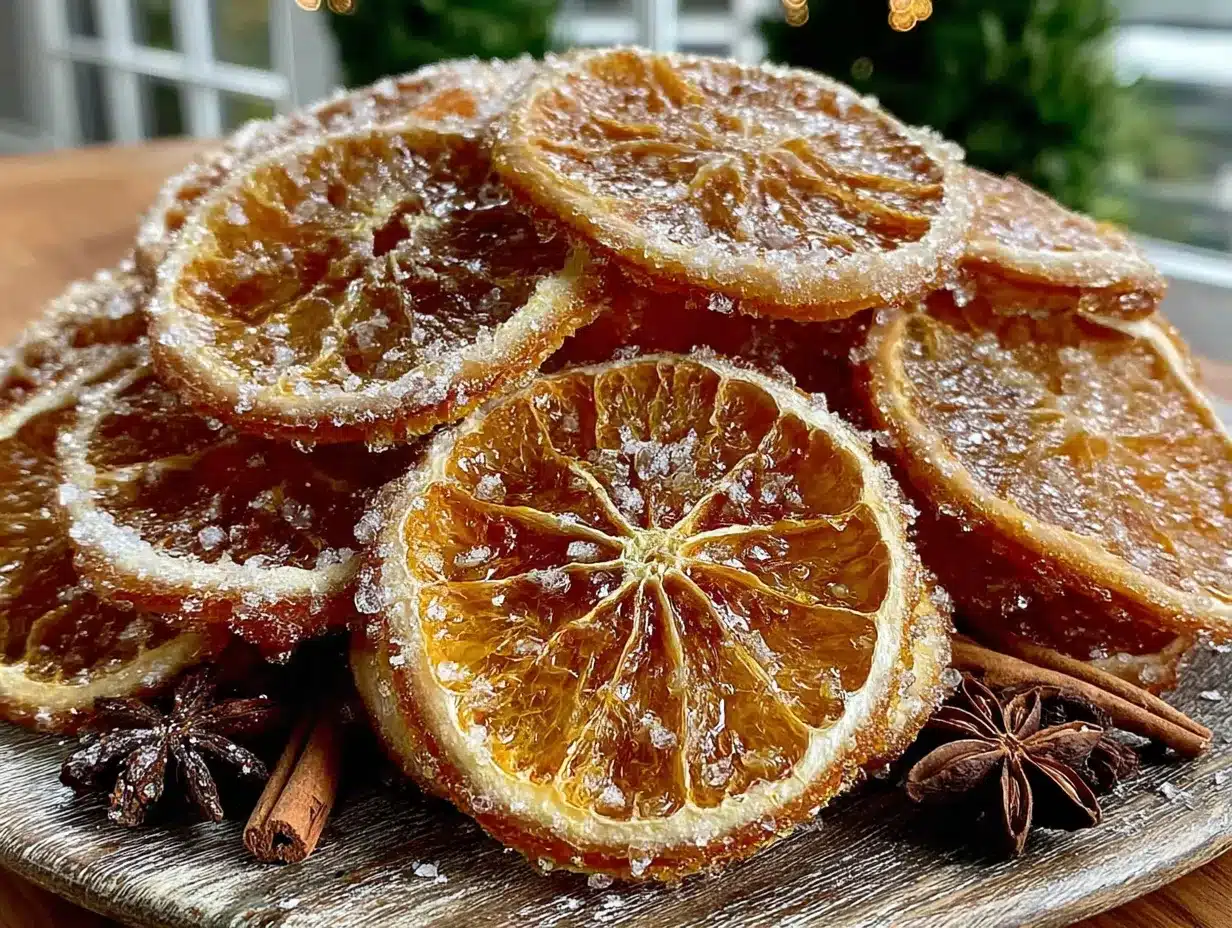
This method is straightforward, but a few small details make the difference between mediocre dried oranges and beautiful ones. Follow these steps closely for the best results.
- Preheat your oven to 200°F (93°C). This is the sweet spot—low enough to dry the fruit without cooking it, high enough to get the job done in a reasonable time. If your oven runs hot, set it to 190°F (88°C). I learned this after my first batch came out looking like burnt toast.
- Wash and dry the oranges thoroughly. Scrub them under warm water to remove any wax, dirt, or residue. Pat them completely dry with a clean kitchen towel. Any moisture on the skin will steam in the oven and slow down the drying process.
- Slice the oranges into even rounds, about ¼-inch (6 mm) thick. This is the critical step. Too thick, and they’ll take forever to dry and may still be moist in the center. Too thin, and they’ll become brittle and break easily. Use a sharp knife and slice steadily—don’t saw back and forth. If you’re using a mandoline, set it to 6 mm. Aim for uniform slices so they dry at the same rate.
- Blot the slices with paper towels. Lay the slices in a single layer on a few layers of paper towels. Place another paper towel on top and press gently to absorb excess juice from the cut surfaces. This step removes surface moisture and prevents the slices from sticking to the racks. You’ll see the paper towels darken with juice—that’s a good sign.
- Arrange the slices on wire racks set inside baking sheets. Place them in a single layer, not overlapping. Leave a little space between each slice for air circulation. If you don’t have racks, place the slices directly on parchment-lined baking sheets—but you’ll need to flip them every 45 minutes for even drying.
- Bake for 2.5 to 3 hours, then check for doneness. At the 2.5-hour mark, start checking. The slices should be dry to the touch but still slightly pliable. They should not feel sticky or tacky. If they bend and crack slightly at the edges, they’re ready. If they’re still soft in the center, continue drying in 20-minute increments.
- For a slightly crispier finish (ideal for garlands), increase the oven temperature to 225°F (107°C) for the last 30 minutes. This firms up the slices without burning them. Watch carefully—the line between “crispy” and “burnt” is thin at this stage.
- Cool completely on the racks. This is non-negotiable. As the slices cool, they’ll continue to firm up. If you try to string them while they’re still warm, they might tear. Let them sit for at least 30 minutes. I usually let mine cool for an hour while I clean up the kitchen.
- Test for doneness by feel. A properly dried slice should be leathery but not brittle. It should bend slightly without snapping. If it’s still soft or sticky, return it to the oven for another 20 minutes. Better to err on the side of slightly under-dried than over-dried—you can always pop them back in, but you can’t undo burnt edges.
Pro tip from my kitchen : I once forgot about a batch and left them in for an extra hour. They turned dark brown and tasted like burnt caramel—not ideal for cocktails, but honestly, they still looked beautiful on a garland when mixed with fresh slices. So don’t stress if you overdo it a little. There’s almost always a way to use them.
Cooking Tips & Techniques
After making these easy oven-dried orange slices more times than I can count, I’ve collected a few hard-won tips that will save you time and frustration.
Slice thickness is everything. I cannot stress this enough. A ¼-inch slice is the Goldilocks zone. Too thin, and the slices curl up at the edges and become fragile. Too thick, and the centers stay moist while the edges dry out. I measure with my eye now, but when I started, I used a ruler. No shame in that game.
Rotate your baking sheets halfway through. Most ovens have hot spots. Halfway through the drying time, swap the top rack with the bottom rack and rotate the sheets front to back. This ensures even drying across all slices. I forgot to do this once, and the top batch finished 45 minutes before the bottom one.
Use the “peel test” for doneness. Gently lift a slice by its peel. If the peel feels dry and the flesh underneath is still slightly tacky, give it more time. If the whole slice feels dry and the peel separates easily from the flesh, it’s done. This test works better than just touching the center.
Don’t crowd the oven. If you’re drying more than 4 oranges, use two baking sheets and stagger them on different racks. Overcrowding traps steam and turns your drying session into a steaming session. That’s how you end up with soggy, sad slices.
One mistake I’ll never make again : I once tried to speed things up by setting the oven to 250°F. The sugars in the oranges caramelized too quickly, turning the edges dark and giving the whole batch a slightly burnt, bitter taste. They still looked fine on a garland, but they were unusable for cocktails. Low and slow is the only way to go.
Multitasking strategy : While the oranges are drying, you can prep other holiday projects—string popcorn, make cookie dough, or wrap gifts. The oven does all the work. Just set a timer so you don’t forget about them. Trust me, the smell will make your whole house feel festive, and you’ll be tempted to open the oven door every 20 minutes. Resist that urge. Every time you open the door, you let heat escape and extend the drying time.
Variations & Adaptations
This recipe is endlessly adaptable. Here are a few ways I’ve tweaked it over the years to keep things interesting.
Spiced orange slices : Before baking, lightly brush the slices with a mixture of cinnamon and a tiny bit of maple syrup (about 1 teaspoon syrup mixed with ½ teaspoon cinnamon). This gives them a subtle warmth that’s perfect for fall garlands or holiday cocktails. Just be careful—the sugar can cause the slices to brown faster, so check them 30 minutes early.
Herb-infused slices for cocktails : Place a small sprig of fresh rosemary or thyme on top of each slice before drying. The herbs will infuse the citrus as they dry, creating a beautifully aromatic garnish for gin and tonics or bourbon cocktails. I tried this with lavender once, and it was surprisingly lovely—just use a light hand, as lavender can be overpowering.
Blood orange and lime mix : For a striking visual contrast, combine blood orange slices with lime slices in the same batch. The deep red and bright green create a stunning garland. Blood oranges dry slightly faster than navels, so keep an eye on them. I like to arrange them in alternating colors on the string for a festive look.
Vegan-friendly note : This recipe is naturally vegan and gluten-free. No substitutions needed.
Low-sugar option : If you’re watching your sugar intake, these slices are naturally low in sugar compared to candied citrus. The drying process concentrates the natural sugars, but no additional sugar is added. For a savory twist, try drying slices of Meyer lemon with a sprinkle of flaky sea salt—they’re fantastic in sparkling water or as a garnish for roasted vegetables.
Personal variation I love : I once made a batch with a mix of navel oranges, cara cara oranges, and lemons, then threaded them onto twine with whole star anise and cinnamon sticks. I hung it over my kitchen window, and it looked so beautiful that I left it up until February. The scent faded after a few weeks, but the colors stayed vibrant. It’s now my go-to holiday decoration.
Serving & Storage Suggestions
These easy oven-dried orange slices are as versatile as they are beautiful. Here’s how to use and store them so they last.
For garlands : Once the slices are completely cool, thread a needle with kitchen twine or jute string. Pierce each slice near the edge of the peel (not through the flesh, which is more fragile) and string them with even spacing. Alternate with cinnamon sticks, star anise, or dried chili peppers for variety. Hang the garland away from direct sunlight, which can fade the color over time. They’ll last for several weeks as decor—I’ve kept mine up for two months with minimal fading.
For cocktails : Drop a dried slice into a glass of bourbon, whiskey, gin and tonic, or sparkling water. The slice will rehydrate slightly in the liquid, releasing its citrus aroma. For a festive touch, float a slice in hot apple cider or mulled wine. They also make stunning garnishes for holiday punch bowls—just float a few on top for instant visual appeal.
For gifting : Arrange dried slices in a clear glass jar or cellophane bag with a sprig of rosemary and a cinnamon stick. Tie with a ribbon and attach a tag that says “Add to cocktails or hang as decor.” I’ve given these as hostess gifts for three years running, and they’re always a hit.
Storage instructions : Store completely dried slices in an airtight container at room temperature. A glass mason jar with a tight-fitting lid works perfectly. Keep them in a cool, dark place—away from the stove or direct sunlight. Properly dried and stored, they’ll last for 6 to 12 months. I still have a jar from last December, and they look and smell as good as the day I made them.
Reheating/crisping tip : If your slices lose their crispness over time (especially in humid weather), spread them on a baking sheet and warm them in a 200°F oven for 10 minutes. Let them cool completely before returning them to storage. This revives their texture without overcooking them.
How flavors develop : Interestingly, the citrus aroma becomes more subtle and mellow after a few weeks of storage. The slices won’t smell as punchy as fresh ones, but they’ll still look beautiful and release a gentle fragrance when added to hot drinks. I actually prefer the aged slices for garlands—they have a softer, more vintage look.
Nutritional Information & Benefits
These easy oven-dried orange slices are a surprisingly healthy option for decorating and garnishing. Here’s what you’re working with.
Estimated nutritional values per slice (based on 1 medium orange yielding about 8 slices) :
- Calories: 15
- Carbohydrates: 4g
- Sugar: 3g (natural, from fruit)
- Fiber: 1g
- Vitamin C: 10% of the Daily Value
- Potassium: 2% of the Daily Value
Health benefits : Oranges are packed with vitamin C, which supports immune health—especially welcome during cold and flu season. The drying process concentrates these nutrients, so even a small slice provides a decent boost. The peel contains flavonoids and antioxidants that are preserved during low-heat drying. Plus, using dried fruit as decor means you’re not adding any artificial scents or plastic decorations to your home. It’s a win for your health and the planet.
Dietary considerations : This recipe is naturally vegan, gluten-free, dairy-free, nut-free, and soy-free. It contains no added sugar, making it suitable for low-sugar diets. The only potential allergen is citrus itself—if you have a citrus allergy, obviously skip this recipe.
Personal wellness perspective : I love that this recipe lets me decorate my home without bringing in synthetic candles or plastic ornaments. The natural scent of dried oranges is calming and grounding, and knowing exactly what’s in my decor feels good. Plus, when the garland’s season is over, I can compost the slices. No waste, no guilt.
Conclusion
Honestly, I never expected to find my favorite holiday tradition in a hardware store paint aisle. But that’s the thing about cooking—and decorating, for that matter—the best ideas often come from the most unexpected places. These easy oven-dried orange slices have become a staple in my kitchen every winter, not just because they’re beautiful (though they are), but because they’re so simple to make. You don’t need a dehydrator, a special oven setting, or a culinary degree. You just need oranges, an oven, and a little bit of patience.
I hope you’ll give them a try—whether you’re stringing them into a garland, floating them in a cocktail, or packing them up as gifts for friends. And when you do, I’d love to hear about it. What variations did you try? Did you mix in other citrus? Did you add spices or herbs? Drop a comment below and share your creation. Your twist might just inspire someone else’s new favorite tradition.
Until next time, happy drying—and don’t forget to save a slice for your evening drink. You’ve earned it.
Frequently Asked Questions
Can I use a dehydrator instead of an oven?
Absolutely. A dehydrator works beautifully for this recipe. Set it to 135°F (57°C) and dry for 6 to 8 hours, flipping the slices halfway through. The result is even more consistent than an oven because there’s no hot spot variation. I’ve used both methods, and the dehydrator gives a slightly more uniform texture—but the oven is faster and doesn’t require extra equipment.
How do I keep the slices from sticking to the rack?
Blotting the slices thoroughly with paper towels before placing them on the rack is the key. Excess surface juice creates a sticky bond as it dries. If you’re still having trouble, lightly spray the wire racks with cooking spray before arranging the slices. I’ve also used parchment paper directly on the racks (with holes poked in it for airflow) as a non-stick solution.
Can I dry other fruits using this method?
Yes! This low-heat method works for many fruits. Apples, pears, lemons, limes, grapefruit, and even kiwis dry beautifully at 200°F. Just adjust the slice thickness based on the fruit—apples and pears should be slightly thinner (about ⅛ inch or 3 mm) because they’re denser. Check them earlier, as drying times vary. I’ve made mixed citrus garlands with oranges, lemons, and limes, and they turned out stunning.
Why did my orange slices turn brown?
Browning usually happens for one of two reasons: the oven temperature is too high, or the slices were left in too long. The natural sugars in oranges caramelize and darken when exposed to prolonged heat. If your slices are browning but still moist, lower the oven temperature to 180°F (82°C) and extend the drying time. A little browning at the edges is normal and even desirable for a rustic look, but if they’re dark all over, reduce the heat next time.
Can I use these slices in baking or cooking?
You can, but with caution. Dried orange slices are quite concentrated in flavor and can be tough in baked goods. I’ve used them as a topping for cakes (placed on top before baking) and as a garnish for glazed ham. They rehydrate slightly during baking, so they soften up a bit. For cooking, I recommend grinding them into a powder using a spice grinder—this makes a lovely orange seasoning for rubs or baked goods. Just be sure they’re completely dry before grinding.
Pin This Recipe!

Easy Oven-Dried Orange Slices for Garland & Cocktails

Transform simple oranges into beautiful, aromatic dried slices perfect for garlands, cocktail garnishes, and gifts. This low-and-slow oven method ensures vibrant color and pliable texture every time.
- Prep Time: 10 minutes
- Cook Time: 3 hours
- Total Time: 3 hours 10 minutes
- Yield: 24–32 slices (from 3–4 oranges) 1x
- Category: Snack, Garnish, Decor
- Cuisine: American
Ingredients
- 3–4 medium navel oranges (or other citrus like blood oranges, Cara Cara, limes, lemons, or grapefruit)
- Optional: cinnamon sticks, star anise, cloves (for decoration only)
- Optional: fresh rosemary or thyme sprigs (for herb-infused slices)
- Optional: 1 teaspoon maple syrup mixed with ½ teaspoon cinnamon (for spiced slices)
Instructions
- Preheat oven to 200°F (93°C).
- Wash and dry oranges thoroughly. Scrub under warm water to remove wax or residue, then pat completely dry.
- Slice oranges into even rounds, about ¼-inch (6 mm) thick. Use a sharp knife or mandoline slicer for uniform slices.
- Blot slices with paper towels to remove excess surface moisture.
- Arrange slices in a single layer on wire racks set inside rimmed baking sheets. Leave space between slices for air circulation.
- Bake for 2.5 to 3 hours. At 2.5 hours, check for doneness: slices should be dry to the touch but still slightly pliable. If still soft in the center, continue drying in 20-minute increments.
- For a crispier finish (ideal for garlands), increase oven temperature to 225°F (107°C) for the last 30 minutes. Watch carefully to avoid burning.
- Cool completely on the racks for at least 30 minutes. Slices will firm up as they cool.
- Test for doneness: a properly dried slice should be leathery but not brittle, bending slightly without snapping. If still soft or sticky, return to oven for another 20 minutes.
Notes
Slice thickness is critical: ¼-inch (6 mm) is ideal. Rotate baking sheets halfway through drying for even results. Avoid overcrowding the oven to prevent steaming. For best flavor and appearance, use organic oranges and scrub well. Dried slices can be stored in an airtight container at room temperature for 6–12 months. If slices lose crispness, reheat at 200°F for 10 minutes.
Nutrition
- Serving Size: 1 slice
- Calories: 15
- Sugar: 3
- Carbohydrates: 4
- Fiber: 1
Keywords: dried orange slices, oven-dried oranges, citrus garland, cocktail garnish, homemade decor, edible gift, low-sugar snack, vegan, gluten-free


