Love this? Save it for later!
Share the inspiration with your friends
I was standing in the checkout line at the grocery store last October, completely unprepared for what hit me. The woman in front of me had a shopping cart piled high with bags of candy corn, pumpkin-shaped sprinkles, and those orange-frosted cookies that somehow taste like autumn in every bite. And right there, wedged between a bag of fun-size chocolate bars and a box of cake mix, was a standard package of Oreos. Just regular Oreos, nothing fancy. But the second I saw them, I wasn’t in that fluorescent-lit aisle anymore. I was eight years old, sitting cross-legged on my neighbor Mrs. Kowalski’s linoleum kitchen floor, watching her crush cookies with a wooden rolling pin while telling me that Halloween treats didn’t have to be complicated to be magical.
Mrs. Kowalski was the kind of person who made everything look effortless. She’d toss ingredients together without measuring, wipe her flour-dusted hands on her apron, and somehow produce the most ridiculous, wonderful creations. Her specialty was no-bake truffles. She’d make them for every holiday, but Halloween was when she really went all out. She’d shape them into little ghosts and pumpkins, and one year, she made these adorable mummies wrapped in white chocolate bandages. I remember thinking, “I could never do that.” But she just laughed and handed me a spoon. “You can do anything with crushed cookies and melted chocolate,” she said. “That’s the rule.”
Mrs. K moved to Florida a few years ago, and I honestly haven’t seen her since. But every October, when the air gets crisp and the stores start stocking Halloween decorations, I find myself back in her kitchen, trying to recreate that feeling. These Easy No-Bake Mummy Oreo Truffles are my best attempt. They’re simple, they’re ridiculous, and they taste exactly like the kind of treat you’d make with a friend on a rainy October afternoon. Maybe you’ve got your own version of that memory. Someone who taught you that cooking doesn’t have to be serious. This recipe is for them. And honestly, it’s for you too. Because everyone deserves a Halloween treat that makes them feel like a kid again.
Why You’ll Love This Recipe
These Easy No-Bake Mummy Oreo Truffles have become my go-to Halloween treat for a reason. I’ve tested them at least a dozen times over the years, tweaking the ratios, trying different melting methods, and even experimenting with various Oreo flavors (spoiler alert: the mint ones are amazing). Here’s why I keep coming back to this recipe:
- No Baking Required : Seriously, your oven stays off. This is a huge win when you’re already juggling Halloween costumes, pumpkin carving, and trying to keep kids from eating all the candy before the big night.
- Just 4 Ingredients : Oreos, cream cheese, white chocolate, and candy eyes. That’s it. No weird specialty items, no trips to three different stores.
- Perfect for Halloween Parties : These little mummies are the star of every potluck, classroom celebration, or spooky movie night I’ve brought them to. Kids go wild for them, and adults pretend to be too cool but secretly grab three.
- Fun to Make with Kids : The process is so simple that even little hands can help crush cookies and dip truffles. It’s messy, but that’s part of the fun.
- Unbelievably Delicious : The texture is what gets me every time. Creamy, rich, slightly crunchy from the cookie bits, and then that smooth white chocolate shell. It’s like a cheesecake truffle that decided to dress up for Halloween.
What makes these different from other Oreo truffle recipes? It’s the little things. I use a specific technique for melting the white chocolate so it doesn’t seize up. I add a pinch of salt to balance the sweetness. And I’ve figured out the perfect ratio of cream cheese to cookies so the truffles hold their shape without being too dense. This isn’t just another version. It’s the version I’ve perfected over years of Halloween celebrations, and I’m pretty proud of it.
These truffles are the kind of treat that makes you close your eyes after the first bite. They’re comfort food dressed up in a costume. They’re simple enough for a weekday but special enough for a party. And honestly, they just make me happy. I hope they do the same for you.
What Ingredients You Will Need
This recipe uses simple, pantry-friendly ingredients to create something that looks way more impressive than it actually is. Here’s what you’ll need:
For the Truffle Base
- 1 package (14.3 oz) regular Oreo cookies (about 36 cookies) – Don’t use Double Stuf for this. I know it’s tempting, but the extra filling throws off the texture. Regular Oreos give you the perfect balance of cookie to cream cheese.
- 8 oz cream cheese, softened to room temperature – Full-fat is best here. Low-fat cream cheese makes the truffles too soft and they won’t hold their shape as well. Let it sit on the counter for about 30 minutes before you start.
- Pinch of salt – This is my secret weapon. It cuts through the sweetness and makes the chocolate flavor pop. Trust me on this one.
For the Decoration
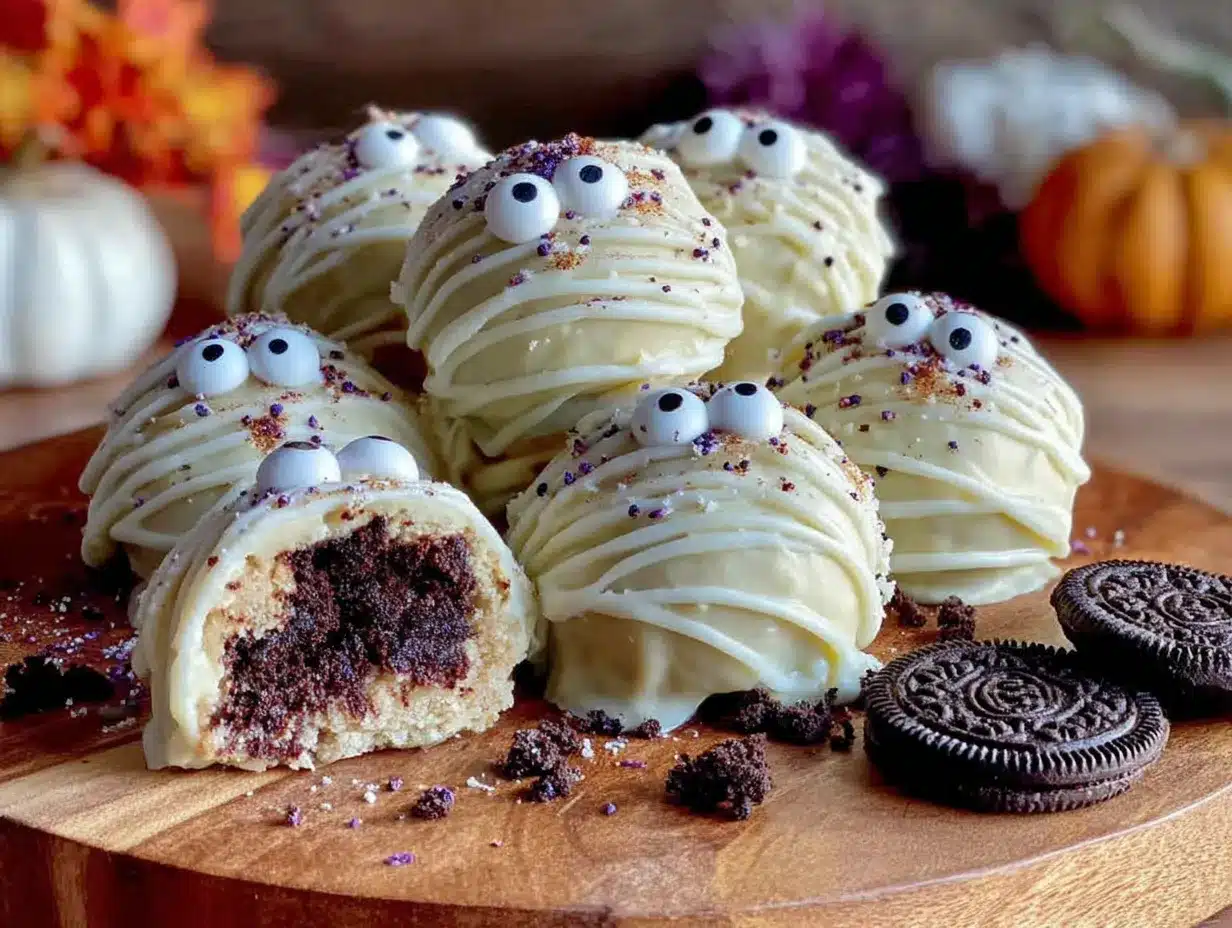
- 12 oz white chocolate melting wafers or white chocolate chips – I prefer Ghirardelli white chocolate melting wafers because they melt so smoothly. If you use regular white chocolate chips, add a teaspoon of coconut oil to help them thin out.
- Candy eyes – You can find these at any craft store or in the baking aisle at the grocery store. I like the ones that come in a mix of sizes. The tiny ones look especially cute on these mummies.
- Optional: black gel food coloring – If you want to pipe little mouths on your mummies, this is how you do it. Totally optional, but adds a fun touch.
Ingredient Tips from My Kitchen
I’ve learned a few things the hard way. Like the time I used generic chocolate sandwich cookies instead of Oreos. Don’t do that. The texture is different, and the truffles just don’t taste right. Oreos have that specific crumb that works perfectly with cream cheese.
For the white chocolate, I’ve found that the melting wafers from Ghirardelli or Wilton are the most forgiving. They melt evenly and don’t seize up as easily as some other brands. If you’re using white chocolate chips, look for ones that contain cocoa butter, not palm oil. The flavor is much better.
And about the cream cheese: please let it come to room temperature. I know we’re all in a hurry, but cold cream cheese doesn’t blend smoothly into the cookie crumbs. You’ll end up with little white lumps, and nobody wants that. Just take it out of the fridge while you’re gathering your other ingredients, and by the time you’re ready to mix, it’ll be perfect.
Equipment Needed
You don’t need a fancy kitchen to make these truffles. Here’s what I use:
- Food processor – This is the easiest way to crush the Oreos into fine crumbs. If you don’t have one, you can put the cookies in a zip-top bag and crush them with a rolling pin. It takes a little longer, but it works. Just make sure you get them really fine.
- Large mixing bowl – For combining the cookie crumbs and cream cheese. I use a glass bowl because it doesn’t hold onto smells.
- Electric hand mixer or stand mixer – You can mix by hand, but the electric mixer makes it so much easier to get everything fully combined. I’ve done it both ways, and the mixer is definitely faster.
- Baking sheet lined with parchment paper – For holding the truffles while they chill and after they’re dipped.
- Microwave-safe bowl – For melting the white chocolate. Glass or ceramic works best.
- Small spoon or fork – For dipping the truffles into the melted chocolate. Some people use toothpicks, but I find a fork works better for getting that mummy wrap look.
- Piping bag or small zip-top bag – For drizzling the white chocolate over the truffles to create the mummy bandages. A zip-top bag with a tiny corner snipped off works perfectly.
If you’re on a budget, skip the food processor and use the bag-and-rolling-pin method. Honestly, it’s kind of therapeutic. I’ve done it while watching Halloween movies, and it feels appropriately spooky.
Preparation Method
Alright, let’s make some mummies. This process is straightforward, but I’ll walk you through every step so you get perfect results the first time.
- Crush the Oreos : Place the entire package of Oreos (filling and all) into your food processor. Pulse until you have fine crumbs. You want them to look like dark sand. No big chunks. If you’re using the bag method, put the cookies in a gallon-size zip-top bag, squeeze out the air, and crush them with a rolling pin until they’re as fine as you can get them. This takes about 5 minutes of solid effort.
- Mix the base : Transfer the cookie crumbs to a large mixing bowl. Add the softened cream cheese and the pinch of salt. Using your electric mixer on medium speed, beat everything together until it forms a smooth, cohesive dough. It should look like dark, fudgy cookie dough. If it seems too dry, add another tablespoon of cream cheese. If it seems too wet, add a few more crushed cookies. I’ve had to adjust both ways depending on the humidity.
- Chill the mixture : Cover the bowl with plastic wrap and pop it in the fridge for at least 30 minutes. This step is crucial. The mixture needs to be firm enough to roll into balls. I’ve skipped this before and ended up with sticky, misshapen truffles. Don’t be like me. Let it chill.
- Roll into balls : Once the mixture is firm, use a small cookie scoop or your hands to roll the mixture into 1-inch balls. I usually get about 24 truffles from one batch. Place them on the parchment-lined baking sheet. If your hands get sticky, lightly dampen them with water. That helps the mixture not stick to your palms.
- Freeze the truffles : Pop the baking sheet into the freezer for 15-20 minutes. This makes them much easier to dip. The truffles should be firm to the touch but not rock hard. If you leave them too long, the white chocolate will crack when you dip them. I learned that one the hard way.
- Melt the white chocolate : While the truffles are freezing, place your white chocolate melting wafers in a microwave-safe bowl. Microwave in 30-second intervals, stirring well after each interval, until the chocolate is completely smooth and melted. Be careful not to overheat it. White chocolate burns easily and turns grainy. If it starts to look thick, stir in a teaspoon of coconut oil.
- Dip the truffles : Remove the truffles from the freezer. Working with one truffle at a time, use a fork to lower it into the melted white chocolate. Roll it around to coat completely, then lift it out and let the excess chocolate drip off. Place it back on the parchment-lined sheet. Immediately press two candy eyes into the chocolate before it sets. Work quickly here because the chocolate starts to harden fast.
- Create the mummy wraps : Transfer the remaining melted white chocolate to a piping bag or a small zip-top bag with a tiny corner snipped off. Once all the truffles are dipped and the chocolate has set slightly (about 5 minutes), drizzle the white chocolate back and forth over each truffle to create the mummy bandage effect. You want it to look messy and wrapped, not perfect. That’s the whole point.
- Let them set : Place the baking sheet back in the fridge for about 15 minutes, or until the chocolate is completely firm. If you used candy eyes, make sure they’re secure before moving the truffles.
- Optional: Add mouths : If you want to give your mummies little expressions, use a toothpick dipped in black gel food coloring to pipe tiny mouths. I like to make some look scared and some look grumpy. It adds personality.
And that’s it. You’ve got a tray full of adorable, delicious mummies ready to haunt your Halloween party.
Cooking Tips & Techniques
I’ve made these truffles more times than I can count, and I’ve messed up plenty along the way. Here’s what I’ve learned:
Don’t overmix the cream cheese. I know it’s tempting to keep beating until everything is perfectly smooth, but overmixing can make the truffles greasy. Just mix until the cream cheese is fully incorporated and the dough comes together. Stop there.
Temperatures matter. Cold truffles are easier to dip, but if they’re too cold, the white chocolate will crack. If they’re too warm, the chocolate will slide right off. That 15-minute freeze is the sweet spot. I actually set a timer because I’ve forgotten and left them in there for an hour, and the results were not pretty.
Work in small batches. Don’t try to dip all the truffles at once. The white chocolate will start to thicken as it cools, and you’ll end up with clumpy mummies. I melt the chocolate, dip about 8 truffles, then reheat the chocolate if needed before continuing.
If your white chocolate seizes up (turns thick and grainy), don’t panic. Stir in a teaspoon of vegetable oil or coconut oil and microwave for 10 seconds. Stir vigorously. It should smooth right out. This has saved me multiple times.
Use a fork for dipping. I’ve tried toothpicks, skewers, and even my fingers. A fork works best. Place the truffle on the fork, lower it into the chocolate, and use a spoon to drizzle chocolate over the top if needed. Then tap the fork on the edge of the bowl to remove excess.
Let the first layer set before drizzling. If you try to add the mummy wraps while the base coat is still wet, everything will run together and you’ll lose that bandage look. Wait about 5 minutes, or until the chocolate is tacky but not fully hard.
Variations & Adaptations
One of the best things about this recipe is how easy it is to customize. Here are some variations I’ve tried:
Flavor Twists : Swap the regular Oreos for mint Oreos, peanut butter Oreos, or even the birthday cake flavor. Each one gives the truffles a completely different personality. The mint ones are especially good if you’re a fan of that chocolate-mint combo.
Gluten-Free Option : Use gluten-free chocolate sandwich cookies. There are several brands that make them, and they work exactly the same way. Just make sure your white chocolate is also gluten-free. Some brands use wheat-based additives.
Different Chocolate Coating : If you’re not a white chocolate fan, use dark or milk chocolate instead. The mummies will look like they’re made of chocolate instead of wrapped in bandages, but they’ll still be delicious. You can also use colored candy melts for a fun twist. Green mummies, anyone?
Add Mix-Ins : Before rolling the truffles, fold in some mini chocolate chips, crushed pretzels, or even a little peanut butter. I made a batch with crushed toffee bits once, and they were gone in minutes.
Spooky Shapes : Instead of rolling the mixture into balls, press it into a pumpkin-shaped silicone mold. Dip and decorate the same way. You’ll get little mummy pumpkins that are absolutely adorable.
Make Them Ahead : These truffles freeze beautifully. Make the entire batch, freeze them on the baking sheet, then transfer to a freezer-safe container. They’ll keep for up to three months. Just let them thaw in the fridge for about 30 minutes before serving.
Serving & Storage Suggestions
These truffles are best served cold, straight from the fridge. The texture is firm but creamy, and the white chocolate shell has that satisfying snap when you bite into it. I like to arrange them on a platter with some fake spiderwebs and plastic spiders for a spooky presentation.
They pair perfectly with hot apple cider, pumpkin spice lattes, or even a glass of cold milk. If you’re serving them at a party, set them out about 10 minutes before guests arrive so they soften slightly. But don’t leave them out too long. If the room is warm, the truffles can get a little melty.
For storage, keep the truffles in an airtight container in the refrigerator. They’ll stay fresh for up to two weeks. I’ve never had them last that long, but theoretically, they’ll be fine. If you’re stacking them in layers, separate the layers with parchment paper so the decorations don’t smudge.
You can also freeze the undipped truffle balls for up to three months. Just roll them, freeze them on a baking sheet, then transfer to a freezer bag. When you’re ready to decorate, thaw them in the fridge for about 20 minutes, then dip and decorate as usual. This is my favorite make-ahead trick for busy Halloween weeks.
One thing I’ve noticed: the flavors actually get better after a day or two in the fridge. The cream cheese and cookie meld together, and the truffles become even more rich and fudgy. So don’t feel like you have to serve them immediately. They’re actually better the next day.
Nutritional Information & Benefits
Let’s be real: these are a treat. They’re not health food, and they’re not pretending to be. But here’s the nutritional breakdown for one truffle, based on a batch of 24:
- Calories: approximately 180
- Fat: 11g
- Carbohydrates: 20g
- Protein: 2g
- Sugar: 15g
That said, there are a few redeeming qualities. Oreos contain a small amount of iron and calcium. White chocolate has calcium too. And cream cheese provides a little protein. But honestly, you’re eating these for the joy, not the nutrients.
If you’re looking for a slightly lighter version, you can use reduced-fat cream cheese and sugar-free white chocolate. The texture won’t be quite as rich, but they’ll still be delicious. I’ve tested this, and honestly, most people can’t tell the difference.
These truffles are vegetarian, but they’re not vegan or dairy-free. If you need a dairy-free option, use vegan cream cheese and dairy-free white chocolate. I’ve tried this with Kite Hill cream cheese and Enjoy Life white chocolate chips, and the results were surprisingly good.
Conclusion
These Easy No-Bake Mummy Oreo Truffles have become a Halloween tradition in my house, and I hope they become one in yours too. They’re simple enough to make on a whim, but special enough to bring to any party. They’re the kind of treat that makes people smile, both because they’re delicious and because they’re just so darn cute.
I love that this recipe doesn’t take itself too seriously. It’s playful. It’s forgiving. And it’s exactly the kind of thing Mrs. Kowalski would have made with a wink and a laugh. Every time I drizzle those white chocolate bandages, I think of her. And I hope that somewhere in Florida, she’s still making truffles and teaching someone that cooking doesn’t have to be complicated to be wonderful.
Now it’s your turn. Make these mummies. Get creative with the expressions. Let the kids help. And then tell me all about it. I’d love to hear how yours turned out, what variations you tried, and whether anyone tried to eat the candy eyes before they made it onto the truffles. Drop a comment below, share a photo, and let’s keep this Halloween tradition going.
Happy haunting, and happy eating!
Frequently Asked Questions
Can I use Double Stuf Oreos for this recipe?
I don’t recommend it. The extra filling changes the texture of the truffles and makes them much softer. Stick with regular Oreos for the best results. If you only have Double Stuf, remove about half the filling before crushing the cookies.
Why did my white chocolate seize up?
White chocolate is sensitive to heat and moisture. If even a drop of water gets into the bowl, the chocolate can seize and turn grainy. Make sure your bowl is completely dry, and heat the chocolate slowly in short bursts. If it does seize, stir in a teaspoon of coconut oil or vegetable oil to smooth it out.
Can I make these truffles ahead of time?
Absolutely. You can make the entire batch up to two weeks in advance and store them in the refrigerator. They actually taste better after a day or two. You can also freeze the undipped truffle balls for up to three months.
How do I keep the candy eyes from falling off?
Press the eyes into the white chocolate while it’s still wet, right after dipping. If the chocolate has already set, you can dab a tiny bit of melted chocolate on the back of each eye and stick it on. I’ve done this many times when I got distracted.
Can I use milk chocolate instead of white chocolate?
Yes! The mummies won’t look as traditional, but they’ll still be delicious. Dark chocolate also works well and balances the sweetness of the filling. Just make sure to use good-quality chocolate for the best flavor and texture.
Pin This Recipe!
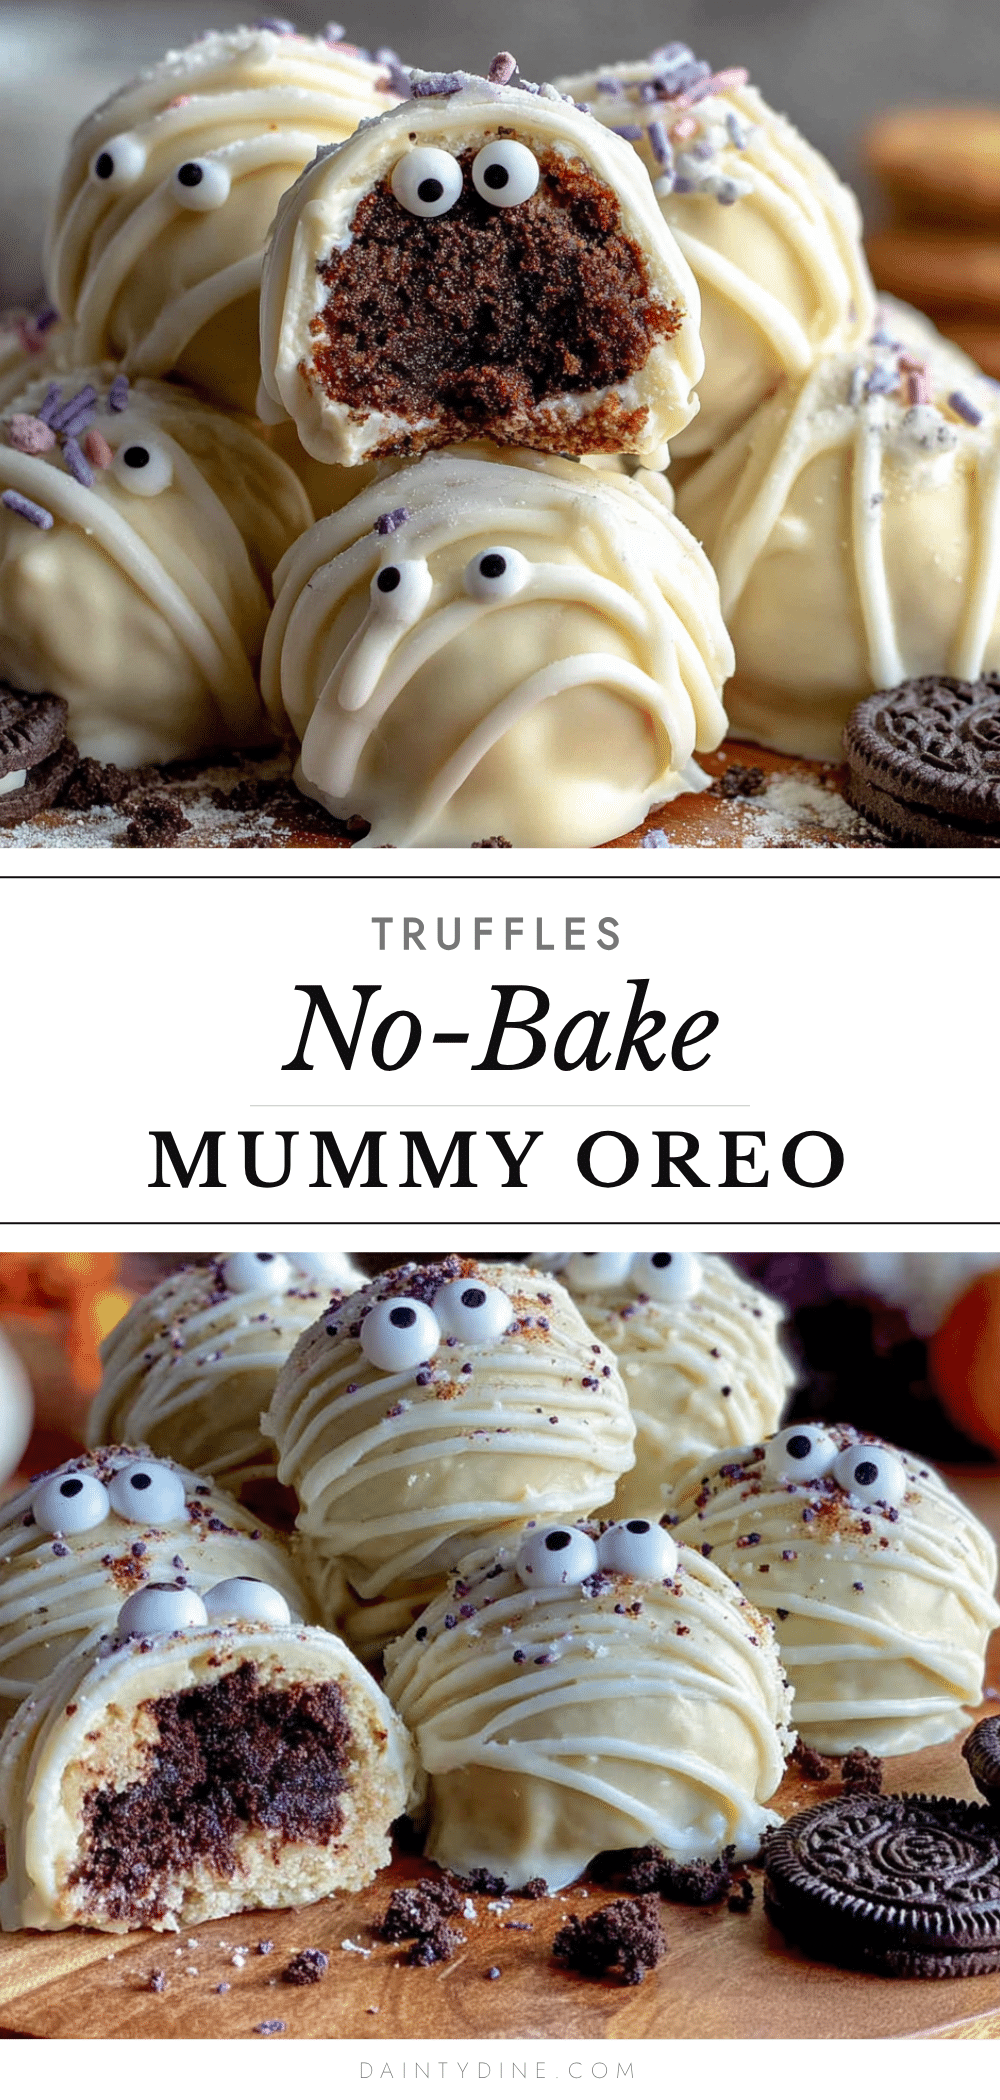
Easy No-Bake Mummy Oreo Truffles: Best Halloween Treat

These adorable no-bake mummy Oreo truffles are the perfect Halloween treat. Made with just four ingredients, they’re creamy, rich, and wrapped in white chocolate bandages with candy eyes.
- Prep Time: 30 minutes
- Cook Time: 0 minutes
- Total Time: 1 hour 30 minutes (includes chilling and setting time)
- Yield: 24 truffles 1x
- Category: Dessert
- Cuisine: American
Ingredients
- 1 package (14.3 oz) regular Oreo cookies (about 36 cookies)
- 8 oz cream cheese, softened to room temperature
- Pinch of salt
- 12 oz white chocolate melting wafers or white chocolate chips
- Candy eyes
- Optional: black gel food coloring for mouths
Instructions
- Crush the Oreos: Place the entire package of Oreos (filling and all) into your food processor. Pulse until you have fine crumbs that look like dark sand. If using the bag method, put cookies in a gallon-size zip-top bag, squeeze out air, and crush with a rolling pin until fine.
- Mix the base: Transfer cookie crumbs to a large mixing bowl. Add softened cream cheese and pinch of salt. Using an electric mixer on medium speed, beat until it forms a smooth, cohesive dough that looks like dark, fudgy cookie dough. Adjust with extra cream cheese if too dry or more crushed cookies if too wet.
- Chill the mixture: Cover the bowl with plastic wrap and refrigerate for at least 30 minutes until firm enough to roll.
- Roll into balls: Use a small cookie scoop or your hands to roll the mixture into 1-inch balls. Place on a parchment-lined baking sheet. Lightly dampen hands with water if sticky. You should get about 24 truffles.
- Freeze the truffles: Place the baking sheet in the freezer for 15-20 minutes until firm but not rock hard.
- Melt the white chocolate: Place white chocolate melting wafers in a microwave-safe bowl. Microwave in 30-second intervals, stirring well after each, until completely smooth. Be careful not to overheat. If it thickens, stir in a teaspoon of coconut oil.
- Dip the truffles: Working one at a time, use a fork to lower each truffle into melted white chocolate. Roll to coat completely, lift out, let excess drip off, and place back on parchment. Immediately press two candy eyes into the chocolate before it sets.
- Create the mummy wraps: Transfer remaining melted white chocolate to a piping bag or small zip-top bag with a tiny corner snipped off. After about 5 minutes when chocolate has set slightly, drizzle white chocolate back and forth over each truffle to create mummy bandage effect.
- Let them set: Place baking sheet back in the fridge for about 15 minutes until chocolate is completely firm.
- Optional: Add mouths: Use a toothpick dipped in black gel food coloring to pipe tiny mouths on the mummies for personality.
Notes
Don’t use Double Stuf Oreos as extra filling throws off texture. Let cream cheese come to room temperature for smooth blending. Freeze truffles exactly 15-20 minutes for best dipping results. Work in small batches when dipping as white chocolate thickens as it cools. If white chocolate seizes, stir in a teaspoon of vegetable or coconut oil. Truffles taste even better after a day or two in the fridge.
Nutrition
- Serving Size: 1 truffle
- Calories: 180
- Sugar: 15
- Sodium: 120
- Fat: 11
- Saturated Fat: 6
- Carbohydrates: 20
- Protein: 2
Keywords: Halloween treats, no-bake desserts, Oreo truffles, mummy truffles, easy Halloween recipes, white chocolate truffles, kid-friendly Halloween


