Love this? Save it for later!
Share the inspiration with your friends
There used to be this tiny Asian-fusion spot on the corner of 7th and Maple in my old neighborhood—the kind of place with mismatched chairs and a handwritten menu on a chalkboard. They made this honey garlic chicken that was absolutely unreal. Sticky, savory, just sweet enough, with that perfect glossy sauce that coated every single grain of rice. When they closed two summers ago—turned into a vape shop, of all things—I honestly felt a little lost. I mean, I’d been going there every other Tuesday for years. That sauce haunted me.
After about seven tries—seven batches of sauce that were either too watery, too sweet, or tasted like straight soy sauce with regrets—I finally cracked it. And here’s the thing: I didn’t even use chicken. I was in a hurry one night, had a pound of ground beef thawed on the counter, and thought, why not? Turns out, ground beef is the perfect vehicle for this sauce. It grabs onto every bit of that honey garlic glaze, and when you cook it all in one skillet with rice? Let me tell you, it’s magic. My neighbor Karen actually knocked on my door that night because the smell drifted through the walls.
This Easy Honey Garlic Ground Beef and Rice skillet is the recipe I’ve been making for every potluck, every casual dinner party, every “I need to bring something that disappears fast” situation since. It’s the kind of dish that makes people hover around the stove with a spoon, pretending they’re just checking on things. Maybe you’ve been there—standing over a pan, sneaking bites before anyone else gets to the table. That’s exactly the energy this recipe brings. And honestly? It’s even better than the original. Don’t tell the old restaurant, but I think they’d approve.
Why You’ll Love This Recipe
Let me be real with you for a second. I’ve tested this recipe more times than I care to admit—about twelve batches in the last eight months alone. My family has become my unofficial taste-testing panel, and they’ve never once complained. That’s how I know this one’s a keeper. Here’s what makes it stand out:
- One Skillet Wonder: Everything cooks in a single pan. No boiling rice separately, no extra pots to scrub. Dinner’s ready in under 30 minutes, and cleanup is almost embarrassing fast.
- Pantry-Friendly Ingredients: You probably have most of this stuff already. Soy sauce, honey, garlic, ground beef, rice. No fancy trips to a specialty store required.
- Perfect for Hosting: This dish scales beautifully for a crowd. Double it for a dinner party, or triple it for a potluck. It holds up well on a buffet table and stays warm for ages.
- Crowd-Pleasing Flavor: That sweet-savory honey garlic combo hits every single time. Kids love it, adults go back for seconds, and I’ve never had leftovers at a gathering.
- Stress-Free Impressing: You can prep the sauce ahead, brown the beef early, and finish everything in minutes before guests arrive. It looks like you spent way more effort than you actually did.
What makes this version different from all the other ground beef and rice recipes out there? It’s the sauce. I spent weeks perfecting that balance—enough honey for sweetness, enough garlic to wake up your taste buds, a splash of rice vinegar for brightness, and a tiny bit of sriracha for warmth that doesn’t overpower. The rice cooks right in the same pan, soaking up all that flavor instead of sitting blandly on the side. It’s not just another weeknight dinner. It’s the kind of meal that makes you close your eyes after the first bite and forget you’re eating ground beef from a Tuesday night.
What Ingredients You Will Need
This recipe uses simple, everyday ingredients that come together to create something surprisingly complex. You don’t need anything exotic here—just good pantry staples and a little love.
For the Honey Garlic Sauce
- 1/3 cup honey (use a runny, pure honey for best consistency; I like Local Hive for its floral notes)
- 1/4 cup low-sodium soy sauce (or tamari for gluten-free; regular soy sauce works but watch the salt)
- 2 tablespoons rice vinegar (unseasoned; adds brightness without being too acidic)
- 4 cloves garlic, minced (fresh is non-negotiable here—pre-minced jarred stuff won’t give you the same punch)
- 1 tablespoon sriracha (adjust to your heat preference; I use Huy Fong for that perfect balance)
- 1 teaspoon sesame oil (toasted variety adds a nutty depth that’s subtle but essential)
- 1 tablespoon cornstarch mixed with 2 tablespoons cold water (the slurry that thickens everything to glossy perfection)
For the Skillet
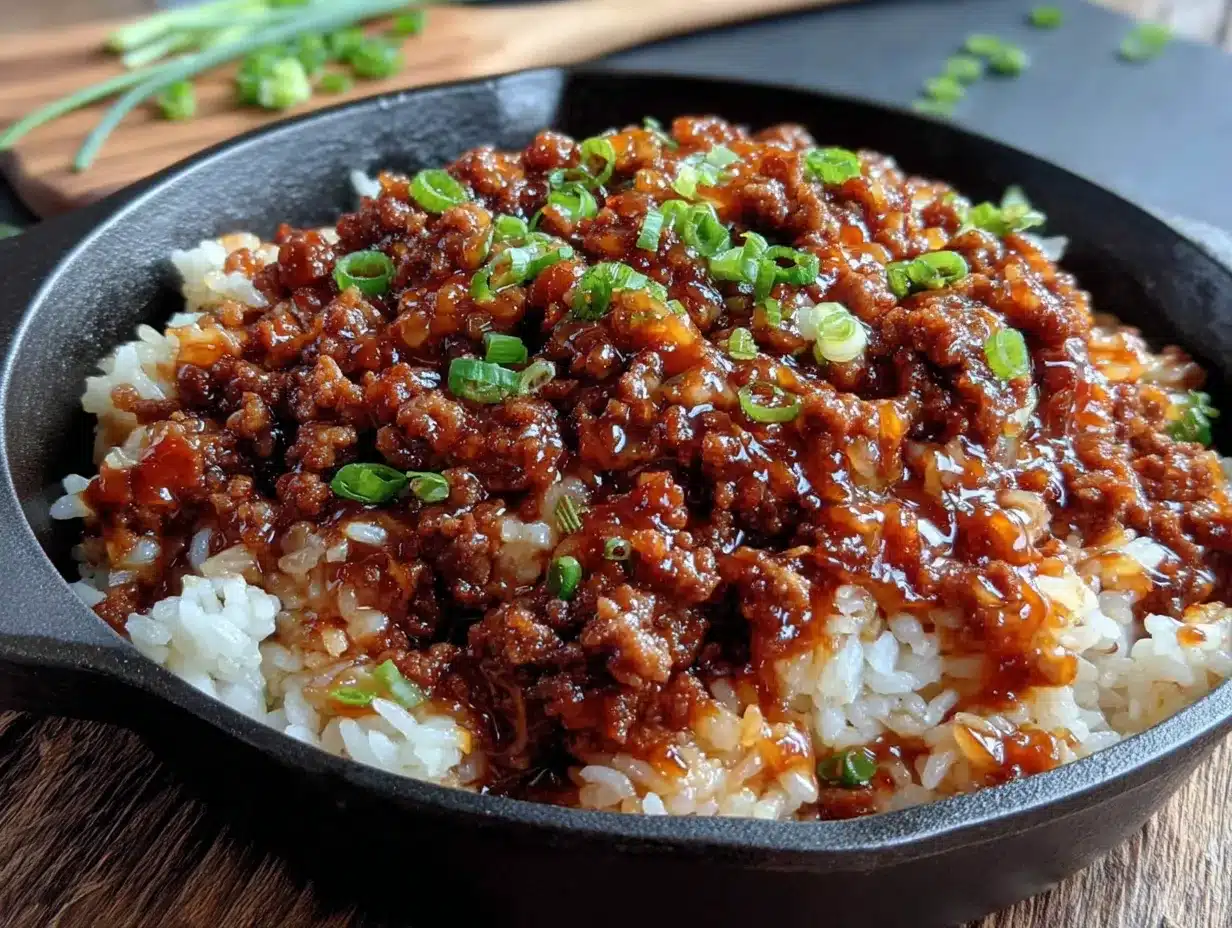
- 1 pound ground beef (80/20 works best—lean enough to not be greasy, fatty enough for flavor)
- 1 tablespoon vegetable oil (or any neutral oil with a high smoke point)
- 1 medium yellow onion, diced (about 1 cup; sweet onions work too if that’s what you have)
- 2 cups white rice, uncooked (long-grain jasmine or basmati work beautifully; avoid short-grain as it gets too sticky)
- 3 cups low-sodium beef broth (or chicken broth if that’s what’s in your pantry; vegetable broth works in a pinch)
- 1 cup frozen peas and carrots mix (no need to thaw—they go straight in frozen)
- 2 green onions, sliced (for garnish; adds a fresh pop of color and mild onion flavor)
- 1 tablespoon sesame seeds, toasted (optional but highly recommended for that restaurant touch)
Ingredient Tips
When I’m making this for a crowd—say, eight to ten people—I double everything and use a wide 14-inch skillet. The key is not overcrowding the pan. If you’re feeding a smaller group, the recipe as written serves about six comfortably. For the ground beef, I’ve tested this with ground turkey and chicken too. They work, but you’ll want to add an extra tablespoon of oil since poultry is leaner. My go-to brand for beef is Coleman Natural—good flavor, not too greasy, and it browns beautifully without releasing too much liquid.
One thing I learned the hard way: don’t skip rinsing your rice. Give it a good rinse in a fine-mesh strainer until the water runs clear. That extra minute removes excess starch and keeps your rice fluffy instead of turning into a gluey mess. Trust me on this one—I learned that lesson after a particularly sad batch that resembled risotto more than skillet rice.
Equipment Needed
You don’t need a fancy kitchen to pull this off. Here’s what you’ll actually use:
- Large deep skillet or Dutch oven (12-inch with a lid is ideal; I use my trusty Lodge cast iron Dutch oven for even heat distribution)
- Wooden spoon or silicone spatula (for breaking up the beef without scratching your pan)
- Sharp chef’s knife (a dull knife makes mincing garlic a chore—I love my Victorinox Fibrox for the price)
- Cutting board (wood or plastic; just make sure it’s stable)
- Measuring cups and spoons (for accuracy; eyeballing the sauce can lead to sad results)
- Fine-mesh strainer (for rinsing rice; a colander works if the holes are small enough)
- Small bowl (for mixing the cornstarch slurry)
- Whisk or fork (for blending the sauce ingredients smoothly)
If you don’t have a lid for your skillet, a large baking sheet or aluminum foil tented over the top works as a makeshift cover. I’ve done it more times than I’d like to admit. And if you’re using a nonstick skillet, be gentle with metal utensils—stick to wood or silicone to protect the coating. Budget-friendly tip: a good cast iron skillet costs about $25 and will outlive you if you take care of it.
Preparation Method
Alright, let’s get cooking. This whole thing comes together in about 30 minutes, and I’ll walk you through every step so you don’t miss a thing.
- Prep your ingredients first. Mince the garlic, dice the onion, slice the green onions, and measure out your honey, soy sauce, rice vinegar, sriracha, and sesame oil into a small bowl. Mix them together with a fork until well combined. In a separate tiny bowl, stir the cornstarch with cold water until smooth—this is your slurry, and it needs to be lump-free. Having everything ready before you start cooking makes the whole process feel effortless.
- Rinse the rice. Place the 2 cups of uncooked rice in a fine-mesh strainer and rinse under cold running water for about 30 seconds, stirring with your fingers. The water should run mostly clear. Shake off the excess water and set aside. Don’t skip this—it’s the difference between fluffy rice and gummy rice.
- Brown the ground beef. Heat your skillet over medium-high heat and add the vegetable oil. Once it shimmers, add the ground beef. Break it apart with your wooden spoon into small crumbles. Let it cook undisturbed for about 3 minutes to get a nice sear—that browning is where the flavor lives. Then stir and continue cooking until no pink remains, about 5 minutes total. If there’s excess grease (more than a tablespoon), spoon it out and discard. Leave a little bit for flavor.
- Cook the aromatics. Reduce the heat to medium. Add the diced onion to the skillet with the beef. Cook for 2 minutes, stirring occasionally, until the onion softens and becomes translucent. Add the minced garlic and cook for just 30 seconds—garlic burns fast, and burnt garlic tastes bitter and sad. You want it fragrant, not brown.
- Add the rice and toast it lightly. Pour the rinsed rice into the skillet. Stir it into the beef and onion mixture for about 1 minute. This toasting step is optional but worth it—it adds a subtle nuttiness to the final dish. You’ll notice the rice grains start to look slightly opaque around the edges.
- Pour in the broth and sauce. Add the 3 cups of beef broth and the honey garlic sauce mixture you prepared earlier. Stir everything together until well combined. Scrape the bottom of the pan to release any browned bits—that’s concentrated flavor right there.
- Bring to a boil, then simmer. Increase the heat to high and bring the liquid to a full boil. Once it’s bubbling, reduce the heat to low, cover the skillet with a tight-fitting lid, and let it simmer for 15 minutes. Do not lift the lid during this time—I know it’s tempting, but you’ll let the steam escape and mess with the cooking time. Set a timer and walk away.
- Add the frozen vegetables. After 15 minutes, remove the lid carefully (steam is hot!). The rice should be tender and most of the liquid absorbed. Sprinkle the frozen peas and carrots over the top—don’t stir them in yet. Cover again and cook for another 3 minutes. This lets the vegetables warm through without turning mushy.
- Finish with the slurry. Remove the lid. Give the cornstarch slurry a quick stir (it settles fast) and pour it evenly over the skillet. Stir everything together gently but thoroughly. The sauce will thicken almost immediately as you stir. Cook for another minute until the sauce is glossy and clings to every grain of rice and piece of beef.
- Garnish and serve. Turn off the heat. Sprinkle the sliced green onions and toasted sesame seeds over the top. Give it one last gentle stir if you want everything distributed, or leave the garnishes on top for a prettier presentation. Serve hot straight from the skillet—it’s a one-pan showstopper.
A quick note: if the rice still seems a little undercooked after the initial 15 minutes, add 2 tablespoons of water, cover, and cook for 2 more minutes. Every stovetop runs a little differently. Also, the skillet will be hot for a while after you turn off the heat, so if you’re serving buffet-style, transfer it to a serving dish to prevent the rice from overcooking on the bottom.
Cooking Tips & Techniques
I’ve made this recipe enough times to have a few hard-won lessons. Let me save you some trouble.
Don’t rush the browning. I used to stir my ground beef constantly because I was impatient. Big mistake. Letting it sit undisturbed for those first 3 minutes creates a beautiful brown crust. That crust is pure flavor—the Maillard reaction, if you want to get technical. If you stir too much, you end up with gray, steamed beef instead of rich, savory crumbles.
Watch your heat levels. The first time I made this, I left the heat on medium-high after adding the broth and rice. The liquid boiled off too fast, and I ended up with crunchy rice and burnt bits on the bottom. Low and slow is your friend once the lid goes on. If you’re using a thinner skillet (not cast iron), you might even need to go to the lowest setting to avoid scorching.
Toast the sesame seeds yourself. I know pre-toasted seeds save time, but they’re often stale or uneven. Just toss raw sesame seeds in a dry pan over medium heat for 2 minutes, shaking frequently. They’ll turn golden and smell amazing. I once forgot about them and ended up with blackened seeds that smelled like burnt popcorn—learn from my mistake and keep an eye on them.
Multitasking strategy: While the rice simmers (that 15-minute covered window), clean up your prep dishes, slice your green onions, or set the table. This recipe is perfect for hosting because the active cooking time is only about 10 minutes—the rest is hands-off simmering. You can even prep the sauce and chop the veggies the night before if you’re really planning ahead.
Consistency tip: If your sauce seems too thin after adding the slurry, don’t panic. Let it cook uncovered for another minute or two, stirring occasionally. The cornstarch needs a moment to fully activate. If it’s too thick, add a splash of broth or water and stir. You’re aiming for a glossy coating that clings to the rice without being soupy.
Variations & Adaptations
This recipe is flexible, and I’ve tried a few twists that turned out surprisingly well.
Spicy Korean-Inspired Version: Swap the sriracha for 2 tablespoons of gochujang (Korean chili paste) and add a teaspoon of grated ginger to the sauce. The gochujang adds a deeper, fermented heat that pairs beautifully with the honey. I made this for a friend’s birthday dinner, and everyone asked for the recipe.
Vegetarian Option: Replace the ground beef with 1 pound of crumbled firm tofu or 1.5 cups of cooked lentils. Use vegetable broth instead of beef broth. The cooking time stays the same, though tofu will release more liquid, so you might need an extra 2 minutes of uncovered cooking at the end to thicken the sauce.
Low-Carb Adaptation: Skip the rice entirely and substitute with 2 cups of riced cauliflower. Add it in step 8 along with the frozen vegetables, and cook covered for only 5 minutes instead of 15. The cauliflower soaks up the sauce beautifully, and you get all the flavor with way fewer carbs.
Extra Veggie Load: Toss in a cup of chopped bell peppers or snap peas along with the onion. Mushrooms work great too—add them after the beef is browned and cook for 2 minutes before adding the onion. I’ve also thrown in a handful of baby spinach at the very end, stirring until it wilts. Sneaky way to get more greens on the plate.
Dairy-Free Creamy Twist: Stir in 2 tablespoons of coconut cream or full-fat coconut milk right before serving. It adds a subtle richness that mellows the garlic and makes the sauce even more luxurious. My sister-in-law tried this version and now refuses to make it any other way.
Serving & Storage Suggestions
This dish is best served hot, straight from the skillet, with a little extra sriracha or chili oil on the side for those who want more heat. I like to set the skillet right on a trivet in the center of the table—it keeps the food warm and makes a gorgeous presentation. For a dinner party, I’ll sprinkle extra sesame seeds and green onions right before bringing it out. The contrast of green and white against the glossy brown rice is just beautiful.
What to serve alongside: A simple cucumber salad with rice vinegar and a pinch of sugar cuts through the richness perfectly. Steamed edamame with sea salt makes a great starter. For drinks, a crisp lager or a dry riesling pairs wonderfully with the sweet-savory flavors. If you’re hosting a big group, serve this alongside grilled chicken skewers or a simple miso soup for a complete spread.
Storage: Leftovers keep in an airtight container in the refrigerator for up to 4 days. The flavors actually meld together even more overnight—I’ve been known to eat this cold straight from the fridge the next morning. To reheat, add a splash of water or broth to a skillet over medium-low heat, cover, and warm for about 5 minutes. The microwave works too, but it can dry out the rice. If using the microwave, cover the bowl with a damp paper towel to add moisture.
Freezer-friendly: This freezes beautifully for up to 3 months. Portion it into freezer-safe containers, leaving a little room for expansion. Thaw overnight in the refrigerator and reheat as directed. I’ve made double batches specifically for freezing, and it’s a lifesaver on busy weeks.
Nutritional Information & Benefits
Here’s the nutritional breakdown for one serving (based on 6 servings):
| Nutrient | Amount per Serving |
|---|---|
| Calories | 485 |
| Protein | 28g |
| Carbohydrates | 62g |
| Fiber | 3g |
| Sugar | 18g |
| Fat | 14g |
| Saturated Fat | 4.5g |
| Sodium | 720mg |
This recipe packs a solid protein punch from the ground beef, which also provides iron and B vitamins essential for energy. The honey offers quick-digesting carbohydrates, while the rice provides sustained energy. Garlic isn’t just for flavor—it contains compounds that support immune health, and the ginger (if you add the variation) aids digestion. For a balanced meal, serve with a side of steamed greens to boost fiber and vitamin content.
Dietary considerations: This recipe contains soy (soy sauce) and sesame (sesame oil and seeds). For a gluten-free version, use tamari instead of soy sauce. It’s naturally dairy-free and nut-free as written. If you’re watching sodium, use low-sodium broth and soy sauce, and reduce the added salt.
Conclusion
This Easy Honey Garlic Ground Beef and Rice skillet has become my go-to for every gathering, and I honestly think it’ll become yours too. It’s the kind of recipe that looks like you spent hours in the kitchen when really, you just let a few simple ingredients do all the work. That sticky-sweet sauce, the tender rice, the savory beef—it all comes together in one pan with minimal fuss and maximum flavor.
I love this recipe because it reminds me that you don’t need complicated techniques or exotic ingredients to create something memorable. Sometimes the best dishes come from chasing a memory and stumbling onto something even better. And when I see that skillet empty at the end of a party—scraped clean by friends who couldn’t stop going back for more—I know I’ve done something right.
Now it’s your turn. Give this recipe a try for your next dinner party or potluck. Customize it, make it your own, and let me know how it turns out. Drop a comment below with your favorite variation, or tag me in your photos—I’d love to see your version of this crowd-pleasing skillet. Happy cooking, friends!
Frequently Asked Questions
Can I use brown rice instead of white rice?
Yes, but you’ll need to adjust the cooking time and liquid. Brown rice takes about 40-45 minutes to cook, so add an extra 1/2 cup of broth and simmer covered for 35 minutes before adding the vegetables. Check for doneness and add more liquid if needed.
Can I make this recipe ahead of time for a party?
Absolutely! You can prepare the entire dish up to 2 days in advance. Reheat it in a skillet over medium-low heat with a splash of broth, stirring occasionally, until warmed through. The flavors actually deepen overnight, making it even better the next day.
Is this recipe spicy?
The sriracha adds a mild warmth, but it’s not overpowering. If you’re sensitive to heat, reduce it to 1 teaspoon or omit it entirely. For extra heat, serve with additional sriracha or red pepper flakes on the side so guests can adjust to their preference.
Can I use ground chicken or turkey instead of beef?
Yes, ground chicken or turkey work well. Since they’re leaner, add an extra tablespoon of oil to prevent sticking. You may also want to add a splash of soy sauce to compensate for the milder flavor. The cooking time remains the same.
How do I prevent the rice from sticking to the bottom of the pan?
Make sure your heat is on low once you cover the skillet, and don’t lift the lid during the 15-minute simmer. If your stovetop runs hot, place a heat diffuser under the pan. Using a heavy-bottomed skillet like cast iron also helps distribute heat evenly and prevent burning.
Pin This Recipe!
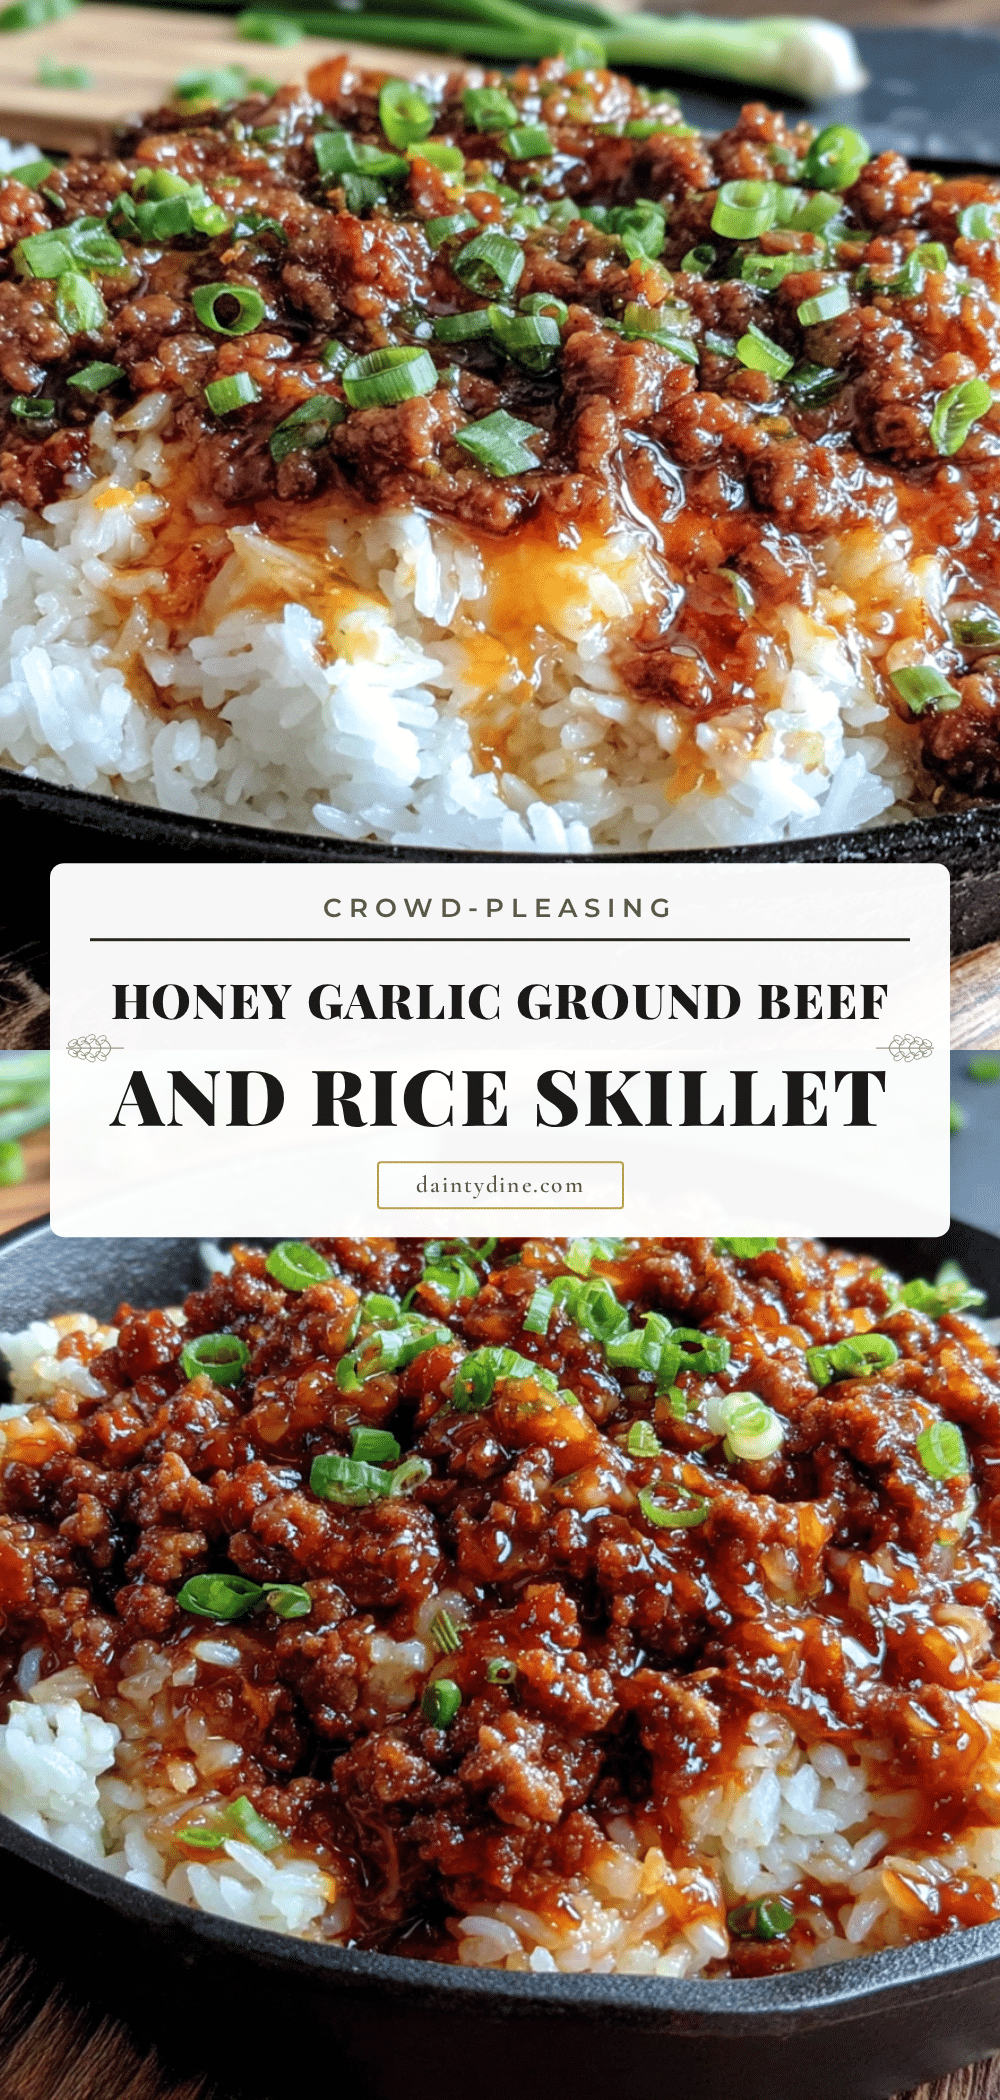
Easy Honey Garlic Ground Beef and Rice

A one-skillet wonder featuring sticky-sweet honey garlic sauce, savory ground beef, and fluffy rice. Ready in under 30 minutes, this crowd-pleasing dish is perfect for weeknights or potlucks.
- Prep Time: 10 minutes
- Cook Time: 20 minutes
- Total Time: 30 minutes
- Yield: 6 servings 1x
- Category: Main Course
- Cuisine: Asian-Fusion
Ingredients
- 1/3 cup honey
- 1/4 cup low-sodium soy sauce
- 2 tablespoons rice vinegar
- 4 cloves garlic, minced
- 1 tablespoon sriracha
- 1 teaspoon sesame oil
- 1 tablespoon cornstarch mixed with 2 tablespoons cold water
- 1 pound ground beef (80/20)
- 1 tablespoon vegetable oil
- 1 medium yellow onion, diced
- 2 cups white rice, uncooked (jasmine or basmati)
- 3 cups low-sodium beef broth
- 1 cup frozen peas and carrots mix
- 2 green onions, sliced
- 1 tablespoon sesame seeds, toasted
Instructions
- Prep your ingredients first. Mince the garlic, dice the onion, slice the green onions, and measure out your honey, soy sauce, rice vinegar, sriracha, and sesame oil into a small bowl. Mix them together with a fork until well combined. In a separate tiny bowl, stir the cornstarch with cold water until smooth.
- Rinse the rice. Place the 2 cups of uncooked rice in a fine-mesh strainer and rinse under cold running water for about 30 seconds, stirring with your fingers. The water should run mostly clear. Shake off the excess water and set aside.
- Brown the ground beef. Heat your skillet over medium-high heat and add the vegetable oil. Once it shimmers, add the ground beef. Break it apart with your wooden spoon into small crumbles. Let it cook undisturbed for about 3 minutes to get a nice sear. Then stir and continue cooking until no pink remains, about 5 minutes total. If there’s excess grease (more than a tablespoon), spoon it out and discard.
- Cook the aromatics. Reduce the heat to medium. Add the diced onion to the skillet with the beef. Cook for 2 minutes, stirring occasionally, until the onion softens and becomes translucent. Add the minced garlic and cook for just 30 seconds.
- Add the rice and toast it lightly. Pour the rinsed rice into the skillet. Stir it into the beef and onion mixture for about 1 minute.
- Pour in the broth and sauce. Add the 3 cups of beef broth and the honey garlic sauce mixture you prepared earlier. Stir everything together until well combined. Scrape the bottom of the pan to release any browned bits.
- Bring to a boil, then simmer. Increase the heat to high and bring the liquid to a full boil. Once it’s bubbling, reduce the heat to low, cover the skillet with a tight-fitting lid, and let it simmer for 15 minutes. Do not lift the lid during this time.
- Add the frozen vegetables. After 15 minutes, remove the lid carefully. The rice should be tender and most of the liquid absorbed. Sprinkle the frozen peas and carrots over the top—don’t stir them in yet. Cover again and cook for another 3 minutes.
- Finish with the slurry. Remove the lid. Give the cornstarch slurry a quick stir and pour it evenly over the skillet. Stir everything together gently but thoroughly. Cook for another minute until the sauce is glossy and clings to every grain of rice and piece of beef.
- Garnish and serve. Turn off the heat. Sprinkle the sliced green onions and toasted sesame seeds over the top. Serve hot straight from the skillet.
Notes
For a gluten-free version, use tamari instead of soy sauce. If rice seems undercooked after 15 minutes, add 2 tablespoons of water, cover, and cook 2 more minutes. Leftovers keep in the refrigerator for up to 4 days or freeze for up to 3 months.
Nutrition
- Serving Size: 1 serving (about 1.5
- Calories: 485
- Sugar: 18
- Sodium: 720
- Fat: 14
- Saturated Fat: 4.5
- Carbohydrates: 62
- Fiber: 3
- Protein: 28
Keywords: honey garlic ground beef, one skillet meal, ground beef and rice, easy dinner, Asian fusion, potluck recipe, 30 minute meal


