Love this? Save it for later!
Share the inspiration with your friends
The school Halloween party was in six hours and I’d completely forgotten. My daughter reminded me at breakfast, her eyes wide with that look that says “Mom, you’re supposed to have this handled.” Every other parent would be bringing elaborate themed treats — I just knew it. Pinterest-worthy cupcakes with perfect fondant ghosts, homemade caramel apples, those adorable mummy hot dogs with little candy eyes. I had a fruit bowl with some slightly browning bananas, a few apples, and a bag of clementines. Honestly, I felt that familiar panic rising. You know that feeling when you’re the one who shows up with the store-bought veggie platter?
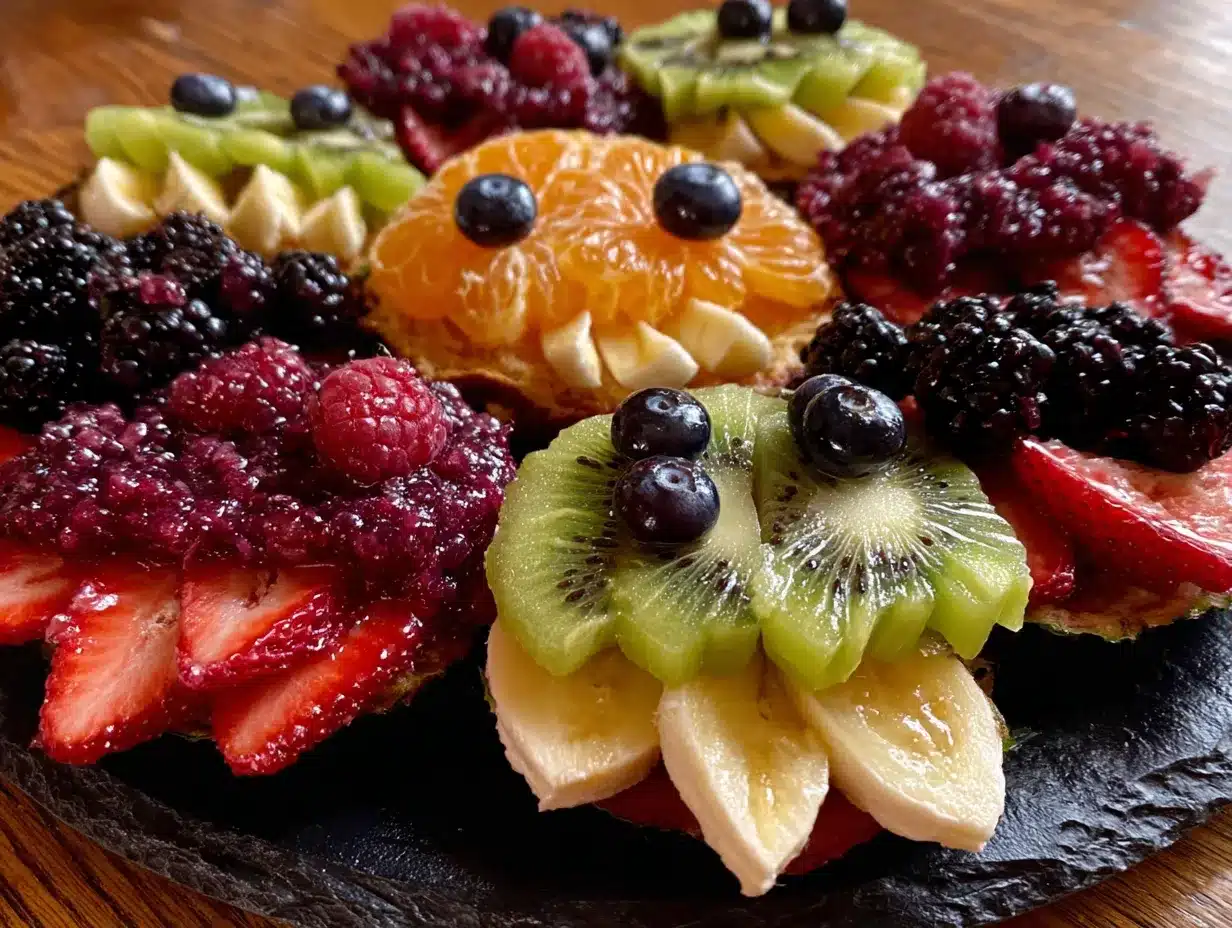
But here’s the thing about desperation — it makes you creative. I grabbed a large platter, started slicing apples, and just began arranging things. The clementines looked like little pumpkin heads, so I gave them funny faces with chocolate chips. The bananas became ghost shapes. Before I knew it, I had a platter full of the goofiest, most colorful monster faces staring back at me. It was ridiculous. It was imperfect. And you know what happened? The kids went absolutely crazy for it. The elaborate cupcakes sat untouched while my silly fruit monsters disappeared in minutes. I stood there, slightly embarrassed but mostly amused, watching a preschooler happily munch on a kiwi slice that looked like a one-eyed alien.
That’s the story behind this Easy Halloween Fruit Tray with Monster Faces. It’s the recipe you make when you have no time, no fancy ingredients, and zero energy for complicated baking. It saved me that day, and now it’s become our family’s go-to Halloween tradition. Because honestly? Sometimes the simplest things win — and they taste a whole lot better than sugary fondant anyway.
Why You’ll Love This Easy Halloween Monster Fruit Tray
Let me just say this upfront — I’ve tested this recipe at three different Halloween parties now, and it never fails. It’s the kind of recipe that makes you look like a creative genius without actually doing much work. Here’s why it works so well:
- Comes together in 15 minutes — Seriously. If you can slice an apple and stick a chocolate chip in a clementine, you’ve got this handled. Perfect for those last-minute school events or when the kids suddenly announce they need a treat for tomorrow.
- Uses ingredients you already have — No special trip to the store for black food coloring or edible eyeballs. Just fruit, a few pantry staples like chocolate chips and nut butter, and maybe some pretzel sticks. That’s it.
- Actually healthy for Halloween — This is the snack that makes parents breathe a sigh of relief. After all the candy and sugar, having a platter of fruit that kids actually want to eat feels like a small victory.
- Kid-approved and parent-approved — I’ve seen toddlers devour kiwi slices they normally wouldn’t touch just because they had silly faces on them. It’s magic, I swear.
- Zero baking required — No oven, no stove, no complicated recipes. If you can arrange things on a plate, you can make this.
What makes this different from other Halloween snacks is the monster concept itself. Instead of trying to make fruit look pretty or elegant, you’re making it look ridiculous and fun. The uglier the better, honestly. My first batch had a banana ghost with crooked chocolate chip eyes and I almost laughed out loud. The kids loved that imperfection — it made the monsters feel friendly and approachable, not scary at all.
This isn’t just another fruit platter. It’s the one that gets photographed, shared, and requested year after year. And for a busy weeknight parent who’s just trying to survive Halloween season, that’s exactly what you need.
What Ingredients You Will Need
This recipe uses simple, wholesome ingredients that you probably already have in your kitchen. The beauty of this Easy Halloween Fruit Tray is that it’s flexible — you can swap things based on what’s in season or what your kids actually eat. Here’s what I typically use:
For the Monster Faces Base
- Clementines or mandarin oranges (4-5, peeled and separated into segments) — These become the little pumpkin heads. Look for ones that are round and smooth for the best monster faces.
- Bananas (2-3, peeled and sliced into rounds) — These make excellent ghost shapes. Use ones that are ripe but still firm so they don’t get mushy.
- Apples (2-3, any variety, cored and sliced into rounds or wedges) — Green apples work great for Frankenstein-style monsters, red apples for more colorful faces.
- Kiwi (2-3, peeled and sliced into rounds) — The green color is perfect for alien monsters. Plus, kids love the bright color.
- Strawberries (1 cup, hulled and sliced) — These make great mouths or hearts for the monsters.
- Blueberries (1/2 cup) — Perfect for eyes or little decorations.
- Grapes (1 cup, red or green) — Slice them in half for eyes or use whole for a different look.
For the Monster Features
- Chocolate chips (1/4 cup, mini or regular) — These are your go-to for eyes and mouths. Mini chips work best for smaller faces.
- Peanut butter or almond butter (2 tablespoons) — Acts as “glue” to hold chocolate chips and other decorations onto the fruit. Sunflower seed butter works great for nut-free classrooms.
- Pretzel sticks (1/4 cup) — These become antennae, arms, or spiky monster hair. You can also use thin breadsticks.
- Raisins or dried cranberries (1/4 cup) — Good alternatives for eyes or mouths if you don’t have chocolate chips.
- Shredded coconut (optional, 1/4 cup) — Great for making “fuzzy” monsters or adding texture.
- Pomegranate seeds (optional, 1/4 cup) — These look like little jewels and add a pop of color.
I personally recommend using organic fruit when possible, especially for the apples and strawberries since you’ll be eating the skins. But honestly, whatever you have on hand works perfectly. The key is variety — the more colors and shapes you have, the more creative your monsters can be.
For the chocolate chips, I like Enjoy Life brand because they’re allergy-friendly and hold their shape well. If you’re making this for a classroom, always check for nut allergies before using peanut butter. Sunflower seed butter is a safe alternative that works just as well as “glue.”
Equipment Needed
You don’t need much for this recipe, which is part of why I love it. Here’s what I use:
- Large platter or serving tray (at least 12 inches wide) — A white platter makes the colors pop, but any large flat surface works. I’ve used a cutting board in a pinch.
- Sharp knife — For slicing apples, kiwis, and strawberries. A serrated knife works well for citrus.
- Cutting board — Preferably one that’s dedicated to fruit to avoid any savory flavors transferring.
- Small bowls (2-3) — For holding chocolate chips, nut butter, and other decorations while you work.
- Toothpicks (optional) — Helpful for placing tiny decorations or securing pretzel sticks.
- Melon baller (optional) — If you want to make round fruit balls for variety, but definitely not necessary.
- Paper towels — For drying fruit after washing. Wet fruit makes it harder for decorations to stick.
I bought a set of inexpensive bamboo platters from IKEA that I use specifically for holiday trays. They cost about $5 each and they’re perfect for this. If you’re on a budget, a clean cutting board or even a sheet pan lined with parchment paper works beautifully. The kids don’t care what it’s served on — trust me on this one.
Preparation Method
Alright, let me walk you through this. The whole process takes about 15 minutes once you have everything washed and ready. I like to set up all my ingredients first so I can just grab and go.
-
Wash and dry all your fruit thoroughly. This is important because wet fruit makes the chocolate chips slide off. Pat everything dry with paper towels. I learned this the hard way after my first batch of monsters kept losing their eyes.
-
Prep your fruit into slices and shapes. Slice the bananas into rounds about 1/2 inch thick. Cut the apples into rounds or wedges — if you’re using rounds, remove the core with a small cookie cutter or just cut around it. Peel and slice the kiwis into rounds. Hull the strawberries and slice them lengthwise. Leave the clementines whole but peel them carefully so they stay intact.
-
Set up your decorating station. Put the chocolate chips in a small bowl. Spoon the peanut butter into another small bowl. Arrange your pretzel sticks, raisins, and any other decorations nearby. This makes the assembly much faster.
-
Start with the base fruit on your platter. Arrange the clementines, banana rounds, apple slices, and kiwi rounds in groups on the platter. Leave space between them so you have room to add faces. I like to group similar fruits together, but mixing them up works too.
-
Add the eyes first. Using a tiny dab of peanut butter on your finger, place a small dot on the fruit where you want the eyes to go. Press a chocolate chip or blueberry half onto the peanut butter. The peanut butter acts like glue — it’s genius, honestly. For banana ghosts, use two chocolate chips close together for a cute look.
-
Create the mouths. Use a small slice of strawberry for a smiling mouth, or arrange three chocolate chips in a curve. For a silly monster, use a raisin placed sideways. You can also use a thin slice of apple with the skin on for a different color mouth.
-
Add monster features. Stick pretzel sticks into the sides of clementines for antennae or arms. Use slivered almonds for teeth. Add shredded coconut on top of banana rounds for “hair.” This is where you can get really creative — every monster should look different.
-
Fill in the gaps. Once all your monsters have faces, fill the empty spaces on the platter with extra grapes, blueberries, or pomegranate seeds. This makes the tray look full and colorful.
-
Check for stability. Gently tap the platter to make sure nothing falls off. If a chocolate chip seems loose, add a tiny bit more peanut butter. The monsters should be sturdy enough to survive being carried to a party.
-
Serve immediately or refrigerate. This tray is best served within a few hours of making it. If you need to make it ahead, cover it loosely with plastic wrap and refrigerate for up to 4 hours. The bananas might brown a bit, but the kids won’t care.
One thing I always do is make a few “practice” monsters on a small plate before arranging the main platter. It helps me figure out what combinations look best. My daughter loves making the faces with me — she’s actually better at it than I am. Her monsters always have more personality.
The sensory cues are important here. When you press a chocolate chip into the peanut butter, you should feel it hold firm. The fruit should be cool to the touch but not wet. The clementines should smell bright and citrusy — that fresh scent is part of the appeal.
Cooking Tips & Techniques
After making this Easy Halloween Fruit Tray about a dozen times, I’ve picked up some tricks that make the process smoother. Let me share what I’ve learned — including the mistakes I’ve made so you don’t have to repeat them.
Keep your fruit dry. This is the number one tip I can give you. If your fruit is wet, nothing sticks. I once made an entire tray of monsters and watched their chocolate chip eyes slide off one by one. It was tragic. Now I pat everything dry with paper towels and let it sit for a few minutes before decorating.
Use peanut butter sparingly. You only need a tiny dab — about the size of a pea — to hold decorations in place. Too much and it becomes messy, plus it might leave a greasy spot on the fruit. I use a toothpick to apply small amounts, which gives me more control.
Prep your fruit in advance. If you’re making this for a party, slice all your fruit the night before and store it in airtight containers in the fridge. Then in the morning, you just need to assemble. This saves so much time when you’re rushing. I learned this after trying to slice apples while my daughter was asking me where her costume was.
Make extra of everything. Kids will eat the fruit as you’re assembling it. I promise you, they will. I always buy extra clementines and bananas because somehow they disappear before they even make it to the platter. It’s a law of nature, I think.
Don’t overthink the faces. The best monsters are the imperfect ones. Crooked eyes, lopsided mouths, uneven antennae — that’s what makes them look like friendly monsters. I used to try to make them perfect and they ended up looking boring. Now I just go with whatever happens and the results are always better.
Time your assembly. This tray takes about 15 minutes to put together once everything is prepped. If you’re doing it with kids, add another 10 minutes because they’ll want to help. Plan accordingly. I usually assemble it right before we leave for the party so it stays fresh.
Use a variety of textures. The combination of smooth clementines, firm apple slices, soft bananas, and crunchy pretzels makes the tray more interesting. Kids love the different sensations in their mouths. I always try to include at least one crunchy element and one soft element.
Variations & Adaptations
One of the best things about this recipe is how flexible it is. I’ve tried lots of different versions over the years, and here are some of my favorites:
Nut-Free Classroom Version
Swap the peanut butter for sunflower seed butter or cream cheese. Both work great as “glue” for the decorations. I’ve used whipped cream cheese before and it actually holds better than nut butter because it’s stickier. Just make sure to check with the teacher about any other allergies in the classroom.
Vegan Option
This recipe is naturally vegan if you use maple syrup or agave instead of honey (though honey isn’t typically used here anyway). Stick with sunflower seed butter or a vegan cream cheese alternative. Everything else — the fruit, chocolate chips, pretzels — is already plant-based. I’ve served this at vegan potlucks and it’s always a hit.
Seasonal Fruit Swap
In the fall, use persimmons, pears, and pomegranates instead of summer berries. In winter, try blood oranges and grapefruit segments. Spring calls for mango and papaya. The concept stays the same — just use whatever fruit is fresh and colorful. I made a winter version with star fruit slices that looked amazing.
Spooky Monster Variations
For a scarier theme, use blackberries for eyes (they look like creepy pupils) and arrange apple slices to look like teeth. You can also use dark chocolate chips for a more sinister look. My son prefers the “scary” version, while my daughter likes the silly one. We usually make half and half.
Mini Monster Bites
Instead of a large platter, make individual monster faces on small plates or in muffin cups. This is perfect for classroom parties where each kid gets their own. I’ve done this for my daughter’s class and the teachers loved how easy it was to distribute. Just put a few fruit pieces in each cup and let the kids decorate their own monsters.
Serving & Storage Suggestions
This Easy Halloween Fruit Tray is best served at room temperature, so take it out of the fridge about 15 minutes before you’re ready to serve. The flavors are brighter and the fruit feels more appealing when it’s not ice cold.
For presentation, I like to place the platter on a contrasting surface — a dark tablecloth or a wood table makes the colors pop. You can also surround the tray with small cups of yogurt dip or chocolate sauce for dipping. My kids love a simple vanilla yogurt dip with a tiny bit of cinnamon mixed in.
If you’re serving this at a party, put it out early because it will disappear fast. I’ve learned to make two trays — one for the kids and one for the adults who inevitably start picking at it too. The adults always pretend they’re grabbing it for their kids, but I see you.
For storage, this tray doesn’t keep super well because the cut fruit will start to brown. If you have leftovers (unlikely, but possible), store them in an airtight container in the fridge for up to 24 hours. The apples and bananas will oxidize a bit, but they’re still fine to eat. Just don’t expect them to look as pretty.
To keep bananas from browning too quickly, you can toss them in a little lemon juice or pineapple juice before assembling. I’ve tried this and it works, but honestly, the kids don’t care about brown bananas. They’re too busy eating the chocolate chips off the top.
The flavors actually develop a bit as the fruit sits — the clementines release some juice that mingles with the other fruits, creating a nice natural syrup. I’ve had leftovers that tasted even better the next day, though the texture is softer.
Nutritional Information & Benefits
Let’s be real — this is a fruit tray, so it’s pretty healthy. Here’s the rough breakdown per serving (about one cup of fruit with decorations):
- Calories: 120-150
- Carbohydrates: 30-35g
- Fiber: 4-5g
- Sugar: 20-25g (natural from fruit)
- Fat: 3-5g (from peanut butter and chocolate chips)
- Protein: 3-4g
- Vitamin C: 60-80% of daily value
- Potassium: 400-500mg
The health benefits here are significant. Clementines are packed with immune-boosting vitamin C, which is especially important during cold and flu season. Bananas provide potassium for heart health and energy. Apples contain fiber and antioxidants that support digestive health. Kiwis are loaded with vitamin C and vitamin K, plus they have more vitamin C per ounce than oranges.
This recipe is naturally gluten-free, dairy-free (if you skip the cream cheese option), and can be made nut-free with simple substitutions. It’s also low in added sugars — the only added sugar comes from the chocolate chips, and you can use dark chocolate for even less sugar.
From a wellness perspective, this is the kind of snack I feel good about serving. It satisfies that Halloween craving for something fun and festive without loading up on artificial colors and preservatives. My kids get excited about eating fruit, which never happens with regular fruit bowls. That alone makes it worth the 15 minutes of assembly time.
Conclusion
This Easy Halloween Monster Fruit Tray has saved me more times than I can count. From forgotten school parties to last-minute playdates, it’s the recipe I turn to when I need something that looks impressive but takes almost no effort. The best part? It actually works. Kids genuinely love it. They eat the fruit without complaining, they laugh at the silly faces, and they ask for it again next year.
I hope you give this a try, even if you’re skeptical. Start with whatever fruit you have in your kitchen right now. Give your clementine a pair of chocolate chip eyes and see if it doesn’t make you smile. That’s really what Halloween is about anyway — having fun, being a little silly, and sharing something good with the people you care about.
If you make this Easy Halloween Fruit Tray, I’d love to hear about it. Drop a comment below and tell me what monster faces your kids came up with. Did you try a variation I didn’t mention? Share it with the community — we’re all in this together, trying to survive Halloween season one fruit monster at a time.
And hey, if you’re looking for more quick and easy Halloween ideas, check out our spooky snack board that uses similar ingredients for a different presentation. Happy Halloween, and may your monsters always have their eyes stay on!
Frequently Asked Questions
How far in advance can I make this fruit tray?
You can prep the fruit the night before and store it in airtight containers in the fridge. Assemble the faces no more than 4 hours before serving for the best appearance. The bananas will start to brown after a few hours, but they’re still safe to eat.
Can I use other fruits for the monster faces?
Absolutely! Mango slices, star fruit, dragon fruit, and melon balls all work great. Just make sure the fruit is firm enough to hold decorations. Soft fruits like raspberries might not work as well for faces, but they’re great for filling in gaps on the platter.
What can I use instead of peanut butter for the “glue”?
Sunflower seed butter, cream cheese, yogurt (thick Greek yogurt works best), or even a tiny dab of honey or maple syrup can hold decorations in place. For a savory option, you can use hummus, though it might taste odd with sweet fruit.
How do I keep the fruit from turning brown?
Toss apple and banana slices in a little lemon juice or pineapple juice before assembling. You can also use a commercial fruit preservative like Fruit-Fresh, but I prefer natural options. Just remember that some browning is normal and doesn’t affect the taste.
Can I make this for a classroom with allergy restrictions?
Yes! Use sunflower seed butter or cream cheese instead of peanut butter. Skip any nuts in the decorations. Check with the teacher about specific allergies before bringing it to school. Most classrooms are nut-free these days, so the sunflower seed butter option is usually safe.
Pin This Recipe!
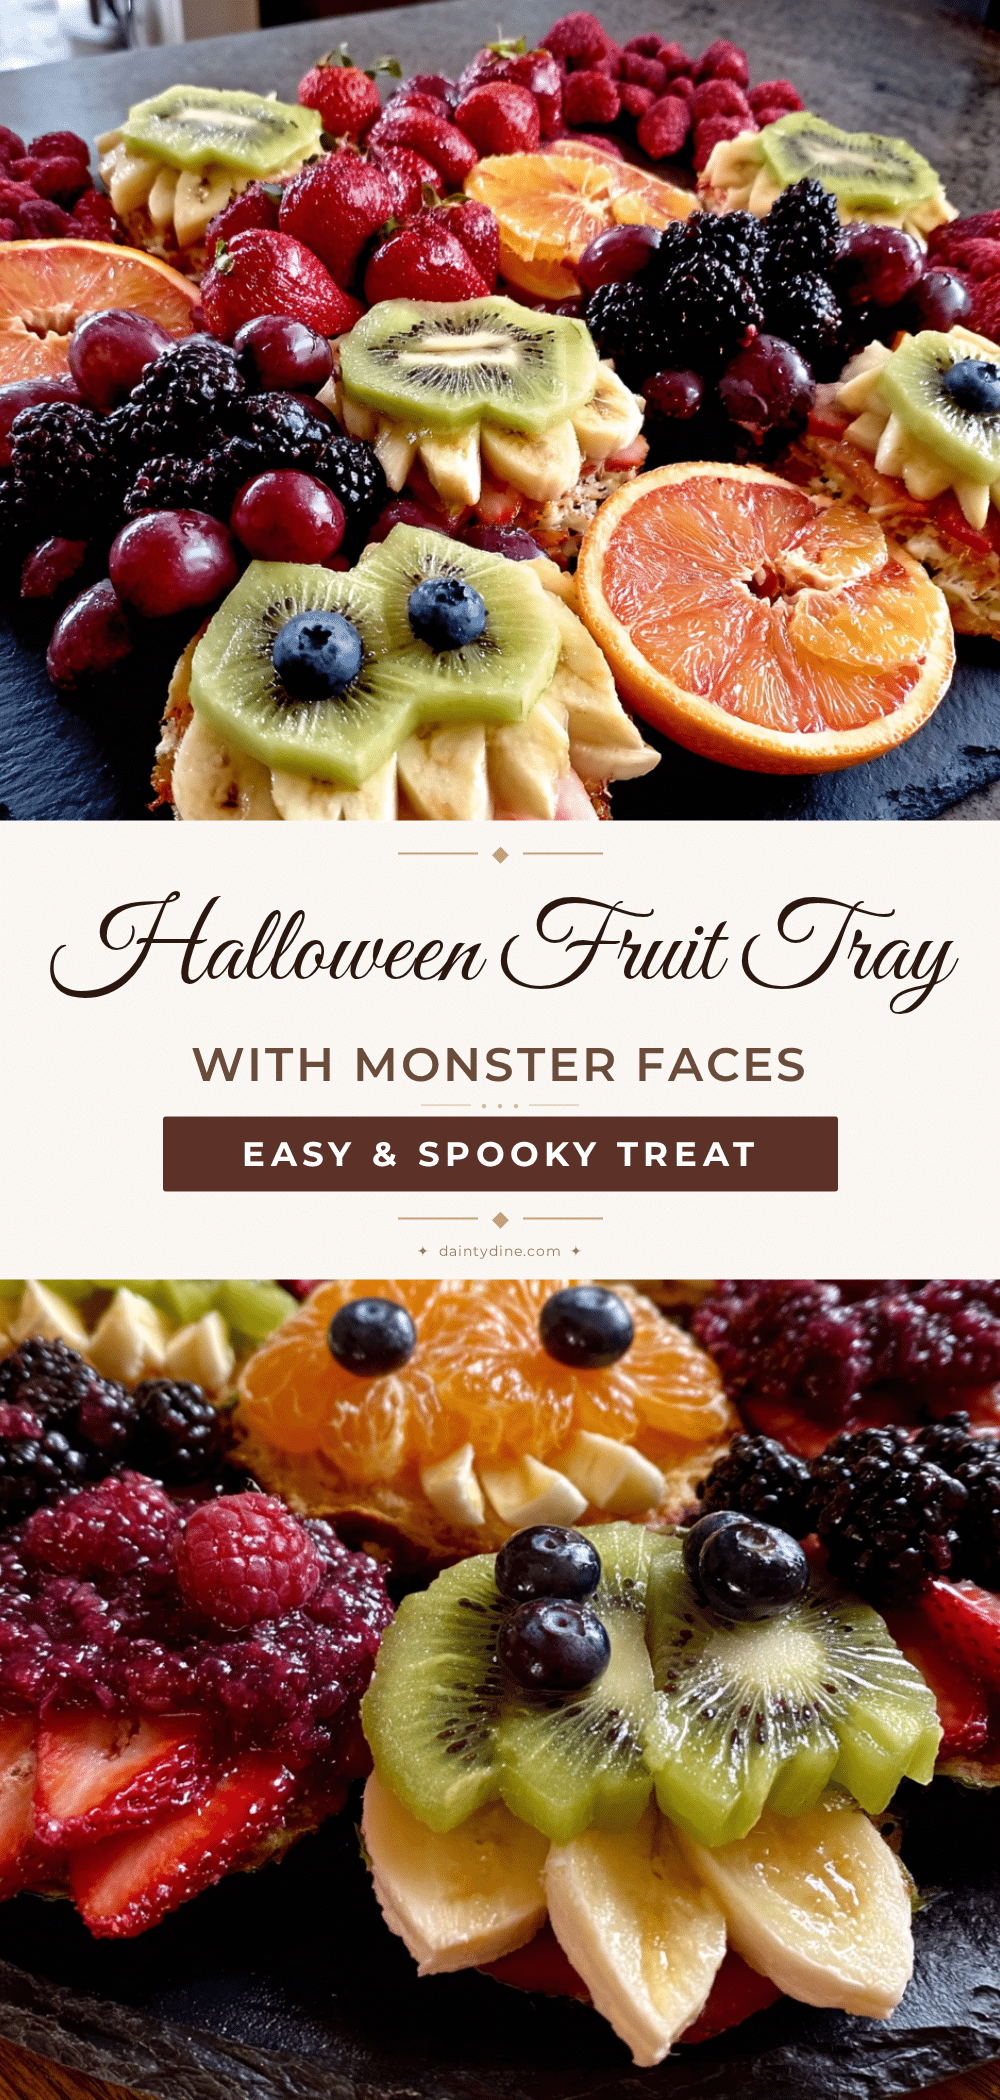
Easy Halloween Monster Fruit Tray: Best Spooky Snack
A quick and fun Halloween fruit tray with silly monster faces made from clementines, bananas, apples, and other fruits. Perfect for last-minute parties, it’s healthy, kid-approved, and requires no baking.
- Prep Time: 15 minutes
- Cook Time: 0 minutes
- Total Time: 15 minutes
- Yield: 8 servings 1x
- Category: Appetizer
- Cuisine: American
Ingredients
- 4–5 clementines or mandarin oranges, peeled and separated into segments
- 2–3 bananas, peeled and sliced into rounds
- 2–3 apples, any variety, cored and sliced into rounds or wedges
- 2–3 kiwis, peeled and sliced into rounds
- 1 cup strawberries, hulled and sliced
- 1/2 cup blueberries
- 1 cup grapes, red or green
- 1/4 cup chocolate chips, mini or regular
- 2 tablespoons peanut butter or almond butter
- 1/4 cup pretzel sticks
- 1/4 cup raisins or dried cranberries
- 1/4 cup shredded coconut (optional)
- 1/4 cup pomegranate seeds (optional)
Instructions
- Wash and dry all fruit thoroughly. Pat dry with paper towels to ensure decorations stick.
- Prep fruit into slices and shapes: slice bananas into 1/2-inch rounds, cut apples into rounds or wedges (remove core), peel and slice kiwis into rounds, hull and slice strawberries lengthwise, leave clementines whole but peeled.
- Set up decorating station: place chocolate chips in a small bowl, spoon peanut butter into another small bowl, arrange pretzel sticks, raisins, and other decorations nearby.
- Arrange base fruit on a large platter: group clementines, banana rounds, apple slices, and kiwi rounds, leaving space for faces.
- Add eyes: use a tiny dab of peanut butter on the fruit, press a chocolate chip or blueberry half onto the peanut butter.
- Create mouths: use a small slice of strawberry for a smiling mouth, or arrange three chocolate chips in a curve, or use a raisin placed sideways.
- Add monster features: stick pretzel sticks into clementines for antennae or arms, use slivered almonds for teeth, add shredded coconut on banana rounds for hair.
- Fill gaps with extra grapes, blueberries, or pomegranate seeds.
- Check stability: gently tap platter to ensure nothing falls off; add more peanut butter if needed.
- Serve immediately or refrigerate loosely covered with plastic wrap for up to 4 hours.
Notes
Keep fruit dry for decorations to stick. Use peanut butter sparingly as glue. Prep fruit night before to save time. Make extra fruit as kids will eat while assembling. Imperfect faces are best. Serve at room temperature. For nut-free classrooms, use sunflower seed butter or cream cheese. To prevent browning, toss apple and banana slices in lemon juice.
Nutrition
- Serving Size: 1 cup of fruit with
- Calories: 120150
- Sugar: 2025
- Sodium: 50
- Fat: 35
- Saturated Fat: 1
- Carbohydrates: 3035
- Fiber: 45
- Protein: 34
Keywords: Halloween, fruit tray, monster faces, healthy snack, kid-friendly, no-bake, easy, spooky, party food


