Love this? Save it for later!
Share the inspiration with your friends
I used to think Halloween treats had to involve a blowtorch and a degree in chemistry.
Last year, I tried to make those fancy chocolate skulls that require tempered chocolate, patience, and three hours of silence. I burned my wrist. I burned the floor. And I ended up eating cold, seized chocolate off a spatula while my kids watched in confused silence.
This was supposed to be the year I won the neighborhood block party with edible art.
Instead, I grabbed the wrong bowl. I knocked over the packet of crushed Oreo crumbs. And I was already five minutes behind schedule because my oven timer was screaming.
What came out was nothing like the plan — and better.
It started as a panic move. I just wanted something sweet, dark, and easy that wouldn’t stain my teeth orange. I mixed pudding, whipped cream, and dirt (okay, crumbs). I stuck a gummy worm in it because my son said it needed “action.”
Honestly, it looked like a garden after a rainstorm. A delicious, edible garden.
Maybe you’ve been there, standing in a kitchen with a burnt offering and a ticking clock. Let me tell you, this is your redemption arc.
These Easy Halloween Dirt Cups with Gummy Worms are the kind of recipe that saves your sanity. They are messy in the best way. They are perfect for little hands that don’t care about presentation, only taste.
I keep making them because they work. Every year. Every party. Every last-minute “oh no, what do I bring?” moment.
It’s not just a snack. It’s a win.
Why You’ll Love This Recipe
Let’s be real for a second. Most Halloween desserts are just sugar and food coloring with a side of regret. This recipe is different because it actually tastes like something you’d want to eat after dinner, not just a handful of candy from a bowl.
I’ve tested this version at least ten times, tweaking the cream-to-pudding ratio until it hit that sweet spot. It’s not too airy, not too dense. It’s that perfect spoonable consistency that makes you want to scrape the bottom of the cup.
- Quick & Easy: You can make this in under 15 minutes. No baking required. No oven preheating. Just mix, layer, and decorate. Perfect for busy weeknights or last-minute trick-or-treat prep.
- Simple Ingredients: You likely already have everything in your kitchen. Instant pudding mix, whipped topping, Oreos, and gummy worms. No fancy grocery trips needed.
- Perfect for Parties: These are individual portions, which means no cutting, no arguing over slices, and no sticky fingers touching the same platter. Great for classroom parties or Halloween gatherings.
- Crowd-Pleaser: Kids love the “dirt” theme. Adults love the chocolate cream. It’s a win-win.
- Unbelievably Delicious: The texture contrast between the creamy pudding and the crunchy cookie crumbs is next-level comfort food. It’s nostalgic, like eating a dessert version of an Oreo, but elevated by the creaminess.
What makes this recipe stand out is the layering technique. Most people just dump it all in a bowl and call it a day. But when you layer the pudding and the crumbs, you get a bit of everything in every spoonful. It’s intentional chaos.
This isn’t just good—it’s the kind of treat that makes you close your eyes after the first bite. It’s comfort food reimagined for Halloween. Healthier? Maybe not. But it’s made with real ingredients, not just artificial jelly beans.
It’s perfect for impressing guests without stress, or turning a simple afternoon snack into something memorable. Plus, it’s interactive. Let the kids stick the worms in themselves. It keeps them busy while you finish your coffee.
What Ingredients You Will Need
This recipe uses simple, wholesome ingredients to deliver bold flavor and satisfying texture without the fuss. The beauty here is in the simplicity. You don’t need exotic spices or hard-to-find items.
The key is quality. Since there are only a few components, each one needs to shine.
- Instant Chocolate Pudding Mix: I recommend Jell-O or a similar brand for the best texture. It sets just enough to hold the layers. (2 boxes, 3.4 oz each)
- Milk: Whole milk works best for richness. If you need dairy-free, almond milk is a decent substitute, though it might be slightly thinner. (2 cups cold)
- Whipped Topping: Cool Whip is the classic choice. It adds that light, airy fluffiness that contrasts with the dense pudding. You can also use freshly whipped heavy cream if you have the time and energy. (1 container, 8-12 oz)
- Chocolate Sandwich Cookies: Oreos are the standard, but any dark chocolate cookie works. For a gluten-free option, use GF chocolate sandwich cookies. (1 package, about 30 cookies)
- Gummy Worms: These are the stars of the show. Use the classic red ones for that “wormy” look. You can also try sour worms for a tangy kick. (1 bag)
- Mini Chocolate Chips: Optional, but they add extra chocolate flavor and look like little pebbles in the dirt. (1/2 cup)
Here is a quick breakdown of how to prep them:
- For the Pudding Layer: Mix the dry mix with cold milk according to package directions. Let it sit for 2 minutes to thicken. This is crucial. If you skip this, the layers might get muddy.
- For the “Dirt” Layer: Crush the cookies. I use a food processor for speed, but a ziplock bag and a rolling pin works fine if you want to let the kids help. You want fine crumbs, not big chunks.
- For the Topping: If using frozen Cool Whip, let it thaw slightly so it’s spreadable but still stiff. If using homemade whipped cream, add a tablespoon of sugar and a teaspoon of vanilla extract.
Pro tip: If you are making these ahead of time, keep the cookie crumbs separate until right before serving. Otherwise, they will soak up the moisture and turn into a soggy mess. Nobody wants soggy dirt.
Equipment Needed
You don’t need a lot of fancy gear for this, but having the right tools makes the process smoother.
- Mixing Bowls: You’ll need two medium bowls. One for the pudding, one for the cookie crumbs. A large bowl is helpful if you are mixing everything in one go, but layering looks better.
- Electric Mixer or Whisk: For the pudding, a hand whisk works if you have strong arms. But an electric mixer ensures there are no lumps. I prefer the mixer because it’s faster.
- Food Processor or Rolling Pin: To crush the cookies. A food processor gives you uniform crumbs. A rolling pin gives you a rustic, chunkier texture. Both are fine.
- Serving Cups: Clear plastic cups or glass jars work best. You want to see the layers. If you use opaque containers, you lose the visual appeal. I like using small mason jars for a rustic look.
- Spatula: A small offset spatula helps with neat layering. If you don’t have one, a regular spoon works, but it’s messier.
Budget-friendly tip: You can reuse plastic cups from yogurt or snack packs. Just wash them well. It’s eco-friendly and saves money.
Preparation Method
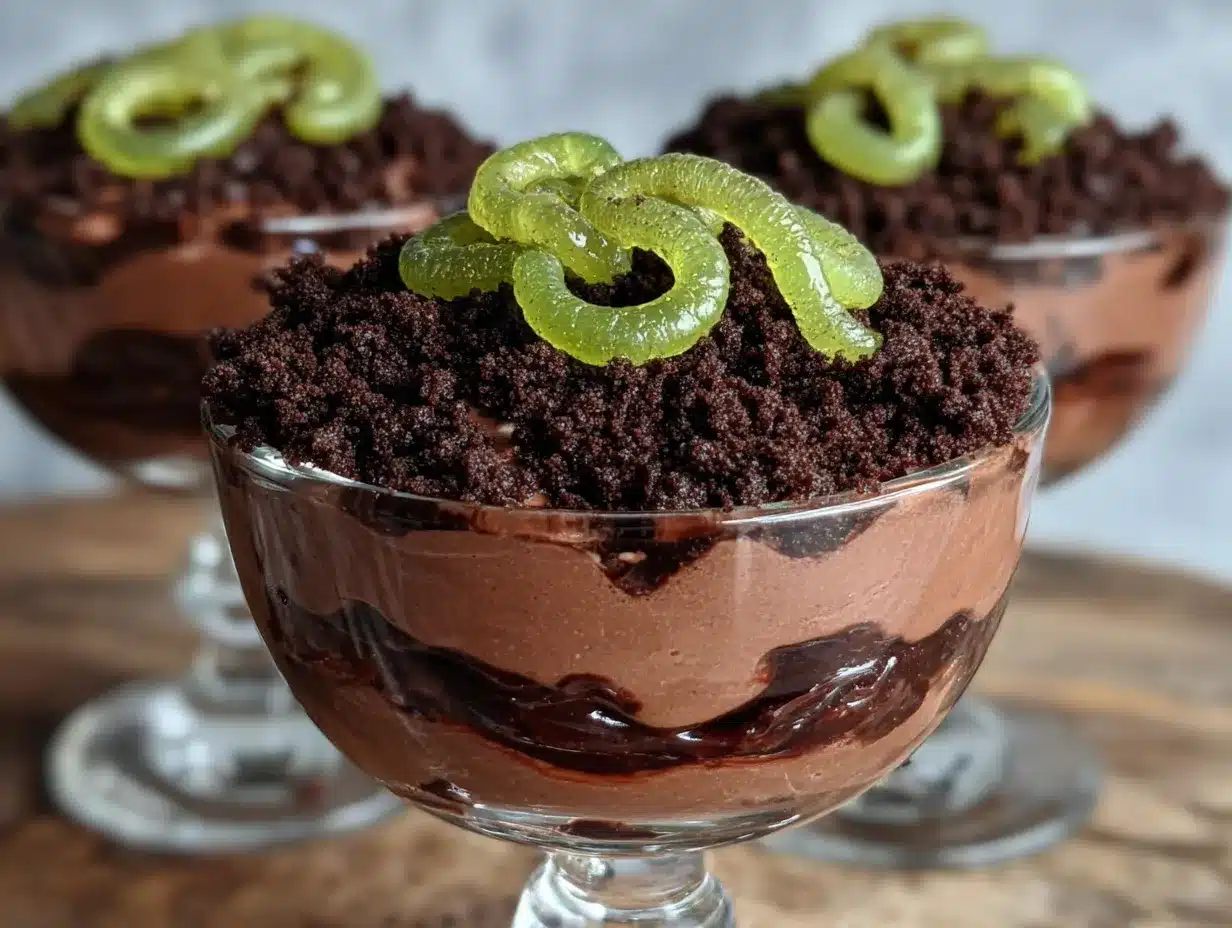
Let’s get into the nitty-gritty. This is where the magic happens.
- Prepare the Pudding: In a medium bowl, combine the instant chocolate pudding mix and cold milk. Whisk vigorously for 2 minutes. Let it sit for 2 more minutes to thicken. This step takes about 4 minutes total. The pudding should be thick enough to hold its shape but still spoonable. If it’s too runny, add a little more mix. If it’s too thick, add a splash more milk.
- Crush the Cookies: Place the chocolate sandwich cookies in a food processor. Pulse until they are fine crumbs. If you don’t have a processor, put them in a ziplock bag and crush them with a rolling pin. You want the texture of potting soil. This takes about 3 minutes. Don’t turn it into dust; you want some texture.
- Prepare the Whipped Topping: If using Cool Whip, let it soften slightly. If using heavy cream, whip it with sugar and vanilla until stiff peaks form. This should take about 2 minutes. The topping should be light and fluffy.
- Start Layering: Take your serving cup. Add a layer of whipped topping at the bottom. About 2 tablespoons. This creates a barrier so the bottom cookie crumbs don’t get too soggy. Use a small spoon to spread it evenly.
- Add the Dirt: Sprinkle a layer of cookie crumbs over the whipped topping. About 1 tablespoon. Press it down gently with the back of the spoon. This helps it stick.
- Add the Pudding: Add a generous layer of chocolate pudding. About 3 tablespoons. Smooth it out. This is the main event. Make sure it covers the crumbs completely.
- Repeat: Repeat the layers: whipped topping, crumbs, pudding. Do this 2 or 3 times, depending on the size of your cup. Always end with a layer of pudding. It looks smoother and is easier to eat.
- Final Dirt Layer: Top with a final layer of cookie crumbs. Make it thick. This is the “dirt” that the worms will live in. Sprinkle mini chocolate chips on top for extra texture. This takes about 2 minutes.
- Add the Worms: Take your gummy worms and stick them into the top layer. Angle them so they look like they are burrowing out of the ground. You can bend them slightly for a more natural look. This is the fun part. Take your time.
- Chill: Place the cups in the refrigerator for at least 30 minutes. This helps the layers set and makes the dessert colder and firmer. This waiting period is the hardest part.
Personal tip: If you are making these for a party, make them 2 hours ahead. They hold up well in the fridge. Just keep them covered with plastic wrap to prevent them from absorbing fridge smells.
Cooking Tips & Techniques
There are a few tricks to making these look professional and taste even better.
- Don’t Skip the Chill Time: I know you want to eat them now. But chilling helps the layers set. If you serve them immediately, the layers might slide around. It’s worth the wait.
- Use Cold Ingredients: Cold milk and cold whipped topping help the pudding set faster. If your kitchen is hot, keep the bowls in the fridge until you are ready to assemble.
- Crumb Texture Matters: Don’t make the crumbs too fine. You want some chunkiness. It adds to the “dirt” aesthetic. If they are too powdery, they look like cake dust.
- Layering Order: Always end with pudding, then crumbs. If you end with crumbs, they might fly out when you take a bite. The pudding acts as a binder.
- Worm Placement: Stick the worms in at an angle. Straight up looks stiff. Angled looks natural. You can also twist them slightly for a more dynamic look.
Common mistake: Over-mixing the pudding. If you whisk it too much after it thickens, it can become airy and lose its density. Mix until smooth, then stop.
Another tip: If you want a richer flavor, use half pudding and half whipped topping in the middle layers. It makes it less sweet and more sophisticated.
Variations & Adaptations
This recipe is a blank canvas. Here are some ways to make it your own.
- Strawberry Dirt Cups: Use strawberry pudding mix instead of chocolate. Top with crushed strawberry cookies and gummy bears. It’s pink and fun.
- Pumpkin Spice Dirt: Use pumpkin pudding mix and gingersnap crumbs. Top with whipped cream and a mini pumpkin spice cookie. Perfect for October.
- Gluten-Free Option: Use gluten-free chocolate sandwich cookies and gluten-free pudding mix. Most major brands have GF options now.
- Dairy-Free Option: Use almond milk and dairy-free whipped topping. Use dairy-free chocolate cookies. It’s surprisingly delicious.
- Low-Sugar Option: Use sugar-free pudding mix and sugar-free cookies. It’s not as sweet, but it’s still satisfying.
My personal favorite variation is adding a layer of crushed peppermint candies between the pudding and the crumbs. It adds a minty crunch that contrasts with the chocolate. It’s like a mint chocolate chip experience.
Serving & Storage Suggestions
Serve these chilled. They taste best cold. The cold temperature makes the pudding firmer and the cookies crunchier.
Pair them with a glass of cold milk or a cup of hot tea. They are a great dessert after a Halloween movie marathon.
Storage: Store in the refrigerator for up to 3 days. Keep them covered with plastic wrap or in an airtight container. They will hold their shape well.
Freezing: Do not freeze these. The whipped topping will separate and become grainy when thawed. The cookies will also get soggy. Best served fresh.
Make Ahead: You can prepare the components (pudding, crumbs, topping) up to 24 hours in advance. Assemble just before serving to keep the layers distinct.
The flavors develop over time. The pudding gets slightly thicker, and the cookies absorb some of the cream. It’s a nice change in texture if you like it softer.
Nutritional Information & Benefits
These cups are a treat, so enjoy them in moderation.
- Calories: Approximately 250-300 calories per cup.
- Fat: High in fat due to the whipped topping and cookies.
- Sugar: High in sugar from the pudding mix and gummy worms.
- Carbs: High in carbs from the cookies and pudding.
However, they are a good source of calcium from the milk and dairy. They are also a fun way to get kids to eat a “dessert” that feels homemade.
For a healthier twist, use Greek yogurt instead of whipped topping. It adds protein and cuts the sweetness. It’s a great option for parents who want to balance out the sugar.
Personally, I view these as a special occasion treat. They are not for everyday snacking, but for Halloween, they are perfect.
Conclusion
Easy Halloween Dirt Cups with Gummy Worms are more than just a snack. They are a memory maker. They are the kind of recipe that brings laughter to the kitchen and smiles to the table.
I love this recipe because it is forgiving. You can’t mess it up. It’s messy by design. It’s perfect for busy parents, clumsy cooks, and anyone who wants a quick win.
I encourage you to try it. Customize it. Make it yours. Add your own twist. The possibilities are endless.
Please share your creations with me! Tag me on social media or leave a comment below. I love seeing how you adapt this recipe.
Happy Halloween! May your cups be full and your worms be wiggly.
FAQs
Can I make these ahead of time?
Yes, you can assemble them up to 24 hours in advance. Keep them covered in the refrigerator. For best texture, add the final cookie crumbs and worms just before serving.
Can I use homemade whipped cream?
Absolutely. Just make sure it is stiff enough to hold the layers. Sweeten it with a little sugar and vanilla extract.
How long do these last in the fridge?
They last for up to 3 days. After that, the cookies may become too soggy and the whipped topping may deflate.
Can I freeze these?
No, freezing is not recommended. The whipped topping will separate and become grainy when thawed.
What can I use instead of Oreos?
Any chocolate sandwich cookie works. You can also use chocolate cake crumbs or crushed chocolate cookies for a different texture.
Pin This Recipe!
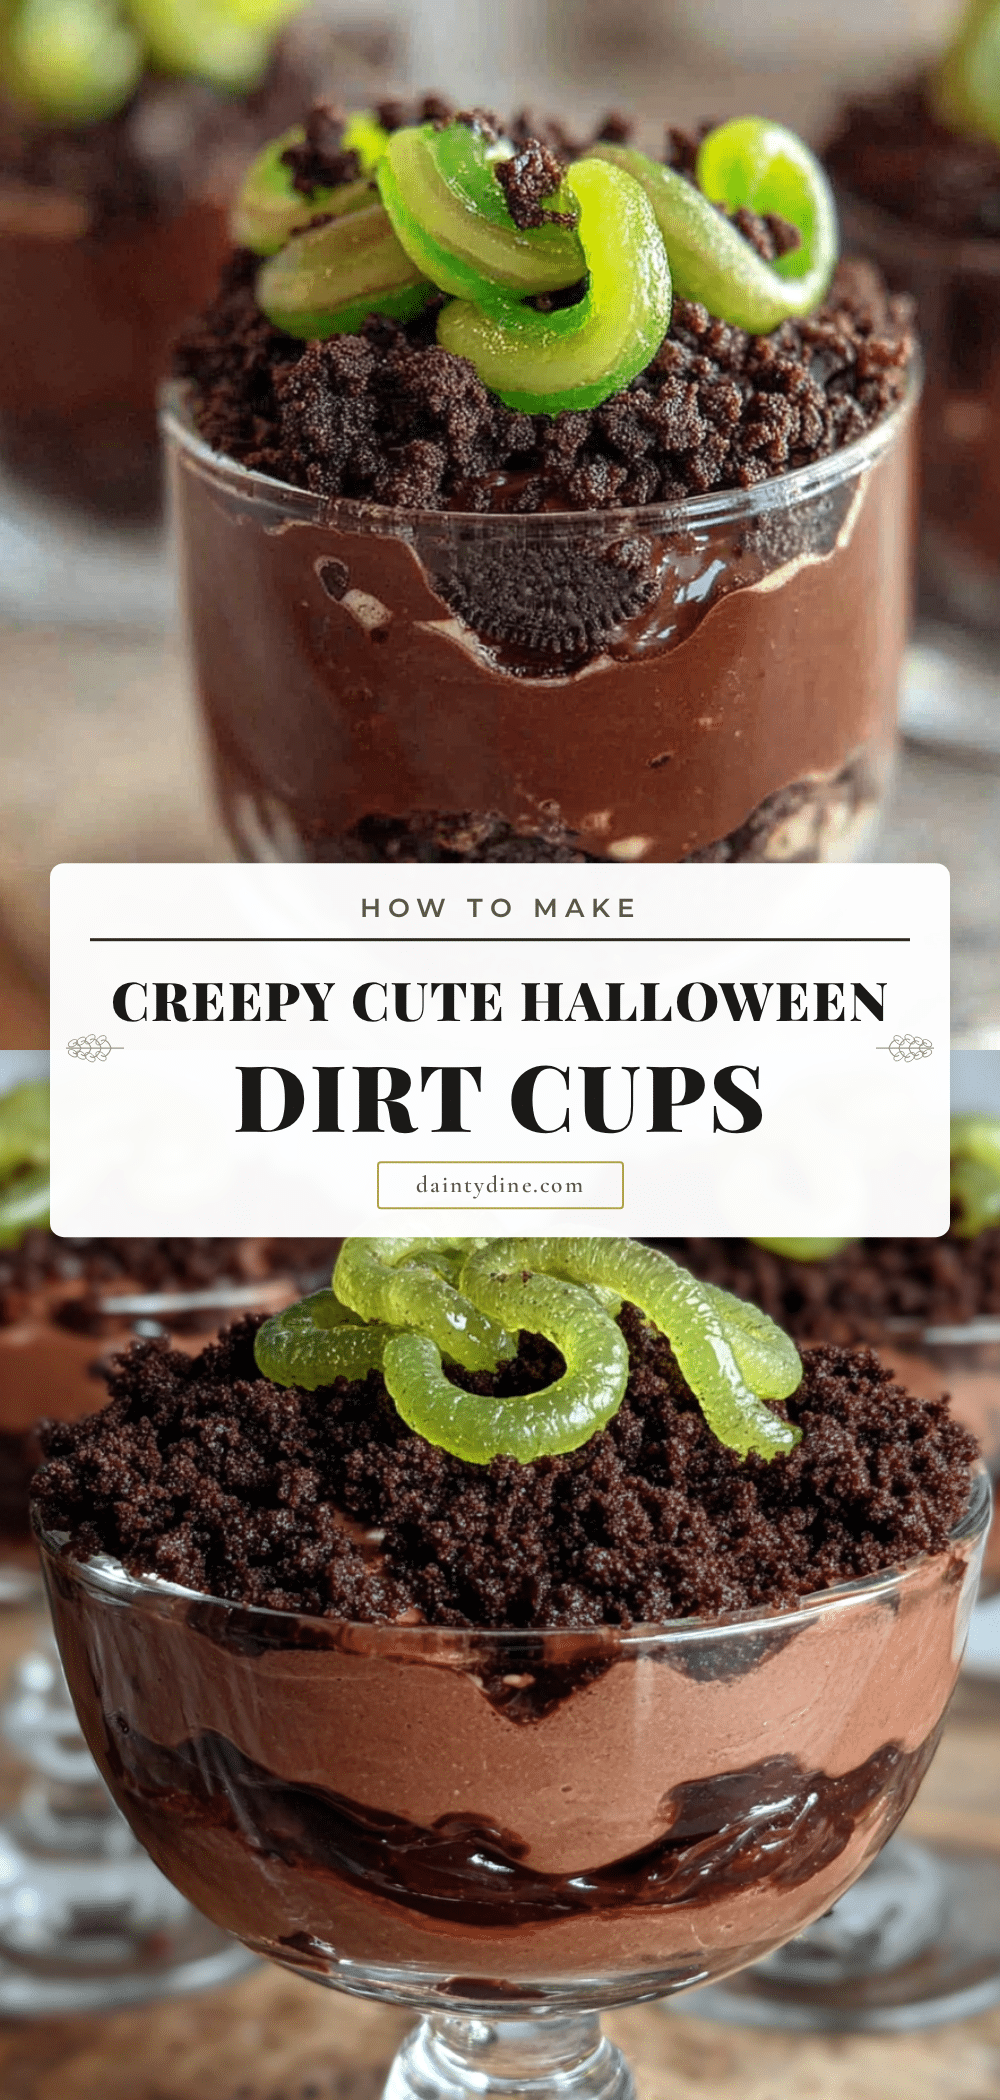
Easy Halloween Dirt Cups with Gummy Worms
A quick, no-bake Halloween dessert featuring layers of chocolate pudding, whipped topping, and crushed Oreo ‘dirt,’ topped with gummy worms. Perfect for parties and last-minute treats.
- Prep Time: 15 minutes
- Cook Time: 0 minutes
- Total Time: 45 minutes
- Yield: 6 servings 1x
- Category: Dessert
- Cuisine: American
Ingredients
- 2 boxes (3.4 oz each) instant chocolate pudding mix
- 2 cups cold whole milk
- 1 container (8-12 oz) whipped topping (e.g., Cool Whip), thawed
- 1 package (approx. 30 cookies) chocolate sandwich cookies (e.g., Oreos)
- 1 bag gummy worms
- 1/2 cup mini chocolate chips (optional)
Instructions
- In a medium bowl, combine instant chocolate pudding mix and cold milk. Whisk vigorously for 2 minutes, then let sit for 2 minutes to thicken.
- Crush the chocolate sandwich cookies into fine crumbs using a food processor or a ziplock bag with a rolling pin.
- If using homemade whipped cream, whip with sugar and vanilla until stiff peaks form. If using Cool Whip, let it soften slightly.
- In a serving cup, add a layer of whipped topping (approx. 2 tablespoons).
- Sprinkle a layer of cookie crumbs (approx. 1 tablespoon) over the topping and press gently.
- Add a generous layer of chocolate pudding (approx. 3 tablespoons) and smooth it out.
- Repeat the layers (whipped topping, crumbs, pudding) 2-3 times, always ending with a layer of pudding.
- Top with a final thick layer of cookie crumbs and sprinkle with mini chocolate chips.
- Stick gummy worms into the top layer at an angle.
- Refrigerate for at least 30 minutes before serving to allow layers to set.
Notes
Keep cookie crumbs separate until serving to prevent sogginess. Do not freeze as whipped topping will separate. Can be made up to 24 hours in advance if assembled just before serving. For a healthier twist, substitute whipped topping with Greek yogurt.
Nutrition
- Serving Size: 1 cup
- Calories: 275
- Sugar: 22
- Sodium: 250
- Fat: 18
- Saturated Fat: 8
- Carbohydrates: 28
- Fiber: 2
- Protein: 4
Keywords: Halloween dessert, dirt cups, gummy worms, no bake, easy treats, kid friendly, party snacks, chocolate pudding, Oreo crumbs


