Love this? Save it for later!
Share the inspiration with your friends
My niece asked why I couldn’t just crush the cookies in a bag instead of pulling out the food processor. I started to explain why that wouldn’t work — something about even crumbs and texture control. Then I stopped. She was seven, holding a ziplock bag and a rolling pin with the kind of determination you only see in kids who know they’re about to prove you wrong. Honestly, I handed over the cookies and watched her go to town. The crumbs were uneven, some bits were practically dust while others were small, satisfying chunks. And you know what? It made the best dirt I’ve ever had.
That moment changed how I approach this recipe. I mean, I’d been making graveyard dirt pudding cups for years, always fussing with the food processor, wiping down the bowl between batches. Turns out, a little imperfection in the crumb texture actually makes it look more like real dirt. Go figure. The power went out halfway through our prep session that afternoon, and we finished everything by flashlight — which, for a Halloween dessert, actually added to the creepy ambiance.
Maybe you’ve been there, overcomplicating a recipe that’s supposed to be fun. This easy graveyard dirt pudding cups recipe is the one that taught me to loosen up in the kitchen. It’s simple, ridiculously cute, and the kind of dessert that makes kids (and adults) light up. I keep making it because it’s the one recipe where perfection isn’t the goal — personality is. And honestly, that’s a lesson I needed to learn.
Why You’ll Love This Recipe
Let me tell you, after testing this recipe about a dozen times over the years, I’ve got the method down. These easy graveyard dirt pudding cups are the Halloween dessert you didn’t know you needed — but once you make them, you’ll wonder why you ever bothered with complicated spooky treats.
- Quick & Easy : Comes together in under 20 minutes of active prep. The hardest part is waiting for the pudding to chill, and that’s just patience.
- Simple Ingredients : No fancy grocery trips needed. You likely already have everything in your kitchen — chocolate pudding, Oreos, and some gummy worms.
- Perfect for Halloween Parties : Great for classroom celebrations, potlucks, or a cozy night in with the kids. They’re individual servings, so no slicing or serving drama.
- Crowd-Pleaser : Always gets rave reviews from kids and adults alike. I’ve seen grown-ups sneak seconds when they think no one’s looking.
- Unbelievably Cute : The graveyard scene with cookie tombstones and gummy worms is next-level adorable. It’s the dessert equivalent of a Halloween decoration you can eat.
What makes this recipe different from the rest? It’s the texture. Most versions use a food processor to get perfectly uniform cookie crumbs, but I’ve found that a mix of fine and chunky crumbs creates that authentic “dirt” look. Plus, I add a tiny pinch of salt to the pudding layer — an old pastry trick that makes the chocolate flavor pop without tasting salty. It’s not just another version; it’s my best version, refined through years of Halloween parties and last-minute classroom treats.
This recipe isn’t just good — it’s the kind that makes you smile before you even take a bite. It’s comfort food with a spooky twist, faster than baking a cake, but with the same soul-soothing satisfaction. Perfect for impressing guests without stress, or turning a simple Tuesday into something memorable.
What Ingredients You Will Need
This recipe uses simple, wholesome ingredients to deliver that classic dirt pudding experience without the fuss. Most of these are pantry staples you probably already have on hand, which is exactly why this recipe is a lifesaver for last-minute Halloween plans.
For the Pudding Layer
- 2 boxes (3.9 ounces each) instant chocolate pudding mix (I prefer Jell-O brand for consistent texture)
- 3 cups cold whole milk (2% works too, but whole milk gives a creamier finish)
- 1 teaspoon vanilla extract (optional, but adds a lovely depth)
- Pinch of sea salt (trust me on this one — it balances the sweetness)
For the Dirt Layer
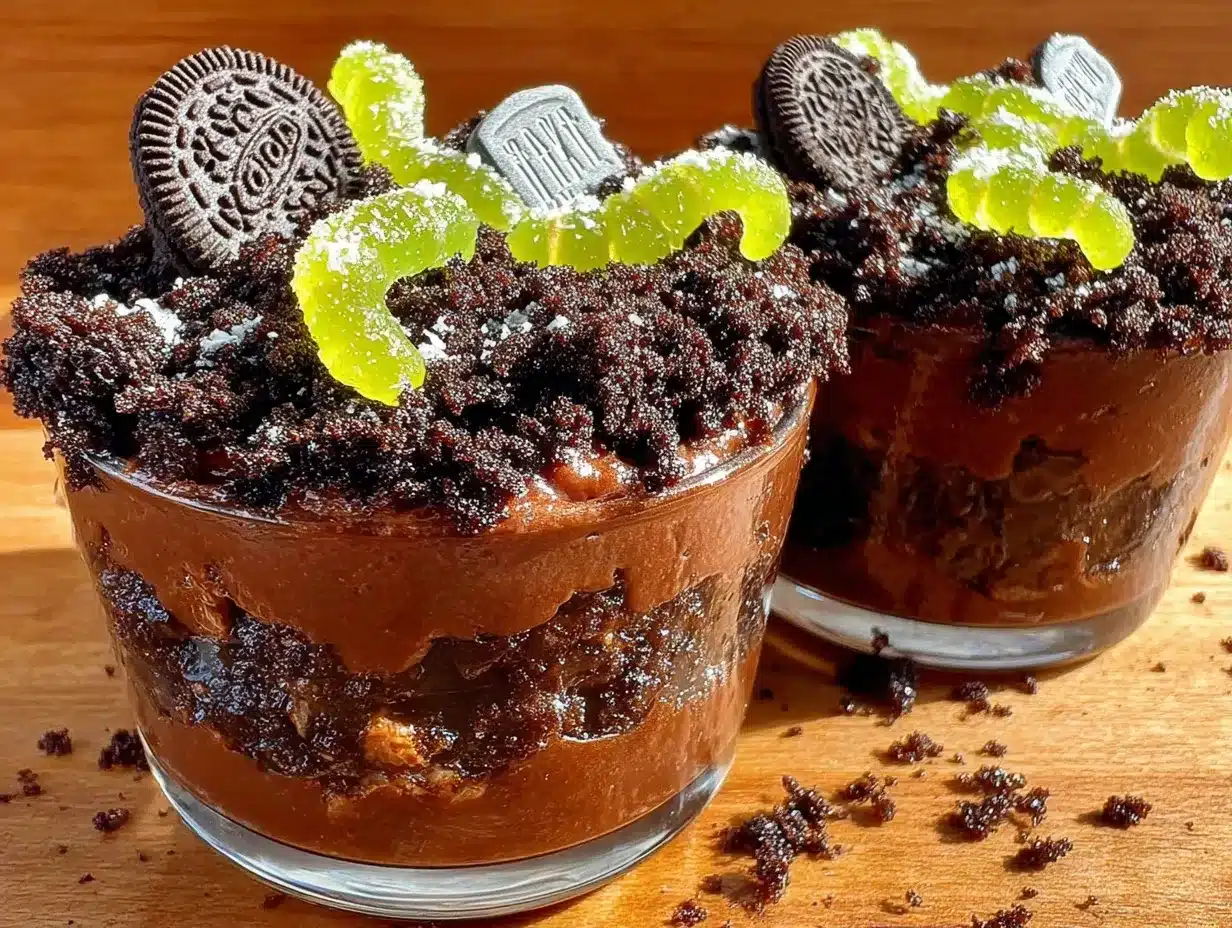
- 1 package (14.3 ounces) Oreo cookies (regular, not double-stuf — you want the right crumb-to-cream ratio)
- 2 tablespoons unsalted butter, melted (optional, for a more “packed” dirt texture)
For the Graveyard Decorations
- 1 cup gummy worms (I use Trolli brand — they’re firmer and hold up better)
- 8-10 rectangular shortbread cookies (for tombstones — Keebler Sandies work great)
- Black decorating gel or black frosting (for writing on tombstones)
- Optional: candy pumpkins, skeleton bones candy, or Halloween sprinkles
When selecting your Oreos, look for packages that aren’t crushed. I know that sounds obvious, but I’ve grabbed a box that was clearly mishandled, and the crumbs were already too fine. For the pudding, instant is key — cook-and-serve pudding won’t set properly in the same timeframe. If you’re dairy-free, swap the whole milk for oat milk or full-fat coconut milk. Just avoid skim or almond milk, which can make the pudding watery.
For the tombstones, I’ve tested about six different cookie options. Shortbread holds up best because it’s dense and doesn’t get soggy quickly. Graham crackers work in a pinch, but they soften faster. And if you’re feeling ambitious, you can make your own sugar cookie tombstones — but honestly, store-bought shortbread saves time and tastes just as good.
Equipment Needed
- 8 small clear cups or glasses (6 to 8 ounces each — I use plastic cups from the dollar store for parties)
- Large mixing bowl for pudding
- Whisk or hand mixer (whisk works fine, but a hand mixer makes it faster)
- Ziplock bag and rolling pin (for crushing Oreos — this is the method my niece taught me)
- Small offset spatula or butter knife (for smoothing pudding layers)
- Piping bag or small ziplock bag (for writing on tombstones)
- Measuring cups and spoons
- Small baking sheet (for laying out tombstones while the icing dries)
If you don’t have a rolling pin, a heavy skillet or even a wine bottle works. I’ve used a jar of pasta sauce in a pinch — just make sure it’s sealed tight. For the cups, any clear glass or plastic cup works, but clear cups really show off the layers. That visual is half the fun.
Preparation Method
- Make the pudding: In a large mixing bowl, whisk together both boxes of instant chocolate pudding mix and 3 cups cold milk. Whisk vigorously for about 2 minutes until the mixture thickens. Add the vanilla extract and pinch of sea salt, then whisk once more. The pudding will be thick but still pourable. Let it sit for 5 minutes to fully set while you prepare the other components.
- Crush the Oreos: Place the entire package of Oreos (cream filling included) into a large ziplock bag. Seal it, removing as much air as possible. Now, take your rolling pin and go to town. You want a mix of fine crumbs and small chunks — think real garden dirt with some pebbles. Don’t overdo it; uneven crumbs look more authentic. If you want a finer texture, you can pulse them in a food processor, but honestly, the bag method gives better results.
- Prepare the tombstones: While the pudding sets, write “RIP,” spooky names, or epitaphs on your shortbread cookies using black decorating gel. Keep the messages simple — “RIP,” “Boo,” “Here Lies” — because the cookies are small. Place them on a baking sheet and let the icing dry for at least 10 minutes. If you’re short on time, you can skip the writing entirely and just use plain cookies as tombstones.
- Assemble the cups: Start with a layer of crushed Oreos at the bottom of each cup — about 2 tablespoons per cup. This creates the “dirt” base. Next, spoon or pipe the chocolate pudding over the Oreo layer, filling each cup about halfway. Tap the cups gently on the counter to settle the pudding and remove air bubbles.
- Add the gummy worms: Press 2-3 gummy worms into the pudding layer, letting some stick out slightly as if they’re crawling out of the dirt. This is the moment where the cups start looking like a graveyard scene. Don’t bury them completely — the visual of worms emerging is what sells the effect.
- Top with more dirt: Add another layer of crushed Oreos over the pudding, covering the worms completely. Use about 2-3 tablespoons per cup. The top layer should look like freshly turned soil. If you want a more realistic effect, leave some areas slightly uneven.
- Insert the tombstones: Gently press one decorated shortbread cookie into each cup, leaving about half an inch sticking out. Position it at an angle for a more authentic graveyard look. Add any additional decorations like candy pumpkins or skeleton bones around the tombstone.
- Chill before serving: Refrigerate the cups for at least 1 hour before serving. This allows the flavors to meld and the texture to set properly. The cups will keep in the refrigerator for up to 3 days, but the cookies will start to soften after 24 hours.
Pro tip: The pudding will look slightly glossy when first made, but after chilling, it takes on a matte finish that looks even more like real dirt. Don’t skip the chill time — it makes a difference in both texture and presentation.
Cooking Tips & Techniques
I’ve learned a few things the hard way with this recipe. The first time I made these, I used cook-and-serve pudding because I grabbed the wrong box at the store. It never set properly, and I ended up with soupy “dirt” that looked more like a mudslide than a graveyard. Instant pudding is non-negotiable here — the texture is what makes these work.
Another mistake? Using double-stuf Oreos. I know, it sounds like more is better, but the extra cream filling makes the “dirt” clump together in an unappealing way. Regular Oreos give you that perfect crumbly texture that looks like real soil. If you only have double-stuf on hand, scrape off some of the cream before crushing.
For the gummy worms, I’ve found that refrigerating them for 10 minutes before assembly makes them easier to handle — they’re less sticky and hold their shape better when you press them into the pudding. Also, cut a few worms in half for a more realistic “emerging from the dirt” look. It’s a small detail, but kids notice and love it.
Timing is everything with these cups. If you’re making them for a party, assemble them the night before and add the tombstones just before serving. The cookies will stay crisp, and the gummy worms won’t bleed their color into the pudding. I learned this one the hard way when I made them 24 hours in advance and ended up with slightly soggy tombstones.
One last tip: if you’re serving these at a classroom party or event where you need to transport them, use cups with lids. I’ve carried these on the subway, in the car, and even on a bus — lidded cups are a lifesaver. The dirt layer stays put, and the tombstones don’t topple over.
Variations & Adaptations
Dairy-Free Version: Use your favorite dairy-free milk (oat milk works best) and a dairy-free chocolate pudding mix. Most instant pudding mixes are actually dairy-free — it’s the milk that adds the dairy. For the Oreos, you’re in luck — they’re accidentally vegan! Just double-check your shortbread cookies for butter content.
Gluten-Free Adaptation: Swap the Oreos for gluten-free chocolate sandwich cookies. Most major brands make a gluten-free version now. Use gluten-free shortbread cookies for the tombstones. Everything else in the recipe is naturally gluten-free.
Peanut Butter Dirt: Add 2 tablespoons of creamy peanut butter to the pudding mixture before whisking. It gives the chocolate a subtle peanut butter flavor that pairs beautifully with the Oreo “dirt.” I tried this on a whim one year, and it was a huge hit at the Halloween party.
Pumpkin Patch Version: For a fall twist, swap the gummy worms for candy pumpkins and use orange-tinted white chocolate for the tombstones. Add a few candy corn pieces scattered around the “dirt.” It’s perfect for Thanksgiving or fall harvest parties.
Individual Mason Jar Presentation: Use small mason jars instead of cups for a rustic look. The jars make them portable and give a cute “potting soil” vibe. Tie a small piece of twine around the jar with a mini Halloween tag for an extra special touch.
Mint Chocolate Dirt: Use mint chocolate Oreos (the green-stuffed ones) and add 1/4 teaspoon peppermint extract to the pudding. The mint-chocolate combination is surprisingly perfect for Halloween, and the green cream in the Oreos adds a subtle creepy color to the “dirt.”
Serving & Storage Suggestions
These graveyard dirt pudding cups are best served cold, straight from the refrigerator. The contrast between the cold, creamy pudding and the crunchy cookie “dirt” is what makes them so satisfying. I like to serve them on a black or orange tray for maximum Halloween effect.
For presentation, arrange the cups on a platter with some fake spiderwebs draped around them. Add a few plastic spiders or skeleton hands for extra creepiness. If you’re serving at a party, label them with a small sign that says “Graveyard Dirt” or “Worm Pudding” — kids get a kick out of that.
Storage-wise, these cups will keep in the refrigerator for up to 3 days. Cover each cup with plastic wrap or a lid to prevent the cookies from absorbing moisture from the fridge. After 24 hours, the shortbread tombstones will start to soften, so if you’re making them ahead, store the tombstones separately and add them just before serving.
I don’t recommend freezing these cups. The pudding texture changes when thawed, and the cookies become completely soggy. If you need to prep ahead, make the pudding and crush the Oreos separately, then assemble the cups the day of your event.
The flavors actually develop over time — the chocolate pudding becomes richer and more pronounced after a day in the fridge. I’ve found that day-old cups taste even better than fresh ones, aside from the softening cookies. It’s a trade-off I’m willing to make.
Nutritional Information & Benefits
Here’s the truth: these graveyard dirt pudding cups are a treat, not a health food. But if you’re going to indulge, at least know what you’re getting into. Per serving (one cup, using whole milk and regular Oreos), you’re looking at approximately:
- Calories: 380-420
- Fat: 16g
- Carbohydrates: 58g
- Protein: 6g
- Sugar: 42g
- Fiber: 2g
The good news? Chocolate pudding contains calcium from the milk, and Oreos have a surprising amount of iron (about 2mg per serving). The gummy worms are basically sugar with a side of gelatin, but they’re fun. If you want to lighten things up, use 2% milk and reduce the Oreo layer by half. You’ll still get the dirt effect with fewer calories.
For those with dietary restrictions, this recipe can be adapted for dairy-free and gluten-free diets (see variations above). It contains wheat, dairy, and soy. The gummy worms may contain gelatin, so check labels if you’re serving vegetarians.
My personal perspective? Life’s too short to skip dessert. These cups are a once-a-year treat for Halloween, and the joy they bring is worth every calorie. Just don’t eat three in one sitting — trust me on that one.
Conclusion
These easy graveyard dirt pudding cups are the Halloween dessert you’ve been looking for. They’re fun, fast, and forgiving — the perfect recipe for busy parents, classroom volunteers, or anyone who wants to bring something special to a party without spending hours in the kitchen. The best part? You can customize them endlessly based on what you have on hand or what your kids are into.
I love this recipe because it reminds me of that afternoon with my niece, crushing cookies in a bag by flashlight. It’s proof that you don’t need fancy equipment or perfect technique to make something memorable. Sometimes the best recipes come from letting go of control and embracing a little chaos.
So grab some Oreos, a bag, and a rolling pin. Make these cups your own. Add extra worms, write silly epitaphs on the tombstones, experiment with different pudding flavors. And when you’re done, come back and tell me how they turned out. I’d love to hear about your graveyard creations!
Frequently Asked Questions
Can I make these graveyard dirt pudding cups ahead of time?
Yes! You can assemble them up to 24 hours in advance. Just wait to add the tombstones until right before serving to keep them crisp. The pudding and dirt layers actually taste better after a day in the fridge.
What if I don’t have clear cups?
Any cup or bowl works, but clear cups really show off the layers. If you’re using opaque cups, consider adding a label or tag that says “Graveyard Dirt” so guests know what’s inside. Mason jars are a great alternative.
Can I use homemade chocolate pudding instead of instant?
You can, but the texture will be different. Homemade pudding is thinner and won’t set as firmly. If you go this route, add an extra tablespoon of cornstarch to help it thicken. The instant version is really the way to go for the right consistency.
How do I keep the tombstones from falling over?
Press them into the dirt layer at a slight angle, and make sure the cookie is thick enough to stand. Shortbread cookies work best because they’re dense. If your cookies are thin, you can break them in half and use the thicker end as the base.
Can I use something other than Oreos for the dirt?
Absolutely! Chocolate wafer cookies, chocolate graham crackers, or even chocolate cake crumbs work. The key is getting that dark, crumbly texture that looks like soil. Just avoid anything too soft or moist, or it won’t look like dirt.
Pin This Recipe!
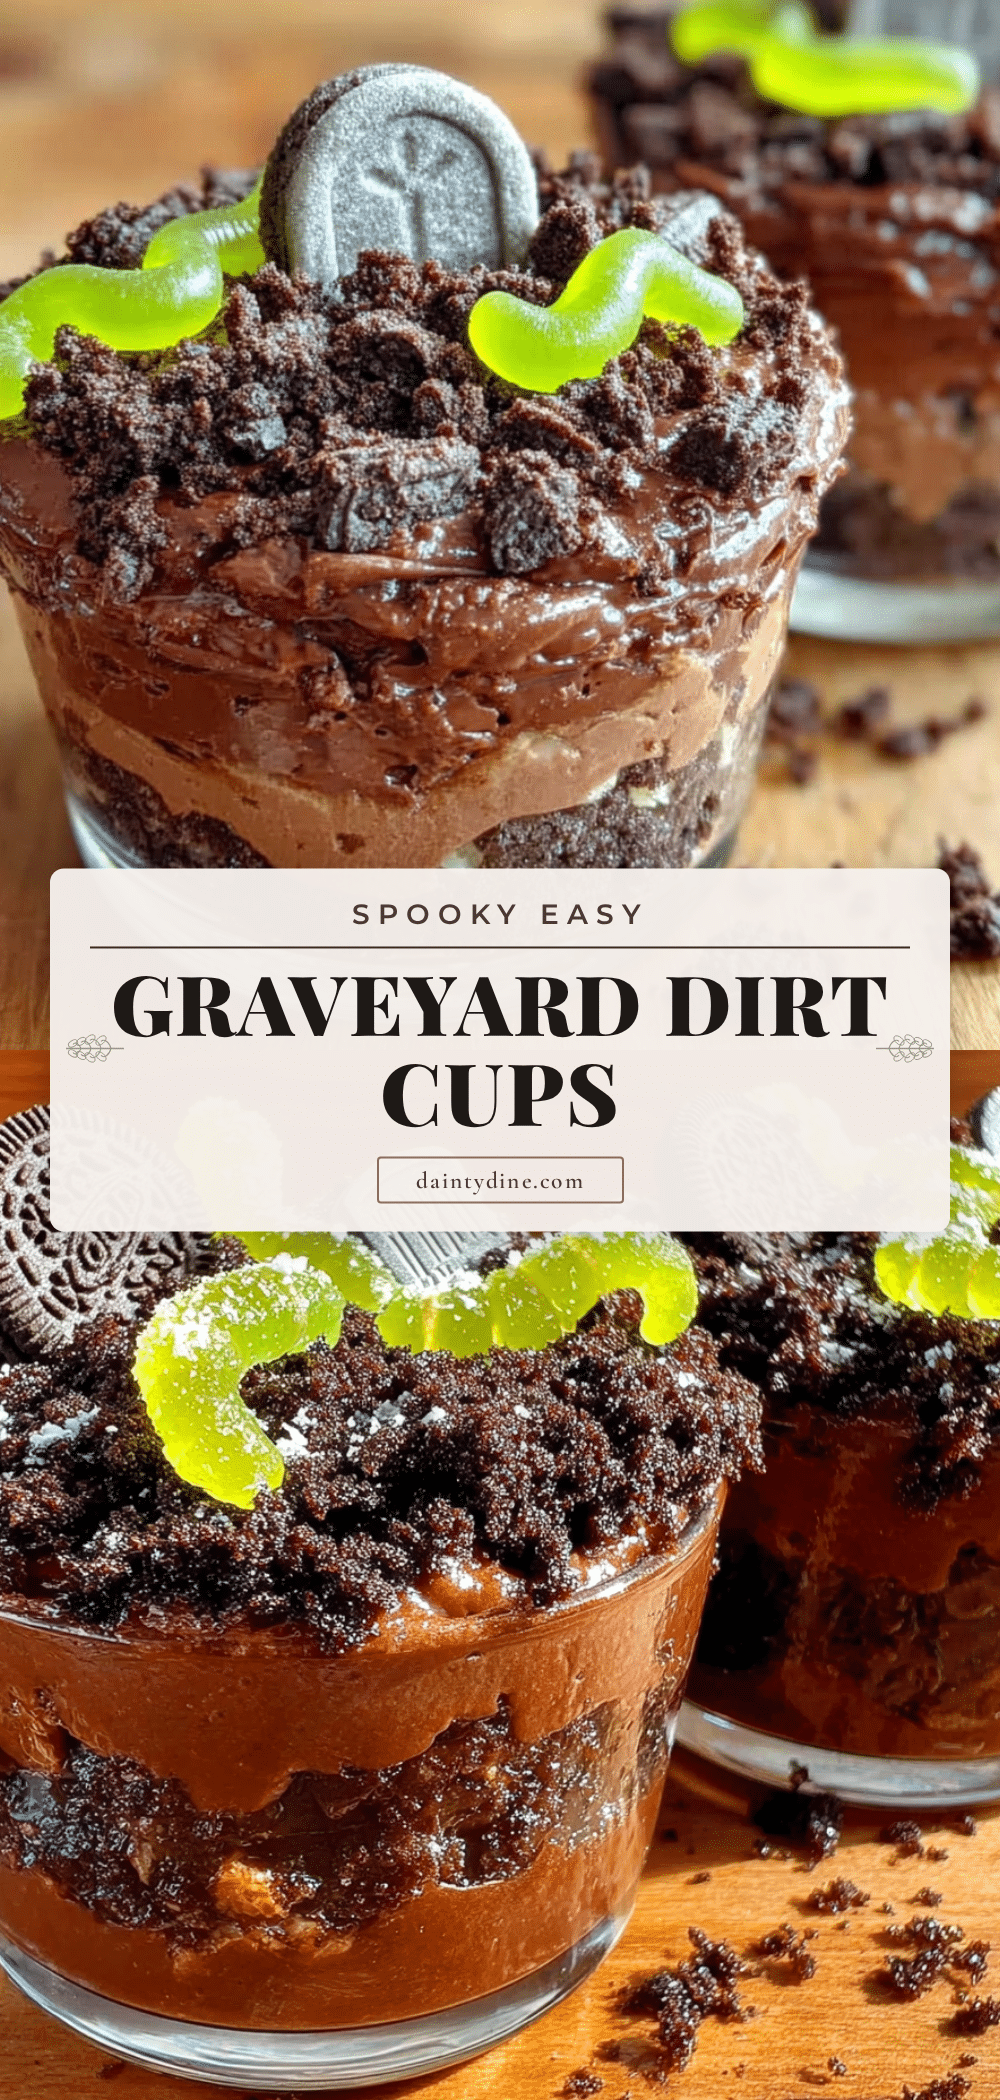
Easy Graveyard Dirt Pudding Cups: Best Halloween Dessert
These easy graveyard dirt pudding cups are the Halloween dessert you’ve been looking for. They’re fun, fast, and forgiving — the perfect recipe for busy parents, classroom volunteers, or anyone who wants to bring something special to a party without spending hours in the kitchen.
- Prep Time: 20 minutes
- Cook Time: 0 minutes
- Total Time: 1 hour 20 minutes (including chill time)
- Yield: 8 servings 1x
- Category: Dessert
- Cuisine: American
Ingredients
- 2 boxes (3.9 ounces each) instant chocolate pudding mix
- 3 cups cold whole milk
- 1 teaspoon vanilla extract
- Pinch of sea salt
- 1 package (14.3 ounces) Oreo cookies (regular, not double-stuf)
- 2 tablespoons unsalted butter, melted (optional)
- 1 cup gummy worms
- 8–10 rectangular shortbread cookies
- Black decorating gel or black frosting
Instructions
- Make the pudding: In a large mixing bowl, whisk together both boxes of instant chocolate pudding mix and 3 cups cold milk. Whisk vigorously for about 2 minutes until the mixture thickens. Add the vanilla extract and pinch of sea salt, then whisk once more. Let it sit for 5 minutes to fully set.
- Crush the Oreos: Place the entire package of Oreos (cream filling included) into a large ziplock bag. Seal it, removing as much air as possible. Use a rolling pin to crush into a mix of fine crumbs and small chunks.
- Prepare the tombstones: Write ‘RIP,’ spooky names, or epitaphs on your shortbread cookies using black decorating gel. Place them on a baking sheet and let the icing dry for at least 10 minutes.
- Assemble the cups: Start with a layer of crushed Oreos at the bottom of each cup — about 2 tablespoons per cup. Next, spoon or pipe the chocolate pudding over the Oreo layer, filling each cup about halfway. Tap the cups gently on the counter to settle the pudding.
- Add the gummy worms: Press 2-3 gummy worms into the pudding layer, letting some stick out slightly as if they’re crawling out of the dirt.
- Top with more dirt: Add another layer of crushed Oreos over the pudding, covering the worms completely. Use about 2-3 tablespoons per cup.
- Insert the tombstones: Gently press one decorated shortbread cookie into each cup, leaving about half an inch sticking out. Position it at an angle for a more authentic graveyard look.
- Chill before serving: Refrigerate the cups for at least 1 hour before serving.
Notes
For best results, use instant pudding (not cook-and-serve). Regular Oreos work better than double-stuf. Chill the gummy worms for 10 minutes before assembly to make them less sticky. Add tombstones just before serving to keep them crisp. The cups will keep in the refrigerator for up to 3 days, but cookies will soften after 24 hours.
Nutrition
- Serving Size: 1 cup
- Calories: 400
- Sugar: 42
- Sodium: 480
- Fat: 16
- Saturated Fat: 8
- Carbohydrates: 58
- Fiber: 2
- Protein: 6
Keywords: Halloween dessert, dirt pudding, graveyard pudding cups, easy Halloween treat, no-bake dessert


