Love this? Save it for later!
Share the inspiration with your friends
My neighbor, Mrs. Gable, watched me struggle with a piping bag full of sticky, deflating meringue one October afternoon. She didn’t say anything at first, just leaned on the chain-link fence that separates our yards, a knowing smile on her face. Then, she disappeared into her house and came back holding a worn, flour-dusted index card. “Forget the fancy shapes,” she said, handing it over. “Just make ghosts. They forgive every mistake.” That card had a simple recipe for ghost meringue cookies, and honestly, it changed my whole approach to Halloween baking.
I had been trying to make these elaborate spiderweb cookies that looked more like a science experiment than a treat. The kitchen was a mess, I was frustrated, and the kids were losing interest fast. Mrs. Gable’s ghost cookies were the exact opposite of all that stress. They are impossibly light, sweet, and have a charmingly imperfect look that makes them perfect for a spooky season treat. You don’t need to be a pastry chef to pull these off, and that’s the beauty of it. Maybe you’ve been there, staring at a complicated recipe and wondering why you even started. These little ghosts are here to save the day.
The recipe is almost laughably simple, but the result is pure magic. A pillowy-soft, crisp-on-the-outside cookie that melts in your mouth. Plus, they are naturally gluten-free and low in fat, which makes me feel a tiny bit better about the handful I inevitably eat while piping them. This is the kind of recipe you make with friends, let the kids decorate, and then watch disappear from the treat platter in minutes. I keep making them because they are a reminder that the best things in life—and in the kitchen—are often the simplest.
Why You’ll Love This Recipe
These ghost meringue cookies aren’t just another Halloween treat—they’re a total game-changer for your holiday baking. I’ve tested this recipe about half a dozen times to get the texture just right, and I can tell you with confidence that it works every single time. Here’s why you’re going to love it:
- Quick & Easy: From start to finish, you’re looking at about 15 minutes of active prep time. The oven does the rest of the work. Perfect for a busy weeknight when you need a last-minute contribution for a school party.
- Simple Ingredients: You only need four basic ingredients—egg whites, sugar, cream of tartar, and vanilla. No weird extracts or trips to a specialty store. You probably have everything in your kitchen right now.
- Perfect for Halloween: These are the ultimate crowd-pleaser for any spooky gathering. They look adorable on a dessert table and are a huge hit with both kids and adults. No one can resist a cute little ghost.
- Crowd-Pleaser: They are naturally gluten-free and fat-free, which means they fit almost every dietary need. I’ve seen people who “don’t like sweets” go back for a second ghost.
- Unbelievably Delicious: The texture is what gets you. A crisp, airy shell that shatters when you bite into it, giving way to a soft, marshmallowy center. It’s next-level comfort food disguised as a spooky snack.
What makes this version different from the rest? It’s the technique. I use a super-slow baking method that dries the meringues out without browning them, keeping them perfectly white. Plus, I add a tiny pinch of salt to balance the sweetness, which most recipes skip. This isn’t just another meringue cookie—it’s my best version, tested and family-approved.
What Ingredients You Will Need
This recipe uses simple, wholesome ingredients to deliver a light, airy cookie with a satisfying crunch. The magic is in how these few basics come together. Most of these are pantry staples you likely already have on hand, making these ghost meringue cookies a truly last-minute-friendly treat.
- 3 large egg whites (at room temperature) – This is crucial. Room-temperature egg whites whip up to a much greater volume than cold ones, giving you taller, fluffier ghosts. I usually set my eggs out on the counter about 30 minutes before I start.
- ¾ cup (150g) granulated sugar – Superfine sugar is ideal because it dissolves faster, but regular granulated sugar works perfectly fine. I’ve used both. Just make sure it’s not powdered sugar, which has cornstarch and will change the texture.
- ½ teaspoon cream of tartar – This is the stabilizer. It helps the egg whites hold their shape and prevents them from weeping or deflating. You can substitute it with 1 teaspoon of lemon juice or white vinegar in a pinch, but cream of tartar gives the most reliable results.
- 1 teaspoon vanilla extract – For flavor. I use pure vanilla extract, but imitation vanilla works too. You could also try peppermint extract for a fun twist, but vanilla is classic and lets the sweetness shine.
- Pinch of salt – This is my secret weapon. It cuts the sweetness and enhances the vanilla flavor. Don’t skip it!
- Mini chocolate chips or black gel food coloring (for the eyes) – This is the fun part. I prefer mini chocolate chips because they look like little coal-black eyes and add a tiny burst of chocolate. Black gel food coloring is great if you want to pipe on faces instead.
For the best texture, I recommend using fresh egg whites. Old egg whites can be a bit runny and won’t whip up as well. If you have leftover yolks, save them for a batch of lemon curd or carbonara. Also, make sure your mixing bowl and whisk are completely clean and free of any grease. Even a tiny bit of oil can prevent the egg whites from whipping up properly.
Equipment Needed
You don’t need a lot of fancy gear for these ghost meringue cookies, which is part of why I love them. Here’s what you’ll need:
- Electric mixer (stand or hand-held) – You can whip egg whites by hand with a whisk, but I wouldn’t recommend it unless you want a serious arm workout. A hand mixer works great and is easier to clean.
- Large mixing bowl – Glass, metal, or ceramic works. Avoid plastic bowls, as they can retain a thin layer of grease that will ruin your meringue.
- Baking sheet – A standard rimmed baking sheet is perfect. Line it with parchment paper or a silicone baking mat. Do not use wax paper, as it will stick.
- Piping bag – A large piping bag with a coupler and a round tip (like Ateco #806 or Wilton 1A) is ideal. If you don’t have one, a sturdy zip-top bag with a corner snipped off works surprisingly well.
- Rubber spatula – For folding in any add-ins and scraping the bowl.
- Cooling rack – To let the baked ghosts cool completely.
If you’re using a zip-top bag as a piping bag, just be careful not to squeeze too hard, or the bag might burst. I learned that one the hard way! A silicone mat is a worthwhile investment—it provides a non-stick surface that makes cleanup a breeze and helps the meringues bake evenly.
Preparation Method
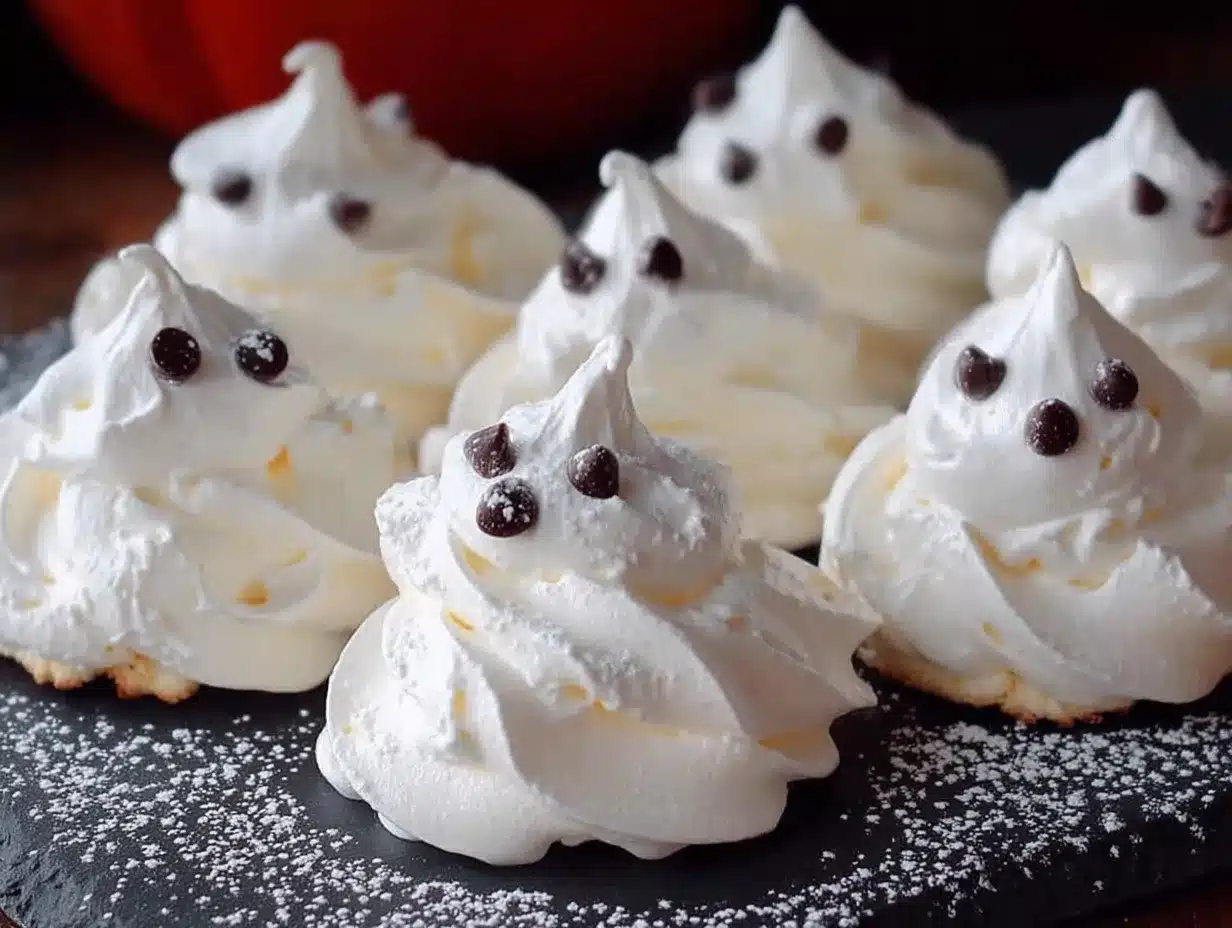
Follow these steps carefully, and you’ll have a sheet full of adorable ghosts in no time. The key is patience during the whipping and baking stages.
- Preheat and Prep: Preheat your oven to 200°F (95°C). Line a large baking sheet with parchment paper or a silicone baking mat. Set aside.
- Whip the Egg Whites: In your clean, dry mixing bowl, combine the room-temperature egg whites and cream of tartar. Using your electric mixer, start on low speed and beat until the mixture is frothy, about 1 minute. You’ll see lots of small bubbles.
- Gradually Add Sugar: With the mixer running on medium speed, start adding the sugar one tablespoon at a time. This is important—adding it all at once can deflate the egg whites. Take your time; it should take about 2-3 minutes to add all the sugar.
- Whip to Stiff Peaks: Increase the speed to high and beat until the meringue is glossy and forms stiff, firm peaks. This means when you lift the whisk attachment, the meringue stands straight up without drooping. It should also feel smooth, not gritty, between your fingers. If it feels gritty, the sugar hasn’t dissolved yet, so keep beating. This usually takes 5-7 minutes total.
- Add Flavor: Add the vanilla extract and the pinch of salt. Beat on high for another 30 seconds until fully combined. The meringue should be thick, glossy, and look like marshmallow fluff.
- Prepare the Piping Bag: Fit your piping bag with the round tip. If using a zip-top bag, snip off about ½ inch from one corner. Fold the top of the bag over your hand to create a cuff, and spoon the meringue into the bag. Don’t overfill it—half full is perfect for control.
- Pipe the Ghosts: Hold the piping bag perpendicular to the baking sheet, about ½ inch above the surface. Squeeze gently to create a small mound for the ghost’s body. As the mound grows, slowly lift the bag straight up to create a slight peak for the head. Stop squeezing and pull the bag away with a quick flick. Each ghost should be about 1.5 to 2 inches tall. Leave about 1 inch of space between each one.
- Add the Faces: This is the fun part. If using mini chocolate chips, gently press two chips into the “head” of each ghost for eyes. If using black gel food coloring, wait until the ghosts are baked and cooled, then pipe on tiny eyes and a mouth. I prefer adding the chips before baking because they stay put perfectly.
- Bake Low and Slow: Place the baking sheet in the preheated oven and bake for 1 hour to 1 hour and 15 minutes. The ghosts are done when they are firm to the touch and can be easily lifted off the parchment paper. They should not be brown at all—just a pure, snowy white. If they start to brown, your oven is too hot.
- Cool Completely: Turn off the oven and leave the ghosts inside with the door slightly ajar (prop it open with a wooden spoon) for another 30 minutes. This helps them dry out completely and prevents cracking. Then, transfer them to a wire rack to cool completely before serving.
Cooking Tips & Techniques
I’ve made these ghost meringue cookies more times than I can count, and I’ve definitely made my share of mistakes. Here are the tips I’ve learned along the way to help you get perfect ghosts every time.
The Biggest Mistake: Over- or Under-whipping. If you don’t whip the egg whites enough, your meringue will be flat and runny. If you overwhip them, they can become dry and grainy. The goal is stiff, glossy peaks that hold their shape. I always do the “bowl test”—if I can turn the mixing bowl upside down over my head (don’t actually do this!) and the meringue stays put, it’s ready. The texture should look like a thick, shiny cloud.
Humidity is the Enemy. Meringue is hygroscopic, meaning it absorbs moisture from the air. Never make these on a rainy or humid day. They will turn out sticky and chewy instead of crisp and light. A dry, cool day is your best bet.
Patience is Key. The low baking temperature is non-negotiable. You are essentially drying out the meringue, not baking it. Rushing this step by turning up the heat will result in cracked, brown ghosts. Trust the process. It’s a great time to clean up the kitchen or start another simple task.
Multitasking Strategy: While the egg whites are whipping (which takes a good 5-7 minutes), you can line your baking sheet and get your piping bag ready. This saves a few minutes. Also, you can make the meringue base a day ahead and store it in an airtight container at room temperature before piping. Just give it a quick re-whip for 30 seconds before using.
Variations & Adaptations
One of the best things about this recipe is how easy it is to change up. Here are a few of my favorite variations to keep things interesting.
- Chocolate Ghosts: Sift 2 tablespoons of unsweetened cocoa powder into the meringue after you’ve reached stiff peaks. Gently fold it in with a rubber spatula until just combined. You’ll get a lovely pale brown ghost that tastes like a chocolate meringue kiss. Delicious!
- Peppermint Ghosts: Swap the vanilla extract for ½ teaspoon of peppermint extract. This gives the cookies a cool, refreshing flavor that is perfect for a holiday twist. You can even crush up a candy cane and sprinkle the pieces on top before baking for a little crunch.
- Gluten-Free & Vegan Option: This recipe is naturally gluten-free, which is a huge win. For a vegan version, use aquafaba (the liquid from a can of chickpeas) instead of egg whites. Use 3 tablespoons of aquafaba per egg white. It whips up exactly the same way! The taste is slightly different, but the texture is spot on.
- Spooky Swirls: Before piping, dip a toothpick into black gel food coloring and swirl it through the meringue in the piping bag. When you pipe, you’ll get a beautiful marbled effect that looks like smoky ghosts. It’s a really cool visual trick.
I once tried a “pumpkin spice” version by adding a teaspoon of pumpkin pie spice to the sugar before whipping. It was a total fail—the spices weighed down the meringue and it fell flat. Stick to dry additions or extracts, not wet purees!
Serving & Storage Suggestions
These ghost meringue cookies are best served at room temperature. They are incredibly light and airy, making them a perfect after-dinner treat or a fun snack for a Halloween party.
Serving Ideas: Pile them on a platter for a “graveyard” effect. You can also stick them into a bowl of chocolate pudding to look like ghosts rising from a swamp. For a festive touch, dust them with a little bit of edible glitter or luster dust before serving. They pair wonderfully with a cup of hot cocoa or a glass of cold milk.
Storage: This is the most important part. Meringues are sensitive to moisture. Store them in an airtight container at room temperature for up to 2 weeks. Do not refrigerate them—the fridge is too humid and will make them sticky. If you live in a humid climate, adding a silica gel packet (the kind you find in shoe boxes) to the container can help keep them crisp.
Freezing: You can freeze baked meringues for up to 3 months. Place them in a single layer in a freezer-safe container with parchment paper between the layers. Thaw them at room temperature for about 15 minutes before serving. They defrost beautifully and taste just like fresh.
The flavors don’t really develop over time like a stew, but the texture does improve. After a day or two, they become even more crisp and dry, which is actually the perfect texture for a meringue.
Nutritional Information & Benefits
I’m not a nutritionist, but I can tell you these are one of the lighter treats you can make. They are naturally fat-free and gluten-free, which is a huge win for a Halloween cookie.
Per ghost (based on making 24 cookies):
- Calories: ~25
- Fat: 0g
- Carbohydrates: 6g
- Sugar: 6g
- Protein: 0.5g
The main health benefit here is that they are fat-free and very low in calories compared to a traditional butter cookie. They are also free from common allergens like dairy and nuts (if you skip the chocolate chips). The egg whites provide a small amount of protein, which is a nice bonus. From a wellness perspective, these are a great “guilt-free” treat. You can have a couple without feeling like you’ve derailed your diet, which is exactly what I need during the candy-filled month of October.
Conclusion
These ghost meringue cookies are the perfect Halloween treat. They are simple, fun to make, and absolutely delicious. You don’t need to be a professional baker to pull them off, and they always get a huge reaction from kids and adults alike. Honestly, they are the kind of recipe that makes you look like a hero with almost zero effort.
I encourage you to make them your own. Play with the flavors, try different face designs, or get the kids involved in piping. The best part is that even the “ugly” ones taste amazing. So go ahead, give them a try, and let me know how they turn out. Did you use chocolate chips or piped faces? I’d love to hear about your ghost creations in the comments below! Happy Halloween baking!
Frequently Asked Questions
Can I make these ghost meringue cookies on a rainy day?
It’s not recommended. Meringue absorbs moisture from the air, so a humid or rainy day will make them sticky and chewy rather than crisp. Wait for a dry day for the best results.
Why did my meringue deflate?
This usually happens for a few reasons: your bowl or whisk had a trace of grease, you added the sugar too quickly, or you over-whipped the egg whites. Make sure your equipment is spotless and add the sugar slowly.
Can I use liquid egg whites from a carton?
You can, but the results are not as reliable. Carton egg whites are pasteurized, which can affect their ability to whip up to stiff peaks. Fresh egg whites from whole eggs are always best for meringue.
How do I know when the meringues are done baking?
They are done when they are firm to the touch and lift easily off the parchment paper. They should be completely dry and not sticky. If they start to brown, your oven is too hot.
Can I double this recipe?
Absolutely! This recipe doubles or even triples very easily. Just make sure you have a large enough mixing bowl, as the volume of the whipped meringue will increase significantly. You may also need to bake them in batches.
Pin This Recipe!
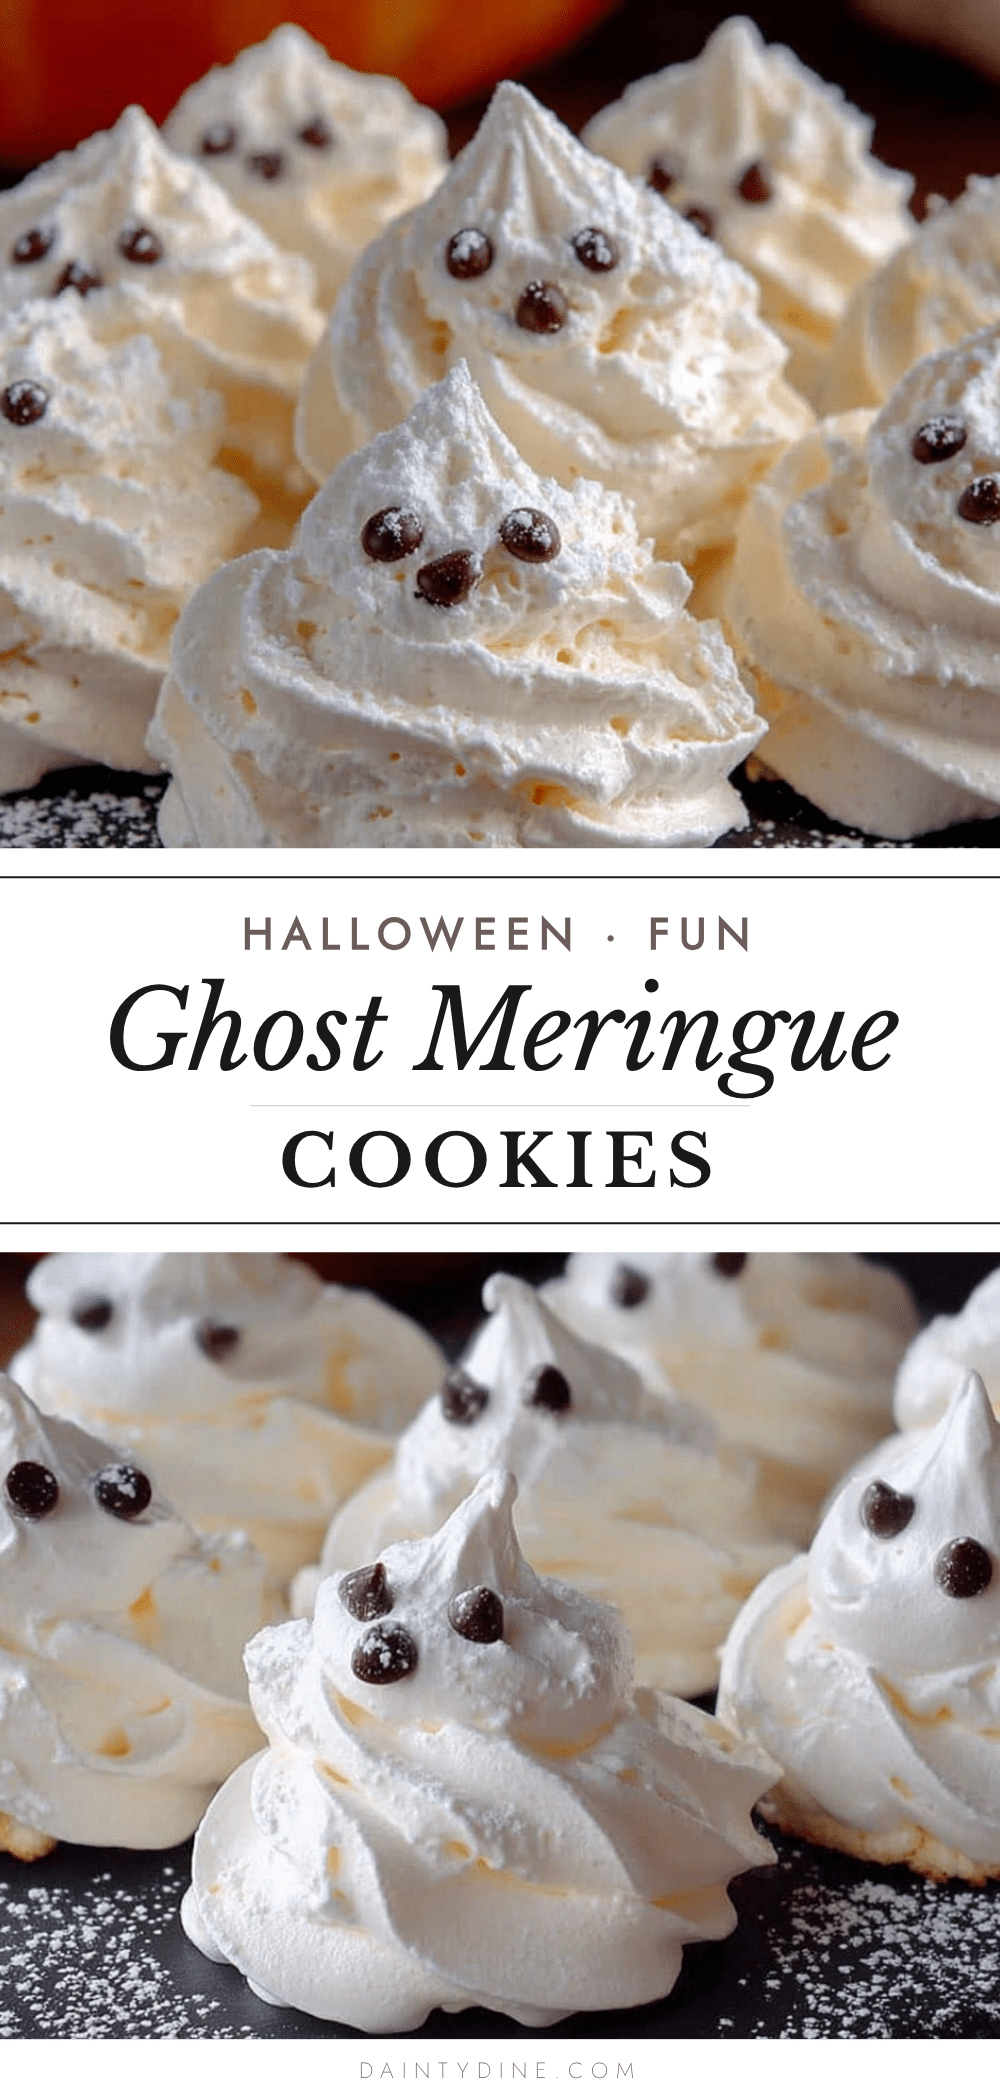
Easy Ghost Meringue Cookies: Best Halloween Treat
These ghost meringue cookies are impossibly light, sweet, and have a charmingly imperfect look that makes them perfect for a spooky season treat. You don’t need to be a pastry chef to pull these off, and they are naturally gluten-free and low in fat.
- Prep Time: 15 minutes
- Cook Time: 1 hour 15 minutes
- Total Time: 2 hours
- Yield: 24 servings 1x
- Category: Dessert
- Cuisine: American
Ingredients
- 3 large egg whites (at room temperature)
- ¾ cup (150g) granulated sugar
- ½ teaspoon cream of tartar
- 1 teaspoon vanilla extract
- Pinch of salt
- Mini chocolate chips or black gel food coloring (for the eyes)
Instructions
- Preheat your oven to 200°F (95°C). Line a large baking sheet with parchment paper or a silicone baking mat.
- In a clean, dry mixing bowl, combine the room-temperature egg whites and cream of tartar. Using an electric mixer, start on low speed and beat until the mixture is frothy, about 1 minute.
- With the mixer running on medium speed, add the sugar one tablespoon at a time over 2-3 minutes.
- Increase the speed to high and beat until the meringue is glossy and forms stiff, firm peaks, about 5-7 minutes total. It should feel smooth, not gritty, between your fingers.
- Add the vanilla extract and pinch of salt. Beat on high for another 30 seconds until fully combined.
- Fit a piping bag with a round tip. Spoon the meringue into the bag.
- Pipe the ghosts onto the prepared baking sheet: hold the piping bag perpendicular to the sheet, squeeze gently to create a small mound, then slowly lift the bag straight up to create a slight peak. Leave about 1 inch of space between each ghost.
- If using mini chocolate chips, gently press two chips into the ‘head’ of each ghost for eyes. If using black gel food coloring, wait until after baking.
- Bake for 1 hour to 1 hour and 15 minutes, until firm to the touch and easily lifted off the parchment. They should remain white.
- Turn off the oven and leave the ghosts inside with the door slightly ajar for 30 minutes. Then transfer to a wire rack to cool completely.
Notes
Use room-temperature egg whites for best volume. Avoid making on humid or rainy days. The low baking temperature is crucial for drying the meringues without browning. Store in an airtight container at room temperature for up to 2 weeks. Do not refrigerate.
Nutrition
- Serving Size: 1 ghost cookie
- Calories: 25
- Sugar: 6
- Sodium: 10
- Carbohydrates: 6
- Protein: 0.5
Keywords: Halloween cookies, meringue cookies, ghost cookies, easy Halloween treats, gluten-free cookies, low-fat cookies


