Love this? Save it for later!
Share the inspiration with your friends
I was standing in line at the hardware store last October, holding a bag of mulch and trying to remember if I needed more light bulbs, when the woman behind me—maybe seventy years old, with a perfectly pressed flannel shirt and the kind of calm that comes from decades of not rushing—started talking about Halloween treats. She wasn’t talking to me at first. She was on the phone with her daughter, describing something called “mummy pretzels” in this offhand way, like everyone already knew what those were. I didn’t. But I was listening. Hard.
“You just wrap them like little bandages,” she said, laughing. “It’s not brain surgery, honey. It’s melted chocolate and pretzels.” She hung up, caught me eavesdropping without even trying to hide it, and just smiled. “Got kids?” she asked. I nodded. “Then you need these.” She told me the whole thing right there between the paint samples and the garden hoses, and I scribbled it on the back of a receipt. Honestly, I thought it was too simple to work. But that night, my kitchen looked like a mummy-making factory and my kids thought I was some kind of Halloween wizard.
That’s the thing about this recipe—it feels almost too easy, but the results are genuinely impressive. Maybe you’ve been there, staring down a classroom party sign-up sheet or a last-minute Halloween get-together, wondering how you’re supposed to come up with something cute and edible without losing your mind. These quick chocolate mummy wrapped pretzel rods are your answer. They take maybe twenty minutes from start to finish, use ingredients you can grab at any grocery store, and honestly, they’re more fun to make than they have any right to be. I’ve been making them every October since that day at the hardware store, and they never get old.
Why You’ll Love This Recipe
Let me tell you why these mummy pretzel rods have become my go-to Halloween recipe year after year. I’ve tested them at parties, classroom events, and even just for a quiet night in with a scary movie, and they deliver every single time.
- Quick & Easy: You can have a full batch done in under 25 minutes. No baking, no complicated steps, no waiting around. The hardest part is keeping the kids from eating the candy eyes before you use them.
- Simple Ingredients: You need pretzel rods, white chocolate or candy melts, and candy eyes. That’s it. Three things. If you want to get fancy, you can add some sprinkles or colored drizzle, but the basic version is perfect as-is.
- Perfect for Halloween: These are made for class parties, trunk-or-treat events, Halloween movie nights, or even as a fun afternoon activity with the kids. They look like you spent way more time than you actually did.
- Crowd-Pleaser: I’ve watched adults sneak these off the platter just as fast as the kids. There’s something about the salty-sweet combo with those googly eyes that makes everyone smile.
- Unbelievably Delicious: The crunch of the pretzel against the smooth white chocolate, plus the little pop of sugar from the candy eyes—it’s a texture and flavor combo that just works. No fancy techniques, just pure comfort food.
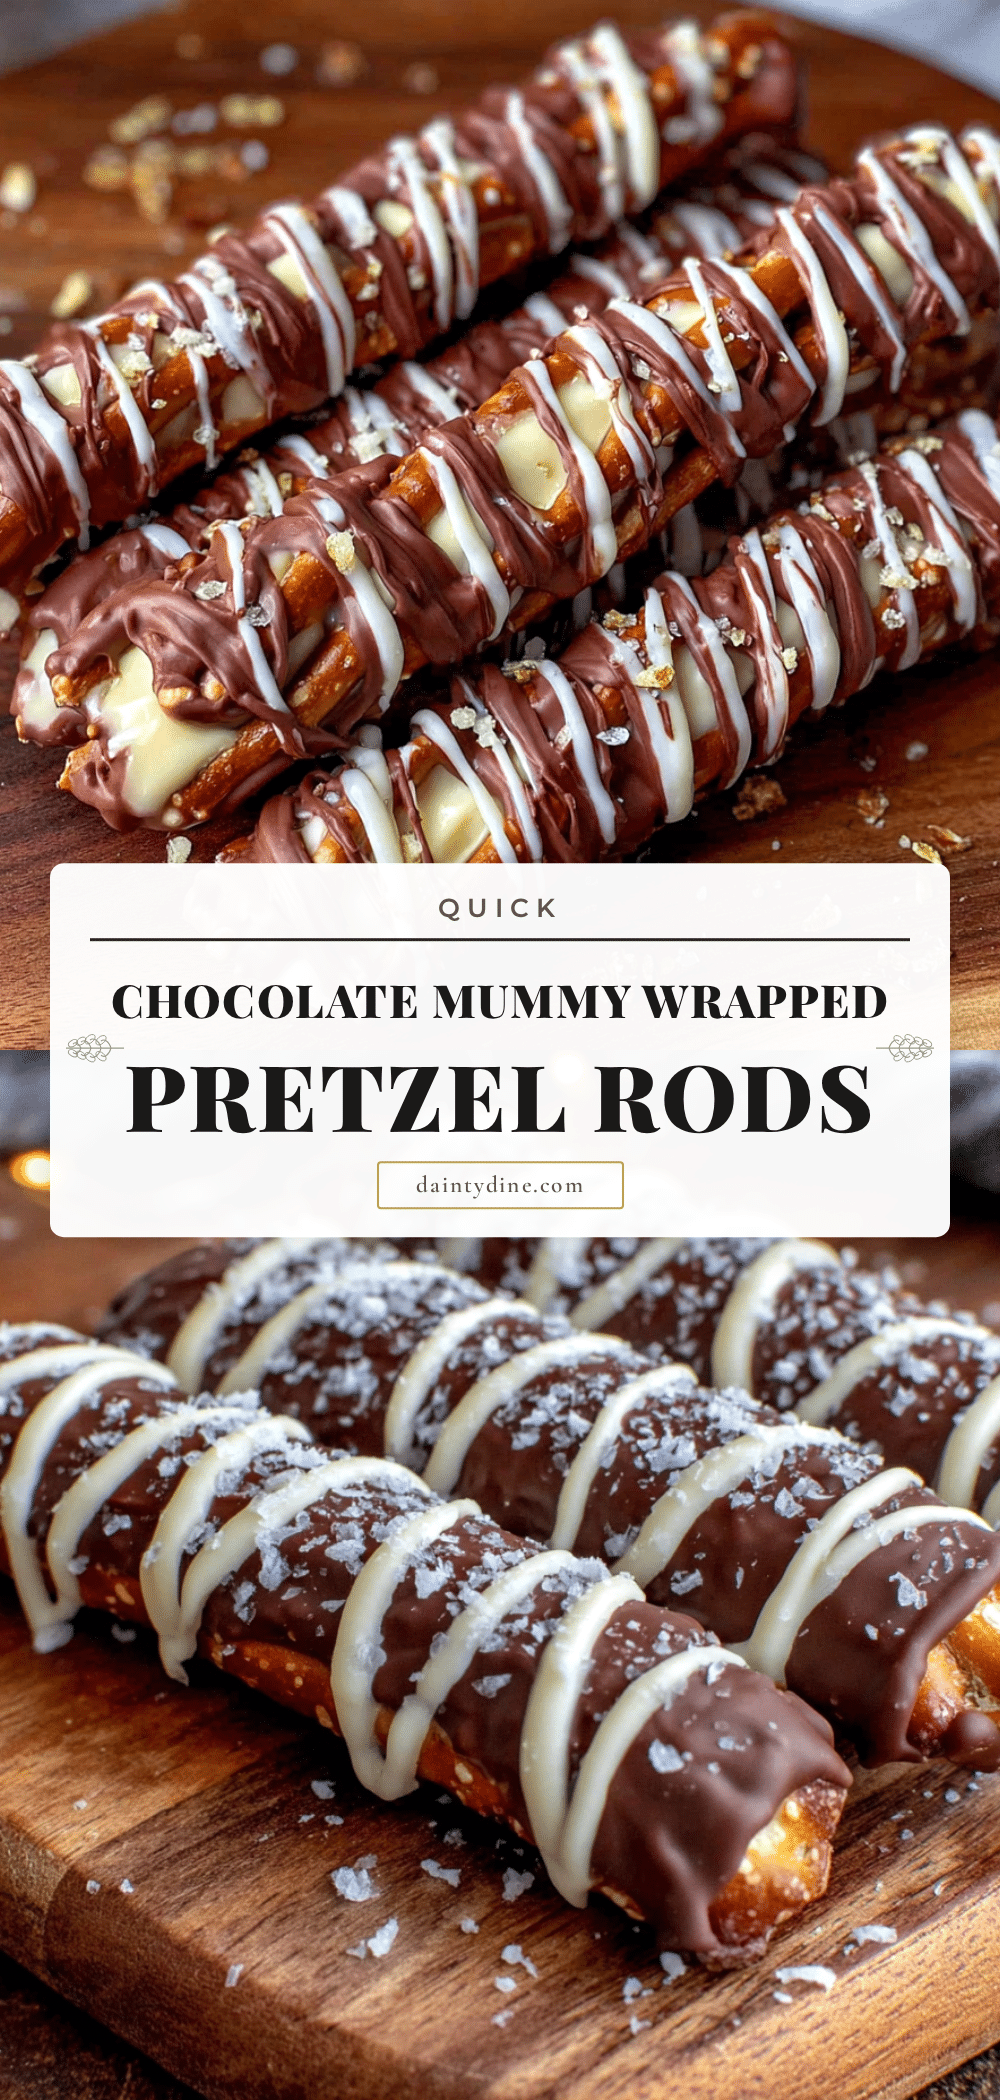
What makes this recipe different from all the other Halloween treats out there? It’s the ratio. I spent a few batches figuring out the perfect amount of chocolate—not too thick that it overwhelms the pretzel, not too thin that it looks sad. The chocolate should look like a proper mummy wrapping, with little gaps where the pretzel peeks through. It’s that balance that makes these feel like a real treat instead of just a chocolate-covered pretzel with eyes stuck on. And honestly, the first time you see a platter of these little guys staring up at you, you’re going to laugh. That’s the whole point.
What Ingredients You Will Need
This recipe uses the simplest ingredients to create something that looks deceptively elaborate. Here’s what you’ll need, along with a few tips I’ve picked up from making these more times than I can count.
- Pretzel rods (about 24 rods) – Look for thick, sturdy pretzel rods, not the thin little sticks. The thick ones hold the chocolate better and give you more surface area to work with. I usually grab the store brand and they work fine. If you can find extra-long rods, even better—they look more dramatic on the platter.
- White chocolate melting wafers or candy melts (12 ounces) – This is where I have a strong opinion. Use melting wafers or candy melts, not regular white chocolate chips. Regular chips don’t melt as smoothly and can get clumpy, which makes the wrapping part frustrating. I like the Ghirardelli melting wafers if I’m feeling fancy, but the Wilton candy melts work great too and come in white or vanilla flavors. You can also use almond bark in a pinch—it melts beautifully and gives a nice shine.
- Candy eyes (about 48 eyes, so 2 per mummy) – The standard size works best. Not the tiny ones that disappear into the chocolate, and not the huge ones that look ridiculous. You can find them at craft stores or in the baking aisle, usually near the cake decorating supplies. I always buy extra because someone will eat them straight out of the package, and also because some will inevitably end up on the floor.
- Coconut oil or shortening (1 teaspoon, optional) – This is my secret weapon. Adding a tiny bit of coconut oil to the melting chocolate makes it thinner and easier to drizzle, plus it gives a nice sheen when it sets. If you don’t have it, don’t stress—the recipe works without it.
- Parchment paper or wax paper – You need something for the finished mummies to set on. Parchment paper is non-stick and easy to clean up. Wax paper works too, but it can curl up a bit. I’ve used aluminum foil in a pinch and it’s fine, just not as non-stick.
- Optional decorations: Orange or black sprinkles, edible glitter, or a drizzle of dark chocolate for contrast. I sometimes add a little orange sprinkle “hair” on top for extra personality, but the plain white mummies are classic and always a hit.
One ingredient tip I learned the hard way: check the expiration date on your candy melts. I once grabbed a bag that had been sitting in my pantry for who knows how long, and they seized up into a grainy mess when I tried to melt them. Fresh candy melts make all the difference. Also, if you’re making these with kids, pre-measure everything before you start. Trust me on this one.
Equipment Needed
You don’t need a lot of fancy equipment for these mummy pretzel rods, which is part of why I love this recipe. Here’s what you’ll want to have on hand:
- Microwave-safe bowl – Any medium bowl works. Glass or ceramic is best because they heat evenly. I use a Pyrex measuring cup sometimes because the pour spout makes drizzling easier.
- Spatula or spoon – For stirring the melting chocolate and for helping to drizzle it onto the pretzels. A small offset spatula is nice but totally not necessary.
- Baking sheet or large plate – Lined with parchment paper, this is where your finished mummies will set. You need enough space to lay out 24 pretzel rods without them touching.
- Piping bag or zip-top bag – For drizzling the chocolate in those mummy-style lines. A small zip-top bag with the corner snipped off works perfectly. You can also use a spoon if you’re not worried about perfect lines.
- Toothpicks – Handy for placing the candy eyes without getting chocolate all over your fingers. Also useful for fixing any drips or smudges.
- Small bowl or cup – For holding your candy eyes within easy reach. Trust me, you don’t want to be hunting for them with chocolate-covered hands.
If you don’t have a microwave, you can melt the chocolate in a double boiler on the stovetop. It takes a few extra minutes but works just as well. And honestly, I’ve used a butter knife to drizzle chocolate before when I couldn’t find my piping bag. It’s not pretty, but it works. This recipe is forgiving like that.
Preparation Method

Alright, let’s get to the fun part. Here’s how to make these quick chocolate mummy wrapped pretzel rods, step by step. I’ve included all the little details I wish someone had told me the first time.
- Set up your workspace. Line a baking sheet with parchment paper and set it aside. Pour your candy eyes into a small bowl or cup so they’re easy to grab. If you’re using coconut oil, measure it out now. Having everything ready before you start melting chocolate will save you from a sticky disaster. I learned this after frantically searching for candy eyes while chocolate dripped everywhere.
- Melt the white chocolate. Place your white chocolate melting wafers or candy melts in a microwave-safe bowl. Microwave in 30-second intervals, stirring well after each interval. It usually takes about 1.5 to 2 minutes total. Stop when the chocolate is mostly melted with just a few small lumps, then stir until it’s completely smooth. If you’re using the coconut oil, stir it in now. The chocolate should be smooth, glossy, and thin enough to drizzle easily. If it’s too thick, add another tiny splash of coconut oil or a few more seconds in the microwave. Be careful not to overheat—burnt white chocolate smells terrible and turns grainy.
- Transfer the chocolate to a piping bag. Spoon the melted chocolate into a small zip-top bag or piping bag. If using a zip-top bag, snip off a tiny corner—like, really tiny, smaller than you think you need. You can always cut more off, but you can’t undo a hole that’s too big. I speak from experience when I say that a too-big hole makes a mess.
- Start wrapping the mummies. Hold a pretzel rod over the parchment-lined baking sheet. Drizzle the white chocolate back and forth across the pretzel in a zigzag pattern, like you’re wrapping a mummy. Leave small gaps so the pretzel shows through—that’s what makes it look like bandages. Don’t try to cover the whole thing completely. The gaps are part of the charm. Rotate the pretzel as you go to get all sides. This is the step where kids can really help, and honestly, the imperfect ones look the most authentic.
- Add the eyes. While the chocolate is still wet, press two candy eyes onto the upper third of the pretzel. Use a toothpick to nudge them into place if your fingers are getting chocolatey. The eyes should be close together but not touching. Don’t press them too hard or they’ll sink into the chocolate. You want them sitting on top, staring out at the world. If the chocolate starts to set before you add the eyes, you can microwave the chocolate briefly to rewarm it, or just press the eyes gently—they’ll stick.
- Set the mummies. Place the finished mummy on the parchment-lined baking sheet. Repeat with the remaining pretzels and chocolate. Work in batches if you need to—the chocolate in the piping bag will start to cool and thicken, so if it gets hard to drizzle, pop it in the microwave for 10-15 seconds to rewarm it. Let the finished mummies sit at room temperature until the chocolate is completely set, about 15-20 minutes. If you’re in a hurry, you can pop them in the fridge for 5-10 minutes, but don’t leave them too long or the condensation can make the chocolate spotty.
- Finishing touches (optional). Once the chocolate is set, you can add extra decorations. Drizzle a little dark chocolate on top for contrast, or sprinkle on some orange or black sprinkles while the chocolate is still wet. I sometimes add a tiny dot of red gel icing to make the eyes look spooky, but that’s totally extra. The plain white mummies are adorable on their own.
A few sensory cues to watch for: the chocolate should look glossy and smooth when it’s melted, not thick and pasty. When you drizzle it, you should see the pretzel clearly through the gaps. The finished mummies should feel firm to the touch, with the chocolate set but not rock hard. If the chocolate looks dull or streaky after setting, you probably overheated it—still edible, just not as pretty.
Cooking Tips & Techniques
I’ve made these mummy pretzel rods enough times to have a few tricks up my sleeve. Here are the things I wish I’d known from the beginning.
Don’t overmelt the chocolate. This is the number one mistake I see people make. White chocolate is sensitive. If you microwave it too long or too hot, it seizes up into a thick, grainy mess that won’t drizzle properly. Always use 30-second intervals and stir between each one. When it looks almost melted with just a few tiny lumps, stop and stir until it’s smooth. The residual heat will finish the job.
Work in small batches. If you’re making a big batch for a party, don’t try to drizzle all 24 pretzels at once. Melt half the chocolate, make 12 mummies, then melt the other half. The chocolate in the piping bag will cool down and thicken as you work, so smaller batches keep everything flowing smoothly. I usually do 6-8 at a time and that feels manageable.
Use a steady hand, but don’t stress. The zigzag drizzle doesn’t have to be perfect. In fact, the messier it looks, the more it looks like a mummy. I’ve had batches where the chocolate was all over the place and they ended up being the cutest ones. Let go of the perfectionism. This is supposed to be fun.
Keep the candy eyes within reach. I cannot stress this enough. Once you start drizzling, you have about 30 seconds before the chocolate starts to set. If you have to hunt for the eyes, you’ll end up with sad, eyeless mummies. Put them in a little bowl right next to your work area. Your future self will thank you.
If the chocolate starts to thicken, rewarm it. Don’t try to force thick chocolate through a tiny piping bag hole. You’ll end up with a burst bag and chocolate everywhere. Just pop the bag in the microwave for 10 seconds, massage it gently to redistribute the heat, and keep going. This is totally normal and happens to everyone.
One failure I’ll never forget: I tried to make these on a humid summer day for a Halloween-in-July party. The chocolate refused to set properly and stayed tacky for hours. Humidity is the enemy of melted chocolate. If it’s a rainy or humid day, air conditioning or a fan can help, or just plan to make these on a drier day. You can also refrigerate them to speed up setting, but let them come to room temperature before serving to avoid condensation.
Variations & Adaptations
One of the best things about this recipe is how easy it is to adapt. Here are some variations I’ve tried over the years, plus a few ideas from friends who’ve put their own spin on it.
Dark Chocolate Mummies: Swap the white chocolate for dark or milk chocolate melts. The dark chocolate gives a more sophisticated look and pairs beautifully with the salty pretzel. I made a batch of dark chocolate mummies for a Halloween dinner party and the adults went crazy for them. The candy eyes stand out really well against the dark background too.
Gluten-Free Option: This recipe is naturally gluten-free if you use certified gluten-free pretzel rods. Most standard pretzel rods contain wheat flour, but there are several gluten-free brands available now. I’ve used Snyder’s gluten-free pretzel rods and they work perfectly. Just double-check your candy melts too—most are gluten-free, but it’s worth reading the label.
Spider Variation: Instead of mummies, turn the pretzels into spiders. Use dark chocolate as the base, then add eight candy legs (use thin pretzel sticks broken in half) and two candy eyes. These are a little more work but look amazing on a Halloween platter mixed in with the mummies.
Colorful Mummies: Use colored candy melts instead of white. Green, orange, or purple mummies are fun for a more colorful Halloween spread. I made a batch of green ones once and called them “zombie pretzels.” The kids thought that was hilarious. You can also swirl two colors together for a marbled effect.
Add Sprinkles: Before the chocolate sets, sprinkle on some Halloween-themed sprinkles—orange and black jimmies, little pumpkins, or bats. The sprinkles add crunch and color, and they make the mummies look even more festive. Just don’t go overboard or you’ll hide the mummy wrapping effect.
Spicy Kick: For the adults, sprinkle a tiny bit of cayenne pepper or chili powder onto the chocolate before it sets. The heat pairs surprisingly well with the sweet white chocolate and salty pretzel. I tried this on a whim one year and it was a hit at our Halloween party. Just label them clearly so no unsuspecting kid grabs one.
Serving & Storage Suggestions
These mummy pretzel rods are best served at room temperature, which is convenient because that’s exactly how they set. Arrange them on a platter with the eyes facing outward so people can see the cute faces. I like to stand them up in a tall cup or jar for a dramatic presentation—it makes them look like a bouquet of mummies, which is both weird and wonderful.
For a Halloween party, I arrange them on a black platter with some fake spider webs or plastic spiders scattered around. You can also stick them into a pumpkin or a foam block covered in orange tissue paper for a centerpiece that doubles as a snack. If you’re bringing them to a classroom party, lay them flat in a single layer in a container lined with parchment paper.
Storage is simple: keep them in an airtight container at room temperature for up to a week. Don’t refrigerate them unless you absolutely have to, because the condensation can make the chocolate look blotchy. If you do refrigerate them, let them come to room temperature before serving to avoid that sweaty look. You can also freeze them for up to a month—just layer them between sheets of parchment paper in a freezer-safe container. Thaw at room temperature for about 30 minutes before serving.
One thing I’ve noticed: these actually get better after a day or two. The flavors meld together and the chocolate firms up nicely. So don’t stress about making them the day before—in fact, I often prefer to make them a day ahead. Just keep them in a cool, dry place and they’ll be perfect.
They pair wonderfully with hot apple cider, pumpkin spice lattes, or even a glass of cold milk. For a Halloween movie night, I serve them alongside popcorn and caramel apples for the ultimate treat spread. They also make great party favors—wrap a few in a clear cellophane bag tied with orange ribbon and you’ve got an instant gift.
Nutritional Information & Benefits
Let’s be honest: these are a treat, not a health food. But if you’re curious about what’s in them, here’s the breakdown. Per serving (one mummy pretzel rod), you’re looking at approximately 120-150 calories, depending on how much chocolate you use. Each one has about 3 grams of protein from the pretzel, 15 grams of carbohydrates, and 7 grams of fat. The sugar content is around 10 grams, mostly from the white chocolate.
On the plus side, pretzels are lower in fat than many other snack options, and they provide a small amount of iron and B vitamins. The white chocolate doesn’t offer much nutritional value, but it does provide a little calcium. If you use dark chocolate melts instead, you’ll get some antioxidants, which is a nice bonus.
For those with dietary restrictions: this recipe contains dairy (white chocolate) and gluten (pretzels), plus the candy eyes may contain traces of soy or other allergens. For a dairy-free version, use dairy-free dark chocolate chips or vegan candy melts. For gluten-free, use certified gluten-free pretzel rods. The candy eyes are typically free of major allergens, but always check the package to be safe. And if you’re avoiding artificial colors, look for naturally colored candy melts or use a simple white chocolate drizzle with no added coloring.
My personal take: I don’t make these for their nutritional value. I make them because they bring joy to a Halloween party, because my kids’ faces light up when they see them, and because sometimes you need a treat that’s just pure fun. Balance is everything.
Conclusion
These quick chocolate mummy wrapped pretzel rods have become a staple in my Halloween rotation for one simple reason: they work. They’re fast enough for a last-minute classroom party, cute enough to impress at a Halloween gathering, and simple enough that even the youngest helper can get involved. That woman at the hardware store had no idea she was passing along a tradition, but here we are, years later, and I still think of her every time I make them.
What I love most about this recipe is how customizable it is. You can make them spooky or silly, elegant or kid-friendly, all with the same basic technique. Add sprinkles, change the chocolate color, turn them into spiders—the possibilities are endless. Don’t be afraid to experiment and make them your own. That’s the whole point of cooking, isn’t it?
I’d love to hear how your mummies turn out! Drop a comment below and let me know if you tried any variations, or share a photo of your Halloween treat spread. And if you’re looking for more easy Halloween recipes, check out my spider web dip and pumpkin patch brownies—they pair perfectly with these mummies for a full Halloween spread. Happy haunting, and happy snacking!
Frequently Asked Questions
Can I use regular white chocolate chips instead of melting wafers?
You can, but they’re harder to work with. Regular white chocolate chips contain stabilizers that make them thick and clumpy when melted. If that’s all you have, add a teaspoon of coconut oil or shortening to help thin them out. Melting wafers or candy melts are designed to flow smoothly and set with a nice shine, so they’re worth seeking out if you can.
How far in advance can I make these mummy pretzels?
You can make them up to a week ahead. Store them in an airtight container at room temperature, away from heat and humidity. I’ve even made them two weeks ahead for a party and they were still perfect. Just don’t refrigerate them unless you have to, and if you do, let them come to room temperature before serving to avoid condensation.
Can I make these without a piping bag?
Absolutely. You can use a spoon to drizzle the chocolate over the pretzels, or dip the pretzels directly into the melted chocolate and let the excess drip off. The look will be different—more coated than wrapped—but they’ll still be delicious. You can also use a fork to drizzle the chocolate by dipping it in and flicking it over the pretzel. Get creative with whatever you have on hand.
My chocolate seized up and got grainy. What went wrong?
This usually happens when the chocolate gets too hot or when a tiny bit of water gets into the bowl. White chocolate is especially sensitive to both heat and moisture. If this happens, you can try stirring in a tablespoon of vegetable oil or shortening to smooth it out, but sometimes it’s a lost cause. The best prevention is to microwave in short intervals and make sure your bowl and utensils are completely dry.
Can I use these as party favors or gifts?
Yes, they make fantastic party favors! Once the chocolate is fully set, wrap each mummy pretzel in a small cellophane bag and tie it with a ribbon or twist tie. You can also arrange them in a small gift box lined with tissue paper. They travel well as long as they’re not jostled too much. I’ve given them as teacher gifts, Halloween party favors, and even as a fun surprise for coworkers.
Pin This Recipe!
Easy Chocolate Mummy Pretzel Rods Recipe
Quick and easy Halloween treat made with pretzel rods, white chocolate, and candy eyes. Perfect for parties, classroom events, or a fun activity with kids.
- Prep Time: 10 minutes
- Cook Time: 5 minutes
- Total Time: 25 minutes
- Yield: 24 servings 1x
- Category: Dessert
- Cuisine: American
Ingredients
- 24 pretzel rods (thick, sturdy)
- 12 ounces white chocolate melting wafers or candy melts
- 48 candy eyes (standard size)
- 1 teaspoon coconut oil or shortening (optional)
- Parchment paper or wax paper
- Optional: orange or black sprinkles, edible glitter, dark chocolate for drizzle
Instructions
- Set up your workspace: Line a baking sheet with parchment paper. Pour candy eyes into a small bowl. If using coconut oil, measure it out.
- Melt the white chocolate: Place melting wafers in a microwave-safe bowl. Microwave in 30-second intervals, stirring well after each, until mostly melted (about 1.5-2 minutes). Stir until smooth. If using, stir in coconut oil.
- Transfer chocolate to a piping bag: Spoon melted chocolate into a small zip-top bag or piping bag. Snip off a tiny corner.
- Wrap the mummies: Hold a pretzel rod over the parchment. Drizzle chocolate in a zigzag pattern, leaving gaps so pretzel shows through. Rotate to cover all sides.
- Add eyes: While chocolate is wet, press two candy eyes onto the upper third of the pretzel. Use a toothpick to adjust if needed.
- Set the mummies: Place finished mummy on parchment. Repeat with remaining pretzels. Let sit at room temperature until chocolate is set, about 15-20 minutes. For faster setting, refrigerate 5-10 minutes.
- Finishing touches (optional): Add dark chocolate drizzle, sprinkles, or other decorations while chocolate is still wet.
Notes
Use melting wafers or candy melts for best results; regular white chocolate chips may clump. Work in small batches to keep chocolate from thickening. Humidity can prevent chocolate from setting properly. Store in airtight container at room temperature for up to a week.
Nutrition
- Serving Size: 1 mummy pretzel rod
- Calories: 135
- Sugar: 10
- Sodium: 200
- Fat: 7
- Saturated Fat: 4
- Carbohydrates: 15
- Protein: 3
Keywords: Halloween treats, mummy pretzels, chocolate pretzel rods, easy Halloween recipe, no-bake dessert


