Love this? Save it for later!
Share the inspiration with your friends
There used to be a tiny farm-to-table spot tucked away on a side street in Hudson, New York, called The Gathered Table that made roasted acorn squash rings that I still think about at odd hours. When they closed their doors after the owner retired in 2019, I honestly felt a little bereft. After twelve tries — some burnt, some soggy, one that my husband politely called “interesting” — I finally got it. The secret? A double-sided caramelization trick that took me way too long to figure out, but let me tell you, it was worth every failed attempt.
I remember the first time I ordered them at that restaurant. It was a chilly October evening, and I was sitting at a wobbly table near the window. The waiter placed this plate in front of me, and I swear the rings were glowing — like someone had brushed them with edible gold. The edges were crispy, the centers were tender, and there was this sticky-sweet glaze that made me close my eyes after the first bite. My friend Sarah laughed at me, but I didn’t care. I was too busy trying to figure out how they got that perfect balance of savory and sweet. Maybe you’ve been there — that moment when a simple side dish steals the entire show.
What kept me coming back to recreate this recipe was the way those squash rings made everyone at the table stop talking. There’s something about food that looks this beautiful and tastes this good that just commands attention, you know? I mean, it’s just squash — but when you caramelize it right, it becomes this thing. This showstopper. And after years of tweaking and testing, I can finally share it with you. Trust me, once you make these for a gathering, people will ask you for the recipe before the plates are cleared.
Why You’ll Love This Recipe
Let me be honest with you — I’ve tested this recipe more times than I care to admit. I’ve roasted acorn squash at every temperature imaginable, tried every oil, and even experimented with different types of sugar. What I’m sharing with you today is the version that has never failed me, whether I’m cooking for a casual family dinner or a holiday party where the stakes feel higher. Here’s why this one is different:
- Stunning Presentation: The ring shape makes this dish look like you spent hours in the kitchen when really, it comes together with minimal effort. Your guests will think you’re a culinary genius.
- Perfect for Hosting: You can prep these rings completely ahead of time and pop them in the oven right before guests arrive. No last-minute scrambling, no stress — just a gorgeous dish that makes you look like a pro.
- Simple Pantry Ingredients: Acorn squash, butter, brown sugar, and a few spices. That’s it. No hunting down specialty items or spending a fortune at the grocery store.
- Naturally Sweet and Savory: The caramelization process creates this incredible depth of flavor that satisfies both sweet and savory cravings. It’s the side dish that everyone, including picky eaters, reaches for seconds of.
- Crowd-Pleasing Magic: I’ve brought these to potlucks, Thanksgiving dinners, and casual get-togethers. Every single time, people hover around the dish. Kids love the sweet caramelized edges, and adults appreciate the sophisticated flavor profile.
What really sets this recipe apart is the double-sided caramelization technique. Most recipes only caramelize one side of the squash, leaving the other side pale and uninteresting. By flipping the rings halfway through and brushing them with an extra layer of glaze, you get that gorgeous golden-brown crust on both sides. It’s a small step that makes a massive difference — the kind of trick you learn after making the same mistake a dozen times.
This recipe is the kind that makes you feel like a confident host. You know that feeling when you bring a dish to the table and everyone’s eyes go wide? That’s what we’re going for here. It’s comfort food that looks elegant, simple ingredients that taste extraordinary, and a method that’s forgiving enough for a Tuesday night but impressive enough for a holiday feast.
What Ingredients You Will Need
This recipe relies on a handful of simple, wholesome ingredients that work together to create something truly special. Each component plays a specific role in building that perfect caramelized exterior and tender interior. Here’s what you’ll need:
For the Squash:
- 2 medium acorn squash (about 1.5 pounds each) — Look for squash that feels heavy for its size with firm, unblemished skin. The deeper the orange color on the flesh, the sweeter the squash will be. I personally prefer squash from farmers’ markets when they’re in season, but grocery store squash works beautifully too.
- 3 tablespoons unsalted butter, melted — I recommend using a good quality butter like Kerrygold or Plugrà for the richest flavor. The butter helps the sugar caramelize evenly and adds that irresistible richness. If you’re dairy-free, you can substitute with a high-quality vegan butter or coconut oil.
- 3 tablespoons brown sugar, packed — Light or dark brown sugar both work, but dark brown sugar will give you a deeper, more molasses-like flavor. The sugar is what creates that gorgeous caramelized crust, so don’t skip it. You can substitute with coconut sugar or maple sugar if needed.
- 1 teaspoon ground cinnamon — This warm spice complements the natural sweetness of the squash beautifully. I like to use Ceylon cinnamon for a milder, more complex flavor, but regular cinnamon works just fine.
- 1/2 teaspoon ground nutmeg — Freshly grated nutmeg makes a noticeable difference here. It adds that cozy, aromatic quality that makes these rings taste like fall on a plate.
- 1/2 teaspoon salt — Don’t skip the salt! It balances the sweetness and enhances all the other flavors. I use fine sea salt for even distribution.
- 1/4 teaspoon black pepper — This might seem unusual for a sweet dish, but a tiny bit of pepper adds warmth and complexity without making things spicy. Trust me on this one.
For the Glaze (Optional but Recommended):
- 2 tablespoons maple syrup — Pure maple syrup, not pancake syrup. This adds an extra layer of sweetness and helps the caramelization process. Grade A dark amber is my go-to for its robust flavor.
- 1 tablespoon balsamic vinegar — This is my secret weapon. The acidity cuts through the sweetness and adds this incredible depth that makes people wonder what’s in it. A good quality balsamic makes a difference here.
For Garnish:
- Fresh thyme or rosemary sprigs — Optional but highly recommended for presentation. The herbs add a pop of green and a subtle savory note that balances the sweetness.
- Flaky sea salt — A sprinkle of Maldon or similar flaky salt right before serving adds a lovely crunch and a burst of salty flavor that contrasts beautifully with the caramelized sugar.
Ingredient Notes and Substitutions:
- If you can’t find acorn squash, butternut squash or delicata squash work as substitutes. Delicata is especially nice because you don’t need to peel it.
- For a lower-sugar version, reduce the brown sugar to 2 tablespoons and use a sugar-free maple syrup alternative. The caramelization won’t be as dramatic, but it will still taste delicious.
- I’ve tested this with ghee instead of butter, and it works beautifully. Ghee has a higher smoke point, which helps prevent burning.
- If you’re serving a crowd, you can easily double or triple this recipe. Just make sure you use a large enough baking sheet — overcrowding will prevent proper caramelization.
Equipment Needed
You don’t need any fancy equipment to make these caramelized acorn squash rings, which is part of what makes this recipe so approachable. Here’s what you’ll need:
- Sharp chef’s knife — A good knife makes cutting through acorn squash so much easier. I learned the hard way that using a dull knife with winter squash is a recipe for disaster. A 8-inch chef’s knife works perfectly.
- Large cutting board — You’ll want a stable surface for cutting the squash. Place a damp paper towel under your cutting board to keep it from sliding around.
- Baking sheet — A rimmed baking sheet is essential to catch any caramelized juices. I prefer using a half-sheet pan (18×13 inches) for even heat distribution. Avoid non-stick pans if possible, as they don’t brown as well.
- Parchment paper or silicone baking mat — This makes cleanup a breeze and prevents the caramelized sugar from sticking to your pan. Trust me, you don’t want to scrub burnt sugar off a baking sheet.
- Melted butter brush — A silicone pastry brush works best for applying the butter mixture evenly. If you don’t have one, you can use a spoon to drizzle the mixture over the rings.
- Measuring spoons — For accurate measurements of the spices and sugar. I’ve learned that eyeballing the salt can lead to disaster.
- Small bowl — For mixing the butter, sugar, and spices together before brushing.
Budget-Friendly Alternatives:
- No pastry brush? No problem. Use a clean basting brush or simply spoon the mixture over the rings and spread it with the back of the spoon.
- No parchment paper? Aluminum foil works in a pinch, though the caramelization might not be as even. Just be sure to grease the foil well.
- I’ve made these with a $15 baking sheet from a discount store, and they turned out beautifully. You don’t need expensive equipment — just a hot oven and a little patience.
Preparation Method
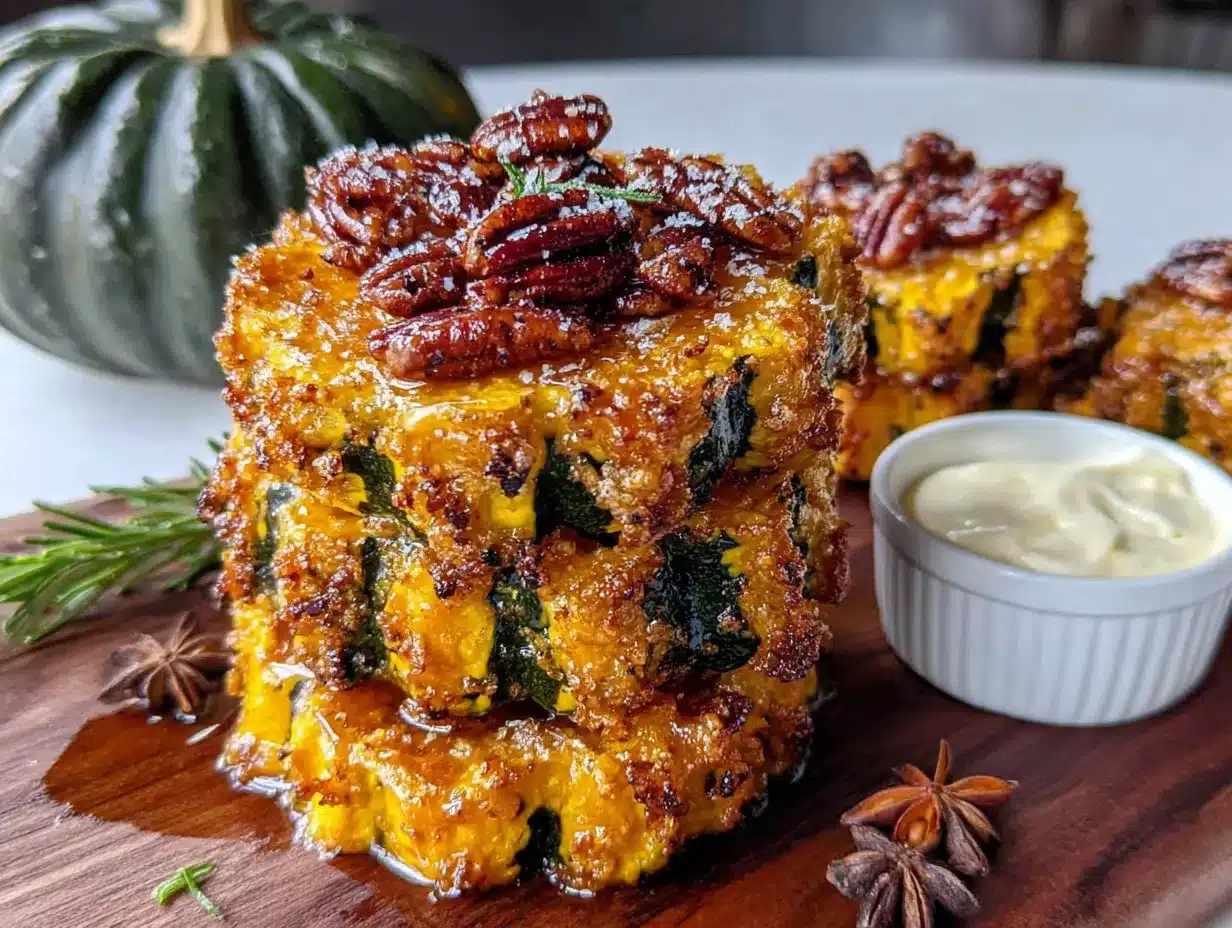
Let me walk you through this step by step. I’ve included all the little details I wish someone had told me when I was first figuring this out. Take your time with the first few steps — proper preparation makes all the difference.
- Preheat your oven to 400°F (200°C). Position the rack in the middle of the oven. While the oven heats up, line a large baking sheet with parchment paper or a silicone baking mat. Trust me, you don’t want to skip the lining — caramelized sugar is a nightmare to clean off bare metal.
- Prepare the squash. Using a sharp chef’s knife, carefully cut off the stem end and the bottom tip of each acorn squash so they sit flat on your cutting board. This is a safety tip I learned after nearly losing a fingertip — a stable squash is a safe squash. Then, cut each squash crosswise into 1/2-inch (1.25 cm) thick rings. You should get about 4 to 5 rings per squash, depending on size. Use a spoon or a small knife to scrape out the seeds and stringy pulp from the center of each ring. Don’t worry about being too precise — a little stringiness left behind will cook away in the oven.
- Make the butter mixture. In a small bowl, combine the melted butter, brown sugar, cinnamon, nutmeg, salt, and black pepper. Stir until everything is well combined and the sugar has mostly dissolved. The mixture should look like a thick, fragrant paste. Give it a taste — it should be sweet with a warm spice kick and a hint of salt. Adjust the seasoning if needed.
- Arrange the rings. Place the squash rings in a single layer on your prepared baking sheet. Make sure they’re not touching each other — if they’re crowded, they’ll steam instead of caramelize, and you’ll end up with sad, soggy rings. Leave a little space between each ring for the hot air to circulate.
- Brush the first side. Using your pastry brush, generously brush the butter mixture onto the top of each ring. Don’t be shy here — you want a nice coating on every ring. The mixture will seem thick, but it will melt and spread as it bakes. Reserve about half of the mixture for the second side.
- Roast for 15 minutes. Place the baking sheet in the preheated oven and roast for 15 minutes. During this time, the sugar will start to melt and bubble, and you’ll begin to smell that incredible caramelized aroma. This is the point where my kitchen starts smelling like a fancy bakery, and I always take a moment to just breathe it in.
- Flip and brush again. After 15 minutes, carefully remove the baking sheet from the oven. Using a spatula, flip each ring over. Be gentle — the rings will be tender but should hold their shape. Brush the second side with the remaining butter mixture. This double-brushing is the secret to that all-over caramelization I mentioned earlier.
- Roast for another 12-15 minutes. Return the baking sheet to the oven and roast until the rings are tender and deeply caramelized on both sides. You’re looking for a deep golden-brown color with slightly darker edges. The rings should be easily pierced with a fork but still hold their shape. If you want extra caramelization, you can switch the oven to broil for the last 1-2 minutes — but watch them carefully, because sugar burns fast.
- Optional glaze step. If you’re using the maple-balsamic glaze, whisk together the maple syrup and balsamic vinegar in a small bowl. During the last 5 minutes of roasting, brush this mixture over the rings. It will create an even stickier, more complex caramelized coating that I honestly can’t get enough of.
- Rest and garnish. Remove the baking sheet from the oven and let the rings rest for 2-3 minutes. This allows the caramelized coating to set slightly. Transfer the rings to a serving platter, arrange them in an overlapping pattern for visual appeal, and sprinkle with flaky sea salt and fresh herb sprigs if desired. Serve warm or at room temperature.
Sensory Cues to Watch For:
- At the 10-minute mark, you should hear a gentle sizzling sound — that’s the sugar beginning to caramelize.
- The color should progress from pale yellow to golden to deep amber. If the edges start looking dark brown before the centers are tender, your oven might run hot. Reduce the temperature to 375°F (190°C) next time.
- The smell is unmistakable — warm, sweet, and slightly nutty. When you can smell the caramelized sugar throughout your kitchen, you’re close to done.
Cooking Tips & Techniques
After more failed batches than I’d like to admit, I’ve gathered some hard-won wisdom that will save you from making the same mistakes I did. Here are the tips that made all the difference:
The Even Thickness Rule: This is probably the most important tip I can give you. Try to cut your rings as close to 1/2-inch thick as possible. If some rings are thinner than others, they’ll burn before the thicker ones are done. I actually use a ruler sometimes — yes, I’m that person — and it makes a noticeable difference. If you end up with uneven rings, group the thinner ones on one side of the baking sheet so you can remove them earlier if needed.
Don’t Skip the Flip: I know it’s tempting to just brush both sides at the beginning and let them roast undisturbed. I tried that. The bottom side stays pale and soggy while the top gets all the caramelization. Flipping them halfway through ensures that beautiful golden crust on both sides. It takes an extra 30 seconds, and it’s absolutely worth it.
Watch Your Oven Temperature: Ovens run differently, and sugar burns easily. I learned this the hard way when I ruined a whole batch at 425°F. If your oven runs hot, drop the temperature to 375°F and extend the cooking time by 5-7 minutes. The caramelization will still happen — it’ll just take a little longer. If you’re using a convection oven, reduce the temperature by 25°F and check the rings 5 minutes earlier than the recipe suggests.
The Parchment Paper Trick: I used to skip the parchment paper because I thought it was wasteful. Let me tell you, scrubbing crystallized sugar off a baking sheet is not a fun way to spend 20 minutes. Use parchment paper or a silicone mat. Your future self will thank you. Plus, the rings slide off the parchment much more easily without breaking.
Timing for Hosting: Here’s my favorite hosting strategy — prepare the squash rings up to step 5 earlier in the day. Cover them with plastic wrap and refrigerate. About 45 minutes before you want to serve, pull them out, let them come to room temperature for 15 minutes, then pop them in the oven. This way, you’re not scrambling in the kitchen when your guests arrive. The caramelization will still be perfect, and you’ll look like you barely broke a sweat.
My Biggest Failure: I once tried to make these for a Friendsgiving dinner and forgot to flip them. The tops were gorgeous, but the bottoms were pale and unappealing. I tried to pass them off as “rustic,” but everyone could tell something was off. Learn from my mistake — set a timer to remind yourself to flip!
Variations & Adaptations
One of the things I love most about this recipe is how versatile it is. Here are some variations I’ve tried and loved:
Savory Herb Version: Skip the cinnamon and nutmeg, and instead add 1 teaspoon dried rosemary, 1/2 teaspoon garlic powder, and 1/4 teaspoon cayenne pepper to the butter mixture. The result is a savory, slightly spicy ring that pairs beautifully with roasted meats. I made this version for a summer barbecue, and it was a hit with people who usually shy away from sweet sides.
Maple-Bourbon Glaze: Replace the maple syrup in the glaze with 2 tablespoons bourbon and 1 tablespoon maple syrup. The alcohol cooks off, leaving behind this incredible warmth and complexity. This is my go-to for adult dinner parties — it feels a little fancy without being fussy.
Spicy Maple Version: Add 1/2 teaspoon chipotle powder or smoked paprika to the butter mixture. The heat cuts through the sweetness beautifully and adds a smoky depth that’s absolutely addictive. I discovered this combination by accident when I grabbed the wrong spice jar, and it turned out to be a happy mistake.
Vegan Adaptation: Substitute the butter with melted coconut oil or a high-quality vegan butter. Use coconut sugar instead of brown sugar. The caramelization won’t be quite as rich, but it’s still delicious. I’ve served this version to vegan friends, and they’ve always asked for seconds.
Air Fryer Method: If you’re short on time, you can make these in an air fryer. Preheat the air fryer to 375°F (190°C). Arrange the rings in a single layer in the basket (you may need to work in batches). Cook for 8 minutes, flip, brush with remaining butter mixture, and cook for another 6-8 minutes until caramelized. The air fryer version gets incredibly crispy edges — almost like candy.
Different Squash Options: While acorn squash is my favorite for its shape and flavor, butternut squash works beautifully if you cut it into 1/2-inch thick half-moons. Delicata squash is another great option — its thin skin is edible, so you don’t need to peel it, and it caramelizes beautifully.
Serving & Storage Suggestions
These caramelized acorn squash rings are incredibly versatile when it comes to serving. Here’s how to make the most of them:
Serving Temperature and Presentation: I prefer serving these rings warm, but they’re also lovely at room temperature. For a stunning presentation, arrange the rings in an overlapping pattern on a large, white platter. The contrast between the golden-brown rings and the white dish is gorgeous. Sprinkle with fresh thyme leaves and a pinch of flaky sea salt right before serving. If you’re feeling extra fancy, drizzle a little balsamic reduction around the edges of the platter.
What to Serve Alongside: These rings are incredibly versatile. They pair beautifully with roasted chicken, pork chops, or steak. For a vegetarian main, serve them alongside a hearty grain salad or stuffed portobello mushrooms. At Thanksgiving, they’re a showstopping alternative to traditional sweet potato casserole. I’ve also served them as part of a holiday brunch spread alongside roasted ham and eggs.
Storage Instructions: Leftover rings can be stored in an airtight container in the refrigerator for up to 4 days. The caramelization will soften slightly, but they’ll still be delicious. I don’t recommend freezing them — the texture becomes watery when thawed.
Reheating Methods: The best way to reheat these rings is in the oven at 350°F (175°C) for 5-7 minutes. This helps restore some of the caramelized exterior. You can also reheat them in an air fryer at 350°F for 3-4 minutes. Avoid the microwave — it will make them soggy and sad. Trust me on this one.
How Flavors Develop: Interestingly, these rings taste even better the next day. The flavors meld and deepen overnight, and the sweetness becomes more complex. I often make a double batch specifically so I can have leftovers for lunch the next day. They’re delicious cold, straight from the fridge — almost like a sweet squash candy.
Nutritional Information & Benefits
While I’m not a nutritionist, I can share what I’ve learned about the ingredients in this dish. Acorn squash is packed with nutrients — it’s rich in vitamin A (from beta-carotene), vitamin C, potassium, and fiber. One cup of cooked acorn squash contains about 115 calories and provides more than 100% of your daily vitamin A needs.
Estimated Nutritional Values (per serving, based on 4 servings):
- Calories: 185
- Total Fat: 9g
- Saturated Fat: 5g
- Carbohydrates: 28g
- Fiber: 4g
- Sugar: 16g
- Protein: 2g
- Sodium: 310mg
- Vitamin A: 180% DV
- Vitamin C: 35% DV
- Potassium: 700mg
Dietary Considerations: This recipe is naturally gluten-free and can be made vegan with the substitutions mentioned above. It’s also nut-free and soy-free. The main allergens to note are dairy (from the butter) and potentially tree nuts if you use certain vegan butter alternatives.
Health Benefits: The fiber in acorn squash supports digestive health and helps keep you feeling full. The beta-carotene is excellent for eye health and immune function. And honestly, when you’re serving a dish this delicious that also happens to be good for you, it feels like a win-win. I love that I can serve something that satisfies both my taste buds and my desire to eat nourishing food.
Conclusion
Listen, I know there are a million ways to cook winter squash out there. But these caramelized roasted acorn squash rings? They’re something special. They’re the dish that makes people stop mid-conversation to ask what you did. They’re the side that steals the show at holiday dinners. And honestly, they’re the recipe that made me feel like a real host — like someone who could walk into a kitchen and make something that people would remember.
What I love most about this recipe is how forgiving it is. You can adjust the spices, swap the sweetener, or change up the squash variety, and it still works. It’s a template for deliciousness that you can make your own. Maybe you’ll go heavier on the cinnamon like my neighbor does, or maybe you’ll discover that a pinch of cayenne is your secret weapon. That’s the beauty of cooking — you get to make it yours.
So here’s my invitation to you: try these rings for your next gathering. Whether it’s a Tuesday night dinner with family or a holiday feast with friends, I promise they’ll deliver. And when someone asks you for the recipe — because they will — send them my way. I’d love to hear how they turned out for you. Drop a comment below, share a photo, or tell me about your own variation. Happy cooking, friends!
Frequently Asked Questions
Can I make these caramelized acorn squash rings ahead of time?
Absolutely! You can prepare the rings up to the point of brushing them with the butter mixture and refrigerate them for up to 24 hours. When you’re ready to serve, just pop them in the oven and add about 5 minutes to the cooking time since they’ll be cold from the fridge. This is my go-to strategy for dinner parties — it makes hosting so much less stressful.
Why are my acorn squash rings not caramelizing?
This usually happens for one of three reasons: your oven temperature is too low, you’re overcrowding the baking sheet, or you didn’t use enough sugar. Make sure your oven is fully preheated to 400°F, leave space between the rings on the pan, and don’t skimp on the brown sugar mixture. If you’re still having trouble, try brushing the rings with a little maple syrup halfway through cooking for extra caramelization power.
Can I eat the skin of acorn squash?
Yes, you can! The skin of acorn squash is edible, especially when roasted. It becomes tender and slightly chewy, with a pleasant texture. However, some people find it a bit tough. If you’re serving guests who might be picky about texture, you can peel the rings before roasting, but I personally love the contrast between the tender flesh and the slightly firmer skin. Just make sure to wash the squash thoroughly before cutting.
What’s the best way to cut acorn squash safely?
Safety first! Acorn squash can be tricky to cut because of its round shape and tough skin. Start by microwaving the whole squash for 2-3 minutes to soften it slightly. Then, cut off a small slice from the bottom so it sits flat on your cutting board. Use a sharp chef’s knife and cut slowly with a rocking motion. If the squash feels too hard, microwave it for another minute. I learned this trick after a close call with a dull knife — it makes a world of difference.
Can I use this recipe for other types of winter squash?
Definitely! This method works beautifully with butternut squash (cut into half-moons), delicata squash (rings or half-moons), and even pumpkin (cut into wedges). Each squash will have a slightly different cooking time and sweetness level, so keep an eye on them during roasting. Delicata squash is especially nice because it caramelizes quickly and has edible skin. Just adjust the cooking time based on the thickness of your pieces.
Pin This Recipe!
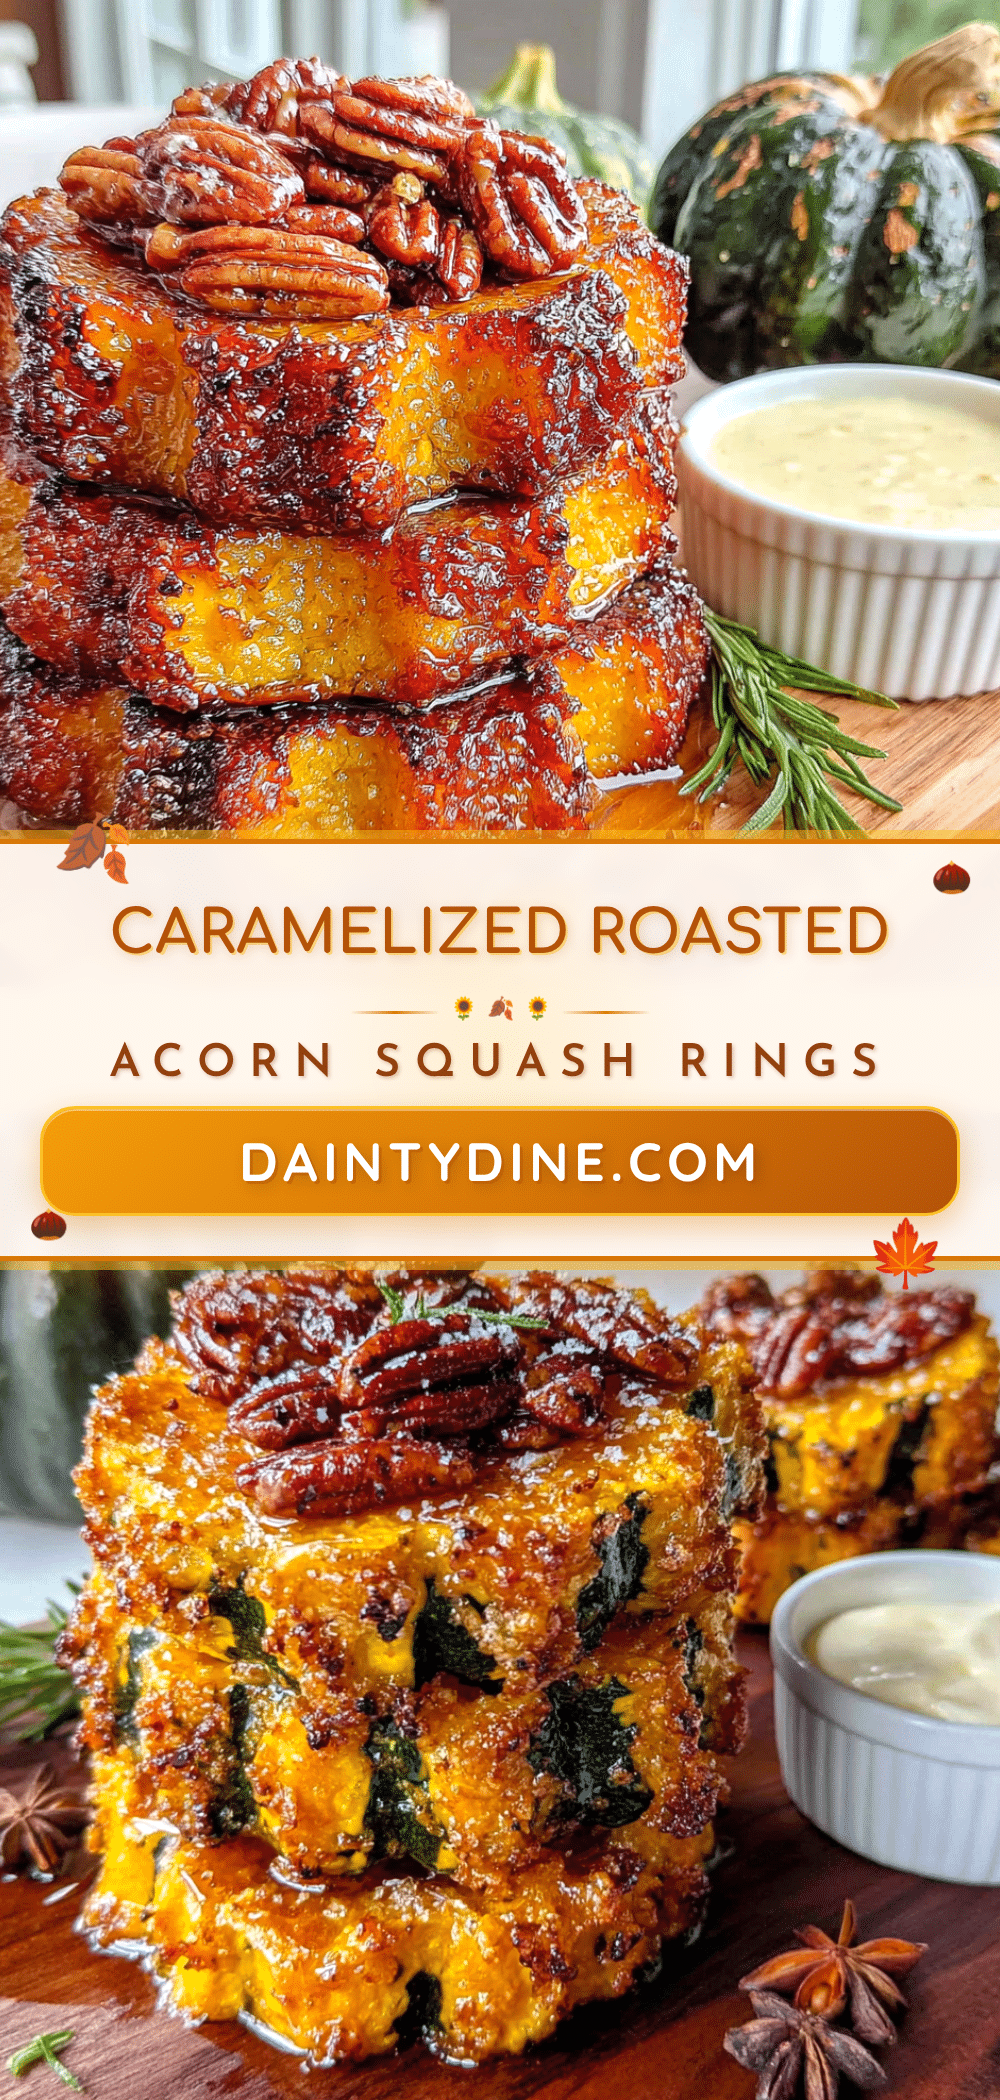
Easy Caramelized Roasted Acorn Squash Rings Recipe
These caramelized roasted acorn squash rings are a showstopping side dish with a double-sided caramelization trick that creates a perfect balance of sweet and savory. Easy to prep ahead and always a crowd-pleaser.
- Prep Time: 15 minutes
- Cook Time: 30 minutes
- Total Time: 45 minutes
- Yield: 4 servings 1x
- Category: Side Dish
- Cuisine: American
Ingredients
- 2 medium acorn squash (about 1.5 pounds each)
- 3 tablespoons unsalted butter, melted
- 3 tablespoons brown sugar, packed
- 1 teaspoon ground cinnamon
- 1/2 teaspoon ground nutmeg
- 1/2 teaspoon salt
- 1/4 teaspoon black pepper
- 2 tablespoons maple syrup (optional, for glaze)
- 1 tablespoon balsamic vinegar (optional, for glaze)
- Fresh thyme or rosemary sprigs (for garnish, optional)
- Flaky sea salt (for garnish, optional)
Instructions
- Preheat your oven to 400°F (200°C). Position the rack in the middle of the oven. Line a large baking sheet with parchment paper or a silicone baking mat.
- Prepare the squash: Using a sharp chef’s knife, cut off the stem end and bottom tip of each acorn squash so they sit flat. Cut each squash crosswise into 1/2-inch (1.25 cm) thick rings. Use a spoon or small knife to scrape out the seeds and stringy pulp from the center of each ring.
- Make the butter mixture: In a small bowl, combine the melted butter, brown sugar, cinnamon, nutmeg, salt, and black pepper. Stir until well combined and the sugar has mostly dissolved.
- Arrange the rings in a single layer on the prepared baking sheet, making sure they are not touching each other.
- Brush the first side: Using a pastry brush, generously brush the butter mixture onto the top of each ring. Reserve about half of the mixture for the second side.
- Roast for 15 minutes.
- Flip and brush again: After 15 minutes, carefully remove the baking sheet from the oven. Using a spatula, flip each ring over. Brush the second side with the remaining butter mixture.
- Roast for another 12-15 minutes, until the rings are tender and deeply caramelized on both sides. For extra caramelization, switch the oven to broil for the last 1-2 minutes, watching carefully.
- Optional glaze step: If using the maple-balsamic glaze, whisk together the maple syrup and balsamic vinegar in a small bowl. During the last 5 minutes of roasting, brush this mixture over the rings.
- Rest and garnish: Remove the baking sheet from the oven and let the rings rest for 2-3 minutes. Transfer to a serving platter, arrange in an overlapping pattern, and sprinkle with flaky sea salt and fresh herb sprigs if desired. Serve warm or at room temperature.
Notes
For even caramelization, cut rings as close to 1/2-inch thick as possible. Don’t skip flipping the rings halfway through. If your oven runs hot, reduce temperature to 375°F and extend cooking time by 5-7 minutes. Leftovers can be stored in an airtight container in the refrigerator for up to 4 days. Reheat in the oven at 350°F for 5-7 minutes or in an air fryer at 350°F for 3-4 minutes. Avoid the microwave.
Nutrition
- Serving Size: 1 serving (about 2-3
- Calories: 185
- Sugar: 16
- Sodium: 310
- Fat: 9
- Saturated Fat: 5
- Carbohydrates: 28
- Fiber: 4
- Protein: 2
Keywords: acorn squash, roasted squash, caramelized squash, fall side dish, holiday side dish, gluten-free, vegetarian


