Love this? Save it for later!
Share the inspiration with your friends
There used to be a tiny coffee shop on the corner of Elm Street, the one with the mismatched chairs and the old record player, that made the most incredible Biscoff cheesecake bars. When they closed two summers ago—just a sign on the door one Tuesday, “Thanks for the memories”—I honestly felt a little lost. After seven attempts—some too crumbly, one that refused to set, and a particularly sad batch that tasted more like butter than cheesecake—I finally cracked it.
I remember standing in my kitchen on a rainy Thursday, staring at a jar of Biscoff spread, thinking about that first bite at the coffee shop. The way the creamy cheesecake layer melted into the spiced cookie crust, the little crunch of crumbled Biscoff on top. My daughter walked in, licked a stray bit of batter off the spatula, and said, “Mom, this is it.” And she was right.
These kid-approved Biscoff cheesecake bars are the kind of dessert that makes everyone at the table stop talking for a second. Maybe you’ve been there, chasing a flavor memory from a place that no longer exists. Well, here it is—recreated, perfected, and ready for your family to love.
Why You’ll Love This Recipe
Let me tell you why these easy Biscoff cheesecake bars have become our go-to dessert for everything from school bake sales to lazy Sunday afternoons.
- Quick & Easy: Comes together in under 30 minutes of prep time, then the oven does the rest. Perfect for those evenings when you promised dessert but forgot until after dinner.
- Simple Ingredients: No fancy grocery trips needed. Biscoff cookies, cream cheese, a few pantry staples—you probably have most of this already.
- Perfect for Family Meals: Great for weeknight treats, birthday parties, or just because. Kids love the cookie flavor, adults appreciate the grown-up cheesecake texture.
- Crowd-Pleaser: Always gets rave reviews from kids and adults alike. I’ve yet to meet a person who doesn’t go back for seconds.
- Unbelievably Delicious: The texture and flavor combo is next-level comfort food. Creamy, crunchy, sweet, and just a little bit salty from the Biscoff.
What makes this recipe different from the rest? It’s the method. Instead of a complicated water bath or fussy crust, I use a simple press-in cookie base and a no-fuss cheesecake filling that sets up perfectly every time. No cracks, no sinking, no stress. This isn’t just another version—it’s your best version.
This recipe isn’t just good—it is the kind that makes you close your eyes after the first bite. It’s comfort food reimagined: easier, faster, but with the same soul-soothing satisfaction. Perfect for impressing your kids without stress, or turning a simple Tuesday into something memorable.
What Ingredients You Will Need
This recipe uses simple, wholesome ingredients to deliver bold flavor and satisfying texture without the fuss. Most of these are pantry staples, which makes these easy Biscoff cheesecake bars perfect for spontaneous baking.
For the Crust
- 2 cups Biscoff cookie crumbs (about 25-30 cookies, crushed finely) — I recommend pulsing them in a food processor for the most even texture, but a zip-top bag and rolling pin work too.
- 5 tablespoons unsalted butter, melted — Adds richness and helps the crust hold together. Use salted butter if that’s all you have, just skip the pinch of salt.
- 1 tablespoon granulated sugar — Just a touch to enhance the sweetness of the cookies.
- Pinch of salt (optional, but recommended) — Balances the sweetness beautifully.
For the Cheesecake Filling
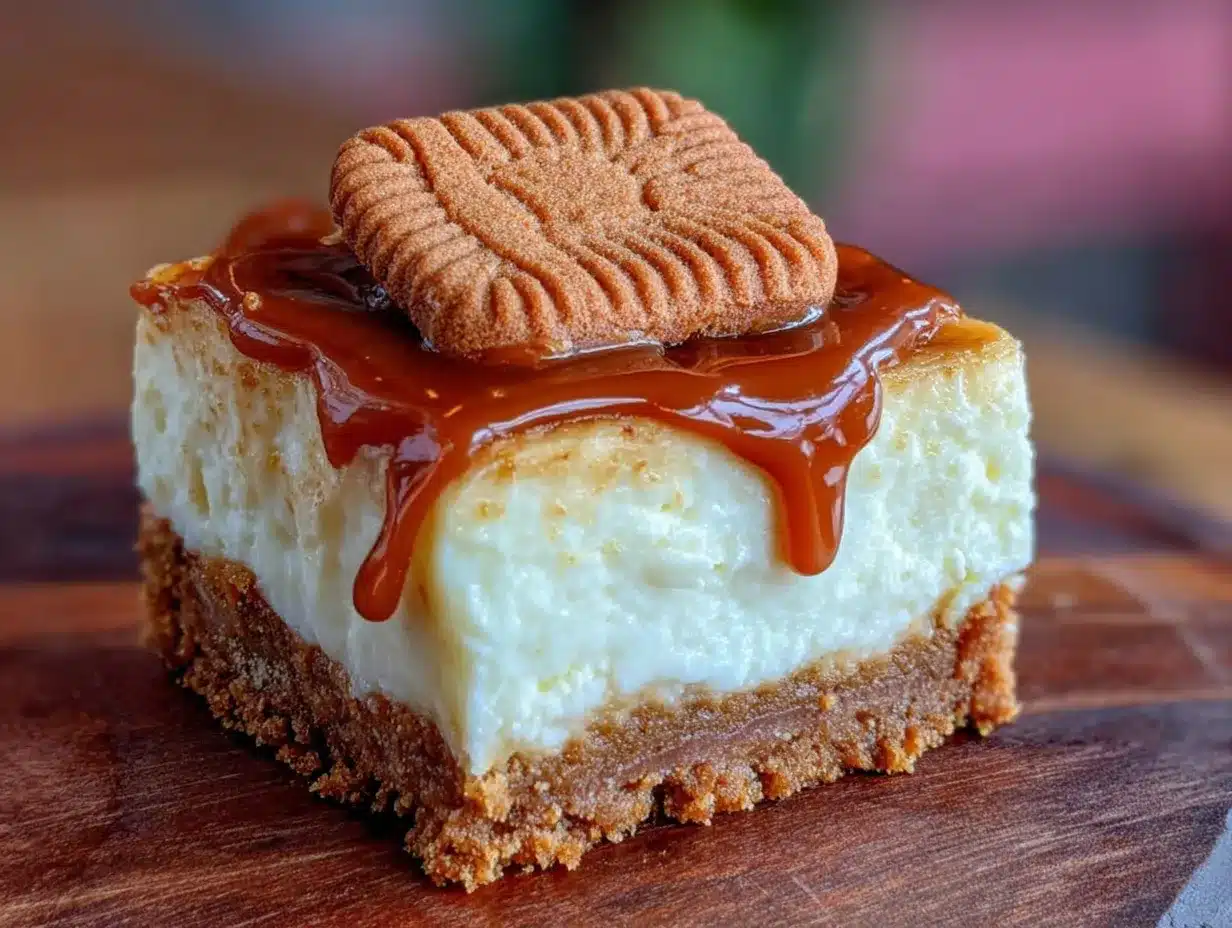
- 16 ounces cream cheese, softened — Full-fat is best for that creamy texture. I recommend Philadelphia brand for consistent results. Let it sit out for at least 30 minutes before starting.
- 1/2 cup granulated sugar — Sweetens without overpowering the Biscoff flavor.
- 2 large eggs, room temperature — Cold eggs can make the filling lumpy. Leave them on the counter with the cream cheese.
- 1 teaspoon vanilla extract — Pure vanilla adds depth. Imitation works in a pinch, but the real stuff makes a difference here.
- 1/2 cup creamy Biscoff spread — This is the star. Look for the jar that says “smooth” or “creamy” — the crunchy version works too but changes the texture slightly.
For the Topping
- 1/4 cup Biscoff spread, warmed — For drizzling. Microwave for 10-15 seconds until pourable.
- 1/4 cup crushed Biscoff cookies — For that irresistible crunch on top.
Equipment Needed
You don’t need a professional bakery setup for these Biscoff cheesecake bars. Here’s what I use, and what you can substitute if needed.
- 9×9-inch baking pan — My go-to for bar recipes. An 8×8-inch works too, but your bars will be slightly thicker and may need an extra 5 minutes of baking time.
- Parchment paper — A total lifesaver for lifting the bars out cleanly. Leave an overhang on two sides for easy removal.
- Food processor or zip-top bag — For crushing the Biscoff cookies. The food processor gives a finer crumb, but honestly, a rolling pin and some elbow grease works just as well.
- Electric hand mixer or stand mixer — For the cheesecake filling. A whisk and some muscle works too, but it takes longer and you might get lumps.
- Mixing bowls — One medium for the crust, one large for the filling.
- Rubber spatula — For scraping every last bit of that creamy filling into the pan.
- Measuring cups and spoons — Accuracy matters in baking, but don’t stress over exact measurements for the cookie crumbs.
Preparation Method
Let’s get these easy Biscoff cheesecake bars into your oven. I’ve broken it down into simple steps with all my little tricks for success.
Step 1: Prep Your Pan
Preheat your oven to 325°F (160°C). Line your 9×9-inch baking pan with parchment paper, leaving an overhang on two opposite sides. This makes lifting the bars out a breeze later. Lightly grease the parchment with butter or non-stick spray.
Step 2: Make the Crust
In a food processor, pulse the Biscoff cookies until you have fine crumbs. You should have about 2 cups. Transfer to a medium bowl, add the melted butter, sugar, and salt. Stir with a fork until the mixture looks like wet sand and holds together when pressed between your fingers.
Press the mixture firmly into the bottom of your prepared pan. I use the bottom of a measuring cup to get it even and compact. Bake for 10 minutes, then set aside to cool slightly while you make the filling. The crust will firm up more as it bakes with the filling.
Step 3: Make the Cheesecake Filling
In a large bowl, beat the softened cream cheese with an electric mixer on medium speed until smooth and creamy, about 2 minutes. Scrape down the sides of the bowl with a rubber spatula. Add the sugar and beat for another minute until well combined.
Add the eggs one at a time, beating on low speed after each addition just until incorporated. Overmixing at this stage can incorporate too much air, leading to cracks. Add the vanilla extract and the 1/2 cup of Biscoff spread, and mix on low until smooth and uniform. The batter should be thick, creamy, and a beautiful caramel color.
Step 4: Assemble and Bake
Pour the cheesecake filling over the pre-baked crust. Spread it evenly with a spatula. Tap the pan gently on the counter a few times to release any air bubbles. Bake for 35-40 minutes, or until the edges are set and the center is just slightly jiggly—like Jell-O, not liquid.
Here’s the trick: don’t overbake. The center should still have a little wobble when you gently shake the pan. It will continue to set as it cools. Remove from the oven and let it cool on a wire rack for 30 minutes at room temperature.
Step 5: Add the Topping and Chill
While the bars are still warm, warm the remaining 1/4 cup of Biscoff spread in the microwave for 10-15 seconds. Drizzle it over the top in a zigzag pattern. Sprinkle the crushed Biscoff cookies evenly over the top.
Refrigerate for at least 4 hours, but overnight is best. This is the hardest part—the waiting. But trust me, it’s worth it. The bars need time to fully set and develop that perfect creamy texture.
Step 6: Slice and Serve
Once fully chilled, use the parchment overhang to lift the entire block of bars out of the pan. Place on a cutting board and use a sharp knife to cut into 16 squares. For clean slices, wipe the knife clean between cuts. Serve cold or let them sit at room temperature for 5-10 minutes for a softer texture.
Cooking Tips & Techniques
After making these Biscoff cheesecake bars more times than I can count, I’ve learned a few things the hard way. Here are my best tips to ensure success every time.
Room Temperature Ingredients Are Non-Negotiable
I learned this lesson after a particularly lumpy batch. Cold cream cheese and cold eggs don’t blend smoothly, leaving you with a grainy filling. Let your cream cheese sit out for at least 30 minutes, and place your eggs in a bowl of warm water for 5 minutes if you forgot to take them out earlier.
Don’t Overmix the Filling
This is the number one cause of cracked cheesecake. Mix on low speed once the eggs are added, and stop as soon as everything is combined. Overmixing incorporates air, which expands in the oven and then collapses, causing cracks. A few tiny lumps are better than a canyon down the middle.
The Water Bath Shortcut
Traditional cheesecake recipes call for a water bath to prevent cracking. For these bars, I skip it. The smaller pan and shorter baking time mean they’re much more forgiving. But if you’re nervous, place a shallow pan of hot water on the oven rack below the cheesecake—it adds humidity without the fuss.
Patience Is a Virtue
I know, I know—the smell is incredible and you want to dig in immediately. But cutting these bars before they’re fully chilled is a recipe for a mess. The filling needs time to set completely. Trust me, I’ve made the mistake. The first time, I cut into them after two hours and got more of a cheesecake pudding than a sliceable bar. Overnight is your friend.
Variations & Adaptations
One of the best things about these easy Biscoff cheesecake bars is how adaptable they are. Here are some of my favorite variations.
Chocolate Biscoff Bars
Melt 1/2 cup of semi-sweet chocolate chips and swirl it into the cheesecake filling before baking. The chocolate and Biscoff combination is absolutely divine. My kids argue over which version is better—this one usually wins.
Gluten-Free Option
Biscoff cookies themselves are not gluten-free, but you can substitute with gluten-free shortbread cookies or gluten-free graham crackers. The texture will be slightly different, but still delicious. Just make sure all your other ingredients are certified gluten-free.
Mini Cheesecake Bites
Line a 24-cup mini muffin tin with paper liners. Press a heaping teaspoon of crust mixture into each cup, then top with a tablespoon of filling. Bake for 12-15 minutes. These are perfect for lunchboxes or party platters. My daughter calls them “unicorn bites” and they disappear within minutes.
Peanut Butter Twist
Swap half of the Biscoff spread in the filling for creamy peanut butter. The salty-sweet combination is incredible. This version is a hit at potlucks—I always bring home an empty pan.
Serving & Storage Suggestions
These Biscoff cheesecake bars are versatile enough for any occasion. Here’s how to serve and store them for the best experience.
Serving
Serve these bars cold straight from the fridge for a firm, creamy texture. If you prefer a softer, more decadent bite, let them sit at room temperature for 10 minutes before serving. I like to cut them into 16 squares for a generous serving, but you can cut them smaller for a crowd.
For an extra special presentation, drizzle with a little more warmed Biscoff spread and a sprinkle of sea salt. A dollop of whipped cream on the side never hurts either. These bars pair beautifully with a cup of coffee or a glass of cold milk—my kids prefer the latter.
Storage
Store leftover bars in an airtight container in the refrigerator for up to 5 days. Place a piece of parchment paper between layers to prevent sticking. The flavors actually develop and deepen over the first 24 hours, so day-old bars are even better.
Freezing
These bars freeze beautifully. Wrap individual slices tightly in plastic wrap, then place them in a freezer-safe bag or container. They’ll keep for up to 3 months. To thaw, transfer to the refrigerator overnight or let sit at room temperature for 30 minutes. I always keep a stash in the freezer for unexpected guests or late-night cravings.
Reheating
I don’t recommend reheating these bars—they’re meant to be served cold or at room temperature. If you want a warm dessert, try my warm Biscoff lava cakes instead.
Nutritional Information & Benefits
Let’s be honest—these Biscoff cheesecake bars are a treat, not a health food. But here’s a rough estimate of what you’re looking at per bar (based on 16 servings).
| Nutrient | Amount Per Serving |
|---|---|
| Calories | 320 |
| Total Fat | 22g |
| Saturated Fat | 12g |
| Cholesterol | 75mg |
| Sodium | 220mg |
| Total Carbohydrates | 28g |
| Sugars | 18g |
| Protein | 5g |
On the bright side, these bars do contain some calcium from the cream cheese and a little protein from the eggs. The Biscoff spread is made from crushed speculoos cookies, which contain warming spices like cinnamon, nutmeg, and cloves—known for their antioxidant properties. But honestly, this is a dessert meant for joy, not nutrition. Enjoy it in moderation, and maybe share with a friend.
Conclusion
These kid-approved Biscoff cheesecake bars are everything I hoped they’d be when I started that rainy Thursday quest to recreate a lost favorite. They’re creamy, crunchy, sweet, and just a little bit salty—the perfect balance of textures and flavors. And the best part? They’re easy enough for a Tuesday night baking project with your kids, but impressive enough for a holiday dessert table.
I’d love to hear how these turn out for you. Did your family love them as much as mine does? Did you try one of the variations? Drop a comment below and let me know—I read every single one. And if you’re looking for more family-friendly desserts, don’t miss my no-bake peanut butter bars and easy chocolate chip cookie bars.
Happy baking, friends. May your kitchen smell like cinnamon and your family ask for seconds.
Frequently Asked Questions
Can I use reduced-fat cream cheese?
You can, but I don’t recommend it. Full-fat cream cheese gives the bars their signature creamy texture and helps them set properly. Reduced-fat versions have a higher water content, which can lead to a softer, less stable filling that may not slice cleanly.
How do I know when the bars are done baking?
The edges should be set and slightly puffed, while the center should still jiggle slightly when you gently shake the pan—like Jell-O, not like liquid. If the center is completely firm, they’re overbaked. They’ll continue to set as they cool.
Can I make these ahead of time?
Absolutely! In fact, they’re better the next day. Make them up to 2 days in advance and keep them refrigerated. The flavors meld and deepen overnight. Just add the topping right before serving for the best texture.
My crust is too crumbly. What went wrong?
This usually happens when the crust mixture is too dry. Make sure your butter is fully melted and you’ve mixed it thoroughly with the cookie crumbs. If it still seems dry, add another tablespoon of melted butter. The mixture should hold together when pressed between your fingers.
Can I use a different cookie for the crust?
Yes! Graham crackers, vanilla wafers, or shortbread cookies all work well. The flavor will be different, of course, but the texture will be similar. If using a less sweet cookie, you might want to add an extra tablespoon of sugar to the crust.
Pin This Recipe!
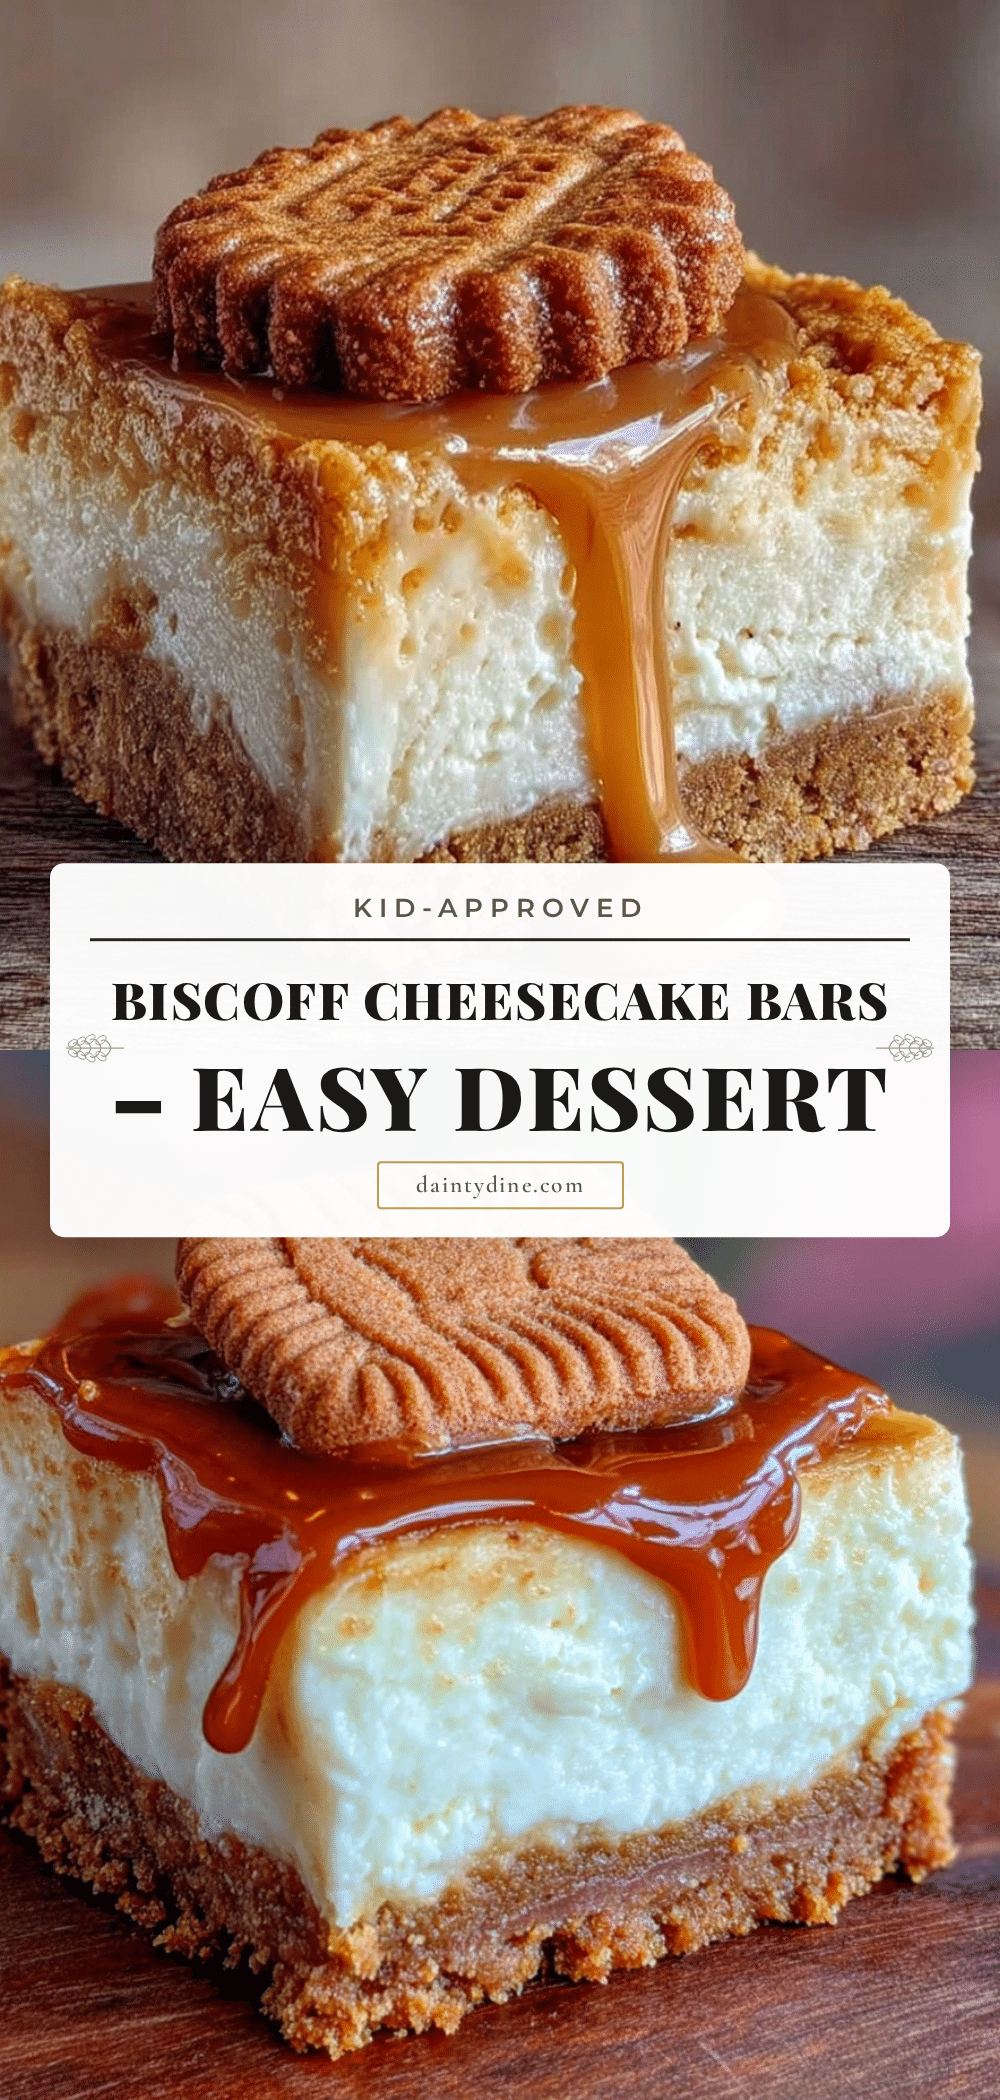
Easy Biscoff Cheesecake Bars: Perfect Kid-Approved Dessert
These creamy, crunchy, and perfectly sweet Biscoff cheesecake bars are a kid-approved dessert that comes together in under 30 minutes of prep. With a spiced cookie crust, smooth cheesecake filling, and a drizzle of Biscoff spread, they’re the ultimate comfort food for any occasion.
- Prep Time: 30 minutes
- Cook Time: 40 minutes
- Total Time: 4 hours 10 minutes (includes chilling)
- Yield: 16 servings 1x
- Category: Dessert
- Cuisine: American
Ingredients
- 2 cups Biscoff cookie crumbs (about 25–30 cookies, crushed finely)
- 5 tablespoons unsalted butter, melted
- 1 tablespoon granulated sugar
- Pinch of salt (optional)
- 16 ounces cream cheese, softened
- 1/2 cup granulated sugar
- 2 large eggs, room temperature
- 1 teaspoon vanilla extract
- 1/2 cup creamy Biscoff spread
- 1/4 cup Biscoff spread, warmed (for topping)
- 1/4 cup crushed Biscoff cookies (for topping)
Instructions
- Preheat oven to 325°F (160°C). Line a 9×9-inch baking pan with parchment paper, leaving an overhang on two opposite sides. Lightly grease the parchment.
- Make the crust: In a food processor, pulse Biscoff cookies into fine crumbs. Transfer to a medium bowl, add melted butter, sugar, and salt. Stir until mixture looks like wet sand and holds together when pressed.
- Press crust mixture firmly into the bottom of the prepared pan. Bake for 10 minutes, then set aside to cool slightly.
- Make the filling: In a large bowl, beat softened cream cheese with an electric mixer on medium speed until smooth, about 2 minutes. Scrape down sides. Add sugar and beat for another minute.
- Add eggs one at a time, beating on low speed after each addition just until incorporated. Add vanilla extract and 1/2 cup Biscoff spread, mix on low until smooth.
- Pour filling over pre-baked crust. Spread evenly. Tap pan gently on counter to release air bubbles. Bake for 35-40 minutes, until edges are set and center is slightly jiggly.
- Remove from oven and cool on a wire rack for 30 minutes at room temperature.
- While still warm, warm remaining 1/4 cup Biscoff spread in microwave for 10-15 seconds. Drizzle over top in a zigzag pattern. Sprinkle crushed Biscoff cookies evenly.
- Refrigerate for at least 4 hours, preferably overnight.
- Use parchment overhang to lift bars out of pan. Cut into 16 squares with a sharp knife, wiping clean between cuts. Serve cold or at room temperature.
Notes
Room temperature ingredients are crucial for a smooth filling. Don’t overmix the filling to avoid cracks. For clean slices, chill overnight and wipe knife between cuts. Bars can be frozen for up to 3 months.
Nutrition
- Serving Size: 1 bar
- Calories: 320
- Sugar: 18
- Sodium: 220
- Fat: 22
- Saturated Fat: 12
- Carbohydrates: 28
- Protein: 5
Keywords: Biscoff cheesecake bars, easy cheesecake bars, kid-friendly dessert, Biscoff dessert, no-bake cheesecake bars, cookie crust cheesecake


