Love this? Save it for later!
Share the inspiration with your friends
The neighborhood potluck was in three hours and I’d completely forgotten. Everyone else would be bringing those elaborate, multi-day dishes—you know the ones. Slow-braised short ribs. Hand-rolled pasta. A cake that looked like it belonged in a bakery window. I had a bunch of bananas turning brown on my counter, a box of vanilla wafers I’d bought on a whim, and about thirty minutes before I needed to walk out the door. Honestly, I almost just grabbed a bag of chips and called it a day.
But then I remembered this old trick my aunt used to pull. She’d throw together what she called “company dessert” in no time flat, and people would lose their minds over it. I figured, what did I have to lose? Worst case scenario, I’d show up with something mediocre and everyone would be too polite to say anything. So I grabbed a bowl, started layering, and tried not to think about the clock ticking away. Let me tell you, the whole thing felt a little desperate—like I was trying to pass off a last-minute scramble as a planned masterpiece.
I walked into that potluck with my trifle dish, feeling a bit sheepish. The table was already groaning under the weight of those fancy dishes I’d been dreading. I found a tiny corner, slid my banana pudding trifle in, and tried to disappear. But then people started eating. And then they started coming back for seconds. And by the end of the night, three different people had asked for the recipe. One lady actually said, “This is the best thing here, and I’m not even being nice.” The panic turned into pure, sheepish joy. That’s the thing about this crowd-pleasing banana pudding trifle—it doesn’t need to show off. It just quietly wins every single time.
Why You’ll Love This Recipe
Let me be real with you—I’ve tested this crowd-pleasing banana pudding trifle more times than I can count. I’ve made it for book club, for Thanksgiving, for a backyard barbecue where the grill caught fire. And every single time, it disappears. There’s something about those layers of creamy pudding, soft bananas, and crunchy wafers that just hits different. It’s not fancy, but it feels fancy. And that’s the sweet spot, right?
- Quick & Easy: Comes together in under 30 minutes, perfect for last-minute hosting emergencies or when you just need a dessert without a whole production.
- Simple Ingredients: No fancy grocery trips needed. Bananas, vanilla wafers, pudding mix, and a few pantry staples—that’s it.
- Perfect for Gatherings: Great for potlucks, dinner parties, holiday buffets, or any time you need to feed a crowd without stress.
- Crowd-Pleaser: Always gets rave reviews from kids and adults alike. I’ve seen people who “don’t like banana desserts” go back for thirds.
- Unbelievably Delicious: The texture combo is next-level comfort food. Creamy, crunchy, soft, sweet—it’s got everything.
What makes this version different from all the others? It’s the method. I use a slightly thicker pudding base that holds its shape better in layers, and I let the wafers soften just enough to get that cake-like texture without turning into complete mush. It’s a small tweak, but it makes a huge difference. This isn’t just another banana pudding recipe—it’s your new secret weapon for impressing guests with zero stress.
What Ingredients You Will Need
This crowd-pleasing banana pudding trifle uses simple, wholesome ingredients to deliver bold flavor and satisfying texture without the fuss. Most of these are pantry staples, which is exactly what you want when you’re hosting and time is tight.
For the Pudding Base
- 2 boxes (3.4 ounces each) instant vanilla pudding mix (I prefer Jell-O brand for consistent results)
- 4 cups cold whole milk (adds richness—don’t use skim here)
- 1 can (14 ounces) sweetened condensed milk (this is the secret to that ultra-creamy texture)
- 1 teaspoon vanilla extract (pure, not imitation, if you have it)
For the Layers
- 1 box (11 ounces) vanilla wafers (Nilla Wafers are my go-to, but store brands work fine)
- 6-7 ripe but firm bananas (look for yellow with a few brown spots—too green and they’re bland, too brown and they’ll get mushy)
- 2 cups heavy whipping cream (for the homemade whipped topping)
- 3 tablespoons powdered sugar (to sweeten the whipped cream)
Optional Garnishes
- Crushed vanilla wafers for the top
- Thin banana slices arranged decoratively
- A sprinkle of cinnamon or nutmeg (adds a warm, cozy note)
A few notes from my kitchen to yours: For the best texture, use cold milk straight from the fridge. If you’re dairy-free, you can substitute oat milk and a dairy-free whipped topping, but honestly, the full-fat version is where the magic happens. I’ve tried this with homemade pudding from scratch, and while it’s delicious, the instant mix gives you that perfect, consistent thickness that holds up in layers. Sometimes convenience wins, and that’s okay.
Equipment Needed
You don’t need a fancy kitchen to pull off this crowd-pleasing banana pudding trifle. Here’s what you’ll need:
- Trifle dish or large glass bowl: A 4-quart trifle dish is ideal for showing off those beautiful layers. No trifle dish? No problem. A large glass mixing bowl or even a 9×13 baking dish works perfectly.
- Electric mixer: Hand mixer or stand mixer for whipping the cream. You can do it by hand with a whisk, but your arm will definitely feel it.
- Large mixing bowl: For preparing the pudding mixture.
- Medium mixing bowl: For whipping the cream.
- Rubber spatula: For folding the whipped cream into the pudding without deflating it.
- Sharp knife and cutting board: For slicing bananas evenly.
- Measuring cups and spoons: For accurate ingredient portions.
I’ve made this in a cheap glass bowl from the grocery store and it looked just as gorgeous as when I use my fancy trifle dish. The key is seeing those layers—that’s what makes people go “ooh” when you bring it to the table.
Preparation Method
This is where the magic happens. Follow these steps, and you’ll have a crowd-pleasing banana pudding trifle that looks like you spent hours on it. (Spoiler: you didn’t.)
-
Make the pudding base. In a large mixing bowl, whisk together the two boxes of instant vanilla pudding mix and 4 cups of cold whole milk. Whisk for about 2 minutes until it starts to thicken. Then add the can of sweetened condensed milk and 1 teaspoon of vanilla extract. Whisk until everything is smooth and combined. The mixture will be thick—that’s exactly what you want. Set it aside for about 5 minutes to let it fully set up. (Pro tip: If your pudding seems too thin, pop it in the fridge for 10 minutes while you prep everything else.)
Sensory cue: The pudding should look glossy and thick, like a very luxurious custard. When you lift the whisk, it should ribbon off slowly.
-
Whip the cream. In a separate medium mixing bowl, pour in 2 cups of heavy whipping cream. Add 3 tablespoons of powdered sugar. Using an electric mixer, beat on medium-high speed until stiff peaks form. This usually takes about 3-4 minutes. You’ll know it’s ready when you lift the beaters and the cream stands up in firm peaks without drooping. Don’t overwhip, or you’ll end up with butter. (Trust me, I’ve done it. It’s not pretty.)
Sensory cue: The cream should be light and airy, almost cloud-like. It should hold its shape but still feel silky, not grainy.
-
Fold it together. Take about one-third of the whipped cream and gently fold it into the pudding mixture using a rubber spatula. Use a gentle cutting and folding motion—don’t stir or you’ll deflate all that air you just whipped in. Once it’s mostly incorporated, add the remaining whipped cream and fold until just combined. You want streaks of white and vanilla throughout; it doesn’t need to be perfectly uniform.
Warning: Be gentle here. Overmixing will make your pudding dense and heavy instead of light and creamy.
-
Slice the bananas. Peel all 6-7 bananas and slice them into rounds about 1/4-inch thick. Try to keep them uniform so they layer evenly. If any bananas are too ripe and starting to get mushy, set those aside for another use—they’ll turn brown too quickly in the trifle.
Personal tip: I slice my bananas right before I start layering. If you slice them too early, they’ll oxidize and turn brown. Nobody wants brown bananas in their pretty trifle.
-
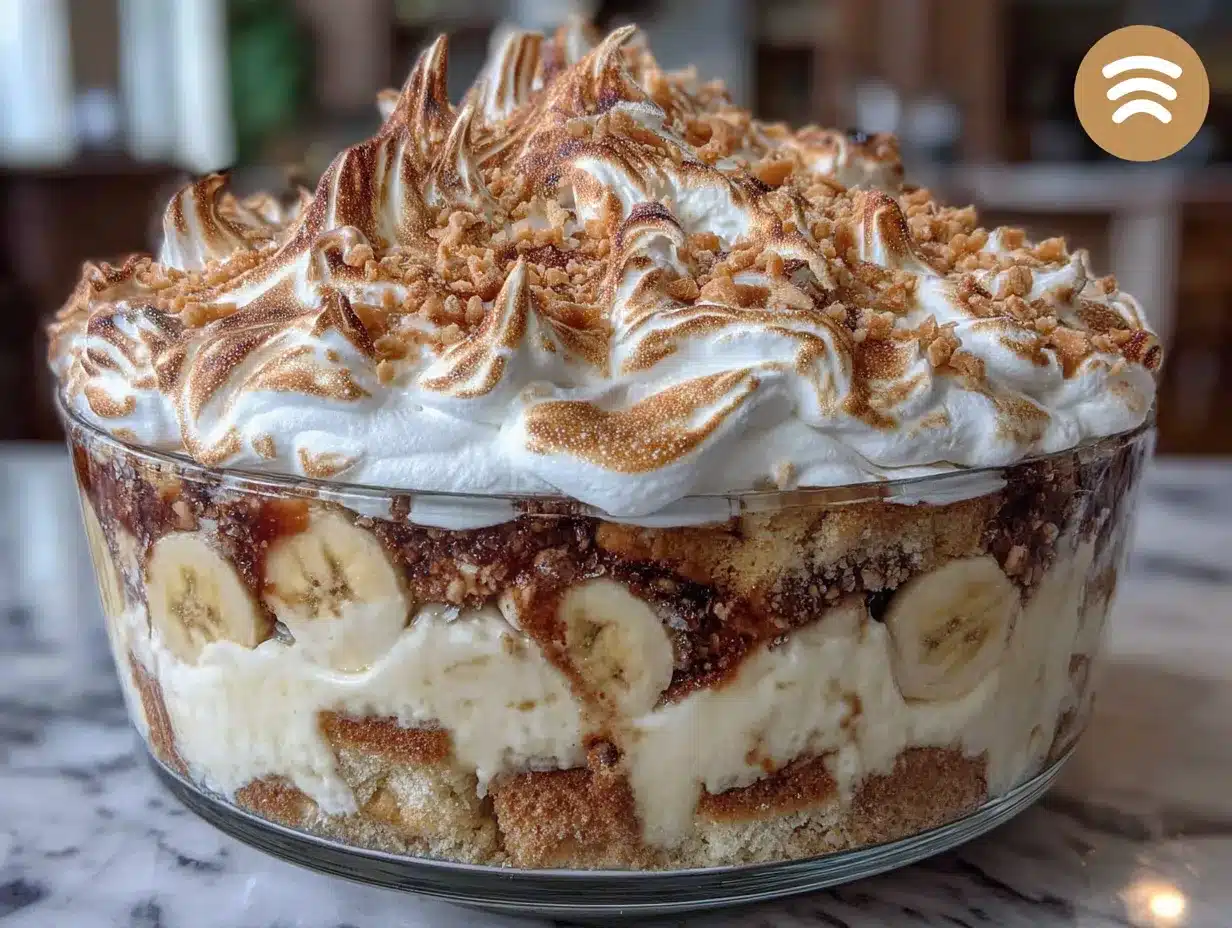
Layer it up. This is the fun part. Start with a thin layer of the pudding mixture on the bottom of your trifle dish—just enough to coat it. Then add a layer of vanilla wafers, covering the bottom completely. You can break some wafers to fill in gaps. Next, add a layer of banana slices. Then another layer of pudding. Repeat this pattern: wafers, bananas, pudding. Aim for 3-4 complete layers, ending with a final layer of pudding on top.
Time estimate: Layering should take about 10 minutes. Go slow and make it pretty—this is what people will see.
-
Top it off. Spread any remaining whipped cream over the top layer of pudding. You can pipe it on for a fancier look, or just spread it with a spatula. Crush a handful of vanilla wafers and sprinkle them over the top for crunch. Add a few thin banana slices arranged in a pattern if you’re feeling fancy.
Preparation note: If you’re making this ahead of time, wait to add the crushed wafers and banana garnish until just before serving. Otherwise, they’ll get soggy and lose their visual appeal.
-
Chill (if you can wait). For best results, refrigerate the trifle for at least 2-3 hours before serving. This allows the wafers to soften slightly and the flavors to meld together. If you’re short on time, you can serve it immediately—the wafers will be crunchier, which some people actually prefer.
Sensory cue at serving: When you scoop into the trifle, you should see distinct layers. The wafers should be tender but not mushy, the pudding creamy and thick, the bananas soft and sweet.
Cooking Tips & Techniques
After making this crowd-pleasing banana pudding trifle more times than I can count, I’ve picked up a few tricks that make a real difference.
Don’t overmix the pudding. I learned this the hard way. If you whisk instant pudding too vigorously or for too long, it can actually start to break down and become thin. Mix it just until it comes together, then let it sit. Patience is your friend here.
Use a serrated knife for bananas. This sounds weird, but it works. A serrated knife slices through bananas cleanly without squishing them. You get nice, even rounds that look professional and hold up better in the layers.
Keep your cream cold. Warm cream won’t whip properly. Make sure your heavy cream is straight from the fridge, and if your kitchen is warm, chill your bowl and beaters too. I pop mine in the freezer for 10 minutes before I start whipping.
Layer strategically. Start and end with pudding. The bottom layer prevents the wafers from sliding around, and the top layer gives you a smooth canvas for your garnish. Also, press the wafers gently into the pudding so they absorb some moisture and start softening.
Watch the banana ripeness. I once used bananas that were too ripe because I was trying to use them up before they went bad. Big mistake. They turned brown and mushy within an hour. Stick with bananas that are yellow with just a few brown spots—firm enough to hold their shape but sweet enough to add flavor.
Make it ahead, but not too far ahead. This trifle is best the day it’s made. If you need to prep in advance, make the pudding and whip the cream separately, then assemble a few hours before serving. Anything longer than 24 hours and the wafers get too soft and the bananas start to discolor.
Variations & Adaptations
One of the best things about this crowd-pleasing banana pudding trifle is how easy it is to change it up. Here are some of my favorite variations:
Chocolate Banana Dream: Swap half the vanilla wafers for chocolate wafer cookies or crushed Oreos. Add a layer of chocolate pudding in the middle. The combination of chocolate and banana is absolutely killer—I made this for a friend’s birthday and she said it was the best dessert she’d ever had.
Strawberry Banana Twist: Add a layer of sliced fresh strawberries between the banana layers. The tartness of the strawberries balances the sweet pudding perfectly. This is amazing in the summer when strawberries are at their peak.
Peanut Butter Lover’s: Drizzle melted peanut butter between the layers, or use peanut butter cookies instead of vanilla wafers. I tried this on a whim one afternoon and now it’s my husband’s favorite version. The salty-sweet combo is irresistible.
Healthier-ish Version: Use sugar-free vanilla pudding mix, light coconut milk, and a dairy-free whipped topping. Swap the vanilla wafers for sliced almonds or crushed graham crackers for less sugar. It’s not the same, but it scratches the itch when you’re trying to be good.
Individual Servings: Instead of one big trifle, layer everything into small mason jars or dessert cups. These are perfect for parties where people are standing around, and they look adorable. Plus, no fighting over who gets the corner piece with the most wafers.
Serving & Storage Suggestions
This crowd-pleasing banana pudding trifle is best served cold, straight from the fridge. The contrast between the cold, creamy pudding and the slightly softened wafers is what makes it so addictive.
Presentation tips for hosting: Set the trifle dish on a cake stand or a pretty platter to give it some height on the dessert table. Garnish the top with a few whole vanilla wafers arranged in a circle and a dusting of cinnamon. If you’re feeling extra, add some fresh mint leaves for a pop of green. When you’re serving a crowd, use a large spoon or spatula to scoop out portions, making sure each serving gets a good mix of all the layers.
What to serve alongside: This trifle is rich enough to stand on its own, but it pairs beautifully with a cup of coffee or a glass of cold milk. If you’re doing a full dessert spread, it goes well with lighter options like fresh fruit or angel food cake. Avoid serving it next to another creamy dessert—you want contrast.
Storage: Cover the trifle dish tightly with plastic wrap or a lid and store in the refrigerator for up to 2 days. After that, the bananas will start to brown and the wafers will get too soft. I don’t recommend freezing this dessert—the texture gets weird and watery when thawed.
Reheating? Nope. This is a cold dessert through and through. If you’ve stored it, just take it out of the fridge about 15 minutes before serving to take the chill off slightly. The flavors actually deepen a bit overnight, so day-old trifle can be even better—just don’t wait too long.
Nutritional Information & Benefits
Let’s be honest—this crowd-pleasing banana pudding trifle is a treat, not a health food. But that doesn’t mean it’s completely devoid of nutritional value. Here’s a rough breakdown per serving (based on 12 servings):
| Nutrient | Amount per Serving |
|---|---|
| Calories | 380 |
| Total Fat | 18g |
| Saturated Fat | 11g |
| Cholesterol | 55mg |
| Sodium | 320mg |
| Total Carbohydrates | 50g |
| Dietary Fiber | 2g |
| Sugars | 35g |
| Protein | 5g |
| Potassium | 350mg |
The good news? Bananas are packed with potassium, vitamin B6, and vitamin C. They’re also a good source of fiber, which helps with digestion. The milk and cream provide calcium and vitamin D for bone health. And hey, dessert is about joy—sometimes you just need to enjoy something delicious without overthinking it. One serving of this trifle won’t derail your health goals, and it might just make your day a little sweeter.
Dietary considerations: This recipe contains dairy, gluten (from the vanilla wafers), and eggs (from the pudding mix). For a gluten-free version, use gluten-free vanilla wafers. For a dairy-free version, use plant-based milk, dairy-free pudding mix, and coconut whipped cream. It won’t be exactly the same, but it’ll still be pretty darn good.
Conclusion
Look, I’m not saying this crowd-pleasing banana pudding trifle will change your life. But I am saying it’ll make your next gathering a whole lot more delicious. It’s the kind of dessert that makes people close their eyes when they take a bite—the kind they text you about the next day asking for the recipe. And the best part? You didn’t break a sweat making it.
I love this recipe because it reminds me that you don’t need to be a professional chef to impress people. Sometimes the simplest things, made with a little care and a lot of love, are the ones that stick with us. So go ahead—make this for your next potluck, your family dinner, or just because it’s Tuesday and you deserve something sweet.
When you do, I’d love to hear about it. Leave a comment below and tell me how it turned out, or share your own twist on the recipe. Did you add chocolate? Swap the fruit? Make it for a party of one? Whatever you do, enjoy every single bite. You’ve earned it.
Frequently Asked Questions
Can I make this banana pudding trifle a day ahead?
Yes, but with a caveat. The trifle is best within 24 hours of assembly. If you make it a day ahead, the wafers will be very soft (almost cake-like) and the bananas may start to brown slightly. Some people actually prefer the softer texture, so it’s really a matter of personal preference. If you want to prep ahead, I recommend making the pudding and whipping the cream separately, then assembling the trifle about 4-6 hours before serving.
How do I keep the bananas from turning brown?
There’s no perfect solution, but a few tricks help. First, use ripe but firm bananas—they brown slower than overripe ones. Second, make sure every banana slice is completely covered by pudding or cream, since exposure to air causes browning. Third, you can toss the banana slices in a little lemon juice or pineapple juice before layering, but this will slightly change the flavor. Honestly, a little browning is natural and doesn’t affect the taste at all.
Can I use homemade pudding instead of instant mix?
Absolutely! If you have the time and want a from-scratch version, homemade vanilla pudding works beautifully. Just make sure it’s fully cooled and thickened before you start layering. The texture will be slightly different—homemade pudding is often softer than instant—so you might want to add an extra egg yolk or a bit more cornstarch to help it hold its shape. I’ve done it both ways, and honestly, the instant mix is more reliable for this particular recipe.
What’s the best way to serve this to a crowd?
For a large gathering, I recommend making two smaller trifles instead of one giant one. This gives you more surface area for garnishes and makes serving easier. If you’re doing a buffet, set the trifle dish on a bed of ice to keep it cold. For individual servings, layer everything into clear plastic cups—guests can grab one and go, and there’s no messy scooping involved. This is especially great for outdoor parties or casual get-togethers.
Can I use low-fat milk or alternative milk?
You can, but the texture won’t be as rich and creamy. Whole milk gives the pudding the best body and flavor. If you’re using low-fat milk, the pudding will be thinner and may not hold its layers as well. For non-dairy alternatives, oat milk or full-fat canned coconut milk work best—they have enough fat content to create a decent pudding texture. Almond milk and skim milk are too thin and will result in a runny trifle.
Pin This Recipe!
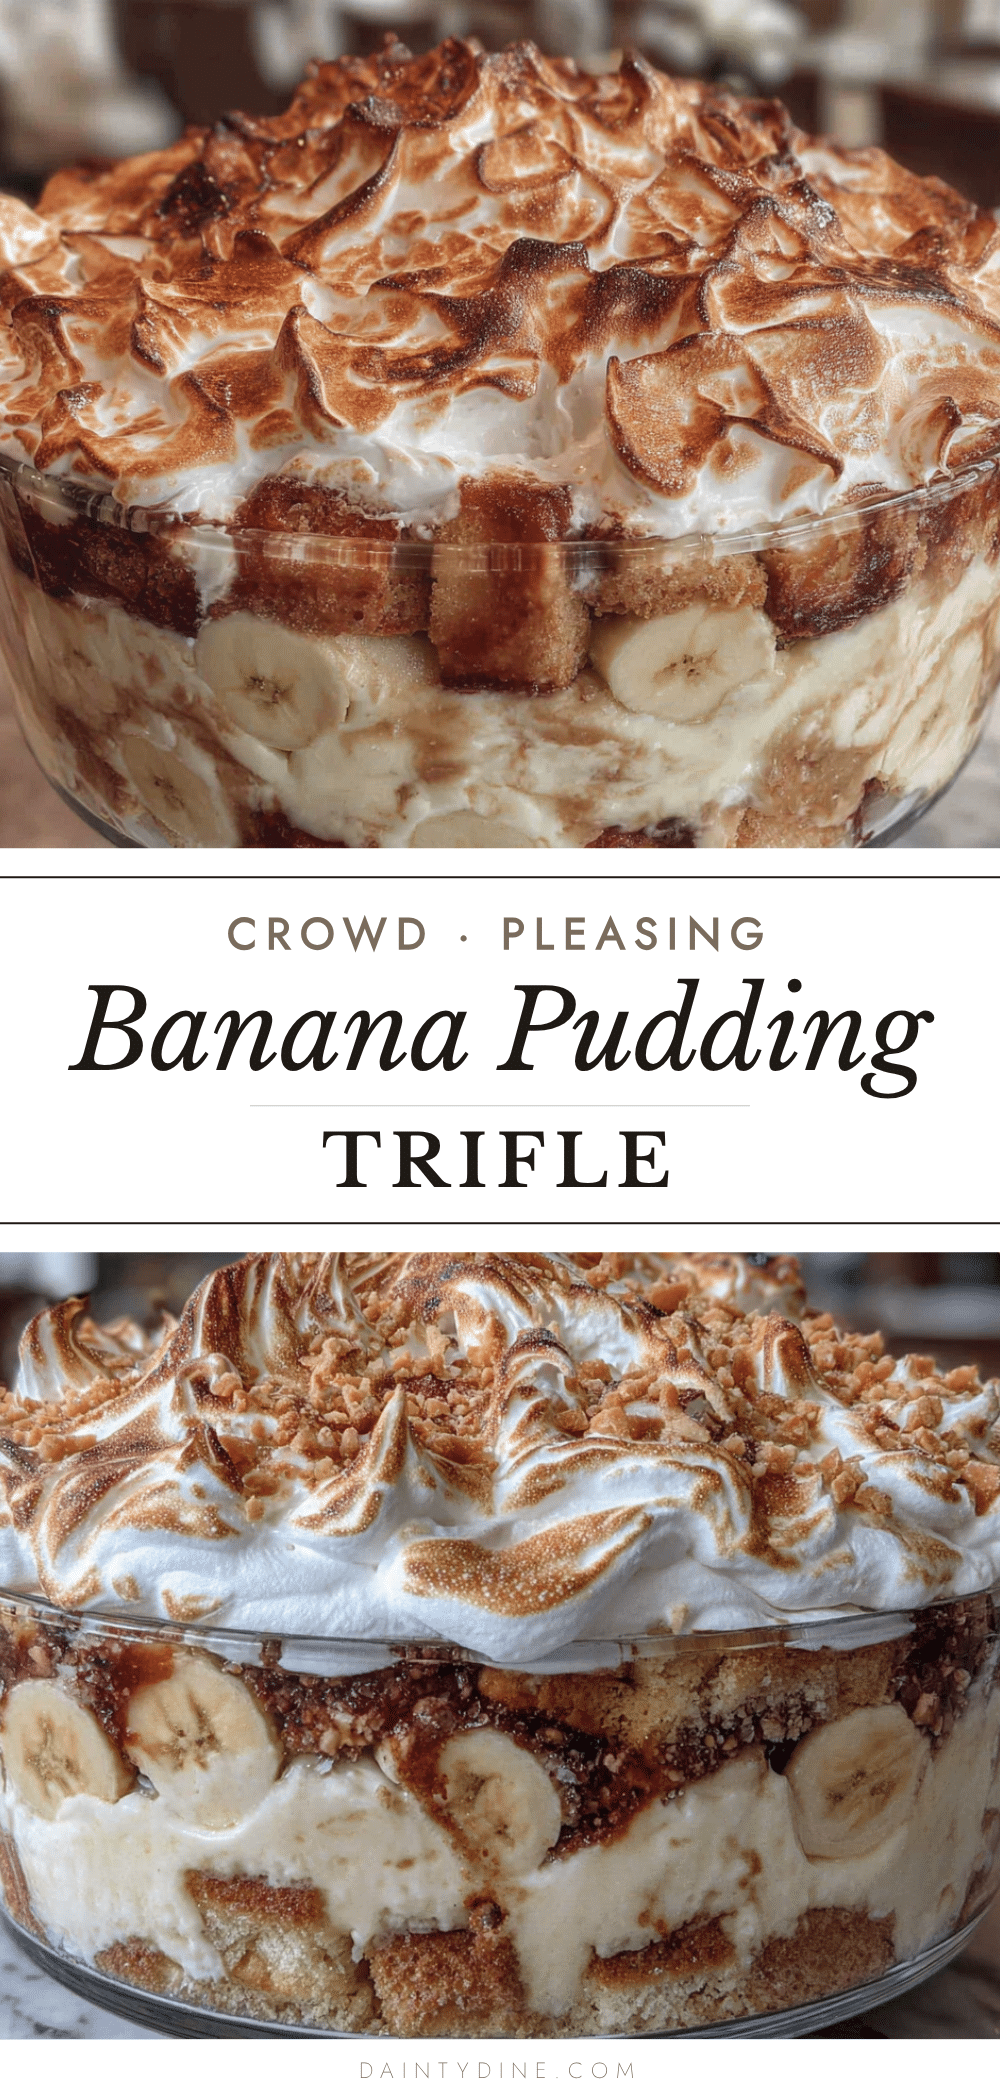
Crowd-Pleasing Banana Pudding Trifle: Easy 30-Min Dessert
A quick and easy banana pudding trifle made with layers of creamy vanilla pudding, ripe bananas, and crunchy vanilla wafers. Perfect for potlucks, parties, or any last-minute dessert emergency.
- Prep Time: 15 minutes
- Cook Time: 0 minutes
- Total Time: 30 minutes (plus optional chilling time)
- Yield: 12 servings 1x
- Category: Dessert
- Cuisine: American
Ingredients
- 2 boxes (3.4 ounces each) instant vanilla pudding mix
- 4 cups cold whole milk
- 1 can (14 ounces) sweetened condensed milk
- 1 teaspoon vanilla extract
- 1 box (11 ounces) vanilla wafers
- 6–7 ripe but firm bananas
- 2 cups heavy whipping cream
- 3 tablespoons powdered sugar
- Optional: crushed vanilla wafers, thin banana slices, cinnamon or nutmeg for garnish
Instructions
- Make the pudding base: In a large mixing bowl, whisk together the two boxes of instant vanilla pudding mix and 4 cups of cold whole milk. Whisk for about 2 minutes until it starts to thicken. Then add the can of sweetened condensed milk and 1 teaspoon of vanilla extract. Whisk until smooth and combined. Set aside for about 5 minutes to let it fully set up.
- Whip the cream: In a separate medium mixing bowl, pour in 2 cups of heavy whipping cream. Add 3 tablespoons of powdered sugar. Using an electric mixer, beat on medium-high speed until stiff peaks form, about 3-4 minutes.
- Fold it together: Take about one-third of the whipped cream and gently fold it into the pudding mixture using a rubber spatula. Use a gentle cutting and folding motion. Once mostly incorporated, add the remaining whipped cream and fold until just combined.
- Slice the bananas: Peel all 6-7 bananas and slice them into rounds about 1/4-inch thick. Try to keep them uniform.
- Layer it up: Start with a thin layer of the pudding mixture on the bottom of your trifle dish. Then add a layer of vanilla wafers, covering the bottom completely. Next, add a layer of banana slices. Then another layer of pudding. Repeat this pattern: wafers, bananas, pudding. Aim for 3-4 complete layers, ending with a final layer of pudding on top.
- Top it off: Spread any remaining whipped cream over the top layer of pudding. Crush a handful of vanilla wafers and sprinkle them over the top for crunch. Add a few thin banana slices arranged in a pattern if desired.
- Chill: For best results, refrigerate the trifle for at least 2-3 hours before serving. This allows the wafers to soften slightly and the flavors to meld together.
Notes
For best texture, use cold milk straight from the fridge. If making ahead, wait to add crushed wafers and banana garnish until just before serving. The trifle is best within 24 hours of assembly. For a dairy-free version, use oat milk and dairy-free whipped topping. For a gluten-free version, use gluten-free vanilla wafers.
Nutrition
- Serving Size: 1 serving
- Calories: 380
- Sugar: 35
- Sodium: 320
- Fat: 18
- Saturated Fat: 11
- Carbohydrates: 50
- Fiber: 2
- Protein: 5
Keywords: banana pudding, trifle, easy dessert, potluck dessert, no-bake dessert, crowd-pleasing dessert


