Love this? Save it for later!
Share the inspiration with your friends
My husband asked why I couldn’t just buy the canned green beans and skip the whole fuss. I started to explain why that wouldn’t work — then stopped. He was right, of course, in the most frustrating way possible. We were standing in our cramped kitchen, the rain hammering against the window, and I was already dreading the chaos of chopping vegetables for a holiday side dish that would inevitably end up sitting cold in the corner of the buffet table.
He suggested microwaving them first to save time. I looked at him like he had lost his mind. You know that feeling when you’re so attached to your “traditional” method that any shortcut feels like a betrayal? That was me. I wanted the crunch. I wanted the creamy, rich sauce. I wanted that specific texture that only comes from blanching fresh beans and frying onions from scratch.
But honestly, looking at the clock, I had zero time. So, I did something reckless. I let him take over the prep while I focused on the sauce. He chopped the beans unevenly, sure, but he also discovered something I had never thought to try: making the crispy topping ahead of time and storing it separately. It seemed like a weird hack, but we tried it.
It worked completely. The onions stayed crisp even after sitting in the fridge overnight. The beans stayed tender but firm. When we finally baked it, the result was better than anything I had ever made from scratch. I was humbled. I had been so focused on the “right” way to cook that I missed the “better” way. That night changed how I approach this dish forever.
I mean, let me tell you, there is something deeply satisfying about knowing you can prep the entire casserole hours before guests arrive. It takes the stress out of hosting. You just pull it out of the fridge, pop it in the oven, and watch that golden, crunchy topping bubble up. It’s not just a recipe; it’s a peace treaty with my own perfectionism. And now, I keep making it this way because it’s the only way I trust.
Why You’ll Love This Recipe
This isn’t just another green bean casserole. It’s the version that actually delivers on the promise of texture. I’ve tested dozens of versions over the years, from the classic canned soup method to complicated gourmet twists, and this crispy make-ahead green bean casserole stands out for a few key reasons. It balances ease with genuine, homemade flavor in a way that feels almost unfair.
- Quick & Easy Prep: The secret is in the make-ahead nature. You can chop, cook, and assemble this entirely the day before. When dinner time hits, you only need about 30 minutes in the oven. It’s perfect for busy weeknights or those chaotic holiday mornings where you want to look like a pro without the stress.
- Simple Ingredients: You likely already have everything in your kitchen. No fancy grocery trips needed. Just fresh green beans, basic pantry staples for the sauce, and a few simple items for the topping. It proves that great food doesn’t require an exotic ingredient list.
- Perfect for Gatherings: Whether it’s Thanksgiving, Christmas, or a casual potluck, this dish is a crowd-pleaser. It travels well and reheats beautifully. The kids love the creamy center, and the adults appreciate the sophisticated crunch of the homemade topping.
- Unbelievably Delicious: The texture combo is next-level comfort food. The contrast between the silky, savory sauce and the shattering-crisp fried onions is what keeps people coming back for seconds. It’s the kind of dish that makes you close your eyes after the first bite.
- Texture Innovation: What makes this recipe different from the rest is the technique. By frying the onions separately and storing them crisp, you avoid the soggy mess that plagues most make-ahead casseroles. It’s not just another version—it’s your best version.
This recipe isn’t just good—it’s the kind that brings people together. It’s comfort food reimagined, faster than traditional methods but with the same soul-soothing satisfaction. It’s perfect for impressing guests without stress, or turning a simple meal into something memorable.
What Ingredients You Will Need
This recipe uses simple, wholesome ingredients to deliver bold flavor and satisfying texture without the fuss. The magic lies in how these basic components interact. We are avoiding heavy creams and artificial thickeners in favor of a rich, homemade roux-based sauce that feels luxurious but is actually quite straightforward.
For the Green Beans
- 2 lbs fresh green beans: Trimmed and cut into 1.5-inch pieces. Look for bright green, firm beans. Avoid any with yellow spots or limpness. (Adds freshness and crunch)
- 1 tbsp olive oil: For sautéing. (Use a high-quality oil for better flavor)
- 2 cloves garlic: Minced. (Adds depth to the blanching process)
- 1 tsp salt: For the blanching water. (Essential for seasoning the beans from the inside out)
- 1 cup ice water: For the ice bath. (Stops the cooking process immediately to keep them vibrant)
For the Creamy Sauce
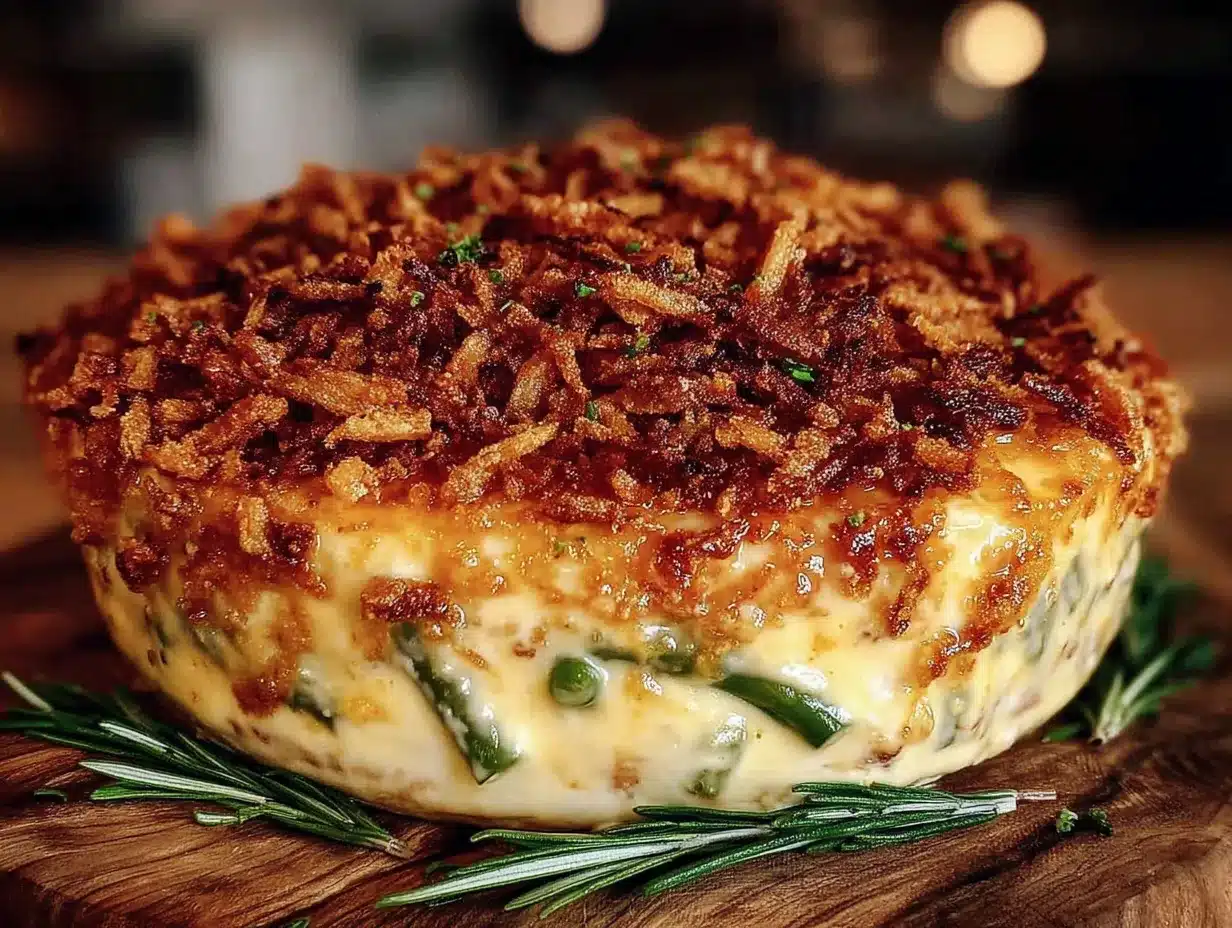
- 4 tbsp unsalted butter: Melted. (I recommend Kerrygold for its rich flavor profile)
- 1/3 cup all-purpose flour: To create the roux. (Sifted if you want to avoid lumps, though whisking well works fine)
- 2 cups chicken or vegetable broth: Low sodium preferred. (Allows you to control the salt level better)
- 1 cup heavy cream: For richness. (Substitute with half-and-half for a lighter option if needed)
- 1 tsp Dijon mustard: (Adds a subtle tang that cuts through the richness)
- 1/2 tsp black pepper: Freshly cracked. (Adds warmth and bite)
- 1/2 tsp nutmeg: Ground. (A pinch goes a long way in savory dishes)
For the Crispy Topping
- 2 cups French’s fried onions: Or homemade fried onions. (If making from scratch, use thinly sliced yellow onions and panko breadcrumbs)
- 2 tbsp butter: Melted. (Helps toast the onions further in the oven)
- 1/4 cup parmesan cheese: Grated finely. (Adds a salty, umami kick to the crunch)
For the best results, I suggest buying high-quality broth. Cheap broth can taste metallic or overly salty. Also, if you are using frozen green beans, thaw them completely and pat them very dry before adding them to the casserole. Moisture is the enemy of crispiness.
Equipment Needed
You don’t need a fancy kitchen to make this, but having the right tools makes a huge difference. Here is what you will need.
- Large Dutch Oven or Stockpot: Essential for blanching the green beans. A pot with a tight lid helps retain heat. If you don’t have one, a large saucepan works.
- Slotted Spoon or Spider Strainer: To remove the beans from the boiling water and transfer them to the ice bath. A slotted spoon is fine, but a spider strainer gives you better control.
- Large Mixing Bowl: For combining the sauce and beans. A bowl with a spout makes pouring easier.
- Whisk: A sturdy wire whisk is crucial for making a lump-free roux. Don’t use a fork; you need that aeration.
- 9×13 Inch Baking Dish: Standard size. Glass or ceramic works best for even heating. If you are making a smaller batch, a 2-quart casserole dish is fine.
- Small Skillet: For melting the butter for the topping. Non-stick is helpful here to prevent burning.
I’ve tried using aluminum pans, but they can sometimes react with the acidic ingredients in the sauce. Stick to glass or ceramic. Also, having a digital thermometer helps if you want to ensure your broth is at the right temperature when adding it to the roux, though visual cues work well too.
Preparation Method
Let’s walk through this step-by-step. It’s easier than it sounds, and the make-ahead aspect makes it feel almost too easy.
- Prep the Green Beans (10 minutes): Wash your green beans thoroughly. Trim the ends and cut them into uniform 1.5-inch pieces. Uniformity is key here so they cook evenly. Place them in a colander and set aside.
- Blanch the Beans (5 minutes): Bring a large pot of salted water to a rolling boil. Prepare a bowl of ice water nearby. Carefully add the green beans to the boiling water. Cook for exactly 3-4 minutes. You want them tender-crisp, not mushy. Watch them closely. Overcooking is the biggest mistake people make here.
- Shock the Beans (2 minutes): Immediately transfer the beans to the ice water bath. This stops the cooking process and locks in that bright green color. Let them sit for at least 2 minutes. Then, drain them well. Pat them dry with a paper towel. Excess water will make the casserole soggy, so be thorough here.
- Make the Roux (5 minutes): In a medium saucepan, melt 4 tablespoons of butter over medium heat. Once foamy, whisk in the flour. Cook this mixture for about 2 minutes, stirring constantly. It should turn a light blonde color and smell nutty. This cooks out the raw flour taste.
- Create the Sauce (5 minutes): Slowly pour in the chicken broth while whisking vigorously. Do not stop whisking. Add the heavy cream, Dijon mustard, black pepper, and nutmeg. Continue to whisk until the mixture thickens and simmers gently. It should coat the back of a spoon. This usually takes about 3-4 minutes. If it gets too thick, add a splash more broth.
- Combine (2 minutes): Add the drained green beans to the sauce. Stir gently to coat every bean. Taste the mixture. Add more salt or pepper if needed. Remember, the fried onions and parmesan will add salt, so don’t over-season yet.
- Assemble for Make-Ahead (2 minutes): Transfer the bean and sauce mixture into your 9×13 baking dish. Smooth the top. Let it cool to room temperature. Once cool, cover tightly with plastic wrap and refrigerate. This can sit for up to 24 hours.
- Prepare the Topping (5 minutes): When you are ready to bake, preheat your oven to 375°F (190°C). In a small skillet, melt 2 tablespoons of butter. Add the fried onions and parmesan cheese. Toss to combine. This step toasts the onions slightly, ensuring maximum crunch.
- Bake (25-30 minutes): Remove the plastic wrap from the casserole. Sprinkle the onion-parmesan mixture evenly over the top. Bake for 25-30 minutes. The casserole should be bubbly around the edges and the topping should be golden brown. If the topping browns too quickly, tent it with foil.
- Rest and Serve (5 minutes): Let the casserole rest for 5 minutes before serving. This allows the sauce to set slightly, making it easier to scoop.
Troubleshooting Tips
If the sauce looks separated, it might be due to high heat. Whisk in a teaspoon of cold water to bring it back together. If the beans seem watery after thawing from the fridge, drain off any excess liquid before baking. The ice bath step is critical for preventing this.
Cooking Tips & Techniques
Having cooked this recipe dozens of times, I’ve learned a few tricks that save the day.
Don’t Skip the Ice Bath: I know it seems like extra work, but it’s non-negotiable. If you just drain the hot water, the residual heat will continue to cook the beans, turning them olive-green and mushy. The ice bath keeps them vibrant and crisp.
Whisk Constantly: When making the roux, do not walk away. Flour can clump instantly if you stop stirring. A consistent whisking motion ensures a silky sauce without lumps. If you do get lumps, strain the sauce through a fine-mesh sieve.
Room Temperature Ingredients: If you are baking immediately, let the sauce and beans come to room temperature before adding the topping. This ensures even cooking. If you are making it ahead, you can bake it straight from the fridge, but it may take an extra 5-10 minutes in the oven.
Toast the Onions: Using store-bought fried onions is convenient, but they can be soft. Tossing them with a little butter and parmesan before baking adds a layer of flavor and texture that elevates the dish. It’s a small step that makes a big difference.
Monitor the Oven: Every oven is different. Check your casserole at the 20-minute mark. If the top is browning too fast, cover it loosely with foil. You want the inside hot and bubbly, not the top burnt.
Variations & Adaptations
This recipe is a great base, so feel free to tweak it to suit your tastes.
- Vegetarian/Vegan: Swap the chicken broth for vegetable broth and the heavy cream for full-fat coconut cream or oat cream. Use vegan butter for the roux. The fried onions are usually vegan, but check the label for dairy.
- Gluten-Free: Use a gluten-free all-purpose flour blend for the roux. Ensure your fried onions are certified gluten-free, as some brands use wheat flour as a binder.
- Low-Carb: Skip the flour in the roux. Instead, thicken the sauce with a small amount of xanthan gum or use a cream cheese base. Swap the fried onions for crushed pork rinds or almond flour for a crunchy topping.
- Flavor Boost: Add 1/2 cup of sautéed mushrooms to the bean mixture. They add an earthy, savory depth that pairs perfectly with the creamy sauce. You can also add a pinch of red pepper flakes for a little heat.
- Personal Twist: I sometimes add a layer of sharp cheddar cheese between the beans and the topping. It adds a nice meltiness that complements the parmesan crunch.
Serving & Storage Suggestions
This casserole is best served hot, right out of the oven. The steam rising from the dish brings out the aroma of the fried onions and herbs. Garnish with fresh chopped parsley or chives for a pop of color and freshness.
Pairing Suggestions: It pairs wonderfully with roast turkey, ham, or roasted chicken. For a lighter meal, serve it alongside a simple green salad with a vinaigrette. A crisp white wine or a light lager beer also complements the rich flavors well.
Storage: Leftovers can be stored in an airtight container in the refrigerator for up to 3 days. The sauce will thicken as it cools, which is normal.
Reheating: To reheat, place the desired portion in a microwave-safe dish and heat in 30-second intervals, stirring in between. Alternatively, reheat in a 350°F oven for 15-20 minutes, covered with foil to prevent drying out. You may need to add a splash of broth or milk if it looks too thick.
Freezing: This casserole freezes well. Assemble it completely (without the topping) and freeze for up to 2 months. Thaw overnight in the fridge before baking. Add the topping just before baking for best texture.
Nutritional Information & Benefits
While this is a comfort food, it does have some nutritional merits. Green beans are a good source of Vitamin C, Vitamin K, and fiber. They are low in calories and high in nutrients.
Estimated Nutrition per Serving (1/10 of casserole):
- Calories: 180
- Protein: 4g
- Carbohydrates: 12g
- Fiber: 3g
- Fat: 12g
- Sodium: 450mg (varies based on broth and cheese)
The dish is not gluten-free or dairy-free unless modified. For those with dietary restrictions, the variations mentioned above can help tailor the recipe to your needs. From a wellness perspective, I enjoy this recipe because it allows me to include more vegetables in my diet in a way that feels indulgent rather than restrictive. It’s a great way to sneak greens onto the table for picky eaters.
Conclusion
This crispy make-ahead green bean casserole is worth trying because it solves the biggest problem with holiday sides: stress. You can make it ahead, keep it fresh, and serve it hot and crunchy without last-minute panic. I love this recipe because it feels like a cheat code for hosting. It’s reliable, delicious, and universally loved.
I encourage you to try it and see how the make-ahead technique changes your experience. Feel free to add your own twists, like mushrooms or extra cheese. If you make this, please leave a comment below and let me know how it turned out. I’d love to hear your variations and tips.
Happy cooking! May your table be full and your stress be low.
FAQs
Can I use frozen green beans instead of fresh?
Yes, you can. However, frozen beans are often softer. Thaw them completely and pat them very dry before adding them to the sauce. You may need to reduce the cooking time in the oven slightly since they are already cooked.
Why is my casserole watery?
This usually happens if the green beans aren’t dried thoroughly after blanching, or if the sauce wasn’t thickened enough. Make sure to use a paper towel to remove excess moisture from the beans, and ensure your roux is cooked until it coats the back of a spoon.
Can I make this recipe completely from scratch, including the onions?
Absolutely. To make fried onions from scratch, slice yellow onions thinly, toss them in flour, and fry them in oil until crispy. Drain on paper towels. This takes more time but offers superior flavor and texture compared to store-bought versions.
How far in advance can I prepare this casserole?
You can assemble the casserole up to 24 hours in advance. Store it in the refrigerator covered tightly. If you leave it longer, the beans may become too soft and the sauce may separate.
What is the best way to reheat leftovers?
Reheat in the microwave for convenience, stirring every 30 seconds. For better texture, reheat in the oven at 350°F for 15-20 minutes. You may need to add a little broth or milk to loosen the sauce.
Pin This Recipe!
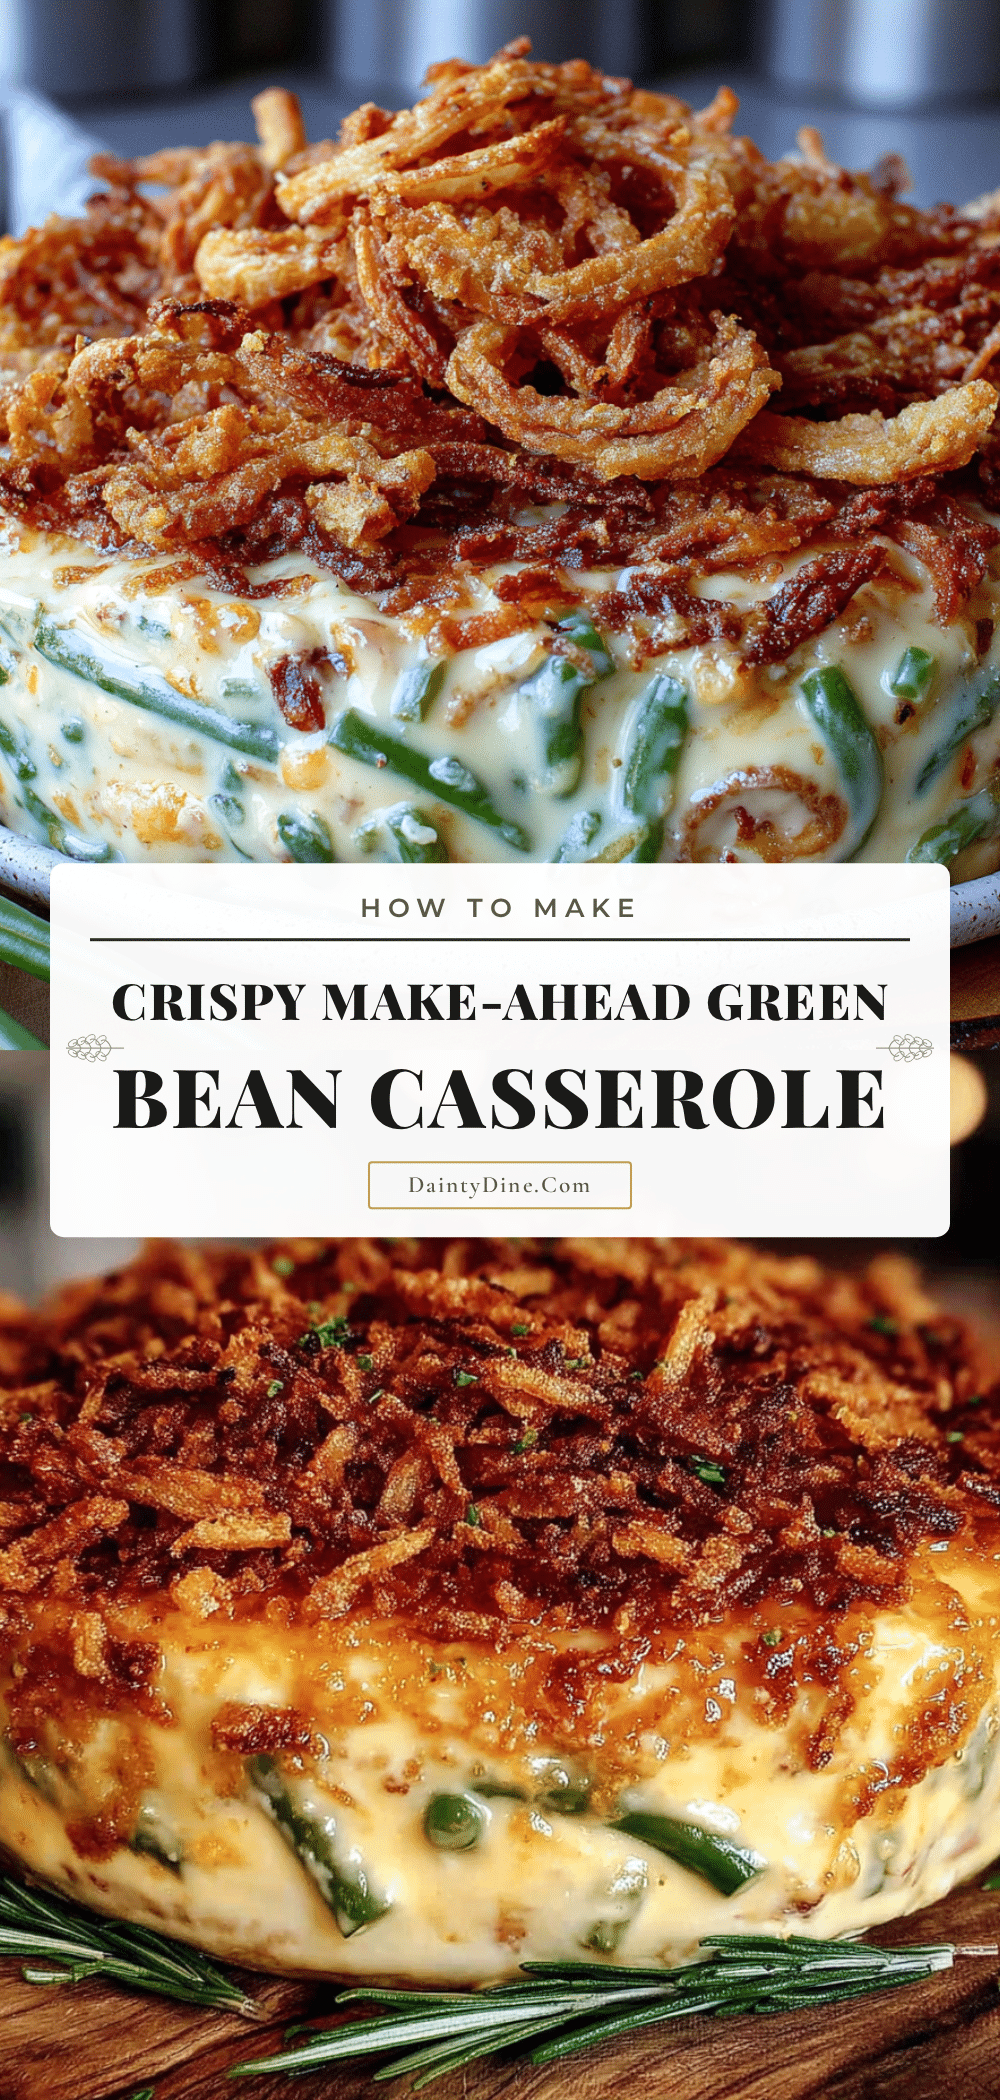
Crispy Green Bean Casserole: Best Easy Make-Ahead Recipe

A stress-free, make-ahead green bean casserole featuring tender blanched beans in a rich homemade roux sauce, topped with crispy fried onions and parmesan for perfect texture.
- Prep Time: 25 minutes
- Cook Time: 30 minutes
- Total Time: 55 minutes
- Yield: 10 servings 1x
- Category: Side Dish
- Cuisine: American
Ingredients
- 2 lbs fresh green beans, trimmed and cut into 1.5-inch pieces
- 1 tbsp olive oil
- 2 cloves garlic, minced
- 1 tsp salt (for blanching water)
- 1 cup ice water (for ice bath)
- 4 tbsp unsalted butter, melted (for sauce)
- 1/3 cup all-purpose flour
- 2 cups chicken or vegetable broth, low sodium
- 1 cup heavy cream
- 1 tsp Dijon mustard
- 1/2 tsp black pepper, freshly cracked
- 1/2 tsp nutmeg, ground
- 2 cups French’s fried onions (or homemade)
- 2 tbsp butter, melted (for topping)
- 1/4 cup parmesan cheese, grated finely
Instructions
- Wash, trim, and cut green beans into 1.5-inch pieces.
- Bring a large pot of salted water to a rolling boil. Prepare a bowl of ice water.
- Blanch green beans in boiling water for 3-4 minutes until tender-crisp.
- Immediately transfer beans to the ice water bath for 2 minutes to stop cooking, then drain and pat dry thoroughly.
- In a medium saucepan, melt 4 tbsp butter over medium heat. Whisk in flour and cook for 2 minutes until light blonde.
- Slowly whisk in chicken broth, then add heavy cream, Dijon mustard, black pepper, and nutmeg. Simmer until thickened.
- Stir the blanched green beans into the sauce until coated. Taste and adjust seasoning.
- Transfer mixture to a 9×13 baking dish. Cool to room temperature, cover, and refrigerate for up to 24 hours if making ahead.
- Preheat oven to 375°F (190°C). In a small skillet, melt 2 tbsp butter and toss with fried onions and parmesan.
- Remove plastic wrap from casserole. Sprinkle onion-parmesan topping evenly over the top.
- Bake for 25-30 minutes until bubbly and topping is golden brown. Tent with foil if browning too quickly.
- Let rest for 5 minutes before serving.
Notes
Ensure green beans are patted completely dry after the ice bath to prevent a watery casserole. The ice bath is critical for maintaining vibrant green color and crisp texture. If baking from the fridge, add 5-10 minutes to the baking time. For a gluten-free version, use GF flour and certified GF fried onions.
Nutrition
- Serving Size: 1/10 of casserole
- Calories: 180
- Sugar: 3
- Sodium: 450
- Fat: 12
- Saturated Fat: 7
- Carbohydrates: 12
- Fiber: 3
- Protein: 4
Keywords: green bean casserole, make-ahead recipe, holiday side dish, crispy onions, comfort food, Thanksgiving, Christmas, easy dinner


