Love this? Save it for later!
Share the inspiration with your friends
“You know that moment when you bite into fried chicken, and it’s like a fireworks show of crunch that somehow sticks around for hours? Well, let me tell you, that kind of magic isn’t just luck—it’s a little science and a whole lot of trial and error. I wasn’t always a fried chicken fan until I stumbled upon this recipe thanks to my friend Marco, who swore by his secret technique. Funny thing is, I met Marco at a backyard barbecue last summer, and between the sound of sizzling grills and laughter, he handed me a plate of chicken that was so crispy it almost made me forget I had a gluten sensitivity.”
Honestly, the crunch was unreal. I asked him how he got it to stay crispy for hours—no soggy patches, no rubbery aftermath. He smiled, shrugged, and said it was all about the coating and a few unexpected steps that most recipes overlook. I tried to jot down his method between bites (and between dodging the neighborhood kids playing tag), but I missed a few details.
After a few messy kitchen sessions at home—spills, smoke alarms, and a near disaster involving too much oil—I finally nailed it. This fried chicken recipe has been my go-to ever since, perfect for everything from casual family dinners to impressing friends at potlucks. Maybe you’ve been there, hunting for that perfect crunch that doesn’t disappear five minutes after frying. Well, this is it. Let me share how to make crispy always-crispy fried chicken that stays crunchy for hours, so you can enjoy that perfect bite anytime!
Why You’ll Love This Recipe
Over the years, I’ve tested countless fried chicken recipes, tweaking everything from the marinade to the frying temperature. This recipe stands out because it’s been tried and true in my kitchen (and yes, tested on very picky eaters too!). Here’s why this crispy always-crispy fried chicken recipe will quickly become your favorite:
- Quick & Easy: From start to finish, it’s ready in just about 45 minutes—perfect for busy weeknights or spontaneous cravings.
- Simple Ingredients: No need for exotic spices or fancy flours. You likely have everything you need right in your pantry.
- Perfect for Any Occasion: Whether it’s game day, a casual dinner, or a picnic, this chicken shines every time.
- Crowd-Pleaser: Adults, kids, even the neighbors have asked for seconds (and thirds!).
- Unbelievably Delicious: The secret lies in the coating that crisps just right, locking in juicy, tender meat underneath.
This isn’t just another fried chicken recipe. It’s a blend of a light but crunchy crust with just the right seasoning balance, plus a clever double-dip technique that keeps moisture out and crispness in. Honestly, it’s the kind of chicken that makes you close your eyes after the first bite and say, “Wow, that’s exactly what I wanted.”
Think of it as comfort food that’s been carefully crafted—not rushed or thrown together—so every batch is just right. It’s also versatile enough to tweak with your favorite spices or dipping sauces, making it a recipe you’ll keep coming back to.
Ingredients Needed
This recipe relies on straightforward, wholesome ingredients that come together to create that perfect crunch and juicy interior. Most are pantry staples, and substitutions are easy if you’re catering to specific diets.
- Chicken pieces: Skin-on, bone-in thighs, drumsticks, or breasts (about 3 pounds / 1.4 kg). I prefer thighs and drumsticks for juiciness.
- Buttermilk: 2 cups (480 ml). This tenderizes and adds subtle tang. You can substitute with plain yogurt mixed with a splash of lemon juice.
- All-purpose flour: 2 ½ cups (320 g). This is the main coating base. For a gluten-free option, use a 1:1 gluten-free flour blend.
- Cornstarch: ½ cup (60 g). The secret ingredient for extra crispiness—don’t skip it!
- Baking powder: 1 teaspoon. Adds lightness to the crust.
- Salt: 1 tablespoon, divided. Use kosher or sea salt for best flavor.
- Black pepper: 1 teaspoon, freshly ground.
- Garlic powder: 1 teaspoon.
- Onion powder: 1 teaspoon.
- Smoked paprika: 1 teaspoon for a subtle smoky note.
- Cayenne pepper: ¼ teaspoon, optional for a little heat.
- Vegetable oil or peanut oil: For frying, about 4 cups (1 liter). I like peanut oil for its high smoke point and neutral flavor.
For best results, I recommend brands like King Arthur for flour and McCormick for spices—they’re reliable and consistent. If you’re in summer mood, toss in fresh herbs like thyme or rosemary to the buttermilk marinade for an herbal twist. I once swapped smoked paprika for chipotle powder—gave it a nice kick without overpowering the chicken.
Equipment Needed
- Heavy-bottomed skillet or cast-iron pan: Ideal for even heat distribution. I’ve tried non-stick pans, but cast iron gives the best crust.
- Deep-fry thermometer: To monitor oil temperature precisely. If you don’t have one, a candy thermometer works too.
- Large mixing bowls: For marinating and dredging the chicken.
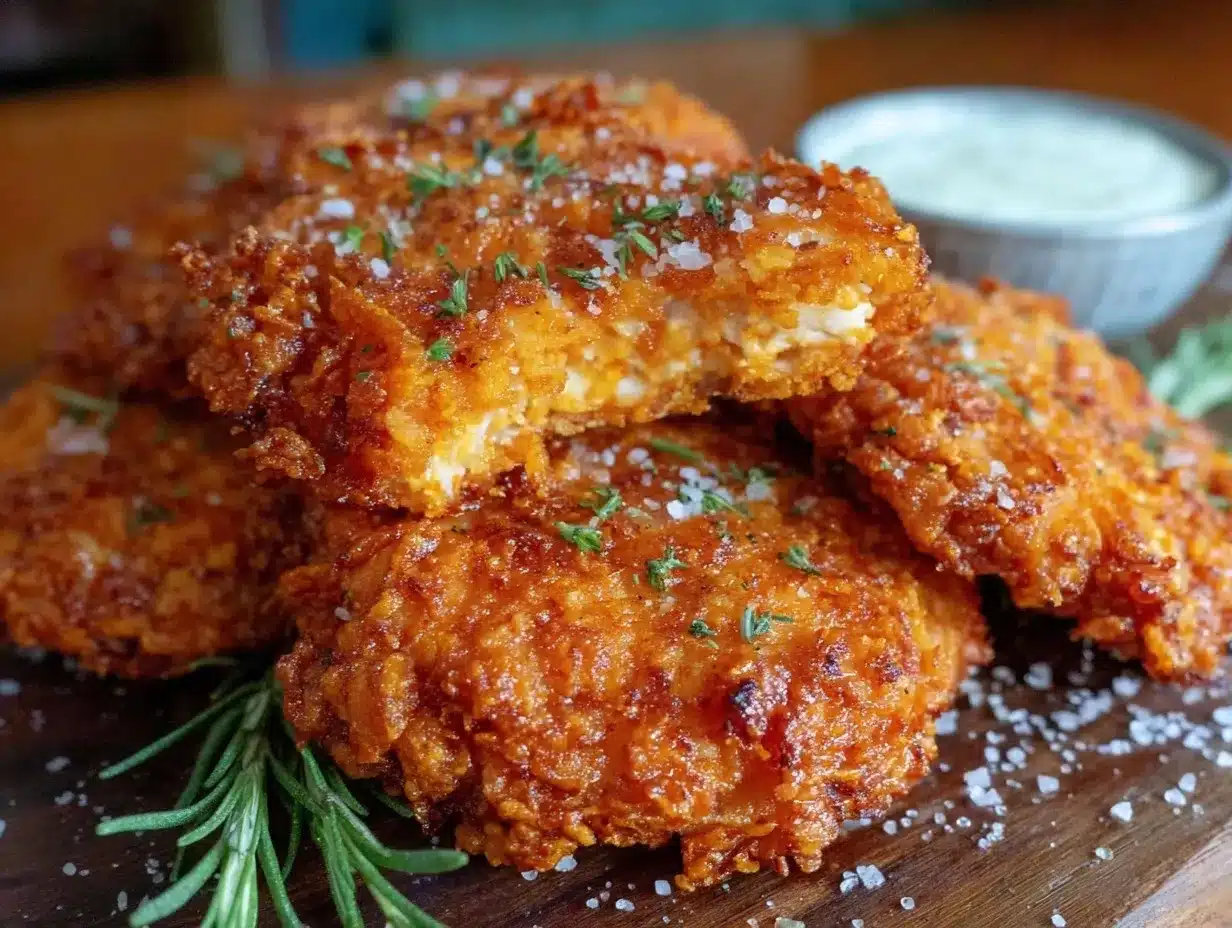
- Wire rack: For draining fried chicken to keep it crispy. Avoid paper towels—they trap steam and make crust soggy.
- Tongs: For safely handling hot chicken pieces.
- Kitchen timer: Helps keep frying times consistent.
If you’re on a budget, a heavy pan from your local store and an inexpensive thermometer do the trick. I once fried a batch in a deep saucepan without a thermometer and ended up with uneven cooking—lesson learned! Also, keep your wire rack clean and dry; it’s a game changer for crispiness.
Preparation Method
- Marinate the chicken: In a large bowl, combine 2 cups (480 ml) of buttermilk with 1 teaspoon salt and half the black pepper. Submerge the chicken pieces, cover, and refrigerate for at least 4 hours or overnight. This tenderizes the meat and infuses flavor. (Tip: If short on time, even 1 hour helps.)
- Prepare the coating: In another large bowl, whisk together flour, cornstarch, baking powder, remaining salt, black pepper, garlic powder, onion powder, smoked paprika, and cayenne (if using). This dry mix is key for the crispy crust.
- Heat the oil: Pour oil into your skillet to a depth of about 2 inches (5 cm). Heat over medium-high until it reaches 350°F (175°C). Use a thermometer to check temperature. (Too hot? The crust burns; too cool? Chicken absorbs oil and gets greasy.)
- Dredge the chicken: Remove each piece from the buttermilk, allowing excess to drip off. Then dip back briefly into the buttermilk (this double dip is the secret for maximum crunch). Next, coat thoroughly in the flour mixture, pressing lightly to adhere. Shake off excess.
- Fry in batches: Carefully place chicken pieces in hot oil. Don’t overcrowd the pan—fry in batches to keep oil temperature steady. Cook for about 12-15 minutes, turning halfway, until golden brown and internal temperature reaches 165°F (74°C). (If you don’t have a thermometer, pierce the thickest part—the juices should run clear.)
- Drain and rest: Use tongs to transfer chicken to a wire rack set over a baking sheet to drain. This prevents sogginess from steam. Let rest for 5-10 minutes before serving; this helps the coating set and keeps it crunchy longer.
Occasionally, I get impatient and pile the fried chicken on paper towels—big mistake! The texture instantly suffers. Also, I like to keep the oven warm at 200°F (95°C) and place finished batches inside to stay hot without drying out.
Cooking Tips & Techniques
Getting consistently crispy fried chicken can be tricky, but a few tricks make all the difference:
- Use cornstarch: This light starch dries out the crust and prevents sogginess. Skipping it or using only flour leads to a denser crust.
- Double dip: The buttermilk-flour-buttermilk-flour method creates layers that lock moisture in and crunch out.
- Maintain oil temperature: Keep the oil between 325°F and 350°F (163°C-175°C). Going too low results in greasy chicken; too high burns the crust before the inside cooks.
- Don’t overcrowd the pan: Crowding drops oil temperature, causing soggy crust.
- Rest on wire rack: Paper towels trap steam; wire racks let air circulate and keep crust crisp.
One time, I forgot to check the oil temperature and ended up with blackened crust and raw centers—lesson learned the hard way! Also, if you want extra crunchy bits, sprinkle a bit of baking powder on the flour before coating. It helps create that extra texture we all crave.
Variations & Adaptations
Feel free to tweak this recipe to suit your tastes or dietary needs:
- Spice it up: Add cayenne or hot paprika to the flour mix for a kick. Alternatively, mix in dried herbs like oregano or thyme.
- Gluten-free: Swap all-purpose flour with a gluten-free blend and use almond milk mixed with lemon juice instead of buttermilk.
- Baked version: For a lighter take, coat chicken as usual, then bake at 425°F (220°C) on a wire rack for 35-40 minutes, flipping halfway. It won’t be quite as crunchy but still delicious.
- Dairy-free: Use coconut milk with a splash of vinegar instead of buttermilk.
- Personal twist: I once added finely crushed cornflakes to the coating for an extra crunch surprise—totally worth trying!
Serving & Storage Suggestions
This fried chicken is best enjoyed hot or at room temperature. Serve it with classic sides like coleslaw, mashed potatoes, or a fresh green salad. For drinks, a cold lemonade or a crisp beer pairs beautifully.
If you have leftovers, store them in an airtight container in the refrigerator for up to 3 days. To reheat and revive crispiness, warm in a preheated oven at 375°F (190°C) on a wire rack for 10-15 minutes. Avoid microwaving, which makes the crust soggy.
Interestingly, the chicken even tastes better the next day as the flavors deepen, but the crunch won’t last as long. Planning ahead? You can freeze cooked pieces for up to 2 months—just thaw overnight and reheat as described.
Nutritional Information & Benefits
Each serving (about 1 medium chicken piece) contains approximately:
| Calories | 350-400 kcal |
|---|---|
| Protein | 28g |
| Fat | 22g |
| Carbohydrates | 15g |
Using skin-on, bone-in pieces ensures juicy, flavorful meat with a satisfying texture. The buttermilk marinade adds calcium and probiotics, which can aid digestion. Choosing peanut or vegetable oil with a high smoke point reduces harmful compounds from overheating.
For those watching carbs, swapping the flour for almond or coconut flour drops starch content considerably. Just be mindful that crust texture will differ. This recipe fits well into a balanced diet when enjoyed in moderation and paired with vegetable sides.
Conclusion
If you’re after fried chicken that stays crispy for hours without the soggy aftermath, this recipe is your new best friend. It’s a simple, approachable method with few ingredients but big flavor and texture payoff. I love it because it’s reliable—no guessing or stressing—and it always makes me feel like a kitchen pro.
Feel free to personalize the seasoning, try different cuts, or experiment with the coating to make it truly yours. And hey, if you give it a go, I’d love to hear how your crispy always-crispy fried chicken turns out. Leave a comment below with your tweaks or triumphs—let’s swap stories!
Trust me, once you taste this, you’ll want to keep this recipe in your arsenal for every fried chicken craving that sneaks up on you.
FAQs
Why does my fried chicken lose its crispiness quickly?
Usually, it’s from resting the chicken on paper towels or stacking pieces, which traps steam. Use a wire rack and avoid overcrowding to keep the crust crunchy.
Can I use boneless chicken for this recipe?
Yes! Boneless thighs or breasts work, but reduce frying time to about 8-10 minutes to avoid overcooking.
What’s the best oil for frying chicken?
Peanut oil and vegetable oil are great due to their high smoke points and neutral flavors. Avoid olive oil as it burns easily.
How do I tell when the fried chicken is cooked through?
Use a meat thermometer; the internal temperature should reach 165°F (74°C). If you don’t have one, pierce the thickest part and check that juices run clear.
Can I prepare the chicken ahead of time?
Absolutely! Marinate the chicken overnight in buttermilk. You can also dredge and refrigerate coated chicken for a few hours before frying to save time.
By the way, if you enjoy this crispy fried chicken, you might appreciate the crispy garlic chicken recipe I shared last year—it’s another crunchy, flavorful winner. Also, for a side that pairs perfectly, try this creamy mashed potatoes that balance richness with comfort.
Pin This Recipe!
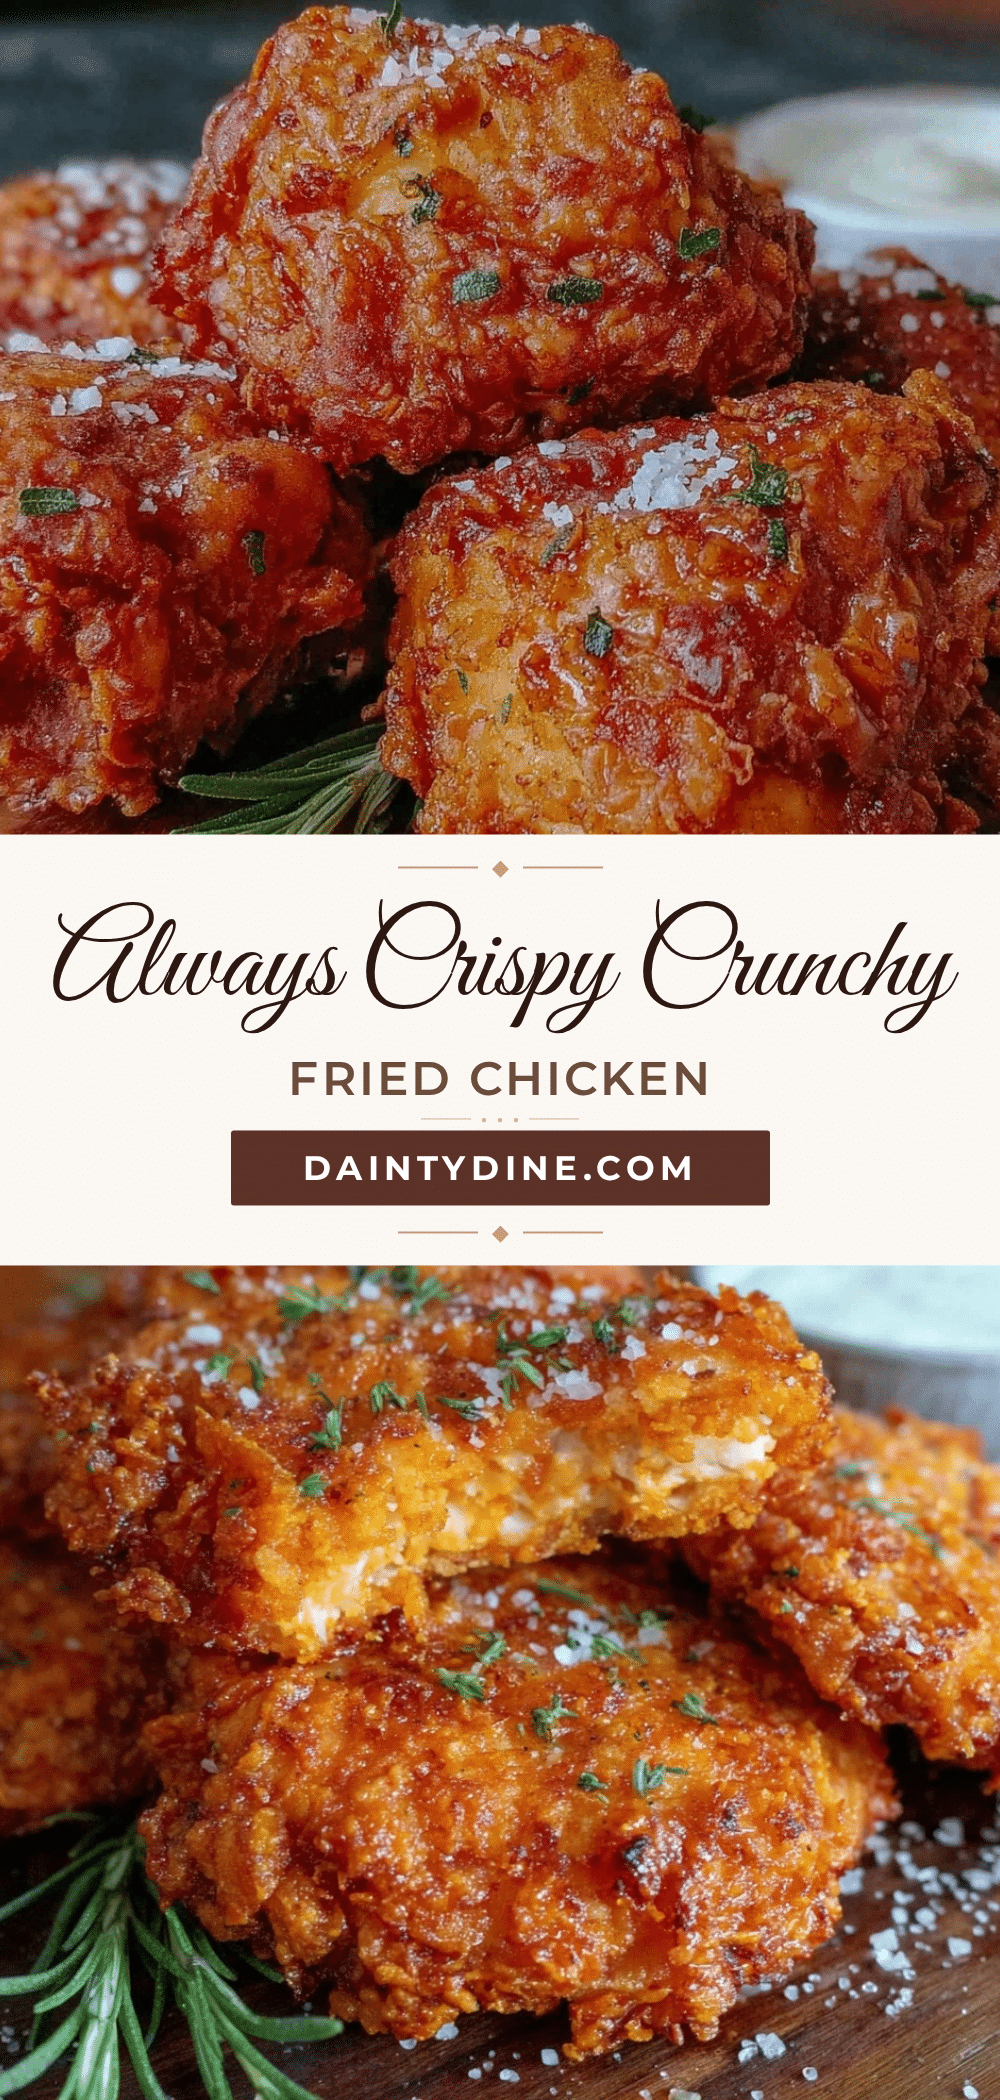
Crispy Always-Crispy Fried Chicken Recipe That Stays Crunchy for Hours Perfect Homemade Crunch
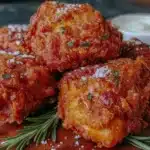
A tried-and-true fried chicken recipe that delivers a crunchy crust that stays crispy for hours, locking in juicy, tender meat underneath. Perfect for family dinners, potlucks, and any occasion.
- Prep Time: 10 minutes (plus 4 hours marinating time)
- Cook Time: 15 minutes
- Total Time: 4 hours 25 minutes
- Yield: 6 servings 1x
- Category: Main Course
- Cuisine: American
Ingredients
- 3 pounds skin-on, bone-in chicken pieces (thighs, drumsticks, or breasts)
- 2 cups buttermilk (480 ml) or plain yogurt with a splash of lemon juice
- 2 ½ cups all-purpose flour (320 g) or gluten-free flour blend for gluten-free option
- ½ cup cornstarch (60 g)
- 1 teaspoon baking powder
- 1 tablespoon salt, divided (kosher or sea salt recommended)
- 1 teaspoon freshly ground black pepper, divided
- 1 teaspoon garlic powder
- 1 teaspoon onion powder
- 1 teaspoon smoked paprika
- ¼ teaspoon cayenne pepper (optional)
- About 4 cups vegetable oil or peanut oil for frying (1 liter)
Instructions
- Marinate the chicken: In a large bowl, combine 2 cups buttermilk with 1 teaspoon salt and half the black pepper. Submerge chicken pieces, cover, and refrigerate for at least 4 hours or overnight. (If short on time, even 1 hour helps.)
- Prepare the coating: In another large bowl, whisk together flour, cornstarch, baking powder, remaining salt, black pepper, garlic powder, onion powder, smoked paprika, and cayenne pepper if using.
- Heat the oil: Pour oil into a heavy-bottomed skillet or cast-iron pan to a depth of about 2 inches. Heat over medium-high until it reaches 350°F (175°C). Use a thermometer to check temperature.
- Dredge the chicken: Remove each piece from the buttermilk, letting excess drip off. Dip briefly back into the buttermilk (double dip), then coat thoroughly in the flour mixture, pressing lightly to adhere. Shake off excess.
- Fry in batches: Carefully place chicken pieces in hot oil without overcrowding. Fry for 12-15 minutes, turning halfway, until golden brown and internal temperature reaches 165°F (74°C).
- Drain and rest: Transfer chicken to a wire rack set over a baking sheet to drain. Let rest for 5-10 minutes before serving to keep coating crunchy.
Notes
Use cornstarch in the coating for extra crispiness. Double dip chicken in buttermilk and flour for a crunch that lasts. Maintain oil temperature between 325°F and 350°F to avoid greasy or burnt crust. Avoid resting fried chicken on paper towels to prevent sogginess; use a wire rack instead. For extra crunch, sprinkle baking powder on flour before coating. To keep chicken warm without drying, place in a 200°F oven after frying.
Nutrition
- Serving Size: 1 medium chicken pie
- Calories: 350400
- Fat: 22
- Carbohydrates: 15
- Protein: 28
Keywords: fried chicken, crispy fried chicken, crunchy chicken, homemade fried chicken, buttermilk fried chicken, easy fried chicken recipe