Love this? Save it for later!
Share the inspiration with your friends
This was supposed to be a simple pan-seared chicken dinner. I had the cast iron out, the butter softening on the counter, and a nice little plan for a Thursday night. Then my phone rang, I got distracted for what felt like thirty seconds but was probably closer to fifteen minutes, and when I came back to the kitchen, the butter was a puddle, the chicken had been sitting out too long, and honestly, I just didn’t feel like standing over a hot skillet anymore. I looked at the air fryer sitting there on the counter—the one I usually only use for frozen fries—and thought, why not? I tossed those chicken thighs in, sprinkled on some garlic powder and Parmesan because that’s what was in arm’s reach, and pressed start. What came out was nothing like the plan—and better.
The skin was shatteringly crisp, the meat was so tender it practically fell off the bone, and that garlic Parmesan crust? Let me tell you, it was the kind of accident you keep trying to recreate on purpose. I honestly stood there in the kitchen eating one right off the rack, burning my fingers and not caring one bit. Maybe you’ve been there—the night when dinner plans fall apart and something unexpected takes their place. That’s how this crispy air fryer chicken thighs recipe was born, and it’s been a regular in my rotation ever since. I keep making it because it delivers that deep, savory satisfaction without the grease splatter or the hour-long cleanup. It’s the meal that reminds me that sometimes the best things come from letting go of the plan.
Why You’ll Love This Recipe
I’ve tested this recipe more times than I care to admit, tweaking temperatures and timing until every batch came out perfect. Here’s why I think you’ll fall for these crispy air fryer chicken thighs the same way I did:
- Quick & Easy: From fridge to plate in under 30 minutes. No marinating, no complicated steps—just simple, honest cooking that fits into a busy weeknight.
- Simple Ingredients: You probably have everything in your kitchen right now. Chicken thighs, garlic, Parmesan, a few pantry spices. No fancy grocery trips needed.
- Perfect for Busy Dinners: Whether it’s a rushed Tuesday or a lazy Sunday, these thighs work. They’re impressive enough for company but easy enough for a solo meal.
- Crowd-Pleaser: I’ve served these to picky kids, health-conscious friends, and serious meat-eaters. Every single person went back for seconds. The crispy skin and juicy meat win everyone over.
- Unbelievably Delicious: The texture is what gets me every time. That crackling, golden-brown exterior gives way to tender, flavorful meat that’s anything but dry. It’s comfort food that feels a little bit fancy.
What makes this version different from every other air fryer chicken recipe out there is the technique. I learned the hard way that simply tossing chicken in the basket leads to soggy skin and uneven cooking. This method uses a light coating of Parmesan and a specific temperature trick that locks in moisture while creating that irresistible crust. It’s not just another recipe—it’s the one I turn to when I need dinner to be both effortless and memorable. Honestly, it’s the kind of meal that makes you close your eyes after the first bite, wondering why you ever bothered with the oven.
What Ingredients You Will Need
This recipe relies on a handful of everyday ingredients that work together to create something special. The magic is in how they’re combined, not in how exotic they are.
- Bone-in, skin-on chicken thighs (about 4-6 thighs, roughly 2 pounds) — This cut is forgiving and stays juicy during the high-heat air frying. The skin is essential for that crispy texture we’re after. I prefer thighs that are similar in size so they cook evenly.
- Fresh garlic (4-5 cloves, minced) — Please use fresh here. The pre-minced stuff in a jar has a different flavor that can turn bitter in the air fryer. Fresh garlic gives a sweet, aromatic punch that complements the Parmesan beautifully.
- Grated Parmesan cheese (½ cup, finely grated) — Not the shredded stuff from a bag. Look for the powdery, finely grated Parmesan that clumps together. It adheres better to the chicken and creates a more even crust. I like the kind from the refrigerated section near the deli.
- Olive oil (2 tablespoons) — Helps the seasoning stick and encourages browning. You can use avocado oil if you prefer a higher smoke point, but olive oil adds a nice fruity note.
- Garlic powder (1 teaspoon) — This is separate from the fresh garlic. It adds a deeper, more concentrated garlic flavor that doesn’t burn as easily in the air fryer.
- Onion powder (1 teaspoon) — A subtle backbone flavor that rounds out the savory notes.
- Paprika (1 teaspoon) — I use smoked paprika for a hint of warmth, but sweet paprika works too. This adds color and a gentle smokiness.
- Dried oregano (½ teaspoon) — Optional, but I love the herbal lift it gives. Italian seasoning works as a substitute.
- Salt and black pepper (to taste) — Don’t be shy with the salt. It seasons the skin and helps it crisp up.
- Fresh parsley (for garnish, optional) — A sprinkle of green makes the dish look finished and adds a fresh pop of flavor.
For the best results, pat the chicken thighs dry with paper towels before you start. Moisture is the enemy of crispiness, so removing as much surface liquid as possible is a game-changer. If you’re out of Parmesan, you can swap in Pecorino Romano for a saltier, sharper flavor. Just go easy on the added salt since Romano is more intense.
Equipment Needed
You don’t need a professional kitchen to make this work. Here’s what I use and what you can substitute if you’re improvising:
- Air fryer (any size works, but a basket-style model is easiest) — I use a 5.8-quart Cosori, and it fits 4-6 thighs comfortably. If yours is smaller, cook in batches to avoid overcrowding.
- Tongs — For flipping the chicken without tearing the skin. Silicone-tipped ones are gentle on the nonstick basket.
- Mixing bowl — A medium bowl for tossing the chicken with oil and seasonings. Glass or stainless steel works best.
- Paper towels — Absolutely essential for drying the chicken. Don’t skip this step.
- Instant-read thermometer — This is my non-negotiable tool. Chicken thighs are done at 175°F internally (I know the USDA says 165°F, but thighs taste better at a slightly higher temp). A thermometer takes the guesswork out.
- Cutting board and knife — For mincing garlic and chopping parsley.
If you don’t have an air fryer, you can use a convection oven set to 400°F. Place the chicken on a wire rack over a baking sheet to allow air circulation. The cooking time will be longer—about 25-30 minutes—but the result is similar. I’ve also made these in a regular oven at 425°F, and while they’re good, they never get quite as crispy as the air fryer version. That circulating hot air really does something special to the skin.
Preparation Method

Let me walk you through this step by step. I’ve made every mistake in the book so you don’t have to.
- Prep the chicken. Start by patting the chicken thighs dry with paper towels. Be thorough—get into the crevices and underneath the skin if you can. This is the single most important step for crispy skin. Place the dried thighs in a large mixing bowl.
- Season the chicken. Drizzle the olive oil over the chicken and toss to coat evenly. In a small bowl, mix together the garlic powder, onion powder, paprika, dried oregano, salt, and pepper. Sprinkle this spice blend over the chicken and toss again until every piece is evenly coated. Let it sit for 5 minutes while you preheat the air fryer.
- Preheat the air fryer. Set your air fryer to 380°F (193°C) and let it run for 3-5 minutes. Preheating ensures the chicken starts cooking immediately, which helps the skin crisp up faster. I learned this after a few sad, soggy batches.
- Add the garlic and Parmesan. In a separate small bowl, combine the minced fresh garlic and grated Parmesan. Sprinkle this mixture over the seasoned chicken and gently press it onto the skin. Don’t toss it at this stage or the Parmesan will fall off. Use your hands to pat it on firmly.
- Arrange in the air fryer basket. Place the chicken thighs skin-side down in a single layer in the basket. Leave a little space between each piece for air to circulate. If they’re touching, they won’t crisp evenly. Work in batches if needed.
- Cook the first side. Air fry at 380°F for 12 minutes. The skin should start turning golden and crispy. You might see some juices pooling on top—that’s normal.
- Flip and finish. Using tongs, carefully flip each thigh over so the skin side is up. Cook for another 10-12 minutes at 380°F. The internal temperature should reach 175-180°F when measured at the thickest part without touching the bone. The skin should be deep golden brown and crackling when you tap it.
- Rest before serving. Remove the chicken from the air fryer and let it rest on a plate for 5 minutes. This allows the juices to redistribute so every bite is tender and moist. Resist the urge to dig in immediately—I know it’s hard.
- Garnish and serve. Sprinkle with fresh chopped parsley if you’re using it. Serve hot with your favorite sides.
A few things I’ve learned along the way: If your chicken thighs are particularly large, add 2-3 minutes to the cooking time. If they’re small, check them at the 20-minute mark. The smell of garlic and Parmesan filling your kitchen is a good sign—you’re on the right track.
Cooking Tips & Techniques
After about a dozen batches, I’ve picked up some tricks that make a real difference. Here’s what I wish someone had told me when I started:
Don’t overcrowd the basket. I know it’s tempting to cram everything in to save time, but overcrowding traps steam and turns that beautiful crispy skin into something sad and flabby. Cook in batches if you have to. The extra 10 minutes is worth it.
Temperature matters more than you think. I tried cooking these at 400°F once, thinking higher heat would mean crispier skin. What I got was burnt Parmesan and raw spots near the bone. That sweet spot at 380°F gives the fat time to render while the skin crisps without burning the garlic and cheese.
Patience with the flip. When you flip the chicken, be gentle. The Parmesan crust is delicate at that stage, and rough handling can pull it off. Use tongs and a light touch. If some pieces stick, let them cook another minute before trying again.
Let the air fryer recover between batches. If you’re cooking multiple batches, give the air fryer a minute to come back to temperature before adding the next batch. Dropping cold chicken into a cooled-down basket messes with the cooking time.
Check for doneness with a thermometer. I can’t stress this enough. Chicken thighs are forgiving, but undercooked chicken is no joke. The thermometer is your best friend. I learned this lesson after serving a slightly underdone thigh to a dinner guest. Never again.
One mistake I made early on: I skipped the resting step because I was hungry and impatient. The chicken was good, but the juices ran out onto the plate, leaving the meat drier than it should have been. Those 5 minutes of rest make a noticeable difference. Trust me on this.
Variations & Adaptations
This recipe is flexible, and I’ve tried several variations depending on what I have on hand or who I’m cooking for.
Spicy version: Add ½ teaspoon of cayenne pepper or red pepper flakes to the spice blend. The heat pairs beautifully with the garlic and Parmesan. I made this for a game day gathering, and it disappeared in minutes.
Lemon herb twist: Swap the dried oregano for dried thyme and add the zest of one lemon to the Parmesan mixture. Squeeze a little fresh lemon juice over the finished chicken. It brightens up the richness and feels lighter for spring and summer meals.
Keto-friendly adaptation: This recipe is already low in carbs, but you can boost the fat content by adding a tablespoon of melted butter to the olive oil. Brush it on halfway through cooking for extra richness. My keto friends always ask for the recipe.
Dairy-free version: Replace the Parmesan with nutritional yeast (about ¼ cup) and add an extra teaspoon of garlic powder. The nutritional yeast gives a cheesy, umami flavor without any dairy. It’s not exactly the same, but it’s surprisingly good—I’ve served it to dairy-free guests who didn’t miss the cheese at all.
Bone-in vs. boneless: If you only have boneless, skin-on thighs, reduce the cooking time to 8 minutes per side. Boneless thighs cook faster, so keep an eye on them. The skin will still get crispy, but the meat is more delicate.
Herb crust variation: Mix 2 tablespoons of finely chopped fresh herbs (rosemary, thyme, and parsley work well) into the Parmesan mixture. It adds a fresh, aromatic layer that feels fancy without extra effort. I did this for a dinner party, and everyone thought I’d spent hours on it.
Serving & Storage Suggestions
These crispy air fryer chicken thighs are versatile enough to pair with almost anything. Here’s how I like to serve them and what to do with leftovers.
Serving temperature: Serve hot, straight from the air fryer. The skin is at its crispiest within the first 15 minutes. If you need to hold them, keep them in a warm oven (200°F) on a wire rack so the bottom doesn’t get soggy.
What to serve alongside: I often pair these with a simple green salad dressed with lemon vinaigrette—the acidity cuts through the richness. Roasted vegetables like asparagus, broccoli, or Brussels sprouts work beautifully. For heartier meals, serve with mashed potatoes or crusty bread to soak up the juices. A side of garlicky sautéed spinach is another favorite.
Storage: Leftover chicken thighs keep well in an airtight container in the refrigerator for up to 4 days. The skin will soften during storage, but don’t worry—you can bring it back to life.
Reheating: The air fryer is your best bet for restoring crispiness. Reheat at 350°F for 3-4 minutes. The microwave will make the skin rubbery, so avoid it if you can. I’ve also reheated them in a hot skillet with a splash of water and a lid for a few minutes—the steam rehydrates the meat while the skin crisps up on the bottom.
Freezing: Cooked chicken thighs freeze well for up to 3 months. Wrap each thigh individually in plastic wrap, then place them in a freezer bag. Thaw overnight in the refrigerator and reheat in the air fryer. The texture won’t be quite as perfect as fresh, but it’s still delicious for a quick meal.
Flavor development: Honestly, these thighs taste even better the next day. The garlic and Parmesan flavors meld together overnight, and the meat becomes even more tender. I sometimes make a double batch just for leftovers.
Nutritional Information & Benefits
Here’s a rough estimate per serving (one chicken thigh, based on a batch of 4):
- Calories: Approximately 320-350
- Protein: 28-30 grams
- Fat: 22-25 grams
- Carbohydrates: 2-3 grams
- Fiber: 0 grams
- Sugar: 0 grams
Chicken thighs are a fantastic source of high-quality protein, which supports muscle health and keeps you feeling full. They also provide essential B vitamins, particularly B6 and B12, which help with energy metabolism. The skin contains some saturated fat, but it also contributes to the satisfying texture that makes this dish feel indulgent without being over-the-top.
Garlic is known for its anti-inflammatory properties and immune-supporting compounds. Parmesan adds calcium and a savory depth that means you don’t need much salt. This recipe is naturally low in carbohydrates, making it suitable for low-carb and keto diets. If you’re watching your sodium, go easy on the added salt since Parmesan is already salty.
From a wellness perspective, this recipe fits into a balanced approach to eating. It’s not diet food—it’s real food that happens to be nutritious. I love that I can serve this to my family knowing it’s both delicious and packed with good-for-you ingredients. No guilt, just satisfaction.
Conclusion
These crispy air fryer chicken thighs with garlic Parmesan have become a staple in my kitchen for good reason. They’re quick enough for a weeknight, impressive enough for guests, and forgiving enough for beginner cooks. The combination of crackling skin, juicy meat, and that savory garlic-Parmesan crust is hard to beat—especially when it comes together in under 30 minutes with minimal cleanup.
I hope you give this recipe a try and make it your own. Maybe you’ll add extra garlic (I always do), or throw in some red pepper flakes for heat, or serve it with your favorite dipping sauce. That’s the beauty of a simple, solid recipe—it leaves room for your personal touch. I’d love to hear how it turns out for you. Drop a comment below and let me know if you tried any variations, or tag me in your photos if you share them online.
Honestly, this recipe taught me that sometimes the best meals come from the moments when everything goes wrong. So the next time your dinner plans fall apart, don’t panic. Look around your kitchen, trust your instincts, and see what happens. You might just discover your new favorite dish.
Frequently Asked Questions
Can I use chicken breasts instead of thighs?
You can, but the results will be different. Chicken breasts are leaner and can dry out more easily in the air fryer. If you swap them in, use boneless, skin-on breasts and reduce the cooking time to 10-12 minutes per side. Check the internal temperature—165°F is safe for breasts. The skin will still crisp up nicely, but the meat won’t be as juicy as thighs.
Why is my chicken skin not getting crispy?
The most common culprit is moisture. Make sure you pat the chicken thighs completely dry before seasoning. Another issue could be overcrowding the basket—if the pieces are too close together, they steam instead of crisp. Also, check that your air fryer is preheated and that you’re cooking at the right temperature (380°F). If all else fails, add an extra 2-3 minutes to the cooking time.
Can I prepare these ahead of time?
Absolutely. You can season the chicken and coat it with the Parmesan mixture up to 24 hours in advance. Store it covered in the refrigerator, then let it sit at room temperature for 15 minutes before air frying. The flavors will meld together beautifully overnight. Just be sure to pat the chicken dry again if any moisture has accumulated.
How do I prevent the Parmesan from burning?
That’s a great question, and it took me a few tries to figure out. The key is cooking at 380°F instead of higher temperatures. Also, make sure the garlic is minced finely so it doesn’t burn before the chicken is cooked through. If you notice the Parmesan getting too dark before the chicken is done, you can tent a small piece of foil over the thighs for the last few minutes of cooking.
Can I make this recipe without an air fryer?
Yes, and I’ve done it several times. Use a convection oven set to 400°F, placing the chicken on a wire rack over a baking sheet. Cook for 25-30 minutes, flipping halfway through. The skin won’t be quite as crispy as the air fryer version, but it’s still delicious. In a regular oven, bake at 425°F for 30-35 minutes. Just know that the texture will be different without that circulating hot air.
Pin This Recipe!
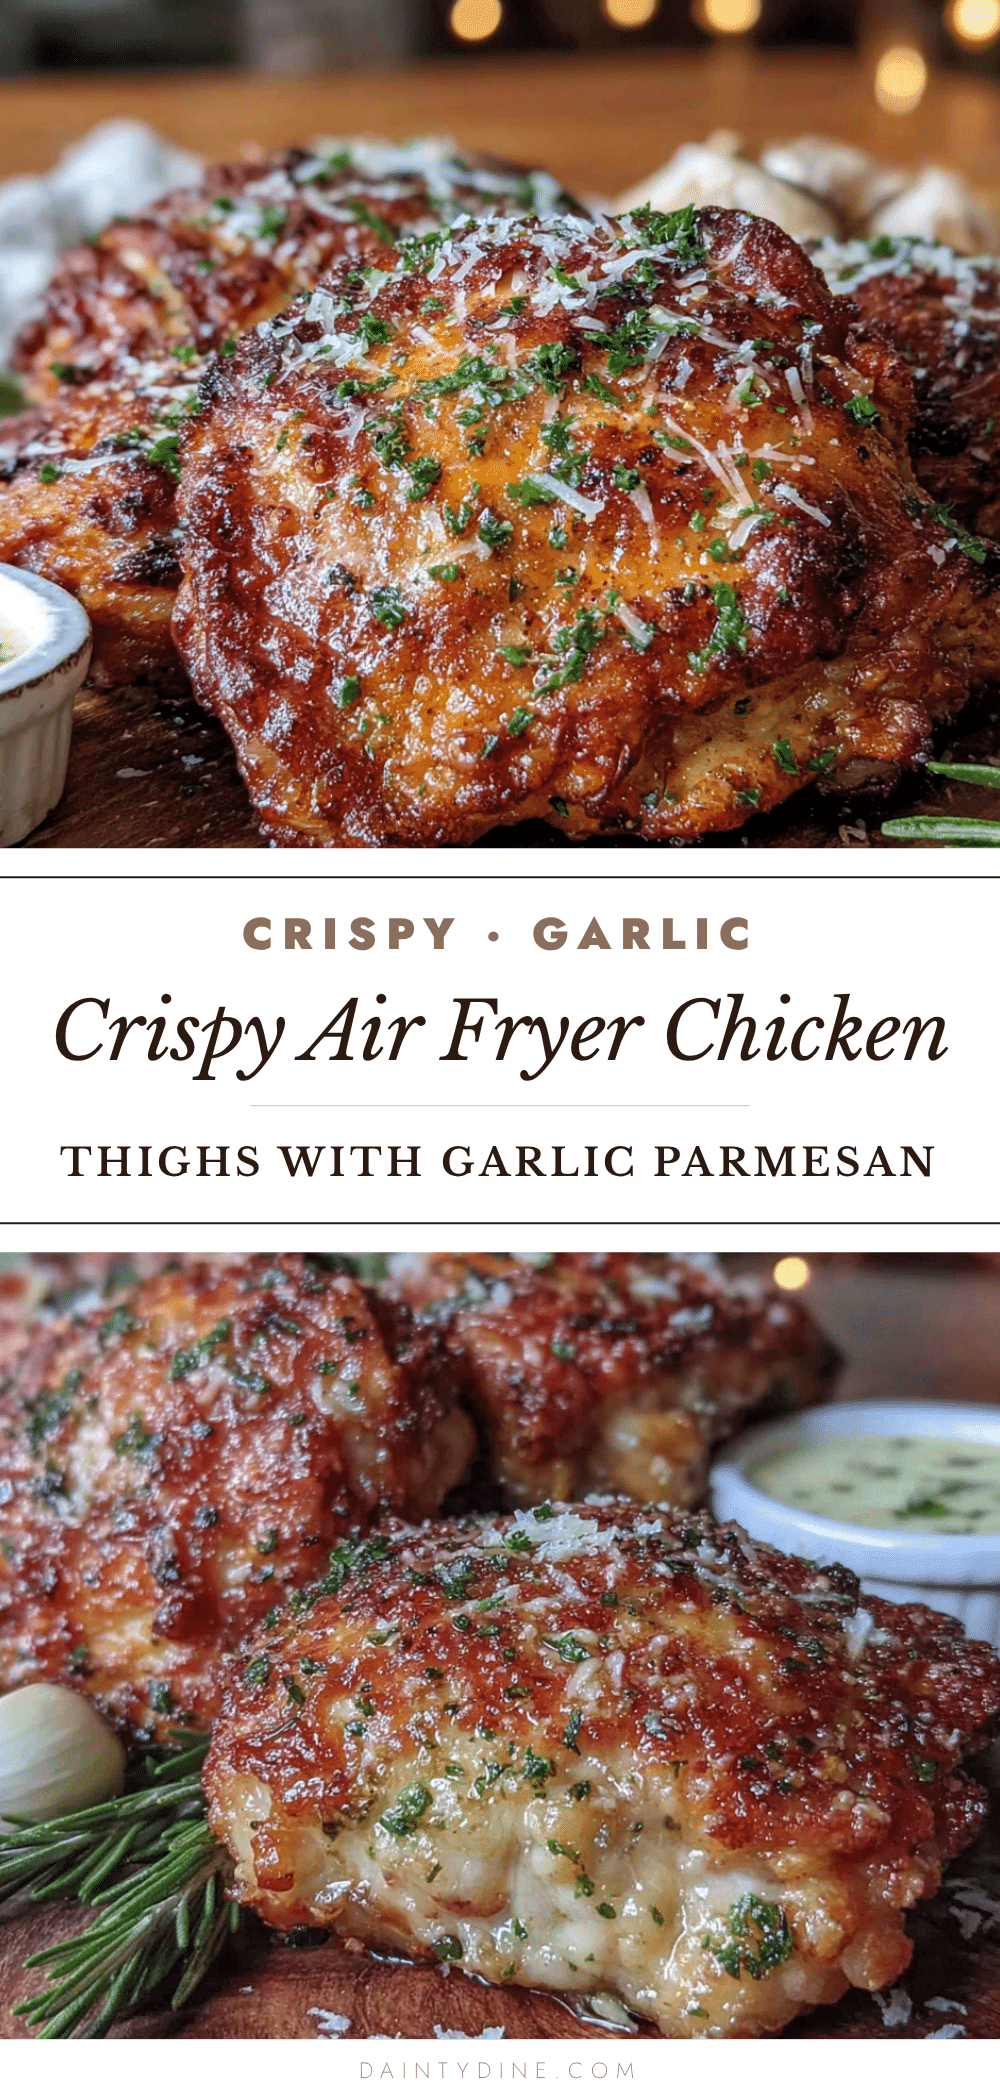
Crispy Air Fryer Chicken Thighs with Garlic Parmesan

Shatteringly crisp skin, tender juicy meat, and a savory garlic Parmesan crust come together in under 30 minutes with minimal cleanup. This easy air fryer recipe is perfect for busy weeknights and delivers comfort food that feels a little bit fancy.
- Prep Time: 10 minutes
- Cook Time: 22-24 minutes
- Total Time: 32-34 minutes
- Yield: 4 servings 1x
- Category: Main Course
- Cuisine: American
Ingredients
- 4–6 bone-in, skin-on chicken thighs (about 2 pounds)
- 4–5 cloves fresh garlic, minced
- ½ cup finely grated Parmesan cheese
- 2 tablespoons olive oil
- 1 teaspoon garlic powder
- 1 teaspoon onion powder
- 1 teaspoon smoked paprika (or sweet paprika)
- ½ teaspoon dried oregano (optional)
- Salt and black pepper to taste
- Fresh parsley for garnish (optional)
Instructions
- Pat the chicken thighs dry with paper towels, being thorough to remove as much surface moisture as possible. Place in a large mixing bowl.
- Drizzle olive oil over the chicken and toss to coat evenly. In a small bowl, mix garlic powder, onion powder, paprika, dried oregano, salt, and pepper. Sprinkle the spice blend over the chicken and toss until evenly coated. Let sit for 5 minutes while preheating the air fryer.
- Preheat the air fryer to 380°F (193°C) for 3-5 minutes.
- In a separate small bowl, combine minced fresh garlic and grated Parmesan. Sprinkle this mixture over the seasoned chicken and gently press it onto the skin using your hands.
- Place the chicken thighs skin-side down in a single layer in the air fryer basket, leaving space between each piece for air circulation. Work in batches if needed.
- Air fry at 380°F for 12 minutes.
- Using tongs, carefully flip each thigh so the skin side is up. Cook for another 10-12 minutes at 380°F, until the internal temperature reaches 175-180°F at the thickest part without touching the bone, and the skin is deep golden brown and crackling.
- Remove the chicken from the air fryer and let rest on a plate for 5 minutes to allow juices to redistribute.
- Sprinkle with fresh chopped parsley if desired. Serve hot.
Notes
Pat chicken thighs completely dry for crispiest skin. Do not overcrowd the basket; cook in batches if needed. For larger thighs, add 2-3 minutes cooking time; for smaller, check at 20 minutes. Let air fryer recover between batches. Resting for 5 minutes is essential for juicy meat. Leftovers keep in the refrigerator for up to 4 days; reheat in air fryer at 350°F for 3-4 minutes to restore crispiness. Can be frozen for up to 3 months.
Nutrition
- Serving Size: 1 chicken thigh
- Calories: 335
- Sodium: 480
- Fat: 23.5
- Saturated Fat: 6
- Carbohydrates: 2.5
- Protein: 29
Keywords: air fryer chicken thighs, crispy chicken thighs, garlic parmesan chicken, easy chicken dinner, weeknight chicken recipe, keto chicken, low carb chicken