Love this? Save it for later!
Share the inspiration with your friends
Three winters ago, I found myself standing in a community garden in late October, staring at a pile of butternut squash that seemed to multiply overnight. A woman named Rosa, who tended the plot next to mine, watched me struggle to haul them to my car. She didn’t say anything at first. Then she walked over, picked up the biggest one—it must have weighed five pounds—and said, “You’re going to roast these, right? Don’t you dare boil them.”
I laughed, honestly, because I had been planning to do exactly that. Rosa shook her head and told me about her grandmother’s method: slow roasting until the flesh turns caramelized and sweet, then blending it with just a few simple things. She didn’t give me a written recipe. She just described it with her hands while we stood there in the cold. I scribbled notes on a crumpled receipt later that night.
That first batch changed everything. The soup came out velvety, rich, and deeply comforting—nothing like the watery versions I’d made before. I’ve tweaked it over time, adding a pinch of cayenne here and a splash of cream there, but the heart of it stays true to what Rosa described. This creamy roasted butternut squash soup has become my go-to for chilly evenings, for impromptu dinner guests, and for those days when I need something that feels like a hug in a bowl. Maybe you’ve been there—standing in your kitchen, craving something warm, and wanting it to taste like it took hours even though it didn’t.
Let me tell you, this recipe delivers exactly that.
Why You’ll Love This Recipe
This isn’t just another soup recipe. After testing this dozens of times—burning a few batches, oversalting more than I’d like to admit—I can confidently say this version hits every mark. Here’s why it stands out:
- Quick & Easy: Comes together in about 30 minutes of active time. The oven does most of the work while you relax.
- Simple Ingredients: You probably have most of these in your pantry right now. No fancy grocery store runs required.
- Perfect for Meal Prep: This soup tastes even better the next day, making it ideal for Sunday meal prep or make-ahead lunches.
- Crowd-Pleaser: I’ve served this to picky eaters, vegan friends, and my meat-and-potatoes uncle. Every single bowl came back empty.
- Unbelievably Creamy Without Heavy Cream: The secret is roasting the squash until it’s almost too soft, then blending it with a touch of coconut milk. You won’t miss the dairy.
What makes this different from every other butternut squash soup recipe out there? It’s the roasting technique. Most recipes rush this step or skip it entirely, but taking the time to get deep caramelization on the squash transforms the flavor completely. The natural sugars concentrate, creating this almost nutty sweetness that no amount of added sugar can replicate.
This is the kind of soup that makes you close your eyes after the first bite. It’s comfort food reimagined—healthier, faster, but with the same soul-soothing satisfaction. Perfect for impressing guests without stress, or turning a simple Tuesday dinner into something memorable.
What Ingredients You Will Need
This creamy roasted butternut squash soup uses simple, wholesome ingredients to deliver bold flavor and satisfying texture without the fuss. Most of these are pantry staples you likely already have on hand.
- 1 large butternut squash (about 3 pounds), peeled, seeded, and cubed into 1-inch pieces. Look for squash that feels heavy for its size with no soft spots.
- 2 tablespoons olive oil, plus more for drizzling. I prefer extra virgin here for the flavor, but regular works fine too.
- 1 medium yellow onion, roughly chopped. Sweet onions like Vidalia work beautifully if you have them.
- 3 cloves garlic, smashed. Don’t bother mincing—you’ll blend everything later anyway.
- 1 teaspoon salt, plus more to taste. I use fine sea salt for even seasoning.
- 1/2 teaspoon black pepper, freshly ground if possible.
- 1/2 teaspoon ground cumin. This adds warmth without overpowering the squash.
- 1/4 teaspoon cayenne pepper (optional). Just a pinch for gentle heat.
- 4 cups vegetable broth, low-sodium. Chicken broth works too if you’re not keeping it vegetarian.
- 1/2 cup full-fat coconut milk, from a can. The richness here is key—light coconut milk will make the soup thinner. (adds creaminess without dairy)
- 1 tablespoon maple syrup (optional). Only if your squash isn’t sweet enough. I usually skip this when squash is in season.
- Fresh thyme sprigs, for garnish. Or use dried thyme—about 1 teaspoon added during cooking.
- Roasted pumpkin seeds, for topping. Adds wonderful crunch.
Ingredient Tips: I recommend using Pacific Foods vegetable broth for its clean flavor, but any brand works. For the coconut milk, Thai Kitchen or Native Forest are my go-to choices. If you’re avoiding coconut, swap in heavy cream or full-fat Greek yogurt—just stir it in at the end off the heat so it doesn’t curdle.
Substitution Guidance: Use chicken broth instead of vegetable broth if preferred. Swap the coconut milk with oat milk for a lighter version, though the soup won’t be as creamy. For a completely oil-free version, roast the squash on parchment paper and skip the olive oil drizzle.
Equipment Needed
You don’t need a fancy kitchen to make this soup. Here’s what you’ll actually use:
- Baking sheet (half-sheet size works best). Rimmed is important to catch any juices.
- Parchment paper or silicone baking mat. Makes cleanup so much easier.
- Chef’s knife and cutting board. A sharp knife makes peeling squash less of a workout.
- Large pot or Dutch oven. I use my 5.5-quart Le Creuset, but any heavy-bottomed pot works.
- Immersion blender. This is my preferred method—less cleanup and you can blend right in the pot. If you don’t have one, a regular blender works fine (just let the soup cool slightly first).
- Measuring cups and spoons. For accuracy, though this recipe is forgiving.
- Vegetable peeler. A Y-shaped peeler makes quick work of butternut squash skin.
Budget-Friendly Tip: If you don’t own an immersion blender, a standard countertop blender works perfectly. Just blend in batches and hold the lid with a towel to prevent splatters. I used a $20 blender for years before upgrading, and the soup turned out great every time.
Preparation Method
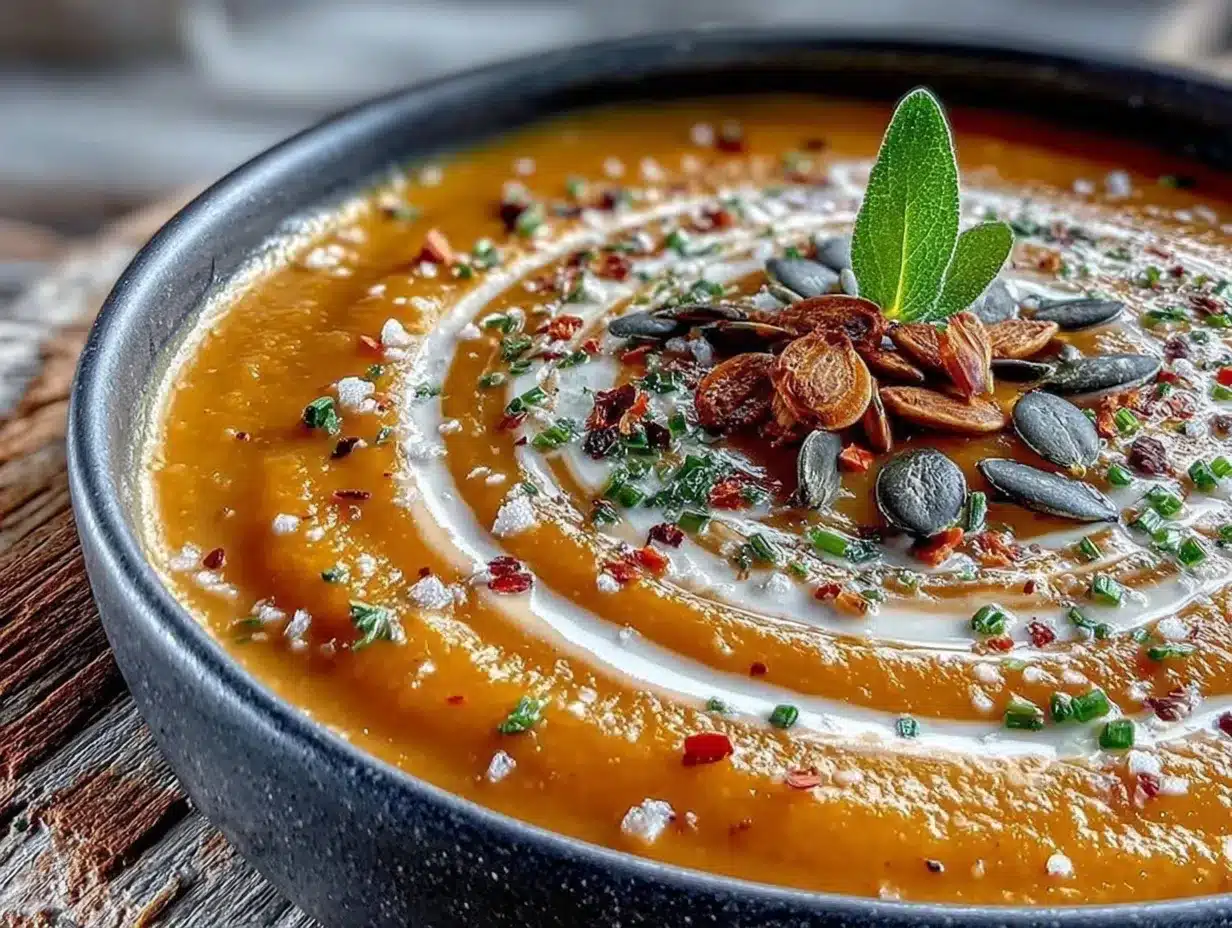
Let’s walk through this step by step. I’ve included timing estimates and sensory cues so you know exactly what to look for.
- Preheat your oven to 400°F (200°C). Line a baking sheet with parchment paper. While the oven heats, peel your butternut squash using a vegetable peeler. Cut off the stem and base, then slice the squash in half lengthwise. Scoop out the seeds with a spoon (save them for roasting later if you’re ambitious). Cube the flesh into 1-inch pieces—they should be roughly uniform so they roast evenly.
- Toss the cubed squash with 2 tablespoons olive oil, 1/2 teaspoon salt, and 1/4 teaspoon black pepper. Spread them in a single layer on the baking sheet. Don’t overcrowd—if the pieces are touching too much, they’ll steam instead of roast. Roast for 25-30 minutes, flipping halfway through. The squash is ready when the edges are caramelized and a fork slides in easily. You should see some dark brown spots—that’s flavor.
- While the squash roasts, heat 1 tablespoon olive oil in a large pot over medium heat. Add the chopped onion and cook for 5-6 minutes until translucent and starting to brown around the edges. Add the smashed garlic cloves and cook for another minute until fragrant. Stir in the cumin and cayenne pepper, cooking for 30 seconds until the spices smell toasted.
- Add the vegetable broth to the pot and bring to a simmer. Scrape up any browned bits from the bottom of the pot—that’s concentrated flavor you don’t want to waste. Let it simmer gently while the squash finishes roasting.
- Once the squash is done, add it directly to the pot with the broth and onions. Stir everything together and let it simmer for 5 minutes so the flavors meld. The squash should be so tender that it starts falling apart when you stir.
- Remove the pot from heat. If using an immersion blender, blend directly in the pot until completely smooth. If using a countertop blender, let the soup cool for 5 minutes first, then blend in batches—fill the blender no more than halfway full and hold the lid with a towel. Blend until velvety smooth, about 1-2 minutes per batch.
- Stir in the coconut milk and maple syrup (if using). Taste and adjust seasoning with remaining salt and pepper. If the soup seems too thick, add more broth or water a tablespoon at a time until it reaches your preferred consistency. I like mine thick enough to coat the back of a spoon.
- Ladle into bowls and garnish with fresh thyme leaves, a drizzle of coconut milk, roasted pumpkin seeds, and a crack of black pepper. Serve hot.
Time-Saving Tip: You can roast the squash up to 3 days ahead and store it in the fridge. The soup comes together in under 15 minutes on busy nights.
Cooking Tips & Techniques
I’ve made this soup more times than I can count, and I’ve learned a few things the hard way. Here’s what I wish someone had told me:
Don’t skip the roasting step. I know it’s tempting to just boil the squash to save time, but roasting concentrates the sugars and adds depth that boiling can’t replicate. The caramelization is where the magic happens. I once tried to rush this by cranking the oven to 450°F—the outside burned before the inside softened. Stick with 400°F.
Cut your squash pieces evenly. This sounds obvious, but I’ve definitely thrown in some 2-inch chunks alongside 1/2-inch pieces. The small ones burned while the big ones stayed hard. Take the extra minute to make them uniform.
Season in layers. Add salt at every stage—when roasting the squash, when cooking the onions, and at the end. This builds flavor gradually instead of needing a heavy hand at the finish. I under-salted my first few batches and ended up adding way too much at the end to compensate.
Let the soup cool slightly before blending. Hot liquid expands in a blender, and the lid can pop off if you’re not careful. I learned this lesson when I ended up with butternut squash soup on my ceiling. Let it sit for 5 minutes, and always vent the lid slightly.
Taste before serving. Flavors change as the soup sits. What tasted perfect right after blending might need another pinch of salt or a squeeze of lemon after resting. I always do a final taste test right before ladling.
Variations & Adaptations
This recipe is wonderfully flexible. Here are some ways I’ve adapted it:
Vegan Version: This recipe is already vegan if you use vegetable broth and coconut milk. For an extra creamy version, blend in a soaked cashew—about 1/4 cup raw cashews soaked in hot water for 15 minutes. It adds richness without altering the flavor.
Spicy Southwest Style: Add 1 teaspoon chili powder and 1/2 teaspoon smoked paprika when cooking the onions. Stir in a can of drained black beans and some corn kernels after blending. Top with avocado and cilantro. This variation is my husband’s favorite.
Apple-Butternut Twist: Roast one peeled and cubed apple (Honeycrisp or Fuji work great) alongside the squash. The apple adds natural sweetness and a subtle fruity note that pairs beautifully with the squash. I discovered this accidentally when I ran out of squash and threw in an apple to make up the volume.
Coconut Curry Version: Add 1 tablespoon red curry paste when cooking the onions, and swap the cumin for 1 teaspoon curry powder. Finish with a squeeze of lime juice. This version has become my go-to for cold-weather dinners.
Nut-Free and Gluten-Free: This recipe is naturally both. Just double-check your broth labels—some brands add wheat-based thickeners.
Serving & Storage Suggestions
This soup is incredibly versatile when it comes to serving. Here’s how I like to enjoy it:
Serving Temperature: Serve piping hot, straight from the pot. I’ve also enjoyed it at room temperature on warmer days—it’s surprisingly good that way. For a fancy presentation, swirl a tablespoon of coconut milk or heavy cream on top and drag a toothpick through it to create patterns.
What to Serve With It: A crusty baguette or sourdough bread is my go-to for dipping. A simple green salad with vinaigrette balances the richness. For a heartier meal, serve it alongside a grilled cheese sandwich or a roasted chicken breast. I also love topping it with crispy bacon bits or crumbled goat cheese when I’m feeling indulgent.
Storage Instructions: Let the soup cool completely before storing. Transfer to an airtight container and refrigerate for up to 5 days. The flavors actually deepen and meld overnight, so it often tastes even better the next day. For longer storage, freeze in freezer-safe containers for up to 3 months. Leave about an inch of headspace for expansion.
Reheating Methods: Reheat gently on the stovetop over medium-low heat, stirring occasionally. Add a splash of broth or water if the soup has thickened. You can also microwave individual portions in 30-second bursts, stirring between each. Avoid boiling—it can cause the coconut milk to separate.
Flavor Development: This soup is one of those rare dishes that improves with time. The spices mellow and meld, and the sweetness of the squash becomes more pronounced. I often make a double batch specifically for leftovers throughout the week.
Nutritional Information & Benefits
This creamy roasted butternut squash soup isn’t just delicious—it’s packed with nutrients. Here’s what you’re getting in each serving (based on 6 servings):
- Calories: Approximately 180 per serving
- Fat: 9g (mostly from heart-healthy olive oil and coconut milk)
- Carbohydrates: 24g
- Fiber: 5g
- Protein: 3g
- Vitamin A: Over 400% of the daily value (from the butternut squash)
- Vitamin C: 35% of the daily value
- Potassium: 600mg
Health Benefits: Butternut squash is loaded with beta-carotene, which your body converts to vitamin A for healthy vision and immune function. The fiber content supports digestive health and keeps you feeling full. Coconut milk provides medium-chain triglycerides (MCTs) that can boost energy metabolism. This soup is naturally gluten-free, dairy-free, and vegan, making it suitable for a wide range of dietary needs.
Dietary Considerations: This recipe is low in added sugars (only 1 tablespoon maple syrup, optional) and uses whole food ingredients. For a lower-fat version, reduce the coconut milk to 1/4 cup and use low-sodium broth. The soup is also suitable for Whole30 if you skip the maple syrup.
Conclusion
This creamy roasted butternut squash soup has become a staple in my kitchen for good reason. It’s the recipe I turn to when I need something comforting but don’t want to spend hours cooking. It’s the dish I bring to friends who are sick or new parents or just having a rough week. And it’s the soup that reminds me of Rosa every time I make it—how a simple conversation in a garden can lead to something you keep making for years.
I hope you’ll give this recipe a try and make it your own. Maybe you’ll add more spice, or skip the cayenne entirely, or top it with something unexpected like crispy chickpeas or pomegranate seeds. That’s the beauty of a good base recipe—it invites experimentation.
I’d love to hear how yours turns out. Leave a comment below and tell me about your version. Did you add something surprising? Did your family love it? Share your photos and tag me on Pinterest—I’m always looking for new inspiration. Until then, happy cooking, and may your kitchen always smell like roasted squash and warm spices.
Frequently Asked Questions
Can I make this soup ahead of time?
Absolutely! This soup is perfect for meal prep. Make it up to 5 days ahead and store it in the refrigerator. The flavors actually improve overnight as they meld together. Reheat gently on the stovetop or in the microwave.
Can I freeze butternut squash soup?
Yes, this soup freezes beautifully. Let it cool completely, then transfer to freezer-safe containers. Leave about an inch of headspace for expansion. It will keep for up to 3 months. Thaw overnight in the refrigerator before reheating.
How do I peel butternut squash easily?
Use a sharp Y-shaped vegetable peeler for the best results. If the squash is very hard, microwave it whole for 2-3 minutes to soften the skin slightly. You can also roast the squash halves with the skin on and scoop out the flesh afterward—this is the easiest method if you’re short on time.
What can I use instead of coconut milk?
Heavy cream, full-fat Greek yogurt, or oat milk all work well. For a lighter version, use 1/2 cup of any milk alternative. Just note that the soup won’t be as creamy. Stir in dairy-based options off the heat to prevent curdling.
Can I make this soup in an Instant Pot?
Yes! Sauté the onions and garlic using the sauté function, then add the cubed squash (no need to roast first), broth, and spices. Pressure cook on high for 8 minutes. Let the pressure release naturally for 10 minutes, then blend and stir in the coconut milk. The flavor won’t be quite as deep as the roasted version, but it’s still delicious and faster.
Pin This Recipe!
Creamy Roasted Butternut Squash Soup (Easy 30-Minute Recipe)

This creamy roasted butternut squash soup is velvety, rich, and deeply comforting. Roasting the squash until caramelized brings out its natural sweetness, and a touch of coconut milk adds creaminess without dairy.
- Prep Time: 15 minutes
- Cook Time: 30 minutes
- Total Time: 45 minutes
- Yield: 6 servings 1x
- Category: Soup
- Cuisine: American
Ingredients
- 1 large butternut squash (about 3 pounds), peeled, seeded, and cubed into 1-inch pieces
- 2 tablespoons olive oil, plus more for drizzling
- 1 medium yellow onion, roughly chopped
- 3 cloves garlic, smashed
- 1 teaspoon salt, plus more to taste
- 1/2 teaspoon black pepper, freshly ground
- 1/2 teaspoon ground cumin
- 1/4 teaspoon cayenne pepper (optional)
- 4 cups vegetable broth, low-sodium
- 1/2 cup full-fat coconut milk, from a can
- 1 tablespoon maple syrup (optional)
- Fresh thyme sprigs, for garnish
- Roasted pumpkin seeds, for topping
Instructions
- Preheat your oven to 400°F (200°C). Line a baking sheet with parchment paper. Peel the butternut squash using a vegetable peeler. Cut off the stem and base, then slice the squash in half lengthwise. Scoop out the seeds with a spoon. Cube the flesh into 1-inch pieces.
- Toss the cubed squash with 2 tablespoons olive oil, 1/2 teaspoon salt, and 1/4 teaspoon black pepper. Spread them in a single layer on the baking sheet. Roast for 25-30 minutes, flipping halfway through, until the edges are caramelized and a fork slides in easily.
- While the squash roasts, heat 1 tablespoon olive oil in a large pot over medium heat. Add the chopped onion and cook for 5-6 minutes until translucent and starting to brown. Add the smashed garlic cloves and cook for another minute until fragrant. Stir in the cumin and cayenne pepper, cooking for 30 seconds until the spices smell toasted.
- Add the vegetable broth to the pot and bring to a simmer. Scrape up any browned bits from the bottom of the pot. Let it simmer gently while the squash finishes roasting.
- Once the squash is done, add it directly to the pot with the broth and onions. Stir everything together and let it simmer for 5 minutes so the flavors meld.
- Remove the pot from heat. If using an immersion blender, blend directly in the pot until completely smooth. If using a countertop blender, let the soup cool for 5 minutes first, then blend in batches—fill the blender no more than halfway full and hold the lid with a towel. Blend until velvety smooth, about 1-2 minutes per batch.
- Stir in the coconut milk and maple syrup (if using). Taste and adjust seasoning with remaining salt and pepper. If the soup seems too thick, add more broth or water a tablespoon at a time until it reaches your preferred consistency.
- Ladle into bowls and garnish with fresh thyme leaves, a drizzle of coconut milk, roasted pumpkin seeds, and a crack of black pepper. Serve hot.
Notes
Roast the squash up to 3 days ahead and store in the fridge for quicker assembly. For a spicier version, add chili powder and smoked paprika. For an apple twist, roast a cubed apple alongside the squash. The soup freezes well for up to 3 months.
Nutrition
- Serving Size: 1 serving (about 1.5
- Calories: 180
- Sugar: 8
- Sodium: 600
- Fat: 9
- Saturated Fat: 3
- Carbohydrates: 24
- Fiber: 5
- Protein: 3
Keywords: butternut squash soup, creamy soup, roasted butternut squash, vegan soup, gluten-free soup, fall soup, easy soup recipe


