Love this? Save it for later!
Share the inspiration with your friends
I was standing in the spice aisle of our local grocery store last October — a Tuesday, I think — when the smell of cinnamon and nutmeg hit me from someone’s open baking-spice container, and suddenly I was seven years old at my Aunt June’s farmhouse table. She wasn’t really my aunt, just a family friend who lived down the gravel road, but she had this way of making you feel like you belonged. Her kitchen always smelled like ginger and brown sugar, and she’d let me press the cookie crumbs into the bottom of a pan with my bare hands. That memory came rushing back so fast I almost dropped my shopping basket. Honestly, I stood there for a good minute, just breathing it in.
I had to make those pumpkin cheesecake bars with gingersnap crust that very weekend. You know that feeling when a recipe just grabs you by the collar and won’t let go? That was it. I grabbed a box of gingersnaps, some cream cheese, and a can of pumpkin puree, and I practically ran home. Let me tell you — recreating that cozy, spicy-sweet flavor was harder than I thought. My first batch? The crust crumbled everywhere, and the cheesecake layer had these weird cracks. But I kept at it, because some recipes are worth the mess.
These pumpkin cheesecake bars are my love letter to that memory. They’ve got that same warm, gingery crunch on the bottom, a creamy pumpkin filling that’s not too sweet, and just the right amount of spice. Every time I make them, I think of Aunt June’s laugh and the way she’d say, “A little imperfection makes it yours.” Maybe you’ve got a memory like that too — one that tastes like fall.
Why You’ll Love This Recipe
These pumpkin cheesecake bars aren’t just another fall dessert. They’re the kind of treat that makes people close their eyes after the first bite — I’ve seen it happen at three different potlucks now. Here’s why they’re a total keeper:
- Quick & Easy: You don’t need a springform pan or a water bath. These bars come together in about 30 minutes of active time, then the oven does the rest. Perfect for a busy Tuesday or when you’re hosting last-minute.
- Simple Ingredients: No fancy grocery trips. Gingersnaps, cream cheese, pumpkin puree, eggs, sugar, and spices — that’s it. You probably have most of this already.
- Perfect for Fall Gatherings: Whether it’s Thanksgiving, a Friendsgiving potluck, or just a cozy Sunday, these bars fit right in. They travel well, slice cleanly, and look gorgeous on a plate.
- Crowd-Pleaser: I’ve served these to kids, grandparents, and picky friends. Everyone loves them. The gingersnap crust adds a spicy kick that balances the creamy pumpkin filling perfectly.
- Unbelievably Delicious: The texture is next-level — a crunchy, buttery crust, a silky cheesecake layer, and that warm pumpkin spice flavor that just screams autumn. It’s comfort food at its finest.
What makes these bars different from every other pumpkin cheesecake recipe out there? It’s the crust. Most recipes use graham crackers, but gingersnaps bring a deep, molasses-y warmth that pumpkin absolutely loves. I tested this with three different brands of gingersnaps before settling on my favorite — and trust me, the crust makes all the difference. Plus, I add a tiny pinch of black pepper to the filling. Sounds weird, I know, but it actually makes the pumpkin flavor pop. This is my best version, and I’m so excited to share it with you.
What Ingredients You Will Need
This recipe uses simple, wholesome ingredients to deliver big flavor without the fuss. Most of these are pantry staples, especially if you bake during the fall season. Let’s break it down.
For the Gingersnap Crust
- 2 cups (about 200g) gingersnap cookie crumbs — I use Nabisco brand for their consistent crunch and spice level. You can crush them in a food processor or by hand in a ziplock bag with a rolling pin.
- 5 tablespoons (70g) unsalted butter, melted — Adds richness and helps the crust hold together. Use salted butter if that’s all you have, just skip the extra salt.
- 2 tablespoons (25g) granulated sugar — A little extra sweetness to balance the spicy gingersnaps.
- Pinch of salt — Only if your butter is unsalted. It enhances all the flavors.
For the Pumpkin Cheesecake Filling
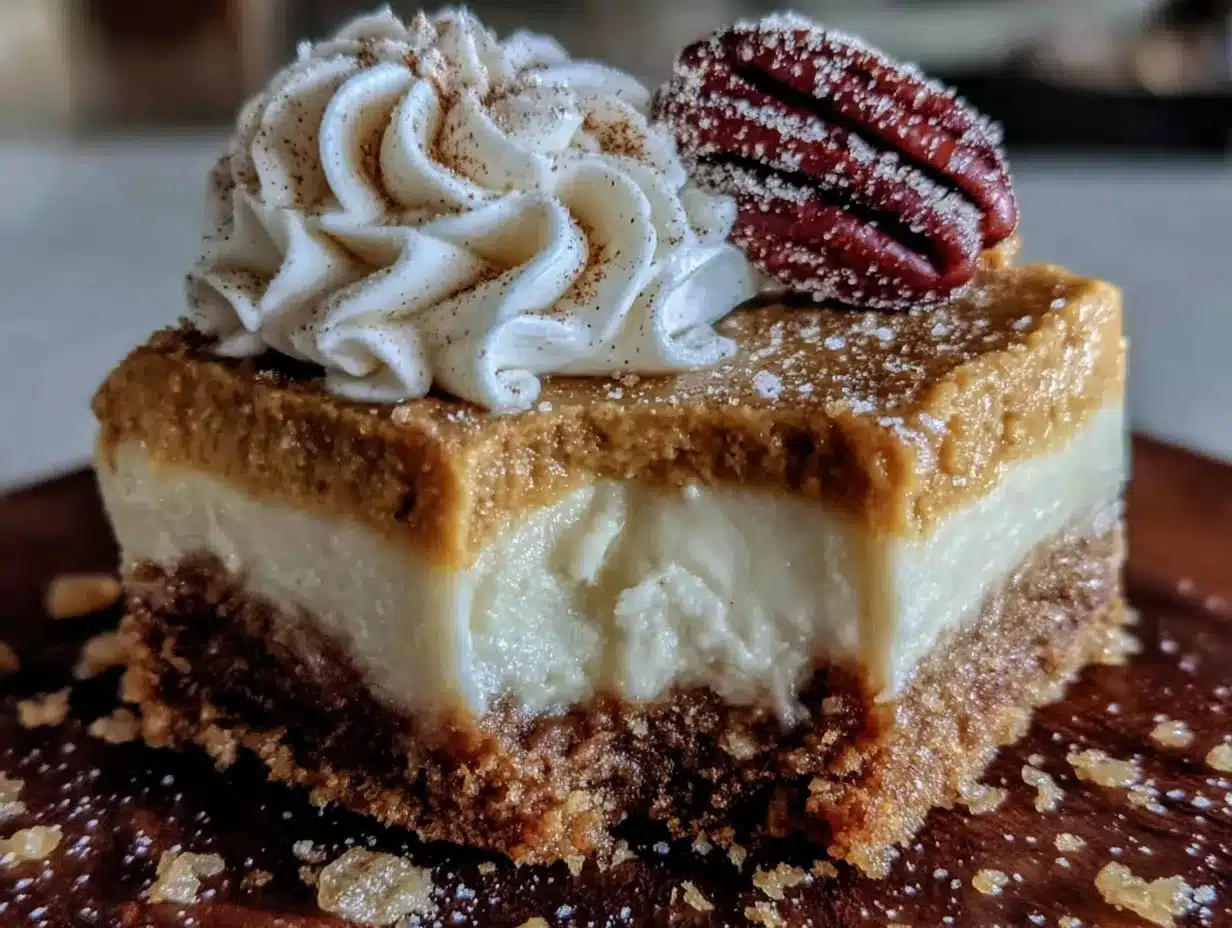
- 16 ounces (450g) cream cheese, softened to room temperature — Full-fat block cream cheese works best here. Low-fat can make the filling too soft. Let it sit out for at least an hour before starting.
- 3/4 cup (150g) granulated sugar — Just enough sweetness without overwhelming the pumpkin.
- 1 cup (245g) pumpkin puree — Not pumpkin pie filling! Make sure it’s 100% pure pumpkin. Libby’s is my go-to brand.
- 2 large eggs, room temperature — Cold eggs can cause the filling to curdle. Leave them on the counter with the cream cheese.
- 1 teaspoon vanilla extract — Pure vanilla, not imitation, for the best flavor.
- 1 teaspoon ground cinnamon — The backbone of pumpkin spice.
- 1/2 teaspoon ground ginger — Adds warmth and a little kick.
- 1/4 teaspoon ground nutmeg — Freshly grated if you have it, but pre-ground works too.
- 1/4 teaspoon ground cloves — Just a touch for depth.
- 1/8 teaspoon black pepper — Trust me on this one. It doesn’t make it spicy; it just makes the pumpkin flavor more pronounced.
For the Optional Topping
- 1/2 cup (120ml) heavy cream — For whipping into a soft, unsweetened cream. Or use store-bought whipped topping if you’re short on time.
- Crushed gingersnaps or candied pecans — For garnish. Adds a lovely crunch.
If you’re looking for a gluten-free option, use gluten-free gingersnaps. I’ve tested this with one brand and it worked perfectly. For dairy-free, swap the cream cheese with a plant-based block version and use coconut oil instead of butter in the crust.
Equipment Needed
You don’t need a fancy kitchen to make these pumpkin cheesecake bars. Here’s what you’ll need:
- 9×9-inch baking pan — This is the sweet spot for bars. An 8×8 works too, but your bars will be slightly thicker and need a few extra minutes in the oven. Glass, metal, or ceramic all work fine.
- Parchment paper — Line your pan with two overlapping sheets, leaving overhang on two sides. This makes lifting the bars out so much easier. I learned this the hard way after a stuck-bar disaster.
- Food processor or ziplock bag — For crushing the gingersnaps. A food processor gives you fine, even crumbs, but a bag and rolling pin work just as well. It’s a little arm workout, honestly.
- Electric hand mixer or stand mixer — Cream cheese needs to be really smooth, and doing it by hand is a pain. A hand mixer is totally fine.
- Mixing bowls — One medium for the crust, one large for the filling.
- Spatula — For scraping every bit of that creamy filling into the pan.
- Measuring cups and spoons — Accuracy matters in baking, especially for the spices.
If you don’t have a 9×9 pan, a 9-inch round cake pan works too — just adjust the baking time slightly. And honestly, a good set of measuring spoons is worth the investment. I’ve used the same cheap set for years, and they still do the job.
Preparation Method
Let’s get baking! I’ll walk you through every step so you get perfect pumpkin cheesecake bars, even if it’s your first time.
Step 1: Prep Your Pan and Oven
Preheat your oven to 350°F (175°C). Line your 9×9-inch pan with parchment paper, leaving about 2 inches of overhang on two opposite sides. This will be your “handle” to lift the bars out later. Lightly spray the parchment with non-stick spray — just a quick spritz.
Step 2: Make the Gingersnap Crust
Place 2 cups of gingersnap cookies in your food processor and pulse until you have fine crumbs. If you’re using a ziplock bag, seal it tight and crush away — this is a great stress reliever, honestly. Transfer the crumbs to a medium bowl. Add 2 tablespoons of sugar and a pinch of salt, then pour in 5 tablespoons of melted butter. Stir with a fork until the crumbs are evenly moistened. They should look like wet sand. Press the mixture firmly into the bottom of your prepared pan. Use the bottom of a glass or a measuring cup to really pack it down — a loose crust will fall apart later. Bake for 10 minutes, then set aside to cool slightly while you make the filling.
Step 3: Make the Pumpkin Cheesecake Filling
In a large bowl, beat 16 ounces of softened cream cheese with an electric mixer on medium speed until smooth and creamy — about 2 minutes. Scrape down the sides and the bottom of the bowl. Add 3/4 cup of sugar and beat for another minute until light and fluffy. Add 1 cup of pumpkin puree, 2 room-temperature eggs (one at a time), and 1 teaspoon of vanilla extract. Beat on low speed just until combined — don’t overmix, or the cheesecake can crack. In a small bowl, whisk together 1 teaspoon cinnamon, 1/2 teaspoon ginger, 1/4 teaspoon nutmeg, 1/4 teaspoon cloves, and 1/8 teaspoon black pepper. Add the spices to the filling and mix on low until just incorporated. Give it one final scrape with a spatula to make sure everything is even.
Step 4: Assemble and Bake
Pour the pumpkin cheesecake filling over the pre-baked crust. Spread it evenly with a spatula. Gently tap the pan on the counter a few times to release any air bubbles. Bake at 350°F (175°C) for 35 to 40 minutes. The edges should look set and slightly puffed, but the center should still jiggle just a little when you shake the pan — like firm Jell-O. That slight jiggle means it’s perfectly creamy. If the center looks completely solid, you’ve overbaked it. Don’t worry, it’ll still taste great, just a little denser.
Step 5: Cool and Chill
Place the pan on a wire rack and let it cool completely at room temperature — about 1 hour. Then cover with plastic wrap and refrigerate for at least 4 hours, but overnight is best. I know the wait is hard, but this step is crucial. Chilling firms up the cheesecake so you get clean, beautiful slices. Trust me, I’ve tried rushing it, and the bars were a gooey mess.
Step 6: Slice and Serve
Once fully chilled, lift the bars out of the pan using the parchment overhang. Place on a cutting board and use a sharp knife to slice into 16 squares. For the cleanest cuts, wipe the knife with a damp paper towel between each slice. Serve cold or at room temperature. If you want to get fancy, top with a dollop of whipped cream and a sprinkle of crushed gingersnaps.
Cooking Tips & Techniques
After making these pumpkin cheesecake bars about a dozen times (my neighbors have become very happy taste-testers), I’ve picked up a few tricks that make a real difference.
Room temperature ingredients are non-negotiable. I know, I know — it’s annoying to plan ahead. But cold cream cheese creates lumps that no amount of mixing will fix. Take it out of the fridge at least an hour before baking. Same with the eggs. If you forget, place the eggs in a bowl of warm water for 5 minutes, and microwave the cream cheese in 10-second bursts — just be careful not to melt it.
Don’t overmix the filling. Once you add the eggs, mix on low speed just until combined. Overmixing incorporates too much air, which can cause cracks during baking. A few tiny bubbles are fine, but you don’t want a frothy batter.
That black pepper trick? I was skeptical too. A friend who’s a pastry chef told me about it, and I tried it on a whim. It doesn’t make the bars spicy — you won’t even taste it. But it somehow makes the pumpkin and cinnamon flavors brighter. It’s one of those little chef secrets that sounds weird but works.
Watch the baking time. Every oven is different. Start checking at 30 minutes. The edges should be set, and the center should have a slight wobble. If it’s still really jiggly, give it 5 more minutes. If the top starts to brown too quickly, tent the pan loosely with foil.
Patience pays off. I know you want to eat these right away. But cutting into warm cheesecake is a recipe for disaster. The bars need time to set up in the fridge. Overnight is ideal, but 4 hours is the absolute minimum. I once tried to rush it after 2 hours, and the slices looked like a pumpkin mudslide. Still delicious, but not pretty.
Variations & Adaptations
This recipe is super flexible. Here are some ways to make it your own.
Gluten-Free Version
Swap the regular gingersnaps with a gluten-free brand. I’ve used one from the health food section and it worked perfectly. Just make sure the crumbs are fine and press them firmly into the pan. Everything else stays the same.
Dairy-Free Version
Use a plant-based block cream cheese — the kind in a block, not the spreadable tub. I like the one from Violife or Miyoko’s. For the crust, substitute the butter with melted coconut oil or a dairy-free butter stick. The texture will be slightly softer, but the flavor is still amazing.
Spice It Up (or Down)
If you love pumpkin spice, add an extra 1/2 teaspoon of cinnamon and a pinch of allspice. If you prefer a milder flavor, just use cinnamon and skip the ginger and cloves. I once made a batch with a teaspoon of pumpkin pie spice instead of individual spices — worked like a charm and saved me a step.
Crunchy Topping
Before baking, sprinkle a handful of chopped pecans or walnuts over the filling. They toast up in the oven and add a lovely crunch. Or, after baking, drizzle with a simple caramel sauce — store-bought is totally fine.
Individual Mini Bars
Use a mini cheesecake pan or a muffin tin lined with paper liners. Press the crust into the bottom of each cup, add the filling, and bake for about 18 to 20 minutes. Perfect for parties or portion control.
I tried a version with a chocolate drizzle once — just melted dark chocolate over the top after chilling. It was a little extra, but honestly? So good. The chocolate and ginger are a surprising combo that works.
Serving & Storage Suggestions
These bars are best served chilled, straight from the fridge. The texture is firm and creamy, and the crust stays crunchy. If you prefer a softer texture, let them sit at room temperature for 10 to 15 minutes before serving.
For a pretty presentation, cut them into clean squares and arrange on a platter. Add a dollop of lightly sweetened whipped cream and a sprinkle of cinnamon or crushed gingersnaps. A few fresh cranberries on the side make it look extra festive — perfect for Thanksgiving or a fall brunch.
These bars pair beautifully with a cup of hot coffee, spiced chai, or even a glass of cold milk. If you’re serving them after a big meal, keep the portions small — they’re rich!
Storage: Keep the bars in an airtight container in the refrigerator for up to 5 days. Place a sheet of parchment paper between layers if you’re stacking them. They actually taste better on day two, once the flavors have had time to meld.
Freezing: These freeze beautifully. Wrap individual bars tightly in plastic wrap, then place them in a freezer-safe bag or container. Freeze for up to 3 months. To thaw, transfer to the fridge overnight. Don’t thaw at room temperature — they can get soggy.
Reheating: Honestly, I prefer them cold. But if you want a warm dessert, microwave a single bar for about 10 to 15 seconds. Just enough to take the chill off without melting the crust.
Nutritional Information & Benefits
Here’s the approximate nutritional breakdown per bar (based on 16 servings):
- Calories: 290
- Fat: 18g
- Carbohydrates: 28g
- Protein: 5g
- Fiber: 1g
- Sugar: 20g
These numbers are estimates and will vary based on your specific ingredients. If you use low-fat cream cheese or a sugar substitute, the numbers will change.
On the plus side, pumpkin is packed with vitamin A, which is great for your eyes and immune system. It’s also a good source of fiber and antioxidants. The ginger in the crust has anti-inflammatory properties, and cinnamon can help regulate blood sugar. So while these bars are definitely a treat, they’ve got a few redeeming qualities too. Everything in moderation, right?
If you’re watching your sugar intake, you can reduce the sugar in the filling to 1/2 cup without affecting the texture too much. The crust needs the full amount to hold together properly. For a lower-carb option, use a sugar substitute like erythritol in the filling — just know the texture might be slightly different.
Conclusion
These pumpkin cheesecake bars with gingersnap crust are everything I love about fall baking — warm spices, creamy texture, and that nostalgic feeling of being in a cozy kitchen. They’re simple enough for a weeknight but impressive enough for a holiday table. That crunch from the gingersnaps, the silky pumpkin filling, the way the spices hit your nose before you even take a bite — it’s pure comfort.
I hope you give these a try and make them your own. Maybe you’ll add extra cinnamon like my friend Sarah does, or a chocolate drizzle like I did that one time. That’s the beauty of a good recipe — it’s a starting point, not a rulebook. I’d love to hear how yours turn out. Drop a comment below and let me know if you tried any fun variations. And if you loved these bars as much as I do, share this recipe with a friend who needs a little fall comfort. Happy baking!
Frequently Asked Questions
Can I use pumpkin pie filling instead of pumpkin puree?
No, don’t do that. Pumpkin pie filling already has sugar and spices added, which will throw off the sweetness and texture of your cheesecake. Stick with 100% pure pumpkin puree for the best results.
Why did my cheesecake crack on top?
Cracks usually happen from overbaking or overmixing. Make sure you take the bars out when the center still has a slight jiggle. Also, don’t beat the filling on high speed — low and slow is the way to go. And let them cool gradually at room temperature before refrigerating.
Can I make these bars ahead of time?
Absolutely! In fact, they taste better the next day. You can make them up to 2 days in advance and keep them covered in the fridge. They also freeze well for up to 3 months.
How do I get clean, neat slices?
Chill the bars for at least 4 hours, preferably overnight. Use a sharp knife and wipe it clean with a damp paper towel between each cut. This prevents the cheesecake from smearing and gives you those beautiful, clean edges.
Can I use a different cookie for the crust?
Sure! Graham crackers, shortbread cookies, or even vanilla wafers all work. But the gingersnaps really make these bars special — that spicy, molasses flavor is what sets them apart. If you use a milder cookie, consider adding a teaspoon of ground ginger to the crust mixture.
Pin This Recipe!
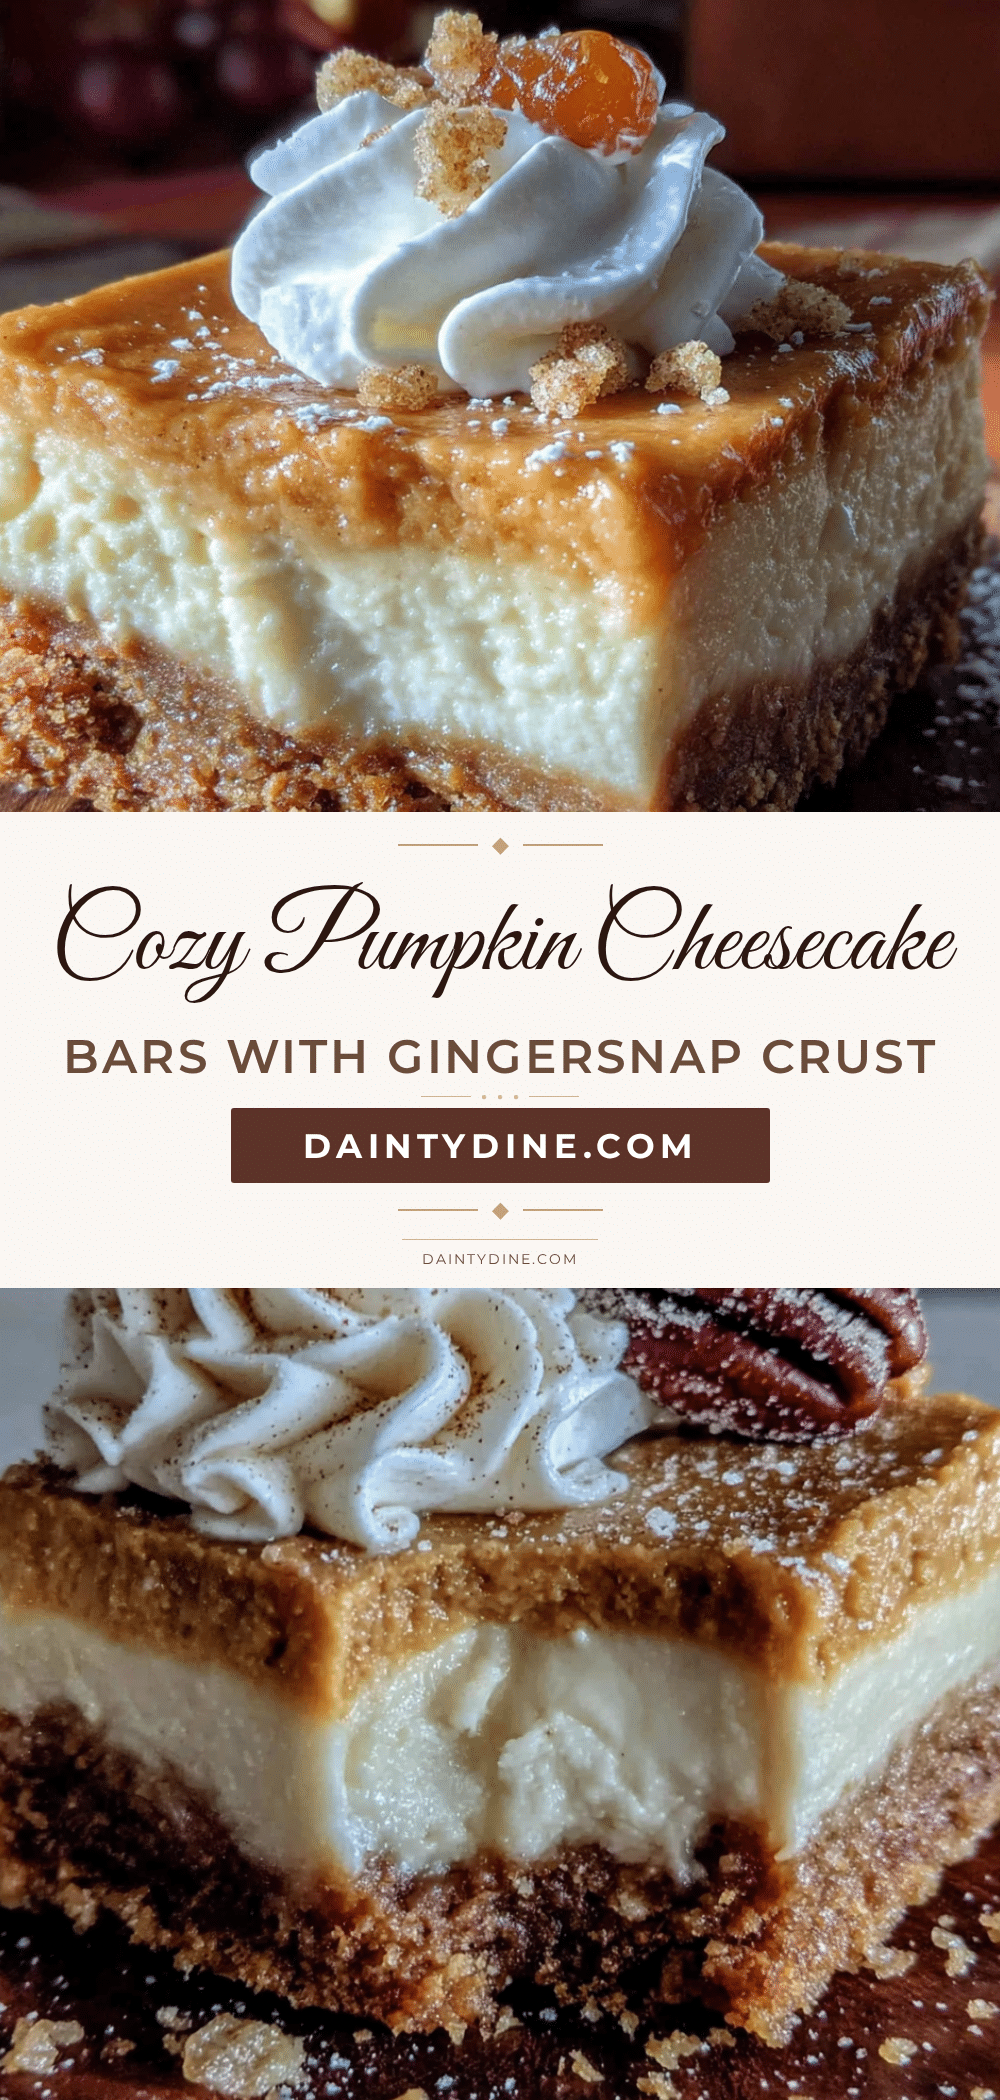
Cozy Pumpkin Cheesecake Bars with Gingersnap Crust
These pumpkin cheesecake bars feature a crunchy gingersnap crust and a creamy, perfectly spiced pumpkin filling. They’re an easy, crowd-pleasing fall dessert that comes together in about 30 minutes of active time.
- Prep Time: 30 minutes
- Cook Time: 40 minutes
- Total Time: 5 hours 10 minutes (includes 4 hours chilling)
- Yield: 16 bars 1x
- Category: Dessert
- Cuisine: American
Ingredients
- 2 cups (about 200g) gingersnap cookie crumbs
- 5 tablespoons (70g) unsalted butter, melted
- 2 tablespoons (25g) granulated sugar
- Pinch of salt (if using unsalted butter)
- 16 ounces (450g) cream cheese, softened to room temperature
- 3/4 cup (150g) granulated sugar
- 1 cup (245g) pumpkin puree (not pumpkin pie filling)
- 2 large eggs, room temperature
- 1 teaspoon vanilla extract
- 1 teaspoon ground cinnamon
- 1/2 teaspoon ground ginger
- 1/4 teaspoon ground nutmeg
- 1/4 teaspoon ground cloves
- 1/8 teaspoon black pepper
- 1/2 cup (120ml) heavy cream (optional, for topping)
- Crushed gingersnaps or candied pecans (optional, for garnish)
Instructions
- Preheat your oven to 350°F (175°C). Line a 9×9-inch baking pan with parchment paper, leaving about 2 inches of overhang on two opposite sides. Lightly spray the parchment with non-stick spray.
- Make the crust: Pulse 2 cups of gingersnap cookies in a food processor until you have fine crumbs. Transfer to a medium bowl. Add 2 tablespoons sugar and a pinch of salt, then pour in 5 tablespoons melted butter. Stir until the crumbs are evenly moistened (like wet sand). Press the mixture firmly into the bottom of the prepared pan. Bake for 10 minutes, then set aside to cool slightly.
- Make the filling: In a large bowl, beat 16 ounces of softened cream cheese with an electric mixer on medium speed until smooth and creamy, about 2 minutes. Scrape down the sides. Add 3/4 cup sugar and beat for another minute until light and fluffy. Add 1 cup pumpkin puree, 2 room-temperature eggs (one at a time), and 1 teaspoon vanilla extract. Beat on low speed just until combined.
- In a small bowl, whisk together 1 teaspoon cinnamon, 1/2 teaspoon ginger, 1/4 teaspoon nutmeg, 1/4 teaspoon cloves, and 1/8 teaspoon black pepper. Add the spices to the filling and mix on low until just incorporated. Scrape with a spatula to ensure everything is even.
- Pour the filling over the pre-baked crust and spread evenly. Gently tap the pan on the counter a few times to release air bubbles. Bake at 350°F (175°C) for 35 to 40 minutes. The edges should be set and slightly puffed, but the center should still jiggle slightly when shaken.
- Place the pan on a wire rack and cool completely at room temperature, about 1 hour. Then cover with plastic wrap and refrigerate for at least 4 hours, preferably overnight.
- Once fully chilled, lift the bars out using the parchment overhang. Place on a cutting board and slice into 16 squares using a sharp knife, wiping the knife clean between cuts. Serve cold or at room temperature. Optionally, top with whipped cream and crushed gingersnaps.
Notes
Room temperature ingredients are crucial for a smooth filling. Don’t overmix the filling once eggs are added to prevent cracks. The black pepper is a secret ingredient that enhances the pumpkin flavor without adding heat. For clean slices, chill at least 4 hours (overnight is best) and wipe the knife between cuts. Bars can be stored in the refrigerator for up to 5 days or frozen for up to 3 months.
Nutrition
- Serving Size: 1 bar
- Calories: 290
- Sugar: 20
- Fat: 18
- Carbohydrates: 28
- Fiber: 1
- Protein: 5
Keywords: pumpkin cheesecake bars, gingersnap crust, fall dessert, pumpkin bars, cheesecake bars, Thanksgiving dessert, easy pumpkin dessert


