Love this? Save it for later!
Share the inspiration with your friends
I was wrestling with a bag of flour in the baking aisle of our local mercado, trying to decipher a label that was half-torn and mostly in Spanish. An older woman next to me, her cart piled high with piloncillo and cinnamon sticks, watched me for a moment. Then she reached over, tapped the bag I was holding, and shook her head with a soft laugh. “No,” she said simply, and handed me a different one. I must have looked confused because she added, “For pan de muerto, you need this one. The other is too fine. It won’t give you the soul.”
That was how I met Señora Elena. She didn’t give me a recipe that day—not exactly. Instead, she told me about the bread her grandmother made every November 1st, the one that filled their tiny kitchen with the smell of orange blossoms and something like heaven. She described the texture, the warmth, the way the dough felt like memory itself. I listened, asked a few questions, and went home to try and recreate it from her words alone. Let me tell you, my first attempt was a disaster. The dough was dense, the glaze was grainy, and I had orange zest absolutely everywhere—on the counter, in my hair, somehow on the ceiling. Honestly, I almost gave up.
But I kept thinking about Elena’s description of that bread. The way she said it wasn’t just food—it was a way to welcome the spirits of loved ones back, a sweet offering on an altar. So I tried again. And again. I called my friend Rosa, who grew up making this bread with her abuela, and she walked me through the feel of the dough over the phone. “It should be soft like a baby’s cheek,” she said. That image finally clicked. This cozy pan de muerto with orange blossom glaze is the result of all those attempts, all those phone calls, and one very patient lady in a grocery store aisle. It’s the version I now make every Día de Muertos, and honestly, on random Tuesdays when I just need a little comfort. Maybe you’ve been there—needing a recipe that feels like a hug from someone you miss.
Why You’ll Love This Recipe
This cozy pan de muerto with orange blossom glaze isn’t just another bread recipe. It’s the one that finally worked for me after plenty of trial and error. I’ve tested this version at least a dozen times, tweaking the hydration, the proofing time, and the glaze consistency until it was just right. Here’s why I think you’ll fall for it too:
- Surprisingly Simple: Don’t let the fancy name fool you. This bread comes together with basic baking skills. No stand mixer required—just your hands and a little patience.
- Pantry-Friendly Ingredients: Flour, sugar, butter, eggs, yeast, and orange. That’s it. You probably have most of this in your kitchen right now.
- Perfect for Día de Muertos or Any Cozy Day: Traditionally made for the holiday, but honestly? It’s wonderful for a chilly Sunday afternoon when you want the house to smell incredible.
- Guaranteed Crowd-Pleaser: I’ve brought this to potlucks and family gatherings. People don’t just eat it—they close their eyes and sigh. Kids love the sweet glaze, adults love the subtle floral notes.
- Unbelievably Soft Texture: The secret is in the enriched dough. It comes out pillowy, tender, and stays fresh for days (if it lasts that long).
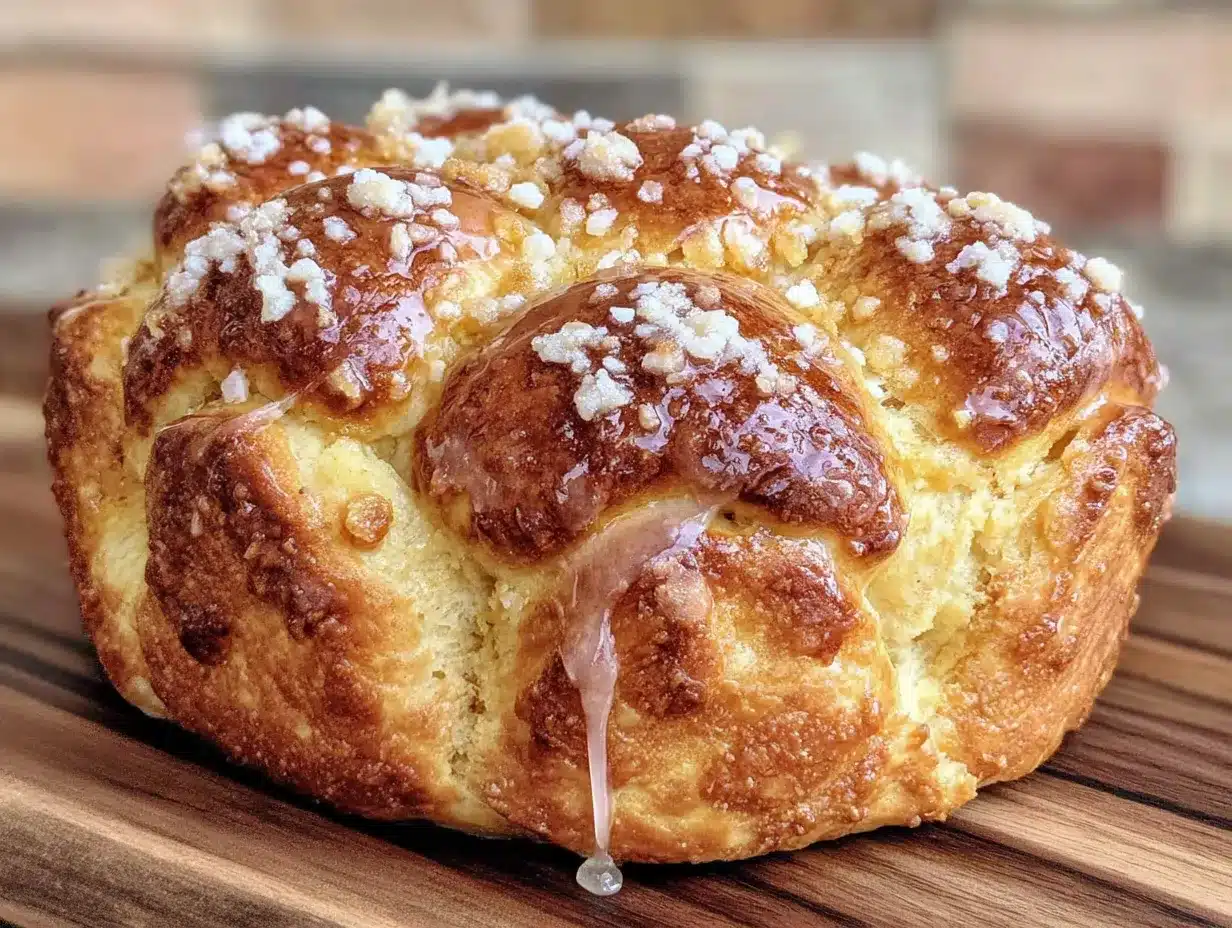
What makes this version different from others you might find online? It’s the balance. Many recipes are either too sweet or too dry. I’ve dialed in the orange blossom water so it’s present but not overpowering—like a whisper of flowers, not a shout. The glaze sets to a beautiful, glossy finish that cracks just slightly when you bite into it. This isn’t just another pan de muerto recipe. It’s your new favorite comfort bread.
What Ingredients You Will Need
This recipe uses simple, humble ingredients to create something truly special. I’ve learned through trial and error that the quality of a few key items really matters here, so I’ve included my personal notes on what to look for.
For the Dough
- All-purpose flour, 4 cups (500g) — I prefer King Arthur or a good store brand. Don’t use bread flour; it makes the bread too chewy.
- Granulated sugar, 1/2 cup (100g) — Regular white sugar works best. I’ve tried honey and maple syrup, but they change the texture.
- Active dry yeast, 2 1/4 teaspoons (one packet) — Make sure it’s fresh! Check the expiration date before you start.
- Warm milk, 1/2 cup (120ml) — Whole milk gives the richest flavor, but 2% works fine. Heat it to about 110°F—warm to the touch, not hot.
- Warm water, 1/4 cup (60ml) — Same temperature as the milk.
- Unsalted butter, 1/2 cup (113g), softened — Let it sit out for at least an hour. Cold butter won’t incorporate properly.
- Large eggs, 3 — Room temperature is crucial. If you forgot to take them out, place them in a bowl of warm water for 5 minutes.
- Orange zest, from 2 medium oranges — Use a microplane if you have one. Avoid the white pith—it’s bitter.
- Orange blossom water, 2 tablespoons — This is the star. Find it in the international aisle or a Middle Eastern market. A little goes a long way!
- Salt, 1 teaspoon — I use fine sea salt. It balances the sweetness perfectly.
- Vanilla extract, 1 teaspoon — Pure vanilla is best, but imitation works in a pinch.
For the Orange Blossom Glaze
- Powdered sugar, 1 1/2 cups (180g) — Sift it first to avoid lumps.
- Orange blossom water, 2 tablespoons — Adds that signature floral note.
- Fresh orange juice, 2-3 tablespoons — Start with 2, add more if needed for drizzling consistency.
- Orange zest, from 1 orange — For garnish and extra flavor.
For the Topping
- Additional granulated sugar, 2 tablespoons — Mixed with a pinch of orange zest for sprinkling.
Equipment Needed
You don’t need a professional bakery setup for this cozy pan de muerto. Here’s what I use in my own kitchen:
- Large mixing bowl — Glass or ceramic is ideal. Metal can react with the yeast.
- Measuring cups and spoons — For accuracy. I’ve learned the hard way that eyeballing yeast doesn’t end well.
- Whisk and wooden spoon — For mixing the dough before you get your hands in there.
- Baking sheet — A standard half-sheet pan works perfectly. Line it with parchment paper.
- Plastic wrap or a clean kitchen towel — To cover the dough while it rises.
- Microplane or zester — For the orange zest. A box grater’s small holes work too, but it’s harder to avoid the pith.
- Pastry brush — For applying the glaze evenly. A silicone one is easiest to clean.
- Cooling rack — Essential for letting the bread cool without getting soggy on the bottom.
If you don’t have a stand mixer, don’t worry. I actually prefer kneading this dough by hand. It lets you feel when it’s ready—smooth, elastic, and slightly tacky but not sticky. If you’re using a mixer, use the dough hook on medium speed for about 8 minutes.
Preparation Method
Alright, let’s make some bread. Set aside about 3 to 4 hours total—most of that is rising time, so you can relax while the yeast does its thing.
- Activate the yeast. In a small bowl, combine the warm milk, warm water, and 1 tablespoon of the sugar. Sprinkle the yeast on top and let it sit for 5 to 10 minutes. It should get foamy and smell like fresh bread. If it doesn’t, your yeast is dead—start over with a new packet.
- Mix the dry ingredients. In your large mixing bowl, whisk together the flour, remaining sugar, and salt. Make a well in the center.
- Combine the wet ingredients. In a separate bowl, whisk together the eggs, orange zest, orange blossom water, and vanilla extract. Pour this mixture into the well of dry ingredients, along with the activated yeast mixture.
- Bring it together. Stir with a wooden spoon until a shaggy dough forms. It will look messy and uneven—that’s normal.
- Add the butter. Add the softened butter, one tablespoon at a time, kneading it into the dough. This takes a few minutes. The dough will feel greasy and weird at first. Keep going. It will come together.
- Knead the dough. Turn the dough out onto a lightly floured surface. Knead for 8 to 10 minutes. The dough should be smooth, soft, and slightly tacky but not sticky. If it’s sticking to your hands like crazy, add a tiny sprinkle of flour. If it’s too dry, add a teaspoon of warm water.
- First rise. Place the dough in a lightly oiled bowl, turning to coat. Cover with plastic wrap or a damp towel. Let it rise in a warm spot for 1.5 to 2 hours, until doubled in size. I put mine in the microwave (not turned on!) with a cup of hot water next to it.
- Shape the bread. Punch down the dough gently. Divide it into two pieces—one large piece (about 2/3 of the dough) for the base, and one smaller piece for the decorations. Shape the large piece into a round loaf and place it on your parchment-lined baking sheet. From the smaller piece, roll out ropes for the “bones” and a small ball for the top knot. Traditional pan de muerto has four strips of dough laid across the top to look like bones, with a small round piece in the center for the skull. Press gently to attach.
- Second rise. Cover the shaped loaf loosely with plastic wrap. Let it rise for another 45 minutes to 1 hour, until puffy.
- Bake. Preheat your oven to 350°F (175°C). Bake the bread for 25 to 30 minutes, until the top is golden brown and the loaf sounds hollow when tapped on the bottom. If it’s browning too fast, tent loosely with foil after 15 minutes.
- Cool. Let the bread cool on the baking sheet for 10 minutes, then transfer to a cooling rack. Wait until it’s completely cool before glazing—about 1 hour. I know it’s hard to wait, but warm glaze will just soak in and disappear.
- Make the glaze. In a small bowl, whisk together the powdered sugar, orange blossom water, and 2 tablespoons of orange juice. Add more juice a teaspoon at a time until it’s thick but pourable. It should coat the back of a spoon.
- Glaze and garnish. Drizzle the glaze over the cooled bread. Sprinkle with the orange-scented sugar and extra zest. Let the glaze set for about 15 minutes before slicing.
Cooking Tips & Techniques
I’ve made this cozy pan de muerto more times than I can count, and I’ve messed it up in almost every way possible. Here’s what I’ve learned so you don’t have to repeat my mistakes:
Temperature is everything. Yeast is a living thing. If your milk and water are too hot (over 130°F), you’ll kill it. Too cold (under 100°F), and it won’t wake up. I use a kitchen thermometer, but if you don’t have one, the liquid should feel like a warm bath—comfortable on your wrist.
Don’t over-knead. I used to think more kneading meant better bread. Not true. Over-kneaded dough becomes tough and dense. Stop when the dough is smooth and springs back when you poke it. That’s the sweet spot.
The butter struggle is real. The first time I made this, I added all the butter at once. Bad idea. It squished out everywhere and the dough was a greasy mess. Adding it gradually, letting each piece get absorbed before the next, makes all the difference.
Watch your rise times. My kitchen is drafty in winter, so rises take longer. In summer, they’re faster. Don’t go by the clock—go by the look of the dough. Doubled in size? You’re good.
Glaze when completely cool. I once glazed a slightly warm loaf. The glaze melted into a sad, sticky puddle. Patience, my friend. Let it cool fully.
Don’t skip the zest. The orange blossom water gives the floral note, but the zest gives the bright, citrusy punch. Both are essential for that authentic flavor.
Variations & Adaptations
This cozy pan de muerto with orange blossom glaze is wonderful as written, but I love playing around with it. Here are some variations I’ve tried and loved:
Chocolate Orange Version: Add 1/4 cup of cocoa powder to the flour mixture and reduce the flour by the same amount. The chocolate pairs beautifully with the orange blossom—it’s like a fancy European pastry.
Vegan Adaptation: Substitute the butter with vegan butter (I like Miyoko’s), use flax eggs (1 tablespoon ground flax + 3 tablespoons water per egg), and replace the milk with oat milk. The texture is slightly denser but still delicious.
Spiced Pan de Muerto: Add 1 teaspoon of cinnamon, 1/2 teaspoon of nutmeg, and a pinch of cloves to the flour. This gives it a cozy, holiday vibe that’s perfect for winter gatherings.
Gluten-Free Version: Use a good 1:1 gluten-free flour blend (I’ve had success with King Arthur’s). Add 1 teaspoon of xanthan gum if your blend doesn’t include it. The dough will be stickier, so wet your hands when shaping.
Lavender Twist: Replace the orange blossom water with culinary lavender extract and add dried lavender buds to the glaze. It’s floral and calming—perfect for a tea party.
My personal favorite variation? I once made a batch with blood orange zest and juice instead of regular oranges. The glaze turned a gorgeous pinkish-red, and the flavor was slightly tarter and more complex. It was stunning on the altar.
Serving & Storage Suggestions
This cozy pan de muerto is best served at room temperature, with a hot cup of Mexican hot chocolate or coffee. The combination of the sweet, floral bread with the rich, spiced drink is honestly one of life’s great pleasures.
For a traditional Día de Muertos presentation, place the bread on your ofrenda alongside marigolds, photos of loved ones, and other offerings. It’s a beautiful way to honor the tradition. For everyday eating, slice it thick and toast it lightly—the glaze caramelizes slightly and becomes even more delicious.
Storage: Keep the bread in an airtight container at room temperature for up to 4 days. Do not refrigerate—it will dry out. If your kitchen is very warm, store it in a cool spot away from direct sunlight.
Freezing: This bread freezes beautifully. Wrap the unglazed, cooled loaf tightly in plastic wrap, then foil. Freeze for up to 3 months. When ready to serve, thaw at room temperature, then make the glaze fresh and apply it. The glaze doesn’t freeze well.
Reheating: If you want that fresh-baked warmth, pop individual slices in a 300°F oven for 5 minutes. The glaze will get slightly melty and the bread will be soft again. Avoid the microwave—it makes the bread rubbery.
One thing I’ve noticed: the flavors actually deepen after the first day. The orange blossom becomes more pronounced, and the bread gets even softer. So if you can wait a day, you’ll be rewarded.
Nutritional Information & Benefits
Let’s be real—this is a treat, not a health food. But here’s what you’re getting in each slice (based on 12 servings):
- Calories: Approximately 320 per slice
- Carbohydrates: 52g
- Protein: 7g
- Fat: 10g
- Fiber: 1g
- Sugar: 24g
On the positive side, this bread contains vitamin C from the orange zest, which supports immune health. The eggs provide high-quality protein and choline, which is good for brain function. And honestly, there’s a mental health benefit to baking bread—the process is meditative, and the result brings joy to you and others.
If you’re watching your sugar intake, you can reduce the sugar in the dough by 2 tablespoons without affecting the texture too much. The glaze is harder to reduce, but you can use a lighter coating.
This recipe contains gluten, dairy, and eggs. For allergen-friendly options, see the variations section above.
Conclusion
This cozy pan de muerto with orange blossom glaze has become a staple in my kitchen, and I hope it becomes one in yours too. It’s more than just a bread—it’s a connection to tradition, a way to slow down, and a reminder that the best things in life are made with patience and love.
I’d love to hear how yours turns out. Did you try a variation? Did your family love it? Did you serve it on an ofrenda or just with your morning coffee? Drop a comment below and let me know. And if you share a photo on Pinterest or Instagram, tag me—I want to see your beautiful bread!
Go ahead, preheat that oven. Your kitchen is about to smell amazing. And honestly? You deserve it.
Frequently Asked Questions
Can I make this bread ahead of time?
Absolutely. You can make the dough through the first rise, punch it down, and refrigerate it overnight. The next day, let it come to room temperature for about an hour before shaping and proceeding with the second rise.
My dough isn’t rising. What went wrong?
Most likely, your yeast was dead or your liquid was too hot. Check the expiration date on your yeast and make sure your milk and water are between 100°F and 110°F. Also, make sure your kitchen isn’t too cold—a drafty room can slow things down significantly.
Can I use orange extract instead of orange blossom water?
You can, but the flavor will be different. Orange blossom water has a delicate floral quality, while orange extract is more intensely citrusy. If you use extract, start with 1 teaspoon and taste as you go—it’s much stronger.
How do I get the traditional bone shape on top?
Roll the reserved dough into thin ropes, about 1/2 inch thick. Cut them into 4-inch lengths. Place two ropes across the top of the loaf in an X shape, then two more in the opposite direction to form a cross. Press a small ball of dough in the center where they meet. It represents a skull and bones.
Can I skip the glaze?
You can, but the bread will be less sweet and won’t have that signature glossy finish. If you prefer a less sweet version, brush the baked bread with melted butter and sprinkle with cinnamon sugar instead. It’s still delicious!
This cozy pan de muerto with orange blossom glaze was inspired by a chance meeting in a grocery store aisle and perfected through many happy kitchen experiments. May it bring warmth and sweetness to your table.
Pin This Recipe!
Cozy Pan de Muerto with Orange Blossom Glaze
This cozy pan de muerto with orange blossom glaze is a soft, pillowy bread enriched with citrus and floral notes, perfect for Día de Muertos or any day you need a comforting treat. It’s surprisingly simple to make with pantry-friendly ingredients and delivers an unbelievably soft texture.
- Prep Time: 30 minutes
- Cook Time: 30 minutes
- Total Time: 3 hours 30 minutes (includes rising time)
- Yield: 12 servings 1x
- Category: Bread
- Cuisine: Mexican
Ingredients
- 4 cups (500g) all-purpose flour
- 1/2 cup (100g) granulated sugar
- 2 1/4 teaspoons active dry yeast (one packet)
- 1/2 cup (120ml) warm milk (whole milk preferred)
- 1/4 cup (60ml) warm water
- 1/2 cup (113g) unsalted butter, softened
- 3 large eggs, room temperature
- Zest of 2 medium oranges
- 2 tablespoons orange blossom water
- 1 teaspoon fine sea salt
- 1 teaspoon vanilla extract
- For the Orange Blossom Glaze:
- 1 1/2 cups (180g) powdered sugar, sifted
- 2 tablespoons orange blossom water
- 2–3 tablespoons fresh orange juice
- Zest of 1 orange
- For the Topping:
- 2 tablespoons granulated sugar mixed with a pinch of orange zest
Instructions
- Activate the yeast: In a small bowl, combine warm milk, warm water, and 1 tablespoon of the sugar. Sprinkle yeast on top and let sit for 5-10 minutes until foamy.
- Mix dry ingredients: In a large mixing bowl, whisk together flour, remaining sugar, and salt. Make a well in the center.
- Combine wet ingredients: In a separate bowl, whisk together eggs, orange zest, orange blossom water, and vanilla extract. Pour into the well of dry ingredients along with the activated yeast mixture.
- Bring it together: Stir with a wooden spoon until a shaggy dough forms.
- Add the butter: Add softened butter one tablespoon at a time, kneading it into the dough until fully incorporated.
- Knead the dough: Turn dough onto a lightly floured surface and knead for 8-10 minutes until smooth, soft, and slightly tacky.
- First rise: Place dough in a lightly oiled bowl, cover with plastic wrap or a damp towel, and let rise in a warm spot for 1.5-2 hours until doubled in size.
- Shape the bread: Punch down dough. Divide into two pieces (2/3 for base, 1/3 for decorations). Shape large piece into a round loaf on a parchment-lined baking sheet. From the smaller piece, roll ropes for ‘bones’ and a small ball for the top knot. Arrange ropes in a cross pattern on top and place the ball in the center.
- Second rise: Cover shaped loaf loosely with plastic wrap and let rise for 45 minutes to 1 hour until puffy.
- Bake: Preheat oven to 350°F (175°C). Bake for 25-30 minutes until golden brown and hollow-sounding when tapped. Tent with foil after 15 minutes if browning too fast.
- Cool: Let bread cool on baking sheet for 10 minutes, then transfer to a cooling rack. Cool completely before glazing (about 1 hour).
- Make the glaze: Whisk together powdered sugar, orange blossom water, and 2 tablespoons orange juice. Add more juice a teaspoon at a time until thick but pourable.
- Glaze and garnish: Drizzle glaze over cooled bread. Sprinkle with orange-scented sugar and extra zest. Let set for 15 minutes before slicing.
Notes
Temperature is crucial for yeast: milk and water should be between 100°F and 110°F. Don’t over-knead; stop when dough is smooth and springs back. Add butter gradually to avoid a greasy mess. Rise times vary by kitchen temperature; go by dough appearance (doubled in size). Glaze only when bread is completely cool to prevent melting. Flavors deepen after the first day. For traditional bone shape, roll thin ropes and arrange in a cross on top.
Nutrition
- Serving Size: 1 slice
- Calories: 320
- Sugar: 24
- Sodium: 200
- Fat: 10
- Saturated Fat: 6
- Carbohydrates: 52
- Fiber: 1
- Protein: 7
Keywords: pan de muerto, day of the dead bread, orange blossom bread, Mexican sweet bread, holiday bread, comfort bread


