Love this? Save it for later!
Share the inspiration with your friends
The church potluck was in three hours and I’d completely forgotten. Everyone else would be bringing their best—Aunt Ruth’s famous seven-layer dip, Mrs. Patterson’s homemade yeast rolls that she’d probably started at dawn. I had a half-empty carton of eggs, some vanilla extract I’d bought on clearance, and a bag of sugar that was getting a little clumpy. My first thought was panic. My second thought was to just grab a store-bought pie and pretend. But then I remembered—those forgotten meringue cookies my grandmother used to make. The ones you just whip up, pop in the oven, and then literally forget about overnight. I mean, honestly, the name says it all.
So I started whisking. I cracked those eggs with shaky hands, separated the whites like I was defusing a bomb (one yolk breaking would’ve ruined everything), and started beating. Let me tell you, there’s something almost magical about watching egg whites transform from a clear, slimy liquid into a stiff, glossy cloud that holds its shape. It felt like a small miracle in my messy kitchen. I added the sugar slowly, a spoonful at a time, and then a splash of vanilla and a pinch of cream of tartar because, you know, science. I piped them onto baking sheets in these little swirls, slid them into the oven at 350°F, and then… turned the oven off. That’s the whole trick. You just leave them in there, in the cooling oven, for hours or overnight. You forget about them. And when you remember—they’re perfect.
I brought a whole tin of those light-as-air cookies to the potluck, still a little nervous. And you know what happened? They vanished. People were grabbing three and four at a time. Someone asked if I’d spent all day on them. I just smiled and said, “Something like that.” Honestly, that’s the kind of recipe this is—it makes you look like a hero with almost no effort. Maybe you’ve been there, scrambling for a contribution and feeling like you’ve got nothing to offer. These cookies are the answer. They’re cozy, old-fashioned, and they let the oven do all the work. That’s why I keep making them, even when I’m not in a pinch. They remind me that sometimes the best things come from forgetting.
Why You’ll Love This Recipe
Let’s be real—how many recipes can you name where you literally turn off the oven and walk away? That’s the beauty of these cozy old-fashioned forgotten meringue cookies. They’re not just easy; they’re practically foolproof once you know the basics. I’ve tested this recipe about a dozen times, tweaking the sugar ratio and the oven temperature, and I can tell you with confidence—this version works every single time.
- Quick & Easy: The active prep time is maybe 15 minutes. After that, the oven does everything. Perfect for those days when you need a dessert but don’t have the energy for a full baking project.
- Simple Ingredients: Eggs, sugar, vanilla, cream of tartar, salt. That’s it. No fancy extracts, no specialty flours, no trip to a gourmet grocery store. You probably have everything right now.
- Perfect for Cozy Evenings: These cookies feel like a warm hug. They’re light, they melt in your mouth, and they pair beautifully with a cup of hot tea or coffee on a chilly night.
- Crowd-Pleaser: I’ve brought these to holiday parties, book clubs, and casual get-togethers. Kids love them because they’re sweet and airy. Adults love them because they’re nostalgic and not too heavy.
- Unbelievably Delicious: The texture is what gets everyone. Crisp on the outside, tender and marshmallowy on the inside. It’s like eating a sweet little cloud.
What makes this recipe different from other meringue cookies? It’s the “forgotten” method. Most meringue recipes require precise baking times and careful watching. This one? You just bake them briefly at a high temperature, then let them sit in the cooling oven for hours. The residual heat slowly dries them out, creating that perfect texture without any risk of over-browning or cracking. It’s the kind of trick that feels like cheating—but it’s not. It’s just smart.
This recipe isn’t just good—it’s the kind that makes you close your eyes after the first bite. It’s comfort food reimagined: lighter, simpler, but with the same soul-soothing satisfaction. Perfect for impressing guests without stress, or turning a quiet Tuesday night into something a little bit special.
What Ingredients You Will Need
This recipe uses just a handful of simple, wholesome ingredients to create something that feels surprisingly elegant. Each one plays a specific role, so let’s talk through what you’ll need and why it matters.
- 3 large egg whites (room temperature): The foundation of the entire cookie. Egg whites provide the structure and volume when whipped. Make sure they’re at room temperature—cold eggs don’t whip up as well. I usually set my eggs on the counter about 30 minutes before I start. If you’re in a hurry, place them in a bowl of warm water for 5 minutes.
- ¾ cup granulated sugar (150 grams): This isn’t just for sweetness. The sugar stabilizes the meringue and gives it that crisp texture. Use fine granulated sugar—superfine is even better if you can find it. Avoid powdered sugar here; it contains cornstarch and will change the texture.
- 1 teaspoon vanilla extract: Pure vanilla extract adds warmth and depth. I prefer Nielsen-Massey or Simply Organic brands for the best flavor. You can also use vanilla bean paste for those little specks of vanilla goodness.
- ½ teaspoon cream of tartar: This is the secret weapon. Cream of tartar is an acid that stabilizes the egg whites, helping them hold their shape and preventing them from deflating. It also gives the cookies a slightly glossy finish. If you don’t have it, you can substitute with 1 teaspoon of lemon juice or white vinegar.
- ⅛ teaspoon salt: A tiny pinch balances the sweetness and enhances the vanilla flavor. Don’t skip it—it makes a difference.
Optional additions for variation:
- Food coloring: A few drops of gel food coloring can turn these into festive treats for holidays. I’ve made pink ones for Valentine’s Day and green ones for Christmas.
- Mini chocolate chips: Fold in ¼ cup after whipping for a chocolate-studded version. Use mini chips so they don’t sink to the bottom.
- Crushed peppermint: Perfect for the winter holidays. Add about 2 tablespoons after folding.
Ingredient selection tip: Look for eggs that are fresh but not too fresh. Eggs that are about a week old actually whip up better because the whites are slightly thinner and more flexible. If you buy farm-fresh eggs, let them sit in the fridge for a few days before using them for meringue.
Substitution guidance: For a dairy-free option, these are naturally dairy-free since there’s no butter or milk. For a lower-sugar version, you can try using a sugar substitute like Swerve confectioners’ sugar, but keep in mind that the texture will be slightly different—they won’t be as crisp. I’ve tested it, and they’re still good, just not quite the same.
Equipment Needed
You don’t need a fancy kitchen to make these cookies, but a few key tools will make your life much easier.
- Electric mixer (stand mixer or hand mixer): Whipping egg whites by hand is possible, but it takes a long time and a lot of arm strength. A stand mixer with the whisk attachment is ideal. I use my KitchenAid for this. A hand mixer works perfectly too—just be prepared to hold it for about 8-10 minutes.
- Large mixing bowl: Make sure it’s spotless. Any grease or residue will prevent the egg whites from whipping properly. Glass or metal bowls are best. Avoid plastic bowls—they can retain oils even after washing.
- Baking sheets: Two large baking sheets. Line them with parchment paper—don’t use wax paper or foil. Parchment paper is non-stick and helps the cookies release easily.
- Piping bag and tip: A piping bag makes the cookies look pretty, but you can also use a zip-top bag with the corner snipped off. For the classic swirled look, use a large star tip (like a Wilton 1M). If you don’t have a piping bag, you can just drop spoonfuls of meringue onto the baking sheet—they’ll still taste amazing.
- Cooling rack: Not strictly necessary since these cool in the oven, but handy if you need to move them around.
- Digital kitchen scale: Optional but helpful. Measuring sugar by weight is more accurate than volume, especially for meringue where the ratio matters.
Budget-friendly options: If you don’t have a piping bag, a sturdy zip-top bag works fine. If you don’t have a stand mixer, a hand mixer is just as effective—it just takes a little more patience. I’ve made these in a tiny apartment kitchen with a $20 hand mixer and they turned out perfectly.
Maintenance tip: After using your mixing bowl for meringue, wash it with hot, soapy water and a little vinegar to remove any residual grease. Dry it thoroughly before storing.
Preparation Method
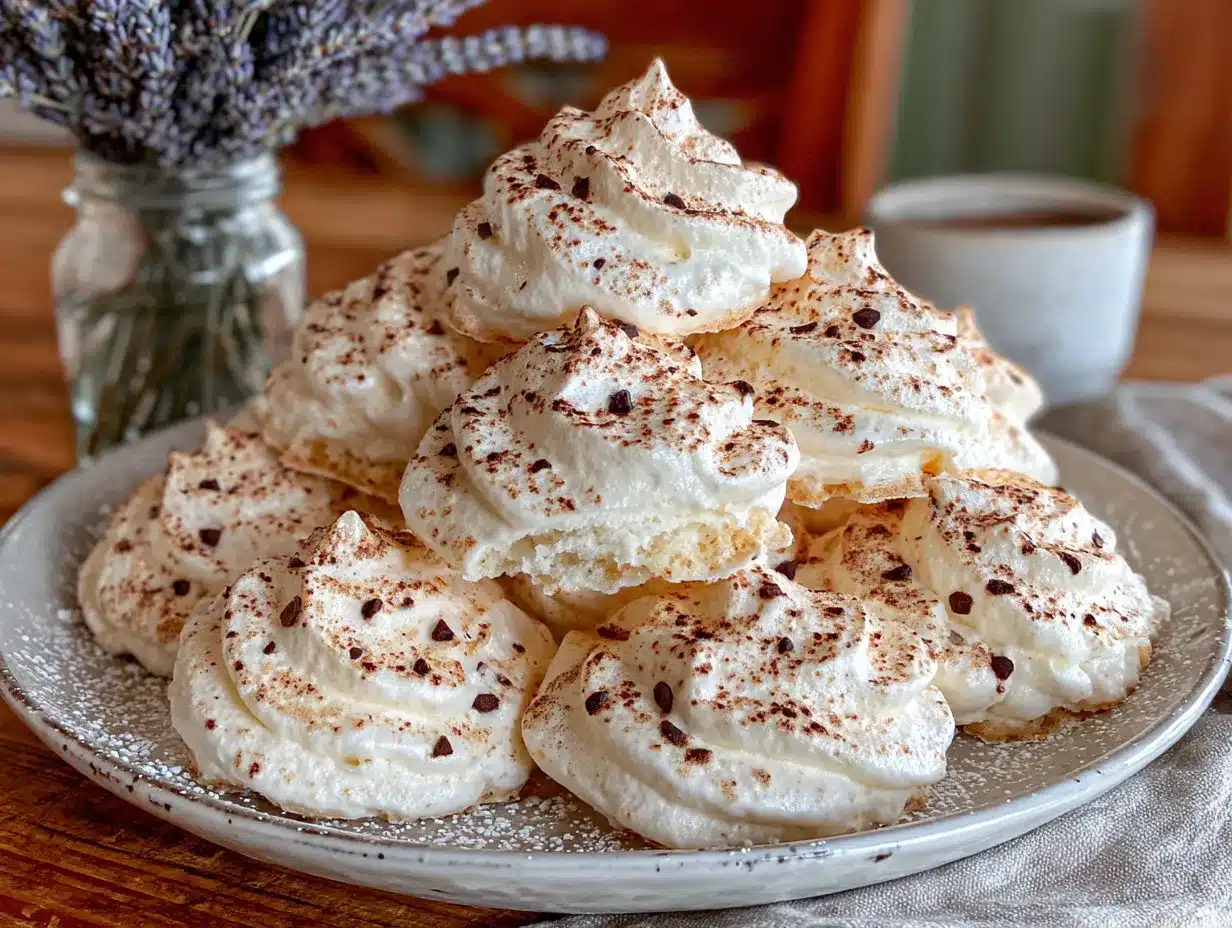
Follow these steps carefully, and you’ll have perfect forgotten meringue cookies every time. I’ve included all the little details I wish someone had told me the first time I made these.
- Preheat your oven to 350°F (175°C). Position the racks in the upper and lower thirds of the oven. Line two baking sheets with parchment paper. Set them aside for now.
- Prepare your egg whites. Separate the eggs while they’re cold—it’s easier. Crack each egg carefully, letting the white fall into a small bowl before transferring it to your mixing bowl. This way, if a yolk breaks, you only lose one egg, not the whole batch. Make sure absolutely no yolk gets in. Even a tiny bit of fat will prevent the whites from whipping.
- Let the egg whites come to room temperature. This takes about 30 minutes. Room temperature whites whip up faster and hold more volume. I usually set my timer and use that time to measure out the other ingredients.
- Add the cream of tartar and salt. Sprinkle them over the egg whites. Start mixing on medium-low speed until the mixture becomes foamy and opaque—about 2 minutes. You should see lots of tiny bubbles.
- Gradually add the sugar. Increase the speed to medium-high. Add the sugar one tablespoon at a time, waiting about 15 seconds between each addition. This slow incorporation is crucial. If you dump all the sugar in at once, the meringue will deflate. The mixture will start to look glossy and thick.
- Whip until stiff peaks form. Once all the sugar is in, increase the speed to high. Whip for 5-7 minutes. You’re looking for stiff, glossy peaks that stand straight up when you lift the whisk. The mixture should be thick enough that it doesn’t slide around in the bowl. A good test: rub a little between your fingers—it should feel smooth, not grainy. If it feels grainy, the sugar hasn’t dissolved fully. Keep whipping for another minute or two.
- Add the vanilla. Drizzle in the vanilla extract and whip for another 30 seconds to combine. The meringue will look beautifully glossy and smooth.
- Pipe the cookies. Transfer the meringue to your piping bag fitted with a star tip. Hold the bag perpendicular to the baking sheet. Pipe small swirls, about 1.5 inches wide and 1 inch tall. Leave about an inch between each cookie—they don’t spread much, but they need a little breathing room. If you’re using a zip-top bag, snip about ½ inch off one corner and pipe rounds or rosettes.
- Bake for 5 minutes. Place both baking sheets in the oven. Bake for exactly 5 minutes. The cookies will start to puff up slightly and look set.
- Turn off the oven and leave the cookies inside. This is the “forgotten” part. Turn the oven off completely. Do not open the door. Leave the cookies in the cooling oven for at least 4 hours, but overnight is best. I usually make these before bed and take them out in the morning. The residual heat slowly dries them out, creating that perfect crisp exterior and tender interior.
- Remove and cool completely. After the oven has cooled completely (or after 8-12 hours), take the cookies out. They should peel easily off the parchment paper. If they stick, they need more drying time—pop them back in the turned-off oven for another hour.
Warning: Do not open the oven door during the cooling process! The sudden rush of cool air can cause the cookies to crack or collapse. I learned this the hard way when I peeked after two hours and ended up with a batch of sad, wrinkled cookies.
Sensory cues: When you take them out, they should feel light as air. The surface should be dry and crisp, not sticky. When you bite into one, you should hear a slight snap, followed by a soft, melt-in-your-mouth interior.
Cooking Tips & Techniques
After making these cookies more times than I can count, I’ve picked up a few tricks that make a real difference. Let me share them so you don’t have to learn the hard way.
Cleanliness is non-negotiable. This is the most important tip. Any trace of grease, yolk, or even residual dish soap will ruin your meringue. Before you start, wipe your mixing bowl and whisk attachment with a little lemon juice or vinegar on a paper towel. This removes any invisible grease. I once used a bowl that I thought was clean, and my egg whites never got past the foamy stage. It was a sad waste of eggs.
Room temperature eggs are worth the wait. Cold eggs don’t whip as high or as quickly. I know it’s tempting to skip this step, but don’t. If you’re in a rush, place the whole eggs (unbroken) in a bowl of warm water for 5-10 minutes. It works in a pinch.
Don’t over-whip. Stiff peaks are the goal, but there’s a fine line between stiff and over-whipped. Over-whipped meringue looks dry and curdled, and it won’t pipe smoothly. Stop as soon as the peaks hold their shape and the mixture is glossy. If you see it starting to separate or look grainy, you’ve gone too far.
Humidity is your enemy. Meringue cookies are hygroscopic, meaning they absorb moisture from the air. On a rainy or humid day, they won’t dry out properly in the oven. Check the weather before you make these. I made the mistake of trying on a rainy spring afternoon, and my cookies came out chewy and sticky instead of crisp. Save these for a dry day.
Multitasking strategy. Since the active prep time is short, I like to get everything ready before I start. Measure your sugar, line your baking sheets, and set up your piping bag. Then you can focus completely on the whipping process without scrambling for ingredients mid-step.
Consistency tip. For perfectly uniform cookies, pipe them all the same size. I use a small cookie scoop to portion the meringue into the piping bag, which helps keep things consistent. If you’re a perfectionist (like me), you can even mark circles on your parchment paper as a guide, then flip it over so the ink doesn’t touch the cookies.
Variations & Adaptations
One of the best things about this recipe is how easy it is to customize. Here are some variations I’ve tried and loved.
Chocolate-Dipped Meringues: After the cookies have cooled, melt some dark chocolate (about ½ cup of chocolate chips) and dip the bottoms of the cookies. Place them on parchment paper to set. The combination of the crisp meringue and rich chocolate is absolutely divine. I did this for a Christmas cookie exchange and they were the first to disappear.
Lemon Meringue Cookies: Replace the vanilla extract with 1 teaspoon of lemon extract and add 1 tablespoon of lemon zest. The bright citrus flavor is perfect for spring. You can also add a drop of yellow food coloring for a sunny look.
Coffee Meringues: Dissolve 1 teaspoon of instant espresso powder in the vanilla extract before adding it to the meringue. The coffee flavor is subtle but adds a lovely depth. These are my personal favorite with an afternoon latte.
Vegan Option: You can use aquafaba (the liquid from a can of chickpeas) instead of egg whites. Use 3 tablespoons of aquafaba per egg white. Whip it the same way, but note that it takes a bit longer to reach stiff peaks. The flavor is neutral, and the texture is surprisingly similar.
Flavor Twist: Add ¼ teaspoon of almond extract along with the vanilla for a nutty, marzipan-like flavor. Or try peppermint extract for a holiday version. Just be careful with strong extracts—a little goes a long way.
Colorful Swirls: Before piping, divide the meringue into separate bowls and add different gel food colors. Layer them in the piping bag for beautiful multicolored cookies. I did this for a baby shower and piped pink and blue swirls that matched the theme perfectly.
Dietary Adaptation: These are naturally gluten-free and dairy-free, which makes them a great option for guests with dietary restrictions. Just double-check that your vanilla extract is gluten-free (most are, but it’s worth verifying).
Serving & Storage Suggestions
These cookies are best served at room temperature, straight from the cooling rack. They’re light and airy, with a satisfying crunch that gives way to a soft, melt-in-your-mouth center. I love serving them on a pretty platter with fresh berries and a dusting of powdered sugar for a simple but elegant dessert.
Pairing Suggestions:
- Hot Beverages: These cookies are perfect with coffee, tea, or hot chocolate. The sweetness balances beautifully with a slightly bitter drink. I especially love them with a cup of Earl Grey tea or a creamy latte.
- Fruit: Serve alongside fresh strawberries, raspberries, or sliced peaches. The tartness of the fruit cuts through the sweetness of the cookies.
- Ice Cream: Crumble a few meringues over vanilla ice cream for a quick and fancy dessert. The texture contrast is amazing.
Storage Instructions:
- Room Temperature: Store in an airtight container at room temperature for up to 2 weeks. They stay crisp and fresh. I like to layer them with parchment paper to prevent them from sticking together.
- Freezer: You can freeze these cookies for up to 3 months. Place them in a single layer in a freezer-safe container, with parchment paper between layers. Thaw at room temperature for about 15 minutes before serving. They won’t lose their texture.
- Important: Do not refrigerate these cookies. The humidity in the fridge will make them sticky and soft. Trust me on this one—I made that mistake once.
Flavor Development: These cookies actually taste best after they’ve been stored for a day or two. The flavors meld together, and the texture becomes even more delicate. I often make them a few days ahead of an event.
Nutritional Information & Benefits
Per serving (about 3 cookies):
- Calories: 85
- Fat: 0g
- Carbohydrates: 20g
- Sugar: 19g
- Protein: 1g
- Sodium: 35mg
These cookies are naturally fat-free and cholesterol-free, since they’re made only from egg whites. They’re also gluten-free and dairy-free, making them accessible for many dietary needs.
Health Benefits of Key Ingredients:
- Egg Whites: High in protein and low in calories. They also contain riboflavin and selenium, which support metabolism and immune function.
- Vanilla Extract: Contains small amounts of antioxidants and has been shown to have calming properties. It’s the reason these cookies feel so comforting.
Dietary Considerations:
- Gluten-free (use certified gluten-free vanilla extract if needed)
- Dairy-free
- Fat-free
- Low-cholesterol
- Contains eggs (not suitable for egg-free diets unless using aquafaba)
Personal Wellness Perspective: I love that these cookies let me enjoy something sweet without feeling heavy or guilty. They satisfy that craving for dessert without the butter and flour that weigh down most baked goods. It’s a small indulgence that feels just right.
Conclusion
These cozy old-fashioned forgotten meringue cookies are more than just a recipe—they’re a little bit of kitchen magic. With just a handful of simple ingredients and a technique that feels almost too easy, you can create something that looks and tastes like you spent hours in the kitchen. The best part? You don’t have to. The oven does the work while you sleep, or while you go about your day.
I hope you give these a try, whether you’re in a pinch for a potluck or just craving something light and sweet. Don’t be afraid to customize them with your favorite flavors and colors. That’s the beauty of this recipe—it’s a blank canvas for your creativity.
I’d love to hear how yours turn out! Did you add chocolate? Try a new flavor? Let me know in the comments below. Share your photos and tag me—I can’t wait to see your beautiful creations. Happy baking, friend!
Frequently Asked Questions
Can I make these cookies on a humid day?
It’s not ideal. Humidity can prevent the meringues from drying out properly, leaving them chewy instead of crisp. If you must bake on a humid day, try leaving them in the turned-off oven for an extra 2-3 hours, and store them immediately in an airtight container once they’re cool.
Why did my meringue cookies crack?
Cracking usually happens when the oven temperature changes too quickly. Make sure you don’t open the oven door while the cookies are cooling inside. Also, avoid over-whipping the meringue, which can make it too stiff and prone to cracking.
Can I use liquid egg whites from a carton?
I don’t recommend it. Carton egg whites often contain stabilizers that prevent them from whipping to stiff peaks. Fresh egg whites give you the best volume and texture. If you’re in a pinch, you can try, but the results won’t be as good.
How do I know when the meringue is whipped enough?
You’re looking for stiff, glossy peaks that stand straight up when you lift the whisk. The mixture should be thick and hold its shape. A good test is to rub a little between your fingers—it should feel smooth, not grainy. If it feels grainy, keep whipping.
Can I double this recipe?
Absolutely! Just make sure your mixing bowl is large enough to accommodate the volume. A stand mixer can handle up to 6 egg whites easily. If you’re using a hand mixer, you might need to work in batches. The baking time remains the same.
Pin This Recipe!
Cozy Old-Fashioned Forgotten Meringue Cookies: Best Easy Recipe

These light-as-air meringue cookies are made with just a few simple ingredients and a clever ‘forgotten’ method—bake briefly, then leave them in the cooling oven overnight. They’re crisp on the outside, tender on the inside, and perfect for potlucks, holidays, or a cozy treat.
- Prep Time: 15 minutes
- Cook Time: 5 minutes
- Total Time: 4 hours 20 minutes (or overnight)
- Yield: 24 cookies 1x
- Category: Dessert
- Cuisine: American
Ingredients
- 3 large egg whites (room temperature)
- ¾ cup granulated sugar (150 grams)
- 1 teaspoon vanilla extract
- ½ teaspoon cream of tartar
- ⅛ teaspoon salt
- Optional: food coloring, mini chocolate chips, crushed peppermint
Instructions
- Preheat your oven to 350°F (175°C). Position the racks in the upper and lower thirds of the oven. Line two baking sheets with parchment paper.
- Separate the eggs while cold, ensuring no yolk gets into the whites. Let the egg whites come to room temperature (about 30 minutes).
- Add the cream of tartar and salt to the egg whites. Mix on medium-low speed until foamy and opaque, about 2 minutes.
- Gradually add the sugar, one tablespoon at a time, waiting about 15 seconds between each addition. Increase speed to medium-high.
- Whip on high speed for 5-7 minutes until stiff, glossy peaks form. The mixture should feel smooth, not grainy.
- Add the vanilla extract and whip for another 30 seconds to combine.
- Transfer the meringue to a piping bag fitted with a star tip. Pipe small swirls (about 1.5 inches wide and 1 inch tall) onto the prepared baking sheets, leaving about an inch between each cookie.
- Bake for exactly 5 minutes. The cookies will puff up slightly.
- Turn off the oven completely. Do not open the door. Leave the cookies in the cooling oven for at least 4 hours, preferably overnight (8-12 hours).
- Remove the cookies from the oven. They should peel easily off the parchment paper. If they stick, return them to the turned-off oven for another hour.
Notes
Do not open the oven door during the cooling process to prevent cracking. Humidity can affect the texture; avoid making these on rainy days. For best results, use room temperature egg whites and ensure all equipment is grease-free.
Nutrition
- Serving Size: 3 cookies
- Calories: 85
- Sugar: 19
- Sodium: 35
- Carbohydrates: 20
- Protein: 1
Keywords: forgotten meringue cookies, old-fashioned meringue cookies, easy meringue cookies, light and airy cookies, gluten-free cookies, dairy-free cookies