Love this? Save it for later!
Share the inspiration with your friends
I was standing in the grocery store parking lot last Tuesday when the smell of roasted peanuts from the bulk bins hit me—and suddenly I was seven years old at my Aunt Carol’s sticky kitchen table, watching her roll peanut butter and oats into little balls with her work-roughened hands. She’d let me press the chocolate chips into the tops, and I always ate more than I pressed. I haven’t thought about those afternoons in years. Aunt Carol moved to Florida a decade ago, and we don’t talk much anymore. But that smell—that specific, warm, nutty smell—brought it all back so fast I almost dropped my reusable bags.
I stood there for a minute, honestly feeling a little ridiculous. The parking lot was loud, someone was beeping, and there I was, choked up over peanuts. But I knew what I had to do. I went straight home, dug out the old recipe card from a box in the back of my pantry (it’s stained with what I think is honey from 2008), and got to work. Let me tell you, I messed up the first batch. Too dry, crumbly, fell apart in my hands. I got peanut butter all over the dog’s head when I tried to fix the texture. It was a mess. But the second batch? That was the one. That was the taste I was chasing.
These Cozy No-Bake Peanut Butter Oat Energy Bites aren’t just snacks. They’re a little piece of my childhood that I can hold in my hand. And honestly, maybe you’ve been there—chasing a taste, a feeling, a moment you thought was gone. That’s what this recipe is for. It’s for the days when you need something simple, something sweet, something that feels like a hug from someone who isn’t there anymore.
Why You’ll Love This Recipe
Let me be straight with you—I have tested this recipe about seven times to get it just right. I am not a professional chef, but I am a professional eater, and these bites have earned a permanent spot in my fridge. Here is why you are going to feel the same way.
- Quick & Easy: These come together in under 15 minutes. No oven, no stove, no fancy equipment. Just a bowl, a spoon, and your two hands. Perfect for those afternoons when you need a win.
- Simple Ingredients: You probably have everything in your pantry right now. Oats, peanut butter, honey, chocolate chips. That is it. No trips to a specialty store required.
- Perfect for Cozy Nights: These are my go-to for cold evenings, rainy Sundays, or any day that just feels a little heavy. They are comfort food that doesn’t require turning on the oven.
- Crowd-Pleaser: I brought these to a potluck last month, and three people asked for the recipe before I even sat down. Kids love them, adults love them, everyone loves them.
- Unbelievably Delicious: The texture is soft and chewy, the peanut butter is rich, and the chocolate chips add little pockets of sweetness. It is next-level comfort food in a tiny package.
What makes these different from the other energy ball recipes out there? It is the ratio. I spent a lot of time tweaking the wet-to-dry ingredient balance so these hold together perfectly without being sticky or dry. They are not too sweet, not too bland. They are just right. And honestly, there is something deeply satisfying about making food with your hands. It feels grounding. It feels like you are actually taking care of yourself.
This recipe is not just good—it is the kind that makes you close your eyes after the first bite. It is comfort food reimagined for busy people who still deserve something homemade. Perfect for impressing guests without stress, or turning a simple Tuesday into something memorable.
What Ingredients You Will Need
This recipe uses simple, wholesome ingredients to deliver bold flavor and satisfying texture without the fuss. Most of these are pantry staples, which is exactly what you want on a cozy night in.
- Rolled Oats: 1 cup (90g) — Use old-fashioned rolled oats for the best texture. Quick oats will work in a pinch, but they make the bites a little mushy. I personally prefer Bob’s Red Mill for consistent quality.
- Creamy Peanut Butter: 1/2 cup (130g) — Go for a natural, no-stir peanut butter if you can. The kind with just peanuts and salt. Avoid the super oily stuff that separates, or your bites won’t hold together. Skippy or Jif works great too if that is what you have.
- Honey: 1/3 cup (110g) — This is our binder and sweetener. Local honey adds a nice floral note, but any honey works. For a vegan option, use maple syrup—just know the mixture will be slightly stickier.
- Mini Chocolate Chips: 1/3 cup (60g) — Semi-sweet is my favorite because it balances the salty peanut butter. Milk chocolate works if you want it sweeter. Dark chocolate chips add a nice grown-up bitterness. Use dairy-free chips if needed.
- Ground Flaxseed: 2 tablespoons (14g) — This is optional, but I love it. It adds fiber, omega-3s, and helps bind everything together. You can skip it or use chia seeds instead.
- Vanilla Extract: 1 teaspoon — Pure vanilla extract adds warmth and depth. Imitation vanilla works fine, but use a little less since it is stronger.
- Salt: 1/4 teaspoon — Only if your peanut butter is unsalted. A little salt makes the sweetness pop and balances the richness.
Ingredient Selection Tips: For the best texture, look for rolled oats that are not too finely processed. If your peanut butter has been sitting in the fridge and is hard, microwave it for 15 seconds to soften it before mixing. For the chocolate chips, I recommend Guittard or Enjoy Life for allergy-friendly options. In summer, you can swap in dried cranberries or chopped dried cherries instead of chocolate for a different vibe. If you are gluten-sensitive, make sure your oats are certified gluten-free—not all oats are created equal.
Equipment Needed
You do not need much for this recipe, and that is the beauty of it. Here is what you will need.
- Large Mixing Bowl: Any bowl works, but a wide one makes mixing easier. I use my grandmother’s old ceramic bowl because it feels right for this recipe.
- Measuring Cups and Spoons: For accuracy. I have learned the hard way that eyeballing peanut butter leads to disaster.
- Rubber Spatula or Wooden Spoon: For mixing. A spatula is better for scraping the sides.
- Baking Sheet or Plate: To hold the energy bites while they chill. Line it with parchment paper for easy cleanup.
- Parchment Paper or Wax Paper: Optional but helpful. Keeps the bites from sticking to the pan.
- Small Cookie Scoop or Tablespoon: For uniform balls. A cookie scoop makes the process faster and gives you evenly sized bites. If you do not have one, just use your hands—it is more fun anyway.
- Refrigerator: For chilling. Patience is a virtue here.
I have made these with a fork when I could not find my spatula, and they turned out fine. Do not let the equipment list stress you out. A bowl and a spoon are really all you need.
Preparation Method
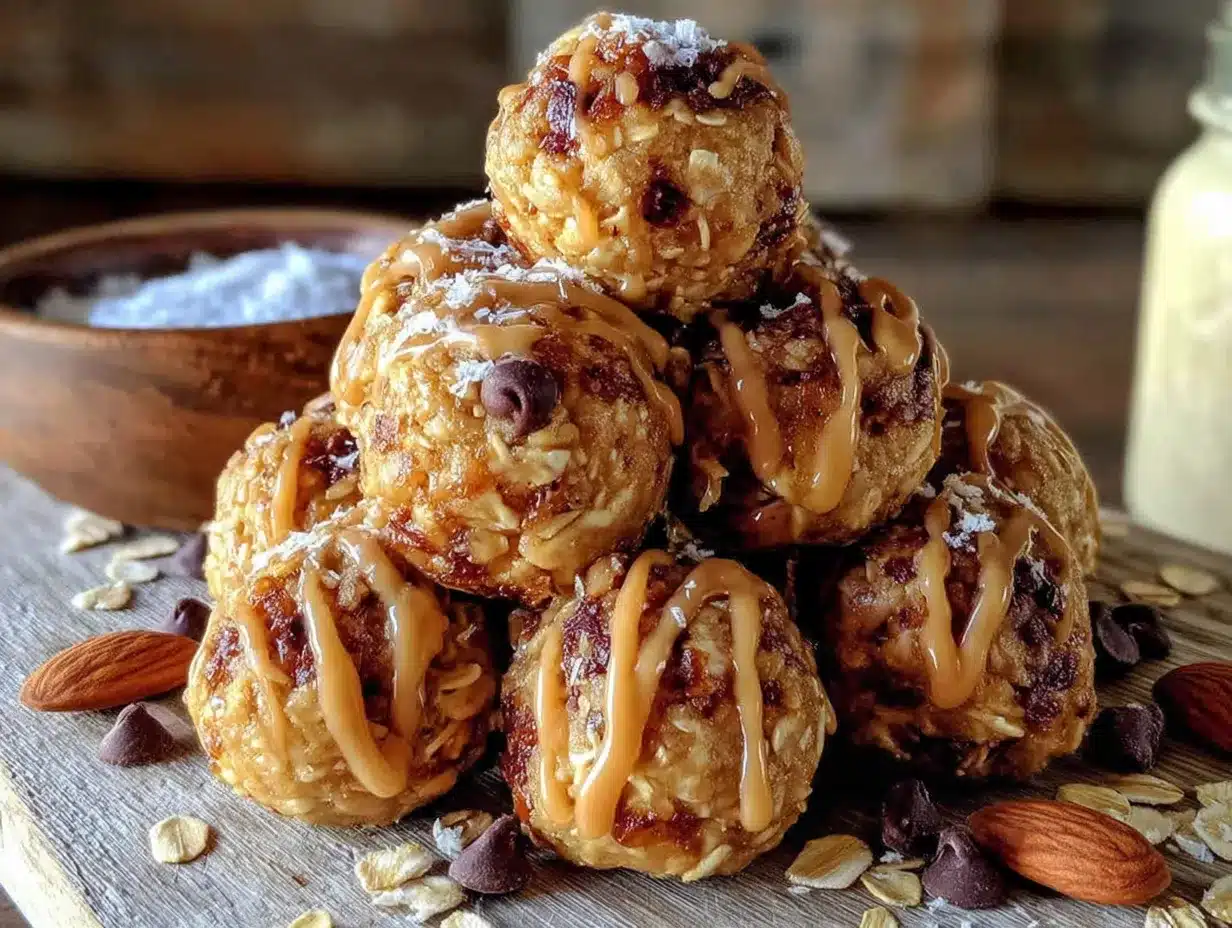
This is where the magic happens. Follow these steps, and you will have perfect energy bites every time.
- Combine the dry ingredients. In your large mixing bowl, add 1 cup (90g) rolled oats, 2 tablespoons (14g) ground flaxseed (if using), and 1/4 teaspoon salt (if your peanut butter is unsalted). Give it a quick stir with your spatula. This ensures the flax is evenly distributed so you do not get clumps later.
- Add the wet ingredients. Add 1/2 cup (130g) creamy peanut butter, 1/3 cup (110g) honey, and 1 teaspoon vanilla extract to the bowl. Do not add the chocolate chips yet—they go in last so they do not get crushed.
- Mix everything together. Stir with your spatula or spoon until everything is fully combined. This takes about a minute of firm stirring. The mixture will look crumbly at first, then it will start to clump together. Keep going until no dry oats are visible. If the mixture looks too dry and crumbly, add 1 tablespoon of warm water or extra honey. If it looks too sticky and wet, add 1 tablespoon of oats. I have had to do both adjustments depending on the peanut butter brand.
- Fold in the chocolate chips. Add 1/3 cup (60g) mini chocolate chips to the bowl. Gently fold them in with your spatula until they are evenly distributed. Try not to overmix or the chips will melt from the warmth of your hands.
- Chill the mixture. Cover the bowl and pop it in the refrigerator for 15-20 minutes. This step is crucial. Chilling makes the mixture firm enough to roll into balls without falling apart. I skipped this once and ended up with a sticky mess all over my fingers. Learn from my mistakes.
- Roll into balls. Line a baking sheet or plate with parchment paper. Using a small cookie scoop or a tablespoon, scoop out portions of the mixture. Roll each portion between your palms to form a smooth ball. You should get about 18-20 bites, depending on size. If the mixture sticks to your hands, lightly wet your palms with water.
- Chill again. Place the rolled bites on the prepared baking sheet. Refrigerate for at least 30 minutes to let them set completely. This helps them hold their shape. The bites will be slightly soft but firm enough to pick up.
- Enjoy or store. Once set, transfer the bites to an airtight container. They are ready to eat immediately, but they taste even better after a few hours in the fridge—the flavors meld together beautifully.
Sensory Cues: When you mix the wet and dry ingredients, the dough should feel like soft play-dough—not sticky, not crumbly. When you roll the balls, they should hold together without cracking. The chocolate chips should stay visible, not get smeared into the dough. The final texture should be soft and chewy, with a slight give when you bite into them.
Cooking Tips & Techniques
I have made these energy bites more times than I can count, and I have definitely made every mistake possible. Here is what I have learned so you do not have to.
Common Mistake #1: Using the wrong oats. Steel-cut oats are too hard and will not soften enough. Instant oats turn into mush. Stick with rolled oats for the perfect chewy texture. I learned this the hard way when I made a batch that felt like eating gravel.
Common Mistake #2: Skipping the chill time. I know you are hungry. I know you want to eat them right now. But if you skip the chilling step, your bites will fall apart. The mixture needs time to hydrate and firm up. Patience pays off.
Common Mistake #3: Overmixing. Once you add the chocolate chips, mix gently. Overmixing can cause the chips to melt or break apart, leaving you with brown dough instead of pretty bites with visible chocolate chunks.
Timing Strategy: Make the mixture, chill it while you clean up the kitchen, then roll the bites while you watch a show. That way, the 15-minute chill feels like no time at all. I usually do this while catching up on a podcast—it turns cooking into a relaxing ritual.
Consistency Tip: If your peanut butter is thick and dry, your dough will be crumbly. Fix it with a splash of warm water or extra honey. If your peanut butter is runny, your dough will be sticky. Fix it with extra oats. The perfect dough should feel like soft, slightly tacky dough that holds together when pressed.
My Biggest Failure: I once tried to make these with crunchy peanut butter because I thought the extra texture would be nice. It was not nice. The chunks of peanuts made the balls uneven and they kept falling apart. Stick with creamy peanut butter for the best structure. Save the crunchy for spreading on toast.
Variations & Adaptations
One of the best things about this recipe is how easy it is to change up. Here are some of my favorite variations.
- Vegan Version: Swap the honey for maple syrup or agave nectar. The texture will be slightly stickier, so you might need to add an extra tablespoon of oats. Use dairy-free chocolate chips. Everything else stays the same.
- Gluten-Free Version: Use certified gluten-free rolled oats. That is literally the only change. Most oats are naturally gluten-free, but they can be cross-contaminated during processing, so check the label.
- Nut-Free Version: Swap the peanut butter for sunflower seed butter or tahini. Sunflower seed butter works wonderfully, though the color will turn a little greenish from a natural reaction—do not worry, it is safe and delicious. Tahini gives a more savory, earthy flavor that pairs beautifully with honey.
- Seasonal Twist: In fall, add 1/2 teaspoon of cinnamon and a pinch of nutmeg. In winter, swap the chocolate chips for white chocolate chips and dried cranberries. In summer, use dried mango or pineapple instead of chocolate for a tropical vibe.
- Protein Boost: Add 2 tablespoons of your favorite protein powder. You will need to add an extra tablespoon of honey or water to balance the dryness. Chocolate protein powder works especially well here.
- My Personal Favorite: I once added 2 tablespoons of unsweetened shredded coconut and 1 tablespoon of chia seeds. The coconut added a lovely chewiness, and the chia seeds gave a nice little pop. I called them “Tropical Energy Bites” and they were gone in two days.
Serving & Storage Suggestions
These energy bites are best served cold, straight from the refrigerator. The texture is firm but chewy, and the chocolate chips are perfectly set. I like to eat them as a mid-afternoon snack with a cup of tea or coffee. They also make a great pre-workout bite—the oats and peanut butter give you steady energy without a sugar crash.
How to Serve: Arrange the bites on a small plate or in a cute bowl. They look beautiful with a sprinkle of flaky sea salt on top—do not skip this if you are serving guests. The salt makes the peanut butter taste even richer. Pair them with a glass of cold milk or a warm latte for the ultimate cozy experience.
Storage Instructions: Store the energy bites in an airtight container in the refrigerator. They will stay fresh for up to 1 week. I use a glass container with a tight lid to keep them from drying out. You can also layer them between sheets of parchment paper if stacking.
Freezer Instructions: These freeze beautifully. Place the bites on a baking sheet in a single layer and freeze for 1 hour. Then transfer them to a freezer-safe bag or container. They will keep for up to 3 months. To eat, just let them thaw in the fridge for 10 minutes, or eat them frozen—they are like little ice cream bites.
Flavor Development: Honestly, these taste even better on day two. The oats absorb more moisture from the peanut butter and honey, making the texture softer and more cohesive. The flavors meld together overnight. So if you can wait, make them a day ahead.
Nutritional Information & Benefits
Here is the estimated nutritional breakdown for one energy bite (based on 20 bites per batch). These numbers are approximate and will vary based on your specific ingredients.
| Nutrient | Amount Per Bite |
|---|---|
| Calories | 120-140 |
| Total Fat | 6-8g |
| Saturated Fat | 2-3g |
| Carbohydrates | 14-16g |
| Fiber | 2-3g |
| Sugar | 8-10g |
| Protein | 4-5g |
Health Benefits: Oats are packed with soluble fiber, which helps keep you full and supports heart health. Peanut butter provides healthy fats and protein for sustained energy. Flaxseed adds omega-3 fatty acids and extra fiber. These bites are a balanced snack that gives you lasting energy without the crash of processed snacks.
Dietary Considerations: This recipe is naturally vegetarian and can be made vegan, gluten-free, and nut-free with simple substitutions. It contains peanuts and potential traces of gluten depending on your oat source. Always check labels if you are cooking for someone with allergies.
I love that these bites feel like a treat but are actually pretty good for you. They satisfy my sweet tooth without making me feel sluggish. That is a win in my book.
Conclusion
These Cozy No-Bake Peanut Butter Oat Energy Bites are more than just a quick snack. They are a little piece of comfort that you can make in 15 minutes with ingredients you already have. They remind me of my Aunt Carol’s kitchen, of sticky fingers and laughter, of the simple joy of making something with your own hands. And I hope they become that for you too.
I encourage you to make these your own. Add cinnamon, swap the chocolate for dried fruit, roll them in coconut—whatever feels right. Cooking should be fun, not stressful. And honestly, you cannot mess these up too badly. Even my crumbly first batch was still delicious.
If you make these, I would love to hear about it. Leave a comment below and tell me how they turned out. Did you add your own twist? Did they remind you of someone special? Share your story. And if you loved them, share the recipe with a friend who needs a little comfort today. Happy snacking, friend.
Frequently Asked Questions
Can I use quick oats instead of rolled oats?
Yes, but the texture will be softer and less chewy. Quick oats absorb moisture faster, so your bites might be a little mushier. If that is what you have, go for it—they will still taste great.
How long do these energy bites last?
They stay fresh in the refrigerator for up to 1 week in an airtight container. In the freezer, they last up to 3 months. I usually make a double batch and freeze half for busy weeks.
Why are my energy bites falling apart?
This usually happens for two reasons: the mixture was not chilled long enough before rolling, or the peanut butter was too dry. Make sure you chill the mixture for at least 15 minutes. If the dough still feels crumbly, add a tablespoon of warm water or extra honey.
Can I make these without chocolate chips?
Absolutely. You can leave them out entirely, or swap them for dried fruit like raisins, cranberries, or chopped dates. Dried cherries are also amazing. Just keep the total volume the same so the texture stays balanced.
Are these healthy enough for kids?
Yes, they are a great snack for kids. They have fiber, protein, and healthy fats without processed ingredients. Just be mindful of the honey content for very young children—the American Academy of Pediatrics recommends no honey for infants under 1 year old. For older kids, these are a perfect lunchbox treat.
Pin This Recipe!
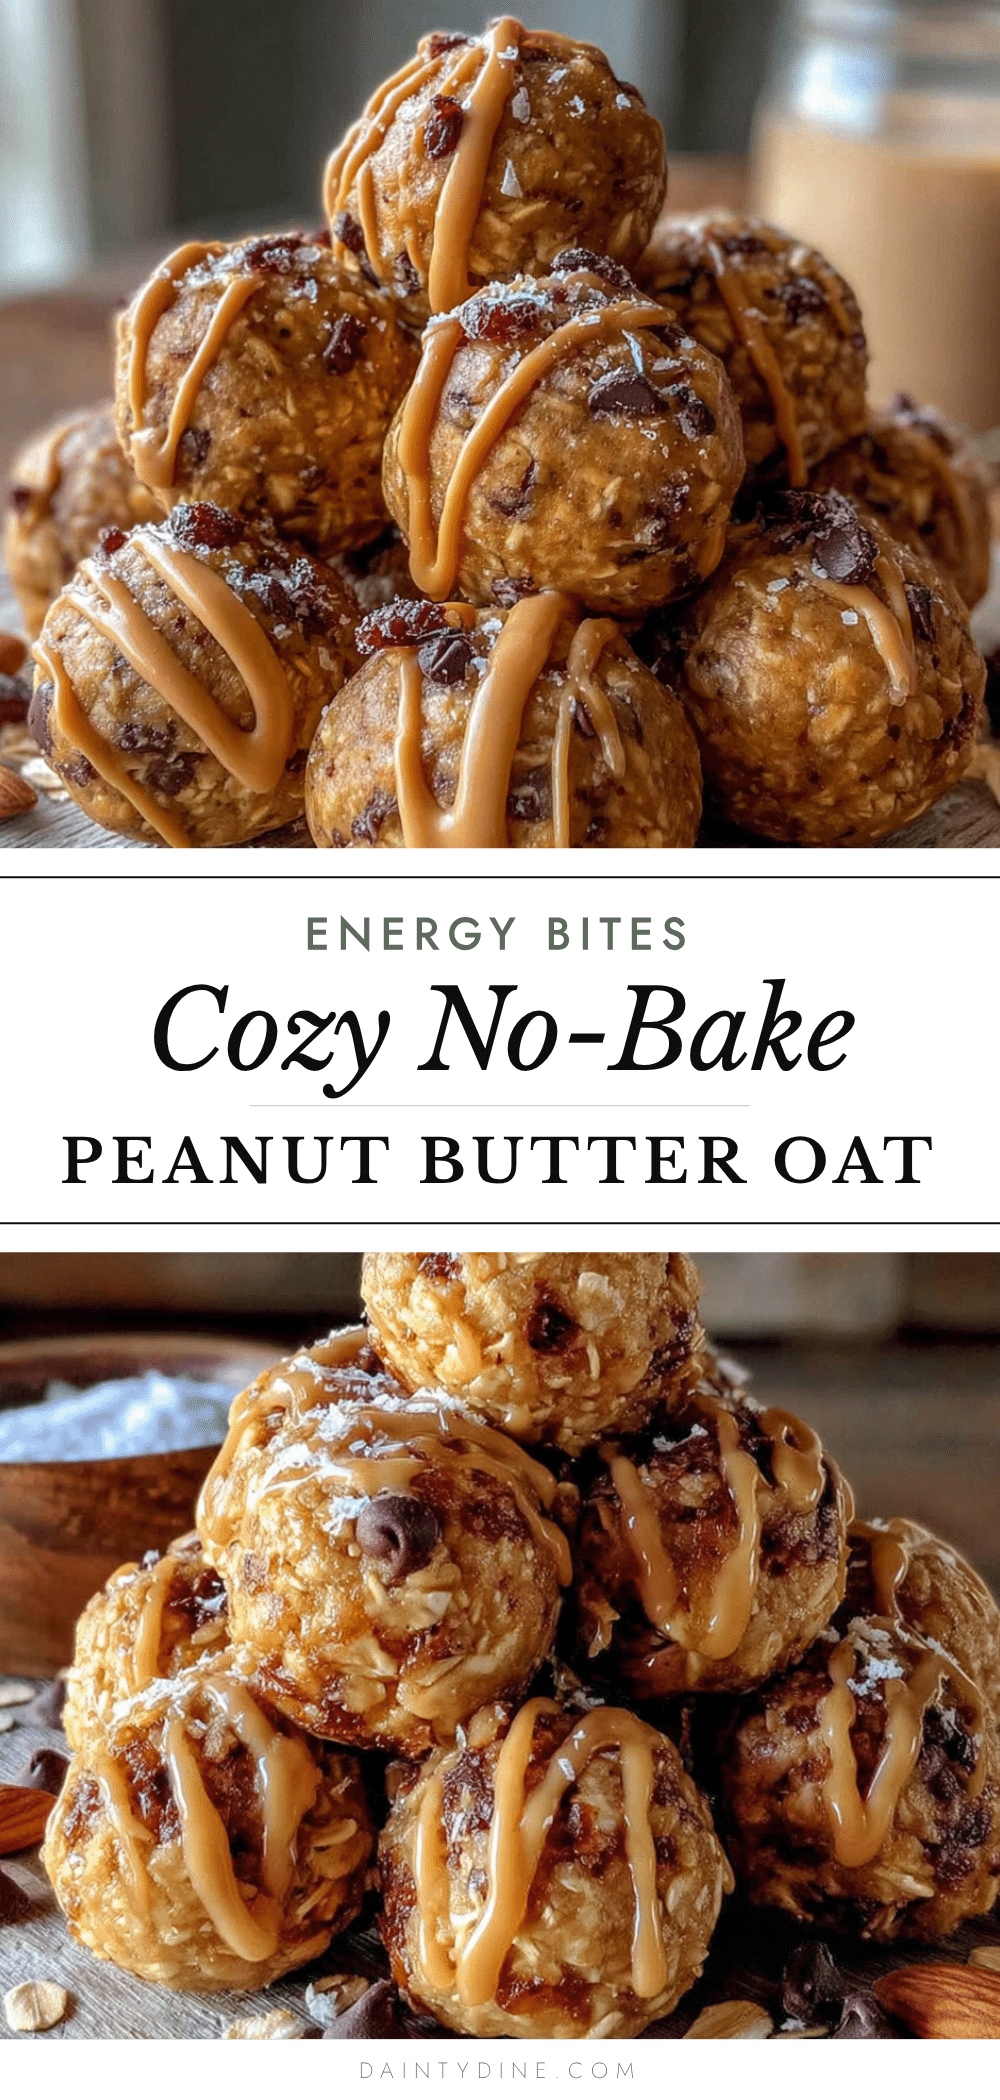
Cozy No-Bake Peanut Butter Oat Energy Bites

These no-bake energy bites are a nostalgic, comforting snack made with simple pantry ingredients. Perfect for cozy nights, they come together in under 15 minutes and are a crowd-pleasing treat.
- Prep Time: 15 minutes
- Cook Time: 0 minutes
- Total Time: 1 hour 5 minutes (includes chilling)
- Yield: 18-20 bites 1x
- Category: Snack
- Cuisine: American
Ingredients
- 1 cup (90g) rolled oats
- 1/2 cup (130g) creamy peanut butter
- 1/3 cup (110g) honey
- 1/3 cup (60g) mini chocolate chips
- 2 tablespoons (14g) ground flaxseed (optional)
- 1 teaspoon vanilla extract
- 1/4 teaspoon salt (if peanut butter is unsalted)
Instructions
- Combine the dry ingredients: In a large mixing bowl, add rolled oats, ground flaxseed (if using), and salt (if using). Stir to combine.
- Add the wet ingredients: Add peanut butter, honey, and vanilla extract to the bowl. Do not add chocolate chips yet.
- Mix everything together: Stir until fully combined and no dry oats are visible. If too dry, add 1 tablespoon warm water or extra honey; if too sticky, add 1 tablespoon oats.
- Fold in the chocolate chips: Gently fold in mini chocolate chips until evenly distributed.
- Chill the mixture: Cover the bowl and refrigerate for 15-20 minutes.
- Roll into balls: Line a baking sheet with parchment paper. Using a small cookie scoop or tablespoon, scoop portions and roll into smooth balls (about 18-20 bites).
- Chill again: Place rolled bites on the prepared sheet and refrigerate for at least 30 minutes to set.
- Enjoy or store: Transfer to an airtight container. Serve immediately or refrigerate for later.
Notes
For best texture, use rolled oats (not quick or steel-cut). Chill the mixture before rolling to prevent sticking. If dough is too crumbly, add a splash of warm water or extra honey. These taste even better the next day as flavors meld.
Nutrition
- Serving Size: 1 energy bite
- Calories: 120140
- Sugar: 810
- Fat: 68
- Saturated Fat: 23
- Carbohydrates: 1416
- Fiber: 23
- Protein: 45
Keywords: no-bake energy bites, peanut butter oat bites, healthy snack, easy snack, no-bake recipe, energy balls


