Love this? Save it for later!
Share the inspiration with your friends
I was supposed to be making chicken soup. It was a Tuesday night, I’d already chopped the carrots and celery, and the stock was simmering on the stove. But somewhere between answering an email and helping my kid find a missing shoe, I completely forgot to add the chicken. By the time I realized, the stock had reduced by half and I was out of time. In a moment of pure desperation—and honestly, a little bit of frustration—I grabbed a whole chicken breast, threw it in the crockpot with a splash of that now-too-concentrated broth, and set it on low before heading to bed. I figured I’d salvage it in the morning.
What came out of that crockpot the next morning was nothing like I planned. The chicken was impossibly tender, practically falling apart at the touch of a fork. It was juicy—almost suspiciously so—and had soaked up just enough of that concentrated broth to be flavorful without being soggy. I stood there in my pajamas, holding a fork, staring at this accidental masterpiece. That was the moment I realized that sometimes the best recipes come from the moments you think you’ve messed everything up. Maybe you’ve been there too—staring at a dried-out piece of chicken, wondering where you went wrong.
This cozy never-dry overnight crockpot chicken breast became my secret weapon. It’s the kind of recipe that feels like cheating, because how can something this easy turn out this good? The secret, I learned, is in the gentle overnight cook and the simple trick of adding just enough liquid to keep things moist without drowning the meat. It’s forgiving, it’s foolproof, and it turned my biggest kitchen fail into my most reliable go-to. I keep making it because it works every single time, and it reminds me that perfection is overrated—but perfectly cooked chicken is not.
Why You’ll Love This Recipe
Let me tell you why this recipe has become a staple in my kitchen and why I think it will become one in yours too. I’ve tested this method more times than I can count, tweaking the timing and the liquid ratios until I got it just right. It’s been approved by my family, shared with neighbors, and even survived a double batch for a potluck where it disappeared in minutes.
- Quick & Easy: Prep takes less than 10 minutes. You literally throw everything in the crockpot before bed and wake up to perfectly cooked chicken. No babysitting, no stirring, no stress.
- Simple Ingredients: You probably already have everything you need in your pantry and fridge. No fancy marinades, no obscure spices, no trips to a specialty store.
- Perfect for Meal Prep: This chicken is a blank canvas. Shred it for tacos, slice it for sandwiches, cube it for salads, or serve it alongside roasted veggies for a cozy dinner. It works for everything.
- Crowd-Pleaser: Even picky eaters love this chicken. It’s so tender and flavorful that nobody believes it came from a crockpot and not a slow-simmered stovetop creation.
- Unbelievably Delicious: The texture is what gets everyone. It’s not stringy or dry like overcooked slow cooker chicken can be. It’s moist, shreddable, and full of savory goodness.
What makes this recipe different from the rest? It’s the overnight cook time and the specific liquid-to-chicken ratio that prevents that dreaded dry, stringy texture. Most slow cooker chicken recipes call for cooking on high for a few hours, which almost always leads to disappointment. This method uses a gentle, low-and-slow approach that keeps the chicken tender and juicy. It’s not just another version—it’s the best version I’ve found after years of trial and error.
This recipe isn’t just good—it’s the kind that makes you close your eyes after the first bite. It’s comfort food at its simplest, perfect for those evenings when you need a win in the kitchen without spending hours there. Honestly, it’s the recipe that saved my sanity more than once.
What Ingredients You Will Need
This recipe uses simple, wholesome ingredients to deliver bold flavor and satisfying texture without the fuss. Most of these are pantry staples, which is exactly what you want when you’re throwing dinner together at the last minute or prepping for the week ahead.
- Boneless, skinless chicken breasts (about 1.5 to 2 pounds, or 680-900 grams) — Look for breasts that are similar in size so they cook evenly. I prefer organic when I can find it, but any good-quality chicken works. If your breasts are very thick, consider cutting them in half horizontally for more even cooking.
- Low-sodium chicken broth (1 cup, or 240 ml) — This is the key to keeping the chicken moist without making it soggy. I use low-sodium so I can control the salt level. Swanson’s is my go-to brand, but homemade broth works beautifully too.
- Olive oil (2 tablespoons, or 30 ml) — A little fat helps seal in moisture and adds richness. Extra virgin is fine, but regular olive oil works just as well.
- Salt (1 teaspoon) — I use fine sea salt. If you’re using kosher salt, you might need a bit more. Season generously—chicken needs it.
- Black pepper (½ teaspoon, freshly ground) — Freshly ground makes a difference here. It adds a subtle warmth that complements the chicken.
- Garlic powder (1 teaspoon) — Not garlic salt. Garlic powder gives you that savory depth without the extra sodium. I prefer McCormick for consistency.
- Onion powder (1 teaspoon) — This adds a mellow sweetness that rounds out the flavor. Don’t skip it—it’s doing more work than you think.
- Dried thyme (½ teaspoon) — Thyme and chicken are a classic pair. It adds an earthy, slightly floral note that makes the chicken feel cozy and comforting.
- Dried rosemary (½ teaspoon) — Crush it between your fingers before adding to release the oils. Rosemary can be strong, so a little goes a long way.
- Optional: Fresh lemon juice (1 tablespoon, or 15 ml) — A squeeze of lemon at the end brightens everything up. I add it after cooking, not before, so it doesn’t get bitter.
Substitution guidance: If you’re out of chicken broth, you can use water with a bouillon cube dissolved in it. For a dairy-free option, this recipe is already dairy-free. If you want a gluten-free option, just make sure your broth is certified gluten-free. You can swap the dried herbs for fresh—use about three times the amount. And if you’re not a fan of thyme, try oregano or marjoram instead. The beauty of this recipe is that it’s forgiving.
Equipment Needed
You don’t need a lot of fancy equipment for this recipe, which is part of what makes it so great. Here’s what you’ll need:
- A slow cooker or crockpot (at least 5-quart capacity) — I use a 6-quart Crock-Pot brand slow cooker and it works perfectly. If you have a smaller one, just make sure the chicken fits in a single layer as much as possible. I’ve also used an Instant Pot on the slow cooker setting, but I prefer a traditional crockpot for overnight cooking because it maintains a more consistent low temperature.
- Tongs — For placing and removing the chicken. A good pair of silicone-tipped tongs makes life easier and won’t scratch your crockpot.
- Measuring cups and spoons — You’ll need a liquid measuring cup for the broth and standard measuring spoons for the seasonings.
- A small bowl — For mixing your spice rub before coating the chicken. It’s not strictly necessary, but it helps distribute the seasoning evenly.
- Two forks or a hand mixer — For shredding the chicken. I use two forks for a chunkier shred, but a hand mixer on low speed works if you want it finer. Just be careful not to overmix or it can turn mushy.
- An airtight container — For storing leftovers. Glass containers with tight-fitting lids are my preference. They don’t absorb odors and they’re easy to clean.
If you don’t have a slow cooker, you can use a Dutch oven in a low oven (around 200°F or 95°C) for about 4-6 hours. But honestly, the crockpot is the easiest and most foolproof method. I found mine at a thrift store for ten bucks, and it’s been going strong for years. You don’t need to spend a lot.
Preparation Method
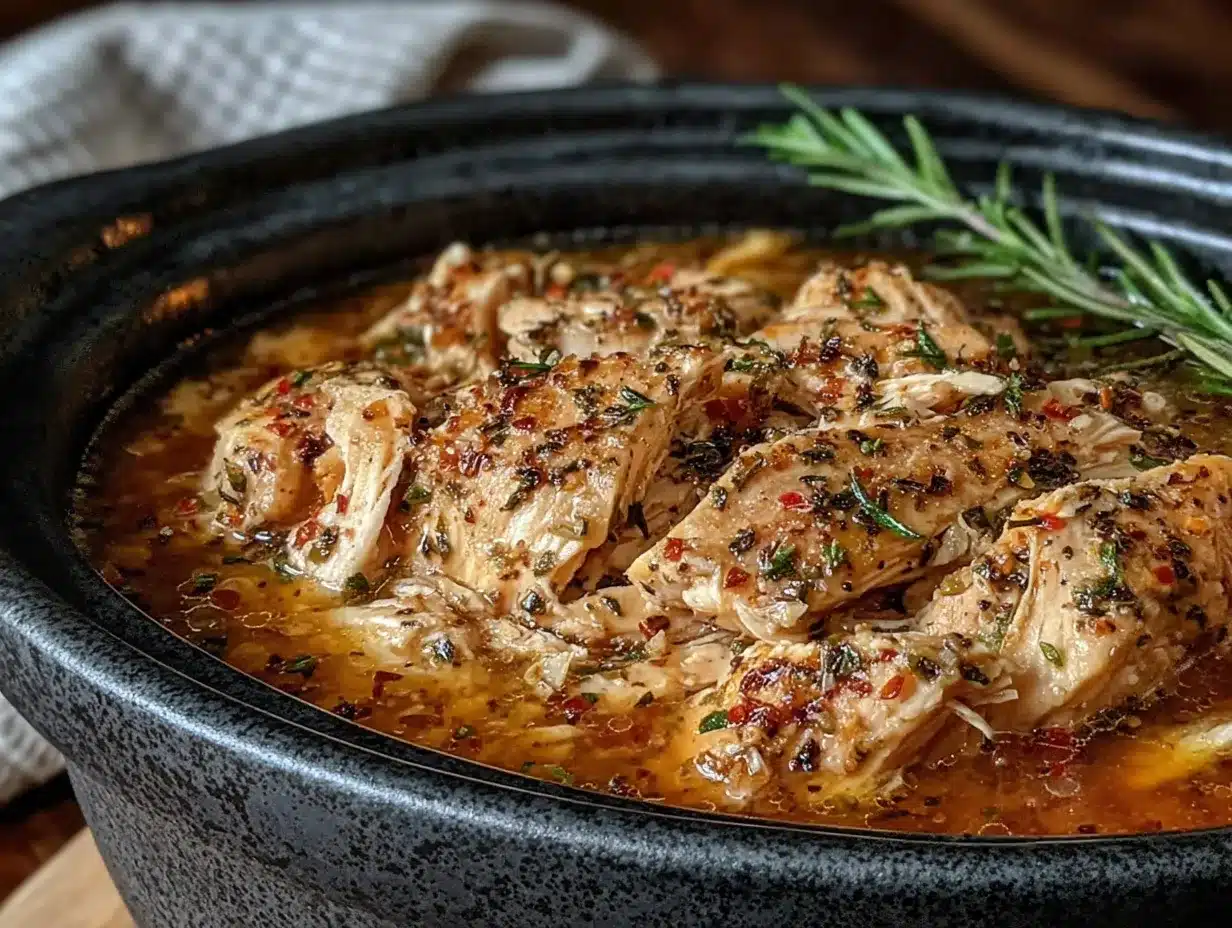
- Pat the chicken breasts dry with paper towels. This is an important step that a lot of people skip. Removing excess moisture helps the seasoning stick and prevents the chicken from steaming instead of slow-cooking. Don’t skip this—it makes a real difference in the final texture.
- In a small bowl, combine the salt, pepper, garlic powder, onion powder, dried thyme, and dried rosemary. Mix them together with a fork until evenly distributed. Give it a sniff—it should smell aromatic and savory. If it doesn’t, your herbs might be old and it’s time to replace them.
- Rub the olive oil all over the chicken breasts. Use your hands for this—it’s a little messy, but it’s the best way to make sure every surface is coated. The oil helps the seasoning stick and also adds a bit of fat that keeps the chicken moist during the long cook.
- Sprinkle the seasoning mixture evenly over all sides of the chicken. Don’t be shy with it. Really press it into the meat with your fingers. I like to do this right over the crockpot to catch any spills. It feels more efficient that way.
- Place the seasoned chicken breasts in the bottom of the slow cooker in a single layer. If they’re overlapping, try to arrange them so they’re as evenly distributed as possible. Overlapping can lead to uneven cooking, with some pieces drying out while others are still underdone.
- Pour the chicken broth around the chicken, not directly over it. This is the trick that took me a few tries to figure out. If you pour the broth over the top, it washes off the seasoning. Pour it gently along the side of the crockpot instead. The liquid should come about halfway up the sides of the chicken breasts—not covering them completely.
- Cover the slow cooker with the lid and set it to LOW. Do not use the HIGH setting for this recipe. The whole point is the gentle, overnight cook. High heat will dry out the chicken and defeat the purpose. Set it and forget it—for 7 to 8 hours.
- Let it cook overnight or for at least 7 hours. I usually set it up around 10 PM and check it when I wake up around 6 AM. The chicken should be fork-tender and register at least 165°F (74°C) on an instant-read thermometer. If it’s not there yet, give it another 30 minutes and check again.
- When the chicken is done, remove it from the crockpot using tongs. Be gentle—it will be very tender and might want to fall apart. Transfer it to a cutting board or a large plate.
- Let the chicken rest for 5 to 10 minutes before shredding or slicing. This resting period allows the juices to redistribute throughout the meat. If you skip this step, you’ll end up with dry chicken and a puddle of juice on your cutting board. Trust me on this one—I learned the hard way.
- Shred the chicken using two forks, or slice it with a sharp knife. For shredding, hold a fork in each hand and pull them apart in opposite directions. The chicken should separate easily. If it’s tough to shred, it might need more cooking time. If it’s falling apart too easily, it might be slightly overcooked, but it’s still delicious.
- Optional: Drizzle a little of the cooking liquid over the shredded chicken for extra moisture and flavor. The broth in the crockpot is liquid gold—it’s concentrated with all the seasoning and chicken juices. Add a few tablespoons to the shredded chicken and toss gently. This is the secret to that “never-dry” texture.
Cooking Tips & Techniques
I’ve made this recipe dozens of times, and I’ve learned a few things along the way that I wish someone had told me. Here are my best tips for getting it right every single time.
Don’t lift the lid. I know it’s tempting to peek, especially if you’re making this during the day instead of overnight. But every time you lift that lid, you let out heat and steam, which extends the cooking time and can dry out the chicken. Resist the urge. Trust the process.
Size matters. Chicken breasts vary wildly in size. If yours are huge (like 10 ounces or more), consider cutting them in half horizontally. This helps them cook more evenly and reduces the risk of the outside drying out before the inside is done. I learned this after a few disappointing batches where the ends were dry and the middle was still a bit undercooked.
Use an instant-read thermometer. This is the single best investment you can make for cooking chicken. The USDA says chicken is safe at 165°F (74°C), but for the best texture, I pull it at around 160°F (71°C) and let carryover cooking do the rest. The chicken will continue to cook as it rests, so it ends up perfectly tender and juicy. If you wait until it hits 165°F in the crockpot, it might be slightly overcooked by the time you serve it.
Season generously. Chicken breast is a blank canvas, and it needs a good amount of seasoning to shine. Don’t be afraid to use your hands to really rub the spice mixture into every nook and cranny. I once made the mistake of being too gentle with the seasoning, and the chicken came out bland. Never again.
Plan for leftovers. This recipe makes enough for multiple meals, which is part of its beauty. I like to shred the chicken and portion it out into containers for the week. It reheats beautifully and can be used in so many different ways. More on that in the serving suggestions.
One mistake I made early on: I used frozen chicken breasts directly from the freezer. Big mistake. Frozen chicken releases a lot of water as it thaws, which dilutes the seasoning and creates a watery, bland result. Always thaw your chicken completely in the refrigerator before cooking. It’s worth the extra planning.
Variations & Adaptations
This recipe is incredibly versatile, and I’ve tried several variations over the years. Here are some of my favorites:
1. Lemon Herb Version: Add the zest of one lemon and a tablespoon of fresh lemon juice to the broth before cooking. Swap the dried thyme and rosemary for fresh if you have them. The lemon brightens everything up and makes the chicken perfect for spring and summer meals. I love this version for chicken salad or served cold over greens.
2. Spicy Southwest Version: Add 1 teaspoon of smoked paprika, ½ teaspoon of cumin, and ¼ teaspoon of cayenne pepper to the seasoning mix. Use a splash of lime juice instead of lemon at the end. This version is amazing for tacos, burrito bowls, or nachos. The smoky heat is so comforting on a cold night.
3. Garlic Lover’s Version: Add 4 to 6 whole garlic cloves to the bottom of the crockpot before adding the chicken. As they cook, they become soft and sweet, and you can mash them into the broth for an extra layer of flavor. I tried this on a whim one night when I had extra garlic, and it was a game-changer. The roasted garlic adds a depth that dried garlic powder just can’t match.
4. Dairy-Free Creamy Version: After the chicken is cooked and removed, stir ½ cup of full-fat coconut milk into the remaining broth. Let it simmer for a few minutes on the stovetop until slightly thickened, then pour it over the shredded chicken. It’s rich, creamy, and completely dairy-free. My neighbor, who’s lactose intolerant, asked for this recipe after I brought it to a potluck.
5. Asian-Inspired Version: Swap the dried herbs for 1 tablespoon of soy sauce, 1 teaspoon of grated ginger, and 1 teaspoon of sesame oil added to the broth. Serve the shredded chicken over rice with a drizzle of the cooking liquid and some sliced green onions. It’s a completely different flavor profile but just as cozy and satisfying.
For dietary adaptations, this recipe is naturally gluten-free and dairy-free as written. To make it low-carb or keto, it’s already perfect—just serve it with roasted vegetables instead of rice or bread. If you’re watching your sodium, use low-sodium broth and reduce the added salt to ½ teaspoon. You can always add more at the table.
Serving & Storage Suggestions
This chicken is incredibly versatile, and how you serve it can change the whole mood of the meal. Here are some of my favorite ways to enjoy it.
Serving temperature: This chicken is best served warm, straight from the crockpot. But it’s also delicious at room temperature or even cold, which makes it perfect for meal prep. If you’re serving it cold, let it cool completely first and then refrigerate. It makes an amazing chicken salad when mixed with a little mayo, celery, and grapes.
Presentation ideas: For a cozy dinner, serve the shredded chicken on a bed of mashed potatoes with a generous drizzle of the cooking liquid. It’s the kind of meal that feels like a hug in a bowl. For something lighter, pile it on a bed of mixed greens with cherry tomatoes, cucumber, and a simple vinaigrette. The chicken is so flavorful that you don’t need a heavy dressing.
Complementary dishes: This chicken pairs beautifully with roasted vegetables like carrots, broccoli, or Brussels sprouts. It’s also amazing with rice, quinoa, or crusty bread to soak up the juices. For a complete meal, I love serving it with a simple side salad and some roasted sweet potatoes. The sweetness of the potatoes balances the savory chicken perfectly.
Storage instructions: Store leftover chicken in an airtight container in the refrigerator for up to 4 days. The flavor actually gets better as it sits, so don’t be afraid to make it ahead. To freeze, portion the chicken into freezer-safe bags or containers, removing as much air as possible. It will keep for up to 3 months. I like to freeze it in 1-cup portions so I can grab exactly what I need.
Reheating methods: The best way to reheat this chicken is in a skillet with a splash of the reserved cooking liquid or broth. Heat over medium-low, stirring occasionally, until warmed through. This prevents it from drying out. You can also microwave it in 30-second intervals, but add a tablespoon of water or broth first to keep it moist. Avoid reheating in the oven, which can dry it out.
How flavors develop: This chicken is delicious right after cooking, but the flavors continue to meld and deepen as it sits. I actually prefer it the next day, when the herbs and seasonings have had time to fully permeate the meat. If you can, make it a day ahead and let it hang out in the fridge. It’s worth the wait.
Nutritional Information & Benefits
This recipe is not only delicious but also packed with nutritional benefits. Here’s a quick look at what you’re getting:
Estimated nutritional values per serving (based on 4 servings, using 6 ounces of chicken per serving):
- Calories: ~280
- Protein: ~40g
- Fat: ~10g
- Carbohydrates: ~2g
- Fiber: 0g
- Sugar: 0g
- Sodium: ~500mg (varies based on broth and added salt)
Health benefits of key ingredients: Chicken breast is an excellent source of lean protein, which is essential for muscle repair and maintaining a healthy metabolism. It’s also rich in B vitamins, particularly B6 and B12, which support energy production and brain function. The olive oil provides healthy monounsaturated fats, which are good for heart health. Garlic and onion powder are both known for their anti-inflammatory properties and immune-boosting effects. Even the herbs—thyme and rosemary—contain antioxidants that help fight oxidative stress.
Dietary considerations: This recipe is naturally gluten-free, dairy-free, and low-carb. It’s also suitable for keto, paleo, and Whole30 diets (just make sure your broth is compliant). If you’re watching your sodium, use low-sodium broth and reduce the added salt. The only potential allergen is the chicken itself, so if you have a poultry allergy, this recipe isn’t for you. But for most people, it’s a wholesome, satisfying meal that fits into a balanced diet.
My personal perspective: I love that this recipe is so nutritious without feeling like a “health food.” It’s comfort food that happens to be good for you, which is the best kind of cooking in my book. I feel good serving it to my family, and I feel good eating it myself. It’s a win-win.
Conclusion
This cozy never-dry overnight crockpot chicken breast has become one of those recipes I can’t imagine my kitchen without. It started as a happy accident—a moment of distraction that turned into something I now rely on week after week. It’s the recipe I turn to when I need a win, when I’m short on time, or when I just want to wake up to the smell of dinner already made.
I love this recipe because it’s forgiving, it’s flexible, and it always delivers. Whether you’re a seasoned cook or someone who’s just starting out, this method works. It takes the stress out of cooking chicken and replaces it with the simple pleasure of knowing you’ve got a delicious, healthy meal ready to go.
I encourage you to make this recipe your own. Try one of the variations I shared, or come up with your own. Adjust the seasonings to match your taste. Use it in your favorite recipes. The beauty of this chicken is that it’s a starting point, not an endpoint. It’s a blank canvas that invites creativity.
If you give this recipe a try, I’d love to hear how it goes. Leave a comment below and tell me about your favorite way to use this chicken. Did you try a variation? Did you serve it with something unexpected? Share your experience—I read every comment and I love hearing from you. And if you found this recipe helpful, please share it with a friend who could use a little comfort in their kitchen.
Happy cooking, and here’s to never having dry chicken again!
Frequently Asked Questions
Can I use frozen chicken breasts for this recipe?
I don’t recommend it. Frozen chicken releases a lot of water as it thaws, which dilutes the seasoning and can make the chicken watery and bland. It also increases the cooking time unpredictably, which can lead to dry or undercooked chicken. Always thaw your chicken completely in the refrigerator before cooking for the best results.
Can I cook this on HIGH instead of LOW?
Technically yes, but I wouldn’t recommend it. Cooking on HIGH for a shorter time (about 3-4 hours) can work in a pinch, but the texture won’t be as tender and juicy. The whole point of this recipe is the gentle, overnight cook that keeps the chicken moist. If you’re in a hurry, this might not be the right recipe for that day. Plan ahead and use LOW.
How do I know when the chicken is done?
The safest way is to use an instant-read thermometer. The chicken is done when it reaches an internal temperature of 165°F (74°C) at the thickest part. But for the best texture, I pull it at around 160°F (71°C) and let carryover cooking finish the job. If you don’t have a thermometer, the chicken should be fork-tender and the juices should run clear when pierced.
Can I add vegetables to the crockpot with the chicken?
You can, but be careful. Vegetables like carrots, potatoes, and onions can be added at the beginning, but they’ll be very soft after 7-8 hours. If you want them to hold their shape, add them halfway through the cooking time. I’ve had good luck adding quartered potatoes and baby carrots at the start, but I don’t recommend delicate vegetables like zucchini or bell peppers—they’ll turn to mush.
How do I keep the chicken from drying out when reheating?
The key is to add moisture. When reheating in the microwave, add a tablespoon of the reserved cooking liquid or chicken broth and cover the dish with a damp paper towel. When reheating on the stovetop, add a splash of broth and heat over medium-low, stirring occasionally. Avoid high heat, which can make the chicken tough and dry. The chicken will stay moist if you give it a little liquid love.
Pin This Recipe!
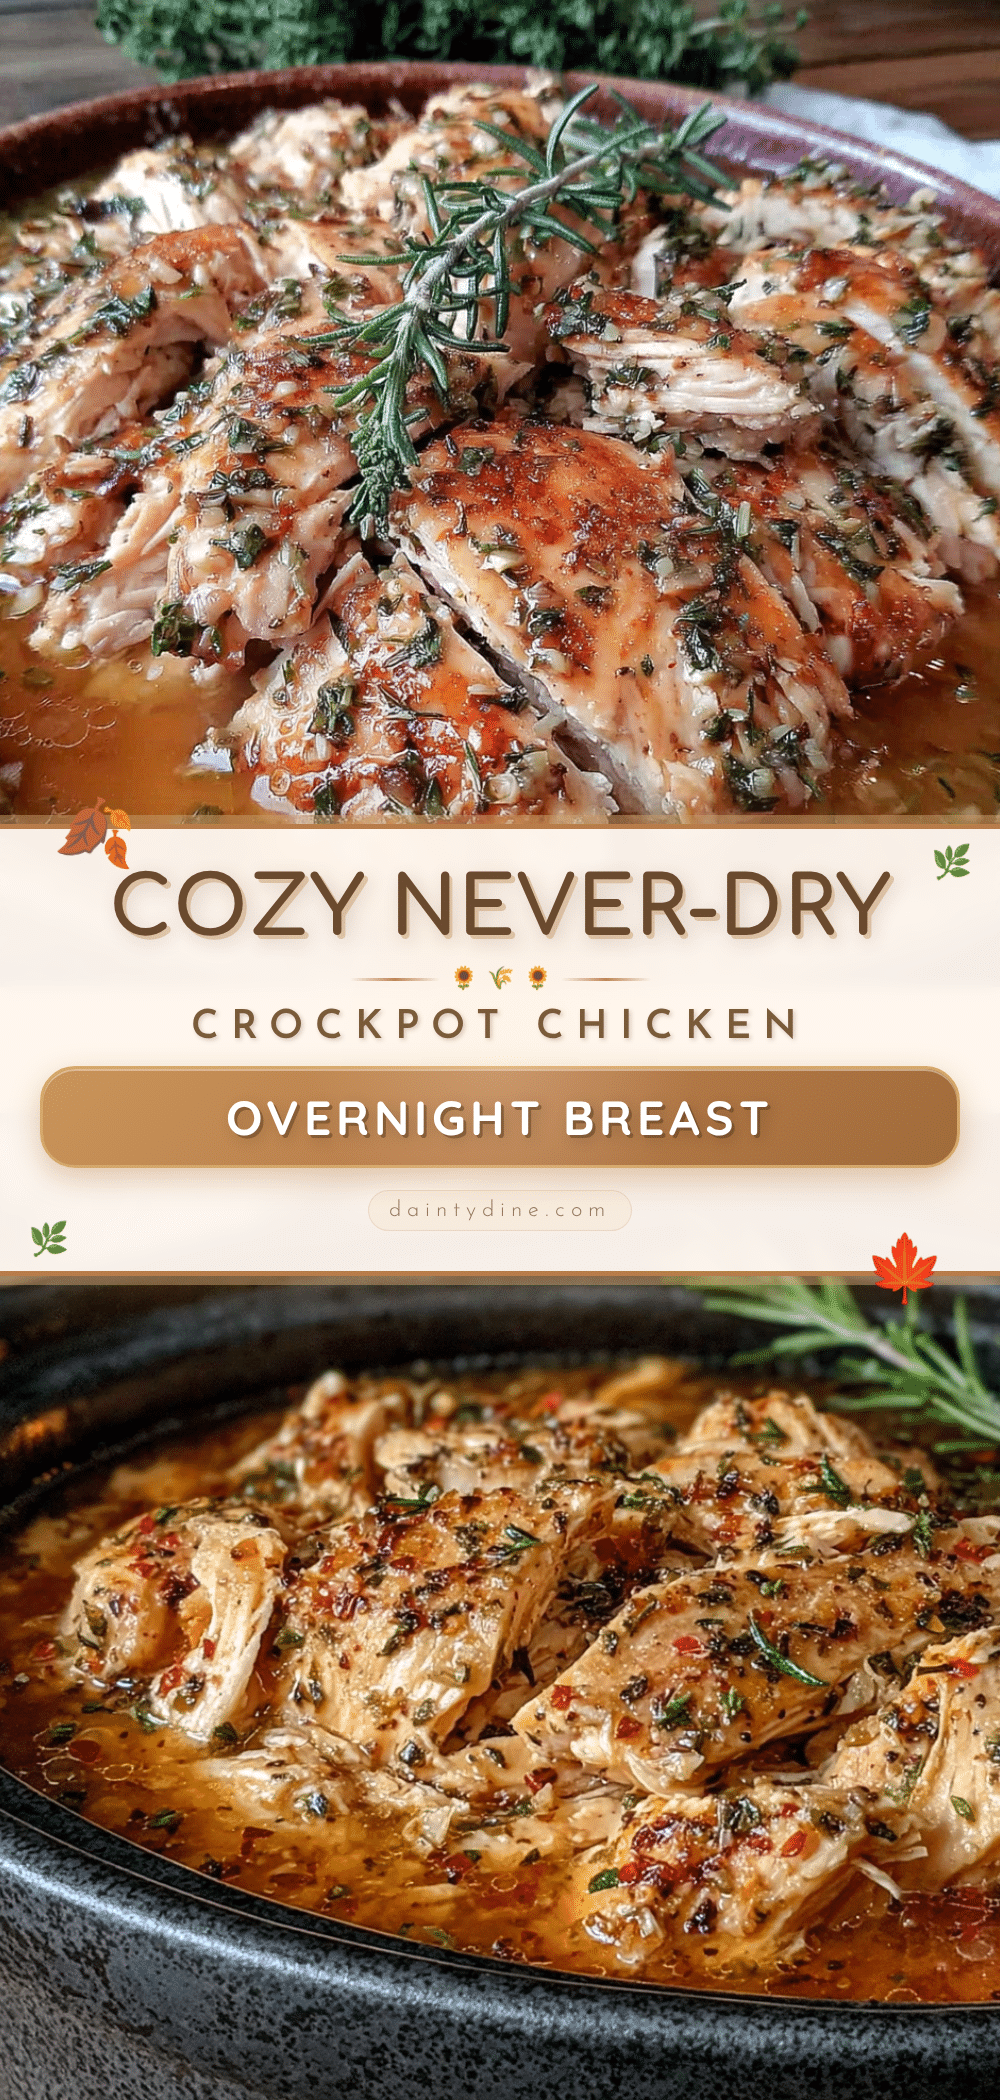
Cozy Never-Dry Overnight Crockpot Chicken Breast: Best Easy Recipe

This foolproof overnight crockpot chicken breast is impossibly tender, juicy, and flavorful. It’s the perfect easy recipe for meal prep, busy weeknights, or when you need a comforting, no-fuss dinner.
- Prep Time: 10 minutes
- Cook Time: 7 hours
- Total Time: 7 hours 10 minutes
- Yield: 4 servings 1x
- Category: Main Course
- Cuisine: American
Ingredients
- 1.5 to 2 pounds (680–900 g) boneless, skinless chicken breasts
- 1 cup (240 ml) low-sodium chicken broth
- 2 tablespoons (30 ml) olive oil
- 1 teaspoon fine sea salt
- ½ teaspoon freshly ground black pepper
- 1 teaspoon garlic powder
- 1 teaspoon onion powder
- ½ teaspoon dried thyme
- ½ teaspoon dried rosemary
- 1 tablespoon (15 ml) fresh lemon juice (optional)
Instructions
- Pat the chicken breasts dry with paper towels.
- In a small bowl, combine salt, pepper, garlic powder, onion powder, dried thyme, and dried rosemary.
- Rub the olive oil all over the chicken breasts.
- Sprinkle the seasoning mixture evenly over all sides of the chicken, pressing it into the meat.
- Place the seasoned chicken breasts in the bottom of the slow cooker in a single layer.
- Pour the chicken broth around the chicken, not directly over it.
- Cover the slow cooker with the lid and set it to LOW.
- Let it cook overnight or for at least 7 hours, until fork-tender and internal temperature reaches at least 165°F (74°C).
- When the chicken is done, remove it from the crockpot using tongs and transfer to a cutting board.
- Let the chicken rest for 5 to 10 minutes before shredding or slicing.
- Shred the chicken using two forks, or slice it with a sharp knife.
- Optional: Drizzle a little of the cooking liquid over the shredded chicken for extra moisture and flavor.
Notes
Don’t lift the lid during cooking. For best texture, pull chicken at 160°F (71°C) and let carryover cooking finish. Always thaw chicken completely before cooking. Season generously. Leftovers keep for up to 4 days in the refrigerator or 3 months in the freezer.
Nutrition
- Serving Size: 6 ounces (170 g) of
- Calories: 280
- Sodium: 500
- Fat: 10
- Saturated Fat: 2
- Carbohydrates: 2
- Protein: 40
Keywords: crockpot chicken, slow cooker chicken, overnight chicken, never-dry chicken, easy chicken recipe, meal prep chicken, tender chicken breast