Love this? Save it for later!
Share the inspiration with your friends
This was supposed to be a proper chocolate mousse. I mean, I had it all planned out—double boiler ready, good dark chocolate chopped, eggs separated like a responsible baker. But somewhere between answering a text from my sister and trying to find my good whisk (which was, of course, in the drawer I never check), I grabbed the wrong bowl. Instead of the tempered chocolate, I ended up with a bowl of cold pudding mix I’d bought for a “just in case” moment. The double boiler was already going, the kitchen was a mess, and honestly? I just stood there staring at the pudding packet like it had personally betrayed me. What came out of that chaotic evening was nothing like the fancy mousse I’d planned—and it was better.
Let me tell you, there’s something about kitchen failures that forces you to get creative. I tossed the pudding together, layered it in some clear cups I had, and crumbled up some chocolate cookies I found in the back of the pantry. Then, because I was already in “what the heck” mode, I grabbed a bag of gummy worms from the Halloween candy stash. Maybe you’ve been there—that moment when you stop trying to be perfect and just make something fun. Those cozy Halloween dirt cups with gummy worms became the hit of my niece’s Halloween party the next day. I mean, the kids went absolutely wild for them. And the adults? They kept sneaking extras when nobody was looking.
This recipe stayed with me because it taught me something honest: sometimes the best recipes come from letting go of control. These no-bake dirt cups aren’t fancy, they aren’t complicated, and they definitely aren’t the mousse I set out to make. But they’re cozy, they’re ridiculous in the best way, and they make people smile. That’s a win in my book any day of the week.
Why You’ll Love This Recipe
Look, I’ve tested a lot of Halloween desserts over the years, and most of them are either way too complicated or they taste like pure sugar with no soul. These cozy Halloween dirt cups with gummy worms hit that sweet spot between fun and actually delicious. Here’s why they work so well:
- Quick & Easy: We’re talking five minutes of active prep time. No baking, no fussing, no standing over a hot stove. If you can stir and layer, you can make these.
- Simple Ingredients: You probably already have most of this stuff in your pantry. No fancy grocery trips, no hunting down obscure ingredients at three different stores.
- Perfect for Halloween Parties: Whether you’re hosting a spooky movie night, a classroom party, or just want something fun for the kids after trick-or-treating, these are the star of the show.
- Crowd-Pleaser: I’ve watched picky eaters, adults who “don’t do sweets,” and toddlers all go back for seconds. The texture and flavor combo is next-level comfort food.
- Unbelievably Delicious: The creamy chocolate pudding against the crunchy cookie crumble, with that little chewy surprise from the gummy worms? It’s simple, but it’s perfect.
What makes this recipe different from the rest is the balance. I’ve had dirt cups that are way too sweet or where the pudding is watery and sad. This version uses a specific technique—letting the pudding set properly and using the right cookie-to-cream ratio—that makes all the difference. It’s comfort food reimagined: faster, easier, but with the same soul-soothing satisfaction that makes you close your eyes after the first bite. Perfect for impressing your kids without stress, or turning a simple Halloween night into something memorable.
What Ingredients You Will Need
This recipe uses simple, pantry-friendly ingredients to deliver that cozy, nostalgic flavor without any fuss. Most of these are probably already in your kitchen, which is honestly the best part.
- Chocolate instant pudding mix (two 3.9-ounce boxes) – I prefer Jell-O brand for the smoothest texture, but store brands work fine too. Make sure it’s instant, not cook-and-serve, or the texture won’t be right.
- Cold milk (3 cups) – Whole milk gives the creamiest result, but 2% works well too. For a dairy-free version, use oat milk or almond milk, though the pudding will be slightly less thick.
- Chocolate sandwich cookies (about 24 cookies) – Oreos are the classic choice here. You’ll be crushing them into “dirt,” so don’t bother with the fancy Double Stuf ones—regular works better for the right texture.
- Gummy worms (about 1 cup) – Get the sour ones if you want a tangy contrast to the sweet pudding. I’ve tried several brands, and Trolli worms hold their texture best without getting too sticky.
- Whipped topping (1 cup, thawed) – Cool Whip is easy, but homemade whipped cream works beautifully if you have the time. Just make sure it’s stabilized if you’re making these ahead.
- Melted butter (2 tablespoons) – This is optional but helps the cookie crumb hold together better and adds a richness that makes the “dirt” taste more authentic.
- Halloween sprinkles (optional, for garnish) – Little ghosts, pumpkins, or just orange and black sprinkles add a festive touch. Totally optional but fun.
Ingredient Selection Tips: For the pudding, look for boxes that aren’t close to their expiration date—older pudding mix can be grainy. For the cookies, I’ve found that generic brands actually crush more evenly than name brands, so don’t be afraid to go budget-friendly here. And for the gummy worms, avoid the ones that are coated in extra sugar; they’ll make the pudding grainy.
Substitution Guidance: If you want a gluten-free version, use gluten-free chocolate sandwich cookies (Kinnikinnick makes a good one) and check that your pudding mix is certified gluten-free. For a lower-sugar option, use sugar-free pudding mix and sugar-free cookies—the texture will be slightly different but still delicious.
Equipment Needed
You don’t need much for these cozy Halloween dirt cups, which is exactly why I love them. Here’s what you’ll need:
- Mixing bowls (one medium, one small) – Any bowls you have will work. I use glass because it’s easier to see if the pudding is smooth.
- Whisk – A wire whisk works best for getting the pudding smooth. A fork works in a pinch, but you’ll have more lumps.
- Measuring cups and spoons – For the milk and any optional ingredients. Eyeballing works for the cookies, but be precise with the milk.
- Plastic bags or food processor – For crushing the cookies. A zip-top bag and a rolling pin work great. I’ve also used a meat tenderizer in a moment of desperation—it works!
- Clear cups or glasses (6 to 8, depending on size) – Clear cups are key for showing off those layers. Small mason jars, plastic party cups, or even juice glasses work perfectly.
- Spatula – For scraping every last bit of pudding out of the bowl. Trust me, you won’t want to waste any.
- Spoon or small offset spatula – For layering the crumbs evenly. A regular spoon works fine.
Budget-Friendly Tip: Don’t buy special cups for this. I’ve used washed-out yogurt containers, old jam jars, and even paper cups from the party store. The kids don’t care what it’s in—they just want the worms!
Preparation Method
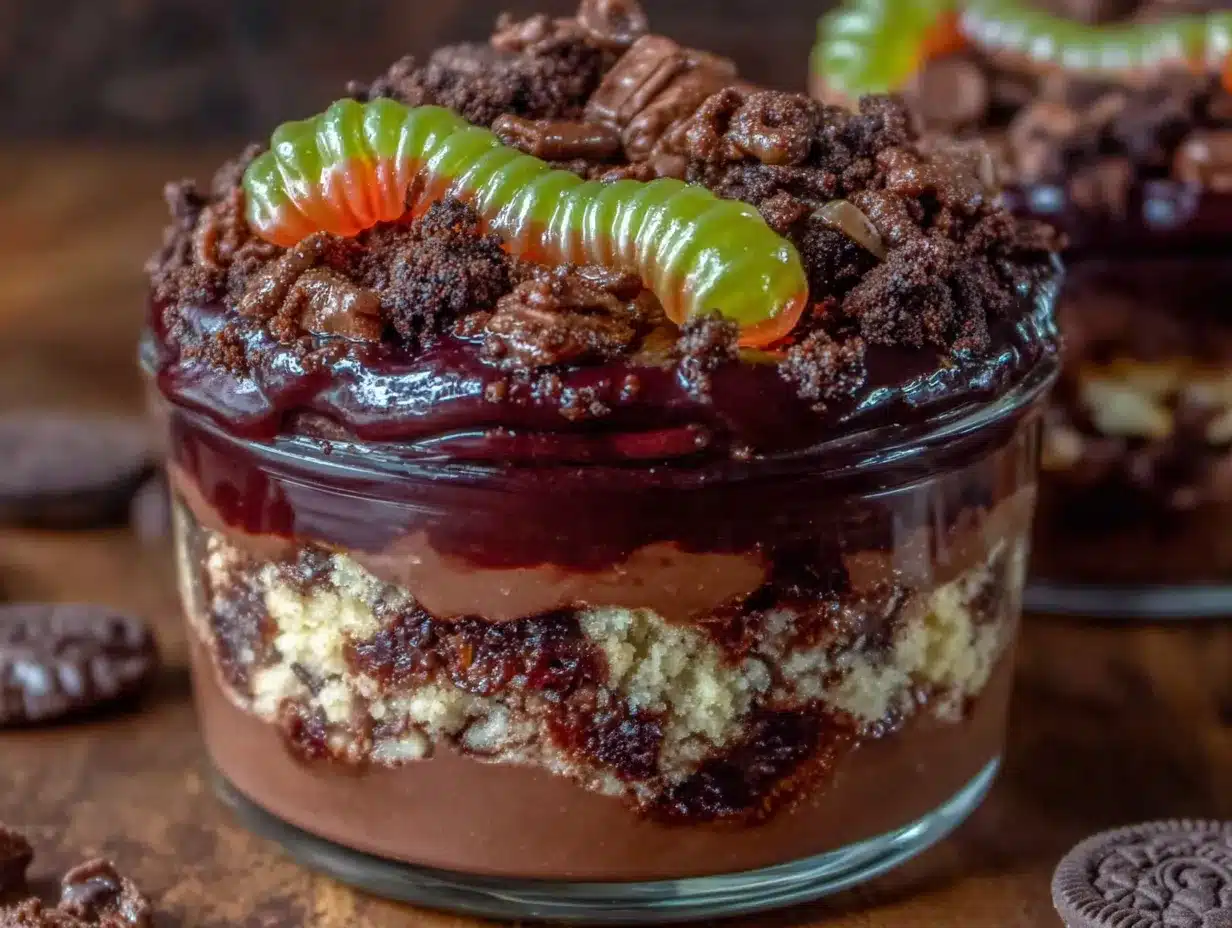
Alright, let’s get to the fun part. These cozy Halloween dirt cups with gummy worms come together in about five minutes of active work, plus some chilling time. Here’s exactly how to do it:
- Crush the cookies. Place the chocolate sandwich cookies in a zip-top bag and seal it, squeezing out the air. Use a rolling pin or the bottom of a heavy pan to crush them into fine crumbs. You want them to look like actual dirt—some bigger pieces are fine, but aim for mostly fine crumbs. If you’re using a food processor, pulse about 10 to 15 times until you get the right texture. Transfer the crumbs to a small bowl and stir in the melted butter if using. Set aside.
- Make the pudding. In a medium mixing bowl, whisk together the cold milk and both boxes of instant pudding mix. Whisk vigorously for about 2 minutes, until the pudding starts to thicken. You’ll feel it get heavier in the bowl—that’s how you know it’s working. Let it sit for 5 minutes to fully set. Don’t rush this step; the pudding needs to be thick enough to hold its layers.
- Fold in the whipped topping. Gently fold the thawed whipped topping into the pudding using a spatula. Do this slowly and carefully—you want to keep the mixture light and airy, not deflate it. Fold until just combined; a few streaks are fine. This step makes the pudding extra creamy and gives it that mousse-like texture that adults love.
- Layer the cups. Grab your clear cups or glasses. Start with a layer of cookie crumbs at the bottom—about 1 to 2 tablespoons, depending on your cup size. Press them down gently with the back of a spoon. Then add a layer of the pudding mixture, filling the cup about halfway. Add another thin layer of cookie crumbs, then press a few gummy worms into the pudding so they’re peeking out like they’re crawling out of the dirt. Top with the remaining pudding mixture.
- Finish with the “dirt” top. Sprinkle a generous layer of cookie crumbs over the top of each cup. You want it to look like a little pot of soil. Stick a few more gummy worms in the top, making them look like they’re wriggling out. If you’re using Halloween sprinkles, scatter a few on top for extra fun.
- Chill before serving. Place the cups in the refrigerator for at least 30 minutes, but 1 to 2 hours is better. This allows the layers to set and the flavors to meld together. The cookies will soften slightly, which makes the texture even better—like a real dirt cup should be.
Pro Tip: If you’re making these for a party, you can prep everything a day ahead. Just wait to add the gummy worms on top until right before serving, or they’ll get too soft and lose their chewiness.
Cooking Tips & Techniques
After making these cozy Halloween dirt cups more times than I care to admit, I’ve picked up a few tricks that make a real difference. Let me share what I’ve learned the hard way:
Don’t overmix the pudding. I know it’s tempting to keep whisking until it’s perfectly smooth, but overmixing can actually make the pudding grainy. Whisk just until it starts to thicken, then let it sit. Trust the process.
The cookie crumb consistency matters. If your crumbs are too fine, they’ll turn into a paste when they hit the pudding. If they’re too chunky, they won’t look like dirt. Aim for a mix of fine crumbs with a few pea-sized pieces. That’s the sweet spot.
Chill your bowls. This is a tip I picked up from a pastry chef friend. If you chill your mixing bowl and whisk for 15 minutes before making the pudding, it sets up faster and smoother. It’s a small step that makes a noticeable difference.
Watch out for soggy worms. I learned this one the hard way at a Halloween party. Gummy worms left in the pudding overnight turn into sad, mushy blobs. If you’re making these more than a few hours ahead, store the worms separately and add them just before serving.
Layer carefully for the best visual effect. Use a spoon to gently dollop the pudding rather than pouring it, which can disturb the cookie layer underneath. And when you add the top layer of crumbs, use a small sieve to dust them evenly—it gives that professional “dirt” look.
One mistake I still make: Forgetting to set the pudding before layering. I get impatient and start assembling too soon, and then the layers all blend together into a muddy mess. It still tastes good, but it doesn’t look as fun. Set a timer if you need to—5 minutes makes all the difference.
Variations & Adaptations
One of the best things about these cozy Halloween dirt cups is how easy they are to customize. Here are some variations I’ve tried and loved:
Peanut Butter Cup Dirt Cups: Swap the chocolate pudding for chocolate peanut butter pudding (just add 2 tablespoons of peanut butter to the mix). Use crushed peanut butter cookies instead of chocolate ones, and top with mini peanut butter cups instead of gummy worms. My husband says this version is “dangerously good.”
Vegan Halloween Cups: Use a vegan chocolate pudding mix (Simply Delish makes a good one) and your favorite plant-based milk. Crush vegan chocolate cookies (Oreos are actually vegan!) and use coconut whipped cream instead of Cool Whip. For the worms, check the label—some gummy brands contain gelatin, but many are now plant-based.
Spooky Spiderweb Design: Instead of gummy worms, create a spiderweb effect on top. After adding the final cookie layer, drizzle melted white chocolate in a spiral pattern, then drag a toothpick from the center outward to create web lines. Place a plastic spider ring on top for maximum Halloween vibes.
Low-Sugar Version: Use sugar-free pudding mix and sugar-free chocolate cookies. Add a few drops of stevia to the milk if you want extra sweetness. The texture will be slightly less creamy, but the flavor is still spot-on. I made this version for my dad, who’s diabetic, and he went back for thirds.
Pumpkin Dirt Cups: For a fall twist, use vanilla pudding mixed with 1/2 cup of pumpkin puree and a teaspoon of pumpkin pie spice. Layer with crushed ginger snaps instead of chocolate cookies. Top with candy corn or little pumpkin candies. This version is perfect for Thanksgiving or fall gatherings.
Serving & Storage Suggestions
These cozy Halloween dirt cups are best served cold, straight from the fridge. The contrast between the creamy pudding and the crunchy cookie crumb is at its peak when they’re well-chilled.
Serving Temperature: Serve them cold, but not ice-cold straight from the back of the fridge. Let them sit at room temperature for about 5 minutes before serving—this takes the edge off the chill and lets the flavors open up.
Presentation Ideas: For Halloween parties, I like to put the cups on a tray lined with fake spiderwebs or orange and black tissue paper. You can also add little paper tags with spooky labels like “Worm Habitat” or “Dirt Pudding.” Kids absolutely eat that up (literally and figuratively).
Complementary Dishes: These pair beautifully with warm apple cider or hot chocolate with marshmallows. For a full Halloween spread, serve them alongside spiderweb dip with pretzels or mummy hot dogs for a savory balance.
Storage Instructions: Store any leftover cups in the refrigerator, covered with plastic wrap or lids. They’ll keep for up to 3 days, but the texture is best within the first 24 hours. After that, the cookie crumbs start to get soggy and the gummy worms lose their chew.
Freezer Tips: You can freeze these for up to 2 weeks, but the texture will change. The pudding becomes more like ice cream, and the cookie crumbs soften completely. If you want to try it, freeze them without the gummy worms on top, then add fresh worms after thawing. Let them thaw in the fridge for about an hour before serving.
How Flavors Develop: Honestly, these are best the day you make them. The cookie crumbs stay crunchy, the pudding is perfectly creamy, and the gummy worms are still chewy. If you have leftovers, they’re still good—just different. The softer texture reminds me of a pudding parfait, which isn’t a bad thing at all.
Nutritional Information & Benefits
Let’s be real—these cozy Halloween dirt cups are a treat, not a health food. But that doesn’t mean they can’t fit into a balanced lifestyle. Here’s what you should know:
| Nutrient | Per Serving (1 cup) |
|---|---|
| Calories | 320 |
| Total Fat | 12g |
| Saturated Fat | 6g |
| Carbohydrates | 50g |
| Sugar | 36g |
| Protein | 5g |
| Calcium | 15% DV |
Health Benefits of Key Ingredients: The milk provides calcium and vitamin D for bone health. Dark chocolate cookies (if you use them) contain antioxidants called flavonoids. And honestly? The biggest benefit here is the joy factor. There’s something to be said for a dessert that makes you smile—that counts for something in my book.
Dietary Considerations: This recipe can be made gluten-free, dairy-free, vegan, or low-sugar with simple substitutions (see the variations section). It contains dairy and gluten in the standard version, and gummy worms may contain gelatin (check the label).
Personal Wellness Perspective: I’m a big believer in balance. These dirt cups are a once-in-a-while treat, not an everyday thing. But when Halloween rolls around? Go for it. Make the full version, enjoy every bite, and don’t feel guilty about it. Life’s too short for sad desserts.
Conclusion
These cozy Halloween dirt cups with gummy worms are proof that the best recipes don’t come from perfection—they come from letting go and having fun. They’re quick, they’re easy, and they bring so much joy to everyone who eats them. Whether you’re making them for a Halloween party, a cozy movie night, or just because you need a little whimsy in your day, they never disappoint.
I honestly love how customizable they are. You can make them your own—swap the worms for spiders, use different pudding flavors, or go all out with spooky decorations. That’s the beauty of a simple recipe: it leaves room for your creativity. So go ahead, grab those ingredients, and make a mess in the kitchen. I promise it’ll be worth it.
If you try these, I’d love to hear about it! Drop a comment below and tell me how they turned out, what variations you tried, or just share your favorite Halloween memory. And don’t forget to pin this recipe for later—you’ll thank me when October rolls around and you need a last-minute treat that actually works.
Happy Halloween, friends. Go make some dirt.
Frequently Asked Questions
Can I make these Halloween dirt cups ahead of time?
Yes! You can assemble them up to 24 hours in advance. Just wait to add the gummy worms on top until right before serving, or they’ll get too soft. Store them covered in the refrigerator.
Can I use homemade pudding instead of instant?
You can, but the texture will be different. Homemade pudding is thinner and won’t set as firmly, so the layers might blend together more. If you want to try it, cook the pudding until it’s very thick and chill it for at least 2 hours before layering.
What can I use instead of gummy worms?
Get creative! Try gummy spiders, candy eyeballs, plastic rings, or even crushed candy bars. For a non-candy option, use pretzel sticks as “bones” or chocolate coins as “treasure.”
How do I keep the cookie crumbs from getting soggy?
The key is to let the pudding set completely before layering, and don’t overdo the crumbs on the bottom layer. A thin layer pressed firmly will stay crunchier longer. For the best texture, serve within 24 hours.
Can I make this in a large dish instead of individual cups?
Absolutely! Use a 9×9-inch baking dish or a trifle bowl. Layer the ingredients the same way, but double the quantities. For serving, scoop it into bowls so everyone can see the layers. This is great for larger parties.
Pin This Recipe!
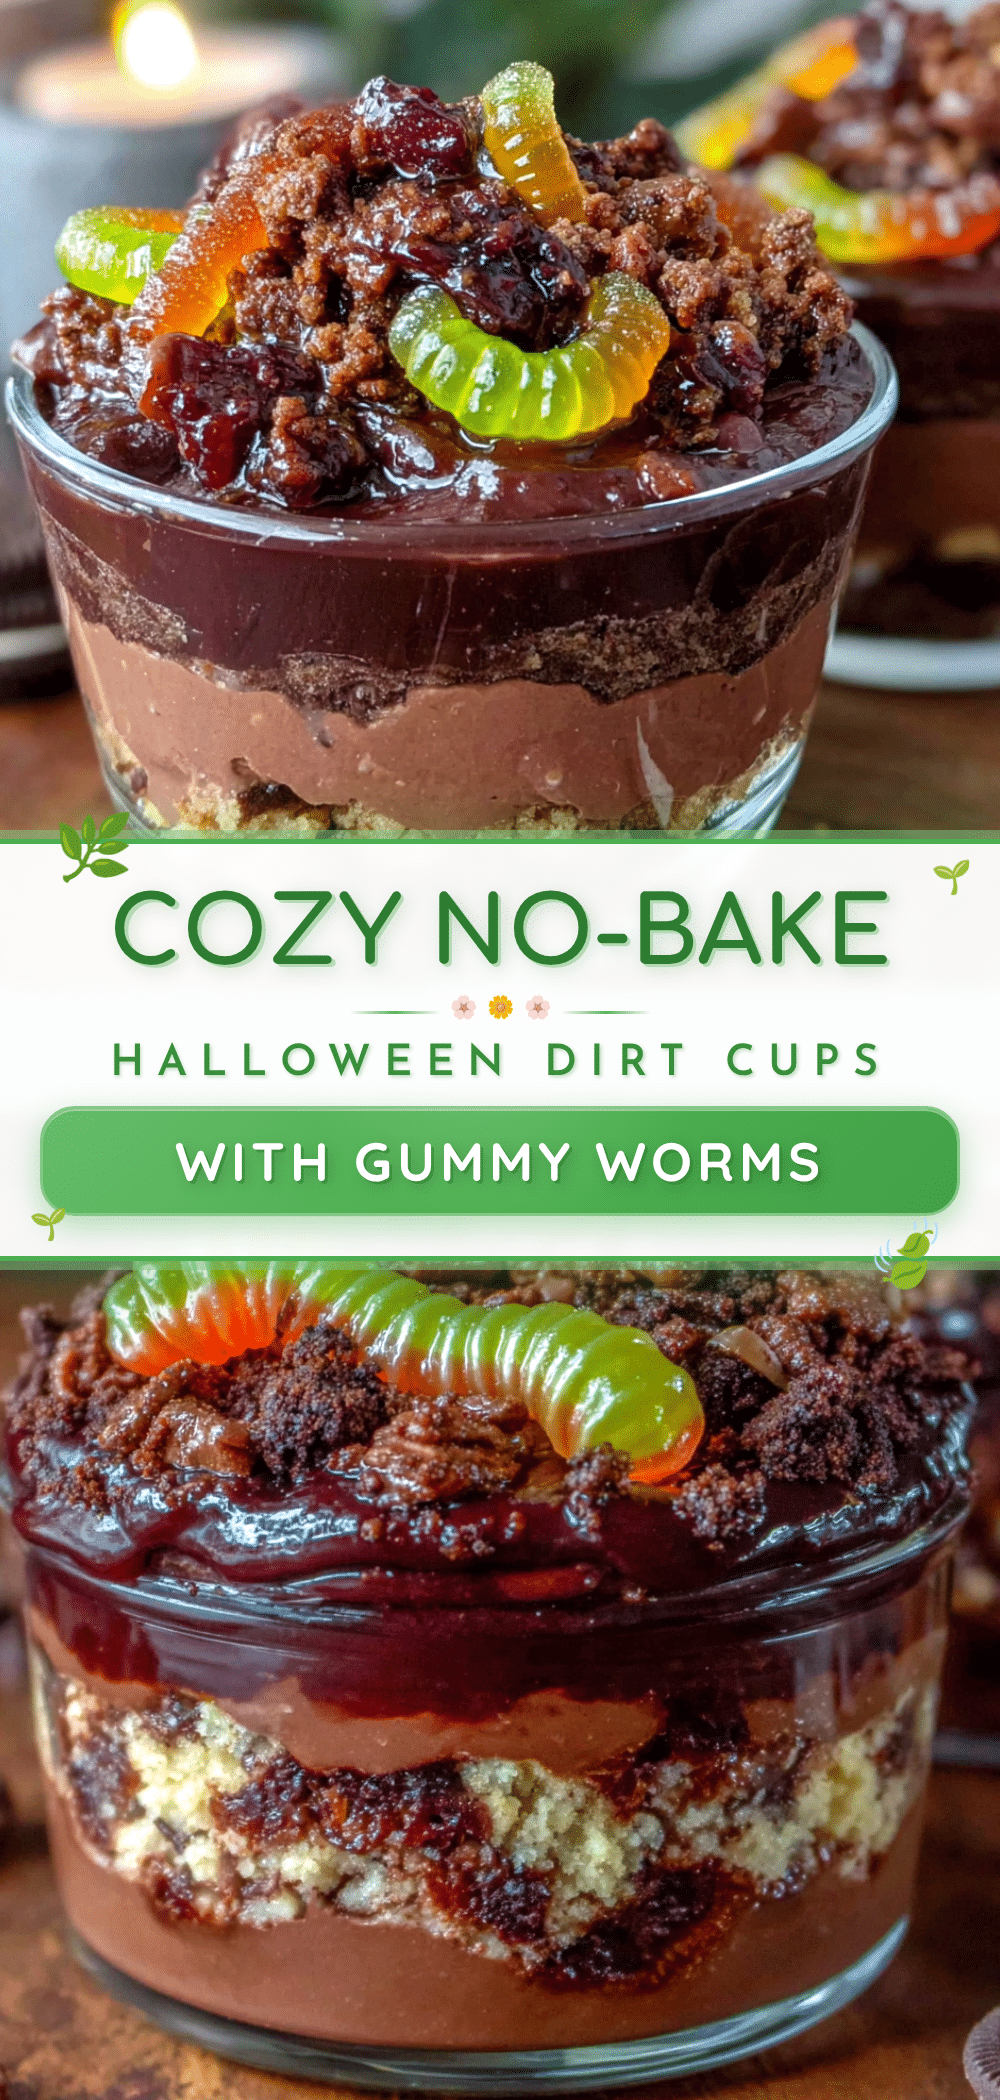
Cozy Halloween Dirt Cups with Gummy Worms: 5-Minute No-Bake Treat
These no-bake dirt cups are quick, easy, and perfect for Halloween parties. Creamy chocolate pudding, crunchy cookie crumble, and chewy gummy worms come together in a fun, crowd-pleasing dessert that takes just 5 minutes to prepare.
- Prep Time: 5 minutes
- Cook Time: 0 minutes
- Total Time: 35 minutes (includes 30 minutes chilling)
- Yield: 6-8 servings 1x
- Category: Dessert
- Cuisine: American
Ingredients
- 2 (3.9-ounce) boxes chocolate instant pudding mix
- 3 cups cold milk
- 24 chocolate sandwich cookies (e.g., Oreos)
- 1 cup gummy worms
- 1 cup whipped topping (thawed)
- 2 tablespoons melted butter (optional)
- Halloween sprinkles (optional, for garnish)
Instructions
- Crush the cookies: Place the chocolate sandwich cookies in a zip-top bag and seal, squeezing out the air. Use a rolling pin or the bottom of a heavy pan to crush them into fine crumbs (aim for mostly fine crumbs with some pea-sized pieces). If using a food processor, pulse 10-15 times. Transfer to a small bowl and stir in melted butter if using. Set aside.
- Make the pudding: In a medium mixing bowl, whisk together the cold milk and both boxes of instant pudding mix. Whisk vigorously for about 2 minutes until the pudding starts to thicken. Let it sit for 5 minutes to fully set.
- Fold in the whipped topping: Gently fold the thawed whipped topping into the pudding using a spatula. Fold until just combined (a few streaks are fine).
- Layer the cups: Grab your clear cups or glasses. Start with a layer of cookie crumbs at the bottom (about 1-2 tablespoons). Press them down gently with the back of a spoon. Add a layer of the pudding mixture, filling the cup about halfway. Add another thin layer of cookie crumbs, then press a few gummy worms into the pudding so they peek out. Top with the remaining pudding mixture.
- Finish with the ‘dirt’ top: Sprinkle a generous layer of cookie crumbs over the top of each cup. Stick a few more gummy worms in the top, making them look like they’re wriggling out. If using Halloween sprinkles, scatter a few on top.
- Chill before serving: Place the cups in the refrigerator for at least 30 minutes, but 1-2 hours is better. This allows the layers to set and the flavors to meld.
Notes
For best texture, serve within 24 hours. If making ahead, add gummy worms just before serving to prevent them from getting too soft. For a gluten-free version, use gluten-free chocolate sandwich cookies and check that the pudding mix is certified gluten-free. For a lower-sugar option, use sugar-free pudding mix and sugar-free cookies.
Nutrition
- Serving Size: 1 cup
- Calories: 320
- Sugar: 36
- Sodium: 380
- Fat: 12
- Saturated Fat: 6
- Carbohydrates: 50
- Fiber: 1
- Protein: 5
Keywords: Halloween dirt cups, no-bake dessert, chocolate pudding, gummy worms, easy Halloween treat, kid-friendly dessert


