Love this? Save it for later!
Share the inspiration with your friends
I was standing in the checkout line at Target last December—you know, that weird purgatory between the holiday lights and the Valentine’s candy that appears way too early—when a kid behind me dropped a bag of M&Ms. The sound wasn’t loud, but it was specific. That plastic-on-tile thud followed by the soft rattle of candy shells scattering. And just like that, I was six years old again in my Aunt Marianne’s kitchen, watching her shake a bag of Christmas M&Ms into a bowl of cookie dough.
She always let me press the candies into the dough. My little fingers would push each one in just enough so they stayed put, but not so deep that they disappeared. “Not too bossy,” she’d say with a wink. “Let them show off a little.” I honestly had no idea what that meant at the time, but I followed her lead anyway. She passed away about five years ago, and I haven’t thought about those cookie bars in ages—until that Target parking lot moment.
I stood there for a second, blinked, and then I just knew. I had to make them. Not the cookies she made—those were drop cookies, round and uneven—but something bigger. Something that felt like a hug in bar form. So I went home, grabbed a bag of holiday M&Ms (the red and green ones, obviously), and started messing around with a recipe. Maybe you’ve had one of those moments where a smell or a sound just pulls you backward in time. This was that. And honestly, the bars turned out even better than I remembered the cookies being.
Why You’ll Love This Recipe
Let me tell you why these Cozy Christmas M&M Cookie Bars are about to become your new holiday tradition. I’ve tested this recipe about six times now—yes, six—and I’ve got the sticky countertops and happy taste-testers to prove it. Here’s what makes them special:
- Quick & Easy: From mixing bowl to cooling rack in under 40 minutes. No chilling the dough, no rolling individual balls, no fuss. Perfect for those December evenings when you’re already behind on wrapping presents.
- Simple Ingredients: You probably have everything except the M&Ms in your pantry right now. Butter, sugar, eggs, flour—the basics that make life delicious.
- Perfect for Holiday Gatherings: Cookie swaps, office parties, Christmas Eve dessert tables, or just a quiet night with a mug of cocoa. These bars fit everywhere.
- Crowd-Pleaser: Kids love the candy-studded top, adults love the buttery, soft texture, and everyone loves that they’re easy to grab and go.
- Unbelievably Delicious: The edges get slightly crisp while the center stays tender and chewy. Each bite has that perfect balance of sweet cookie and crunchy candy shell.
What makes this recipe different from every other cookie bar out there? It’s the ratio. I spent a lot of time figuring out the right amount of butter to keep them soft without being greasy, and the perfect number of M&Ms so every bite gets at least two or three. Plus, I use a little trick with the baking time that gives you those gorgeous golden edges without drying out the middle. Trust me, this isn’t just another version of a cookie bar—it’s the version you’ll come back to year after year.
What Ingredients You Will Need
This recipe uses simple, wholesome ingredients that come together to create something truly special. Most of these are pantry staples, so you’re probably already halfway there.
- Unsalted butter, softened (1 cup / 2 sticks / 226g) — I always use unsalted so I can control the salt level. Let it sit out for about 30 minutes before starting. (Adds richness and that tender texture we’re after)
- Granulated sugar (3/4 cup / 150g) — Just regular white sugar. Nothing fancy here.
- Light brown sugar, packed (3/4 cup / 150g) — This is where the chewiness comes from. Don’t skip it or use dark brown unless you want a deeper molasses flavor. (Adds moisture and that slight caramel note)
- Large eggs (2, room temperature) — I know, room temperature eggs matter here. Cold eggs can make the batter seize up. Just set them on the counter with the butter.
- Vanilla extract (2 teaspoons) — Pure vanilla if you’ve got it, imitation works fine too. I personally prefer Nielsen-Massey for baking. (Adds warmth and depth)
- All-purpose flour (2 and 1/4 cups / 280g) — Spoon and level your flour. Scooping straight from the bag packs it down and gives you dry bars. (Provides structure without toughness)
- Baking soda (1 teaspoon) — Makes them rise just enough.
- Salt (1/2 teaspoon) — Balances the sweetness. Don’t skip it.
- Christmas M&Ms (1 and 3/4 cups / 300g, divided) — You’ll mix some into the dough and press the rest on top. I recommend getting the regular size, not the mini or peanut varieties, though peanut would work if that’s your thing.
- Semi-sweet chocolate chips (1/2 cup / 90g, optional) — I like adding these for extra chocolate pockets. Completely optional, but highly recommended.
One thing I’ve learned: buy the big bag of M&Ms. You’ll want extra for snacking while you bake, and also because pressing them into the top takes more than you think. I’ve made the mistake of running out halfway through, and let me tell you, staring at a pan of half-decorated cookie bars is not a good look.
Equipment Needed
You don’t need a fancy kitchen to make these bars. Here’s what I use:
- 9×13-inch baking pan — Metal works best for even browning. Glass pans can make the edges overdone before the center sets. I use a Nordic Ware aluminum pan and love it.
- Parchment paper — Cut a piece long enough to overhang on two sides. This creates a sling that lets you lift the whole batch out cleanly. Total game-changer.
- Electric mixer (hand or stand) — You can do this by hand with a wooden spoon, but your arm will get tired. I use my KitchenAid stand mixer with the paddle attachment.
- Large mixing bowl — Any bowl works. I have a set of Pyrex nesting bowls that I’ve used for years.
- Spatula — For scraping down the sides and spreading the dough. A rubber spatula is ideal.
- Measuring cups and spoons — Dry measuring cups for flour and sugar, liquid measuring cup for nothing here, actually. But have them handy.
- Cooling rack — Lets air circulate so the bottom doesn’t get soggy. If you don’t have one, you can use the oven rack turned off, but be careful.
If you don’t have a 9×13 pan, you can use a 9×9 square pan, but the bars will be thicker and need about 5 extra minutes of baking time. Just keep an eye on them.
Preparation Method
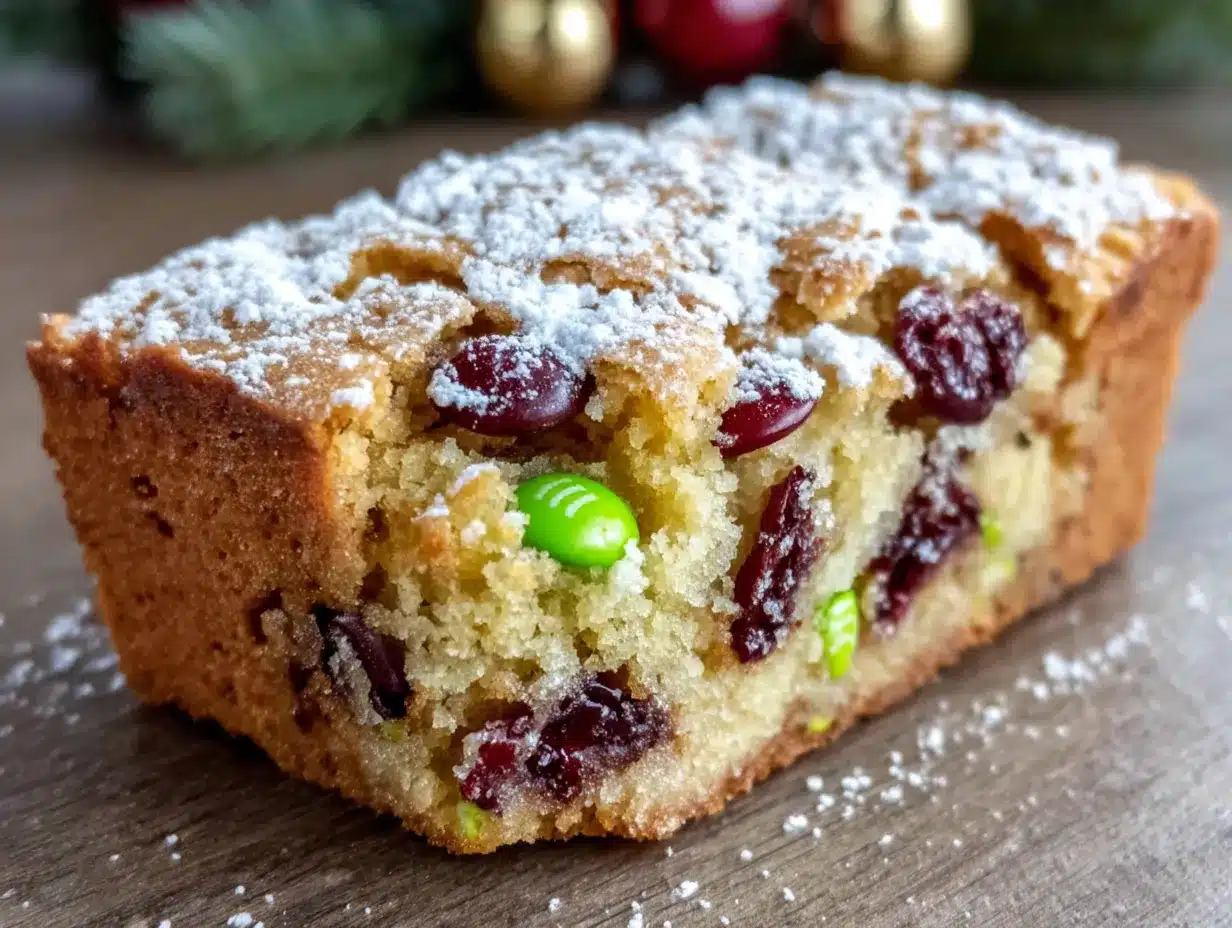
Alright, let’s get baking. I’ll walk you through every step so you feel confident.
- Preheat your oven to 350°F (175°C). Line your 9×13-inch pan with parchment paper, leaving some overhang on the long sides. Lightly spray the parchment with nonstick cooking spray. This step sounds fussy, but it makes lifting the bars out so much easier later.
- Cream the butter and sugars together. In your large mixing bowl, beat the softened butter, granulated sugar, and brown sugar together on medium speed for about 2-3 minutes. You want it light and fluffy—pale in color and noticeably airy. Scrape down the sides and bottom of the bowl once during this process. I’ve forgotten to scrape before, and trust me, you end up with butter streaks in your dough. Not ideal.
- Add the eggs and vanilla. Crack both eggs into a small bowl first (just in case you get shell pieces—ask me how I know). Add them to the butter mixture one at a time, beating on low after each until just combined. Then add the vanilla and mix it in. The mixture might look a little curdled at this point, and that’s totally fine. Don’t panic.
- Whisk the dry ingredients together. In a separate medium bowl, whisk the flour, baking soda, and salt together. This distributes the leavening evenly so you don’t get one bar that rises like a soufflé and another that’s flat as a pancake.
- Combine the wet and dry ingredients. Add the flour mixture to the butter mixture in two additions, mixing on low speed after each until just combined. Stop as soon as you don’t see any more flour streaks. Overmixing develops gluten and makes the bars tough. We want tender, not tough.
- Fold in the mix-ins. Using your spatula, gently fold in 1 and 1/4 cups of the M&Ms and the chocolate chips if you’re using them. Reserve the remaining 1/2 cup of M&Ms for the top. The dough will be thick and slightly sticky—that’s exactly what we want.
- Press the dough into the pan. Transfer the dough to your prepared pan. It’s going to be thick, so use your spatula or lightly greased fingers to press it into an even layer. Don’t use wet fingers—that makes the dough sticky and annoying. Just a light coat of cooking spray on your hands works wonders.
- Press the remaining M&Ms on top. This is the fun part. Take those reserved 1/2 cup of M&Ms and press them gently into the top of the dough. Space them out so every bar gets a few. Press them just enough so they stay put—about halfway in. If you push them all the way down, they’ll disappear into the dough as it bakes.
- Bake for 22-26 minutes. Place the pan on the middle rack. Bake until the edges are golden brown and the center looks set—not jiggly, but still soft. A toothpick inserted in the center should come out with a few moist crumbs, not wet batter. My oven runs hot, so I start checking at 22 minutes. Yours might need the full 26. Know your oven, friends.
- Cool completely before cutting. Place the pan on a cooling rack and let the bars cool for at least 30 minutes in the pan. Then use the parchment sling to lift them out and transfer to the rack to cool completely. I know you want to cut into them right away. I’ve been there. But warm bars crumble like crazy. Patience pays off here.
A quick note: if you’re making these ahead of time, you can cut them once they’re fully cool and store them in an airtight container. They actually taste even better the next day—the flavors meld together somehow.
Cooking Tips & Techniques
I’ve made these bars enough times to have a few disasters under my belt. Let me save you from repeating my mistakes.
Don’t overbake them. This is the number one mistake I see. Cookie bars continue to bake from residual heat after you pull them out of the oven. If they look done in the oven, they’ll be overdone on the counter. Pull them when the center still looks slightly underdone and soft. The carryover cooking will finish the job. I learned this the hard way when I made a batch that turned into hockey pucks. My neighbor’s dog appreciated them, but my family did not.
Room temperature ingredients matter. Cold eggs and cold butter don’t cream together properly. You end up with a dense, greasy bar instead of a light, tender one. Set your butter and eggs out about 30-45 minutes before you start. If you forgot, you can microwave the butter in 5-second bursts (watch it—butter explodes fast) and place the eggs in a bowl of warm water for 5 minutes.
Press the dough evenly. An uneven layer means some bars bake faster than others. Use your spatula to really spread it into the corners. I like to use a piece of parchment paper over the dough and press down with a flat-bottomed measuring cup. It gives you a perfectly level surface.
Use the right pan. I mentioned this before, but it’s worth repeating. A light-colored metal pan gives you the most even baking. Dark pans absorb more heat and can over-brown the bottom. Glass pans take longer to conduct heat and can leave you with a raw center. Stick with aluminum if you can.
Let them cool. I know. I said it already. But I’m saying it again because I’ve ruined so many pans of bars by cutting too early. The bars need time to set up. If you cut them while they’re warm, the edges will crumble and the center will squish. Give them the full cooling time. Your future self will thank you.
Variations & Adaptations
One of the best things about this recipe is how flexible it is. Here are some ways to make it your own:
Peppermint Crunch: Swap half the M&Ms for crushed peppermint candies or Andes peppermint baking chips. The combination of chocolate and mint is pure Christmas magic. I tried this last year and my sister-in-law asked for the recipe three times.
White Chocolate Cranberry: Replace the semi-sweet chips with white chocolate chips and add 1/2 cup of dried cranberries. The tartness of the cranberries cuts through the sweetness beautifully. This version feels a little more grown-up, if that makes sense.
Gluten-Free Option: Use a 1:1 gluten-free baking flour blend. I’ve tested this with King Arthur Measure for Measure and it works perfectly. No one in my family could tell the difference. Just make sure your blend contains xanthan gum, or add 1/2 teaspoon separately.
Nutty Twist: Fold in 1/2 cup of chopped pecans or walnuts along with the M&Ms. Toast them first in a dry pan for about 3 minutes to bring out their flavor. This adds a lovely crunch and makes the bars feel extra special.
Dark Chocolate Lovers: Use dark chocolate M&Ms instead of the milk chocolate ones, and swap the semi-sweet chips for dark chocolate chunks. The bitterness balances the sweet cookie base. My husband, who claims he doesn’t like sweets, ate half a pan of these.
If you’re feeling adventurous, you can even turn these into Christmas blondies by omitting the chocolate chips and adding white chocolate chunks instead. They’re equally delicious and just as festive.
Serving & Storage Suggestions
These Cozy Christmas M&M Cookie Bars are best served at room temperature, but they’re also amazing slightly warm with a scoop of vanilla ice cream. The contrast between the warm, soft cookie and the cold, creamy ice cream is honestly one of my favorite things in the world.
For a holiday dessert table, arrange them on a festive platter and dust with a little powdered sugar for a snowy effect. They also look gorgeous stacked in a clear jar tied with a ribbon—perfect for gifting to neighbors, teachers, or coworkers.
Pair them with a glass of cold milk, a mug of hot cocoa, or a warm spiced chai latte. If you’re serving adults, they go surprisingly well with a cup of black coffee or a glass of bourbon. Don’t judge until you try it.
Storage: Keep the bars in an airtight container at room temperature for up to 5 days. Place a piece of bread in the container to keep them soft—the bread absorbs excess air and releases moisture. Replace the bread every day or two. I learned this trick from a baker friend and it works like magic.
Freezing: These bars freeze beautifully. Cool them completely, then wrap the whole slab (or individual bars) tightly in plastic wrap, then aluminum foil. Freeze for up to 3 months. To thaw, let them sit at room temperature for about an hour, or pop them in a 300°F oven for 5-7 minutes.
The flavors actually develop more after a day or two in the fridge. Something about the M&Ms softening slightly and the cookie absorbing their flavor. I’ve tested this, and I swear day-old bars taste better than fresh ones.
Nutritional Information & Benefits
Let’s be real—these are a treat, not a health food. But here’s the estimated nutritional breakdown per bar (based on 24 servings):
| Nutrient | Amount Per Bar |
|---|---|
| Calories | 245 |
| Total Fat | 12g |
| Saturated Fat | 7g |
| Cholesterol | 35mg |
| Sodium | 115mg |
| Total Carbohydrates | 33g |
| Dietary Fiber | 1g |
| Sugars | 22g |
| Protein | 3g |
That said, there are some redeeming qualities. The butter provides a small amount of vitamin A, and the eggs contribute protein and choline. The M&Ms? Well, they’re made with real chocolate, which contains antioxidants. I’m reaching here, I know. But sometimes you just need a cookie bar, and that’s okay.
For those with dietary restrictions, this recipe contains gluten, dairy, and eggs. The gluten-free variation I mentioned earlier works well, and you can try using a dairy-free butter substitute like Earth Balance. Just note that the texture may be slightly different.
Conclusion
These Cozy Christmas M&M Cookie Bars have become my go-to holiday recipe for one simple reason: they make people happy. Every time I bring a pan to a party or leave one on a neighbor’s doorstep, I get texts asking for the recipe. They’re easy enough for a Tuesday night baking session but special enough for Christmas morning.
I love that they remind me of Aunt Marianne, even though they’re not exactly the same as her cookies. They’re my version of her memory—a little bigger, a little softer, and studded with red and green candies that make me smile every time I look at them. That’s what I love most about baking. You take something from someone else and make it your own, and somehow it keeps their spirit alive.
So go ahead—preheat that oven, grab a bag of M&Ms, and make some memories. And when you do, come back and tell me how they turned out. Did you add the chocolate chips? Did you try the peppermint version? I’d love to hear about it. Drop a comment below or tag me in your photos. Happy baking, friends!
Frequently Asked Questions
Can I use mini M&Ms instead of regular-sized ones?
You can, but they tend to disappear into the dough more. If you use minis, press extra into the top so they’re visible. The texture is slightly different, but they still taste great.
Why did my cookie bars turn out dry?
This usually happens from overbaking or overmixing the dough. Pull them out when the center is still slightly soft, and stop mixing as soon as the flour is incorporated. Also, make sure you’re measuring your flour correctly—spoon it into the measuring cup and level it off.
Can I make these ahead of time for a party?
Absolutely. Bake them up to two days in advance and store them in an airtight container. They actually taste better the next day. You can also freeze them for up to three months.
Can I use a different candy instead of M&Ms?
Sure! Try chopped peanut butter cups, toffee bits, or even chopped chocolate bars. Just keep the total amount of mix-ins around 2 cups so the dough structure holds up.
How do I get clean, even cuts?
Let the bars cool completely, then use a sharp chef’s knife and wipe it clean between cuts. For the cleanest edges, chill the bars in the fridge for about 20 minutes before slicing. This firms up the butter and gives you those perfect squares.
Pin This Recipe!
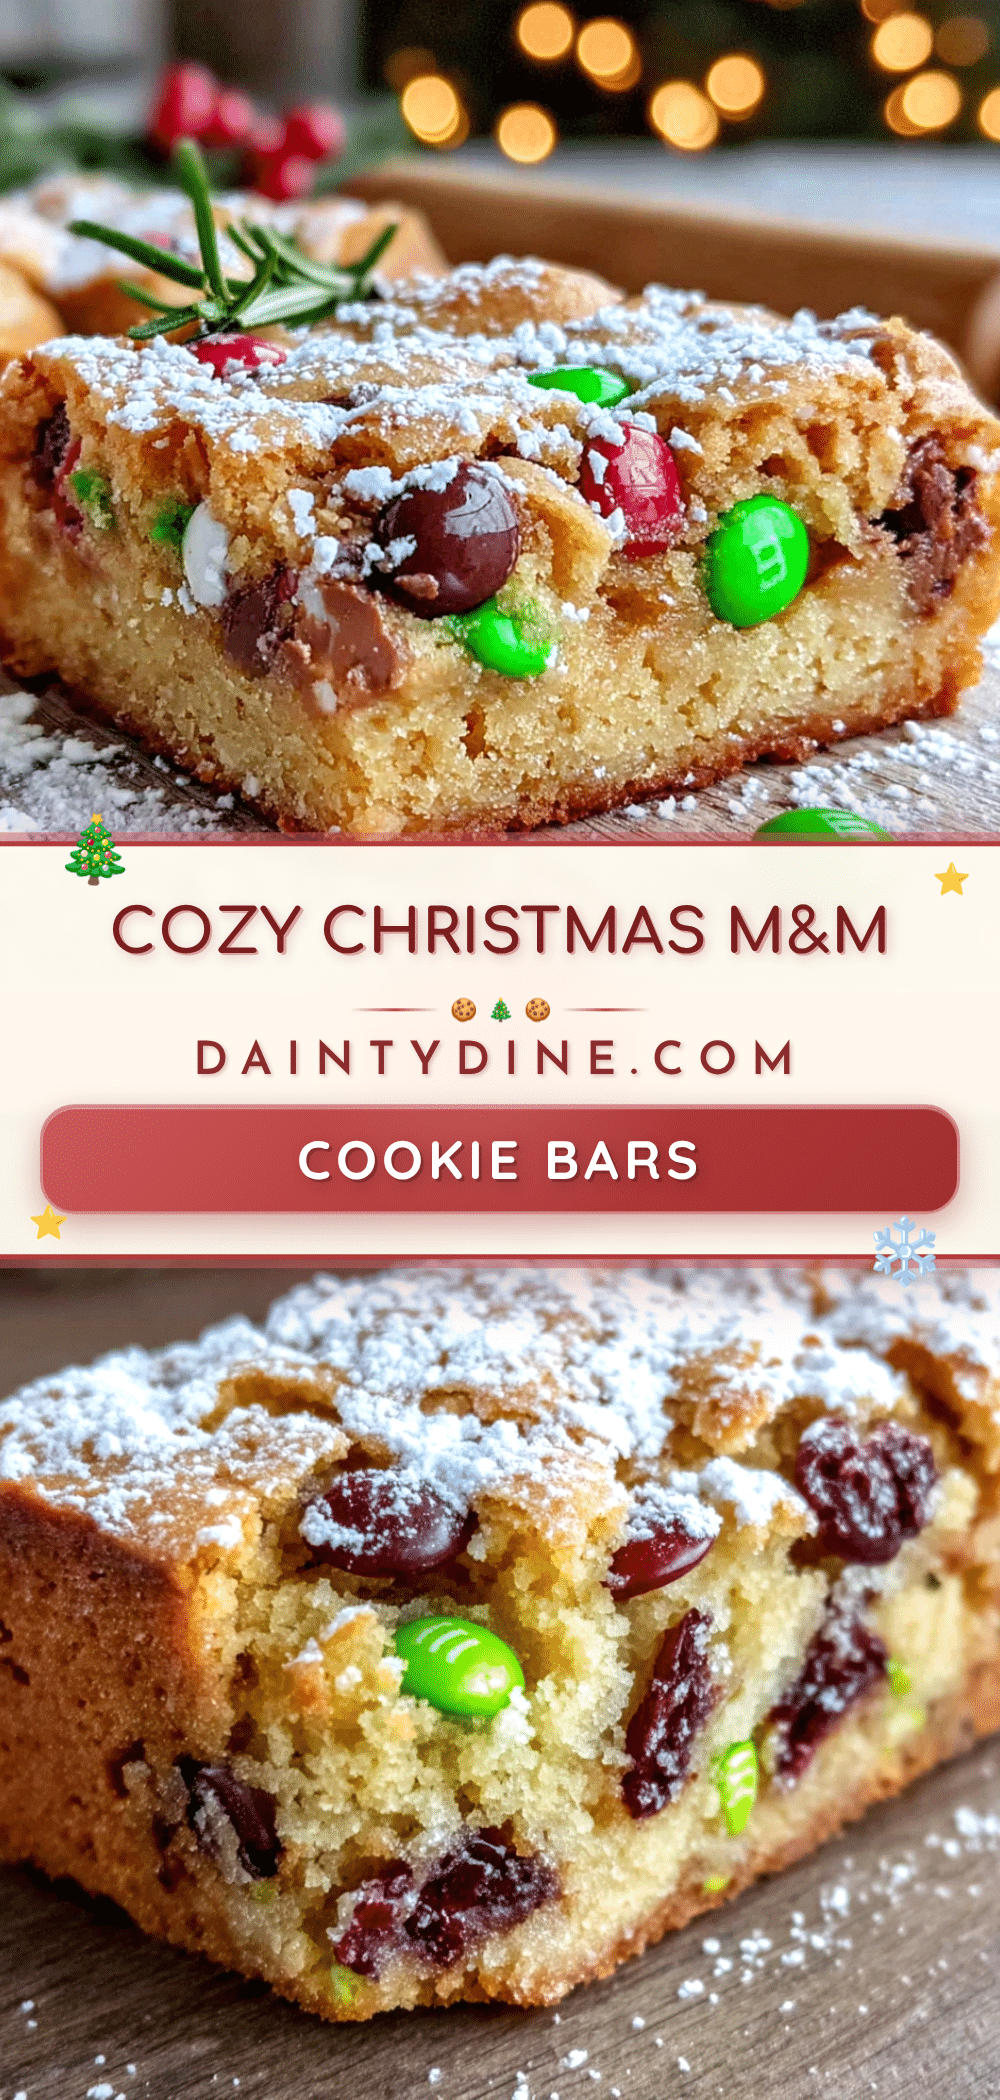
Cozy Christmas M&M Cookie Bars: Easy Holiday Recipe
These Cozy Christmas M&M Cookie Bars are soft, chewy, and studded with festive red and green M&Ms. They come together in under 40 minutes with simple pantry ingredients, making them the perfect treat for holiday gatherings, cookie swaps, or a cozy night in.
- Prep Time: 15 minutes
- Cook Time: 25 minutes
- Total Time: 40 minutes
- Yield: 24 servings 1x
- Category: Dessert
- Cuisine: American
Ingredients
- 1 cup (2 sticks / 226g) unsalted butter, softened
- 3/4 cup (150g) granulated sugar
- 3/4 cup (150g) light brown sugar, packed
- 2 large eggs, room temperature
- 2 teaspoons vanilla extract
- 2 and 1/4 cups (280g) all-purpose flour
- 1 teaspoon baking soda
- 1/2 teaspoon salt
- 1 and 3/4 cups (300g) Christmas M&Ms, divided
- 1/2 cup (90g) semi-sweet chocolate chips (optional)
Instructions
- Preheat your oven to 350°F (175°C). Line a 9×13-inch baking pan with parchment paper, leaving overhang on the long sides. Lightly spray the parchment with nonstick cooking spray.
- In a large mixing bowl, beat the softened butter, granulated sugar, and brown sugar together on medium speed for 2-3 minutes until light and fluffy. Scrape down the sides and bottom of the bowl once.
- Add the eggs one at a time, beating on low after each until just combined. Add the vanilla and mix in. The mixture may look slightly curdled.
- In a separate medium bowl, whisk together the flour, baking soda, and salt.
- Add the flour mixture to the butter mixture in two additions, mixing on low speed after each until just combined. Do not overmix.
- Using a spatula, gently fold in 1 and 1/4 cups of the M&Ms and the chocolate chips (if using). Reserve the remaining 1/2 cup of M&Ms for the top.
- Transfer the dough to the prepared pan and press it into an even layer using a spatula or lightly greased fingers.
- Press the remaining 1/2 cup of M&Ms gently into the top of the dough, spacing them out evenly.
- Bake on the middle rack for 22-26 minutes, until the edges are golden brown and the center is set but still soft. A toothpick inserted in the center should come out with a few moist crumbs.
- Cool the pan on a cooling rack for at least 30 minutes. Then use the parchment sling to lift the bars out and transfer to the rack to cool completely before cutting.
Notes
Don’t overbake; pull bars when center is still slightly soft. Room temperature ingredients are important for proper creaming. Press dough evenly for uniform baking. Let bars cool completely before cutting to avoid crumbling. For clean cuts, chill bars for 20 minutes before slicing.
Nutrition
- Serving Size: 1 bar
- Calories: 245
- Sugar: 22
- Sodium: 115
- Fat: 12
- Saturated Fat: 7
- Carbohydrates: 33
- Fiber: 1
- Protein: 3
Keywords: Christmas cookie bars, M&M cookie bars, holiday dessert, easy cookie bars, Christmas baking