Love this? Save it for later!
Share the inspiration with your friends
There used to be a tiny bakery on a side street in Portland called “Mabel’s Curiosities” that made the most hauntingly beautiful black cat sugar cookies I had ever seen. When they closed their doors three years ago—the owner retired to the coast, lucky her—I felt a genuine pang of loss. Those cookies weren’t just cookies. They were little edible works of art with these glossy, jet-black royal icing eyes that seemed to follow you around the plate. After twelve tries—and I mean twelve, including one batch that looked more like sad blobs than cats—I finally got it.
The secret, honestly, was patience and a good piping tip. I spent a whole rainy Saturday evening hunched over my kitchen island, a glass of red wine getting warm beside me, trying to replicate that perfect curve of a cat’s ear. My first few attempts looked like deformed potatoes with whiskers. But somewhere around attempt number eight, something clicked. The icing flowed just right, the cookie held its shape, and I let out a little yelp that scared my own cat right off the counter.
These cozy black cat sugar cookies aren’t just for Halloween, though they’re perfect for that. They’re for those slow October evenings when the air gets crisp and you want to do something with your hands. Maybe you’ve been there—staring at Pinterest boards full of perfect cookies, wondering if you could ever make something that pretty. Let me tell you, you absolutely can. This recipe is the one that proved it to me, and every time I make them now, I think of Mabel and her little bakery and that first perfect bite.
Why You’ll Love This Recipe
I have tested this recipe more times than I care to admit, and each batch taught me something new. The first time, I used too much flour and the cookies spread into weird, flat pancakes. The second time, my royal icing was too runny and dripped right off the cookie like sad little tears. But by the fifth batch, I had cracked the code. This is the version that works every single time, and I’m so excited to share it with you.
- Quick & Easy: The dough comes together in about 15 minutes, and the chilling time does all the hard work for you. Perfect for a weeknight baking session when you need something cozy to do.
- Simple Ingredients: Butter, sugar, flour, eggs, vanilla—all the usual suspects you probably already have in your pantry. No weird specialty items required.
- Perfect for Halloween: These little black cats are the star of any Halloween party, spooky movie night, or just a random Tuesday when you want to feel festive.
- Crowd-Pleaser: Kids absolutely lose their minds over these. Adults do too, honestly. There’s something about a cute animal-shaped cookie that brings out the kid in everyone.
- Unbelievably Delicious: The sugar cookie base is soft in the middle with slightly crispy edges, and the royal icing adds that perfect sweet crunch. It’s comfort food at its finest.
What makes this recipe different from all the others is the technique. I spent a long time figuring out how to get the dough to hold its shape during baking—because nothing is more disappointing than a cat cookie that looks like a blob. The answer was a slightly longer chill time and a specific ratio of butter to flour. Trust me on this one.
This recipe isn’t just good—it is the kind that makes you close your eyes after the first bite. It’s warm, nostalgic, and exactly what you need on a cool autumn evening with a cup of tea and a good movie.
What Ingredients You Will Need
This recipe uses simple, wholesome ingredients to create cookies that are both beautiful and delicious. Everything here is a pantry staple, which makes these perfect for spontaneous baking sessions.
- Unsalted butter, softened (1 cup / 226g) – I always use unsalted so I can control the salt level. Let it sit out for about 30 minutes before you start.
- Granulated sugar (1 cup / 200g) – Regular white sugar gives these cookies that perfect crisp edge.
- Large egg (1, room temperature) – Room temperature eggs incorporate better into the butter-sugar mixture.
- Vanilla extract (2 teaspoons) – Pure vanilla makes a difference here. I love Nielsen-Massey, but any good brand works.
- All-purpose flour (2 ½ cups / 312g) – Spoon and level your flour—don’t scoop straight from the bag or you’ll end up with dry cookies.
- Baking powder (½ teaspoon) – Just enough to give them a little lift without spreading too much.
- Salt (¼ teaspoon) – Balances the sweetness and brings out the vanilla flavor.
- Black gel food coloring (for the dough) – Liquid coloring will mess with the dough consistency, so stick with gel. I use Americolor Super Black.
For the Royal Icing:
- Powdered sugar (2 cups / 240g) – Sift it first to avoid lumps. Trust me on this one.
- Meringue powder (2 tablespoons) – This gives the icing that perfect glossy finish and helps it harden properly.
- Warm water (3-4 tablespoons) – Add slowly. You might need a little more or less depending on humidity.
- Black gel food coloring (for the icing) – Same brand as before. You want a deep, true black.
- White gel food coloring (optional, for details) – For little eyes or whiskers if you want to get fancy.
For the black food coloring, I recommend getting a good quality gel. Cheap ones can leave a bitter aftertaste, and nobody wants that. The Americolor brand has never let me down.
Equipment Needed
You don’t need a fancy bakery setup for these cookies, but a few specific tools will make your life a whole lot easier.
- Cat-shaped cookie cutter – Obviously! I found mine at a kitchen supply store for about $4. Amazon has tons of options too.
- Stand mixer or hand mixer – Either works fine. I’ve made these with both and honestly, the hand mixer is easier to clean.
- Rolling pin – A standard rolling pin is perfect. If you have adjustable rings, even better for getting even thickness.
- Parchment paper – Non-negotiable for easy cleanup and preventing sticking.
- Baking sheets – Light-colored metal sheets work best. Dark sheets can cause the bottoms to brown too fast.
- Piping bags – Disposable ones are easiest. You’ll need a few for the different colors.
- Small round piping tip (size 2 or 3) – For outlining and flooding the cookies with icing.
- Cooling rack – Essential for letting the royal icing set properly.
If you don’t have piping bags, you can use a zip-top bag with a tiny corner snipped off. It’s not as precise, but it works in a pinch. I’ve done it more times than I’d like to admit.
Preparation Method
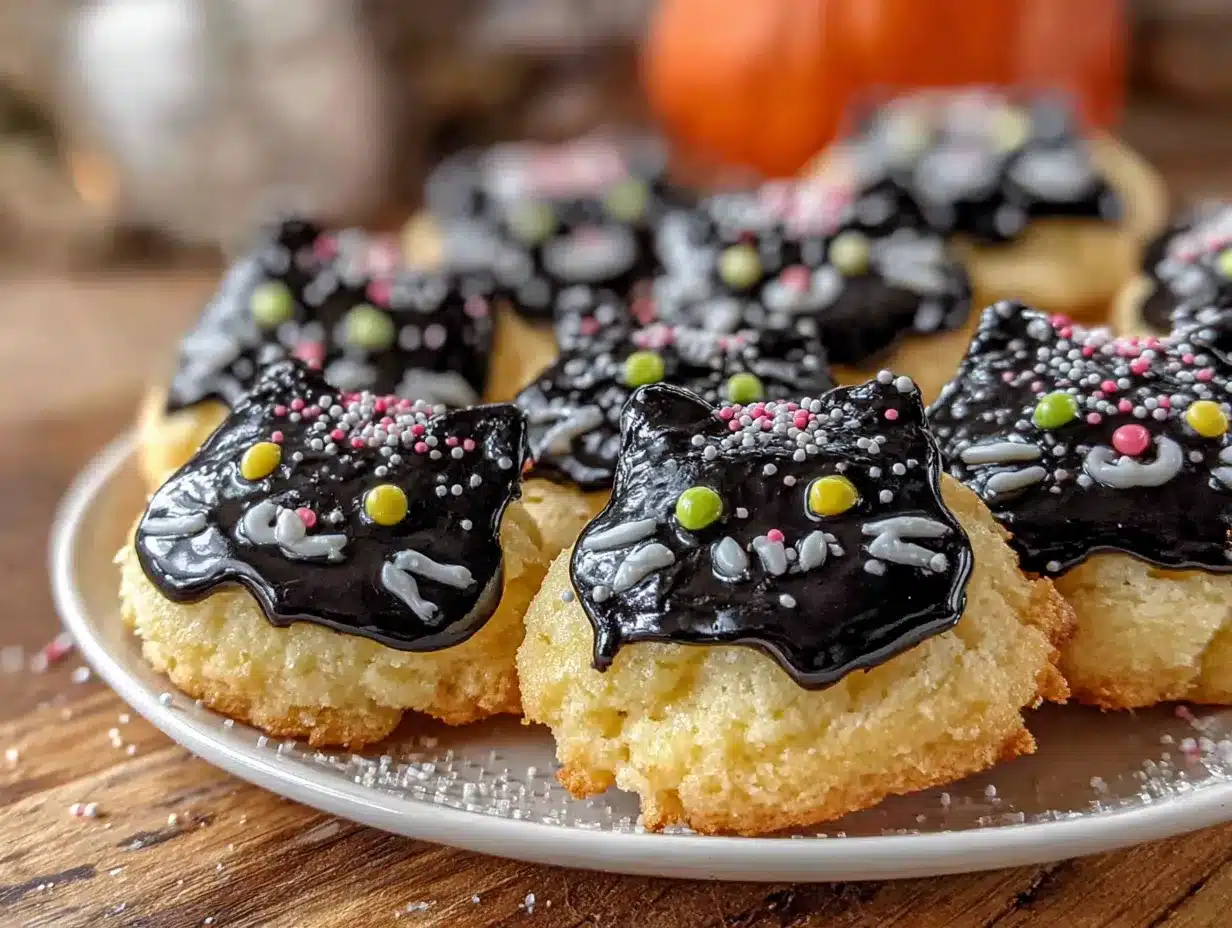
Alright, let’s get to the fun part. Set aside a couple of hours for this—the actual hands-on time is about 45 minutes, but you need time for chilling and decorating.
- Cream the butter and sugar. In a large mixing bowl, beat the softened butter and granulated sugar together until light and fluffy, about 3-4 minutes. You want it to look pale and almost doubled in volume. Scrape down the sides halfway through.
- Add the egg and vanilla. Beat in the egg and vanilla extract until fully combined. The mixture might look a little curdled at this point—that’s totally normal, don’t panic.
- Mix the dry ingredients. In a separate bowl, whisk together the flour, baking powder, and salt. Gradually add this to the wet mixture, mixing on low speed until just combined. Overmixing will make tough cookies.
- Add the black food coloring. Squeeze in about 1 teaspoon of black gel food coloring and mix until the dough is evenly dark gray. It will darken further as it sits. Add more if needed—you want a deep charcoal color.
- Chill the dough. Divide the dough in half, flatten each into a disc, wrap in plastic wrap, and refrigerate for at least 1 hour. This step is crucial—cold dough holds its shape better when baking.
- Preheat and prep. Preheat your oven to 350°F (175°C). Line two baking sheets with parchment paper.
- Roll and cut. On a lightly floured surface, roll out one disc of dough to about ¼-inch thickness. Cut out your cat shapes and place them 2 inches apart on the prepared baking sheets. Re-roll scraps and repeat.
- Chill again. Pop the cut-out cookies into the freezer for 10 minutes before baking. This is my secret weapon—it prevents spreading and keeps those cute cat shapes intact.
- Bake. Bake for 8-10 minutes, rotating the pan halfway through. The edges should be just barely golden. Let them cool on the baking sheet for 5 minutes, then transfer to a cooling rack to cool completely.
- Make the royal icing. In a clean bowl, combine the powdered sugar and meringue powder. Add 3 tablespoons of warm water and beat on medium speed for 4-5 minutes until glossy and thick. The icing should hold a stiff peak. Add more water a few drops at a time if it’s too thick.
- Color the icing. Divide the icing into two bowls. Add black gel food coloring to one bowl until you reach your desired darkness. Leave the other bowl white (or add a tiny drop of white coloring to brighten it).
- Pipe and flood. Fill a piping bag fitted with a small round tip with the black icing. Outline each cookie, then fill in the center with more icing, using a toothpick to spread it into the corners. Tap the cookie gently to smooth the surface.
- Add details. While the black icing is still wet, use the white icing to pipe little eyes or whiskers. A tiny dot for each eye and three little lines on each cheek.
- Let set. Allow the cookies to dry at room temperature for at least 4 hours, or overnight. The icing should be completely hard to the touch before stacking or storing.
One thing I learned the hard way—don’t rush the drying process. I once tried to stack these too early and ended up with a tragic pile of smeared cat faces. Let them sit out overnight if you can.
Cooking Tips & Techniques
I have made every mistake in the book with these cookies, so you don’t have to. Here’s what I’ve learned:
Chill, chill, chill. I cannot stress this enough. Cold dough is happy dough. If your cookies start spreading in the oven, it means the dough got too warm. Pop the whole baking sheet in the freezer for 5 minutes and try again.
Watch your oven temperature. Every oven runs a little different. My first batch came out looking like dark chocolate cookies because I didn’t realize my oven runs 25 degrees hot. Invest in an oven thermometer—they’re cheap and worth every penny.
Don’t overmix the dough. I know it’s tempting to keep mixing until everything looks perfectly combined, but overworking the dough develops gluten and makes tough cookies. Stop mixing as soon as the flour disappears.
Royal icing consistency is everything. You want it to be thick enough to hold its shape but thin enough to spread smoothly. The test: lift your spatula and the ribbon of icing should settle back into the bowl within 10 seconds. If it’s too thick, add water a drop at a time. Too thin? Add more sifted powdered sugar.
Work in small batches. When decorating, only fill your piping bag halfway. The icing will warm up from your hands and get thinner as you work. Smaller batches mean more control.
My biggest failure? I once tried to use liquid food coloring in the royal icing. It turned into a runny mess that took three days to dry and never really hardened. Stick with gel coloring—it’s worth the extra few dollars.
Variations & Adaptations
These cookies are wonderfully adaptable. Here are a few ways I’ve played around with them:
Gluten-Free Version: Swap the all-purpose flour for a 1:1 gluten-free baking flour blend. I’ve used Bob’s Red Mill with great success. Just add an extra tablespoon of flour to account for the different absorption rates.
Vegan Adaptation: Use vegan butter (I like Earth Balance) and a flax egg (1 tablespoon ground flaxseed mixed with 3 tablespoons water, let sit for 5 minutes). For the royal icing, you can skip the meringue powder and use aquafaba instead—3 tablespoons of chickpea brine whipped with the powdered sugar works beautifully.
Spiced Version: Add 1 teaspoon of cinnamon and ½ teaspoon of nutmeg to the dry ingredients. It gives the cookies a warm, cozy fall flavor that pairs perfectly with the black cat theme. I made these for a Halloween party and they disappeared in minutes.
Different Shapes: Don’t limit yourself to cats! This dough works beautifully with any cookie cutter. Pumpkins, ghosts, bats, or even simple circles decorated like moons. The black icing looks stunning on any shape.
Chocolate Variation: Replace ¼ cup of the flour with unsweetened cocoa powder for a chocolate sugar cookie base. The black icing on a chocolate cookie is next-level delicious.
I personally love the spiced version for fall. It makes the whole kitchen smell like a cozy autumn day, and the warmth of the cinnamon balances the sweetness of the royal icing perfectly.
Serving & Storage Suggestions
These cookies are best served at room temperature. The royal icing should be completely set and hard, giving you that satisfying snap when you bite into them. Arrange them on a pretty plate or platter—I like using a dark slate board for contrast.
They pair beautifully with a warm cup of chai tea, hot apple cider, or a cozy latte. For a Halloween party, set them out alongside some spooky punch or hot chocolate with marshmallows. Kids love them with a glass of cold milk.
Storage: Keep these cookies in an airtight container at room temperature. Layer them between sheets of parchment paper to prevent the icing from sticking. They’ll stay fresh for up to a week, though honestly, they never last that long in my house.
Freezing: You have two options here. You can freeze the unbaked cookie dough discs for up to 3 months—just thaw in the fridge overnight before rolling and cutting. Or you can freeze the baked, undecorated cookies for up to 2 months. Thaw at room temperature, then decorate as usual.
One thing I’ve noticed—the flavors actually get better after a day or two. The vanilla deepens and the cookie softens slightly while maintaining that crisp edge. So don’t feel like you have to serve them immediately.
Reheating: These are meant to be eaten at room temperature, but if you want a warm cookie experience, pop one in the microwave for about 8 seconds. Just be careful—the royal icing can get sticky if overheated.
Nutritional Information & Benefits
Let’s be real—these are cookies, not health food. But that doesn’t mean they can’t fit into a balanced lifestyle. Here’s the estimated nutritional breakdown per cookie (based on 24 cookies):
| Nutrient | Amount per Cookie |
|---|---|
| Calories | 145 |
| Total Fat | 6g |
| Saturated Fat | 4g |
| Carbohydrates | 22g |
| Sugar | 14g |
| Protein | 2g |
The butter provides a small amount of vitamin A, and the egg adds a bit of protein. The real benefit here is the joy factor—there’s something genuinely therapeutic about decorating these little cats. It’s a form of mindfulness, honestly. You have to slow down, focus, and be present.
For those with dietary concerns, the gluten-free and vegan variations I mentioned earlier work really well. The cookies are naturally nut-free (just double-check your ingredients if allergies are a concern). And if you’re watching your sugar intake, you can reduce the sugar in the cookie dough by ¼ cup without affecting the texture too much.
My personal philosophy? Life is short. Eat the cookie. But maybe just one or two, you know?
Conclusion
These cozy black cat sugar cookies are more than just a Halloween treat—they’re a little piece of edible art that brings joy to everyone who sees them. Whether you’re making them for a spooky movie night, a classroom party, or just because you need something cute and delicious in your life, they never disappoint.
I love how forgiving this recipe is. Even the “ugly” cookies taste amazing, and every batch teaches you something new. Maybe your first few cats will have lopsided ears or slightly smudged eyes—that’s okay. That’s how you learn. My first batch looked like a colony of mutant hamsters, and I still ate half of them before they cooled down.
I’d love to see your creations! Tag me in your photos, leave a comment below with your variations, or share your decorating tips. Did you add little witch hats? Rainbow whiskers? Googly eyes? The possibilities are endless, and I genuinely get so excited seeing what you come up with.
So grab your rolling pin, put on your favorite cozy playlist, and get baking. These little black cats are waiting to come to life in your kitchen. Happy baking, friend!
Frequently Asked Questions
Can I make the dough ahead of time?
Absolutely! The dough can be refrigerated for up to 3 days or frozen for up to 3 months. Just wrap it tightly in plastic wrap and then foil. Thaw frozen dough in the fridge overnight before rolling.
Why did my cookies spread in the oven?
This usually happens when the dough is too warm. Make sure you chill the cut-out cookies for at least 10 minutes before baking. Also, check that your butter wasn’t too soft when you started—it should be softened but still cool to the touch.
How do I get the royal icing perfectly smooth?
The key is getting the right consistency. After flooding the cookie with icing, tap the baking sheet gently on the counter to help it settle. Use a toothpick to pop any air bubbles and guide the icing into corners. Let it dry completely without moving the cookies.
Can I use a different type of food coloring?
I recommend gel food coloring for both the dough and the icing. Liquid food coloring can alter the texture of your dough and make royal icing too runny. Gel colors are more concentrated and give you a deeper, truer black without affecting consistency.
How long will these cookies stay fresh?
Stored in an airtight container at room temperature, these cookies will stay fresh for up to a week. The royal icing helps seal in moisture, keeping the cookies soft. If you live in a humid climate, add a silica gel packet to the container to prevent the icing from getting sticky.
Pin This Recipe!

Cozy Black Cat Sugar Cookies with Royal Icing – Easy Halloween Treat

These adorable black cat sugar cookies are soft in the middle with slightly crispy edges, topped with glossy royal icing. Perfect for Halloween parties, cozy autumn evenings, or any time you want a fun, delicious treat.
- Prep Time: 15 minutes
- Cook Time: 10 minutes
- Total Time: 1 hour 25 minutes (plus chilling and drying time)
- Yield: 24 cookies 1x
- Category: Dessert
- Cuisine: American
Ingredients
- 1 cup (226g) unsalted butter, softened
- 1 cup (200g) granulated sugar
- 1 large egg, room temperature
- 2 teaspoons vanilla extract
- 2 ½ cups (312g) all-purpose flour
- ½ teaspoon baking powder
- ¼ teaspoon salt
- Black gel food coloring (for dough)
- 2 cups (240g) powdered sugar, sifted
- 2 tablespoons meringue powder
- 3–4 tablespoons warm water
- Black gel food coloring (for icing)
- White gel food coloring (optional, for details)
Instructions
- Cream the butter and sugar. In a large mixing bowl, beat the softened butter and granulated sugar together until light and fluffy, about 3-4 minutes. Scrape down the sides halfway through.
- Add the egg and vanilla. Beat in the egg and vanilla extract until fully combined.
- Mix the dry ingredients. In a separate bowl, whisk together the flour, baking powder, and salt. Gradually add to the wet mixture, mixing on low speed until just combined.
- Add the black food coloring. Squeeze in about 1 teaspoon of black gel food coloring and mix until the dough is evenly dark gray. Add more if needed.
- Chill the dough. Divide the dough in half, flatten each into a disc, wrap in plastic wrap, and refrigerate for at least 1 hour.
- Preheat and prep. Preheat oven to 350°F (175°C). Line two baking sheets with parchment paper.
- Roll and cut. On a lightly floured surface, roll out one disc of dough to about ¼-inch thickness. Cut out cat shapes and place 2 inches apart on prepared baking sheets. Re-roll scraps and repeat.
- Chill again. Place cut-out cookies in the freezer for 10 minutes before baking.
- Bake. Bake for 8-10 minutes, rotating the pan halfway through. Edges should be just barely golden. Cool on baking sheet for 5 minutes, then transfer to a cooling rack to cool completely.
- Make the royal icing. In a clean bowl, combine powdered sugar and meringue powder. Add 3 tablespoons warm water and beat on medium speed for 4-5 minutes until glossy and thick. Add more water a few drops at a time if too thick.
- Color the icing. Divide icing into two bowls. Add black gel food coloring to one bowl until desired darkness. Leave the other bowl white (or add a tiny drop of white coloring to brighten it).
- Pipe and flood. Fill a piping bag fitted with a small round tip with black icing. Outline each cookie, then fill in the center with more icing, using a toothpick to spread it into corners. Tap gently to smooth.
- Add details. While black icing is still wet, use white icing to pipe little eyes or whiskers.
- Let set. Allow cookies to dry at room temperature for at least 4 hours, or overnight, until icing is completely hard.
Notes
Chill the dough thoroughly to prevent spreading. Use gel food coloring, not liquid, to avoid altering dough and icing consistency. Royal icing must dry completely before stacking. For best results, let cookies sit out overnight.
Nutrition
- Serving Size: 1 cookie
- Calories: 145
- Sugar: 14
- Sodium: 50
- Fat: 6
- Saturated Fat: 4
- Carbohydrates: 22
- Protein: 2
Keywords: black cat cookies, sugar cookies, Halloween cookies, royal icing cookies, cat-shaped cookies, easy Halloween treat


