Love this? Save it for later!
Share the inspiration with your friends
It was 11:17 PM on a random Wednesday in mid-October, and I had a very specific, slightly unhinged craving for something spooky and buttery. I didn’t have any cookie cutters shaped like ghosts or bats, but I had a block of butter, a bag of slivered almonds, and the wild idea that I could just… sculpt them. Honestly, the late hour made it feel less like baking and more like a secret mission. I was in my pajamas, the house was dead quiet, and I was determined to make the most terrifyingly adorable cookies the world had ever seen. Let me tell you, there’s something about the midnight hour that makes you braver in the kitchen. You stop second-guessing and just go for it.
I remember I had to use a butter knife to carve the knuckle lines because I couldn’t find my paring knife. It was buried under a pile of mail on the counter. Typical. But you know what? That slightly dull knife gave the cookies a more authentic, craggy look. They weren’t perfect, and that was the whole point. These witch fingers are supposed to look a little gnarly. The first batch came out of the oven looking more like tiny, swollen sausages than elegant witch fingers, but I learned. I adjusted the shaping, I chilled the dough longer, and by the third tray, I had a plate of gloriously creepy cookies. This recipe stayed with me because it’s not just a cookie; it’s a story you get to eat. Every time I make them, I feel that same mischievous, late-night energy, and I think you will too.
Why You’ll Love This Recipe
Let’s be real—Halloween baking can be a huge hassle. You need special cutters, complicated icing techniques, and about five hours of patience you just don’t have. These witch finger cookies are the exact opposite of that. They look incredibly impressive, but they’re secretly one of the easiest cookies you’ll ever make.
- Quick & Easy: From start to finish, you’re looking at about 45 minutes. The dough comes together in one bowl, and there’s no rolling or cutting involved.
- Simple Ingredients: You probably have everything in your pantry right now. Butter, sugar, flour, an egg, and some almonds. No special trips to the store for black food coloring or scary sprinkles.
- Perfect for Halloween Parties: These are the showstopper of any spooky spread. Kids and adults alike can’t resist picking one up—and biting off a finger! They’re a guaranteed conversation starter.
- Crowd-Pleaser: They taste like a classic, buttery shortbread cookie. No weird “green apple” or “bubblegum” Halloween flavors here. Just pure, delicious comfort.
- Unbelievably Delicious: That first bite—the crisp, buttery cookie with the pop of a crunchy almond “nail”—is next-level. It’s the perfect texture combination.
What makes this recipe different from all the others I’ve tried? It’s the chilling technique. I’ve tested this a dozen times, and the secret to getting fingers that don’t puff up into blobs is a solid 30-minute chill in the freezer before baking. This is a chef-tested, family-approved trick that guarantees your cookies keep their creepy shape. This isn’t just another version of a Halloween cookie—it’s the one that will make you close your eyes after the first bite, feeling all warm and cozy and just the right amount of spooky.
What Ingredients You Will Need
This recipe uses simple, wholesome ingredients to deliver a bold buttery flavor and a satisfyingly crisp texture without any fuss. Most of these are pantry staples, making this a perfect last-minute Halloween project.
- 1 cup (2 sticks) unsalted butter, softened (adds richness; I recommend using a good quality brand like Kerrygold for the best flavor)
- 1 cup powdered sugar (creates a tender, melt-in-your-mouth texture)
- 1 large egg, separated (the yolk goes into the dough, the white is used as “glue” for the almond nails)
- 1 teaspoon vanilla extract (for that classic, warm cookie flavor)
- 1/2 teaspoon almond extract (this is the secret ingredient! It enhances the almond nails and makes the whole cookie taste more complex)
- 2 1/2 cups all-purpose flour (spooned and leveled for accuracy)
- 1/2 teaspoon salt (balances the sweetness and enhances the butter flavor)
- 1/2 cup whole blanched almonds (for the fingernails; look for ones that are uniform in size and shape)
- Red food coloring (gel or liquid) (for a bloody effect at the “cuticle” and to add realistic coloring to the knuckles)
For the “blood” effect, you can also use a little red jam (like raspberry or strawberry) thinned with a drop of water. It gives a more organic, gory look. If you don’t have almond extract, you can omit it, but it really does tie the whole “almond nail” theme together. Make sure your butter is truly softened—you should be able to press a finger into it easily—but not melted. Melted butter will make the cookies spread too much and lose their finger shape.
Equipment Needed
You don’t need any fancy Halloween-specific tools for this recipe, which is one of the best parts. Here’s what you’ll want to have on hand:
- Electric mixer (hand or stand): A hand mixer works perfectly. A stand mixer with the paddle attachment is even easier.
- Mixing bowls: One large bowl for the dough, one small bowl for the egg white.
- Baking sheets: I use two standard half-sheet pans. Line them with parchment paper for easy cleanup.
- Paring knife or butter knife: This is your sculpting tool. A paring knife is easier for carving knuckle lines, but a butter knife works in a pinch (pun intended!).
- Small pastry brush: For brushing the egg white onto the almonds. A clean, unused paintbrush works great too.
- Plastic wrap: Essential for chilling the shaped dough.
- Cooling rack: For letting the cookies cool completely before you add the “blood.”
I used to think I needed a special “finger mold” to make these look good. Honestly, I wasted $15 on a silicone mold that was impossible to use. Your hands are the best tool you have. The slightly imperfect, uneven shapes you create by hand are what make them look so realistic and creepy.
Preparation Method
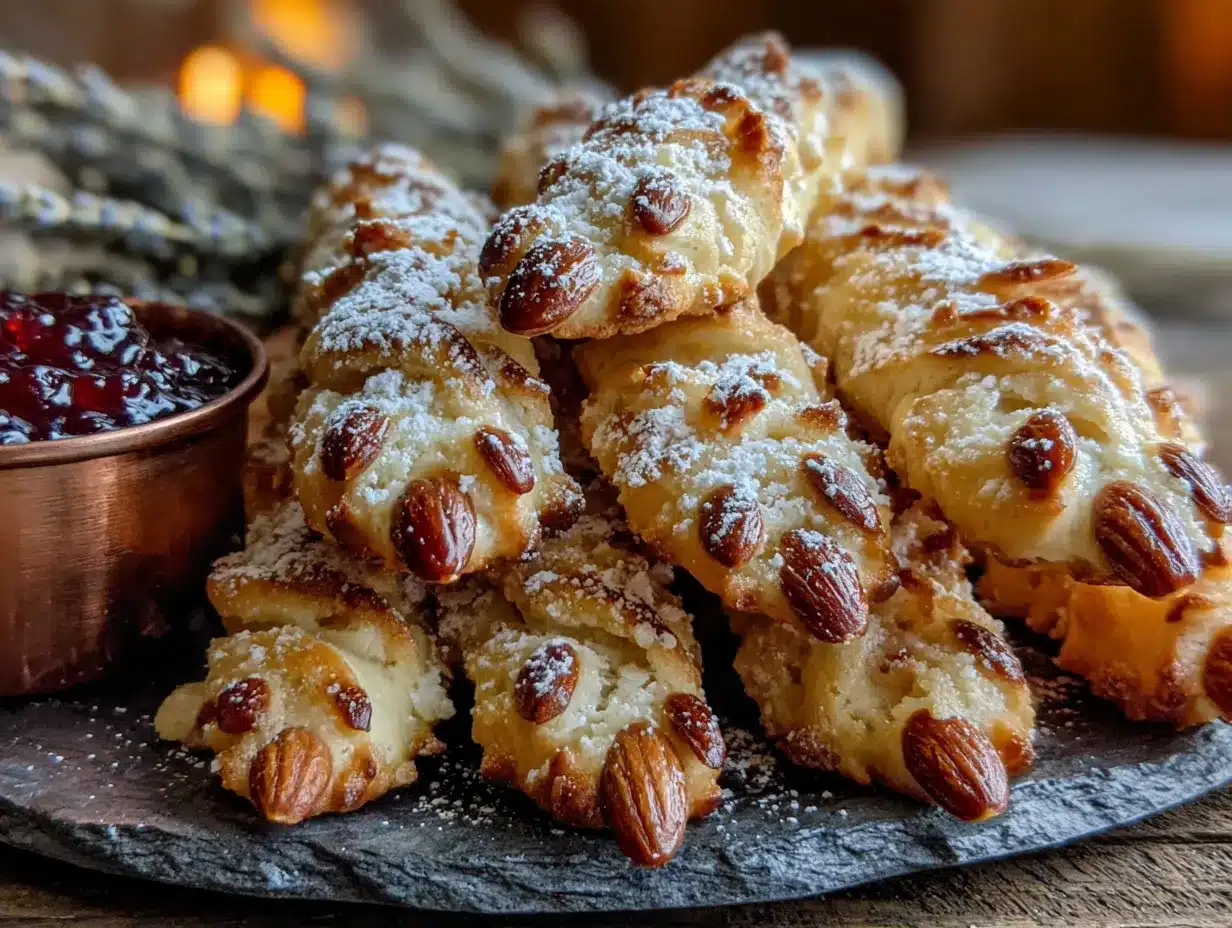
Get ready to have some fun. This is the kind of baking where you get to be a little messy and creative. Let’s make some fingers.
- Make the dough: In a large bowl, cream together the softened butter and powdered sugar with your electric mixer on medium speed until light and fluffy, about 2-3 minutes. Scrape down the sides of the bowl. Add the egg yolk (save the white!), vanilla extract, and almond extract. Beat until combined. In a separate bowl, whisk together the flour and salt. Gradually add the dry ingredients to the wet ingredients, mixing on low speed until a soft dough forms. Don’t overmix. The dough should be smooth and slightly sticky.
- Chill the dough: This is a crucial step. Wrap the dough in plastic wrap and flatten it into a disc. Refrigerate for at least 30 minutes. This makes the dough much easier to handle and shape. While it chills, you can prepare your “nails.”
- Prepare the almonds: Place the whole blanched almonds on a small plate. In a small bowl, lightly beat the reserved egg white with 1 teaspoon of water. This is your “glue.”
- Shape the fingers: Preheat your oven to 325°F (165°C). Line your baking sheets with parchment paper. Take a small piece of dough (about 1 heaping tablespoon) and roll it into a log shape in your hands. It should be about 3 inches long and slightly thicker at one end (the “knuckle” end) and tapered at the other (the “fingertip” end). Place it on the prepared baking sheet.
- Add the nail: Take one blanched almond. Dip the wider end into the beaten egg white, then press it firmly onto the tapered fingertip of the cookie. The pointed end of the almond should stick out like a fingernail. Press gently to secure it.
- Sculpt the details: Use the back of a paring knife (or a toothpick) to press lines into the dough to create knuckles. Make two or three indentations along the length of the finger. You can also gently press the sides of the finger to make it look more realistic, with slight ridges. For a truly gory look, use a tiny bit of red food coloring on a toothpick to draw a thin line around the base of the almond “nail.”
- Freeze before baking: This is my non-negotiable tip. Place the shaped cookies on their baking sheets and put them in the freezer for 15-20 minutes. This solidifies the butter and prevents the cookies from spreading and losing their finger shape in the oven. While they freeze, preheat the oven if you haven’t already.
- Bake: Bake the chilled cookies for 12-15 minutes, or until they are just set and the bottoms are very lightly golden. The tops should still be pale. Don’t overbake, or they will lose their creepy, flesh-like color. Let them cool on the baking sheet for 5 minutes before transferring to a wire rack to cool completely.
- Add the finishing touch: Once the cookies are completely cool, you can add a little more “blood.” Dip the “cuticle” end of the cookie (where the almond meets the dough) into a small dish of red food coloring or thinned red jam. You can also use a toothpick to draw a few tiny “veins” on the cookies for an extra spooky effect.
Your kitchen will smell like a cozy, buttery bakery—with a side of mischief. Let them cool completely before you start nibbling on fingers.
Cooking Tips & Techniques
I’ve made these cookies more times than I care to admit, and I’ve definitely learned a few things the hard way. Here are my best tips to make sure your witch fingers turn out perfectly creepy.
- Don’t skip the chill: I know it’s tempting to skip the freezer step, but I promise you, this is the difference between a finger and a blob. The cold dough holds its shape perfectly in the oven. One time, I was in a rush and only chilled them for 5 minutes. They looked like sad, flat slugs.
- Use your own hands: The warmth of your hands helps shape the dough. Don’t be afraid to get in there. The more you handle the dough, the more realistic the “wrinkles” and imperfections will be. Think of yourself as a sculptor of spooky things.
- Watch the bake time: Ovens vary wildly. Start checking your cookies at the 10-minute mark. You want them to be firm to the touch but not brown. If the edges start to turn golden, they’ve been in too long. A pale cookie looks much more like a real finger.
- Almond placement matters: Make sure the almond is pressed firmly onto the dough. If it’s loose, it will fall off during baking. The egg white acts as a glue, but the pressure is what really seals the deal. I lost a few “nails” in the oven once, and they looked like sad, amputated fingers.
- Multitask smartly: While the first batch is in the freezer, shape the second batch. While the first batch is baking, you can start on the next tray. This keeps the workflow smooth and ensures all your cookies get the proper chill time.
Variations & Adaptations
Once you’ve mastered the basic witch finger, the possibilities are endless. Here are a few fun ways to customize your cookies and make them your own.
- Green Monster Fingers: Add a few drops of green gel food coloring to the dough before you add the flour. Knead it in until the dough is a uniform, swampy green. Use a pecan or walnut half for the nail instead of an almond. It gives them a different, more “ogre” vibe.
- Chocolate Witch Fingers: Replace 1/4 cup of the all-purpose flour with 1/4 cup of unsweetened cocoa powder. The result is a dark, chocolatey finger that looks like it belongs in a haunted chocolate factory. Use white chocolate chips or macadamia nuts for the nails for a great contrast.
- Vegan Adaptation: Use a high-quality vegan butter stick (like Earth Balance) and a flax egg (1 tablespoon ground flaxseed mixed with 3 tablespoons water, let sit for 5 minutes). For the “glue” on the almond, use a little maple syrup or agave nectar. The texture will be slightly different, but they will still be delicious and spooky.
- Gluten-Free Version: Swap the all-purpose flour for a 1:1 gluten-free baking flour blend that contains xanthan gum. I’ve tried this with the King Arthur Measure for Measure blend, and it worked beautifully. Just be sure to chill the dough well, as gluten-free doughs can be a bit more fragile.
My personal favorite variation is the chocolate one. I made a batch for a movie night, and my friend swore they were the best cookies she’d ever had, Halloween-themed or not. They’re just so rich and satisfying.
Serving & Storage Suggestions
These cookies are best served at room temperature, which is when the buttery, shortbread texture really shines. For the most dramatic effect, arrange them on a black platter or a wooden “witch’s” board. Scatter a few extra almonds around to look like “clippings.” It’s a morbidly fun touch.
These pair perfectly with a glass of cold milk, a warm mug of apple cider, or (for the grown-ups) a dark and stormy cocktail. They also make a fantastic addition to a Halloween charcuterie board alongside cheese cubes, grapes, and other savory snacks. The sweet, buttery cookie is a great contrast to salty foods.
Storage: Store any leftover cookies in an airtight container at room temperature for up to 5 days. I actually think they taste even better on day two, as the flavors have a chance to meld. Do not refrigerate them, as this can dry them out.
Freezing: You can freeze the unbaked, shaped cookies. After you’ve shaped them and added the almond nails, place the baking sheet in the freezer for 1 hour, or until the cookies are solid. Transfer the frozen cookies to a zip-top freezer bag. They can be frozen for up to 3 months. When you’re ready to bake, place them directly on a baking sheet (no need to thaw) and add 2-3 minutes to the baking time. This is a great way to get ahead on your Halloween prep.
Nutritional Information & Benefits
Let’s be honest—these are a treat, not a health food. But that doesn’t mean they can’t be part of a balanced, joyful life. Here’s the estimated nutritional breakdown for one cookie (based on a recipe that makes about 24 cookies):
| Nutrient | Amount Per Cookie |
|---|---|
| Calories | 145 |
| Total Fat | 9g |
| Saturated Fat | 5g |
| Carbohydrates | 15g |
| Sugar | 6g |
| Protein | 2g |
The almonds themselves offer a small dose of healthy fats, vitamin E, and magnesium. The butter, while high in saturated fat, provides a source of fat-soluble vitamins like A and D. My personal perspective? Food is about more than just fuel. It’s about connection, celebration, and creating memories. A batch of these witch finger cookies, shared with friends on a spooky October night, is good for the soul. And that’s a kind of nutrition you can’t measure.
Conclusion
So there you have it—the best, most deliciously creepy witch finger cookies you’ll ever make. They’re proof that you don’t need fancy tools or hours of free time to create something truly memorable for Halloween. With just a handful of simple ingredients and a little bit of imagination (and a late-night impulse!), you can whip up a batch that will have everyone talking.
I hope you give these a try and make them your own. Maybe you’ll add a little extra “blood,” or shape them into claws instead of fingers. The beauty of this recipe is that it’s a canvas for your own spooky creativity. Don’t be afraid to get a little weird with it—honestly, that’s where the magic happens. I can’t wait to hear about your creations. Did your kids love them? Did you horrify your coworkers? Drop a comment below and let me know! And if you’re looking for more cozy, comforting treats, be sure to check out my recipe for creepy crawly cupcakes for your next Halloween party.
Frequently Asked Questions
Can I make the dough ahead of time?
Absolutely! You can make the dough up to 3 days in advance. Wrap it tightly in plastic wrap and keep it in the refrigerator. When you’re ready to bake, let it sit at room temperature for about 10-15 minutes to soften slightly, making it easier to shape.
My cookies spread in the oven. What did I do wrong?
This is the most common issue, and it usually comes down to one of two things: the dough wasn’t chilled long enough before baking, or the butter was too soft (almost melted) when you started. Make sure to freeze the shaped cookies for that full 15-20 minutes. It makes a world of difference.
Can I use a different nut for the nails?
Yes, definitely! Whole pecans or walnut halves work great for a chunkier, more rustic look. You can also use whole cashews for a more rounded nail shape. Just make sure they are large enough to look like a fingernail on the cookie.
How do I make the “blood” look more realistic?
For a truly gory effect, use a combination of red gel food coloring and a tiny drop of corn syrup. Mix them together on a small plate, and then use a toothpick to dab it around the “cuticle” area. The corn syrup gives it a thicker, more viscous, blood-like consistency.
Are these cookies suitable for kids to help make?
100% yes! This is a perfect recipe for little hands. Kids love getting messy with the dough and shaping the fingers. The “sculpting” part is like playing with Play-Doh, and they get a huge kick out of adding the almond nails. Just be careful with the sharp knife for carving knuckles—that’s a job for an adult.
Pin This Recipe!
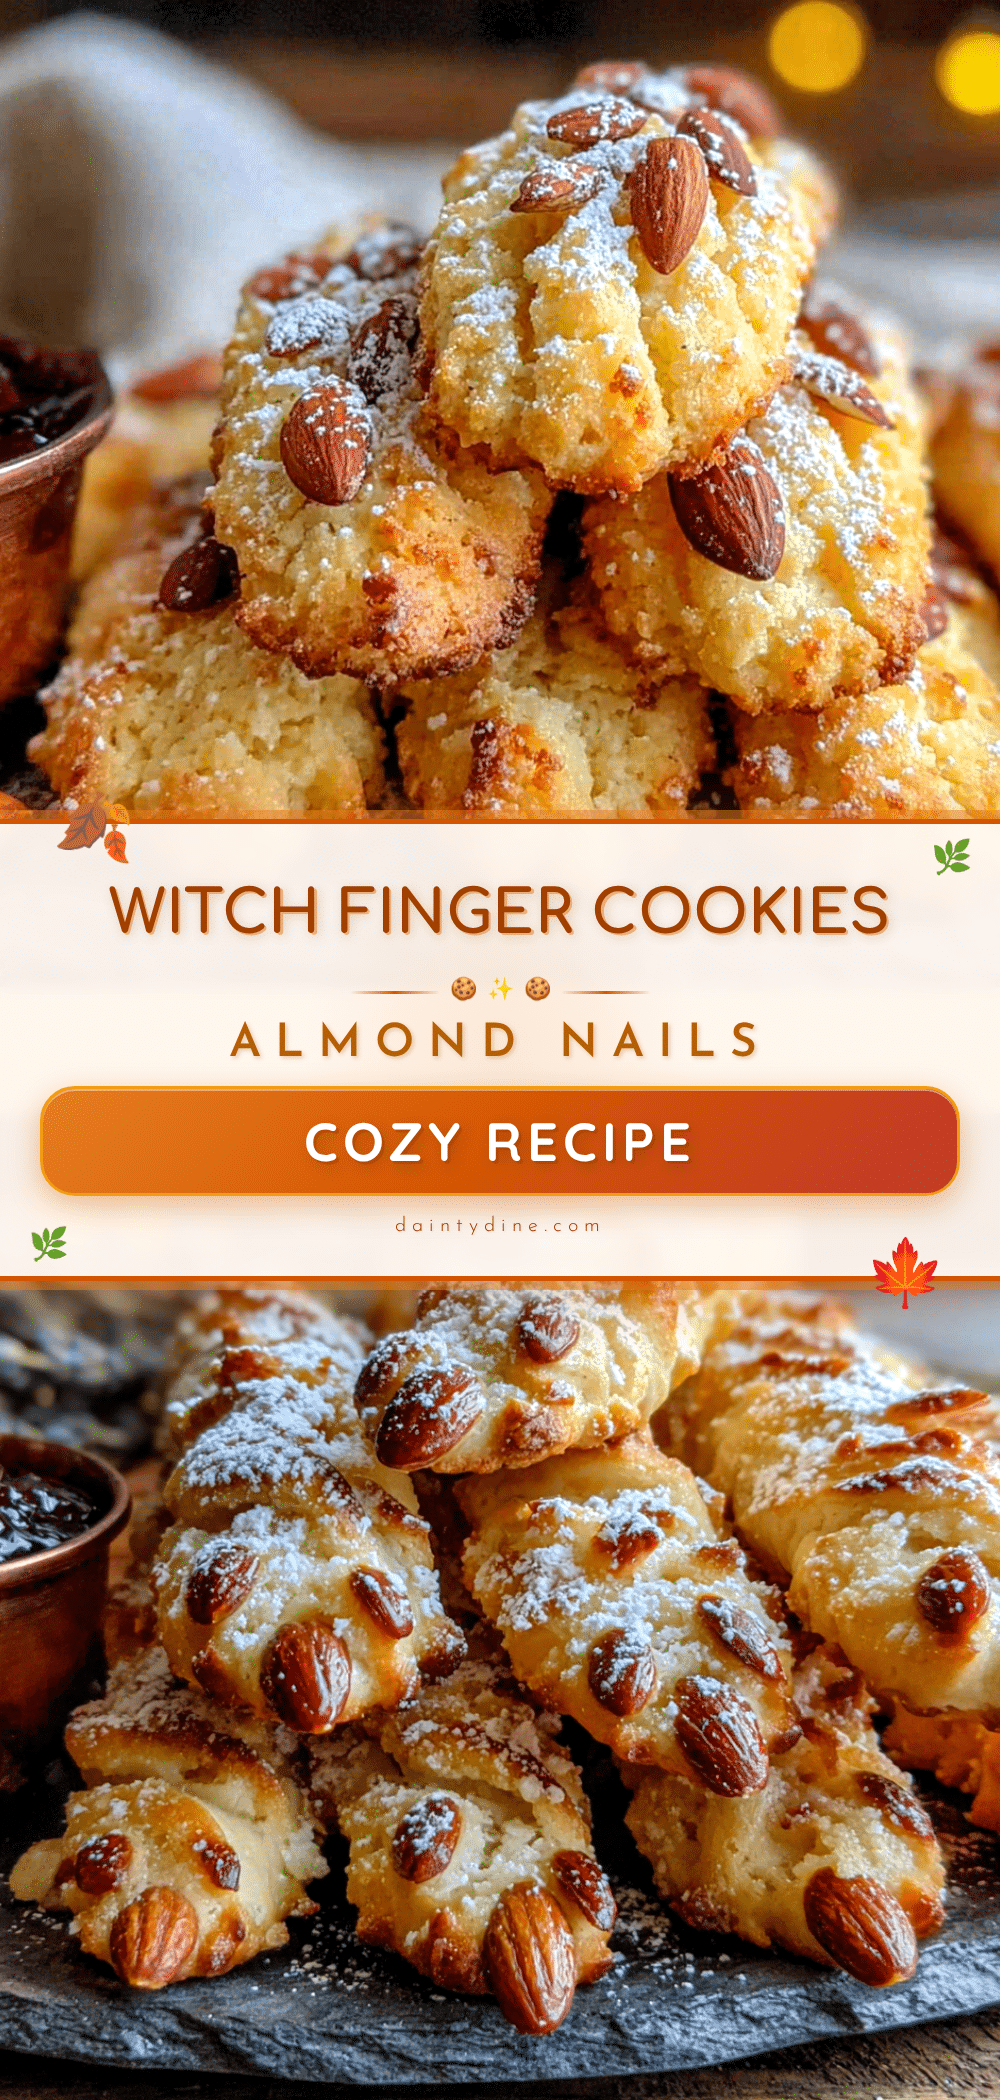
Best Witch Finger Cookies with Almond Nails (Easy Halloween Recipe)
These spooky and buttery witch finger cookies are the perfect Halloween treat. Made with simple ingredients and no special cutters, they look impressively creepy but are secretly easy to make.
- Prep Time: 30 minutes
- Cook Time: 15 minutes
- Total Time: 45 minutes
- Yield: 24 cookies 1x
- Category: Dessert
- Cuisine: American
Ingredients
- 1 cup (2 sticks) unsalted butter, softened
- 1 cup powdered sugar
- 1 large egg, separated
- 1 teaspoon vanilla extract
- 1/2 teaspoon almond extract
- 2 1/2 cups all-purpose flour, spooned and leveled
- 1/2 teaspoon salt
- 1/2 cup whole blanched almonds
- Red food coloring (gel or liquid)
Instructions
- Make the dough: In a large bowl, cream together the softened butter and powdered sugar with an electric mixer on medium speed until light and fluffy, about 2-3 minutes. Scrape down the sides of the bowl. Add the egg yolk (save the white!), vanilla extract, and almond extract. Beat until combined. In a separate bowl, whisk together the flour and salt. Gradually add the dry ingredients to the wet ingredients, mixing on low speed until a soft dough forms. Don’t overmix.
- Chill the dough: Wrap the dough in plastic wrap and flatten it into a disc. Refrigerate for at least 30 minutes.
- Prepare the almonds: Place the whole blanched almonds on a small plate. In a small bowl, lightly beat the reserved egg white with 1 teaspoon of water.
- Shape the fingers: Preheat your oven to 325°F (165°C). Line baking sheets with parchment paper. Take a small piece of dough (about 1 heaping tablespoon) and roll it into a log shape about 3 inches long, slightly thicker at one end and tapered at the other. Place on the prepared baking sheet.
- Add the nail: Take one blanched almond. Dip the wider end into the beaten egg white, then press it firmly onto the tapered fingertip of the cookie. The pointed end of the almond should stick out like a fingernail.
- Sculpt the details: Use the back of a paring knife (or a toothpick) to press lines into the dough to create knuckles. Make two or three indentations along the length of the finger. For a gory look, use a tiny bit of red food coloring on a toothpick to draw a thin line around the base of the almond ‘nail.’
- Freeze before baking: Place the shaped cookies on their baking sheets and put them in the freezer for 15-20 minutes.
- Bake: Bake the chilled cookies for 12-15 minutes, or until they are just set and the bottoms are very lightly golden. The tops should still be pale. Let them cool on the baking sheet for 5 minutes before transferring to a wire rack to cool completely.
- Add the finishing touch: Once the cookies are completely cool, dip the ‘cuticle’ end of the cookie into a small dish of red food coloring or thinned red jam. You can also use a toothpick to draw a few tiny ‘veins’ on the cookies.
Notes
Don’t skip the freezer step—it prevents the cookies from spreading. Use your hands to shape the cookies for a more realistic look. Start checking cookies at the 10-minute mark to avoid overbaking. For a vegan version, use vegan butter and a flax egg. For gluten-free, use a 1:1 gluten-free flour blend. Store in an airtight container at room temperature for up to 5 days. Unbaked shaped cookies can be frozen for up to 3 months.
Nutrition
- Serving Size: 1 cookie
- Calories: 145
- Sugar: 6
- Sodium: 50
- Fat: 9
- Saturated Fat: 5
- Carbohydrates: 15
- Protein: 2
Keywords: witch finger cookies, Halloween cookies, spooky cookies, shortbread cookies, almond cookies, easy Halloween recipe, no cookie cutter


