Love this? Save it for later!
Share the inspiration with your friends
I had claimed to hate themed baking for years. Honestly, the whole concept felt gimmicky—cookies that looked like eyeballs, cupcakes dyed strange colors, things that tasted more like food coloring than actual food. My friend Jenna, who lives three doors down and decorates her porch like a haunted graveyard every October, kept trying to recruit me for her annual Halloween bake swap. I politely declined every single year. “I’m just not that kind of baker,” I’d say, and I meant it. Then last October, I came home from a terrible Tuesday—the kind where the car made a weird noise and the grocery store was out of heavy cream—and found a note taped to my door. It was from Jenna. “Left something on your step. No pressure.” Inside a plain tin was a single cookie shaped like a spider, and I ate it standing in my kitchen before I even took off my coat. I ate it, and then I texted her for the recipe before I’d even swallowed the last bite. That’s how these Spooky Spider Cookies with Chocolate Cookie Crunch got me.
It wasn’t just the look of them, though they are frankly adorable in a creepy-cute way. It was the texture—that perfect snap when you bite into a chocolate cookie base, followed by the creamy richness of the frosting and the satisfying crunch of the pretzel legs. I mean, I was hooked. I spent the next weekend making batch after batch, tweaking the chocolate-to-crunch ratio, figuring out how to get the spider legs to stay put without sliding off. Maybe you’ve been there, rolling your eyes at a trend only to find yourself elbow-deep in powdered sugar a week later. These cookies are that for me. They’re the reason I finally caved, and honestly, I’m not sorry about it. Let me tell you, they’re worth every sticky finger.
Why You’ll Love This Recipe
These aren’t just another Halloween cookie that looks better than it tastes. I’ve tested this recipe more times than I care to admit—through burnt bottoms, collapsed legs, and one memorable incident involving a very angry dog and a cooling rack. What I landed on is a cookie that delivers on every single level.
- Quick & Easy : From start to finish, you’re looking at about 45 minutes. The cookie dough comes together in one bowl, and the decorating is so simple a six-year-old can do it (I tested that theory with my nephew). Perfect for last-minute Halloween parties or a fun weekend project.
- Simple Ingredients : No hunting down specialty baking items at three different stores. You likely have everything in your pantry right now—flour, sugar, cocoa powder, butter, and some basic decorations. The most exotic thing is a bag of chocolate sandwich cookies.
- Perfect for Halloween Parties : These are the cookies that disappear first from the dessert table. Kids love the spider design, and adults appreciate that they actually taste like a real dessert, not a sugar-propelled science experiment.
- Crowd-Pleaser : I’ve brought these to a church potluck, a kid’s birthday party, and a grown-up cocktail hour. They got devoured every single time. The chocolate crunch is universally appealing.
- Unbelievably Delicious : Here’s the thing—the cookie base is a dark, fudgy chocolate cookie that’s slightly crisp on the edges and soft in the middle. The frosting is a simple buttercream that doesn’t overpower. And the pretzel legs? They add this salty-crunchy contrast that makes you reach for another one.
What makes this recipe different is the texture. I’ve had spider cookies that were either too hard or too soft, where the legs fell off after ten minutes, or where the frosting was so sweet it hurt your teeth. This version nails the balance. The chocolate cookie crunch comes from finely crushed chocolate sandwich cookies folded into the dough, which adds both flavor and that irresistible sandy texture. It’s comfort food reimagined for a spooky season—faster than a from-scratch cake, but with the same soul-soothing satisfaction.
What Ingredients You Will Need
This recipe uses simple, wholesome ingredients to deliver bold chocolate flavor and that satisfying crunch without the fuss. Most of these are pantry staples, so you can whip up a batch whenever the Halloween spirit strikes.
- For the Cookie Dough:
- 1 cup (2 sticks) unsalted butter, softened (I prefer Kerrygold for its rich flavor)
- 1 cup granulated sugar
- 1 large egg, room temperature
- 1 teaspoon vanilla extract
- 2 cups all-purpose flour
- 1/2 cup unsweetened cocoa powder (use Dutch-process for a darker, richer color)
- 1/2 teaspoon baking soda
- 1/4 teaspoon salt
- 1 cup chocolate sandwich cookies, finely crushed (about 8-10 cookies, cream filling included)
- For the Chocolate Buttercream Frosting:
- 1/2 cup (1 stick) unsalted butter, softened
- 2 cups powdered sugar
- 1/4 cup unsweetened cocoa powder
- 2-3 tablespoons milk (adds creaminess)
- 1/2 teaspoon vanilla extract
- Pinch of salt
- For the Spider Decorations:
- 1/2 cup mini pretzel twists (for the legs)
- 24 candy eyes (available at most grocery stores or online)
- 2 tablespoons black decorating gel or melted chocolate chips (for the spider bodies and webs)
When selecting your chocolate sandwich cookies, I recommend Oreos for the most consistent texture, but any brand works. The cream filling adds sweetness and helps bind the crumbs into the dough. For the cocoa powder, I’ve tested this with both natural and Dutch-process, and Dutch-process gives a deeper, more dramatic color that looks better for Halloween. If you only have natural cocoa, it will still taste great—just a lighter shade of chocolate.
For the pretzels, look for the mini twists, not the sticks. The twists have that classic spider-leg shape with the little bumps, and they’re easier to break into four pieces per cookie. If you can’t find mini pretzels, you can use regular-sized ones and break them into smaller segments.
Equipment Needed
Nothing too fancy here. You probably have most of this already.
- Large mixing bowl and electric mixer (handheld or stand mixer both work fine)
- Measuring cups and spoons
- Baking sheets (I use two, so I can rotate them in the oven)
- Parchment paper or silicone baking mats (parchment is easier for cleanup)
- Rolling pin or food processor for crushing the sandwich cookies (a zip-top bag and a heavy pan work in a pinch)
- Wire cooling rack
- Small piping bag or zip-top bag for the frosting (I’ve used a sandwich bag in a crisis—just snip the corner)
If you don’t have a piping bag, don’t worry. A small offset spatula or even a butter knife works for spreading the frosting. The spider legs will cover up any imperfections anyway. I’ve made these in a friend’s kitchen with nothing but a whisk and a wooden spoon, and they turned out fine. The dough is forgiving.
Preparation Method
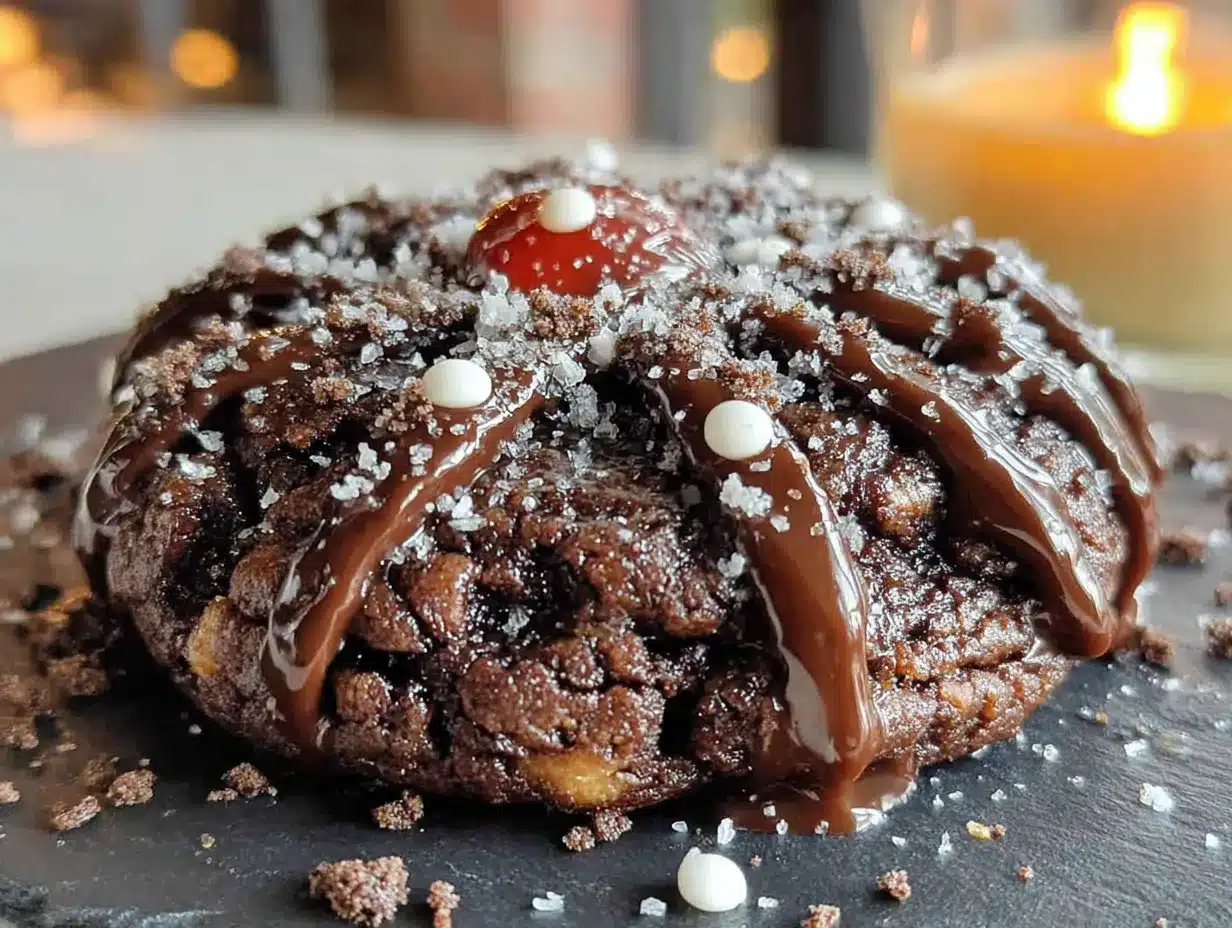
- Preheat and Prep: Preheat your oven to 350°F (175°C). Line two baking sheets with parchment paper. This prevents sticking and makes cleanup a breeze.
- Crush the Cookies: Place the chocolate sandwich cookies in a zip-top bag and crush them with a rolling pin until you have fine crumbs with a few slightly larger pieces. You want a texture similar to coarse sand. Alternatively, pulse them in a food processor. Set aside 2 tablespoons of the crumbs for sprinkling on top later.
- Cream the Butter and Sugar: In a large mixing bowl, beat the softened butter and granulated sugar together until light and fluffy, about 3-4 minutes. Scrape down the sides of the bowl halfway through. The mixture should look pale and airy.
- Add Wet Ingredients: Beat in the egg and vanilla extract until fully combined. The mixture might look slightly curdled at this point—that’s okay, it will come together when you add the dry ingredients.
- Combine Dry Ingredients: In a separate bowl, whisk together the flour, cocoa powder, baking soda, and salt. Gradually add this to the butter mixture, mixing on low speed until just combined. Be careful not to overmix, or the cookies will be tough.
- Fold in the Crushed Cookies: Gently fold in the crushed chocolate sandwich cookies (minus the reserved 2 tablespoons) using a spatula. The dough will be thick and slightly crumbly. Don’t worry if it looks a little dry—that’s the cookie crumbs absorbing moisture.
- Shape the Cookies: Scoop the dough into 1.5-tablespoon-sized balls (about the size of a walnut). Roll them between your palms until smooth. Place them on the prepared baking sheets, spacing them about 2 inches apart. Flatten each ball slightly with the bottom of a glass to form a disc about 1/2-inch thick.
- Bake: Bake for 10-12 minutes. The edges should look set, and the tops will be slightly cracked. Don’t overbake—they will continue to set on the baking sheet. Let them cool on the baking sheet for 5 minutes, then transfer to a wire rack to cool completely.
- Make the Frosting: While the cookies cool, make the frosting. Beat the softened butter until creamy. Gradually add the powdered sugar and cocoa powder, alternating with the milk. Beat in the vanilla and salt. The frosting should be thick but spreadable. If it’s too stiff, add another tablespoon of milk.
- Assemble the Spiders: Once the cookies are completely cool, spread a generous layer of chocolate frosting on top of each one, leaving a small border around the edge. The frosting acts as the glue for the spider parts.
- Add the Legs: Break each mini pretzel twist into four pieces (you’ll get two legs from each twist). Gently press four pretzel pieces into the frosting on each side of the cookie, angling them outward like spider legs. Press them in just enough so they stay put.
- Create the Spider Body: Use the black decorating gel or melted chocolate to pipe a small dollop in the center of the cookie, right where the legs meet. This forms the spider’s body. Immediately press two candy eyes into the gel, positioning them close together.
- Final Touch: Sprinkle the reserved crushed cookie crumbs around the edges of the frosting for a “dirt” effect. Let the cookies sit for 15 minutes to allow the frosting to set before serving.
Cooking Tips & Techniques
Here’s where I share the things I learned the hard way so you don’t have to. My first batch of these was a disaster—the legs slid off, the cookies spread too much, and I ended up with something that looked more like a melted octopus than a spider.
Don’t Skip Chilling the Dough: If your kitchen is warm, pop the shaped cookie dough in the fridge for 15 minutes before baking. This prevents the cookies from spreading too much and losing their shape. I forgot to do this once on a hot day, and my spiders ended up looking like flat pancakes.
Use Room Temperature Butter: For both the cookie dough and the frosting, softened butter is crucial. Cold butter won’t cream properly, and melted butter will make the cookies greasy. Leave it on the counter for about an hour before you start. If you’re in a hurry, cut it into small cubes and microwave it in 5-second bursts until soft but not melted.
Crush the Cookies Finely: Big chunks of cookie in the dough can create uneven texture and cause the cookies to break apart. Take the time to crush them into fine crumbs. I use a food processor for this—it takes about 30 seconds and gives consistent results.
Frosting Consistency is Key: The frosting needs to be thick enough to hold the pretzel legs in place but not so stiff that it cracks when you spread it. If your frosting is too thin, the legs will slide off. Add more powdered sugar a tablespoon at a time until it holds its shape.
Work in Batches: Don’t try to decorate all 24 cookies at once. The frosting will start to set, and the legs won’t stick. I decorate 6 cookies at a time, adding the legs and eyes immediately after frosting each one.
Patience with the Eyes: The candy eyes are small and can be fiddly. Use a pair of tweezers to place them if you have steady hands. Otherwise, just use your fingertips—it’s fine if they’re not perfectly aligned. Imperfect spiders look more authentic anyway.
Variations & Adaptations
This recipe is surprisingly flexible. I’ve played around with it quite a bit, especially when I ran out of a key ingredient mid-batch.
Gluten-Free Version: Substitute the all-purpose flour with a 1:1 gluten-free baking flour blend. Use gluten-free chocolate sandwich cookies and gluten-free pretzels. The texture will be slightly more crumbly, but the taste is still fantastic. I tried this for a friend with celiac disease, and she said they were the best Halloween cookies she’d had in years.
Peanut Butter Spider Cookies: Replace 1/4 cup of the butter with creamy peanut butter. Add it when you cream the butter and sugar. The peanut butter adds a savory note that pairs beautifully with the chocolate. Just be aware of any nut allergies if you’re serving these at a party.
White Chocolate Spiders: Instead of chocolate buttercream, use a white chocolate ganache or a simple vanilla buttercream. The white frosting against the dark cookie creates a striking contrast. Top with black and orange sprinkles for a more festive look.
Vegan Adaptation: Use plant-based butter and a flax egg (1 tablespoon ground flaxseed mixed with 3 tablespoons water, left to sit for 5 minutes). Use dairy-free chocolate sandwich cookies and vegan candy eyes. The cookies will be slightly less tender, but still delicious.
Spider Web Variation: Instead of making individual spider bodies, pipe a thin spider web pattern on top of the frosting using white or black decorating gel. Place a single candy spider (you can buy these at craft stores) in the center of the web. This is easier for younger kids to help with.
I personally love the white chocolate version. I made it for a Halloween brunch last year, and people kept asking if they were from a bakery. They’re that good.
Serving & Storage Suggestions
These cookies are best served at room temperature, which lets the frosting soften slightly and the pretzel legs maintain their crunch. Arrange them on a platter lined with black or orange tissue paper for a spooky presentation. If you’re feeling extra festive, scatter some candy corn or gummy worms around the base.
For a Halloween party, I like to serve these alongside a glass of cold milk or a warm mug of hot chocolate. The chocolate-on-chocolate combination is pure comfort. If you’re serving adults, a glass of red wine or a dark stout beer pairs surprisingly well with the rich chocolate flavor.
Storage: Store the decorated cookies in an airtight container at room temperature for up to 5 days. Place a piece of parchment paper between layers to prevent the pretzel legs from sticking to each other. Do not refrigerate them—the cold will make the frosting hard and the pretzels go stale.
Freezing: You can freeze the undecorated cookie bases for up to 3 months. Bake and cool them completely, then place them in a single layer in a freezer-safe container. When you’re ready to serve, thaw them at room temperature, then make the frosting and decorate. The cookies taste freshly baked this way.
Make-Ahead Tip: The cookie dough itself can be refrigerated for up to 3 days. Wrap it tightly in plastic wrap and let it sit at room temperature for 10 minutes before shaping and baking. This is a lifesaver if you’re hosting a Halloween party and want to spread out the prep work.
One thing I’ve noticed—these cookies actually taste better the day after they’re made. The flavors meld together, and the cookie softens slightly while the pretzels stay crunchy. It’s a texture thing that really works.
Nutritional Information & Benefits
Let’s be real—these are a treat, not a health food. But that doesn’t mean they can’t have a place in a balanced diet. One cookie (based on the recipe making 24) contains approximately:
- Calories: 210
- Fat: 11g
- Carbohydrates: 28g
- Protein: 3g
- Fiber: 2g
- Sugar: 16g
The cocoa powder in these cookies is a surprising source of antioxidants. Dark chocolate has been linked to improved heart health and mood—though I’m not saying these cookies are a health supplement. The pretzels add a small amount of sodium, which balances the sweetness nicely.
For those with dietary restrictions: This recipe contains gluten, dairy, and eggs. I’ve included gluten-free and vegan variations above. The cookies are nut-free as written, making them a safe choice for school parties where nut allergies are a concern.
My personal philosophy? Life is short. Enjoy the cookie. Just maybe don’t eat six of them in one sitting. I speak from experience.
Conclusion
These Spooky Spider Cookies with Chocolate Cookie Crunch are the Halloween treat that finally made me a believer. They’re fun to make, even more fun to eat, and they have that perfect balance of creepy and cute that makes everyone smile. Whether you’re hosting a costume party, sending treats to school, or just looking for a way to get into the spooky spirit, these cookies deliver.
I love how forgiving this recipe is. You can make them as perfect or as imperfect as you want. The spiders don’t have to be symmetrical. The legs can be a little crooked. Honestly, the wonky ones are the most charming. That’s the thing about Halloween baking—it’s supposed to be a little messy, a little imperfect, and a whole lot of fun.
So go ahead, give them a try. Pin this recipe for later, and when you make them, tag me in your photos—I want to see your spider creations! Drop a comment below and let me know if you tried any of the variations or came up with your own. Happy Halloween, and happy baking!
Frequently Asked Questions
Can I use a different type of cookie for the base?
Absolutely. While the chocolate cookie crunch base is my favorite, you can use a sugar cookie or even a shortbread base. Just adjust the baking time accordingly. Sugar cookies will be lighter and sweeter, while shortbread will be more buttery. The chocolate base complements the pretzel legs best, in my opinion.
How do I keep the pretzel legs from falling off?
The key is the frosting consistency. It needs to be thick enough to act as glue. If your frosting is too thin, the legs will slide off. Also, press the pretzels in gently but firmly, and let the cookies sit for at least 15 minutes before moving them. If you’re transporting them, place them in a single layer in a container with a tight-fitting lid.
Can I make these cookies ahead of time for a party?
Yes! Bake the cookie bases up to 3 days ahead and store them in an airtight container. Make the frosting and decorate them the day of your party for the freshest results. The pretzel legs will stay crunchiest if added within a few hours of serving.
What can I use instead of candy eyes?
If you can’t find candy eyes, you can make your own. Pipe a small dot of white frosting, then place a tiny chocolate chip or black sprinkle on top. You can also use white chocolate chips with a dot of black decorating gel. It’s a little more work, but the effect is the same.
My cookies spread too much in the oven. What went wrong?
This usually happens for one of three reasons: the dough was too warm, the butter was too soft, or the baking sheet was greased. Chill the shaped dough for 15 minutes before baking, make sure your butter is softened but not melted, and always use parchment paper instead of greasing the pan. If the cookies still spread, try adding an extra tablespoon of flour to the dough next time.
Pin This Recipe!
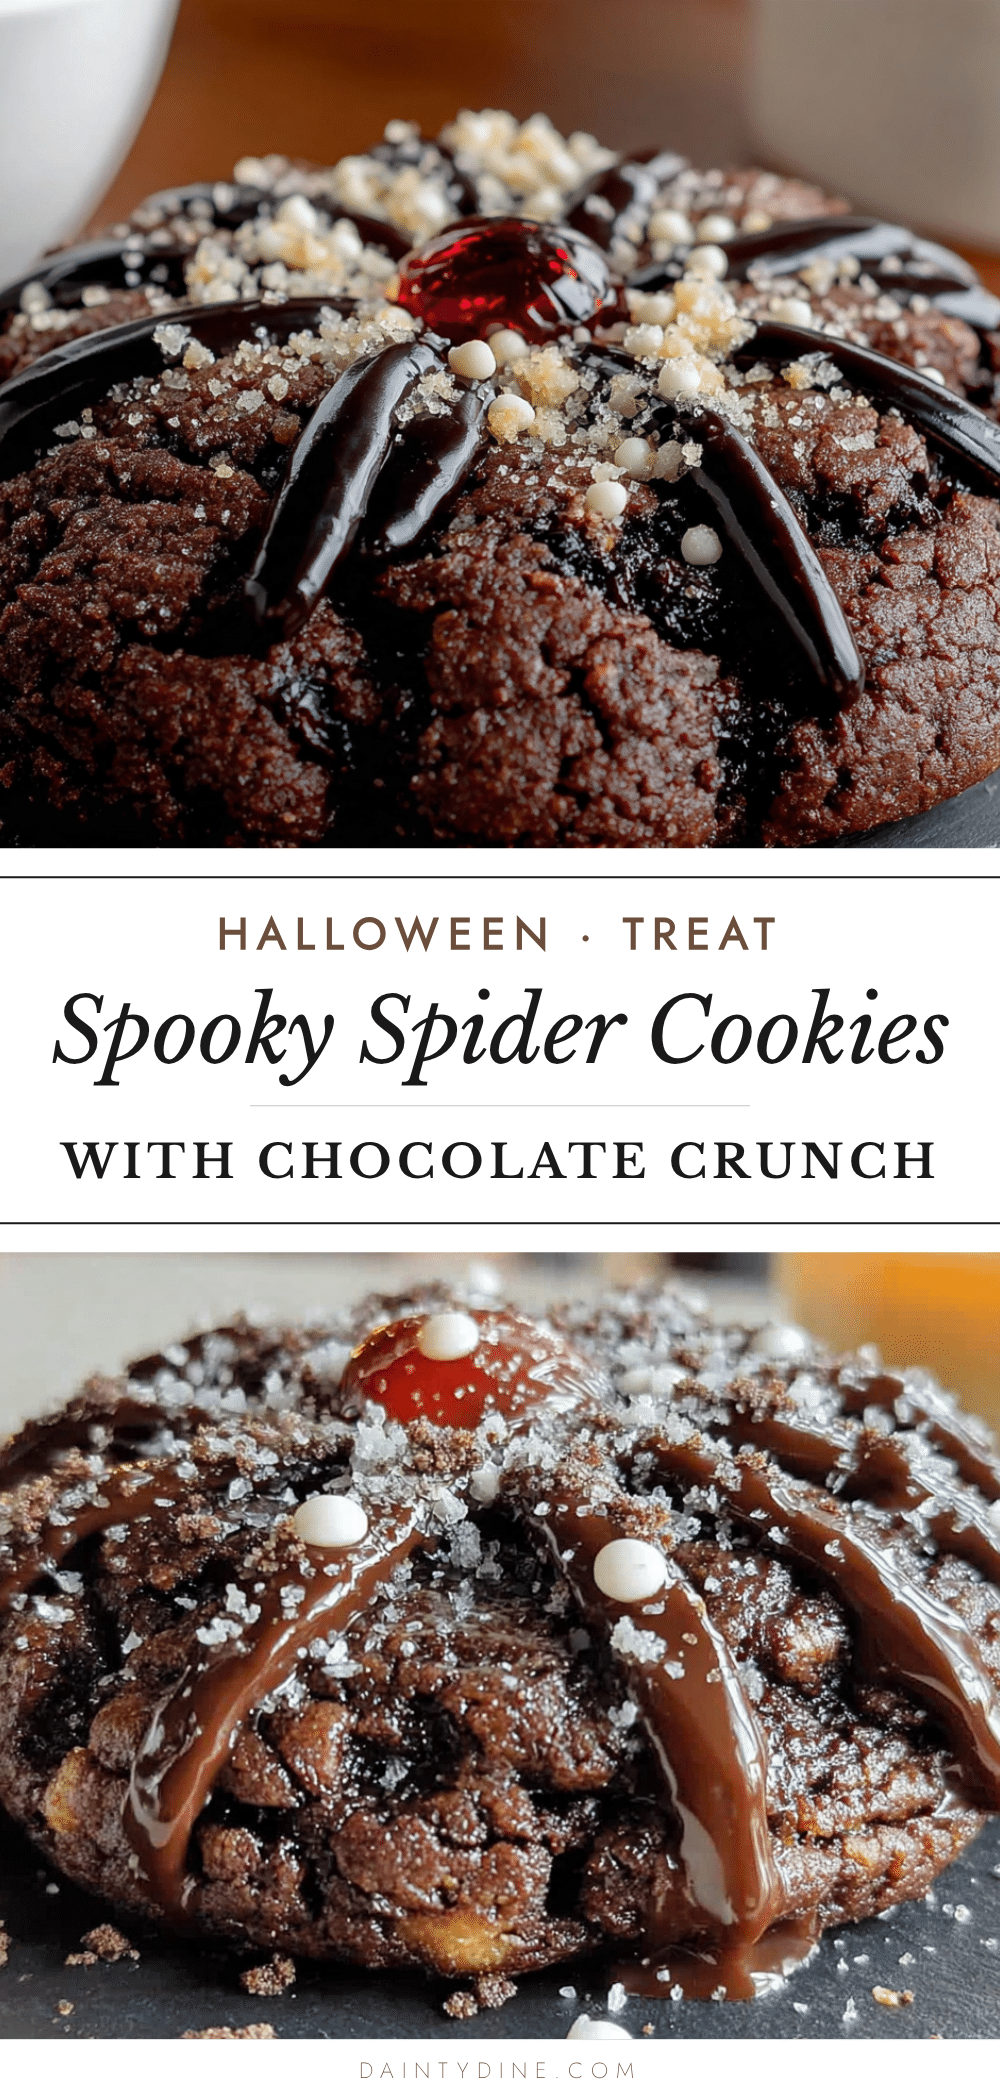
Best Spooky Spider Cookies: Easy Chocolate Crunch Treats
These Spooky Spider Cookies are the perfect Halloween treat—dark, fudgy chocolate cookies topped with rich buttercream frosting, crunchy pretzel legs, and candy eyes. They’re quick, easy, and guaranteed to be a crowd-pleaser.
- Prep Time: 20 minutes
- Cook Time: 12 minutes
- Total Time: 45 minutes
- Yield: 24 cookies 1x
- Category: Dessert
- Cuisine: American
Ingredients
- 1 cup (2 sticks) unsalted butter, softened
- 1 cup granulated sugar
- 1 large egg, room temperature
- 1 teaspoon vanilla extract
- 2 cups all-purpose flour
- 1/2 cup unsweetened cocoa powder (Dutch-process preferred)
- 1/2 teaspoon baking soda
- 1/4 teaspoon salt
- 1 cup chocolate sandwich cookies, finely crushed (about 8–10 cookies, cream filling included)
- 1/2 cup (1 stick) unsalted butter, softened (for frosting)
- 2 cups powdered sugar
- 1/4 cup unsweetened cocoa powder (for frosting)
- 2–3 tablespoons milk
- 1/2 teaspoon vanilla extract (for frosting)
- Pinch of salt (for frosting)
- 1/2 cup mini pretzel twists (for legs)
- 24 candy eyes
- 2 tablespoons black decorating gel or melted chocolate chips
Instructions
- Preheat oven to 350°F (175°C). Line two baking sheets with parchment paper.
- Crush chocolate sandwich cookies in a zip-top bag with a rolling pin or in a food processor until fine crumbs form. Set aside 2 tablespoons for sprinkling.
- In a large bowl, beat softened butter and granulated sugar until light and fluffy, about 3-4 minutes.
- Beat in egg and vanilla extract until combined.
- In a separate bowl, whisk together flour, cocoa powder, baking soda, and salt. Gradually add to butter mixture, mixing on low until just combined.
- Gently fold in crushed cookies (minus reserved 2 tablespoons) with a spatula.
- Scoop dough into 1.5-tablespoon balls (walnut-sized). Roll smooth, place on prepared sheets 2 inches apart, and flatten slightly with a glass to 1/2-inch thick.
- Bake for 10-12 minutes until edges are set and tops are slightly cracked. Cool on sheet for 5 minutes, then transfer to a wire rack to cool completely.
- For frosting: Beat softened butter until creamy. Gradually add powdered sugar and cocoa powder, alternating with milk. Beat in vanilla and salt until thick and spreadable.
- Once cookies are cool, spread a generous layer of frosting on each, leaving a small border.
- Break each mini pretzel twist into four pieces. Gently press four pieces into the frosting on each side of the cookie, angling outward like spider legs.
- Pipe a small dollop of black decorating gel or melted chocolate in the center for the spider body. Immediately press two candy eyes into the gel.
- Sprinkle reserved crushed cookie crumbs around the edges for a ‘dirt’ effect. Let cookies sit for 15 minutes to set before serving.
Notes
For best results, chill shaped dough for 15 minutes if kitchen is warm to prevent spreading. Use room temperature butter for both dough and frosting. Crush cookies finely for even texture. Frosting should be thick enough to hold pretzel legs. Decorate in batches of 6 to prevent frosting from setting. Cookies taste even better the day after baking.
Nutrition
- Serving Size: 1 cookie
- Calories: 210
- Sugar: 16
- Sodium: 120
- Fat: 11
- Saturated Fat: 6
- Carbohydrates: 28
- Fiber: 2
- Protein: 3
Keywords: Halloween cookies, spider cookies, chocolate crunch cookies, easy Halloween treats, spooky cookies


