Love this? Save it for later!
Share the inspiration with your friends
My neighbor Jen wasn’t trying to impress anyone. I’d stopped by to borrow a screwdriver—mine had vanished into the black hole of my junk drawer—and the smell hit me before I even got past her screen door. Butter. Brown sugar. Something warm and deeply vanilla. She was standing at her counter in old sweatpants, scraping a spatula across a baking sheet, and she barely looked up. “Oh, these? They’re just cookies. I was craving something sweet.” Just cookies. She said it like it was nothing, like the scent hadn’t stopped me mid-step in her entryway.
I watched her work while she handed me the screwdriver. No chilled dough. No waiting around. She mixed everything in one bowl—honestly, it looked like she barely measured—and scooped them onto the pan while the oven beeped. Twenty minutes later, she was handing me one still warm, the edges crispy and the center so soft it practically melted on my tongue. “You gotta eat them fast,” she said, grabbing one for herself. “That’s the whole point.”
I stood there in her kitchen, holding a cookie that had come together in less time than it takes me to decide what to watch on Netflix, and I felt a little cheated. All those years of chilling dough, of planning ahead, of acting like cookie-making was some kind of science project. And here was Jen, in her sweatpants, making the best chocolate chip cookies I’d ever had without a single ounce of effort. Maybe you’ve been there—that moment when someone shows you a simpler way and you can’t believe you never thought of it yourself.
I asked for the recipe, obviously. She shrugged and scribbled it on a sticky note. No fancy technique. No secret ingredient. Just a small batch of cookies that come together fast, skip the chill time entirely, and deliver that perfect texture every single time. I’ve been making them ever since, and let me tell you—they’ve ruined every other chocolate chip cookie for me. These little beauties are the reason I stopped overcomplicating things.
Why You’ll Love This Recipe
Let’s be real—most chocolate chip cookie recipes require planning. You have to chill the dough for at least an hour, sometimes overnight, and by the time you actually get cookies, that craving has either passed or turned into something else entirely. These cookies fix that problem completely.
- No Chill Time Required : Mix, scoop, bake. That’s it. From start to warm cookie in your hand in under 25 minutes. Perfect for when that sweet tooth hits hard and fast.
- Small Batch Perfection : This recipe makes exactly 6 to 8 cookies. No giant batch that leaves you with stale leftovers or forces you to freeze half the dough. Just enough for a treat without the temptation of a full dozen staring at you from the counter.
- Simple Pantry Ingredients : Butter, sugar, flour, an egg, chocolate chips. You probably have everything already. No trips to the store for buttermilk or specialty extracts.
- Perfect Texture Every Time : The edges get golden and slightly crisp while the centers stay soft and chewy. It’s that ideal cookie texture that usually requires chilling, but somehow works here without it.
- Foolproof for Beginners : If you’ve ever been intimidated by cookie recipes that demand precision, this one is forgiving. I’ve made it with slightly melted butter, with a random extra splash of vanilla, even with whatever chocolate I had in the pantry. It always works.
What makes this recipe different from the rest? It’s the ratio. After testing this about five times in my own kitchen—because I couldn’t believe it worked without chilling—I realized the balance of melted butter to flour is what does the magic. The dough comes together soft and almost scoopable, spreading just enough in the oven to create those crispy edges without turning into flat puddles. It’s not just another version of chocolate chip cookies. It’s the version you’ll actually make on a Tuesday night when you need something warm and comforting.
These cookies are the kind that make you close your eyes after the first bite. Honestly, they’re comfort food reimagined—faster, simpler, but with the same soul-soothing satisfaction. Perfect for impressing someone who drops by unexpectedly, or for turning a regular evening into something a little more special without any stress.
What Ingredients You Will Need
This recipe uses simple, wholesome ingredients to deliver big flavor without the fuss. Most of these are pantry staples, which is exactly the point—you don’t need anything fancy to make a truly great cookie.
- Unsalted butter, 4 tablespoons (56g), melted and slightly cooled. I use unsalted so I can control the salt level myself. If you only have salted butter, just reduce the added salt to an eighth of a teaspoon. Let the butter cool for a couple minutes after melting—you don’t want it hot enough to cook the egg.
- Light brown sugar, ¼ cup (50g), packed. This is where the chewiness comes from. Brown sugar has molasses in it, which keeps the cookies soft and adds that deep caramel-like flavor. I prefer light brown sugar here—dark brown can overpower the chocolate a bit.
- Granulated sugar, 2 tablespoons (25g). Just a little bit for sweetness and to help the edges crisp up. The combo of both sugars is what gives these cookies their perfect texture contrast.
- Large egg yolk, 1. You read that right—just the yolk. Using only the yolk instead of the whole egg reduces moisture, which helps the cookies hold their shape without chilling. Save the white for scrambled eggs tomorrow.
- Vanilla extract, ½ teaspoon. Pure vanilla if you have it, imitation works fine too. I honestly can’t tell the difference in cookies once they’re baked. Don’t skip it though—vanilla rounds out the flavor in a way that’s subtle but noticeable if it’s missing.
- All-purpose flour, ½ cup plus 1 tablespoon (70g). Spoon and level your flour—don’t scoop straight from the bag. Packed flour will make your cookies dry and cakey instead of chewy. I learned this the hard way after a batch of sad, crumbly cookies.
- Baking soda, ¼ teaspoon. This helps the cookies spread just a little and gives them that slight lift. Make sure it’s fresh—old baking soda won’t do much.
- Salt, ¼ teaspoon. Salt isn’t just for flavor—it balances the sweetness and enhances the chocolate. I use fine sea salt for even distribution.
- Semi-sweet chocolate chips, ⅓ cup (60g). I prefer Ghirardelli or Guittard for the best melt and flavor, but any brand works. You can also chop up a chocolate bar if you want bigger puddles of chocolate throughout. Dark chocolate chips are great here too if you like a less sweet cookie.
- Flaky sea salt, for finishing (optional but highly recommended). A tiny sprinkle on top right when they come out of the oven makes a huge difference. It’s that salty-sweet thing that keeps you reaching for just one more.
Equipment Needed
The beauty of this recipe is that you don’t need much. Here’s what you’ll want on hand:
- Medium mixing bowl — Any bowl works, but I prefer a wide one so I can mix without flinging flour everywhere. My favorite is a simple ceramic bowl I picked up at a thrift store for two dollars.
- Whisk — For combining the wet ingredients. A fork works in a pinch, but a whisk makes it easier to get the egg yolk fully incorporated.
- Rubber spatula or wooden spoon — For folding in the flour and chocolate chips. I use a spatula because it scrapes the sides well, but a spoon is totally fine.
- Measuring cups and spoons — Accurate measurements matter here since the batch is small. A kitchen scale is even better if you have one—it’s more precise and means fewer dishes.
- Baking sheet — A standard half-sheet pan works great. No need to grease it—the butter in the dough prevents sticking.
- Parchment paper or silicone baking mat — Parchment paper makes cleanup effortless and helps the cookies brown evenly. I’ve used both and honestly prefer parchment for the crispier bottoms.
- Cookie scoop or tablespoon — For evenly sized cookies. A #40 scoop (about 1.5 tablespoons) is perfect for this batch size. If you don’t have one, just use two spoons to portion the dough.
- Cooling rack — Optional but nice. Letting the cookies cool on the pan for a few minutes before transferring them to a rack helps them set without breaking.
Preparation Method
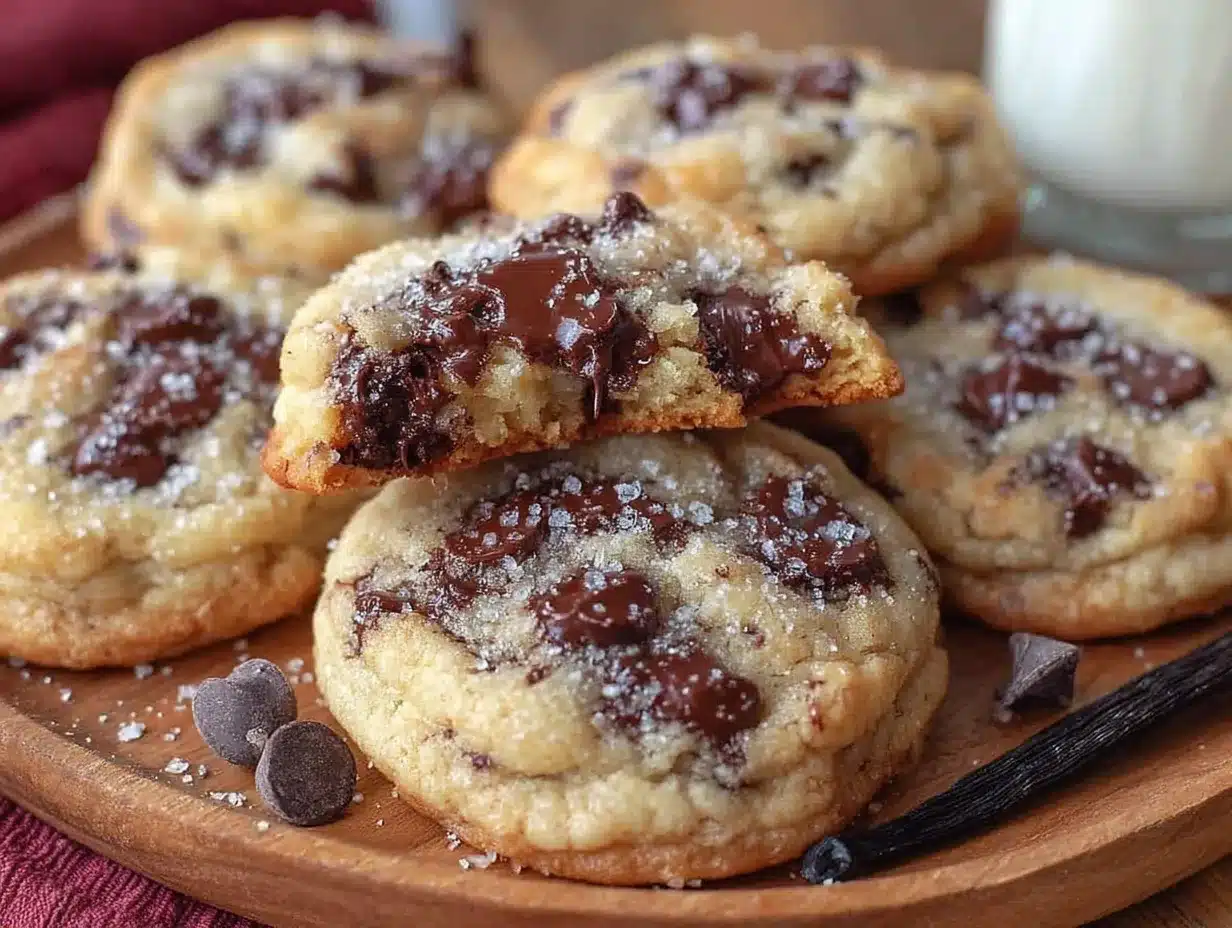
Preheat your oven to 350°F (175°C). Line a baking sheet with parchment paper or a silicone mat. This takes two minutes and saves you from scrubbing later.
- Melt the butter. Place the 4 tablespoons of butter in a microwave-safe bowl and heat in 15-second bursts until just melted. You want it liquid but not boiling—about 30 seconds total in my microwave. Set it aside to cool for a minute or two while you gather the other ingredients. If you add the sugar to hot butter, it’ll melt the sugar too much and change the texture.
- Combine the sugars and butter. In your medium mixing bowl, add the melted butter, ¼ cup packed brown sugar, and 2 tablespoons granulated sugar. Whisk them together until smooth and well combined. The mixture should look like wet sand—grainy but uniform. This takes about 30 seconds. Don’t worry if it separates a little; that’s normal.
- Add the egg yolk and vanilla. Drop in the egg yolk and ½ teaspoon vanilla extract. Whisk vigorously for about 30 seconds until the mixture turns slightly lighter in color and looks a bit thicker. This step is important—you’re incorporating air, which helps the cookies have a tender texture. If you just stir lazily, the cookies will be denser. I know this because I’ve done both.
- Mix the dry ingredients separately. In a small bowl, whisk together ½ cup plus 1 tablespoon flour, ¼ teaspoon baking soda, and ¼ teaspoon salt. This ensures the baking soda and salt are evenly distributed. I used to skip this step and add them directly to the wet mixture, but I ended up with occasional bitter pockets of baking soda. Not pleasant.
- Combine wet and dry. Add the flour mixture to the butter mixture. Use your rubber spatula or wooden spoon to fold everything together gently. Stir just until you no longer see streaks of flour—overmixing develops gluten and makes the cookies tough. A few streaks are better than overmixed dough. Stop when it looks like a cohesive, soft dough.
- Fold in the chocolate chips. Add the ⅓ cup chocolate chips and fold them in with a few strokes. Make sure they’re evenly distributed throughout the dough. If you’re using chopped chocolate, save a few bigger pieces to press onto the tops of the dough balls before baking—it makes them look prettier.
- Scoop the dough. Use your cookie scoop or a tablespoon to portion the dough into 6 to 8 equal balls. Place them on the prepared baking sheet, spacing them about 2 inches apart. They’ll spread a little but not hugely. If you want bakery-style cookies, roll each ball between your palms until smooth—this gives them a more uniform shape as they bake.
- Bake immediately. No chilling! Pop the baking sheet into the preheated oven and bake for 10 to 12 minutes. At 10 minutes, the cookies will be soft and slightly underdone in the center—my preferred texture. At 12 minutes, the edges will be more golden and the centers will be set but still soft. The cookies will look puffy and slightly underbaked when you pull them out. That’s exactly what you want—they continue cooking on the hot pan.
- Add flaky salt (optional). As soon as the cookies come out of the oven, sprinkle a tiny pinch of flaky sea salt on top of each one. This step is entirely optional, but it takes these cookies from great to unforgettable. The salt crystals add little bursts of savory that make the chocolate taste even richer.
- Cool on the pan. Let the cookies rest on the baking sheet for 5 minutes. This is crucial—they’re too fragile to move right away. After 5 minutes, transfer them to a cooling rack if you want, or just eat them straight off the pan like I usually do. They’ll firm up as they cool but stay soft in the middle.
The whole process takes about 20 minutes from start to warm cookie. It’s almost too easy, honestly. The first time I made these, I kept checking the oven because I couldn’t believe they were actually going to work without chilling. They did. They absolutely did.
Cooking Tips & Techniques
After making these cookies more times than I care to admit, I’ve picked up a few things that make the process smoother and the results more consistent. Here’s what I’ve learned:
Let the butter cool. I made the mistake of using butter straight from the microwave once, and the dough turned into a greasy mess. The cookies spread too much and came out flat. Let the melted butter sit for a couple minutes before adding the sugars. It should be warm but not hot—about the temperature of a warm bath.
Use a kitchen scale if you have one. Flour measurement is where most cookie recipes go wrong. Scooping flour directly from the bag can add up to 25% more flour than you need, which makes cookies dry and cakey. Weighing your flour at 70 grams total for this recipe guarantees perfect results every time. I resisted buying a scale for years, and now I use it for almost everything.
Don’t overbake. This is probably the most common cookie mistake. Cookies continue baking on the hot pan after they come out of the oven, so pulling them when they look slightly underdone is the right move. The centers should look soft and puffy, not fully set. If you wait until they look completely done in the oven, they’ll be overbaked and crunchy all the way through.
Chill the dough if you absolutely must. Look, I know this recipe is called no-chill, and that’s the whole point. But if you have the time and want an even chewier texture, you can pop the scooped dough balls in the fridge for 30 minutes. It changes the spread slightly—they’ll be a bit thicker—but they’re still delicious. I’ve done both ways and honestly prefer the straight-to-oven version for convenience.
Double the batch if you’re feeding a crowd. The small batch makes 6 to 8 cookies, which is perfect for two people or one person with limited self-control. If you need more, just double everything. The method stays exactly the same—no adjustments needed for the no-chill technique.
Variations & Adaptations
One of the best things about this recipe is how easy it is to adapt. Here are some variations I’ve tried and loved:
Chocolate Lover’s Version : Swap 1 tablespoon of flour for 1 tablespoon of unsweetened cocoa powder. Use dark chocolate chips instead of semi-sweet. The result is a double-chocolate cookie that’s rich and deeply chocolatey without being too sweet. My friend Sarah requests these every time I bring cookies to her place.
Gluten-Free Adaptation : Replace the all-purpose flour with a 1-to-1 gluten-free baking flour blend. I’ve used both Bob’s Red Mill and King Arthur brands with good results. The texture is slightly more delicate—they spread a tiny bit more—but the taste is nearly identical. Just make sure your blend contains xanthan gum for structure.
Nutty Crunch : Add ¼ cup of toasted chopped walnuts or pecans along with the chocolate chips. Toast the nuts in a dry pan for 3-4 minutes before adding them—it brings out their flavor and keeps them crunchy in the baked cookies. I did this on a whim one day and now it’s my go-to variation.
White Chocolate & Macadamia : Swap the semi-sweet chips for white chocolate chips and add ¼ cup chopped macadamia nuts. This variation feels a little more indulgent, almost like a fancy bakery cookie. The white chocolate gets beautifully golden in spots as it bakes.
Vegan Option : Use melted coconut oil or vegan butter instead of dairy butter. Replace the egg yolk with 1 tablespoon of aquafaba (the liquid from a can of chickpeas) mixed with 1 teaspoon of cornstarch. I tested this for a friend with a dairy allergy, and honestly, the texture was remarkably close to the original. The cookies are slightly more fragile but still delicious.
Feel free to experiment with mix-ins too. Dried cherries, toffee bits, shredded coconut, or even a pinch of cinnamon can transform these cookies into something uniquely yours. That’s the beauty of a simple base recipe—it’s a canvas for whatever you’re craving.
Serving & Storage Suggestions
These cookies are best served warm, straight from the oven. That’s not just a suggestion—it’s really the whole point of a no-chill recipe. The centers are soft and gooey, the edges are crisp, and the chocolate is still melty. Serve them with a glass of cold milk or a hot cup of coffee for the full experience.
If you’re serving them to guests, arrange them on a plate or board with the flaky salt side up. They look beautiful just as they are—no need for fancy plating. A small bowl of extra chocolate chips or a dollop of vanilla ice cream on the side never hurts though.
For storage, keep any leftover cookies in an airtight container at room temperature. They’ll stay soft for about 3 days. The edges might lose some of their initial crispness, but the flavor actually improves as they sit—the flavors meld together overnight. I’ve been known to hide a couple in the back of the pantry for “emergencies.”
To reheat, pop a cookie in the microwave for 10 seconds. It brings back that just-baked softness and melts the chocolate chips again. You can also warm them in a 300°F oven for 3-4 minutes if you’re reheating several at once.
These cookies also freeze beautifully. Place the baked and cooled cookies in a single layer in a freezer bag or container. They’ll keep for up to 3 months. Thaw at room temperature for about 15 minutes, or microwave for 15 seconds straight from frozen. I make a double batch sometimes just to have some stashed away for unexpected cravings.
Nutritional Information & Benefits
Per cookie (based on 8 cookies per batch): Approximately 180 calories, 10g fat, 22g carbohydrates, 2g protein, 14g sugar, 1g fiber. These values are estimates and will vary based on specific ingredients and portion sizes.
While these are definitely a treat, there are a few redeeming qualities. The butter provides vitamin A and healthy fats, and the dark chocolate chips contain antioxidants and a small amount of iron. Using an egg yolk instead of a whole egg concentrates the protein and healthy fats while reducing the overall moisture content—which is actually what makes the no-chill technique work.
For a slightly lighter version, you can reduce the sugar by 1 tablespoon or use a sugar substitute like monk fruit sweetener. I’ve tried this and the texture changes a bit—the cookies are less chewy—but they’re still good. This recipe is also naturally nut-free if you skip the nut variations, and it can be made gluten-free or vegan with the substitutions I mentioned earlier.
These cookies are proof that you don’t need to sacrifice flavor for convenience. They’re a small indulgence that fits into a balanced lifestyle—the kind of treat that satisfies a craving without derailing your whole day. And honestly, sometimes that’s exactly what you need.
Conclusion
These small batch no-chill chocolate chip cookies have genuinely changed the way I think about baking. I used to avoid making cookies because the chilling time felt like such a hassle—it turned a spontaneous craving into a planned event. Now I can have warm, perfect cookies in less time than it takes to watch a single episode of a show. That’s a game changer.
I hope you give these a try, whether it’s for a late-night snack, a surprise for someone you love, or just because you deserve something warm and delicious. Feel free to customize them however you like—swap the chocolate, add nuts, make them gluten-free. The recipe is forgiving and adaptable, which is exactly what a good recipe should be.
If you make these cookies, I’d love to hear how they turn out. Drop a comment below and let me know if you tried any variations, or share a photo of your batch. And if you’re looking for another quick sweet treat, you might enjoy my quick cinnamon rolls or these no-bake peanut butter bars for another no-fuss dessert option. Happy baking, friends—go make something delicious without overthinking it.
Frequently Asked Questions
Can I use whole eggs instead of just the yolk?
You can, but the cookies will spread more and be slightly thinner. The egg white adds extra moisture, which changes the texture. If you use a whole egg, you might want to add an extra tablespoon of flour to compensate. I’ve tested it both ways, and the yolk-only version gives the best chewy texture without chilling.
Why did my cookies turn out flat?
Flat cookies usually mean the butter was too warm or the flour was under-measured. Make sure your melted butter has cooled slightly before mixing, and spoon your flour into the measuring cup instead of scooping directly from the bag. Old baking soda can also cause flat cookies—check that yours is fresh.
Can I double this recipe?
Absolutely. Double all ingredients and follow the same method. The baking time stays the same. Just make sure your baking sheet isn’t overcrowded—bake in batches if needed. I double this all the time when I’m bringing cookies to a gathering.
How do I make these cookies dairy-free?
Use a vegan butter stick or melted coconut oil instead of dairy butter. I’ve had good results with both. The coconut oil version has a slight coconut flavor that pairs nicely with dark chocolate. Just make sure your chocolate chips are dairy-free too—many semi-sweet brands are, but check the label.
Can I prepare the dough ahead of time?
Yes, you can scoop the dough into balls and refrigerate them for up to 24 hours before baking. The no-chill technique still works if you bake immediately, but the dough holds up fine in the fridge. If baking from cold, add 1-2 minutes to the baking time. I wouldn’t recommend freezing the unbaked dough though—the texture changes slightly upon thawing.
Pin This Recipe!
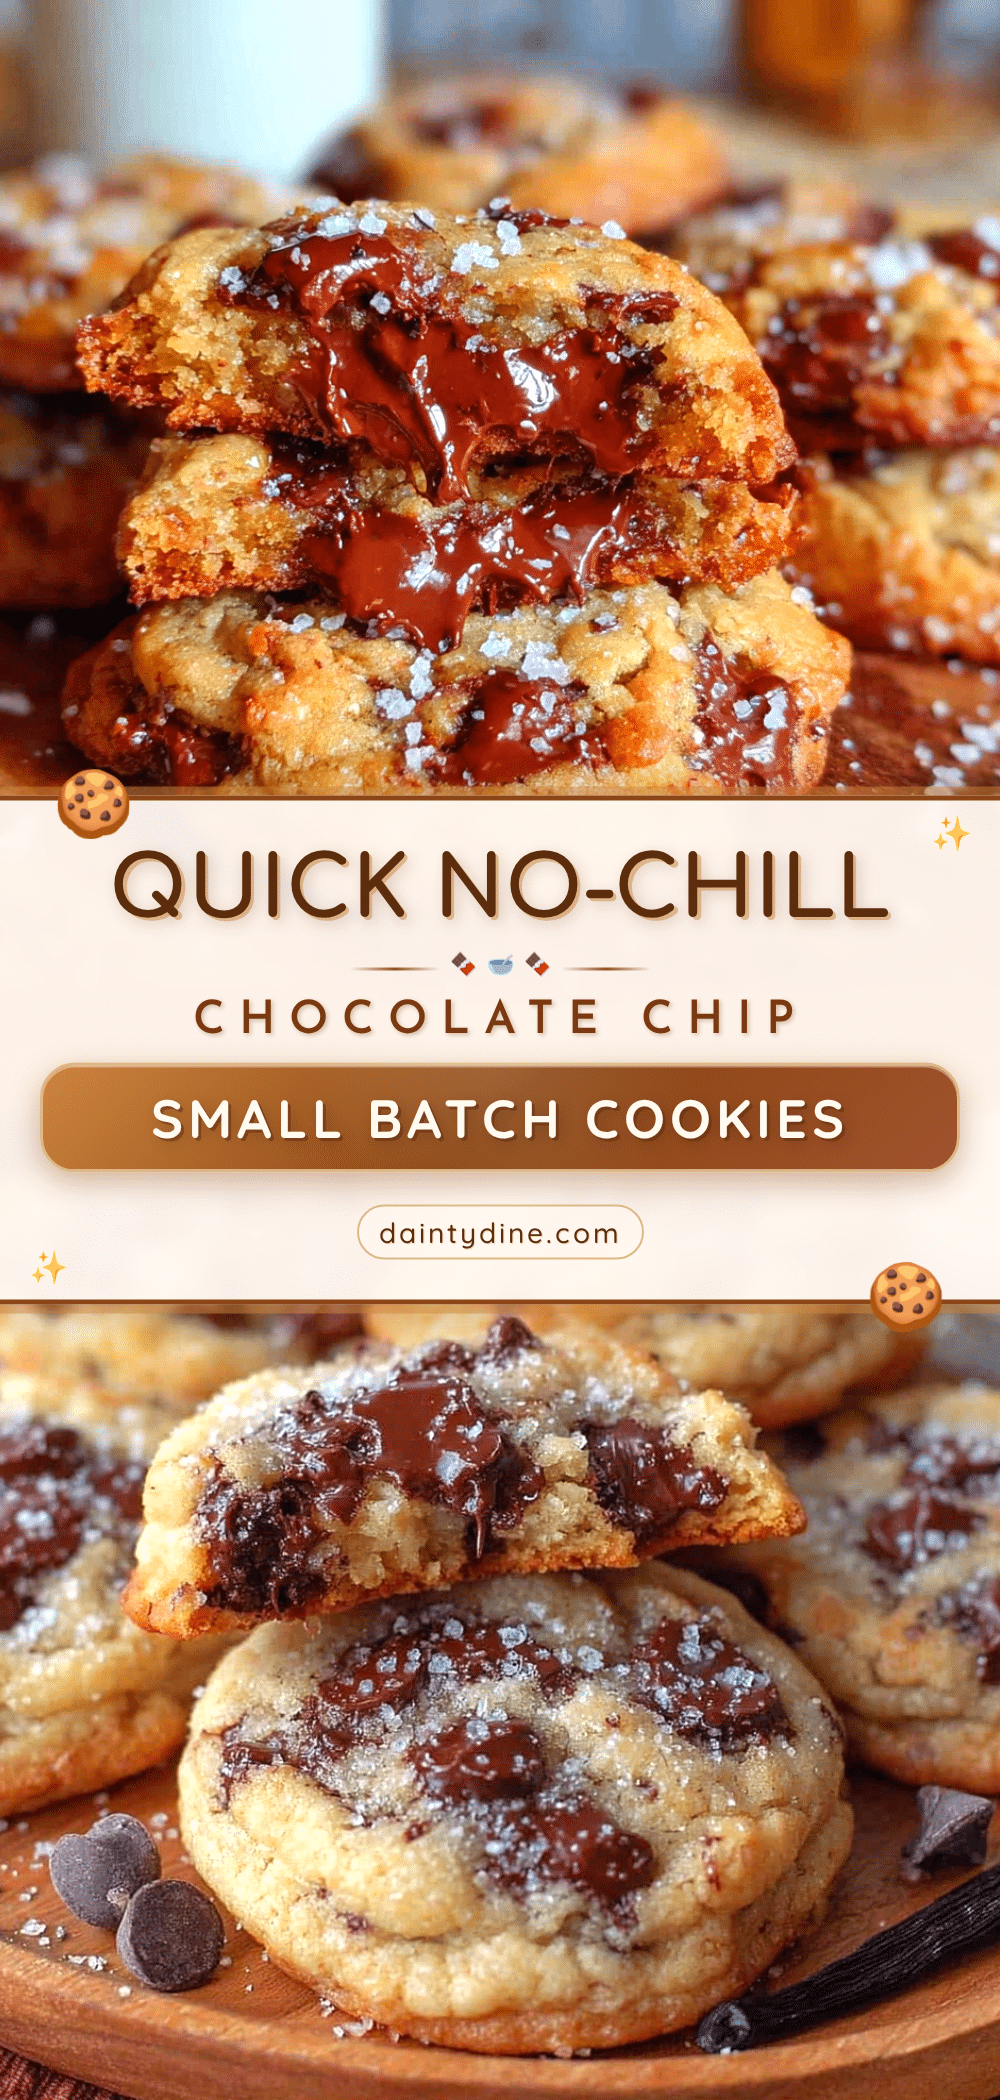
Best Small Batch No-Chill Chocolate Chip Cookies
These small batch no-chill chocolate chip cookies come together in under 25 minutes with no chilling required. They deliver perfectly crispy edges and soft, chewy centers every time.
- Prep Time: 10 minutes
- Cook Time: 12 minutes
- Total Time: 22 minutes
- Yield: 6 to 8 cookies 1x
- Category: Dessert
- Cuisine: American
Ingredients
- 4 tablespoons (56g) unsalted butter, melted and slightly cooled
- 1/4 cup (50g) light brown sugar, packed
- 2 tablespoons (25g) granulated sugar
- 1 large egg yolk
- 1/2 teaspoon vanilla extract
- 1/2 cup plus 1 tablespoon (70g) all-purpose flour
- 1/4 teaspoon baking soda
- 1/4 teaspoon salt
- 1/3 cup (60g) semi-sweet chocolate chips
- Flaky sea salt, for finishing (optional)
Instructions
- Preheat oven to 350°F (175°C). Line a baking sheet with parchment paper or a silicone mat.
- Melt the butter in a microwave-safe bowl in 15-second bursts until just melted. Set aside to cool for 1-2 minutes.
- In a medium mixing bowl, whisk together the melted butter, brown sugar, and granulated sugar until smooth and well combined (about 30 seconds).
- Add the egg yolk and vanilla extract. Whisk vigorously for about 30 seconds until the mixture lightens slightly and thickens.
- In a small bowl, whisk together the flour, baking soda, and salt.
- Add the flour mixture to the butter mixture. Fold gently with a rubber spatula or wooden spoon until just combined—do not overmix.
- Fold in the chocolate chips until evenly distributed.
- Scoop the dough into 6 to 8 equal balls (about 1.5 tablespoons each) and place them on the prepared baking sheet, spacing 2 inches apart.
- Bake immediately (no chilling) for 10 to 12 minutes. The cookies should look puffy and slightly underbaked in the center.
- If desired, sprinkle a tiny pinch of flaky sea salt on top of each cookie as soon as they come out of the oven.
- Let the cookies cool on the baking sheet for 5 minutes, then transfer to a cooling rack or serve warm.
Notes
Let the melted butter cool slightly before mixing to avoid greasy dough. Use a kitchen scale for precise flour measurement (70g). Do not overbake—cookies continue cooking on the hot pan. For a chewier texture, you can chill the scooped dough balls for 30 minutes, but it’s not necessary.
Nutrition
- Serving Size: 1 cookie
- Calories: 180
- Sugar: 14
- Sodium: 120
- Fat: 10
- Saturated Fat: 6
- Carbohydrates: 22
- Fiber: 1
- Protein: 2
Keywords: chocolate chip cookies, small batch cookies, no-chill cookies, easy cookies, quick cookies, chewy cookies


