Love this? Save it for later!
Share the inspiration with your friends
The neighborhood potluck was in six hours and I’d completely forgotten. Everyone else would be bringing their signature dishes—the ones they’d been perfecting for years. Mrs. Patterson’s famous seven-layer dip, the Johnsons’ slow-cooked brisket, and my neighbor Dave’s award-winning chili that he guards the recipe for like a state secret. I had a block of cheddar, some forgotten Gruyère in the back of the fridge, and a bag of panko breadcrumbs that was probably past its expiration date. I stood there, staring into the open refrigerator door, feeling the cold air hit my face and wondering if I could fake a sudden illness.
But here’s the thing about panic—it makes you creative. Or at least, it makes you desperate enough to try something bold. I’d been meaning to develop a make-ahead mac and cheese recipe for the blog anyway, and this seemed like the perfect, terrifying opportunity. I grabbed every cheese I could find, pulled out the butter, and started grating. Honestly, I wasn’t aiming for anything special. I just needed something that wouldn’t embarrass me in front of the entire block. You know that feeling when you’re cooking under pressure and every move feels like a gamble?
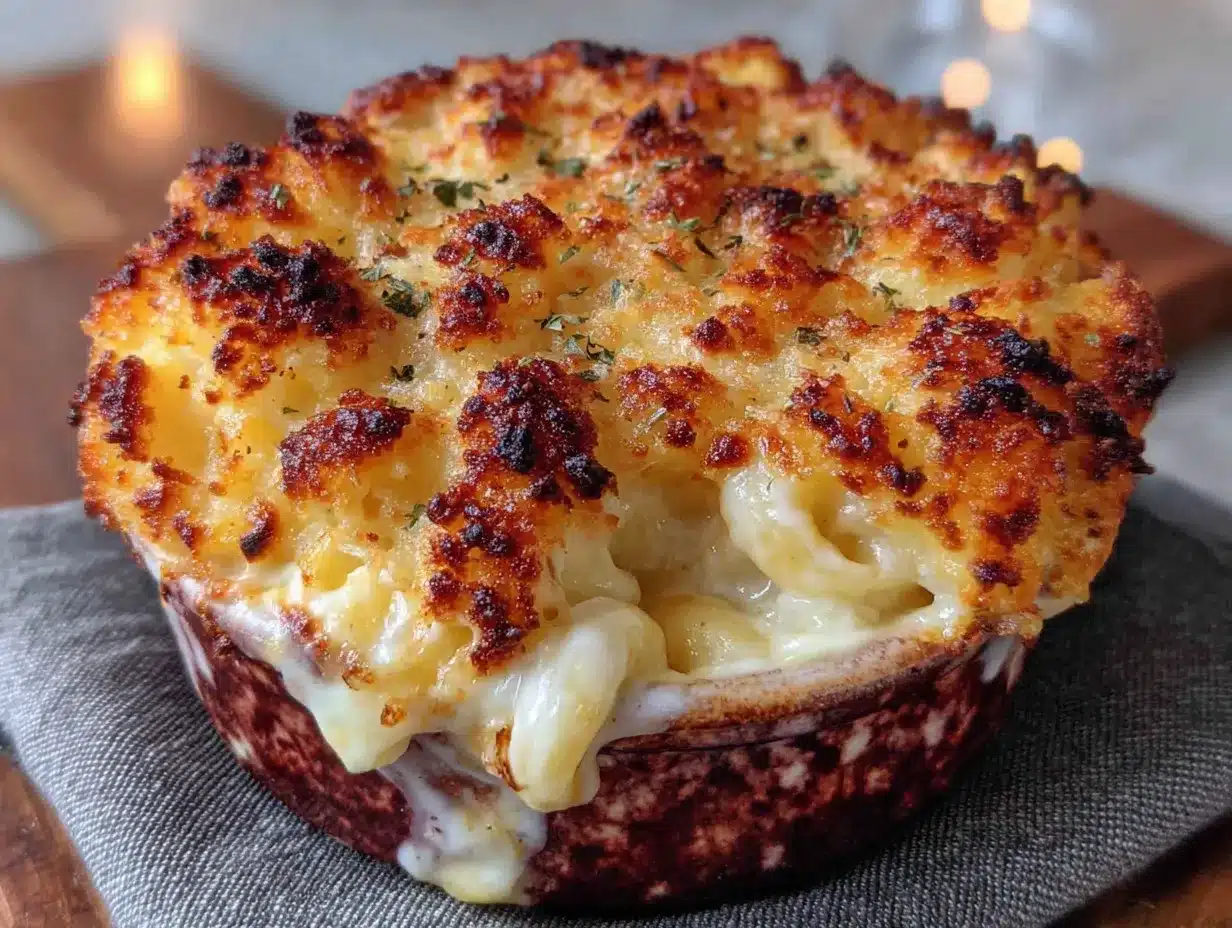
The mac and cheese came together in a blur of melted butter and bubbling cream. I poured it into a disposable aluminum pan (classy, I know), topped it with that questionable panko, and threw it in the oven. When I pulled it out, the top was golden and crispy, the cheese sauce was bubbling up around the edges, and I thought, okay, maybe this won’t be a total disaster. I let it cool, covered it, and carried it to the potluck like it was a peace offering.
Long story short—it disappeared in twenty minutes. Dave the chili guy asked for the recipe. Mrs. Patterson said it was the best mac and cheese she’d had since her grandmother’s. And I stood there, holding an empty pan, pretending I hadn’t been sweating bullets six hours earlier. That’s how this recipe was born—not from a place of confidence, but from a frantic scramble and a refrigerator full of mismatched cheese. And honestly? That’s why I keep making it. Because sometimes the best things come from the moments when you’re absolutely sure you’ve failed.
Why You’ll Love This Recipe
This isn’t just another mac and cheese recipe. This is the one that makes people close their eyes after the first bite. I’ve tested this recipe at three different dinner parties, two potlucks, and one very stressful Thanksgiving where I forgot to defrost the turkey. Every single time, the mac and cheese was the first dish to run out. Let me tell you why this version stands out from the crowd.
- Truly Make-Ahead Friendly : You can assemble this dish up to 48 hours in advance. That means you can actually enjoy your party instead of sweating over a hot stove while your guests mingle. Just pull it out of the fridge, let it come to room temperature for 20 minutes, and bake. It’s that simple.
- Four Cheeses for Maximum Flavor : I’m using a blend of sharp cheddar, creamy Gruyère, nutty fontina, and a touch of Parmesan. Each cheese brings something different to the table—sharpness, meltability, richness, and that salty umami kick. It’s a cheese symphony, honestly.
- That Crunchy Panko Crust : The golden, buttery panko topping is what takes this from good to unforgettable. It adds texture and visual appeal that makes it perfect for impressing guests. Plus, it stays crispy even after reheating, which is basically a miracle.
- Perfect for Crowds : This recipe scales beautifully. Need to feed twelve people? Double it. Feeding twenty? Make two pans. It’s the ultimate potluck or dinner party dish because it travels well, holds up beautifully, and everyone loves it.
- No Fancy Techniques : You don’t need to be a trained chef to pull this off. If you can stir and grate cheese, you can make this recipe. The roux comes together in minutes, and the cheese sauce is practically foolproof if you follow a few simple tips.
This is the kind of recipe that makes you look like a rockstar in the kitchen without actually having to work that hard. It’s comfort food at its finest—creamy, cheesy, crunchy, and deeply satisfying. And when you bring this to a gathering, people will assume you spent all day on it. I won’t tell if you don’t.
What Ingredients You Will Need
This recipe uses simple, high-quality ingredients to create something truly special. Most of these are pantry staples or easy to find at any grocery store. Let me walk you through each one and explain why it matters.
For the Pasta
- 1 pound (450g) elbow macaroni — You can use cavatappi, shells, or rotini if you prefer. I like elbows because they hold the cheese sauce in their little curves. Cook them one minute less than al dente so they finish cooking in the oven.
- Salt for the pasta water — Don’t skip this. The pasta water should taste like the sea. It’s your first chance to season the dish from the inside out.
For the Cheese Sauce
- 4 tablespoons (56g) unsalted butter — I use unsalted so I can control the salt level. If you only have salted butter, reduce the added salt by a quarter teaspoon.
- 1/4 cup (31g) all-purpose flour — This creates the roux that thickens the sauce. Make sure to cook it for at least one minute to get rid of that raw flour taste.
- 3 cups (710ml) whole milk — Whole milk gives the creamiest results. You can use 2% in a pinch, but don’t go lower than that. The fat content matters here.
- 1 cup (240ml) heavy cream — This is what makes the sauce luxuriously rich. If you’re feeling indulgent, you can use all cream instead of milk. I won’t judge.
- 2 cups (226g) sharp cheddar cheese, shredded — Buy a block and shred it yourself. Pre-shredded cheese has anti-caking agents that prevent smooth melting. Trust me on this one.
- 1 1/2 cups (170g) Gruyère cheese, shredded — Gruyère melts like a dream and adds a nutty, slightly sweet flavor. It’s worth the extra few dollars.
- 1 cup (113g) fontina cheese, shredded — Fontina is incredibly creamy when melted. It adds richness without being overpowering.
- 1/2 cup (50g) Parmesan cheese, finely grated — Use the good stuff, not the green can. Parmesan adds a salty, umami depth that rounds out the other cheeses.
- 1 teaspoon Dijon mustard — This doesn’t make it taste like mustard. It just brightens the cheese flavor and helps with emulsification.
- 1/2 teaspoon garlic powder — For a subtle savory note. Fresh garlic can be too harsh here, so I stick with powder.
- 1/2 teaspoon smoked paprika — Optional, but it adds a lovely warmth and color. Regular paprika works too.
- 1/4 teaspoon cayenne pepper — Just a pinch for a tiny kick. It cuts through the richness beautifully.
- Salt and black pepper to taste — Start with 1/2 teaspoon salt and 1/4 teaspoon pepper, then adjust.
For the Panko Crust
- 1 1/2 cups (90g) panko breadcrumbs — Panko gives a lighter, crunchier topping than regular breadcrumbs. They absorb less oil and stay crisp longer.
- 3 tablespoons (42g) unsalted butter, melted — This helps the panko toast to golden perfection. Don’t skip it or you’ll have dry, sad crumbs.
- 1/4 cup (25g) Parmesan cheese, finely grated — Adds flavor and helps the crust brown beautifully.
- 1 tablespoon fresh parsley, chopped — Optional, but it adds a pop of color and freshness. Chives work great too.
Equipment Needed
You don’t need a professional kitchen to make this recipe. Here’s what you’ll need:
- Large pot (6-8 quart) — For boiling the pasta. Make sure it’s big enough so the pasta has room to move around.
- Medium saucepan — For making the cheese sauce. A heavy-bottomed pan works best to prevent scorching.
- 9×13 inch baking dish — This is the standard size for this recipe. You can also use a 3-quart casserole dish. For a smaller batch, use an 8×8 inch dish and reduce the cooking time by 10 minutes.
- Whisk — Essential for making a smooth roux and cheese sauce without lumps.
- Box grater or food processor — For shredding cheese. A food processor with a grating disc makes quick work of it, but a box grater works perfectly fine.
- Wooden spoon or silicone spatula — For stirring the pasta into the sauce. Silicone is great because it won’t scratch your pans.
- Mixing bowls — One for the cheese sauce and one for the panko topping.
- Aluminum foil — For covering the dish if the top is browning too quickly.
If you don’t have a 9×13 dish, you can use two 8×8 dishes or even individual ramekins for a fancy presentation. Just adjust the baking time accordingly. And honestly, I’ve made this in a disposable aluminum pan more times than I’d like to admit, and it works perfectly. Sometimes the budget-friendly option is the smartest one.
Preparation Method
Let me walk you through this step by step. I’ve made this recipe dozens of times, so I’ll share all the little tricks I’ve learned along the way.
Step 1: Preheat and Prep
Preheat your oven to 375°F (190°C). Butter your 9×13 inch baking dish lightly, or spray it with non-stick cooking spray. Set it aside. Take your shredded cheeses out of the fridge so they can start coming to room temperature—this helps them melt more smoothly.
Step 2: Cook the Pasta
Bring a large pot of generously salted water to a rolling boil. Add the elbow macaroni and cook for 1 minute less than the package directions for al dente. For most brands, that’s about 6-7 minutes. The pasta will continue cooking in the oven, so you want it slightly underdone. Drain the pasta, but don’t rinse it—you want that starch to help the sauce cling. Toss it with a drizzle of olive oil to prevent sticking while you make the sauce.
Step 3: Make the Roux
In a medium saucepan over medium heat, melt the 4 tablespoons of butter. Once it’s fully melted and starting to bubble, whisk in the flour. Keep whisking for about 1-2 minutes until the mixture turns a pale golden color and smells slightly nutty. This is your roux, and it’s the foundation of your cheese sauce. Don’t rush this step—undercooked roux tastes like raw flour.
Step 4: Build the Sauce
Slowly pour in the milk while whisking constantly. Do the same with the heavy cream. Keep whisking until the mixture is smooth and starts to thicken, about 3-4 minutes. It should coat the back of a spoon. If you see lumps, don’t panic—just whisk vigorously and they’ll dissolve. I’ve had my fair share of lumpy sauces, and whisking always saves the day.
Step 5: Add the Cheese
Reduce the heat to low. Add the shredded cheddar, Gruyère, fontina, and 1/2 cup of Parmesan cheese to the sauce, a handful at a time. Stir gently after each addition until the cheese is fully melted before adding more. This gradual approach prevents the sauce from breaking or becoming grainy. Once all the cheese is melted, stir in the Dijon mustard, garlic powder, smoked paprika, cayenne pepper, salt, and black pepper. Taste it and adjust the seasoning. The sauce should be well-seasoned because it has to flavor all that pasta.
Step 6: Combine Pasta and Sauce
Add the drained pasta to the pot with the cheese sauce. Gently fold everything together until every piece of pasta is coated in that glorious, creamy sauce. Make sure there are no dry spots hiding at the bottom. This is the moment where you can already tell it’s going to be good.
Step 7: Assemble the Dish
Pour the mac and cheese into your prepared baking dish and spread it into an even layer. Now, here’s a pro tip: let it sit for 5 minutes before adding the topping. This allows the sauce to settle and creates a more stable base for the panko crust.
Step 8: Make the Panko Topping
In a small bowl, combine the panko breadcrumbs, melted butter, and remaining 1/4 cup of Parmesan cheese. Stir until the crumbs are evenly coated. Sprinkle this mixture evenly over the top of the mac and cheese. Don’t press it down—you want it to stay light and airy so it gets really crispy.
Step 9: Bake
Place the dish on a baking sheet to catch any potential overflow (trust me, this has saved my oven many times). Bake for 25-30 minutes until the sauce is bubbly and the top is golden brown. If the top is browning too quickly but the center isn’t hot yet, tent loosely with foil for the last 10 minutes. Let it rest for 10 minutes before serving. This resting period is crucial—it allows the sauce to set up so you get clean, beautiful servings instead of a soupy mess.
Cooking Tips & Techniques
After making this recipe more times than I can count, I’ve collected a few hard-won lessons. Let me share them so you don’t have to learn the hard way.
The Cheese Grating Rule : I cannot stress this enough—grate your own cheese. Pre-shredded cheese is coated in cellulose and starches that prevent it from melting smoothly. Your sauce will be grainy instead of silky. I learned this the hard way when I brought a lumpy mac and cheese to a Friendsgiving and had to watch everyone politely eat around the weird texture. Spend the extra three minutes with a box grater. Your sauce will thank you.
Low and Slow for the Sauce : When you’re melting the cheese into the sauce, keep the heat on low. High heat can cause the proteins in the cheese to seize up, leaving you with a stringy, greasy mess. If your sauce starts to look separated or oily, remove it from the heat immediately and whisk in a splash of cold milk. It usually brings it back together.
The Make-Ahead Magic : If you’re preparing this for a party, assemble the dish completely (including the panko topping) up to 48 hours in advance. Cover it tightly with foil and refrigerate. When you’re ready to bake, let it sit at room temperature for 20 minutes while the oven preheats. You may need to add 5-10 minutes to the baking time since it’s starting from cold. The panko might not get as crispy, but it’ll still be delicious. For the crispiest topping, add the panko crust fresh right before baking.
Multitasking Strategy : Here’s how I time everything to avoid stress. Start the pasta water first. While it’s coming to a boil, shred your cheese and measure out your other ingredients. While the pasta cooks, make the roux. By the time the pasta is done, your sauce base should be ready. Drain the pasta, finish the sauce, combine everything, and you’re done in about 30 minutes of active work. It’s totally manageable even on a busy weeknight.
The Consistency Check : Your cheese sauce should be slightly thinner than you think it should be before you add the pasta. It will continue to thicken as it bakes. If it’s already thick on the stovetop, your final dish will be dense and gluey. Aim for a sauce that coats the back of a spoon but still drips off easily.
Variations & Adaptations
One of the best things about this recipe is how flexible it is. Here are some of my favorite variations:
Spicy Jalapeño Popper Version : Add 1/2 cup of chopped pickled jalapeños and 4 ounces of cream cheese (cubed and added with the other cheeses) to the sauce. Top with crushed tortilla chips mixed into the panko crust. It’s spicy, creamy, and absolutely addictive. I made this for a Super Bowl party and it was gone before the halftime show.
Lobster Mac and Cheese : Fold in 8 ounces of cooked, chopped lobster meat just before pouring the mac and cheese into the baking dish. This turns it into a showstopping main course that’s perfect for date night or special occasions. Just be prepared for people to ask you to make it for every holiday dinner from now on.
Gluten-Free Adaptation : Use gluten-free pasta and substitute the all-purpose flour with a 1:1 gluten-free flour blend. Make sure your panko is certified gluten-free (Ian’s brand makes a great one). Everything else in the recipe is naturally gluten-free. I’ve tested this with my gluten-sensitive cousin and she said it was the best mac and cheese she’d had in years.
Vegetable-Packed Version : Sauté 1 cup of finely chopped broccoli, cauliflower, or spinach and fold it into the pasta mixture before baking. The cheese sauce is so rich that you barely notice the vegetables, but you get the nutritional boost. It’s a great way to sneak veggies into a kid-friendly meal.
Smoky Bacon Addition : Cook 6 strips of bacon until crispy, crumble them, and sprinkle half into the mac and cheese mixture and the rest on top of the panko crust. Because everything is better with bacon, right?
Serving & Storage Suggestions
This mac and cheese is incredibly versatile when it comes to serving. Here’s how to make the most of it:
Serving Temperature and Presentation : Serve this dish hot, straight from the oven. Let it rest for exactly 10 minutes—any less and it’ll be too loose, any more and it starts to set up too much. For a dinner party, I like to garnish with a sprinkle of fresh parsley and a little extra cracked black pepper on top. It adds a touch of color and makes it look intentional, not just thrown together.
What to Serve Alongside : This mac and cheese is rich and filling, so it pairs beautifully with lighter sides. A crisp green salad with a tangy vinaigrette cuts through the richness perfectly. Roasted vegetables like asparagus, Brussels sprouts, or green beans are also excellent choices. If you’re serving it as a main dish, a simple side of roasted chicken or grilled sausage rounds out the meal nicely.
Storage Instructions : Leftovers can be stored in an airtight container in the refrigerator for up to 4 days. The texture will change slightly as it sits—the pasta absorbs some of the sauce—but the flavor actually gets better. To reheat, microwave individual portions for 1-2 minutes, or reheat the whole dish in a 350°F (175°C) oven for 15-20 minutes, covered with foil. Add a splash of milk before reheating to restore some creaminess.
Freezing Instructions : This mac and cheese freezes beautifully. Assemble the dish completely (with the panko topping), but don’t bake it. Wrap it tightly in plastic wrap, then foil, and freeze for up to 3 months. To bake from frozen, remove the plastic wrap, cover with foil, and bake at 375°F (190°C) for 60-70 minutes. Remove the foil for the last 15 minutes to crisp up the top. The texture won’t be quite as creamy as fresh, but it’s still remarkably good for a frozen dish.
Nutritional Information & Benefits
Let’s be honest—this is not a health food. But that doesn’t mean it can’t fit into a balanced diet. Here’s the nutritional breakdown for one serving (based on 8 servings per recipe):
- Calories : Approximately 580-620 per serving
- Protein : 24-28 grams
- Fat : 36-40 grams
- Carbohydrates : 42-46 grams
- Calcium : 45% of the daily value (thanks to all that cheese!)
- Vitamin A : 20% of the daily value
The cheese provides a significant amount of calcium and protein, which are essential for bone health and muscle repair. The pasta offers complex carbohydrates for sustained energy. And honestly, there’s something to be said for the mental health benefits of a comforting, indulgent meal shared with people you love. Food is about more than just nutrients—it’s about connection, joy, and sometimes, pure, unapologetic pleasure.
If you’re watching your intake, you can lighten this up by using 2% milk instead of whole milk, reducing the butter in the topping, or using a lower-fat cheese blend. But I’ll be honest—I think this recipe is best enjoyed in moderation as the decadent treat it’s meant to be. Save it for special occasions and savor every single bite.
Conclusion
This make-ahead four-cheese mac and cheese with panko crust has become my go-to dish for every gathering, from casual potlucks to holiday dinners. It’s the recipe that made Dave the chili guy ask for seconds and Mrs. Patterson request it for the next block party. It’s the dish that lets me actually enjoy my own party instead of hiding in the kitchen. And honestly? It’s the recipe that taught me that sometimes the best things come from the most stressful moments.
I hope you give this recipe a try and make it your own. Add your favorite cheese, throw in some bacon, or keep it classic—there’s no wrong way to do it. The only rule is that you share it with people you care about. Because that’s what mac and cheese is really about, isn’t it? Comfort, warmth, and the people around your table.
If you make this recipe, I’d love to hear about it. Leave a comment below and tell me how it turned out, what variations you tried, or if it made you the hero of your own potluck story. And don’t forget to share this recipe with someone who needs a little comfort food in their life. Happy cooking, friends!
Frequently Asked Questions
Can I use pre-shredded cheese for this recipe?
Technically yes, but I really don’t recommend it. Pre-shredded cheese contains anti-caking agents that prevent it from melting smoothly. Your sauce will likely turn out grainy or clumpy. For the creamiest results, always shred your cheese from a block. It takes an extra few minutes but makes a huge difference in the final texture.
How far in advance can I make this mac and cheese?
You can assemble the entire dish (including the panko topping) up to 48 hours before baking. Just cover it tightly with foil and refrigerate. When you’re ready to bake, let it sit at room temperature for 20 minutes while the oven preheats, then add about 5-10 minutes to the baking time. The panko might not be quite as crispy, but it’ll still be delicious.
Can I freeze this mac and cheese?
Absolutely! Assemble the dish completely but don’t bake it. Wrap it tightly in plastic wrap, then foil, and freeze for up to 3 months. To bake from frozen, remove the plastic wrap, cover with foil, and bake at 375°F for 60-70 minutes. Remove the foil for the last 15 minutes to get that golden, crispy top.
Why did my cheese sauce turn out grainy?
Grainy cheese sauce usually happens for one of three reasons: you used pre-shredded cheese, you cooked the sauce over too high heat, or you added all the cheese at once. Keep the heat on low, add the cheese gradually while stirring constantly, and always shred your own cheese. If your sauce does start to look grainy, remove it from the heat immediately and whisk in a splash of cold milk or cream to try to bring it back together.
What’s the best cheese combination for mac and cheese?
This recipe uses sharp cheddar for flavor, Gruyère for its incredible meltability, fontina for creaminess, and Parmesan for a salty umami kick. But feel free to experiment! Gouda, Monterey Jack, and Colby are all excellent choices. Just avoid cheeses that don’t melt well, like feta or goat cheese, unless you’re using them as a small accent.
Pin This Recipe!
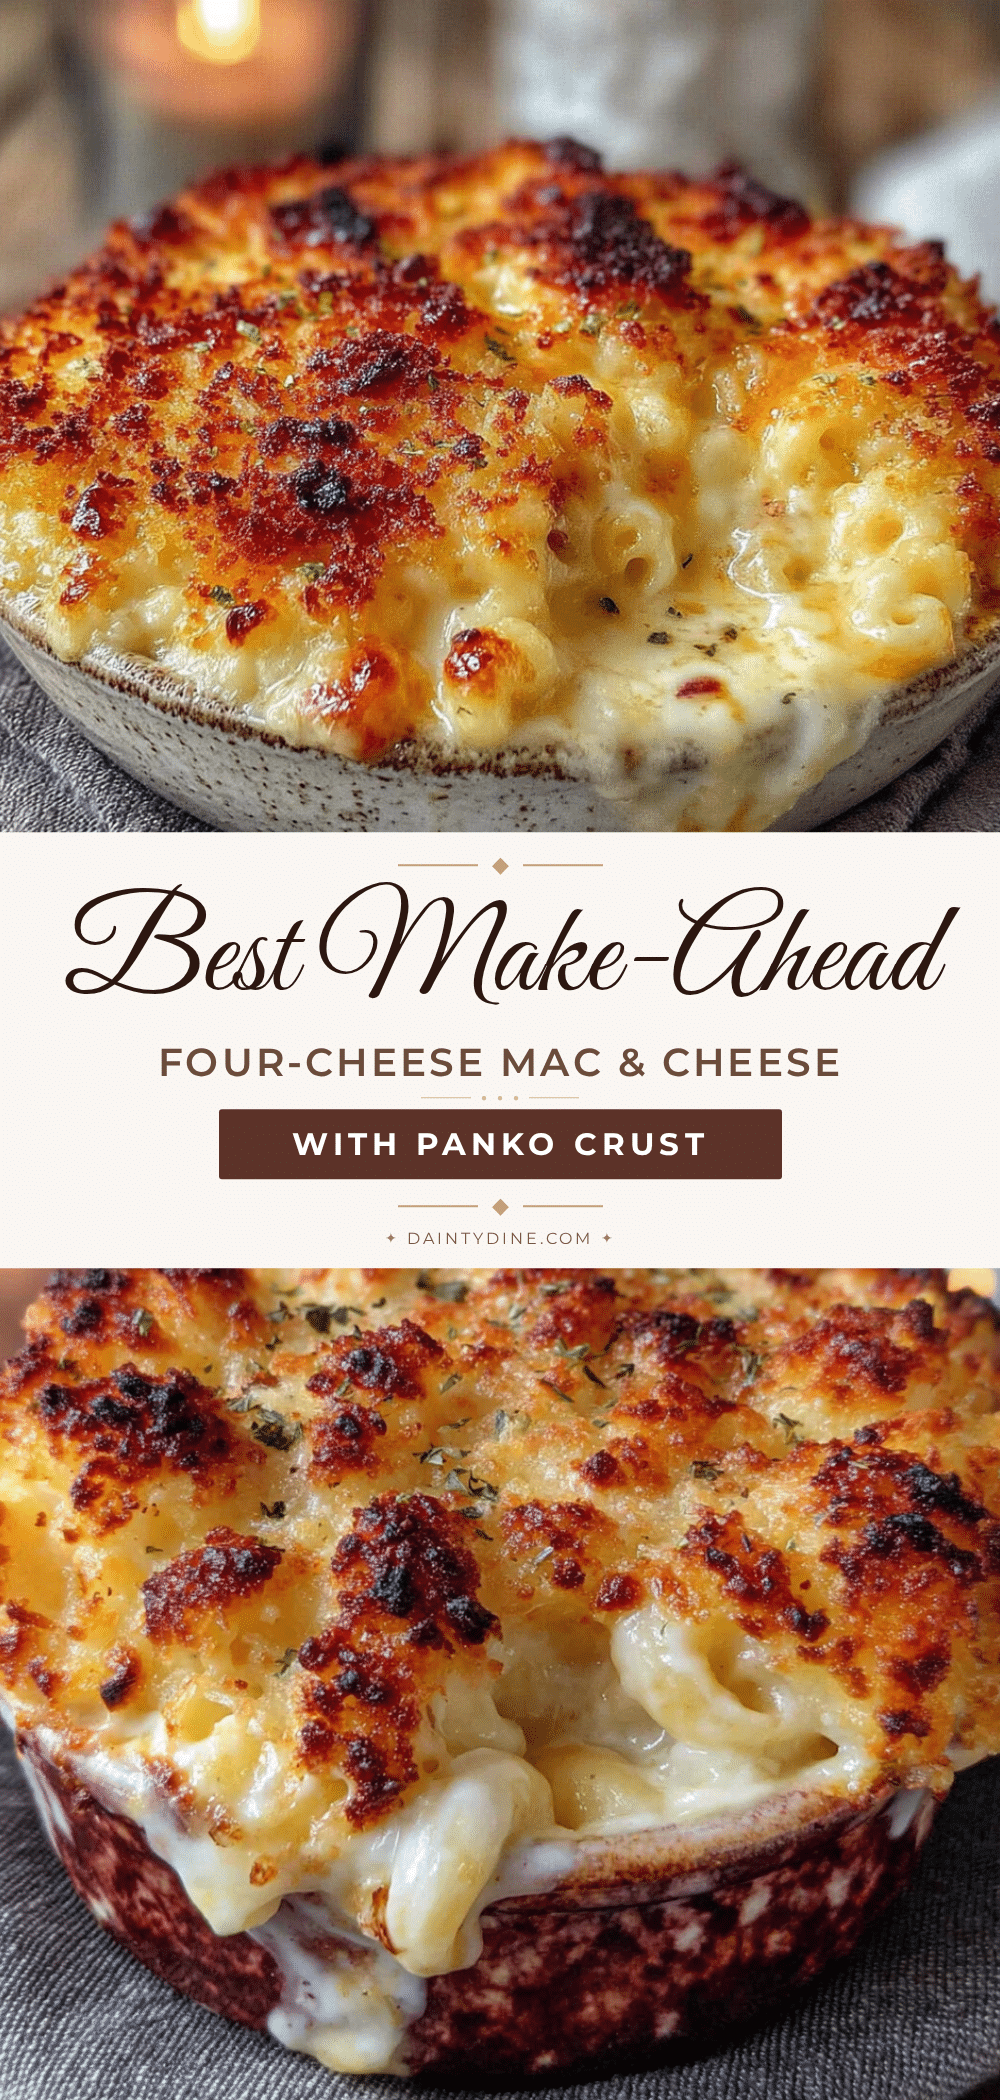
Best Make-Ahead Four-Cheese Mac and Cheese with Panko Crust

This make-ahead four-cheese mac and cheese with a crunchy panko crust is the ultimate comfort food for potlucks, dinner parties, or any gathering. It features a creamy blend of sharp cheddar, Gruyère, fontina, and Parmesan, and can be assembled up to 48 hours in advance.
- Prep Time: 30 minutes
- Cook Time: 30 minutes
- Total Time: 1 hour
- Yield: 8 servings 1x
- Category: Main Course
- Cuisine: American
Ingredients
- 1 pound (450g) elbow macaroni
- Salt for the pasta water
- 4 tablespoons (56g) unsalted butter
- 1/4 cup (31g) all-purpose flour
- 3 cups (710ml) whole milk
- 1 cup (240ml) heavy cream
- 2 cups (226g) sharp cheddar cheese, shredded
- 1 1/2 cups (170g) Gruyère cheese, shredded
- 1 cup (113g) fontina cheese, shredded
- 1/2 cup (50g) Parmesan cheese, finely grated
- 1 teaspoon Dijon mustard
- 1/2 teaspoon garlic powder
- 1/2 teaspoon smoked paprika
- 1/4 teaspoon cayenne pepper
- Salt and black pepper to taste
- 1 1/2 cups (90g) panko breadcrumbs
- 3 tablespoons (42g) unsalted butter, melted
- 1/4 cup (25g) Parmesan cheese, finely grated
- 1 tablespoon fresh parsley, chopped (optional)
Instructions
- Preheat your oven to 375°F (190°C). Butter a 9×13 inch baking dish lightly, or spray it with non-stick cooking spray. Set aside. Take your shredded cheeses out of the fridge to come to room temperature.
- Bring a large pot of generously salted water to a rolling boil. Add the elbow macaroni and cook for 1 minute less than the package directions for al dente (about 6-7 minutes). Drain the pasta, but do not rinse. Toss with a drizzle of olive oil to prevent sticking.
- In a medium saucepan over medium heat, melt the 4 tablespoons of butter. Once melted and bubbling, whisk in the flour. Continue whisking for 1-2 minutes until the mixture turns a pale golden color and smells slightly nutty.
- Slowly pour in the milk while whisking constantly. Do the same with the heavy cream. Keep whisking until the mixture is smooth and starts to thicken, about 3-4 minutes. It should coat the back of a spoon.
- Reduce the heat to low. Add the shredded cheddar, Gruyère, fontina, and 1/2 cup of Parmesan cheese to the sauce, a handful at a time, stirring gently after each addition until fully melted. Stir in the Dijon mustard, garlic powder, smoked paprika, cayenne pepper, salt, and black pepper. Taste and adjust seasoning.
- Add the drained pasta to the pot with the cheese sauce. Gently fold everything together until every piece of pasta is coated.
- Pour the mac and cheese into the prepared baking dish and spread into an even layer. Let it sit for 5 minutes before adding the topping.
- In a small bowl, combine the panko breadcrumbs, melted butter, and remaining 1/4 cup of Parmesan cheese. Stir until the crumbs are evenly coated. Sprinkle this mixture evenly over the top of the mac and cheese. Do not press down.
- Place the dish on a baking sheet. Bake for 25-30 minutes until the sauce is bubbly and the top is golden brown. If the top is browning too quickly, tent loosely with foil for the last 10 minutes. Let it rest for 10 minutes before serving.
Notes
For the creamiest sauce, always shred your own cheese from a block. Pre-shredded cheese contains anti-caking agents that prevent smooth melting. If making ahead, assemble the dish completely (including panko topping) up to 48 hours in advance, cover tightly with foil, and refrigerate. Let sit at room temperature for 20 minutes before baking, and add 5-10 minutes to the baking time. For the crispiest topping, add the panko crust fresh right before baking.
Nutrition
- Serving Size: 1 serving (1/8 of re
- Calories: 600
- Sugar: 6
- Sodium: 680
- Fat: 38
- Saturated Fat: 22
- Carbohydrates: 44
- Fiber: 2
- Protein: 26
Keywords: mac and cheese, four-cheese, panko crust, make-ahead, potluck, comfort food, cheddar, Gruyère, fontina, Parmesan


