Love this? Save it for later!
Share the inspiration with your friends
My husband claimed to hate meringue for fifteen years. Fifteen years. He’d make a face anytime I mentioned it—too sweet, too airy, too fussy for what you actually get. I believed him completely. Then last October, I was testing a batch of these ghost meringue cookies for a neighbor’s Halloween party, and I found him standing at the kitchen counter, three cookies gone, crumbs on his shirt, trying to look innocent. “These are different,” he mumbled, reaching for a fourth. “These actually taste like something.”
That’s the thing about this recipe, honestly. It’s not trying to be fancy or complicated. It’s just a simple, reliable vanilla meringue that happens to look absolutely adorable when piped into little ghost shapes. I mean, I’ve made meringue that collapsed, wept, or turned into sticky puddles more times than I care to admit. But this version? It works every single time. The trick is a little cream of tartar for stability and baking them low and slow so they dry out perfectly crisp without browning. Maybe you’ve had meringue disasters too—I sure have. That’s why I kept testing until I found a method that felt foolproof even for a busy weeknight when you’re wrangling kids and decorations at the same time.
The first time I made these for my daughter’s class party, I was nervous. Kids can be brutally honest about food, you know? But they went absolutely wild. Something about the little ghost shapes—each one slightly different, some leaning, some chubby, some with tiny chocolate chip eyes that look a little cross-eyed—makes them irresistible. The whole batch disappeared in ten minutes, and I got three different parents asking for the recipe. That’s when I knew this wasn’t just another Halloween treat. It was the one I’d be making every year from now on.
Why You’ll Love This Recipe
Let me tell you why these ghost meringue cookies have become my most-requested Halloween recipe. I’ve tested this method at least a dozen times—through humid weather, cold kitchens, and even that one time my oven thermometer was completely off—and it holds up beautifully every single time.
- Quick & Easy: Active prep time is only about 15 minutes. The oven does the rest of the work while you focus on other party prep.
- Simple Ingredients: You probably already have everything in your pantry right now. No specialty baking supplies needed.
- Perfect for Halloween Parties: These are the star of any classroom celebration, neighborhood gathering, or family movie night.
- Crowd-Pleaser: I’ve watched picky eaters, sugar-shy adults, and meringue skeptics all reach for seconds. There’s something about the ghost shape that makes everyone smile.
- Unbelievably Delicious: The outside shatters with the lightest pressure, and the inside melts away like a sweet little cloud. It’s pure vanilla comfort.
What makes this recipe different from the dozens of meringue recipes out there? It’s the balance of cream of tartar and vanilla extract, plus the specific baking temperature I landed on after ruining more batches than I’d like to admit. The ghosts hold their shape perfectly, stay bright white, and have that signature crisp exterior with a soft, marshmallowy center. It’s not just another version—it’s the version that finally made my husband admit he was wrong about meringue.
These cookies are the kind of treat that makes you feel like a kitchen hero without actually working that hard. They’re perfect for busy parents who want to bring something homemade to a party but don’t have hours to spend in the kitchen. And honestly, watching kids’ faces light up when they see a plate of little ghost cookies? That’s worth every minute of effort.
What Ingredients You Will Need
This recipe uses simple, everyday ingredients that come together to create something truly magical. The key is using them correctly—room temperature eggs, pure vanilla, and a steady hand with the cream of tartar. Here’s what you’ll need:
For the Ghost Meringues
- 4 large egg whites, room temperature (this matters a lot—cold eggs won’t whip up as high)
- 1 cup granulated sugar (200 grams, preferably superfine if you have it, but regular works too)
- 1/2 teaspoon cream of tartar (this stabilizes the meringue and prevents weeping)
- 1 teaspoon pure vanilla extract (I prefer Nielsen-Massey for its rich flavor, but any pure vanilla works)
- Pinch of salt (balances the sweetness and helps the meringue hold structure)
For the Ghost Faces
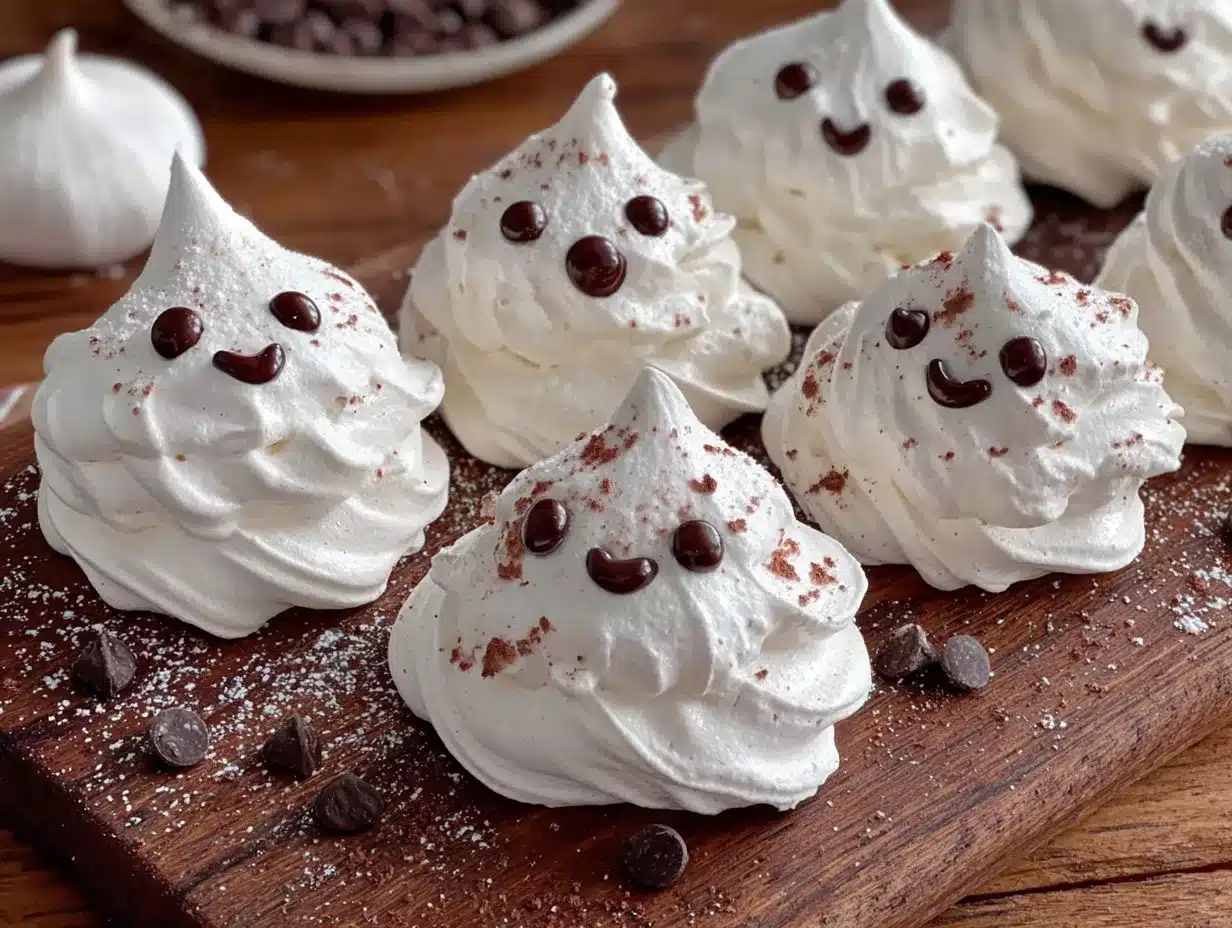
- 1/4 cup mini chocolate chips (about 60 chips—you’ll need two per ghost)
- Optional: Black gel food coloring (if you want to pipe little mouths instead of using chips)
A few ingredient notes from my experience: Room temperature egg whites are non-negotiable here. I’ve tried whipping cold egg whites straight from the fridge, and they just don’t reach the same volume. Leave your eggs on the counter for about 30 minutes before starting, or place them in a bowl of warm water for 5 minutes if you’re in a hurry.
For the sugar, I’ve had great results with regular granulated sugar, but if you happen to have superfine sugar (sometimes called caster sugar), it dissolves faster and creates an even smoother meringue. You can also pulse regular sugar in a food processor for a few seconds to make your own superfine sugar—I do this all the time when I remember.
The cream of tartar is your secret weapon here. It’s an acid that stabilizes the egg white proteins, helping them hold their structure and preventing the meringue from collapsing or weeping. Don’t skip it, and don’t substitute it with lemon juice or vinegar—I’ve tried both, and the results were not as reliable.
As for the chocolate chips for the eyes, mini chips work best because they’re small enough to look cute without weighing down the delicate meringue. Regular-sized chips tend to sink or look disproportionate on the little ghost bodies. Trust me on this one—I learned the hard way after making a batch of ghosts that looked like they had googly eyes.
Equipment Needed
You don’t need a fancy pastry setup for these ghost meringue cookies. Here’s what I use every time:
- Electric stand mixer or hand mixer: A stand mixer makes this easier since you can walk away while the meringue whips, but a hand mixer works perfectly fine. I’ve used both, and the results are identical as long as you’re patient.
- Large mixing bowl: Make sure it’s completely clean and dry—any trace of grease can prevent the egg whites from whipping up properly. I wipe mine down with a little lemon juice and a paper towel before starting, just to be safe.
- Piping bags: Disposable piping bags are easiest for cleanup, but you can also use a large zip-top bag with the corner snipped off. I’ve done both, and honestly, the zip-top bag works just fine for these simple ghost shapes.
- Large round piping tip: A 1/2-inch round tip (like Ateco 806 or Wilton 1A) creates the perfect ghost shape. If you don’t have one, just snip a 1/2-inch opening in your piping bag.
- Baking sheets: Two large baking sheets lined with parchment paper. Silpat mats work too, but parchment is easier for lifting the finished cookies off.
- Small offset spatula or butter knife: For smoothing the tops of the ghosts if needed.
- Oven thermometer: This is optional but highly recommended. My oven runs about 25 degrees hot, and using an oven thermometer was the single biggest improvement to my meringue game.
If you don’t have piping bags, don’t let that stop you. I’ve made these ghosts using a zip-top bag with the corner snipped off, and they turned out just as cute. The shapes might be a little less uniform, but honestly, that adds to the charm—each ghost has its own personality.
Preparation Method
Let me walk you through exactly how to make these ghost meringue cookies. I’ve broken it down into clear steps with all the little details I wish someone had told me when I first started making meringue.
- Preheat your oven to 200°F (93°C). Yes, that low. We’re not baking these so much as drying them out. Line two large baking sheets with parchment paper and set them aside. If your oven runs hot, use an oven thermometer to double-check the temperature—even 25 degrees too high can cause your ghosts to brown or crack.
- Prepare your egg whites. Separate your eggs while they’re cold—it’s much easier to keep the yolks intact that way. Then let the egg whites sit at room temperature for 30 minutes. Place them in your completely clean, dry mixing bowl. Add the pinch of salt and the cream of tartar.
- Start whipping. Begin beating the egg whites on medium speed. After about 2 minutes, they should become foamy with small bubbles throughout. This is when you know they’re ready for the sugar.
- Add the sugar slowly. With the mixer running on medium speed, add the sugar one tablespoon at a time. I know it feels tedious, but rushing this step is the number one reason meringues fail. Each addition should be fully incorporated before you add the next. This whole process takes about 5 minutes. The mixture will gradually become thick, glossy, and white.
- Add the vanilla. Once all the sugar is incorporated, add the vanilla extract. Increase the speed to medium-high and continue beating. You’re looking for stiff peaks—when you lift the beaters, the meringue should stand up straight without drooping. This usually takes another 3-5 minutes. The mixture should feel smooth when you rub a tiny bit between your fingers, not gritty. If it feels gritty, keep beating until the sugar dissolves completely.
- Transfer to piping bag. Fit your piping bag with the large round tip, or snip a 1/2-inch opening. Fold the top of the bag down over your hand to create a cuff, then fill it with the meringue. Work quickly here—meringue can start to deflate if it sits too long.
- Pipe the ghosts. Hold the piping bag straight up and down, about 1/2 inch above the baking sheet. Squeeze gently to create a round base, about 1.5 inches wide. Then, as you lift the bag straight up, continue squeezing to create a taller, slightly narrower body. Release pressure and pull upward to create a little peak on top. Each ghost should be about 2 inches tall. Leave about 1 inch of space between each ghost—they don’t spread much, but you want air to circulate around them.
- Add the faces. Before the meringue starts to set (work within 2-3 minutes of piping), gently press two mini chocolate chips into each ghost for eyes. You can also add a tiny dot of black gel food coloring for a mouth if you want, but I find the chocolate chip eyes are plenty cute on their own. If the meringue starts to form a skin, the chips won’t stick as well.
- Bake low and slow. Place the baking sheets in the preheated oven. Bake for 1 hour and 15 minutes to 1 hour and 30 minutes. The ghosts are done when they feel dry and firm to the touch and lift easily off the parchment paper. They should be pure white, not brown or tan. If they start to color at all, your oven is too hot—crack the door open slightly to let heat escape.
- Cool completely in the oven. This is the secret step that makes all the difference. Turn off the oven but leave the ghosts inside for at least 1 hour, or even overnight. This gradual cooling prevents cracking and ensures they dry out completely. I’ve left them in the oven overnight more times than I can count, and they come out perfect every time.
- Store carefully. Once completely cool, transfer the ghosts to an airtight container. Layer them between sheets of parchment paper—they’re fragile and can break easily. They’ll keep for up to 2 weeks at room temperature, but let’s be honest, they never last that long in my house.
Cooking Tips & Techniques
After making these ghost meringue cookies more times than I can count, I’ve collected a few tricks that make the process smoother and the results more reliable.
Don’t overmix once the sugar is in. I learned this one the hard way. Once you’ve reached stiff peaks, stop mixing. Overbeaten meringue becomes grainy and starts to separate, and you can’t fix it once it’s gone too far. If you see the mixture start to look curdled or watery, you’ve gone too far—start over with fresh egg whites.
Humidity is the enemy. Meringue absorbs moisture from the air, which can make it sticky or cause it to weep. If it’s a rainy or humid day, I wait to make these until the weather clears. If you absolutely must make them in humid conditions, add an extra 1/4 teaspoon of cream of tartar and bake them for an additional 15-20 minutes.
Room temperature eggs really matter. I know I’ve said this already, but it’s worth repeating. Cold eggs won’t whip up to the same volume, and the meringue will be denser and less stable. Set your eggs out 30 minutes before you start, or place them in a bowl of warm water for 5 minutes if you forgot.
Make sure your bowl is spotless. Any trace of grease or egg yolk will prevent the egg whites from whipping properly. I wipe my bowl and beaters with a paper towel dipped in lemon juice or white vinegar before I start. It takes 10 seconds and saves me from having to start over.
Pipe with confidence. Your first few ghosts might look a little wonky—mine always do. That’s okay. The uneven shapes make them look more like real ghosts anyway. If you mess up, just scrape the meringue back into the bowl and try again. It’s forgiving stuff as long as you haven’t baked it yet.
Multitask wisely. While the meringue is whipping (which takes about 8-10 minutes total), use that time to line your baking sheets and set up your piping bag. Once the meringue is ready, you want to pipe it quickly before it starts to deflate. I also prep my chocolate chips in a small bowl so I can grab them easily while adding the eyes.
Variations & Adaptations
One of the best things about these ghost meringue cookies is how easy they are to customize. Here are a few variations I’ve tried and loved:
Colorful Ghosts: Add a few drops of gel food coloring to the meringue before piping. I’ve made purple ghosts for a spooky vibe and orange ghosts for a brighter Halloween look. Just fold the color in gently with a spatula—don’t overmix or you’ll deflate the meringue.
Flavor Variations: Swap the vanilla extract for peppermint, almond, or lemon extract. Peppermint ghosts are especially fun for a winter-themed party. Use 1/2 teaspoon instead of 1 full teaspoon, since these extracts are stronger than vanilla.
Chocolate Drizzle: Once the ghosts are completely cool, drizzle melted dark chocolate over the tops for an extra layer of flavor. Let the chocolate set at room temperature before storing. This is my personal favorite variation—it adds a little richness that balances the sweetness.
Gluten-Free Friendly: These cookies are naturally gluten-free since they contain no flour at all. They’re also a great option for parties where guests have dietary restrictions. Just make sure your vanilla extract is certified gluten-free if that’s a concern.
Dairy-Free Option: These are naturally dairy-free as written, since meringue contains no butter or milk. Just double-check that your chocolate chips are dairy-free if that’s important for your guests. Many dark chocolate chips are dairy-free by default.
Bigger Ghosts: For a more dramatic presentation, pipe larger ghosts using a 3/4-inch tip. Increase the baking time to about 1 hour 45 minutes, and check for doneness by lifting one gently off the parchment.
Serving & Storage Suggestions
These ghost meringue cookies are at their best when served at room temperature. They should be crisp on the outside with a slightly soft, marshmallowy center—that contrast is what makes them so special.
Presentation Ideas: Arrange the ghosts on a black platter or cake stand for maximum Halloween effect. I like to scatter a few candy eyeballs or edible glitter around the plate for extra sparkle. For a classroom party, I place each ghost in a small cupcake liner to keep them from rolling around and breaking.
Pairing Suggestions: These cookies are wonderful on their own, but they also pair beautifully with a warm drink. Serve them alongside hot chocolate, apple cider, or a pumpkin spice latte for a cozy Halloween treat. For an adult gathering, they’re lovely with a cup of coffee or a glass of dessert wine.
Storage Instructions: Store the ghosts in an airtight container at room temperature for up to 2 weeks. Layer them between sheets of parchment paper or wax paper to prevent them from sticking together or breaking. Do not refrigerate them—the moisture in the fridge will make them sticky and soft.
Freezer Instructions: You can freeze these cookies for up to 3 months. Place them in a single layer in a freezer-safe container, separating layers with parchment paper. To thaw, let them sit at room temperature for about 30 minutes. Don’t open the container while they’re thawing, or condensation can form and make them sticky.
How Flavors Develop: Interestingly, these cookies actually taste better after a day or two. The vanilla flavor deepens and the texture becomes even more delicate. I often make them a day or two before a party, and they’re always a hit.
Nutritional Information & Benefits
Here’s the nutritional breakdown for one ghost meringue cookie (based on making about 24 ghosts from this recipe):
| Nutrient | Amount per Cookie |
|---|---|
| Calories | 35 |
| Total Fat | 0.5g |
| Saturated Fat | 0g |
| Cholesterol | 0mg |
| Sodium | 10mg |
| Total Carbohydrates | 8g |
| Sugars | 8g |
| Protein | 1g |
These cookies are naturally low in calories and fat, making them a lighter option compared to traditional Halloween treats like chocolate bars or frosted cupcakes. They’re also gluten-free, dairy-free, and contain no artificial colors or preservatives when made with pure vanilla extract.
The egg whites provide a small amount of protein, while the sugar gives a quick energy boost—perfect for active kids running around at a Halloween party. Of course, they’re still a treat, so enjoy them in moderation. But honestly, when you’re comparing options for a classroom celebration, these are one of the better choices you can make.
One thing I love about these cookies is that they’re free from common allergens like nuts, soy, and dairy. That makes them a safe choice for parties where you might not know everyone’s dietary restrictions. Just be sure to check your chocolate chips if you’re serving someone with a dairy allergy.
Conclusion
These ghost meringue cookies have become a Halloween tradition in our house, and I have a feeling they’ll become one in yours too. They’re simple enough to make on a busy weeknight, cute enough to impress at any party, and delicious enough that even my meringue-hating husband can’t resist them.
What I love most about this recipe is how forgiving it is. Your ghosts don’t have to be perfect—in fact, the imperfect ones are always the most charming. Each one has its own little personality, and that’s exactly what makes them so special for kids. They’re not just cookies; they’re little edible art projects that everyone can enjoy.
I’d love to hear how your ghosts turn out! Drop a comment below and let me know if you tried any fun variations or if your kids helped with the piping. And if you’re looking for more Halloween treats, you might enjoy these crispy pumpkin seed brittle or this easy spider web dip for your party spread.
Happy Halloween, and happy baking! Remember—the ghosts don’t have to be perfect. They just have to be made with love. And maybe a little extra vanilla.
Frequently Asked Questions
Can I make these ghost meringue cookies without a piping bag?
Absolutely! If you don’t have a piping bag, simply spoon the meringue into a large zip-top bag, snip off one corner, and pipe away. The shapes might be a little less uniform, but that just adds to the charm. I’ve even seen people use a spoon to drop dollops of meringue and then shape them gently with the back of the spoon into ghost-like forms.
Why did my meringue cookies turn brown?
Brown meringue usually means your oven is too hot. Meringue should be baked at a very low temperature—200°F (93°C)—to dry them out without coloring them. Use an oven thermometer to check your actual temperature, and if your oven runs hot, crack the door open slightly during baking. You want pure white ghosts, not tan ones!
Can I make these cookies ahead of time for a party?
Yes, and I actually recommend it! These cookies taste even better after a day or two, and they store perfectly at room temperature in an airtight container for up to 2 weeks. I often make them 2-3 days before a party to free up my baking day for other treats.
My meringue won’t whip up to stiff peaks. What went wrong?
This usually happens for one of three reasons: your bowl or beaters had traces of grease, there was a tiny bit of egg yolk in the whites, or your eggs were too cold. Make sure everything is spotlessly clean, separate your eggs carefully (cold eggs are easier to separate), and let the whites come to room temperature before whipping. Adding the cream of tartar also helps stabilize the meringue.
Can I freeze these ghost meringue cookies?
Yes, you can freeze them for up to 3 months. Place them in a single layer in a freezer-safe container with parchment paper between layers. To thaw, let them sit at room temperature for about 30 minutes without opening the container to prevent condensation. They’ll taste just as fresh as the day you made them!
Pin This Recipe!
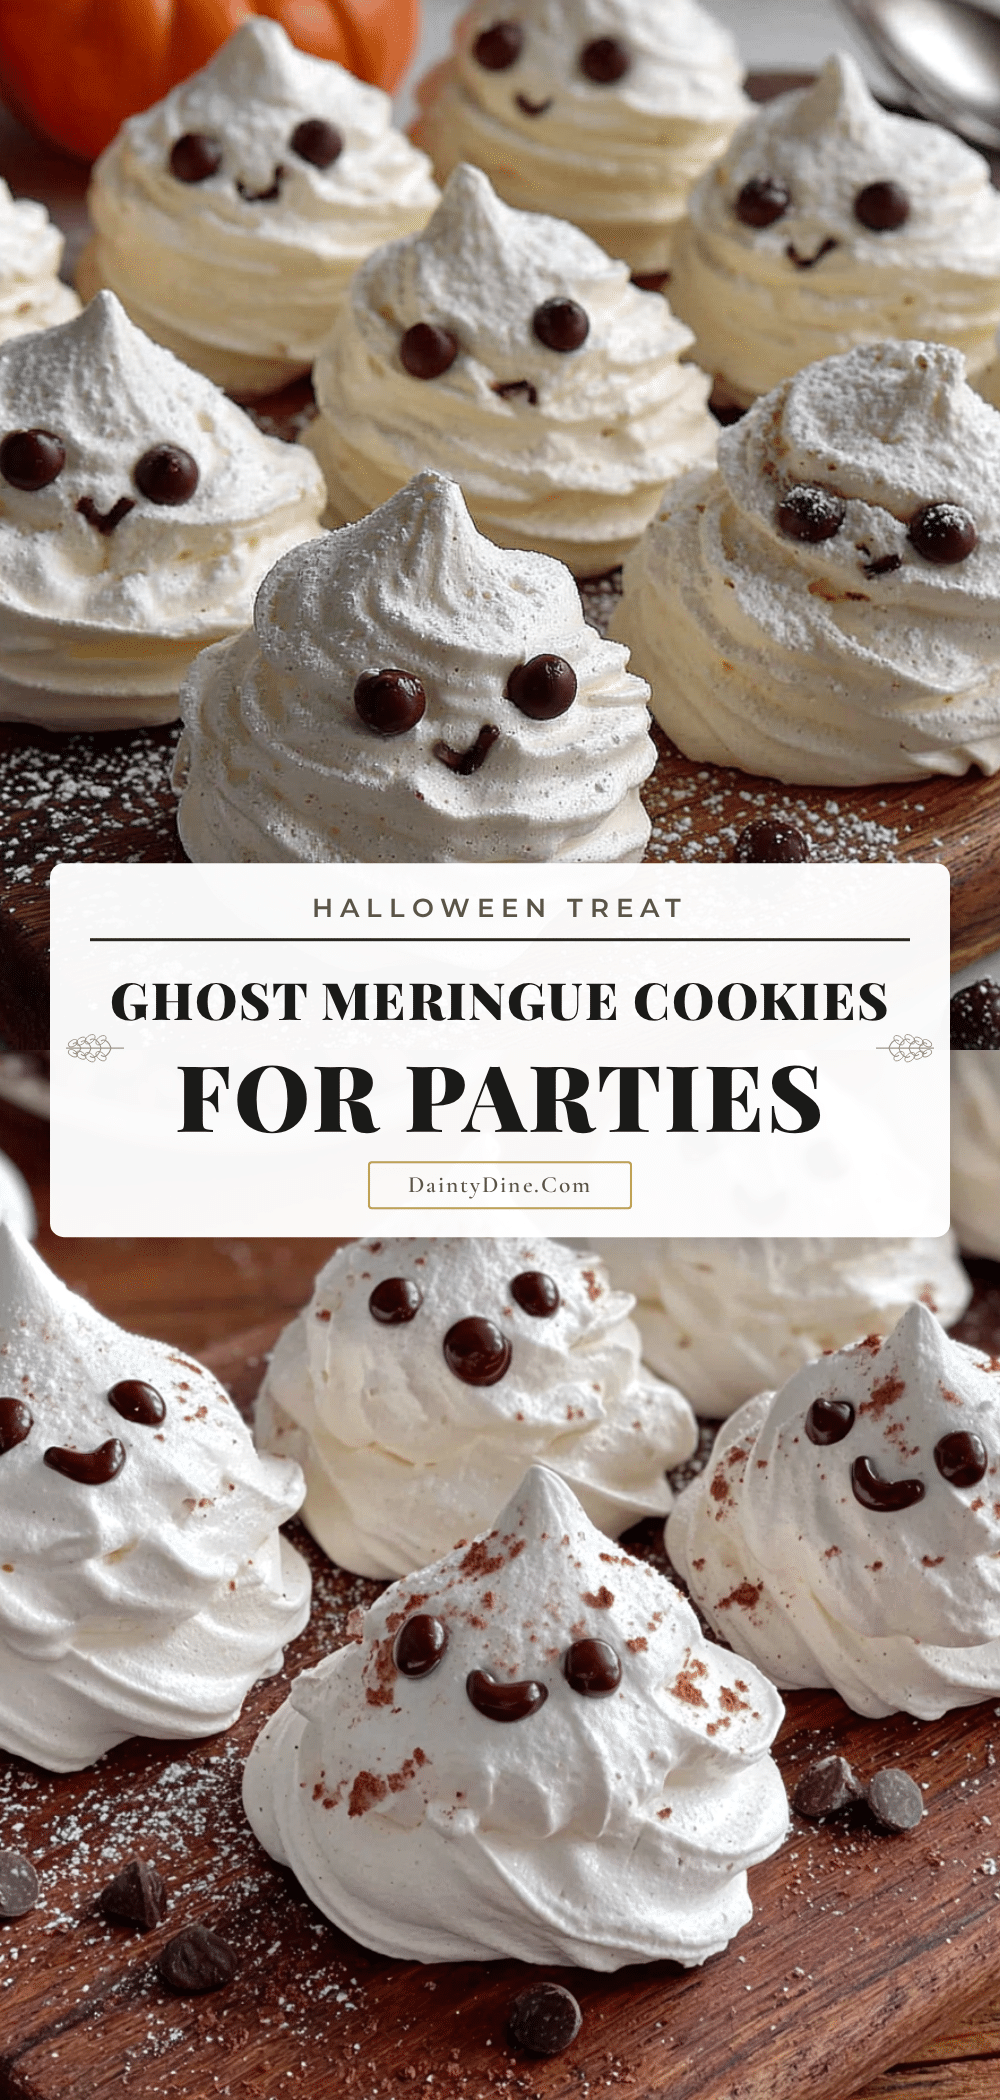
Best Ghost Meringue Cookies: Easy Halloween Treat for Kids
These adorable ghost meringue cookies are a simple, reliable vanilla meringue that bakes up crisp on the outside with a soft, marshmallowy center. Perfect for Halloween parties, they’re easy to make and always a crowd-pleaser.
- Prep Time: 15 minutes
- Cook Time: 1 hour 15 minutes
- Total Time: 2 hours 30 minutes (includes cooling)
- Yield: 24 cookies 1x
- Category: Dessert
- Cuisine: American
Ingredients
- 4 large egg whites, room temperature
- 1 cup granulated sugar (200 grams)
- 1/2 teaspoon cream of tartar
- 1 teaspoon pure vanilla extract
- Pinch of salt
- 1/4 cup mini chocolate chips (about 60 chips)
Instructions
- Preheat your oven to 200°F (93°C). Line two large baking sheets with parchment paper.
- Separate your eggs while cold, then let the egg whites sit at room temperature for 30 minutes. Place them in a completely clean, dry mixing bowl. Add the pinch of salt and cream of tartar.
- Begin beating the egg whites on medium speed. After about 2 minutes, they should become foamy with small bubbles throughout.
- With the mixer running on medium speed, add the sugar one tablespoon at a time, fully incorporating each addition before adding the next. This takes about 5 minutes. The mixture will become thick, glossy, and white.
- Add the vanilla extract. Increase speed to medium-high and continue beating until stiff peaks form—when you lift the beaters, the meringue should stand up straight without drooping. This usually takes another 3-5 minutes. The mixture should feel smooth, not gritty.
- Transfer the meringue to a piping bag fitted with a large round tip (or snip a 1/2-inch opening).
- Pipe the ghosts: Hold the piping bag straight up and down, about 1/2 inch above the baking sheet. Squeeze gently to create a round base about 1.5 inches wide. As you lift the bag straight up, continue squeezing to create a taller, slightly narrower body. Release pressure and pull upward to create a little peak on top. Each ghost should be about 2 inches tall. Leave about 1 inch of space between each ghost.
- Within 2-3 minutes of piping, gently press two mini chocolate chips into each ghost for eyes.
- Bake for 1 hour 15 minutes to 1 hour 30 minutes, until the ghosts feel dry and firm to the touch and lift easily off the parchment. They should be pure white.
- Turn off the oven but leave the ghosts inside for at least 1 hour, or overnight, to cool completely and prevent cracking.
- Store in an airtight container at room temperature, layered between sheets of parchment paper, for up to 2 weeks.
Notes
Room temperature egg whites are non-negotiable for best volume. Cream of tartar stabilizes the meringue and prevents weeping. Humidity is the enemy—avoid making these on rainy or humid days. If your oven runs hot, crack the door open slightly during baking to prevent browning. The ghosts taste even better after a day or two as the vanilla flavor deepens.
Nutrition
- Serving Size: 1 cookie
- Calories: 35
- Sugar: 8
- Sodium: 10
- Fat: 0.5
- Carbohydrates: 8
- Protein: 1
Keywords: ghost meringue cookies, Halloween cookies, meringue cookies, easy Halloween treats, gluten-free cookies, dairy-free cookies


