Love this? Save it for later!
Share the inspiration with your friends
Jenny wasn’t trying to impress anyone. I’d stopped by her place on a random Thursday afternoon to pick up a book she’d borrowed, and the scent of vanilla and butter hit me before I even got through the front door. It was that warm, sweet smell that instantly makes you feel like something good is about to happen. She was standing at the kitchen counter in an old t-shirt, casually scraping down a mixing bowl like it was nothing special.
“Oh, that’s just the cake I throw together for the kids’ birthdays,” she said when I asked, completely nonchalant. She shrugged and pointed to a plate covered in plastic wrap. “It’s not fancy or anything.” But let me tell you, the way that cake looked—tall, tender, and topped with the most cheerful, rainbow-speckled buttercream—it was anything but ordinary. I mean, honestly, I’d have paid good money for a slice right then and there.
She cut me a piece without me even asking (maybe you’ve been there, hoping someone will offer), and that first bite was a total revelation. The crumb was so soft it practically dissolved, and the buttercream was light and sweet without being cloying. The sprinkles added that little pop of crunch and joy that just makes you smile. Jenny kept saying it was “just a basic cake,” but I knew right then I was witnessing something special—a recipe that had been made so many times it had become second nature. It’s the kind of cake that doesn’t need a fancy occasion. It just needs people you love. And honestly, that’s the best kind of cake there is.
Why You’ll Love This Recipe
This isn’t just another birthday cake recipe. Over the years, I’ve tested countless versions—some too dry, some too complicated, some that left you with a sink full of dishes and a mediocre result. This one is different. It’s the one I bring to every family party, school bake sale, and last-minute celebration. Here’s why it works so well for real families:
- Quick & Easy : From start to finish, this cake comes together in about an hour. The batter mixes up in one bowl with a hand mixer, so you’re not scrubbing a dozen dishes before the party even starts.
- Simple Ingredients : Everything you need is probably already in your pantry. Butter, sugar, eggs, flour, milk, and vanilla. No fancy extracts or hard-to-find specialty items.
- Perfect for Birthdays : This is the ultimate crowd-pleaser for kids’ parties. The sprinkle buttercream is a guaranteed hit, and the cake itself is sturdy enough for stacking but tender enough to melt in your mouth.
- Crowd-Pleaser : I’ve yet to meet a kid—or an adult, for that matter—who doesn’t go back for seconds. It’s that universally loved combination of vanilla cake and sweet, creamy frosting.
- Unbelievably Delicious : The texture is what sets this apart. It’s moist but not dense, light but not crumbly. The secret is a little trick I picked up from Jenny: using buttermilk instead of regular milk. It makes the crumb incredibly tender.
This is the recipe that makes you close your eyes after the first bite. It’s comfort food reimagined—faster, simpler, but with the same soul-soothing satisfaction. Perfect for impressing a room full of six-year-olds without stressing yourself out.
What Ingredients You Will Need
This recipe uses simple, wholesome ingredients to deliver bold flavor and a tender crumb without any fuss. Most of these are pantry staples, which makes it perfect for those “I need a cake right now” moments.
- Unsalted butter, softened (1 cup / 2 sticks) – I always use unsalted so I can control the salt level. Let it sit out for about 30 minutes before you start.
- Granulated sugar (2 cups) – Regular white sugar gives the cake its sweetness and helps create a light, airy texture when creamed with the butter.
- Large eggs (4, at room temperature) – Room-temperature eggs blend into the batter much more smoothly. If you forget to take them out, just place them in a bowl of warm water for 5 minutes.
- All-purpose flour (3 cups) – Standard AP flour works perfectly here. No need for cake flour or specialty blends.
- Baking powder (1 tablespoon) – This gives the cake its rise. Make sure yours is fresh—test it by dropping a teaspoon into hot water; if it fizzes, it’s good.
- Salt (1/2 teaspoon) – Just enough to balance the sweetness and enhance the vanilla flavor.
- Buttermilk (1 cup) – This is the secret ingredient for a tender crumb. If you don’t have buttermilk, you can make your own by adding 1 tablespoon of lemon juice or white vinegar to 1 cup of milk and letting it sit for 5 minutes.
- Vanilla extract (2 teaspoons) – Pure vanilla extract makes a noticeable difference. I recommend Nielsen-Massey for the best flavor.
- Vegetable oil (1/4 cup) – This adds extra moisture and helps the cake stay soft for days.
For the Sprinkle Buttercream:
- Unsalted butter, softened (1 1/2 cups / 3 sticks) – The base of the frosting. Make sure it’s truly soft but not melting.
- Powdered sugar (4 cups, sifted) – Sifting prevents lumps and gives you a silky smooth buttercream.
- Heavy cream (3-4 tablespoons) – This thins the frosting to the perfect spreading consistency. You can use milk in a pinch.
- Vanilla extract (1 teaspoon) – For that classic birthday cake flavor.
- Salt (a pinch) – To cut the sweetness.
- Rainbow sprinkles (1/2 cup, plus more for decorating) – Use jimmies (the long, skinny ones) rather than nonpareils, which can bleed color into the frosting.
Equipment Needed
You don’t need a professional bakery setup to make this cake. Here’s what you’ll need:
- Two 9-inch round cake pans – I’ve used both metal and glass; metal gives a more even bake. If you only have one pan, you can bake the layers one at a time.
- Electric hand mixer or stand mixer – A hand mixer works perfectly. A stand mixer is great but not necessary.
- Large mixing bowls – You’ll need at least two: one for the dry ingredients and one for the wet.
- Whisk and rubber spatula – A whisk for combining dry ingredients and a spatula for scraping down the bowl.
- Cooling rack – Essential for letting the cakes cool evenly so the frosting doesn’t melt.
- Offset spatula – Makes frosting the cake so much easier. A butter knife works in a pinch, but an offset spatula is worth the $8 investment.
- Parchment paper – Cutting circles to line the bottom of your pans ensures the cakes release perfectly every time.
Preparation Method
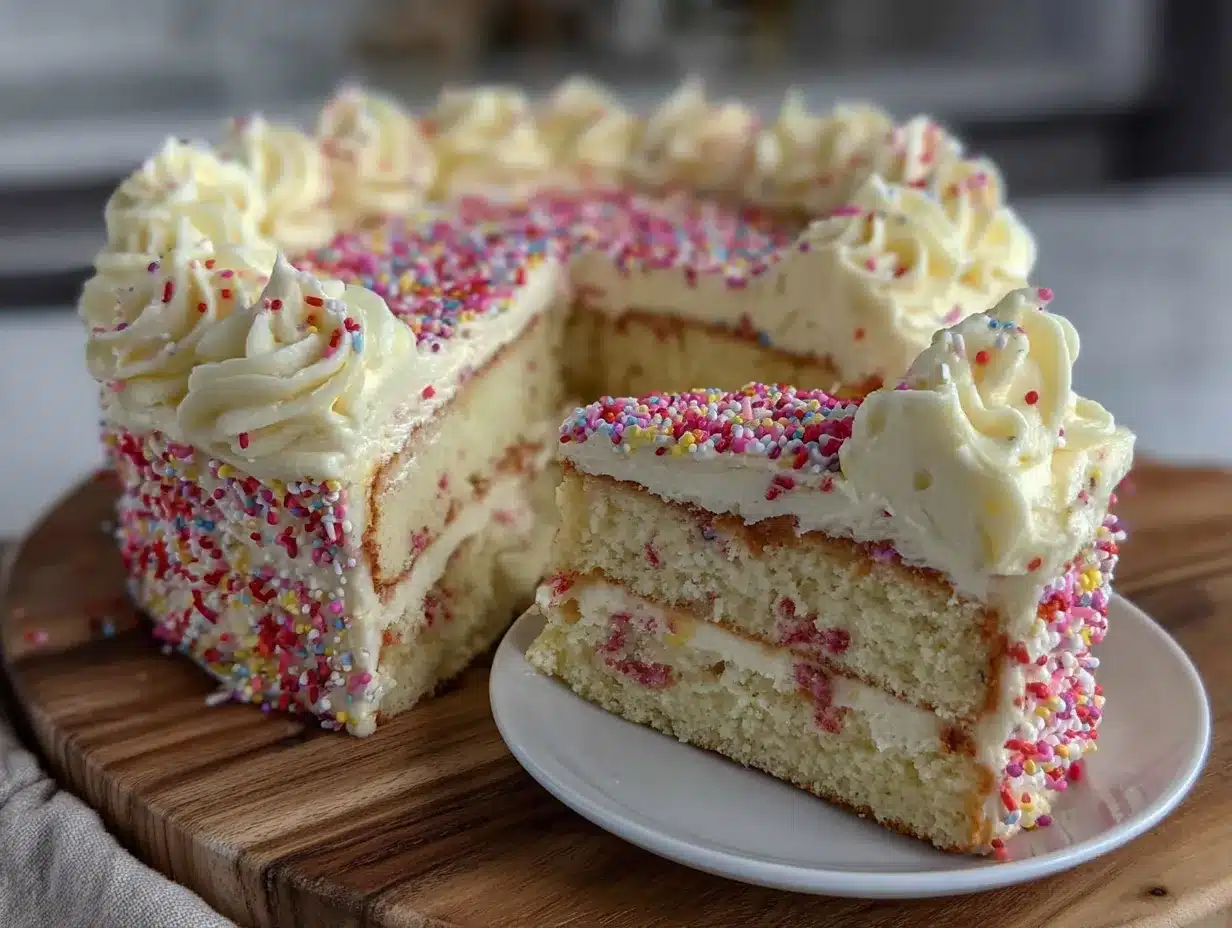
Let’s walk through this step by step. I’ve made this cake dozens of times, so I’ll share all the little tricks I’ve picked up along the way.
-
Preheat and prep your pans. Preheat your oven to 350°F (175°C). Grease two 9-inch round cake pans with butter or non-stick spray. Cut circles of parchment paper to fit the bottoms, place them in the pans, and grease those too. This extra step guarantees your cakes will release without sticking. I learned this the hard way after my first cake came out in pieces.
-
Whisk the dry ingredients. In a medium bowl, whisk together 3 cups of all-purpose flour, 1 tablespoon of baking powder, and 1/2 teaspoon of salt. Set this aside. Whisking ensures the baking powder is evenly distributed, so you don’t end up with one tall layer and one flat one.
-
Cream the butter and sugar. In a large bowl, beat 1 cup of softened unsalted butter with 2 cups of granulated sugar until light and fluffy. This takes about 3-4 minutes with a hand mixer on medium speed. You’re looking for a pale, creamy texture. Don’t rush this step—proper creaming is what gives the cake its airy structure.
-
Add the eggs one at a time. Crack 4 large eggs into the butter-sugar mixture, one at a time, beating well after each addition. Scrape down the sides of the bowl with your spatula after the second egg. If the mixture looks slightly curdled, don’t panic—it’ll come together once you add the flour.
-
Alternate the dry ingredients and buttermilk. With the mixer on low speed, add about one-third of the flour mixture, then half of the buttermilk, then another third of flour, the remaining buttermilk, and finally the last of the flour. Mix just until combined after each addition. Overmixing at this stage will make the cake tough, so stop as soon as you don’t see any more streaks of flour.
-
Add the oil and vanilla. Pour in 1/4 cup of vegetable oil and 2 teaspoons of vanilla extract. Mix on low for about 10 seconds, then fold the batter a few times with your spatula to make sure everything is evenly incorporated. The oil adds an extra layer of moisture that keeps the cake soft for days.
-
Divide and bake. Divide the batter evenly between your two prepared pans. I like to use a kitchen scale to get exactly the same amount in each pan—about 700 grams per pan. Bake for 28-32 minutes, or until a toothpick inserted in the center comes out clean or with a few moist crumbs. The tops should be golden and spring back when lightly touched.
-
Cool completely. Let the cakes cool in the pans for 10 minutes, then run a knife around the edges and turn them out onto a cooling rack. Remove the parchment paper and let them cool completely—this is crucial. If the cake is even slightly warm, your buttercream will melt into a sad, greasy mess. I usually let mine cool for at least an hour.
-
Make the buttercream. While the cakes cool, beat 1 1/2 cups of softened butter in a large bowl until smooth and creamy. Gradually add 4 cups of sifted powdered sugar, about 1 cup at a time, beating on low speed. Add 3 tablespoons of heavy cream, 1 teaspoon of vanilla extract, and a pinch of salt. Beat on medium-high for 3-4 minutes until light and fluffy. If the frosting is too thick, add another tablespoon of cream. Gently fold in 1/2 cup of rainbow sprinkles by hand.
-
Assemble the cake. Place one cake layer on your serving plate or cake stand. Spread about 1 cup of buttercream evenly over the top. Place the second layer on top, then apply a thin crumb coat—a thin layer of frosting that traps any loose crumbs. Refrigerate for 15 minutes to set the crumb coat, then apply the final layer of frosting. Decorate with extra sprinkles on top and around the sides.
Cooking Tips & Techniques
Over the years, I’ve made every mistake in the book with this cake. Here’s what I’ve learned so you don’t have to repeat my failures.
Room temperature ingredients matter. I know it’s tempting to use cold eggs and butter straight from the fridge, but trust me on this. Cold ingredients don’t emulsify properly, which leads to a dense, heavy cake. Set your butter and eggs out on the counter about 30 minutes before you start. If you’re in a rush, you can microwave the butter for 5-10 seconds (just until it’s soft, not melted) and place the eggs in a bowl of warm water for 5 minutes.
Don’t overmix the batter. This is probably the most common mistake. Once you add the flour, mix only until you don’t see any more white streaks. Overmixing develops the gluten in the flour, and that makes your cake tough and rubbery instead of tender and soft. I’ve done it myself—one time I got distracted by my toddler and kept mixing, and that cake came out like a hockey puck.
Use a kitchen scale for even layers. If you want your cake to look professional, weigh the batter in each pan. Even a small difference in batter amount can cause one layer to bake up taller than the other. A digital kitchen scale costs about $15 and it’s one of the best investments you can make for consistent baking.
Chill the cake before frosting. After you stack the layers, pop the whole thing in the fridge for 15-20 minutes before you do the final coat of frosting. This sets the crumb coat and makes the final layer so much easier to spread. I learned this trick from a bakery owner, and it was a game-changer.
For the smoothest buttercream, sift your powdered sugar. I know it’s an extra step, but it takes less than a minute and it prevents those annoying little lumps that clog your piping tip. If you’re in a hurry, you can skip it, but your frosting won’t be as silky.
Variations & Adaptations
This cake is incredibly versatile. Here are some of my favorite ways to change it up:
Chocolate Birthday Cake: Replace 1/2 cup of the all-purpose flour with 1/2 cup of unsweetened cocoa powder. Add an extra 2 tablespoons of buttermilk to compensate for the dry cocoa. The result is a rich, chocolatey cake that pairs beautifully with the sprinkle buttercream.
Gluten-Free Version: Substitute the all-purpose flour with a 1:1 gluten-free baking flour blend that contains xanthan gum. I’ve used Bob’s Red Mill with great success. The texture will be slightly more delicate, so handle the layers gently when stacking.
Lemon Birthday Cake: Add the zest of 2 lemons to the butter-sugar mixture during the creaming step, and replace 1 teaspoon of the vanilla extract with lemon extract. The bright citrus flavor is a wonderful contrast to the sweet buttercream.
Cupcake Adaptation: This batter makes about 24 standard cupcakes. Bake them at 350°F for 18-20 minutes. The sprinkle buttercream pipes beautifully on top, and they’re perfect for classroom parties or bake sales.
Dairy-Free Version: Use vegan butter sticks (like Earth Balance) and substitute the buttermilk with 1 cup of unsweetened almond milk mixed with 1 tablespoon of vinegar. For the buttercream, use vegan butter and a dairy-free milk alternative. The texture is slightly less tender, but it’s still delicious.
Serving & Storage Suggestions
This cake is best served at room temperature. If you’ve refrigerated it, let it sit out for about 30 minutes before slicing. The buttercream softens beautifully and the cake crumb becomes perfectly tender.
For a classic birthday presentation, I like to pile extra sprinkles on top and around the base of the cake. You can also add birthday candles, fresh berries, or even a drizzle of chocolate sauce for a more decadent look. It pairs wonderfully with a tall glass of cold milk for the kids or a cup of coffee for the adults.
Storage: Leftover cake can be stored in an airtight container at room temperature for up to 3 days. If your kitchen is warm, refrigerate it instead—just bring it back to room temperature before serving. The cake actually gets even more moist on the second day as the flavors meld together.
Freezing: This cake freezes beautifully. You can freeze the unfrosted cake layers, wrapped tightly in plastic wrap and then foil, for up to 3 months. Thaw them at room temperature before frosting. The buttercream can also be frozen in an airtight container for up to 3 months—just let it thaw in the fridge overnight and re-whip it before using.
Nutritional Information & Benefits
Let’s be honest—this is a celebration cake, not a health food. But that doesn’t mean it can’t have a place in a balanced diet. Here’s the estimated nutritional breakdown per slice (based on 12 servings):
| Nutrient | Amount Per Slice |
|---|---|
| Calories | 485 |
| Total Fat | 26g |
| Saturated Fat | 16g |
| Carbohydrates | 62g |
| Sugar | 45g |
| Protein | 5g |
The buttermilk adds a small amount of calcium and probiotics, and the eggs provide protein and essential vitamins. The butter, while rich, is a source of fat-soluble vitamins like A and E. The real benefit here is the joy factor—sharing a homemade cake with people you love is good for the soul. I always remind myself that special occasions deserve special treats, and this cake is worth every single bite.
If you’re watching your sugar intake, you can reduce the sugar in the cake to 1 3/4 cups without affecting the texture too much. The buttercream is harder to modify, but you can use a sugar-free powdered sugar substitute if needed.
Conclusion
This classic birthday cake with sprinkle buttercream is more than just a recipe—it’s a tradition waiting to happen. It’s the cake that makes kids’ eyes light up and adults feel like kids again. The tender crumb, the sweet, creamy frosting, and those cheerful little sprinkles—it all comes together to create something truly special.
I love this recipe because it’s forgiving. It doesn’t demand perfection. If your layers are slightly uneven or your frosting has a few streaks, it doesn’t matter. What matters is the smile on the birthday kid’s face when they see it. I encourage you to make it your own—add different sprinkles, try a new extract, or layer it with jam or fresh fruit. This cake is a blank canvas for your creativity.
So go ahead, preheat that oven, and make someone’s day a little sweeter. And when you do, I’d love to hear about it. Leave a comment below, share your photos, or tell me about your favorite birthday cake memory. Happy baking, friends!
Frequently Asked Questions
Can I use salted butter instead of unsalted?
Yes, you can. Just reduce the added salt in the recipe to 1/4 teaspoon. The salted butter will add a bit more saltiness, which can actually be quite nice with the sweet buttercream.
How do I know when the cake is done baking?
Insert a toothpick or a thin knife into the center of the cake. If it comes out clean or with just a few moist crumbs, it’s done. The edges should also be pulling away slightly from the sides of the pan.
Why did my buttercream turn out too runny?
This usually happens if the butter was too soft or if you added too much cream. Pop the bowl in the fridge for 10-15 minutes, then re-whip it. If it’s still too soft, beat in a little more sifted powdered sugar, one tablespoon at a time.
Can I make this cake ahead of time?
Absolutely. You can bake the cake layers up to 2 days in advance and store them wrapped tightly at room temperature. The buttercream can be made up to 3 days ahead and stored in the fridge—just bring it to room temperature and re-whip before using.
How do I get clean slices of cake?
Use a long, sharp knife and wipe it clean between each cut. For the cleanest slices, you can also chill the cake for about 20 minutes before slicing. This firms up the buttercream and prevents it from smearing.
Pin This Recipe!
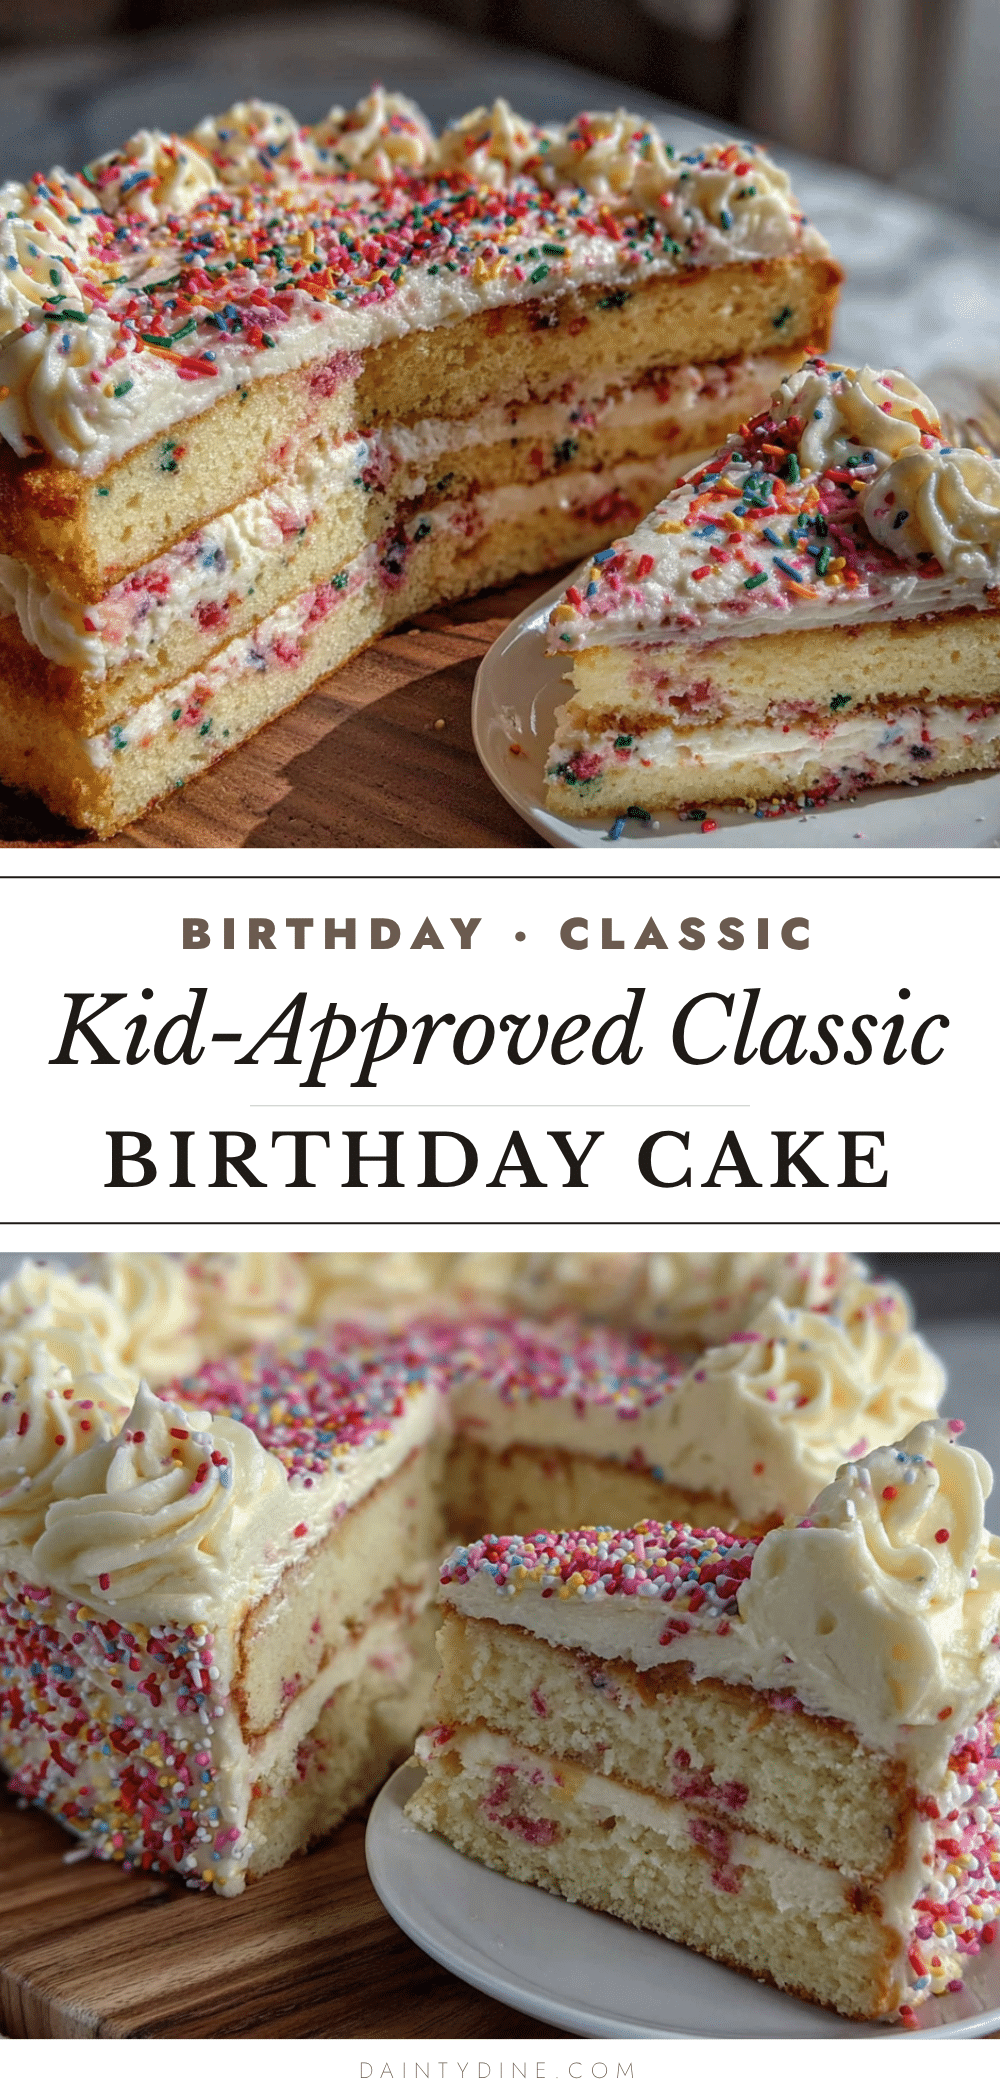
Best Classic Birthday Cake with Easy Sprinkle Buttercream
This classic birthday cake features a tender, moist vanilla crumb and a cheerful rainbow sprinkle buttercream. It’s a simple, crowd-pleasing recipe that comes together in about an hour with basic pantry ingredients.
- Prep Time: 20 minutes
- Cook Time: 30 minutes
- Total Time: 1 hour 10 minutes
- Yield: 12 servings 1x
- Category: Dessert
- Cuisine: American
Ingredients
- 1 cup (2 sticks) unsalted butter, softened
- 2 cups granulated sugar
- 4 large eggs, at room temperature
- 3 cups all-purpose flour
- 1 tablespoon baking powder
- 1/2 teaspoon salt
- 1 cup buttermilk
- 2 teaspoons vanilla extract
- 1/4 cup vegetable oil
- For the Sprinkle Buttercream:
- 1 1/2 cups (3 sticks) unsalted butter, softened
- 4 cups powdered sugar, sifted
- 3–4 tablespoons heavy cream
- 1 teaspoon vanilla extract
- A pinch of salt
- 1/2 cup rainbow sprinkles (jimmies), plus more for decorating
Instructions
- Preheat oven to 350°F (175°C). Grease two 9-inch round cake pans, line bottoms with parchment paper, and grease the paper.
- In a medium bowl, whisk together flour, baking powder, and salt.
- In a large bowl, beat butter and sugar with an electric mixer on medium speed until light and fluffy, about 3-4 minutes.
- Add eggs one at a time, beating well after each addition. Scrape down the bowl as needed.
- With mixer on low, add dry ingredients and buttermilk alternately, starting and ending with flour. Mix just until combined.
- Add oil and vanilla; mix on low for 10 seconds. Fold batter a few times with a spatula.
- Divide batter evenly between prepared pans (about 700g each). Bake for 28-32 minutes, until a toothpick inserted in center comes out clean.
- Cool in pans for 10 minutes, then turn out onto a wire rack. Remove parchment and cool completely.
- For buttercream: Beat softened butter until smooth. Gradually add sifted powdered sugar, then cream, vanilla, and salt. Beat on medium-high for 3-4 minutes until fluffy. Fold in sprinkles.
- Place one cake layer on a serving plate. Spread about 1 cup buttercream on top. Add second layer. Apply a thin crumb coat, refrigerate 15 minutes, then frost with remaining buttercream. Decorate with extra sprinkles.
Notes
Room temperature ingredients are crucial for proper emulsification. Don’t overmix the batter once flour is added. Chill the cake before final frosting for a smoother finish. For clean slices, chill the cake for 20 minutes before cutting.
Nutrition
- Serving Size: 1 slice
- Calories: 485
- Sugar: 45
- Sodium: 200
- Fat: 26
- Saturated Fat: 16
- Carbohydrates: 62
- Protein: 5
Keywords: birthday cake, vanilla cake, sprinkle buttercream, classic cake, easy cake recipe


